1. Two-Tone Rim Stripe with a Soft Ombre Belly

Start with a white base coat, then add a navy ring around the rim using painter's tape. After the ring dries, blend an ombre wash from light blue up toward the center - I use a makeup sponge dab pattern and lightly drag it once the paint is tacky. This works because the pot's curve naturally turns the gradient into a smooth transition instead of a flat rectangle.
Tape 1/4 inch below the rim for the navy stripe, press the tape down hard, and paint with a small foam brush for even coverage. For the ombre, mix light blue with a little white and dab in a band about 3 inches tall, then soften by lightly tapping outward with a clean sponge. Leave the middle mostly white so the ombre feels airy.
Pro tipRemove tape while the paint is still slightly wet so the edge stays razor-clean.
AvoidSkip thick paint on the rim - it builds a ridge that looks messy once the sealer goes on.
2. Bold Polka Dots in Three Sizes
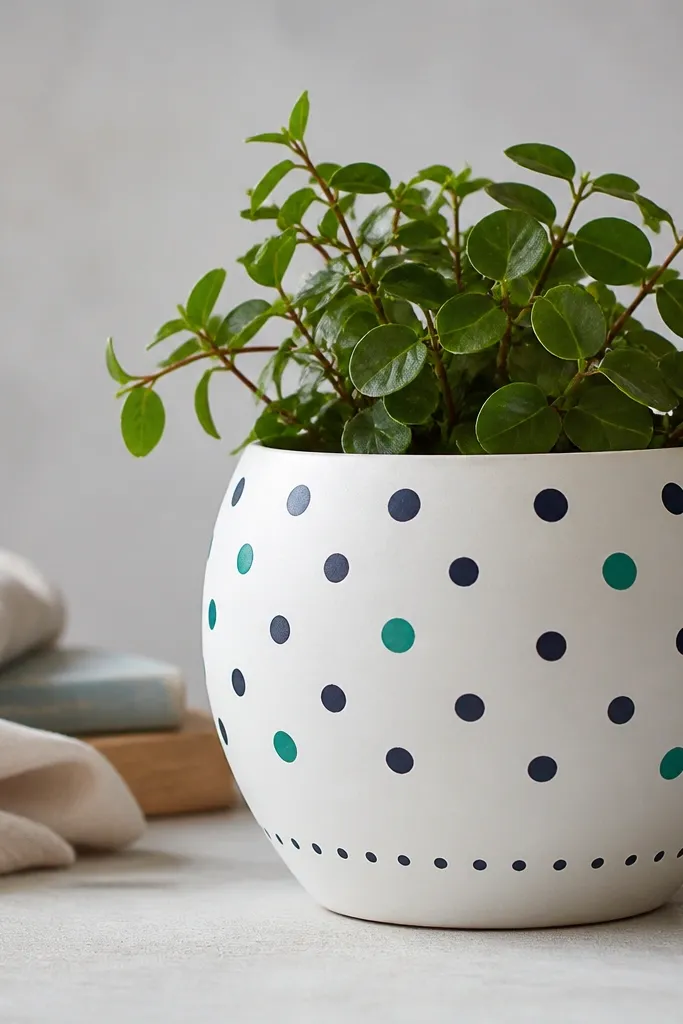
Polka dots are the fastest way to look intentional. Use one main color (navy) and add a second accent (teal) with a third size of tiny dots to keep it from looking flat. Dots work well on smooth pots because they don't fight texture, and the spacing makes the curved surface look designed rather than random.
Paint the pot fully white first. Use a dotting tool or the end of a rounded paintbrush handle: small dots about the size of a rice grain, medium about 1/4 inch, and large about 1/2 inch. Plan a loose grid by measuring the pot circumference and marking 6-8 guide points with a pencil very lightly.
Pro tipIf you mess up one dot, dab it out with a slightly damp paper towel before it fully dries.
AvoidDon't place all the dots at one height - vary the vertical placement by 1/2 inch to match the pot's curve.
3. Lemon Slice Pattern with a Thin Yellow Outline
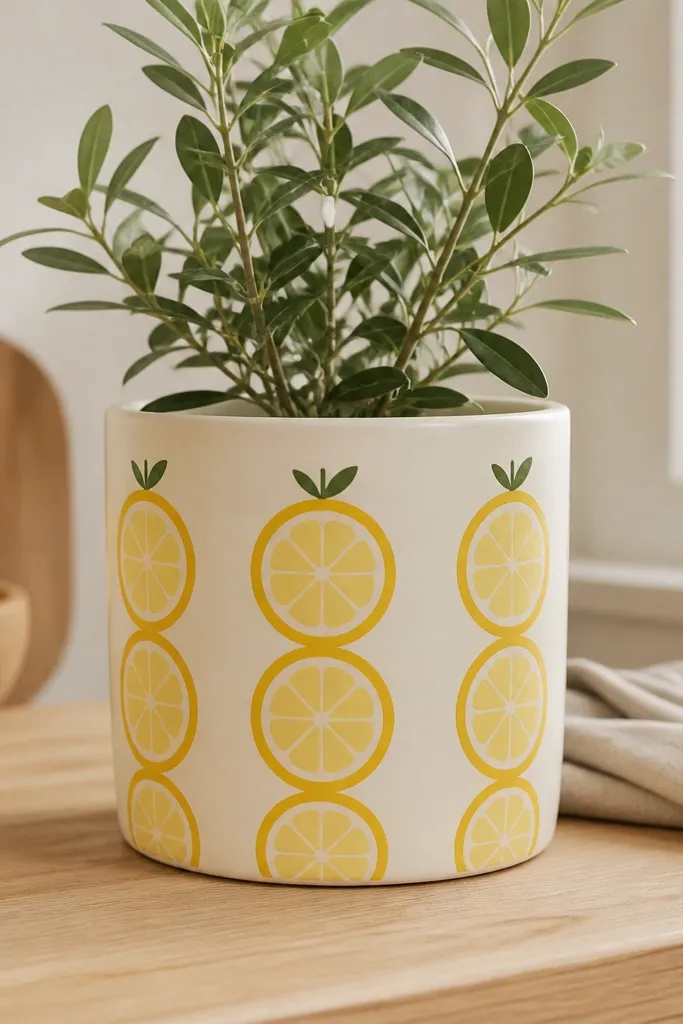
This one reads cheerful from across the patio. Paint a cream base, then add lemon slices in pale yellow with a brighter yellow outline. The thin outline makes the segments pop, and the repeated shape naturally wraps around the pot without you needing perfect symmetry.
Use a small round brush for the outlines and a wider flat brush or sponge for the pale interior. Make slices about 2 inches tall each; leave a small gap between slices so the cream base shows through. Add 3-4 short leaf strokes near the top edge with a green paint mixed from leaf green and a touch of white.
Pro tipUse a pencil to lightly mark the slice centers first - it keeps your spacing even.
AvoidAvoid thick outlines - they look like stickers once sealed.
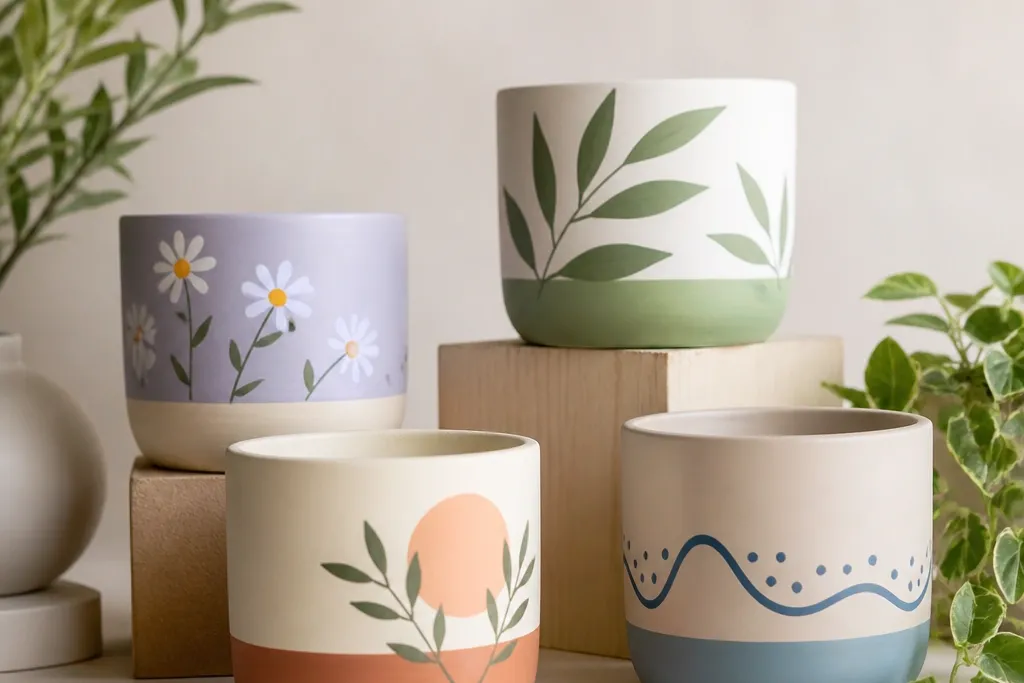
4. Pastel Succulent Rows with Tiny Leaf Veins
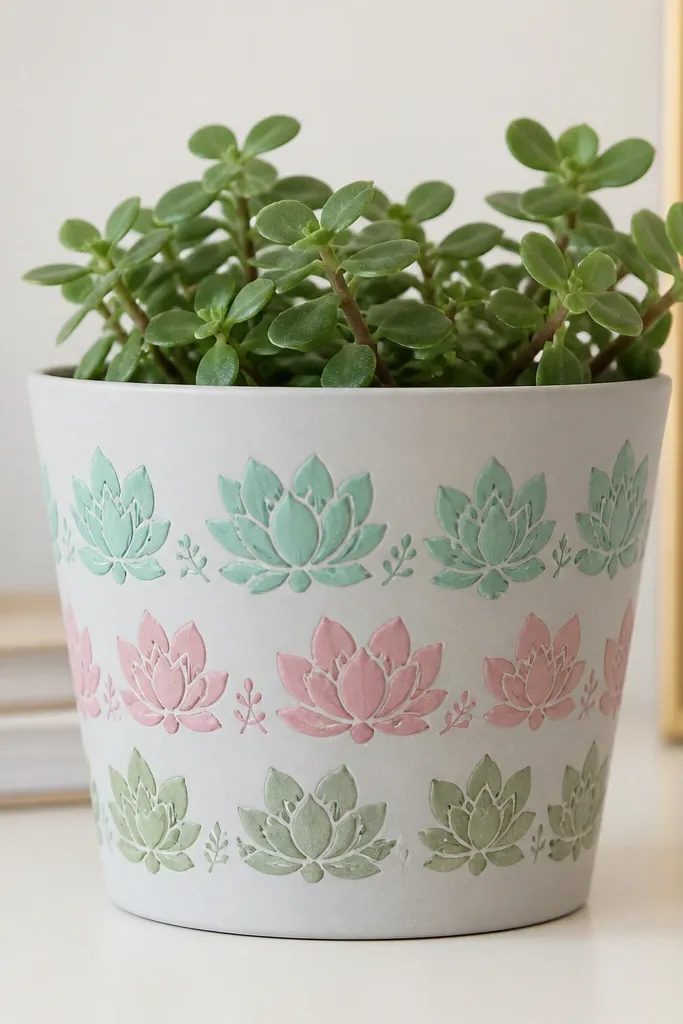
Succulents look detailed but they're actually simple shapes. You paint rounded leaf clusters in a row, then add 2-3 short darker strokes for the leaf veins. The row layout works because pots have a natural banding effect around the belly, so your design stays cohesive.
Base coat in light gray or off-white so the pastels show. For each succulent, paint 5-7 leaf blobs in a tight cluster, then add a darker shade of the same color for vein lines. Space the rows about 1.5 inches apart, leaving a thin strip of base color between rows.
Pro tipUse a damp paper towel to clean your brush edge before switching colors so the leaf tips stay crisp.
AvoidDon't try to paint every leaf with perfect symmetry - slight variation looks real and handmade.
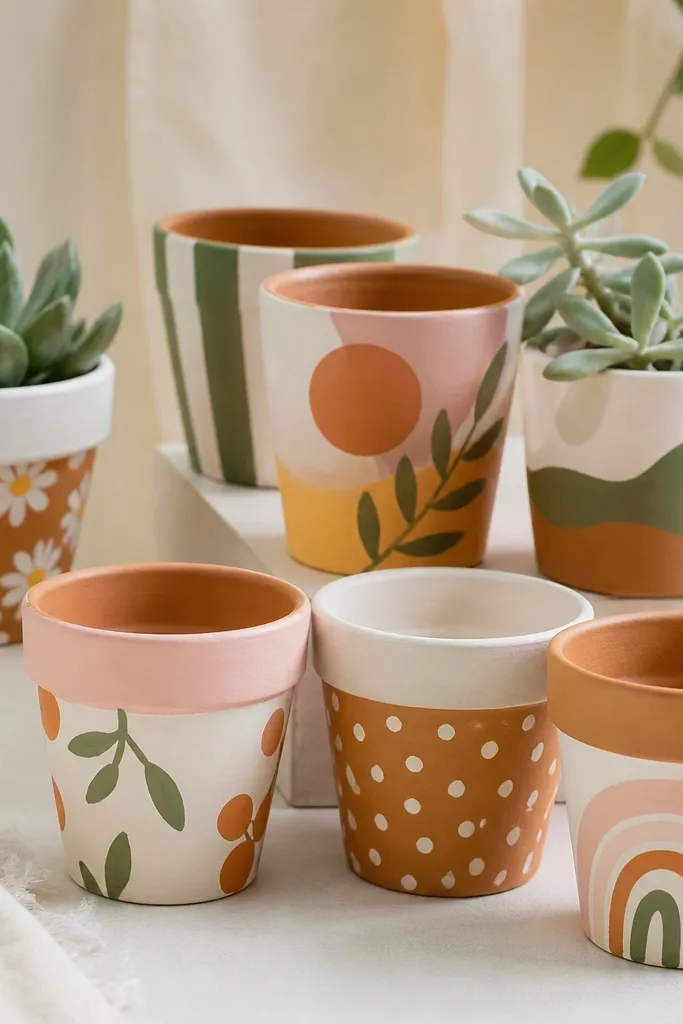
5. Terracotta Pot with White Stenciled "Seeds"
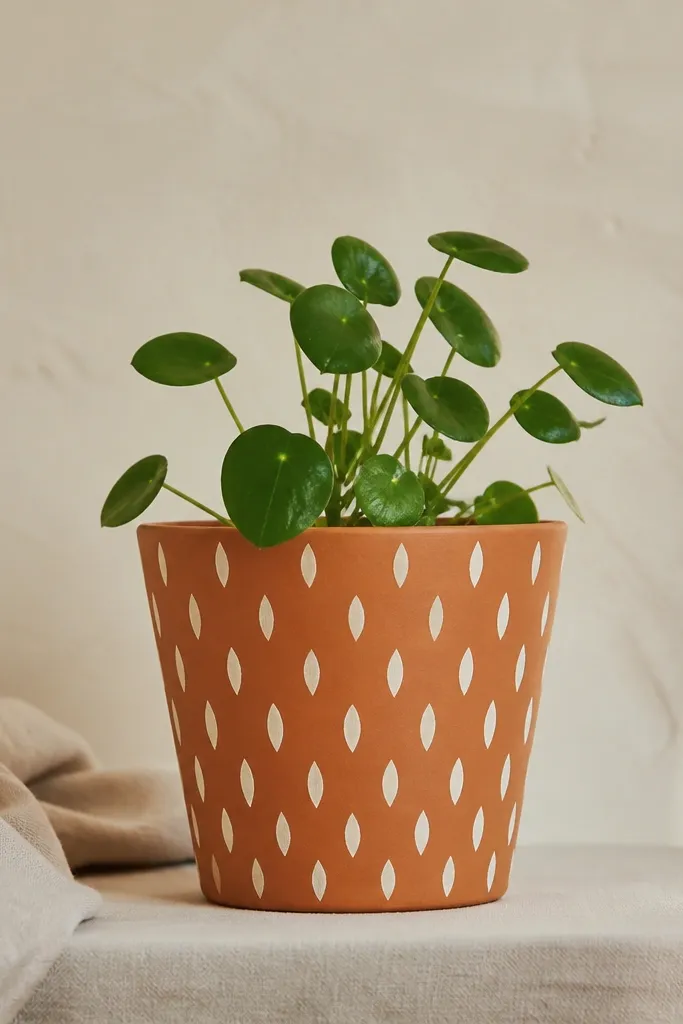
Leaving the terracotta base visible keeps it grounded and saves you time. A simple seed stencil in white looks clean and modern, even if you're a beginner. The pattern works because the seed shapes repeat nicely around the curve and you don't need freehand drawing skills.
Tape a seed stencil template around the pot and use a foam dabber to apply white paint. Build in two light coats so the stencil edges stay sharp. After drying, gently remove any stray paint specks with a cotton swab dipped in water.
Pro tipUse low-tack painter's tape to hold the stencil - high-tack tape can pull dried paint.
AvoidDon't overload the stencil with paint - it bleeds under the edges and looks fuzzy.
6. Rainbow Drip Topcoat on a Matte Base
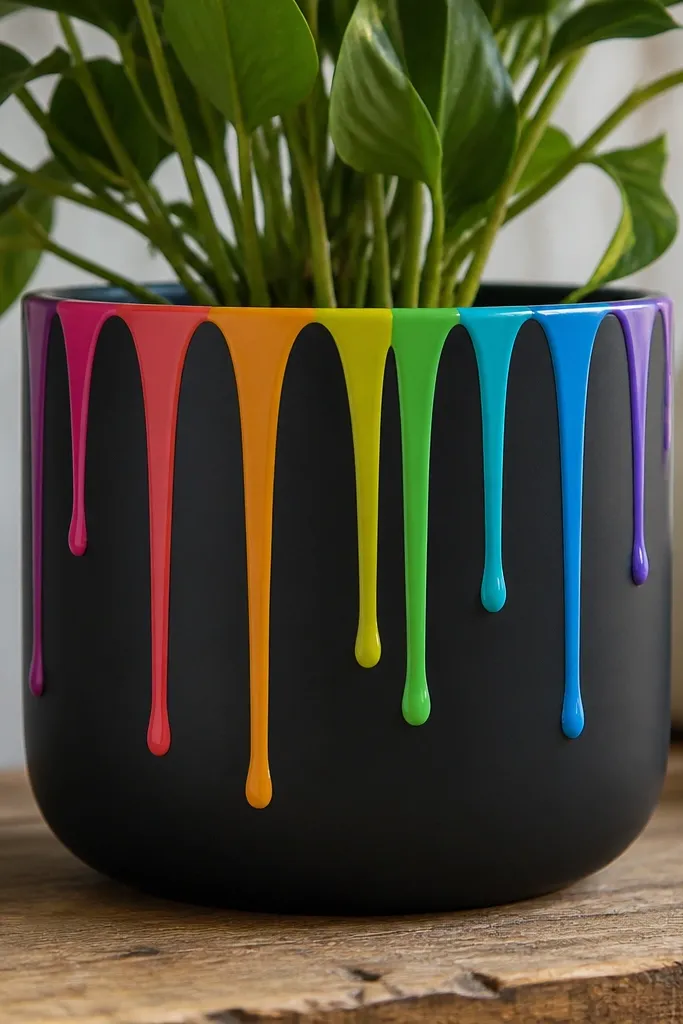
Drips look dramatic, and they're still beginner-friendly if you control the paint thickness. Paint a matte black base, then add rainbow stripes right under the rim. Use watered-down paint for the drips so it flows just enough to stretch downward, not flood.
Let the black base dry fully, then paint stripes across the top band about 1 inch tall: red, orange, yellow, green, blue, purple. For each stripe, load your brush lightly and drag downward once or twice to start the drip. Keep the pot angled slightly (I rest it on a towel) so gravity helps.
Pro tipPractice one drip on a scrap piece of cardboard before touching the pot.
AvoidSkip glossy paint on the base - drips look less controlled and catch light in a cheap way.
7. Botanical Silhouette Cutout Style
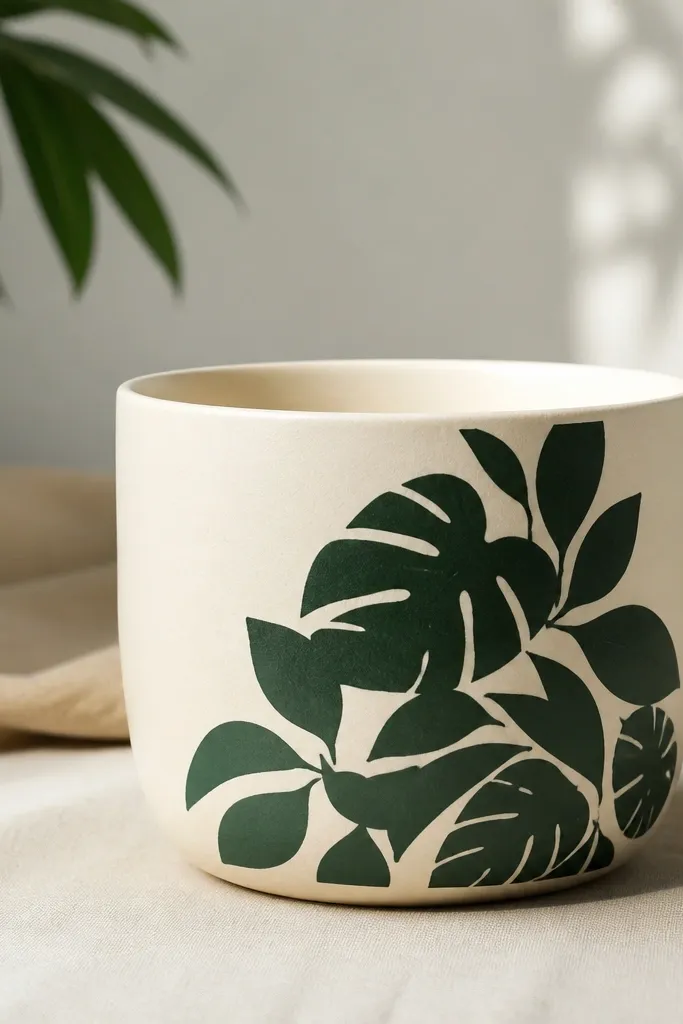
Silhouette style looks artsy without being hard. You paint a solid leaf shape in one dark color, then layer a second shade slightly offset for depth. It works because your eyes read the contrast, not the fine details.
Base coat cream. Print or trace simple leaf shapes onto paper, cut them out, and use them as a guide. Hold the cutout against the pot and dab dark green paint around the edge with a foam brush, then fill the inside. Add a darker shadow leaf behind one or two leaves with the same shape.
Pro tipKeep the leaves clustered on one side so the design feels intentional instead of scattered.
AvoidDon't use a stencil that's too detailed - tiny veins turn into messy smudges on curved surfaces.
8. Gold Leaf Speckle with a Deep Green Undercoat
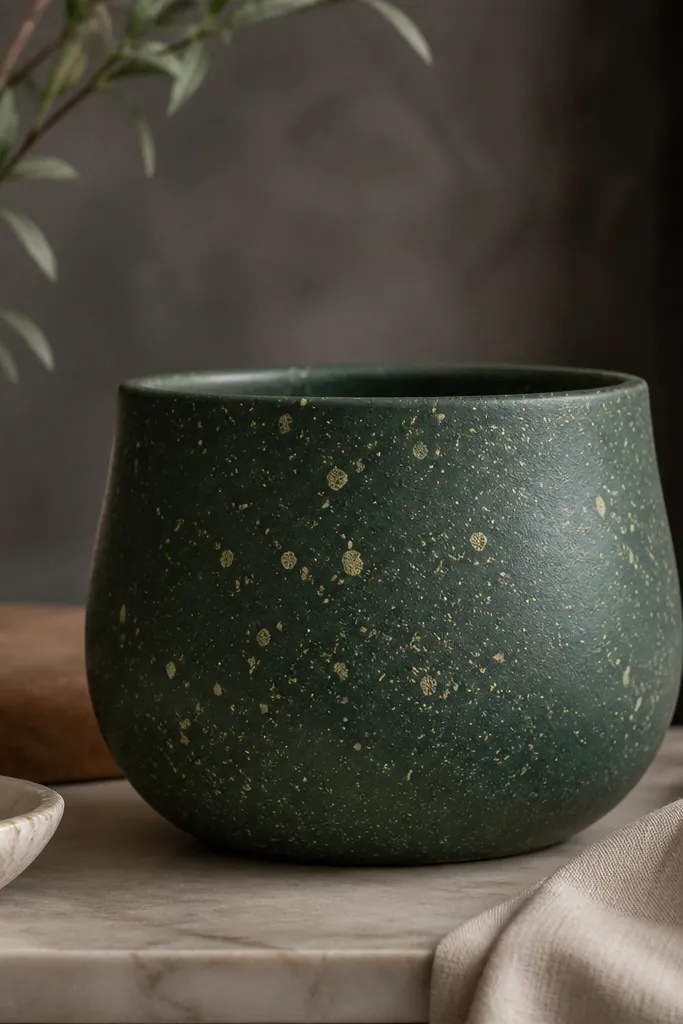
Speckle looks expensive when the undercoat is dark. Paint the pot deep green, then add gold speckles using a stiff brush and a small amount of gold paint or metallic craft paint. The variation in dot sizes makes it feel like real leaf fragments, even though it's simple.
Base coat deep green and let it dry. Load a toothbrush or stiff bristle brush with gold paint, then flick over the pot from 6-10 inches away. Do two passes: one light, one heavier on the upper half. If you want "leaf clusters," press a small piece of crumpled paper lightly and dab gold paint around it.
Pro tipMask the drainage holes with painter's tape so gold doesn't build up inside.
AvoidAvoid thick metallic paint - it clumps and looks like glitter glue.
9. Stripey Clay Pot with Tape-Resist Lines
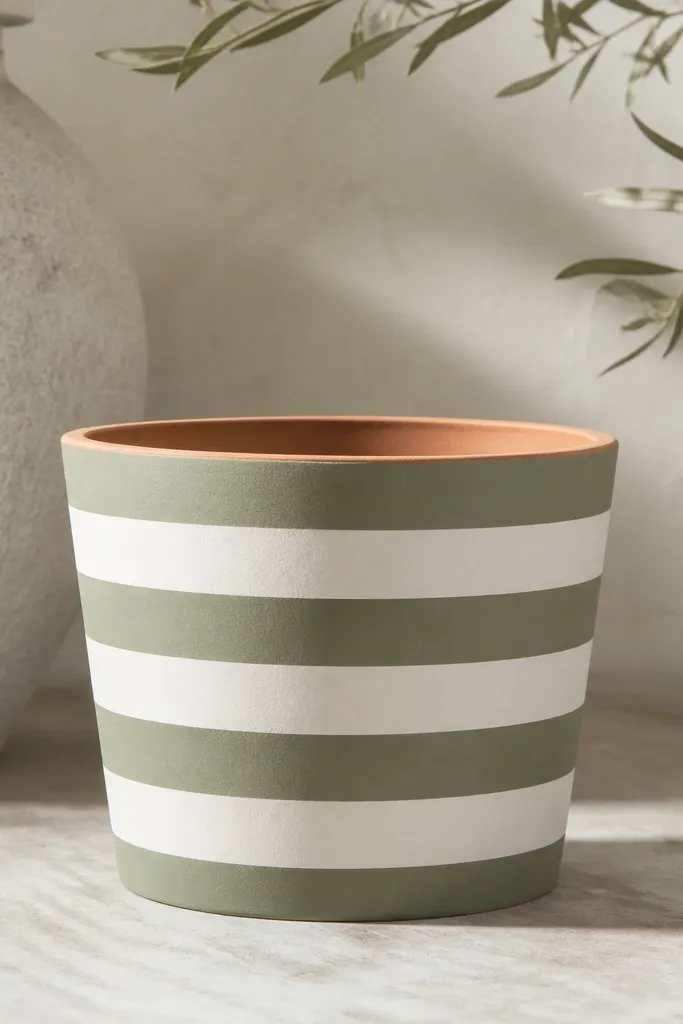
Tape-resist stripes are the fastest way to get crisp geometry. The secret is letting each color dry fully before removing tape, so you don't get fuzzy edges. This style works on ridged or smooth pots because the stripes follow the shape cleanly.
Paint the pot matte white first. After it dries, apply painter's tape bands at 1/2 inch spacing (adjust to your pot height). Paint sage green over the taped bands, then peel tape after 20-30 minutes. Seal everything with a matte outdoor sealer so the stripes don't turn glossy.
Pro tipPress the tape edges with a fingernail so paint can't creep underneath.
AvoidDon't rush tape removal at full dry - you'll pull paint and create a jagged line.
10. Monochrome Face Pot with Simple Line Features
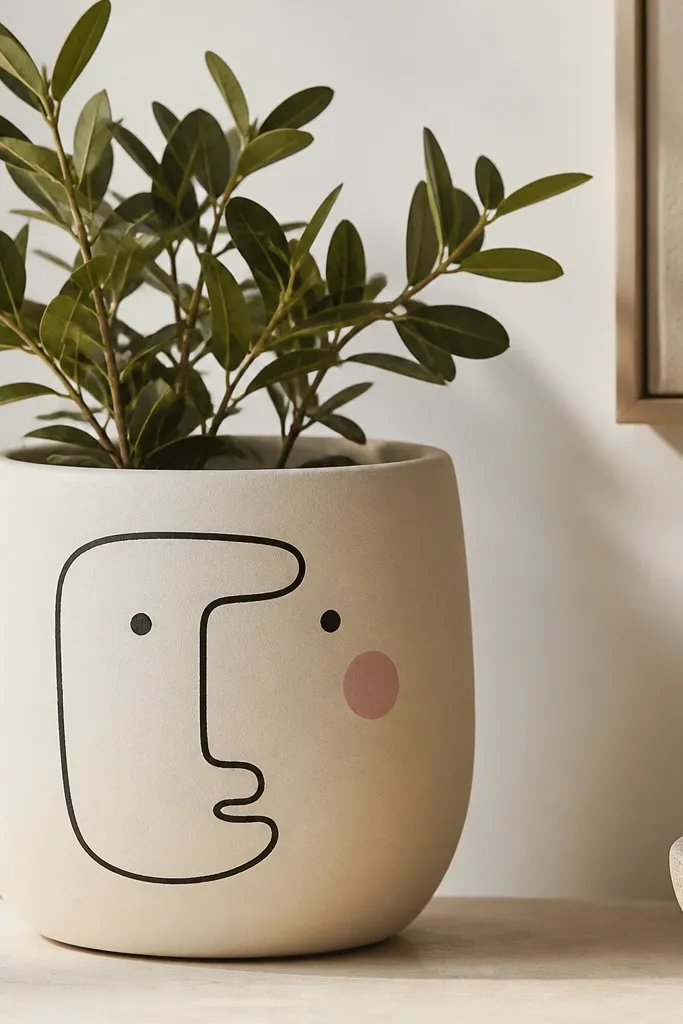
You don't need art skills for a cute face. Use one monochrome color and keep the features small - the pot's curve helps the face look playful instead of stretched. Line work also hides minor paint imperfections because the drawing draws attention.
Base coat cream or light beige. Use a fine-tip paint pen or a small liner brush to draw the face: two dot eyes, a short nose line, and a simple mouth. Add blush with a tiny circle of pink near the cheek. Keep the face centered on the belly so it reads clearly.
Pro tipLet the base coat cure overnight before adding the pen - it prevents smearing.
AvoidSkip super-thick lines - they look like marker, not paint.
11. Ocean Waves with a Turquoise Wash Base
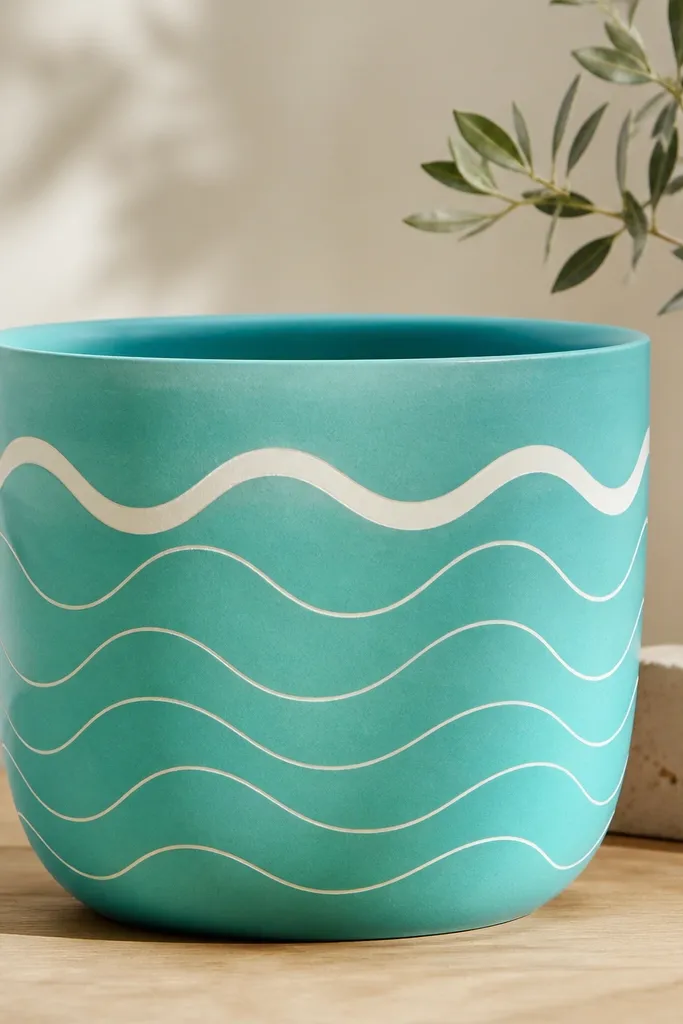
Wave patterns look calming and they're a great fit for beginners because arcs repeat easily. Start with a turquoise wash, then layer white wave lines like stacked parentheses. The contrast makes the waves pop on the curved belly.
Paint a turquoise base by mixing teal with white and doing a thin coat so the pot texture still shows. Use a liner brush to paint wave arcs spaced about 3/4 inch apart. Add a slightly thicker top wave by tracing one of the lines again after it dries 5-10 minutes.
Pro tipMark a straight guide line around the pot with pencil so the waves stay level.
AvoidDon't paint waves with a wide brush - the arcs get chunky and lose the airy look.
12. Seasonal Stars and Dots for Holiday Pots
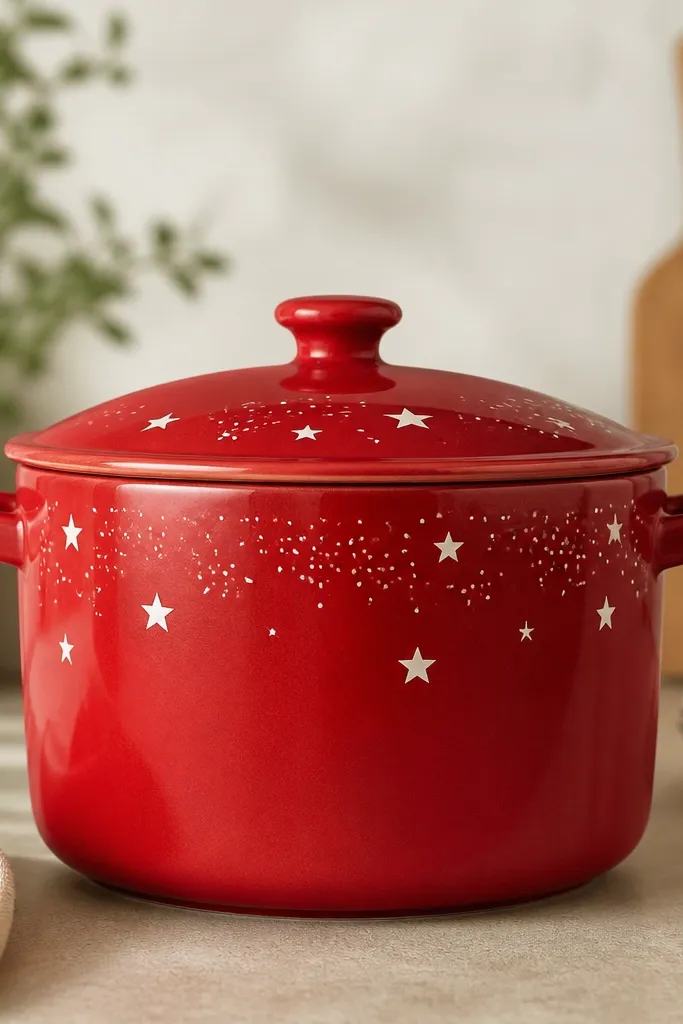
Stars and dots look festive without turning into a full mural. Use one holiday color (red or green) and one crisp contrast (white). The clusters make it feel designed, and the pot's curve helps the stars wrap naturally.
Paint the pot the holiday base color and let it dry. Use a star stamp or cut a star shape from cardboard to dab paint into place. Add dot clusters with a dotting tool - 3-5 dots per cluster. Keep the densest area in the upper third so the pot looks balanced.
Pro tipSeal with a satin outdoor sealer so the white stars stay bright but still resist rain.
AvoidSkip glitter on outdoor pots - it sheds and makes a mess in soil.
13. Monogram Banner with Taped Letters

A monogram makes a pot look like decor, not a craft project. The taped banner gives you crisp separation between colors, and the letter looks sharp even if your handwriting isn't. This style works great for gifting because the personalization is the whole point.
Base coat pale gray. Tape a horizontal band about 2 inches tall across the pot, paint it white, and peel tape after drying. For the letter, use vinyl stencil or tape cutouts; paint navy inside the stencil and remove carefully once tacky.
Pro tipIf you don't have stencils, use painter's tape to mask a simple block letter shape.
AvoidDon't paint the letter freehand - uneven edges scream beginner.
14. Textured Sponge Florals in Coral and Butter Yellow
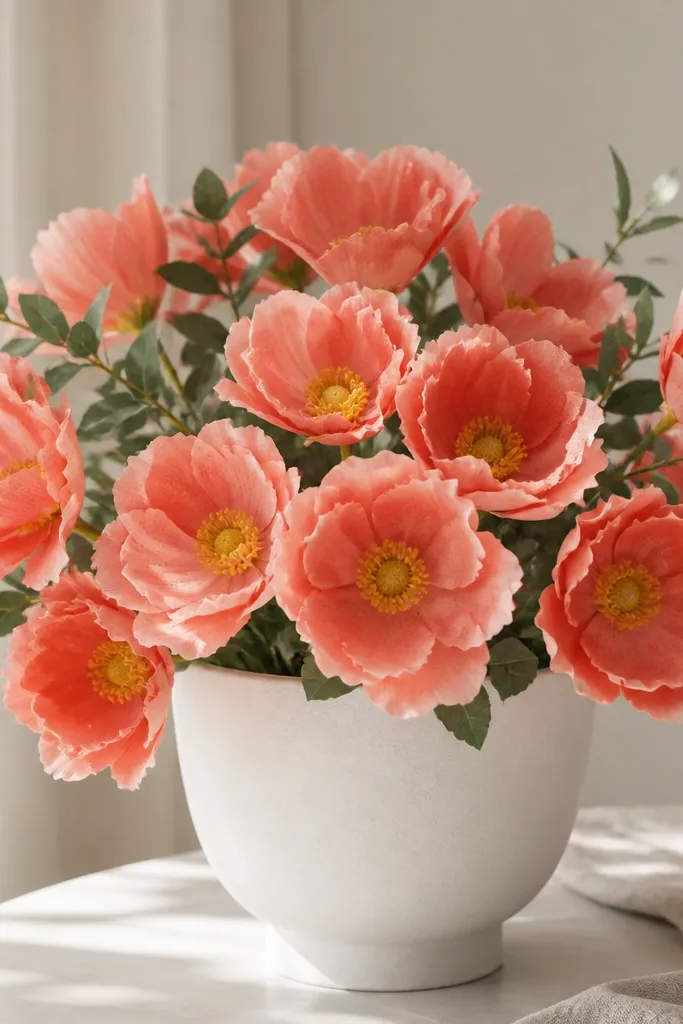
Sponge florals are forgiving, and the texture hides brush streaks. You dab coral petals using a makeup sponge, then stamp butter yellow centers. Add tiny green leaf strokes between blooms to tie it together. The softness of sponge edges looks good on curved clay because it feels organic.
Base coat white, then lightly sketch bloom positions with pencil dots. Dab coral around each position in a ring of petal blobs. Center each bloom with a small butter yellow dot, then add 2-3 green leaf strokes using a small brush. Let each color dry 10-15 minutes before the next pass.
Pro tipCut the sponge into a flat edge so your petal shapes stay more consistent.
AvoidAvoid muddy colors - rinse your sponge between coral and yellow so they don't blend into brown.
15. Ridge-Accent Painting for Chunky Pots
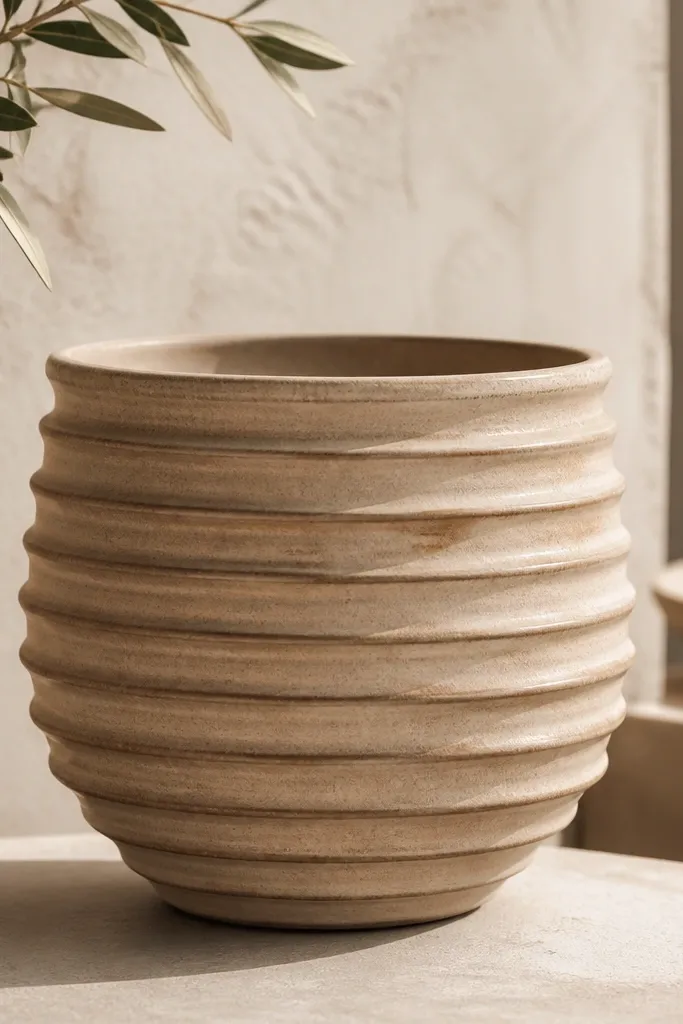
If your pot has deep ridges, you can paint it to look dimensional without doing any art. Paint the whole pot one base color, then use a darker color to get into the grooves and wipe the raised areas clean. The result looks like carved pottery, and it's faster than trying to paint a pattern across the ridges.
Base coat warm beige. After it dries, dab dark brown paint into the grooves with a small brush or old makeup brush. Then wipe the raised ridges immediately with a damp cloth so only the recesses keep the darker paint. Repeat once if the grooves need more color.
Pro tipUse a slightly damp cloth, not dripping wet, so you don't pull paint out of the grooves.
AvoidDon't let the dark paint dry on the ridges - wiping after full dry is harder and leaves streaks.


