1. One Stem in a Thin Black Border
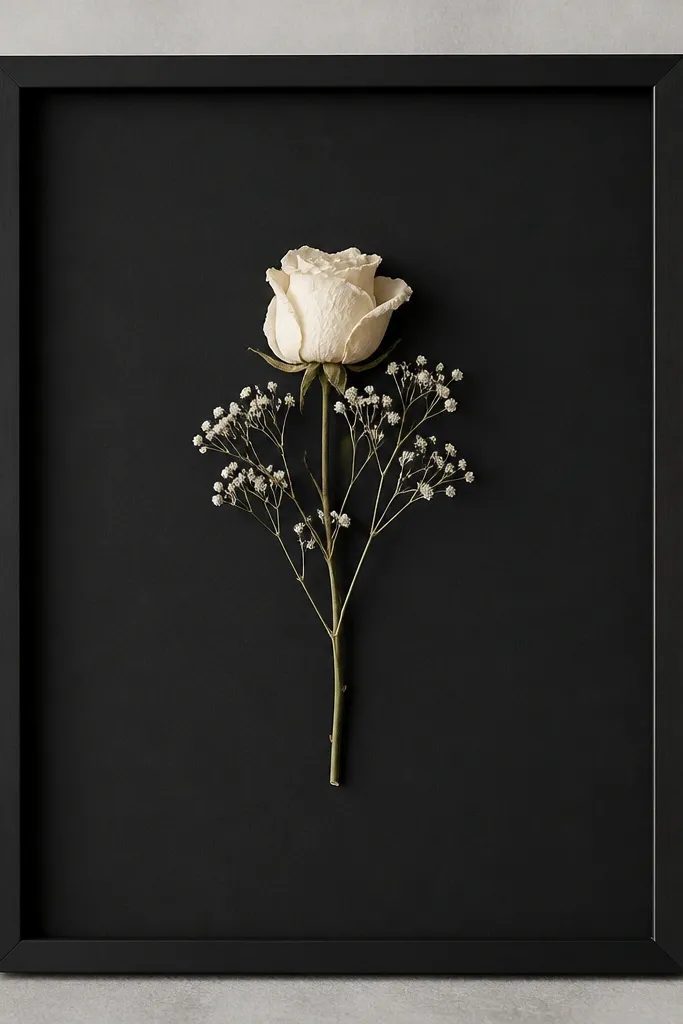
This layout is minimal because it has one clear line and no crowding. The matte black backing makes cream petals look sharp and intentional, and the upright stem gives you that graphic, modern look. I keep the baby's breath pieces sparse so they don't turn into a fuzzy halo.
Use a 5x7 or 8x10 thin black frame. Back with matte black paper or archival cardstock, then press the rose and sprigs so they sit flat. Place the rose slightly above center, then tuck the baby's breath on one side so the negative space stays clean.
Pro tipIf your rose head is thicker than the rest, gently trim the outer petal edge so it lies flatter before gluing.
AvoidDon't add multiple stems just to fill space - the whole point is the single line.
2. Blush Peony Half-Circle with Off-White Mat
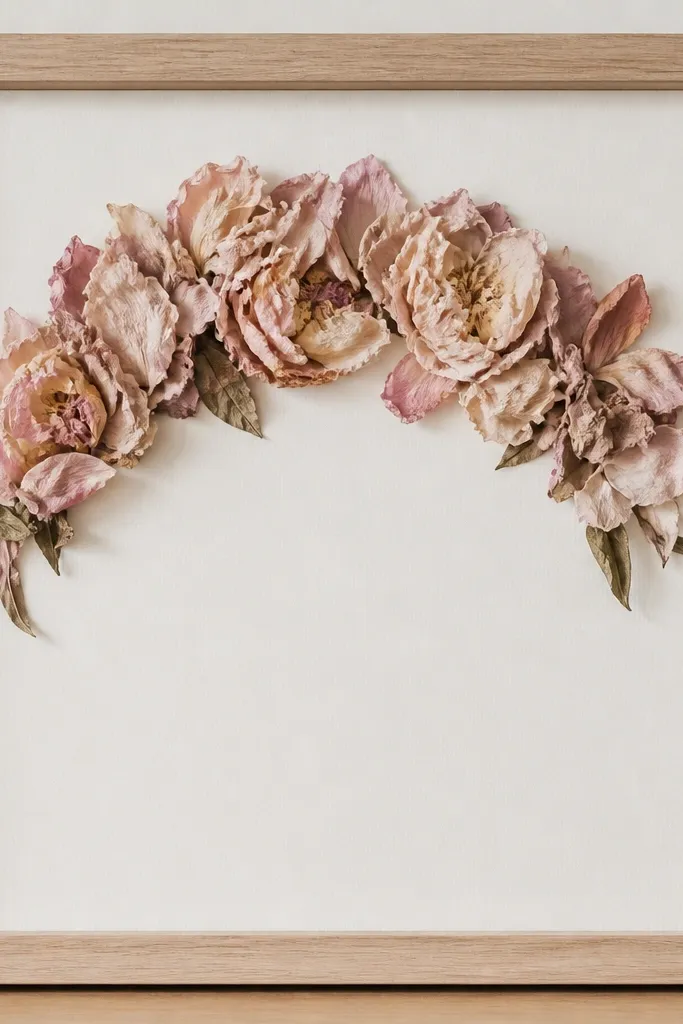
A half-circle reads modern because it's directional and controlled, not scattered. Blush peony petals look romantic, but the off-white mat keeps it from feeling like a wedding bouquet. I glue petals like puzzle pieces so the curve is smooth.
Choose a light wood or natural frame to match the off-white mat. Press peony petals flat; then arrange them along the top border like an arch. Use 6-10 petals total, spaced 2-4 mm apart, and add 2 small dried leaves on the right for balance.
Pro tipLightly mist the pressed petals with a tiny amount of diluted matte medium on the underside if edges curl up.
AvoidAvoid thick glue blobs at the petal bases - they create bumps that show through glass.
3. Sage Grass Diagonal with Clear Spacer

Diagonal lines make dried florals feel designed instead of accidental. Sage grass gives you an earthy modern palette, and the center gap keeps the frame airy. When the blades are flat and aligned, the whole thing looks like minimalist wall art.
Use a 8x10 white frame with frosted or matte white backing. Arrange the longest grass blade diagonally, then add two shorter blades parallel to it near the top right. Keep the distance between blades about the width of the grass stem so it reads intentional.
Pro tipIf your grass curls, press it under parchment for an extra day before mounting.
AvoidDon't bend stems into random angles - uneven direction makes it look handmade in a bad way.
4. Black-and-White Daisy Cluster in a Grid
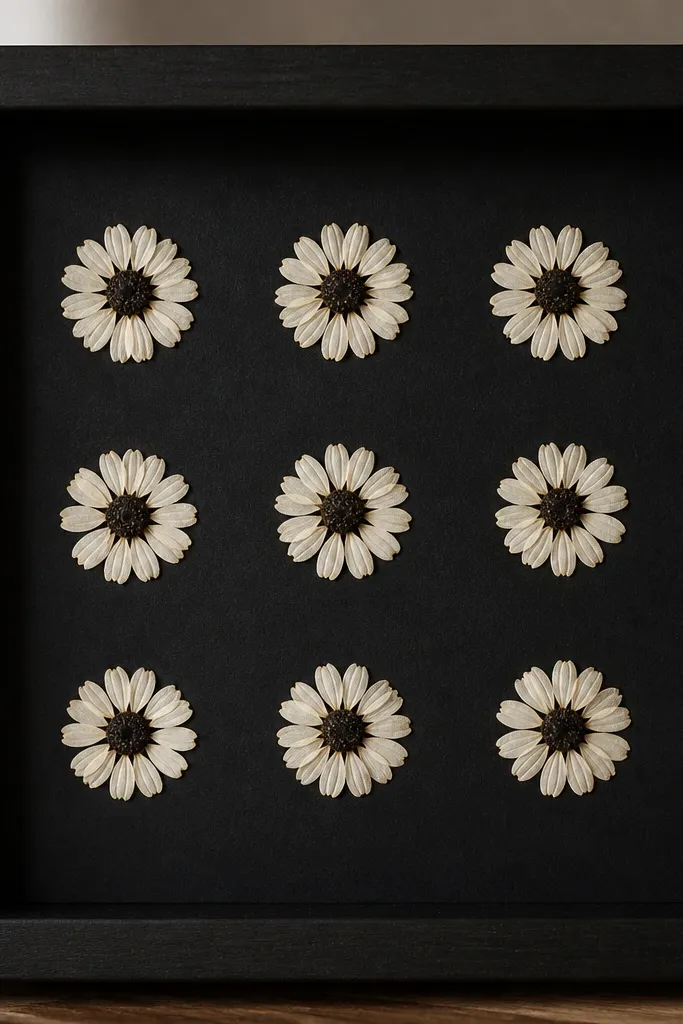
A grid makes dried flowers look modern because it adds order. The black backing and white petals create high contrast, and the repeated size makes the whole piece feel graphic. I use small blooms so each "cell" stays crisp.
Use a square frame, 8x8 or 10x10, with matte black backing. Press daisies flat and trim stems to 1-2 cm. Arrange 9 small blooms with consistent spacing - aim for 6-10 mm between petals so the grid reads.
Pro tipUse a ruler under the paper while you arrange, then remove it before gluing so your spacing stays consistent.
AvoidDon't use mixed bloom sizes in the same grid - it breaks the clean pattern.
5. Monochrome Lavender Sprig Corner
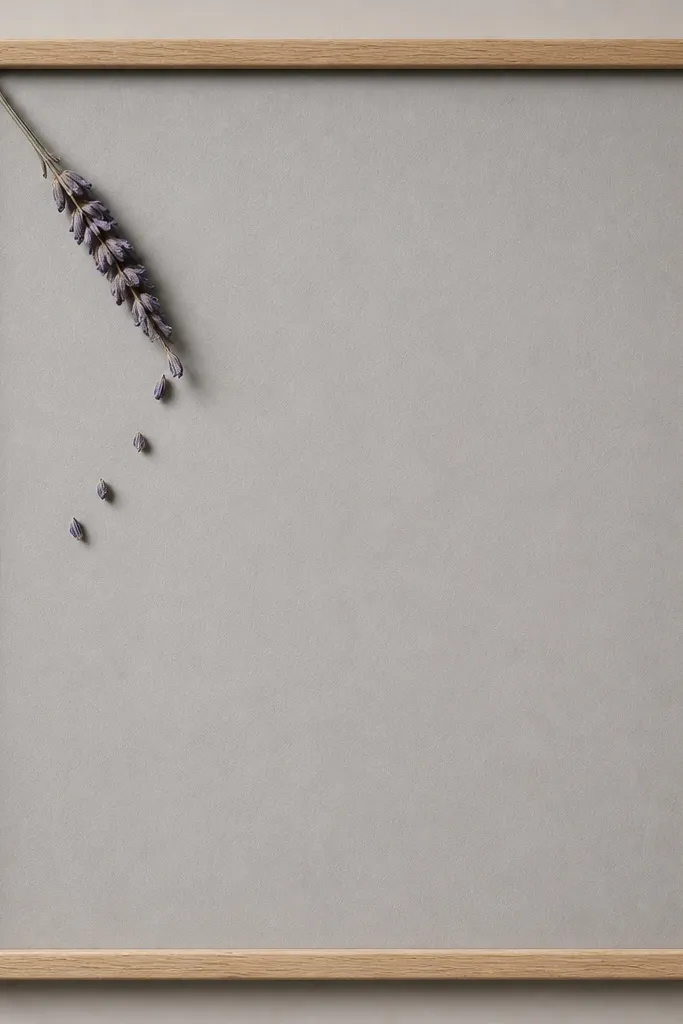
Corner placement is a minimalist trick that still feels full. Lavender gives a cool tone, and the gray backing makes it look calm rather than loud. The comma-like trailing buds add movement without clutter.
Use a 5x7 or 8x10 frame with gray cardstock backing. Press lavender sprigs and keep most buds intact by handling gently at the stem. Glue only the stem and the first few buds tightly, leaving the trailing buds slightly spaced.
Pro tipIf buds fall off during handling, press them separately and glue them back with clear glue dots.
AvoidAvoid overfilling the corner - one sprig is enough for this style.
6. Evergreen Wreath Strip for Winter
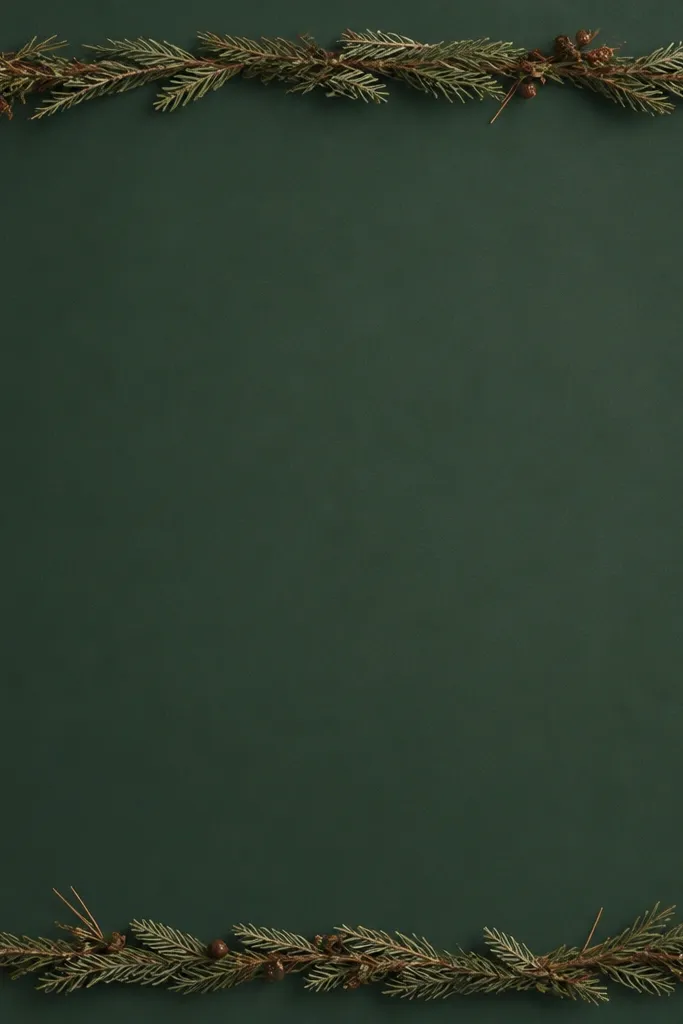
This is seasonal without turning into a full wreath mess. The strip gives you the holiday feel while the frame stays modern and tidy. Deep green backing makes needles look like clean silhouettes.
Use deep green archival paper as backing. Arrange a thin ring of dried evergreen needles along the inner border, leaving a 1-2 cm gap at the center. Add 3-5 tiny dried berries or seed pods spaced out, not clustered.
Pro tipGlue the needles along their length with tiny dots, not long lines, so they don't soak through.
AvoidDon't cover the entire center - you'll lose the minimalist look.
7. Neutral Pampas Feathers with Center Pin
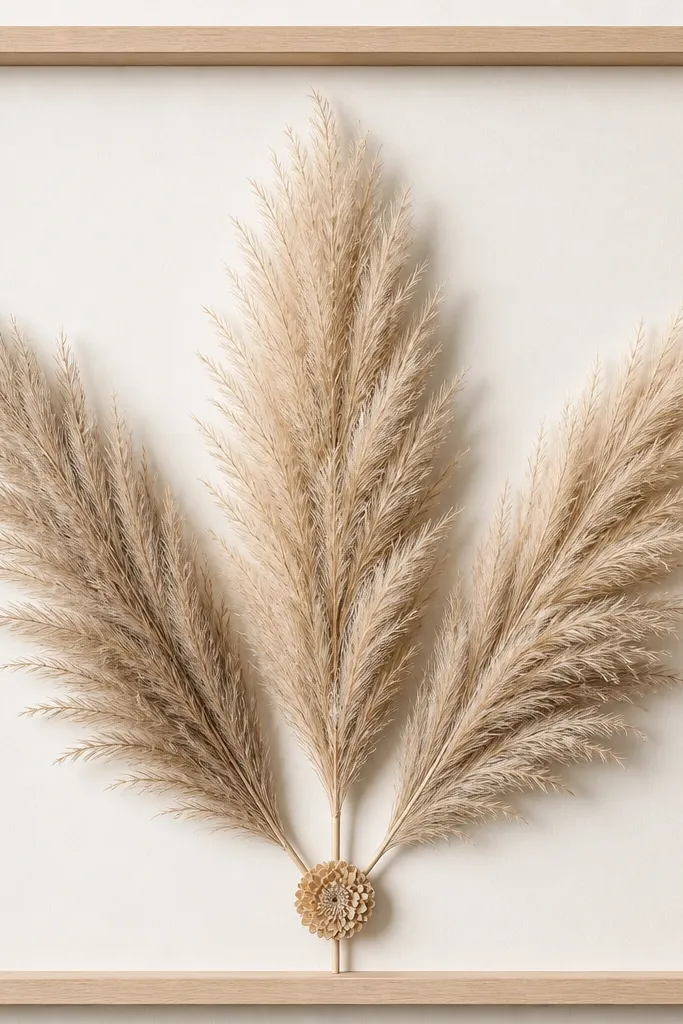
Pampas looks expensive when it's controlled and flat. The warm white backing keeps it neutral, and the radiating plume shape reads intentional even with dried texture. I use a center pin so the eye knows where the composition starts.
Use a 8x10 frame with warm white cardstock. Press the feather plumes lightly so the base flattens, then arrange three plumes in a fan with tips touching the side edges softly. Glue a small dried flower head at the center and let the plumes overlap slightly.
Pro tipIf your plumes aren't flat, trim the outer fluff and keep the base clean for a better minimalist silhouette.
AvoidAvoid messy overlaps - keep the feather bases aligned so the fan shape looks crisp.
8. Pressed Fern + Tiny Rosebud Line
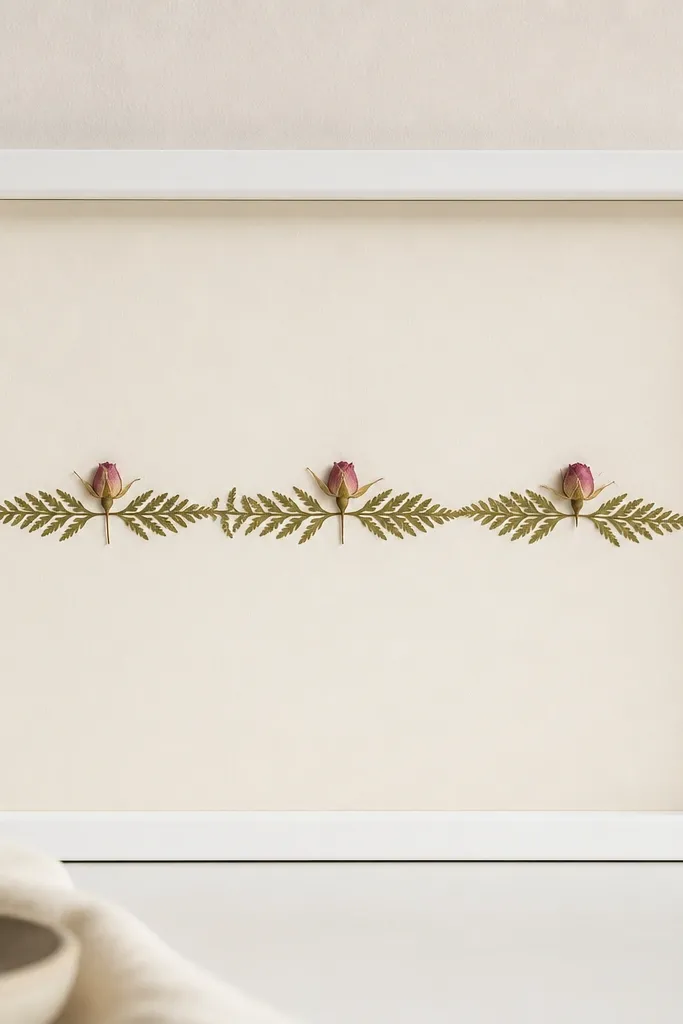
This layout looks modern because it's horizontal and evenly spaced. Fern fronds add texture without color chaos, and tiny rosebuds bring a soft focal point. The even spacing makes it feel designed, not random.
Use an 8x10 white frame with matte cream backing. Press fern fronds until crisp, then trim them into narrow strips so they lie flat. Glue a fern strip across the center, then place three rosebuds along it with equal gaps of about 2 cm.
Pro tipUse tweezers and a toothpick to position rosebuds without dragging glue across the backing.
AvoidDon't use long, uneven fern fronds - the line will look lopsided.
9. Terracotta Seed Pods with Vertical Symmetry
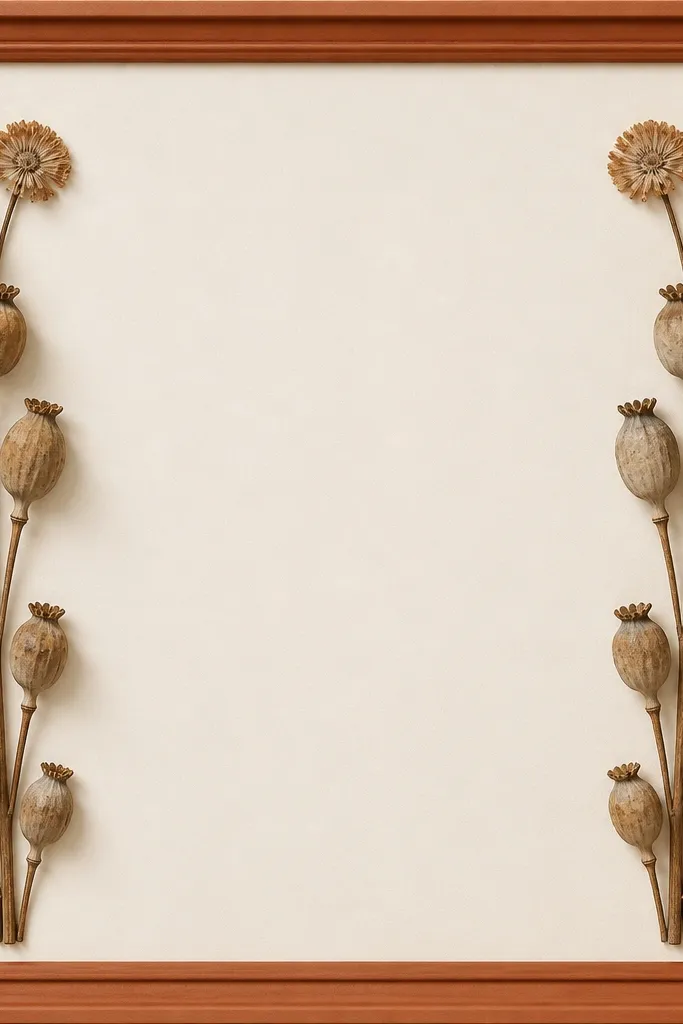
Symmetry is the fastest path to "modern" with dried materials. Terracotta accents look warm and seasonal, and the blank center keeps it clean. I build it like a pair of columns so it reads balanced from a distance.
Use a frame that's terracotta or warm clay tone. Back with off-white matte cardstock. Press seed pods flat where possible, then glue mirrored clusters of 4-6 pods per side. Keep the columns about 3-4 cm from the center gap.
Pro tipMeasure with a ruler before gluing so both columns land at the same height.
AvoidAvoid mixing pod colors in the same column - keep it terracotta-brown only.
10. Monochrome Eucalyptus Stem with Float Mount
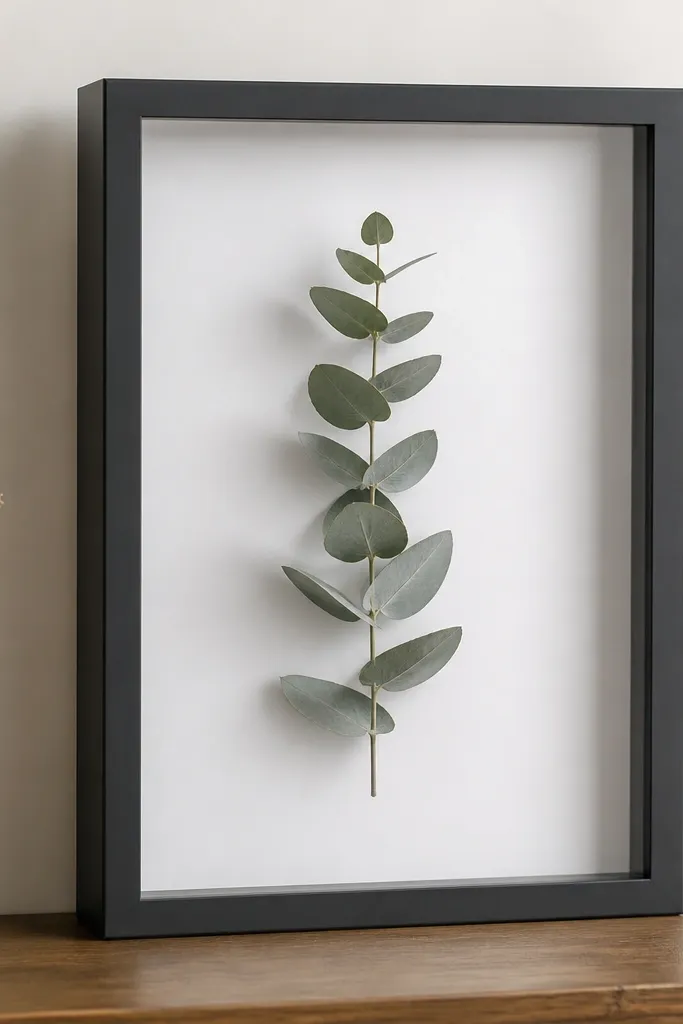
A float mount makes dried flowers look dimensional without adding clutter. Eucalyptus leaves are already structured, and the spiral pattern reads clean. The white backing and floating stem give you that gallery feel at home.
Use a shadow box style frame with depth. Mount the eucalyptus stem on 1-2 mm foam tape strips so it lifts off the backing by a few millimeters. Keep the leaf spiral tight and trim the stem so it doesn't poke into the frame glass.
Pro tipIf you see leaf edges curling, press again under parchment before mounting - floating highlights bumps.
AvoidDon't stack foam tape thickly - it creates a lumpy look under lighting.
11. Red Berry Branch with Minimal Curve
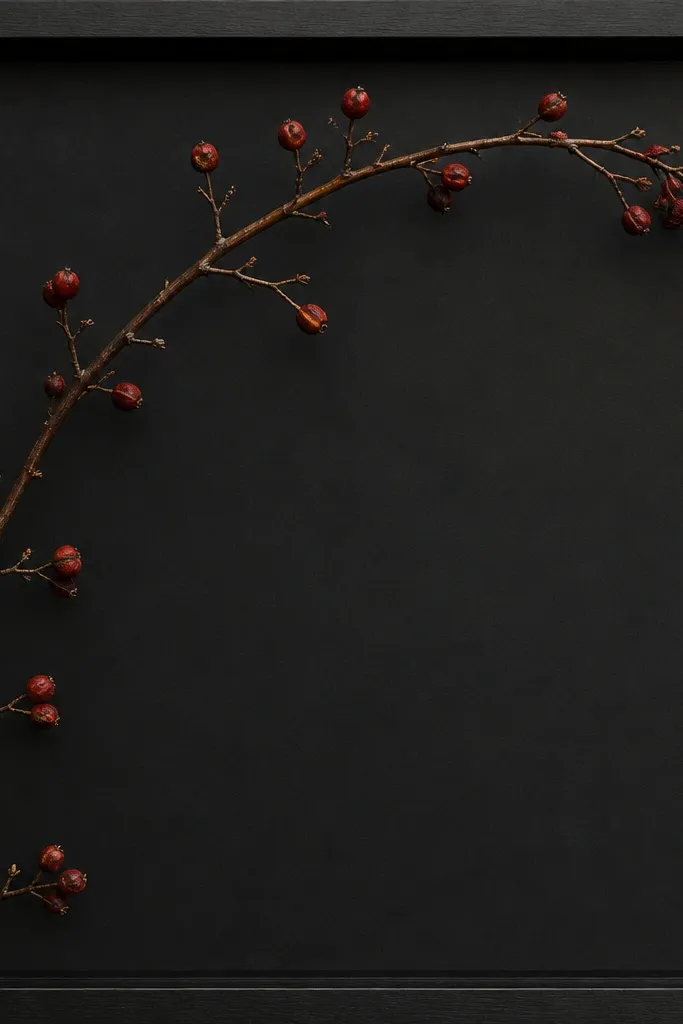
This one works because the branch curve gives you a single motion line. Red berries look striking against black, and the sparse spacing keeps it minimalist. I avoid lots of berries - the empty space around them makes them pop.
Use a narrow black frame and matte black backing. Arrange a curved branch with 6-10 berries spaced along it, leaving about 2-3 cm gaps between berry clusters. Press berries if possible, or use ultra-thin glue dots so they don't bulge.
Pro tipChoose berries with similar size so the curve looks even rather than random.
AvoidAvoid clumping berries together - it turns into a craft-store wreath look.
12. Cream Rose Petal Confetti in a Circle
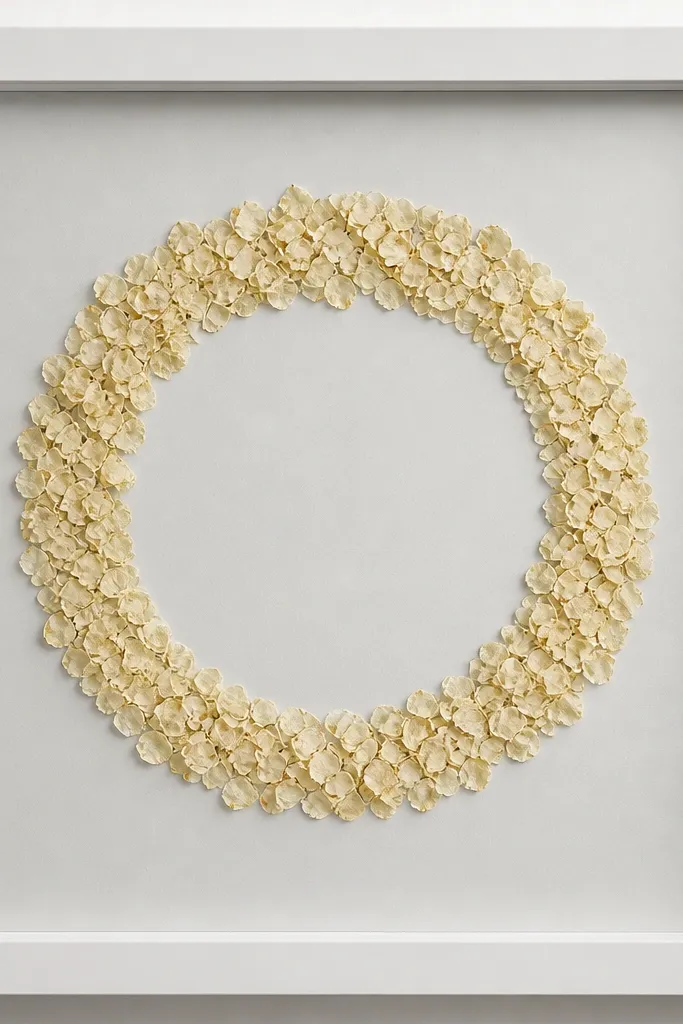
Petal confetti looks modern when it's controlled into a ring. The thin donut shape creates a graphic focal point, and the blank center keeps it from feeling like a pile. I use only one flower color family so it stays minimalist.
Use a light gray matte backing. Press rose petals very flat, then arrange them into a ring about 6-8 cm wide depending on frame size. Glue in small batches, starting at 12 o'clock and working around, so the ring stays even.
Pro tipIf petals look translucent, dust the underside lightly with dry matte medium after pressing to reduce shine.
AvoidDon't make the ring too thick - a fat ring looks like a flower accident.
13. Sage and White Flower Trio on a Diagonal Mat
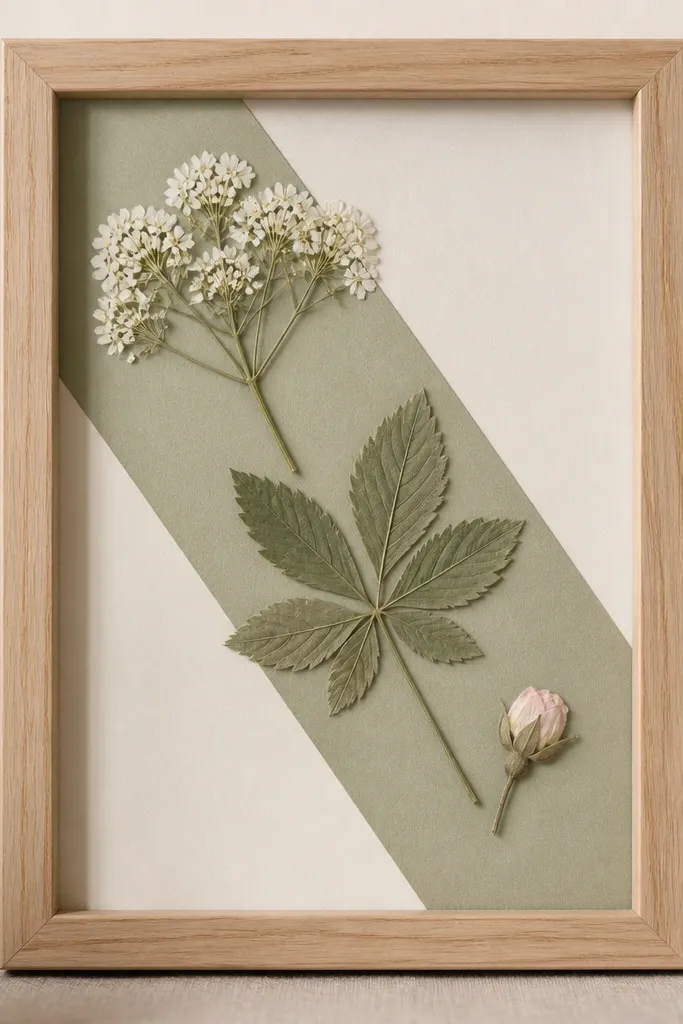
A diagonal mat stripe creates structure, so the flowers don't need to fill the whole frame. Sage and white feels clean for spring, and the slight diagonal movement keeps it from looking static. I keep the trio small - the diagonal stripe does the heavy lifting.
Use a frame with a mat or backing you can cut. Cut a sage diagonal strip about 3-4 cm wide across the backing. Place three pressed flowers along the strip with equal spacing, keeping the smallest at the end of the diagonal.
Pro tipUse a craft knife and metal ruler for straight edges - crooked diagonal lines ruin minimalist style fast.
AvoidAvoid using more than three focal pieces here - it stops reading as "trio design."
14. Monogram Frame with Flower Cutout Letter
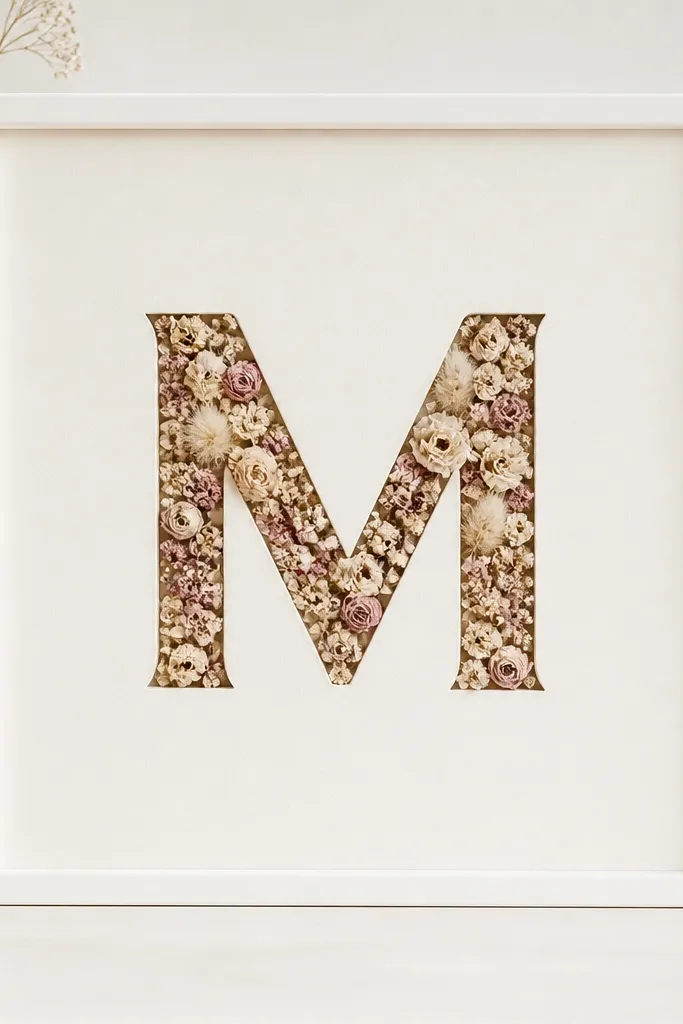
Letter cutouts make dried flowers feel personal and modern. The flowers only exist inside the letter shape, so you get clean boundaries and zero clutter. I like using muted tones inside the letter for that calm, modern look.
Use a shadow box or flat frame with thick backing. Cut a monogram letter from thin black cardstock or kraft paper, then glue flowers inside the letter cutout area. Arrange tiny petals and buds in the letter only, then secure the letter to the backing with thin double-sided tape.
Pro tipPress tiny flowers longer than bigger blooms - small pieces curl if you rush pressing time.
AvoidDon't use a busy mix of colors inside the letter - it turns into confetti, not design.
15. Neutral Botanicals with Side-by-Side Blocks
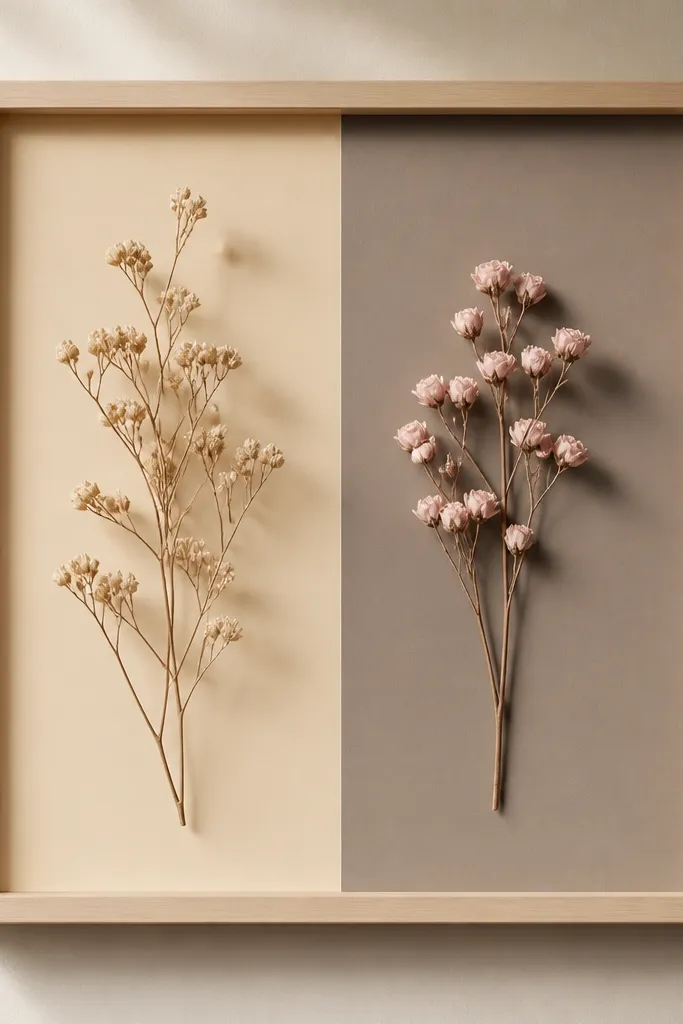
Color-blocking makes dried flowers look like graphic design. Splitting the backing into two neutrals keeps everything calm, and placing elements only on their side keeps the layout tidy. I treat each block like its own mini arrangement.
Use a frame with enough space to create a background panel. Cut two rectangles of matte cardstock and glue them flush, so the split line is straight. Place one small cluster per side, keeping the tallest piece within a 2 cm band so it stays balanced.
Pro tipUse matte paper, not cardstock with shimmer - shimmer shows through and makes the frame look cheap.
AvoidAvoid uneven block widths - even a 3-5 mm difference shows in minimalist layouts.
16. Deep Wine Dahlia Petal Fan
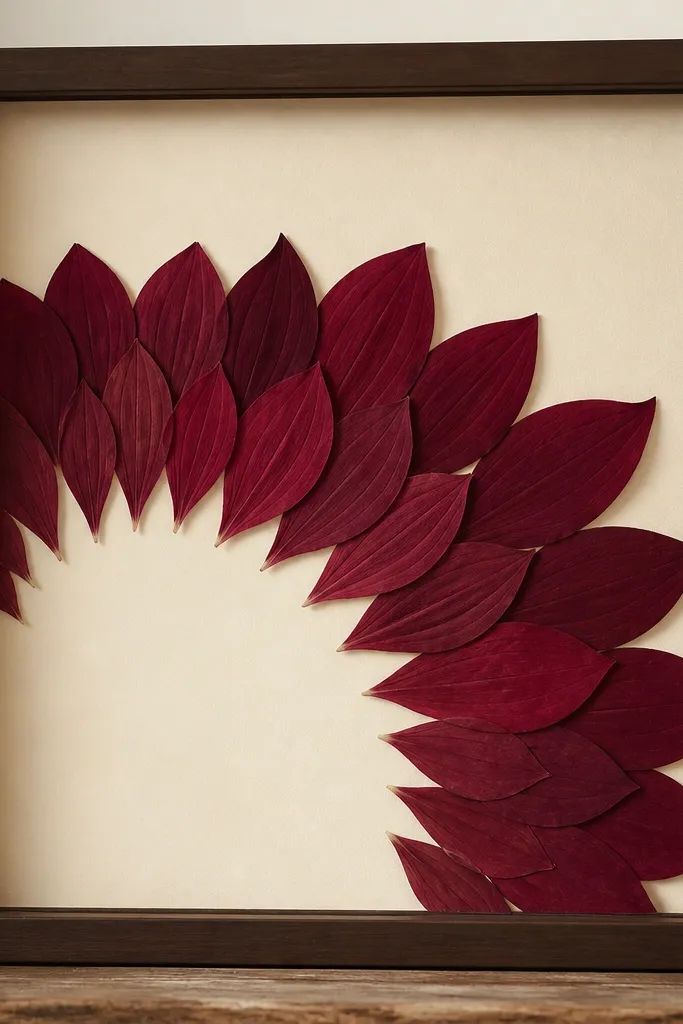
A fan layout reads modern because it spreads in a controlled arc. Deep wine petals against cream feel seasonal and dramatic without needing extra decorations. I keep the fan to one color family so the texture does the work.
Press dahlia petals until flat, then trim any curled edges. Arrange from about 9 o'clock to 3 o'clock, overlapping petals by 1-2 mm. Glue the bases only, leaving petal tops floating slightly for a soft layered look.
Pro tipIf petals look too red under indoor light, switch to dusty mauve petals and test under your room lamp before final gluing.
AvoidDon't glue every petal top - only the base needs adhesive.
17. Sunflower Mini Heads with Staggered Row
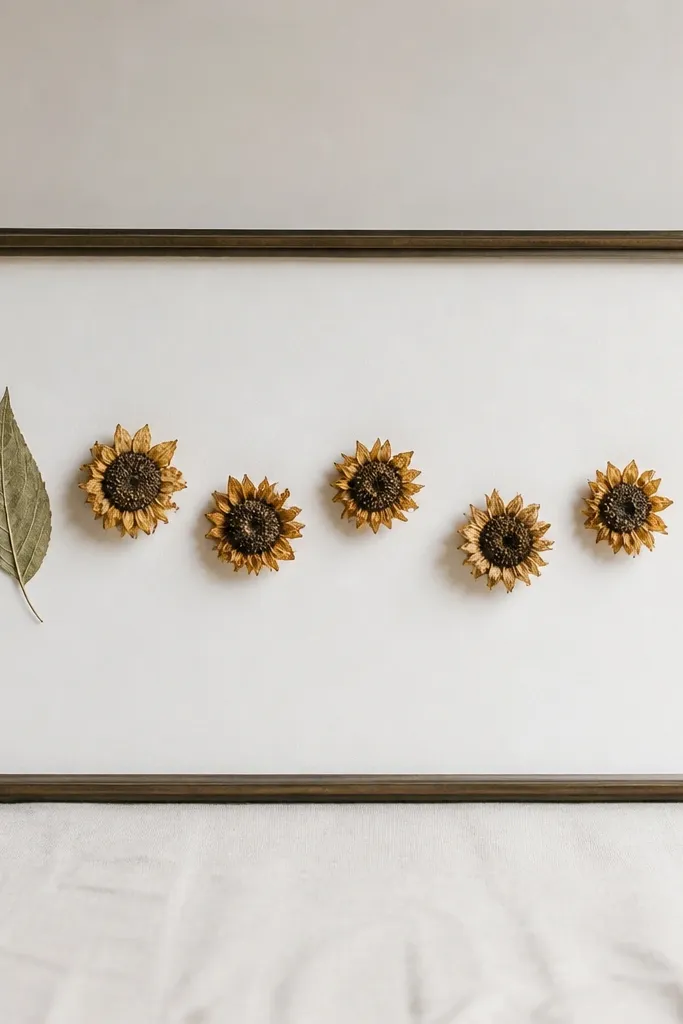
Staggering gives you movement while still staying clean. Tiny sunflower heads keep the palette warm, and the white backing keeps it fresh. I like alternating heights by about 5-7 mm so it looks intentional, not accidental.
Press sunflower heads flat and trim stems short so they don't shadow. Arrange 7-9 mini heads in a row across the center, alternating placement slightly higher and lower. Add one small leaf at one end to anchor the row visually.
Pro tipUse a small dot of glue at the stem base only, then press gently for a few seconds to avoid shifting.
AvoidDon't crowd the heads together - leave at least 1 cm between centers.
18. Monochrome Rosebud Stack with Open Center
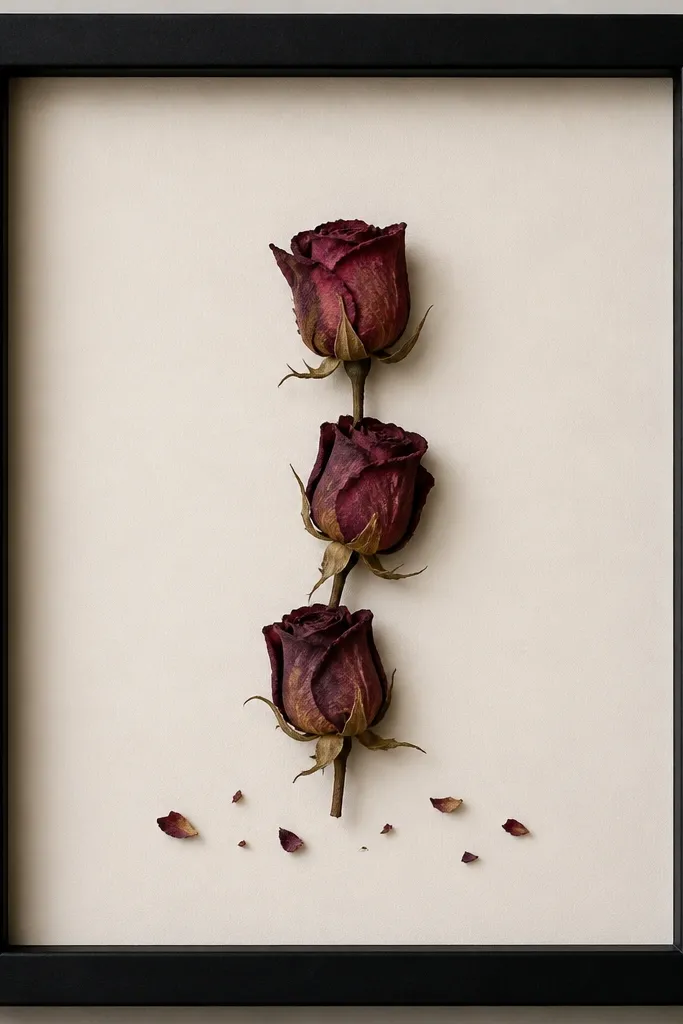
A vertical stack feels modern because it's compact and readable. Off-white backing makes rosebuds look soft and sculptural, and the slight offset prevents it from looking like a pasted column. I keep the extra petals minimal so the stack stays the hero.
Use a black frame with off-white matte backing. Press rosebuds flat; then glue the bottom bud first, followed by the middle and top bud, offsetting each by 3-5 mm. Add 2-3 tiny petals at the bottom only, with wide gaps.
Pro tipIf the middle bud sits too high, trim the bud stem and re-glue so the stack stays balanced.
AvoidAvoid spreading petals around the whole frame - it ruins the stack focus.
19. Paper-Layered Window Frame with Dried Blossoms
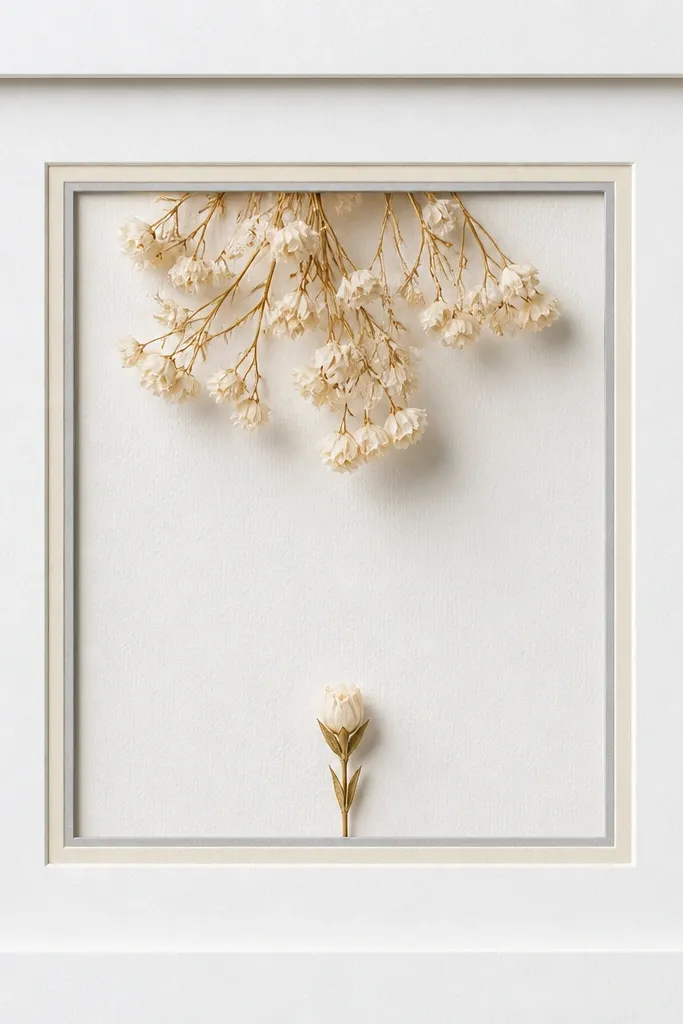
Layered paper borders create a modern "window" effect, and you don't need ornate molding. The inner window keeps the flowers contained so the arrangement stays minimalist. I like using two border tones because it adds depth without adding clutter.
Cut two inner rectangles from matte cardstock: one slightly larger and one smaller. Glue them to the backing to form the frame effect. Place a top cluster of 3-4 pressed blossoms and one bottom bud, centered. Keep everything within the inner window so it never touches the outer border.
Pro tipBurnish the paper edges with a plastic ruler so the layers look sharp under light.
AvoidDon't use textured glitter paper for the borders - it catches light and makes the whole piece look messy.


