1. Matte White Frame with Mini Pampas Feathers Border
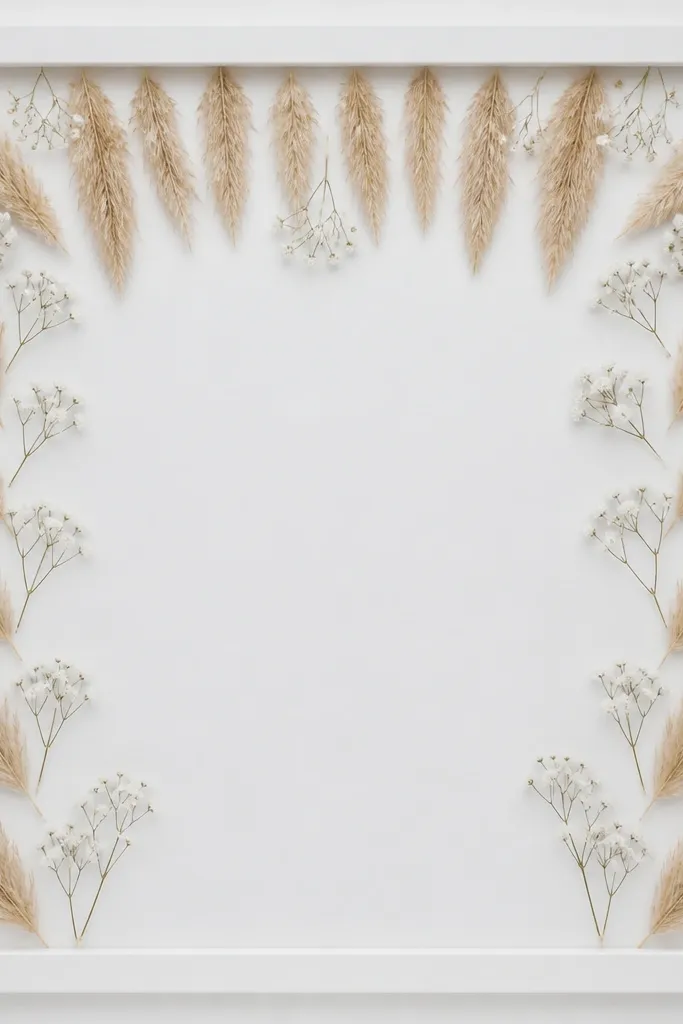
This design works because the plumes create a soft "air" effect without needing thick glue. White pampas and small dried sprigs keep the palette calm and make the frame look like decor, not craft debris. The clear center gives your eye a place to rest, so the flowers don't feel crowded. I like it for winter through early spring because it reads neutral and bright.
Use a 8x10 or 11x14 frame with a removable backing. Cut a piece of white acid-free paper or cardstock for the background and add a thin strip of clear double-sided tape along the border you want to fill. Arrange the plumes so the tips point slightly inward; trim stems with small scissors. Seal the entire surface with 2 light passes of matte clear spray from 10-12 inches away.
Pro tipAfter gluing, wait 10 minutes and gently brush the surface with a dry makeup brush. It removes loose dust before sealing.
2. Cinnamon Rosebuds in a Kraft Paper Center Window
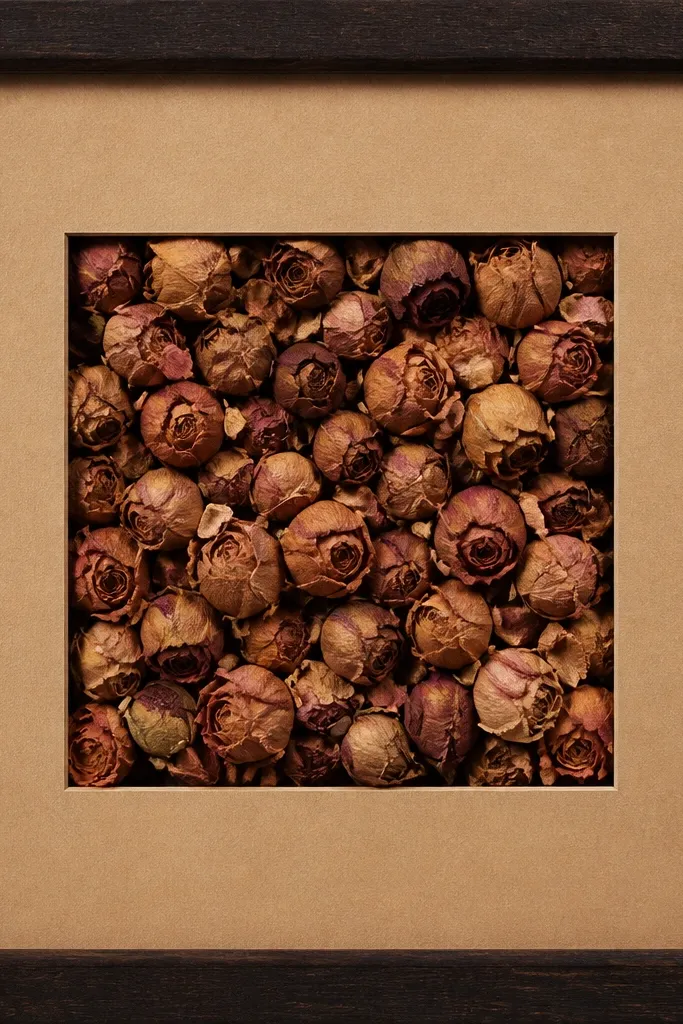
Kraft paper makes dried flowers look warmer and more intentional, especially when your rosebuds are brownish-red. The centered window keeps the mess contained, so the frame looks neat even up close. This one is my go-to for fall and winter because it looks like "spice" decor without adding extra items. The contrast between dark wood and kraft paper also hides tiny imperfections in glue lines.
Start with a 9x12 or 8x10 frame. Cut kraft paper to fit the backing, then cut a smaller rectangle in the middle (leave a 1 inch border). Glue dried cinnamon rosebuds and a few tiny dried leaves inside the window only. Use clear-drying craft glue for the smallest pieces so you can reposition them.
Pro tipSpray the finished cluster lightly, then let it dry flat overnight. Matte spray reduces that dry, chalky look on rose petals.
3. Green Eucalyptus Sprig Frame with a Single Red Accent
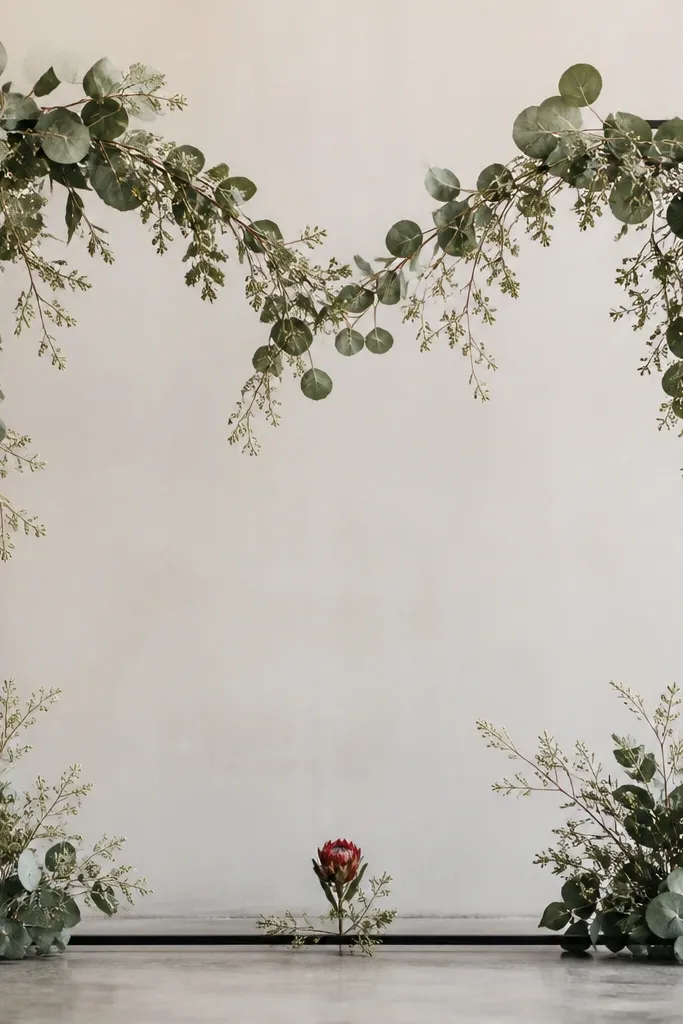
A mostly monochrome green palette looks expensive even on a budget. Keeping just one red accent makes the frame feel designed, not random. Eucalyptus-style leaves are forgiving because they lay flat and don't crumble as easily as ultra-dainty flowers. This design looks great for holidays and also for everyday mantel styling.
Use a 5x7 or 8x10 frame with a backing that can hold a few layers. Arrange two dried eucalyptus sprigs on the top corners, then add smaller leaf pieces along the sides to form a loose V. Place one red element (like a dried mini rose or a small dried berry cluster) exactly at center. Seal with matte spray and avoid heavy gloss.
Pro tipIf your red accent sheds, glue it to a tiny cardstock square first, then place the whole square into position.
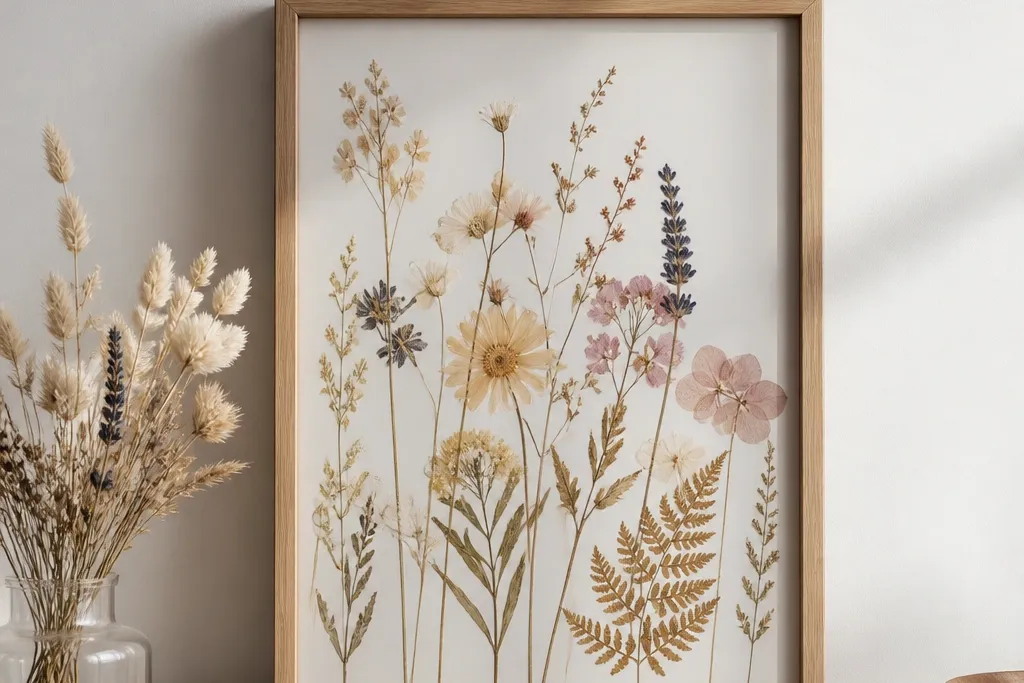
4. Press-Dried Wildflower Strip Frame
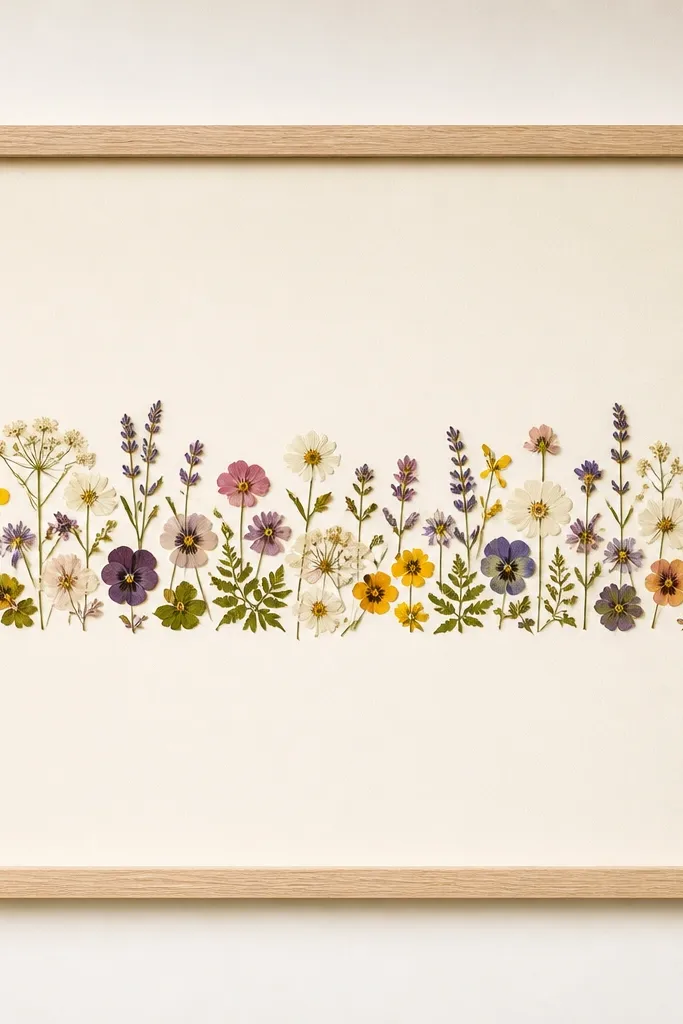
Press-dried flowers look crisp because they're truly flat. A single horizontal strip is the easiest way to make it look intentional, and it keeps you from piling fragile petals. Cream paper makes muted colors pop without turning the frame into a rainbow. This is a "subtle seasonal" option for spring and summer.
Use pressed flowers you've dried flat for at least 2 weeks. Add cream cardstock as background. Glue flowers with a very thin line of tacky glue only at the stem ends, then cover with a hair-thin layer of clear gel medium so they lie flat. Frame in a 8x10 with glass or acrylic to protect the petals.
Pro tipMist the paper background with a little water-then-dry trick (let it dry fully) so glued petals don't curl at the edges.
5. Sunburst Dried Flower Frame with One Center Bloom
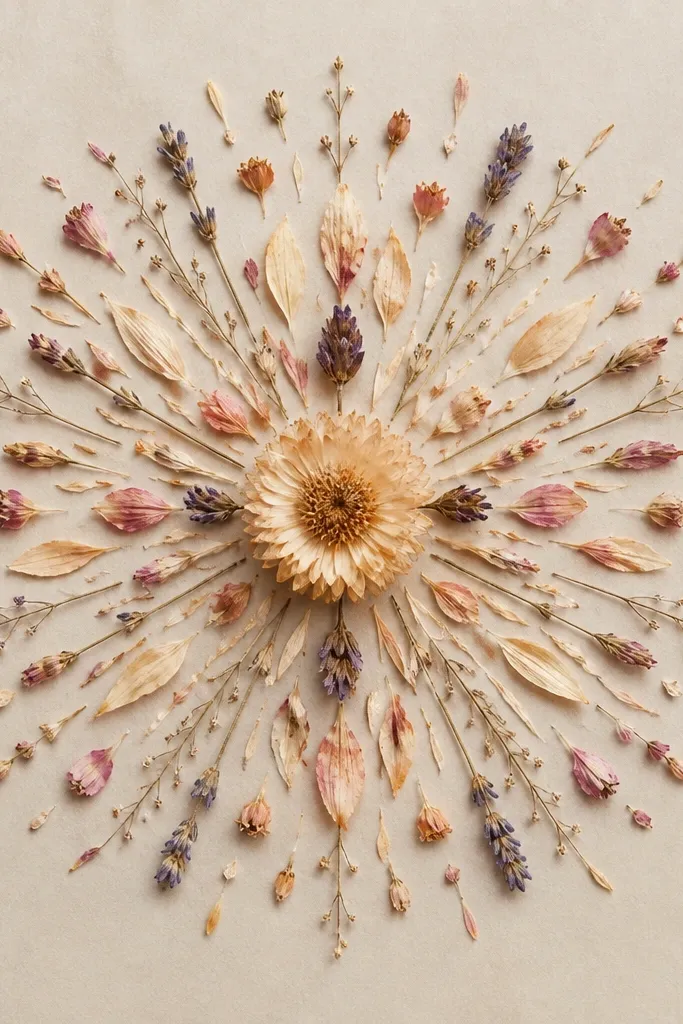
Sunburst layouts force symmetry, and symmetry makes DIY look polished fast. The center bloom anchors the whole piece, and the radiating pieces give movement without height. I like this when I want a "statement" frame on a budget because you can use small leftovers. It reads nicely on shelves and entryways.
Use a 9x9 or 10x10 frame. Mark the exact center of the backing with a pencil dot. Glue tiny dried petals and sprigs in arcs, keeping them short at the edges and longer near the middle. Use matte spray in two light coats. If you have a center bloom that's too tall, trim the stems and flatten it with gel medium before gluing.
Pro tipDry-fit everything first by laying pieces on the backing without glue. When it looks balanced, glue only the bottom edges.
6. Holiday Pine Mini Wreath Frame
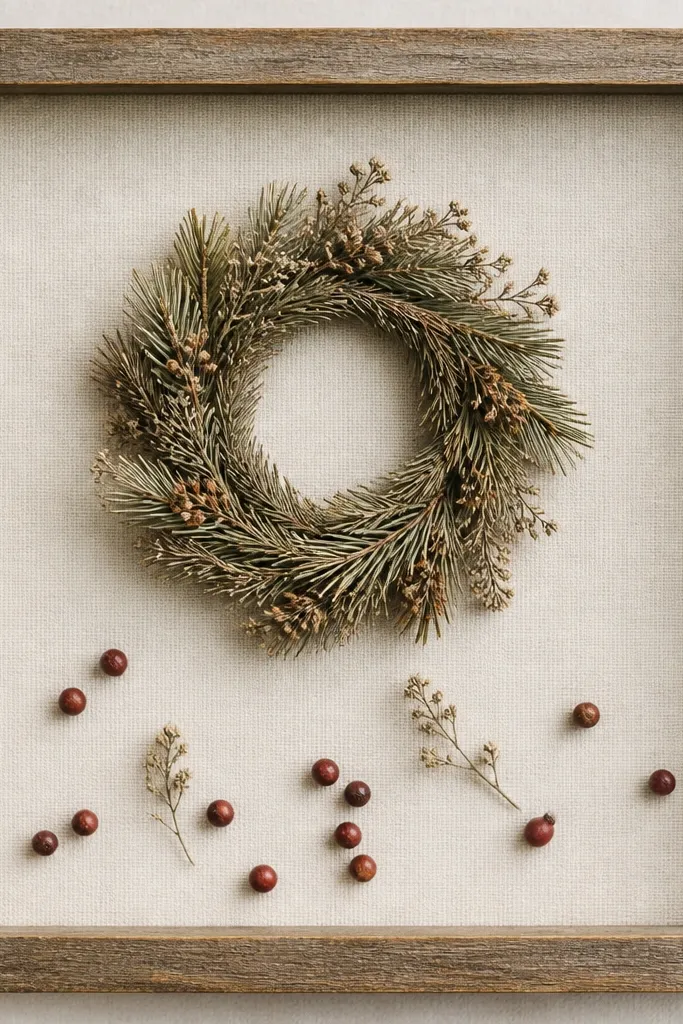
A mini wreath gives you instant holiday energy without needing a full ring of materials. Pine tips hold shape better than delicate flowers, so the frame stays neat. Sparse berry clusters add a pop of color and keep the wreath from looking flat. This one looks great on a side table or above a holiday shelf.
Choose a 6x6 or 7x7 frame. Build the wreath on the backing with a light zigzag line of hot glue, then press pine tips into the line. Add one small berry cluster at 5 o'clock and another at 8 o'clock, or just one if you prefer calm. Seal with matte spray after the glue cools.
Pro tipCut pine tips shorter than you think. Short pieces reduce shedding and keep the wreath from turning lumpy.
7. Black Frame with Dried Lavender Corner Clusters
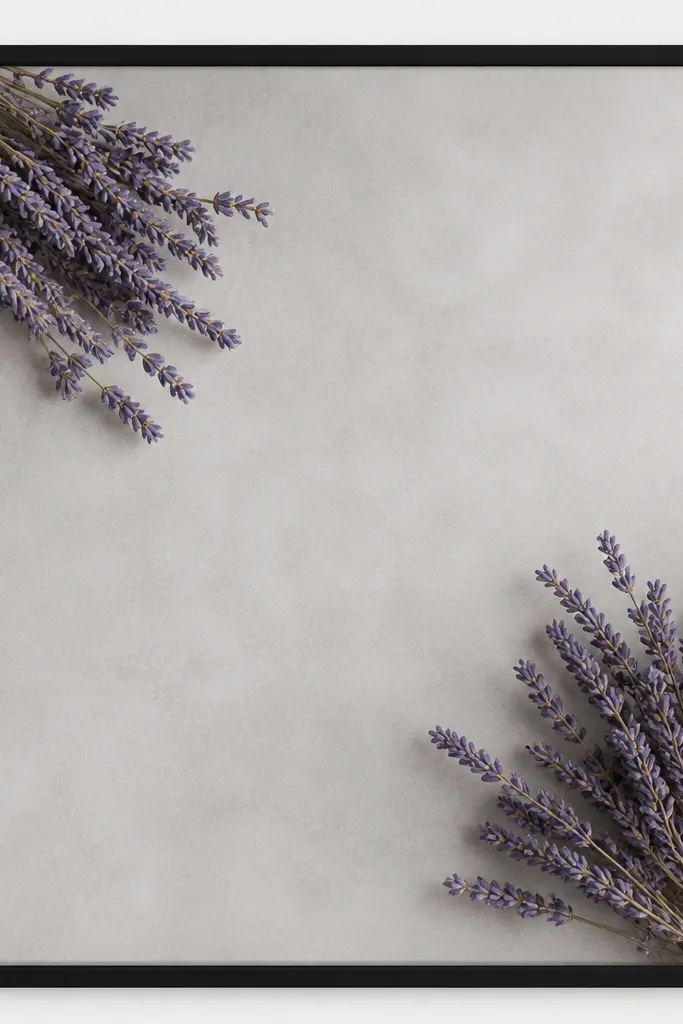
Lavender sprigs are thin and flat, which makes them perfect for corner placement. Corners look modern and intentional, and negative space makes the frame feel cleaner than full-coverage designs. The black frame adds contrast so pale lavender doesn't disappear. This works year-round, especially in kitchens and bathrooms.
Use a 8x10 frame with light gray cardstock backing. Glue lavender sprigs so they overlap slightly like a small bouquet. Add two tiny filler elements (like dried baby's breath or thin grass) only inside the corners. Seal gently with matte spray and avoid soaking the stems.
Pro tipIf your lavender stems look too pale, lightly mist the stems with diluted brown spray paint (one drop of water per teaspoon paint) and test on scrap first.
8. Terracotta Flower Frame with Dried Marigold Rings
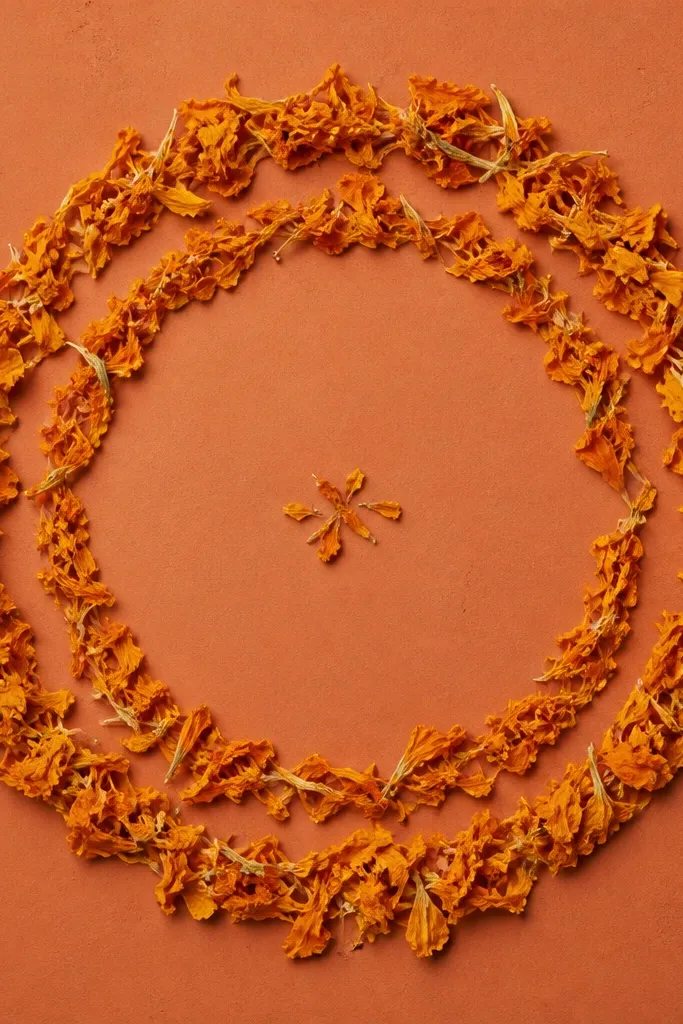
Marigold petals naturally form ring shapes when they're dry, and that gives you a graphic look. The terracotta border ties the warm tones together so the whole piece feels cohesive. You also get a lot of texture without stacking tall stems. This one looks great for late summer and fall, and it hangs nicely near warm lighting.
Pick a frame with a warm border or paint a thrifted one terracotta using acrylic paint. Use a cream background. Arrange marigold petals in two arcs, then fill the inner center with a few petals and one dried bud. Seal with matte spray and let it dry flat to prevent curling.
Pro tipUse tweezers for the ring petals. It keeps gaps even and stops the petals from shifting.
9. Blue-Grey Hydrangea Frame with Tiny Lace Edge
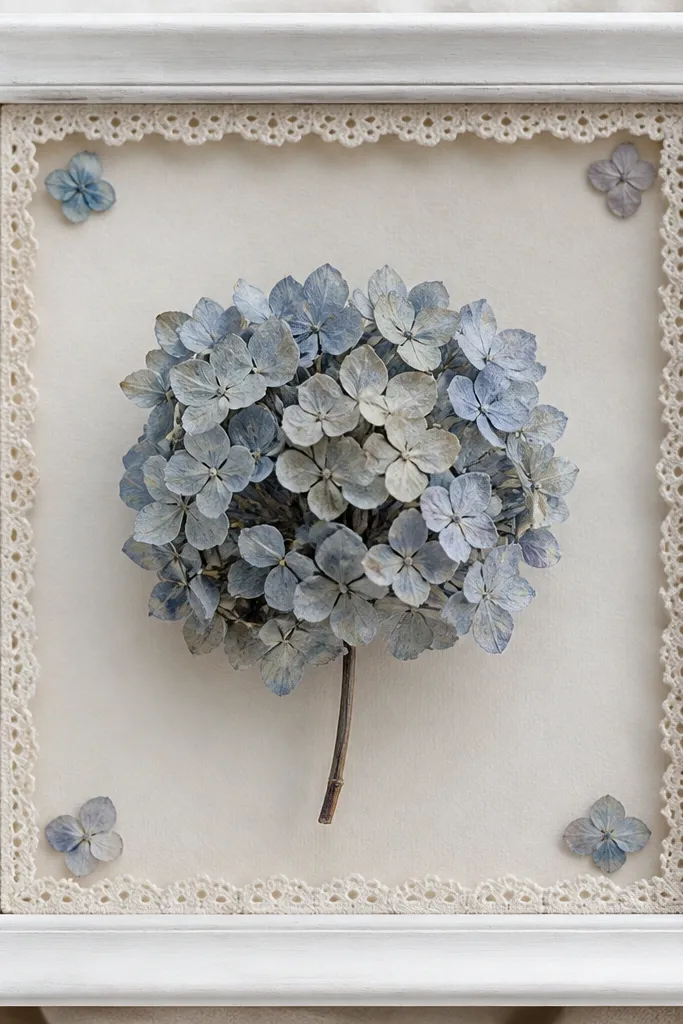
Hydrangea heads have a built-in shape, so you don't need to over-arrange. The lace edge makes the hydrangea feel softer and more "romantic farmhouse" without adding extra bulky decor. Blue-grey tones look calm and classy in daylight. This design works for spring, weddings, and Mother's Day.
Use a 5x7 or 8x10 frame with a white backing. Glue off-white lace along the inner edge, then place the hydrangea head centered. Add tiny filler bits around the base so the glue line disappears. Seal the whole thing lightly with matte spray.
Pro tipPress the lace flat under a heavy book for an hour before gluing so it doesn't pucker.
10. Pressed Fern Frame with Clear Gel Medium Topcoat
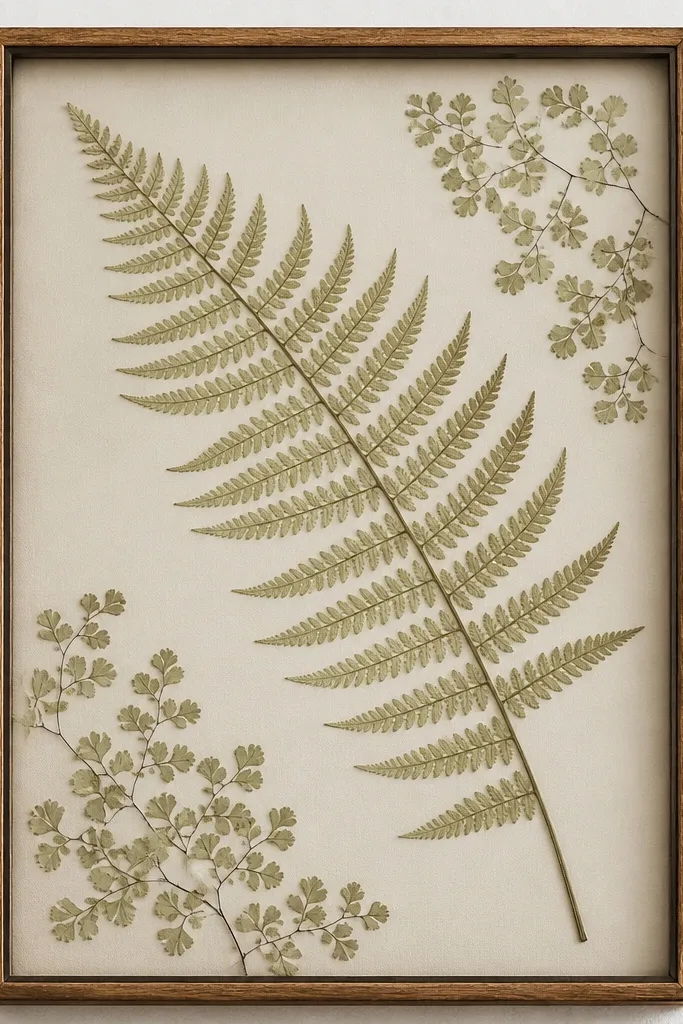
Fern fronds look best when you keep them flat, and clear gel medium locks them down better than glue alone. The diagonal placement gives motion and keeps it from looking like a biology specimen. The topcoat also reduces dust buildup on the delicate edges. This is a cool-toned frame for spring and early summer.
Use pressed fern fronds that are fully dry and flat. Apply gel medium with a small foam brush over the fern edges and background, then smooth so it doesn't pool. Let it dry 12-24 hours flat before framing. Use a glass or acrylic cover to keep it from getting bumped.
Pro tipUse a foam brush for gel medium. It leaves fewer streaks than a bristle brush.
11. Eucalyptus + White Baby's Breath Minimal Frame
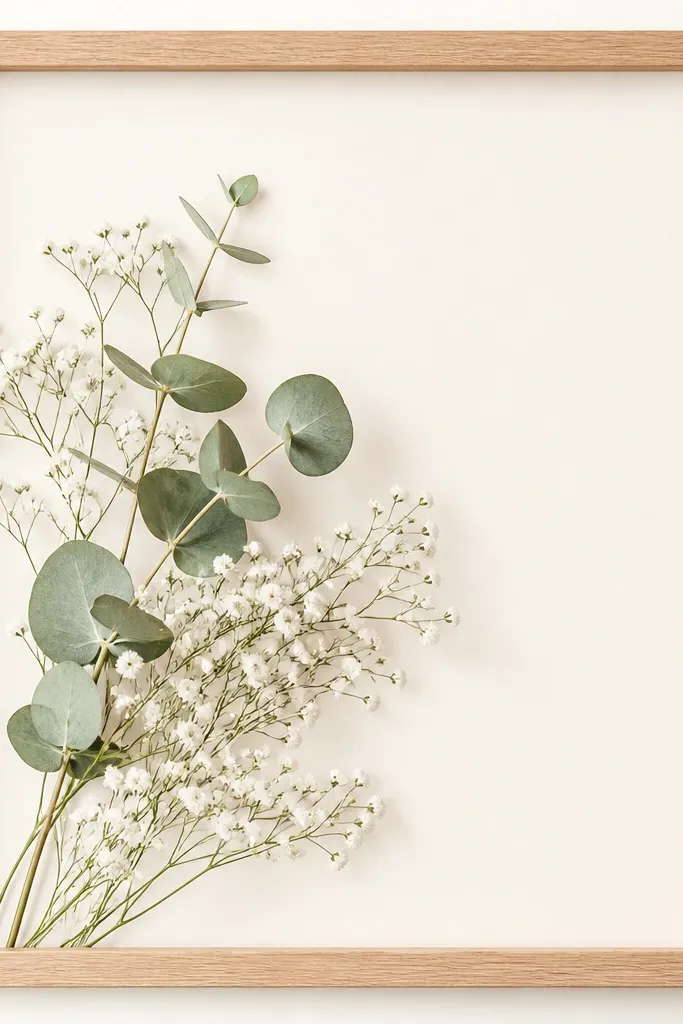
This is a "one sprig" composition, and it looks tidy because it doesn't cover the whole background. Baby's breath dries flatter than you'd expect, and it adds a soft texture around the eucalyptus. Off-center placement keeps it from feeling like a stamp. Great for small spaces because it's visually light.
Use a 5x7 frame. Glue one eucalyptus sprig first, then build baby's breath around the base so it hides glue. Leave at least 1 inch of blank space on the opposite side. Seal with matte spray and keep the spray distance consistent to avoid wet-looking spots.
Pro tipIf baby's breath looks too "spidery," trim the stems shorter so the cluster sits tighter.
12. Gold Foil Frame with Dried Rose Petal Confetti
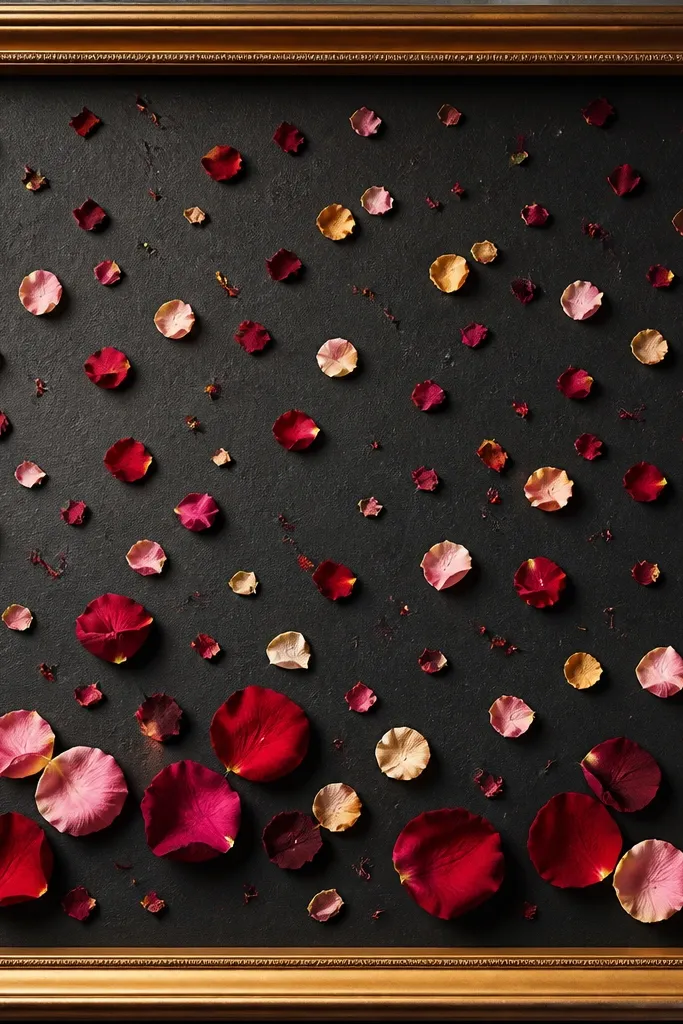
Charcoal background makes faded rose tones look richer without needing new flowers. Petal confetti gives you a low-effort look that still feels artful. Gold frame edges make the whole thing read "holiday glam" even when you don't add ornaments. This is a good option when you have lots of small petals.
Use a 8x10 frame with charcoal cardstock. Scatter dried rose petals in small clusters rather than fully random. Add a few larger petals to create a visual weight at the bottom. Seal with matte spray, then use a second coat only on the petal edges.
Pro tipUse a piece of tape to lift petals and place them - it's faster than tweezing tiny bits.
13. Layered Mat Frame with Two Height Levels

Two height levels make dried flowers look dimensional without making the frame bulky. The trick is using a layered mat so you can keep petals low and add only one raised focal point. This design looks great for portraits and shelf displays because the shadow adds depth. It also hides uneven glue areas.
Use a frame with a removable mat or add one yourself using foam board. Glue a base layer of smaller dried flowers on the lower half. Build a center cluster on top of a thin foam square (about 1/4 inch) so it lifts slightly. Seal the entire arrangement with matte spray.
Pro tipKeep the raised cluster under 1/2 inch tall so it doesn't bump the glass.
14. Rusty Orange Marigold + Black Seed Pods Frame
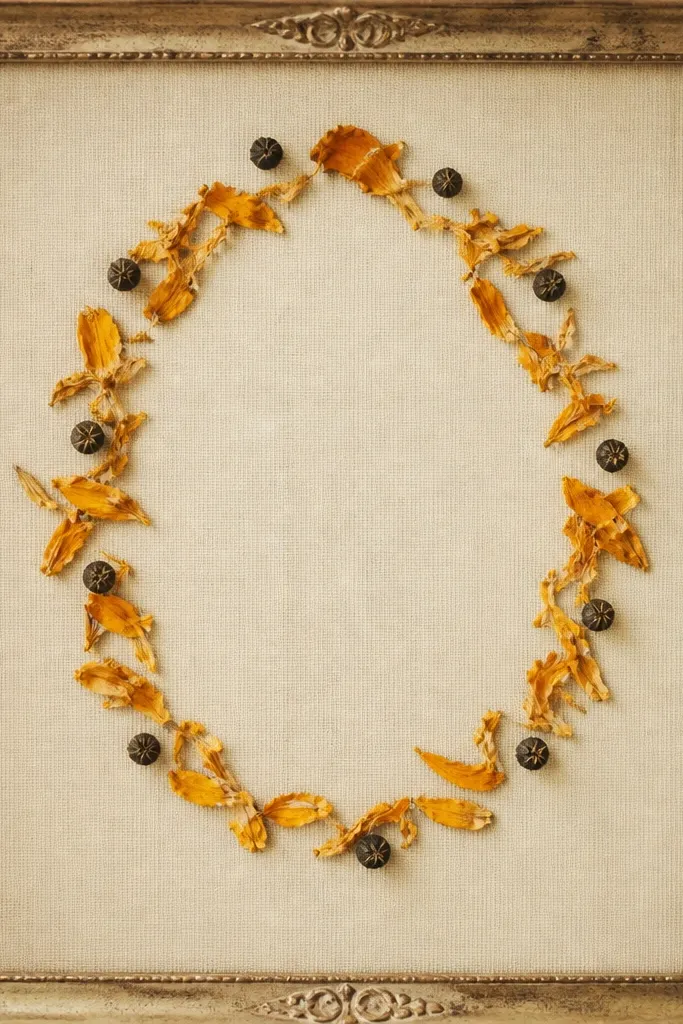
Seed pods add graphic contrast and they dry in a way that stays crisp. Marigold petals provide the warm softness, and the seed pods create a "speckled" pattern that looks intentional. This is a great fall frame when you want something less floral and more textural. It also hides glue lines well because pods cover them.
Use an oatmeal or beige backing. Glue marigold petals in an oval, leaving a small gap at the top for visual breathing room. Add black seed pods around the oval in a loose orbit. Seal lightly with matte spray so pods don't look oily.
Pro tipGroup seed pods in pairs. Odd singles look unfinished in this style.
15. Whitewashed Frame with Dried Cotton Stem Trio
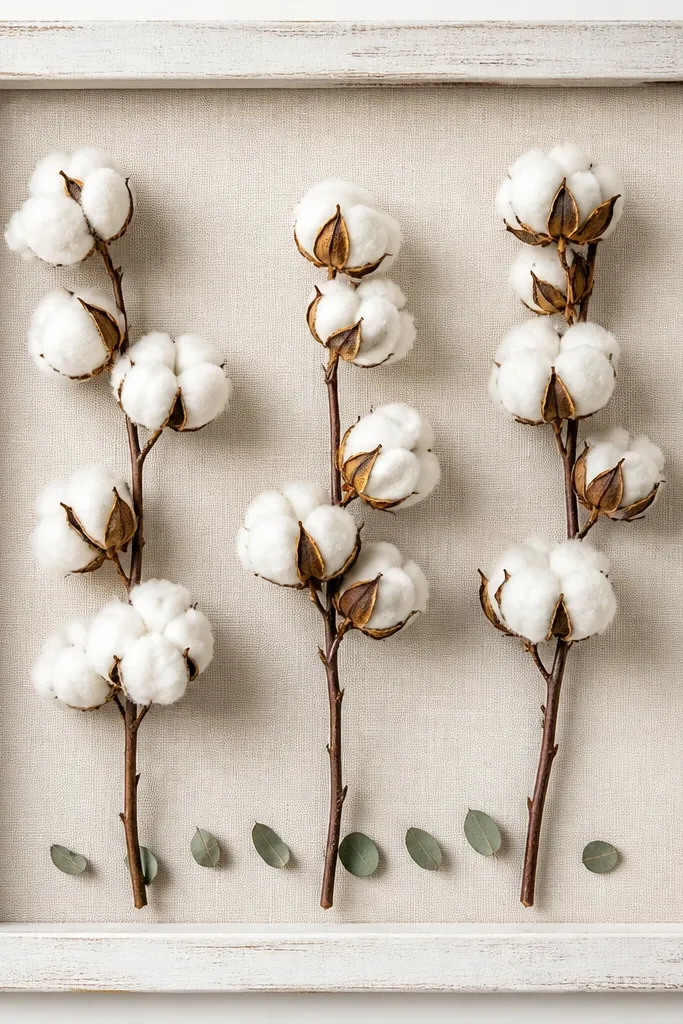
Cotton stems have that soft, cloud-like texture that looks good even when you keep the arrangement simple. The whitewashed frame and linen backing make the cotton feel airy, not dusty. Because stems stand up, the frame reads as "tactile" even from across the room. This one fits winter decor and also rustic neutral spaces.
Use a 8x10 frame with linen fabric or linen-textured cardstock backing. Glue cotton stems in a vertical cluster of three, spacing them evenly. Add tiny dried green bits at the bottom so the stems look anchored. Seal with matte spray from a distance so the cotton doesn't clump.
Pro tipIf cotton looks yellow, press it in a book with a sheet of plain white paper for a day. It helps even out the tone.
16. Mini Shadowbox Frame with Dried Berry Stem and Twine
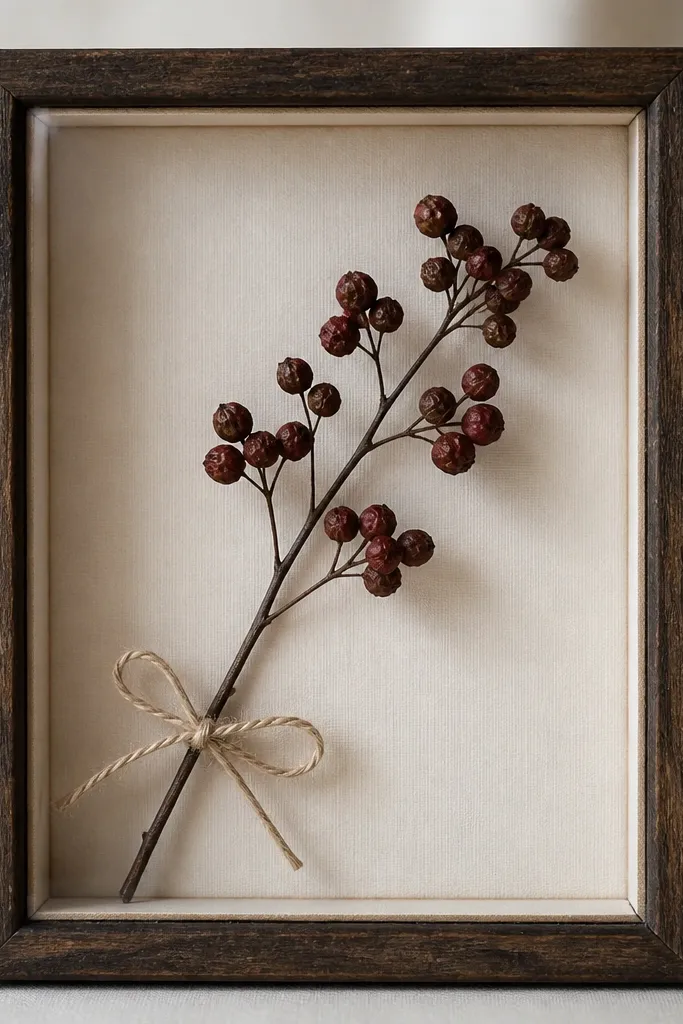
Shadowboxes protect the pieces and make the arrangement look curated without extra work. A single diagonal stem is easier than a full composition, and the twine adds a handmade touch that hides glue. Berry stems also keep their shape, so the frame doesn't collapse. This is the best option when you want something holiday-leaning but not overly busy.
Use a 5x7 shadowbox with a depth of at least 1 inch. Tie twine around the base of the berry stem and hot-glue the twine knot to the backing. Add two or three tiny filler leaves under the stem to hide the glue. Seal the berry stem lightly with matte spray.
Pro tipTie the twine first, then glue the whole twine + stem assembly. It's faster and more centered.
17. Blackboard-Style Background with White Dried Flowers
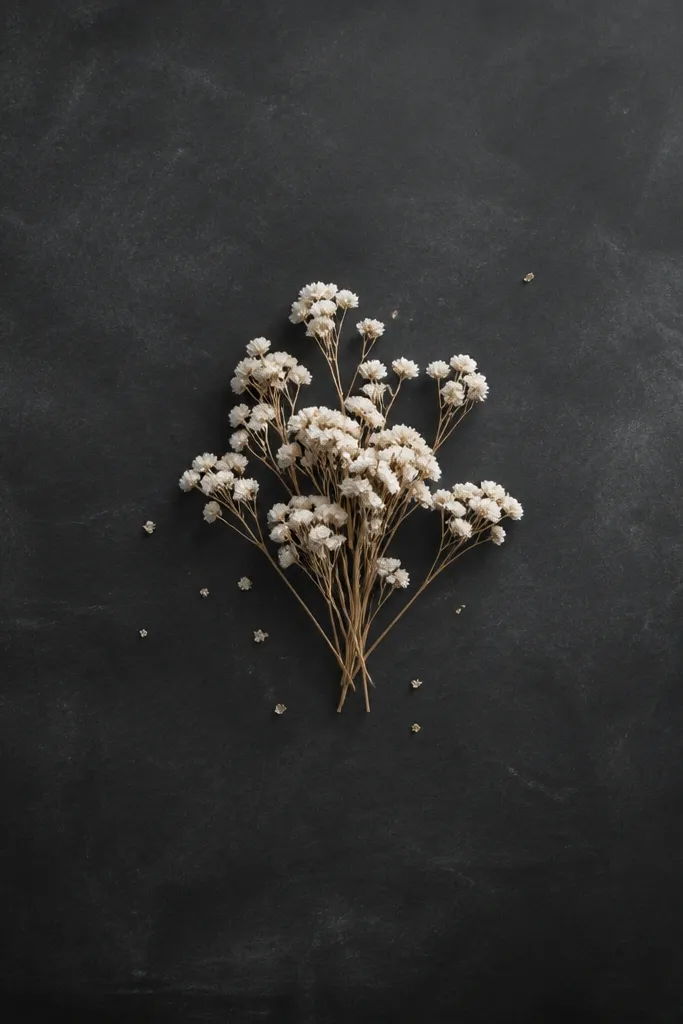
Dark slate makes white dried flowers look crisp, like pressed snow. The frame feels modern and works in entryways and hallways where you need something graphic. It also hides small dust specks better than light backgrounds. I use this style when I have leftover white petals and want them to look intentional.
Paint a thrifted frame backing with matte chalkboard paint, then let it cure 24 hours. Glue white dried flowers in a small cluster and keep stems tucked behind petals. Seal with matte spray so the chalky background doesn't get glossy. If you have fragile petals, glue only the base and let loose petals rest on top.
Pro tipWipe the backing with a dry microfiber cloth before sealing so dust doesn't show under the dark paint.
18. Pastel Rainbow Frame Using One Flower Type Per Color
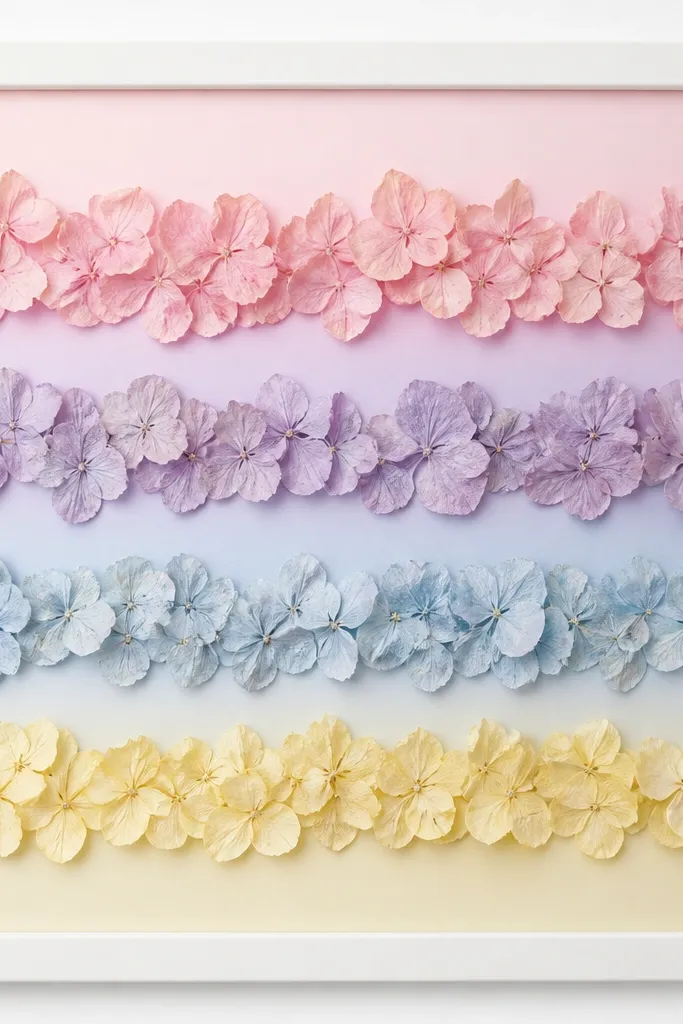
Using one flower type per color keeps the texture consistent, which is why this looks clean instead of chaotic. Pastel bands read like spring decor, and you can keep it low maintenance because the flowers are in a flat layer. Straight horizontal bands also make it easier to measure placement, so you don't end up with crooked clusters. This is a great "birthday gift" frame too.
Create a pastel gradient background with watercolor or paint, then let it dry fully. Cut thin strips of cardstock as "band guides" and glue flowers only inside each band. Use different dyed or naturally colored flowers for each band (for example, dyed baby's breath for pink and blue, dried marigold for yellow). Seal lightly with matte spray.
Pro tipUse a ruler and masking tape to keep the bands straight while glue dries.
19. Vintage Book Page Frame with Dried Daisy Sprigs
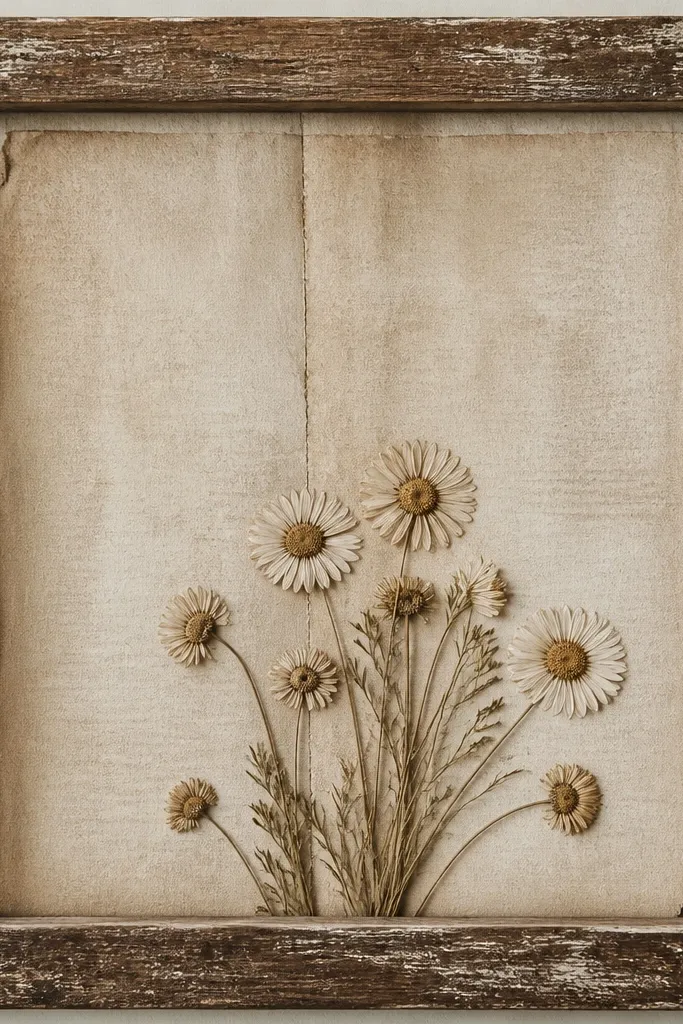
Book page backgrounds make dried daisies look like a real vintage print. The printed text adds visual interest so you don't need a dense flower arrangement. Daisies are sturdy enough to glue at the center and they dry with a crisp shape. This style feels like old library decor without buying anything fancy.
Use a frame with a deep enough backing for the page texture. Glue torn book page pieces onto the backing first, then smooth with a thin layer of matte Mod Podge. Place dried daisies in the lower center and glue only the stems and backs. Seal everything lightly to protect the paper and keep flowers flat.
Pro tipTear the page edges with slightly uneven breaks. Perfectly straight cuts make the background look like a printout.
20. Monochrome Burgundy Frame with Rose Hip Confetti
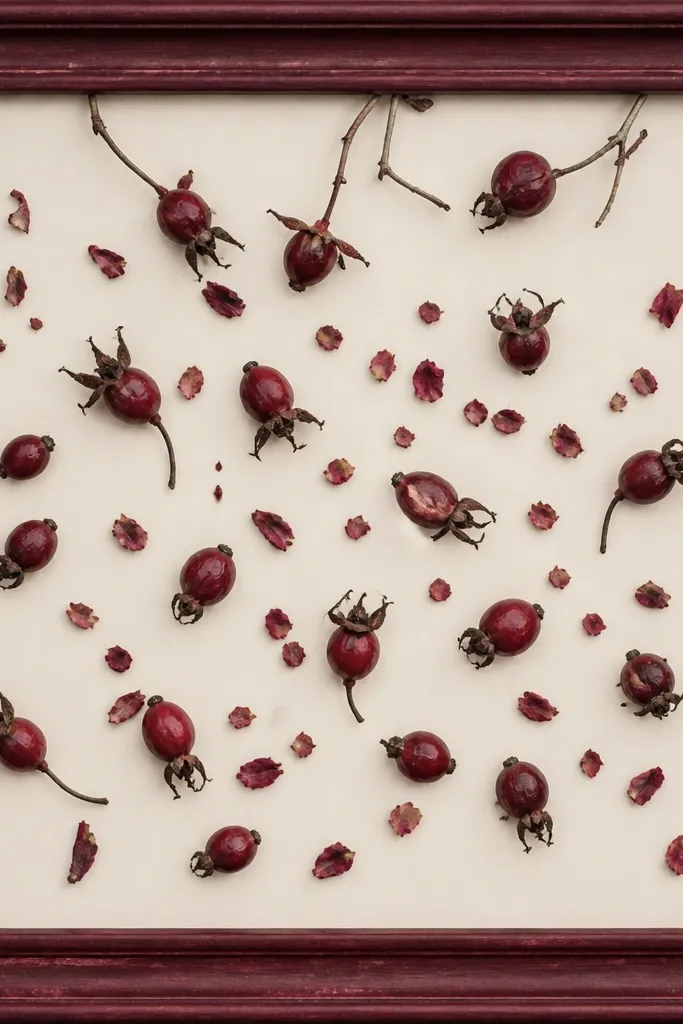
Monochrome looks expensive because you don't have to match multiple colors. Rose hips dry with a nice structure, and small confetti-like placement keeps everything from looking too heavy. This frame looks great for winter because burgundy reads warm and cozy. It also works when your flowers are small - confetti styles use scraps well.
Use a cream background to make the burgundy pop. Glue rose hips in a tight cluster, then add tiny dried petal bits around them. Keep the edges sparse so the center cluster looks intentional. Seal with matte spray and let it dry flat overnight.
Pro tipUse a cotton swab to press down any petals that lift so they don't cast shadows.
21. White Frame with Dried Button Mum Blooms and Gold Thread
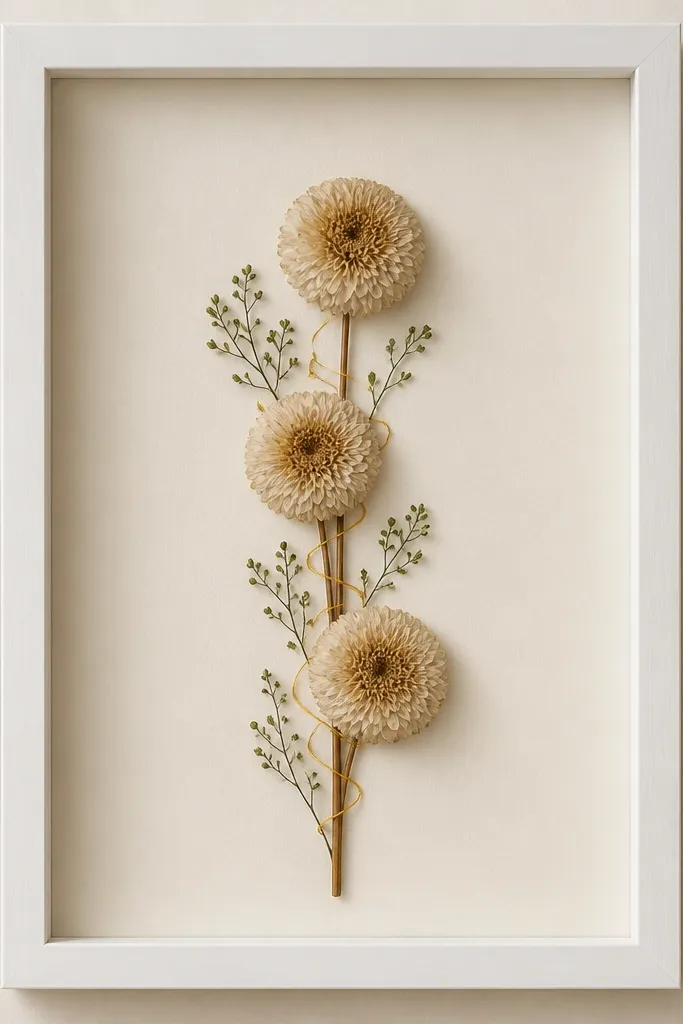
Button mums hold their shape better than many delicate blooms, which makes them beginner-friendly. Gold thread gives you a "jewelry" look without adding bulky supplies. The vertical line of blooms feels clean and modern, and it doesn't require a full wreath. This style looks great for fall through Thanksgiving.
Use a 8x10 frame with a beige backing. Glue the three blooms so they're evenly spaced, then wrap gold thread lightly around the stem area and tack it down with tiny dots of glue. Add small leaf scraps at the base to hide glue. Seal with matte spray.
Pro tipWrap the thread before gluing the blooms if you want perfect alignment. Mark spacing on the backing with a pencil first.
22. Floating Flower Frame with Foam Board Backing
Foam board makes dried flowers look like they're floating, which instantly upgrades the frame. You get depth without thick glue piles, and the foam hides uneven placement. This is the best style when your flowers are a bit uneven in height. It looks great on mantels because it catches light.
Cut foam board to fit the frame backing. Glue a flat layer of small dried flowers directly to the foam. Then glue your focal cluster onto thin foam squares (about 1/4 inch). Seal lightly with matte spray, keeping the spray distance far to avoid soaking foam edges.
Pro tipUse a single foam layer under the focal cluster. Too many foam levels look wobbly.
23. Minimal Pink Peony Frame with Tissue Paper Back
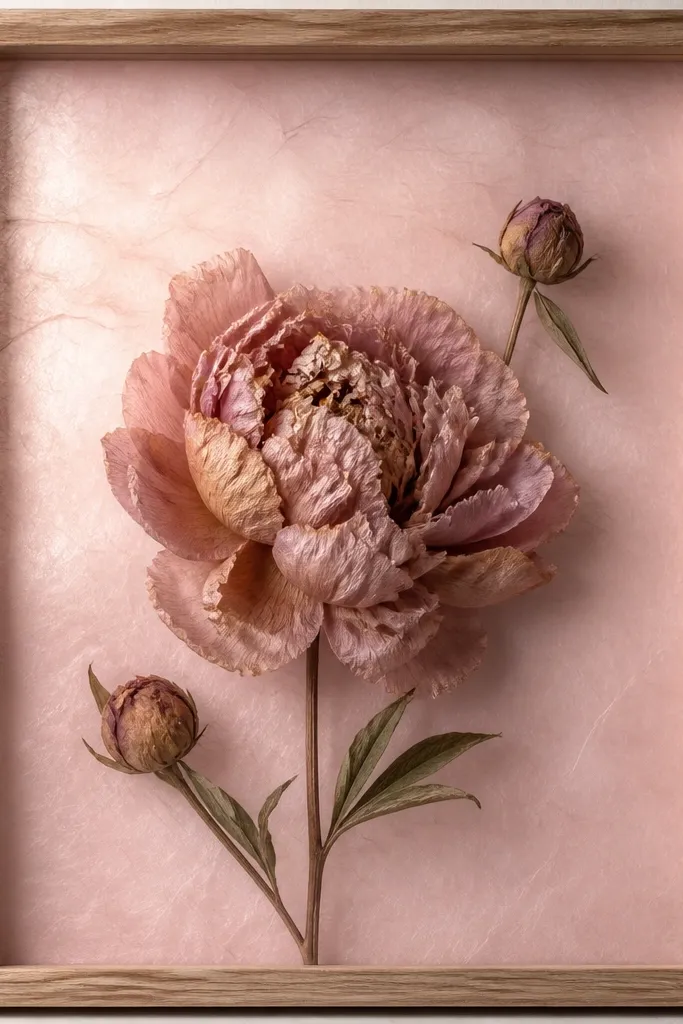
Tissue paper behind dried flowers creates a gentle glow that makes pale petals look richer. It also hides tiny glue lines because the background is slightly textured and semi-opaque. This is a low maintenance look because you're only working with one focal bloom. It's perfect for spring, bridal showers, and soft romantic corners.
Cut tissue paper to fit the backing and glue it flat using a thin layer of Mod Podge or craft glue. Let it dry fully so it doesn't wrinkle. Glue the dried peony in the center and add two small buds at the lower edge. Seal with matte spray lightly to protect the tissue.
Pro tipUse blush or dusty rose tissue, not bright pink. Bright tissue can overpower the dried petals.
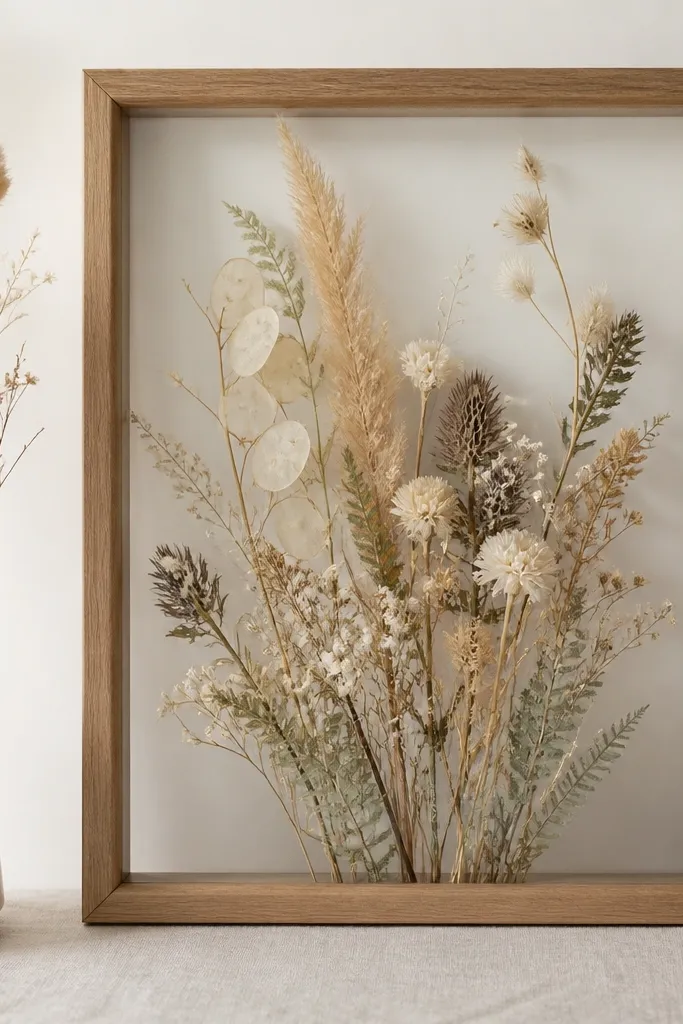
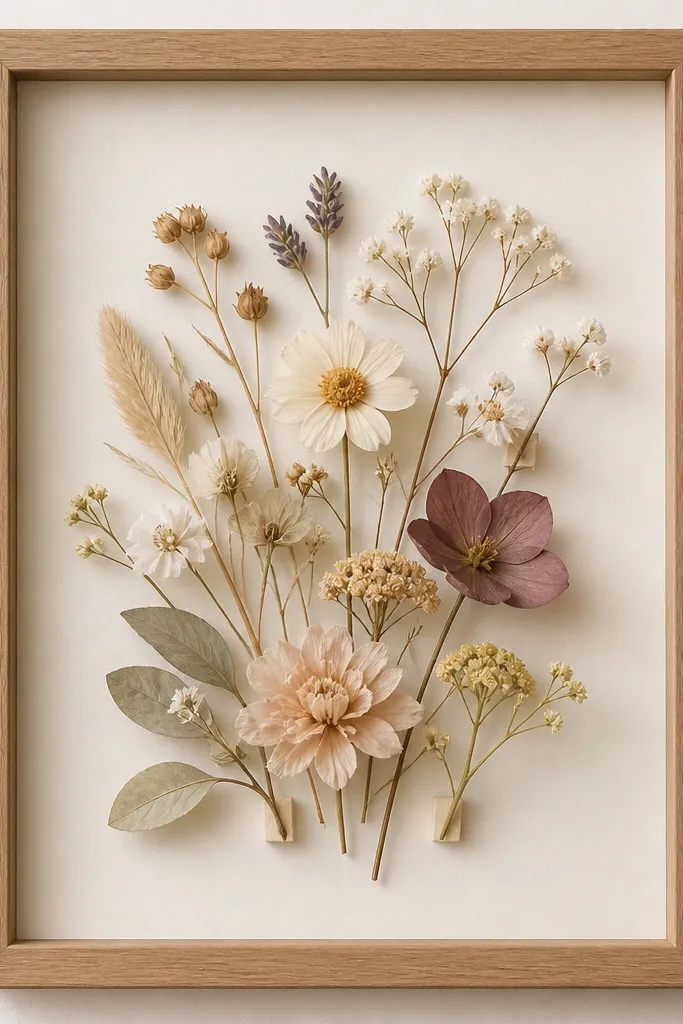
24. Neutral Grass + Dried Thistle Frame in a Wide Mat
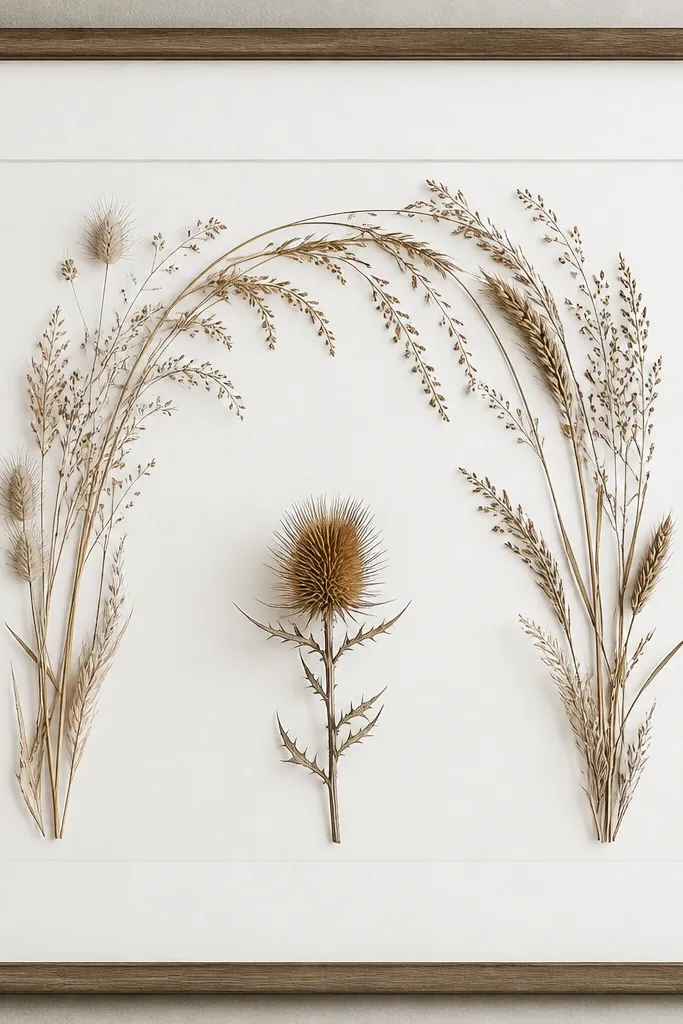
Grass and thistle look great because they already have strong shapes. The wide mat creates a gallery feel and makes the dried pieces look intentional. Keeping it mostly blank keeps the frame from looking crowded. This style reads as fall-to-winter neutral decor.
Use a frame with a wider mat or add one with foam board. Glue the grass first, forming an arch that frames the center. Place one thistle upright and trim it to about 1/2 inch above the backing. Seal with matte spray in short bursts so the grass doesn't get wet.
Pro tipTrim grass stems to the same length as your mat opening. It keeps the silhouette even.
25. Monogram Initial Frame with Dried Flowers on Transparent Film
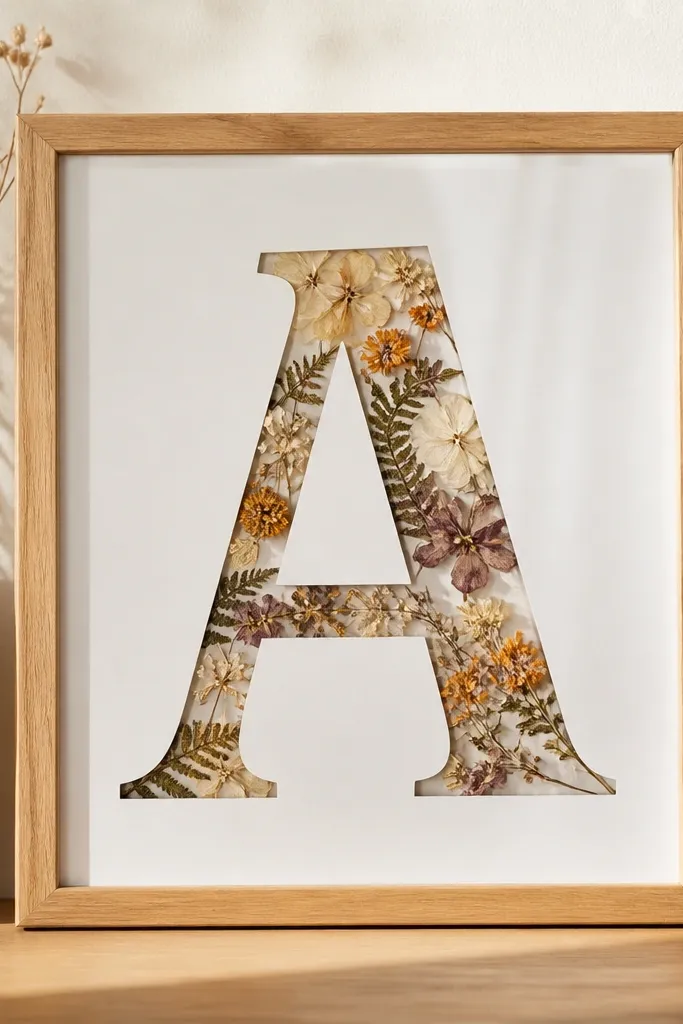
A monogram makes dried flowers feel personal without adding a bunch of extra elements. Transparent film lets you place flowers neatly within a letter shape and keeps the surface easy to dust. I like this when you want a gift that looks thoughtful but doesn't require complex assembly. The letter outline also stops the composition from drifting.
Print or cut a single letter stencil and place it behind clear acetate. Glue dried flowers inside the letter outline only. Use a seal spray on the flowers before you attach the film to the frame, so the glue sets cleanly. Choose a mat color that matches your flowers, like cream for whites and gray for blues.
Pro tipUse a foam adhesive strip around the letter edges so the acetate sits flat and doesn't bow.


