1. Pale Sage Eucalyptus Edge Glow
This one looks calm because eucalyptus dries into long, thin pieces that don't block the light. The leaves are pale green with a slightly silvery cast, so they catch warm light without turning yellow. I keep the lights along the inner border so the glow stays even and doesn't create bright hotspots in the center. The result looks like gentle backlighting for a botanical print.
Use a white or natural wood frame with glass. Arrange eucalyptus in an oval with the stems pointing outward, leaving a 1-2 cm gap around the edges for the light strand to sit behind. Hide the wire along the back lip with clear packing tape, then close the frame so the wire doesn't pinch the glass.
Pro tipIf you see bulb dots through the glass, add a single layer of vellum between the dried leaves and the lights.
AvoidDon't pack the leaves tightly to the glass - crowded stems make the light look dim and patchy.
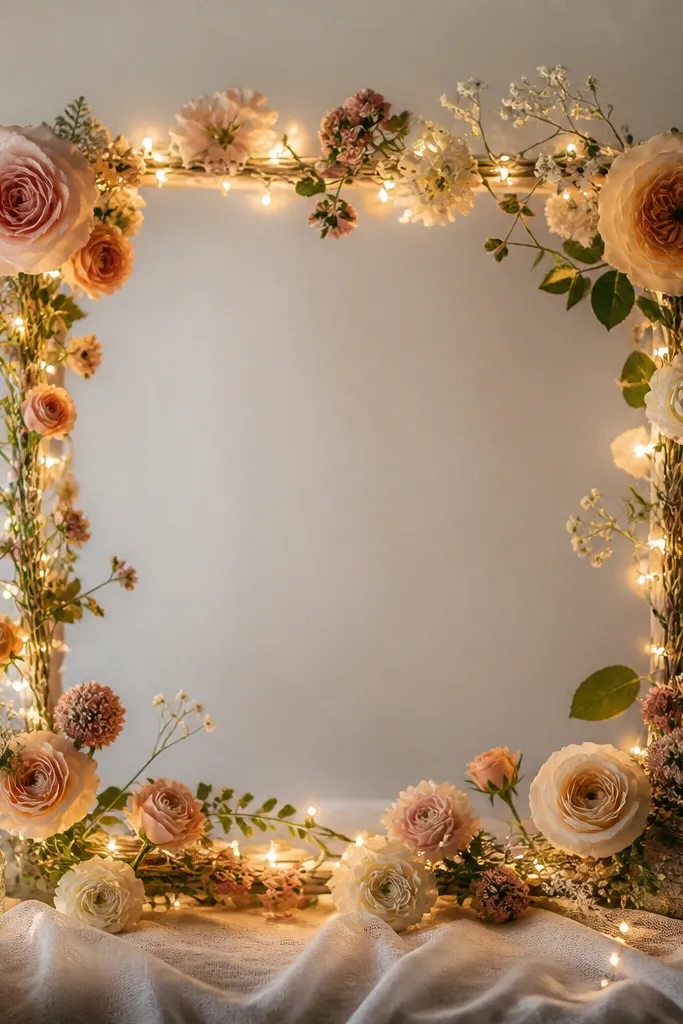
2. Cream Dried Baby's Breath Starburst
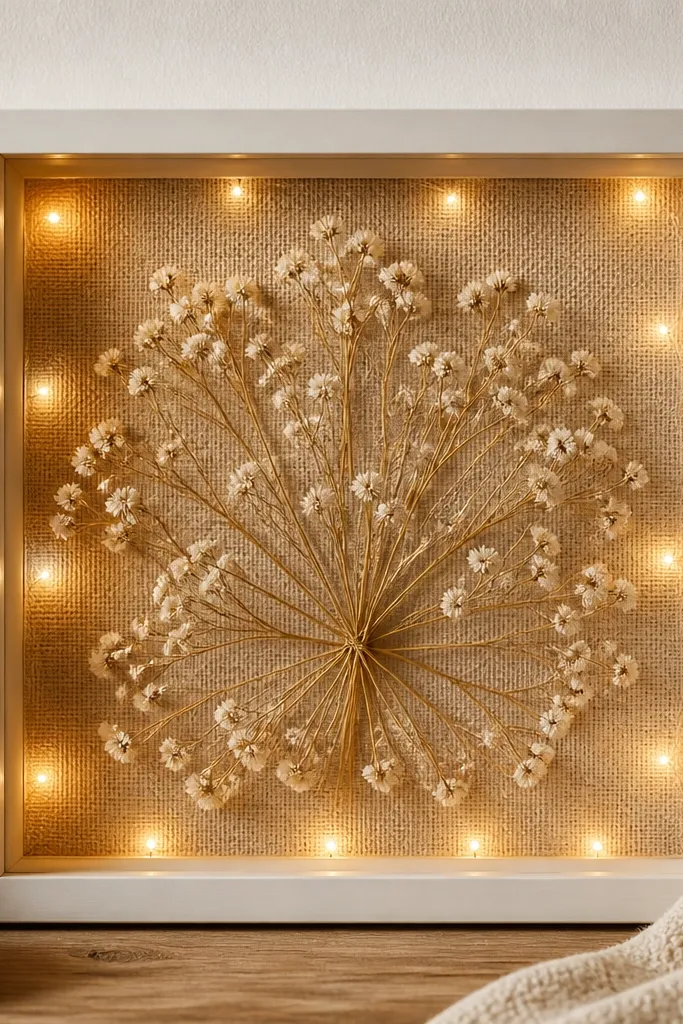
Baby's breath dries into lots of tiny, airy pieces. When you arrange it in a starburst, the light spreads through the "lacy" texture and looks like a halo rather than a string of bulbs. I like this for holidays because it reads wintery without looking like you dumped snow everywhere. The burlap backing adds texture so the glow feels cozy.
Use a shadowbox-style frame so you have depth. Cut a piece of burlap to fit the backing, then hot-glue baby's breath in a fan shape from the center outward. Place warm mini lights around the inside edge - keep the strand about 1 cm from the flowers to prevent scorching and to keep the glow soft.
Pro tipMist the dried baby's breath with a tiny amount of clear matte spray from 12 inches away so it won't shed dust onto the lights.
AvoidSkip battery-powered lights with blue tint - it makes the baby's breath look gray.
3. Terracotta Pampas With Warm Copper Micro-Lights
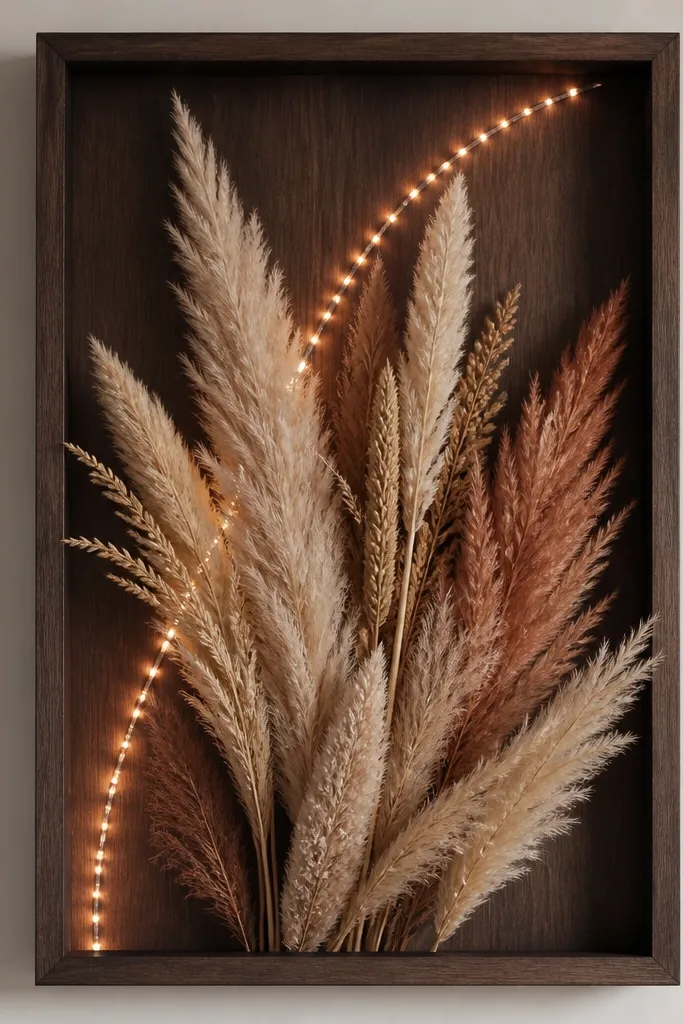
Pampas grass is dramatic, so you don't need many flowers. Warm copper micro-lights create a "sunset" glow that matches the oat and terracotta tones. I tie the look together by keeping the dried plumes mostly vertical and letting the light curve behind them. It photographs really well because the strands add movement and dimension.
Use a dark walnut or black frame. Glue two or three pampas plumes into a cluster with their tips slightly leaning right. Tuck the micro-LED wire along a curved path behind the cluster, then cover the wire with a thin strip of felt so it disappears from the front.
Pro tipTrim pampas plumes so the longest plume is about 3/4 the height of the frame opening; too tall looks top-heavy.
AvoidDon't use thick rope lights - the bulbs are too big and overpower the delicate plumes.
4. Pressed Flower Vellum Glow Window
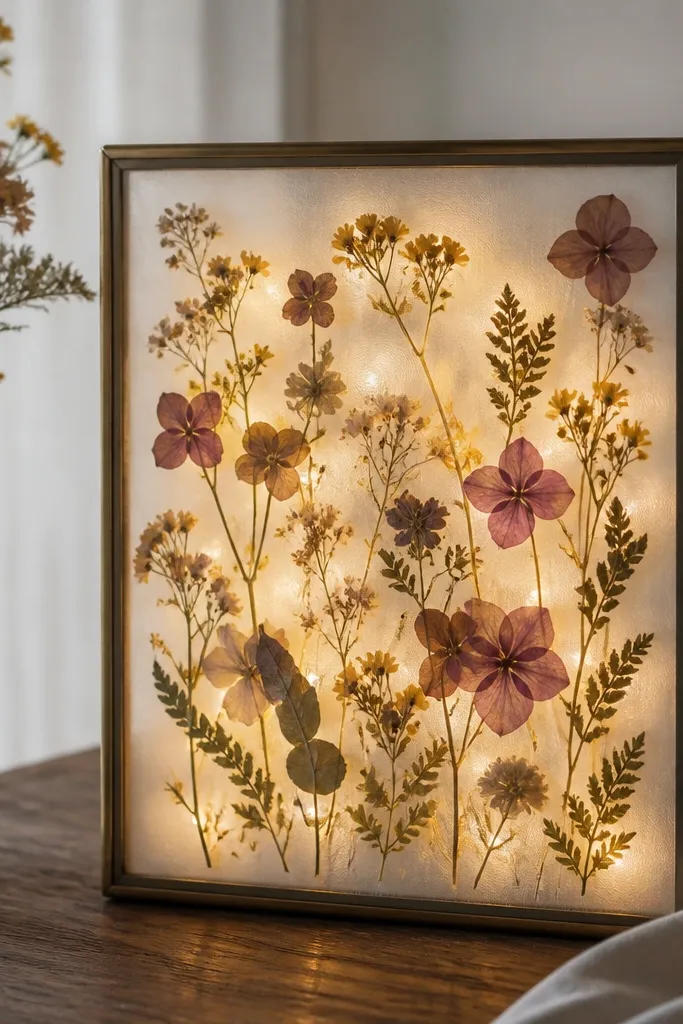
Pressed flowers look flat in daylight, but backlighting makes their veins visible. Vellum acts like a diffuser, so the light passes through the paper and softens edges. I keep the palette small - dried yellow calendula and muted mauve petals - so the glow stays clean and not muddy. This is the "quiet museum" style.
Use a glass frame and place a vellum sheet over your pressed flowers on the backing side. Use warm white LED strip or mini LEDs taped to the back of the frame, not touching the vellum. Secure with a thin frame mat or double-sided tape so the vellum doesn't sag.
Pro tipPress your flowers flat for at least 2 weeks so the backlight doesn't reveal bumps.
AvoidDon't stack thick petals behind vellum - they create dark shadows.
5. Winter White Hydrangea Halo
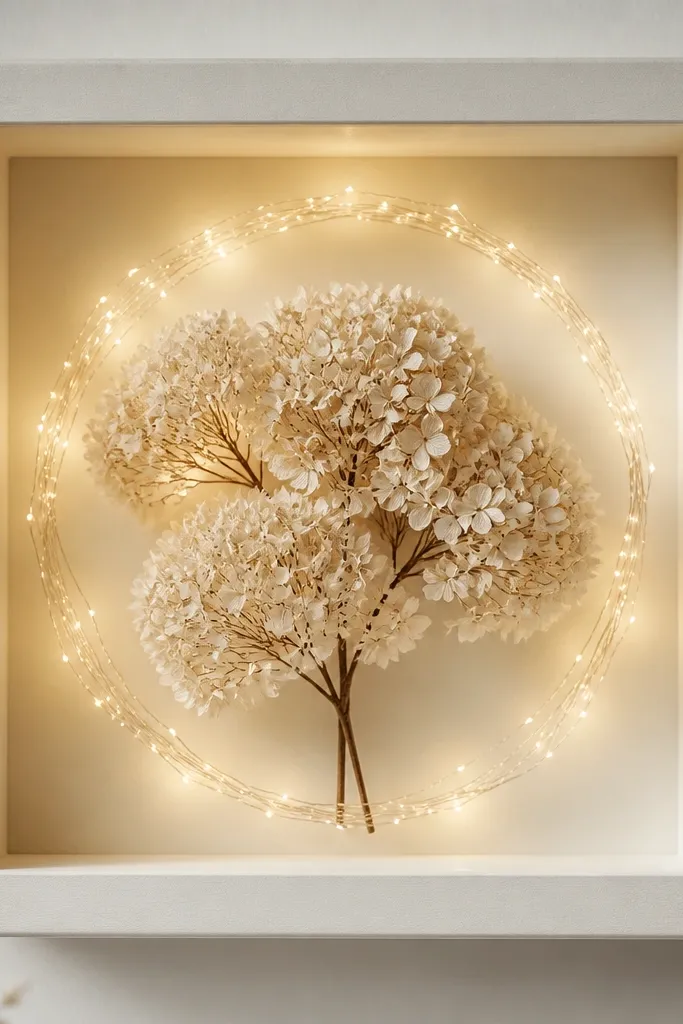
Hydrangea has lots of tiny round petals, so it glows like a lantern when you add a ring of lights. I like winter white because it stays bright instead of turning dingy under warm bulbs. The halo ring keeps the light focused around the main cluster, which makes the center look intentional. It feels like winter decor without adding fake snow.
Build depth with a 1/2 inch foam board spacer behind the hydrangea cluster. Place a ring of warm fairy lights around the inner perimeter, then glue hydrangea blooms with their stems trimmed short. Add a thin translucent sheet behind the blooms if you want the ring glow to spread more evenly.
Pro tipUse a hot glue dot only where stems touch - too much glue shows shiny blobs under light.
AvoidDon't let the lights sit directly against hydrangea - it can look spotty and too bright in one area.
6. Dark Green Fern Frame With Amber Glow
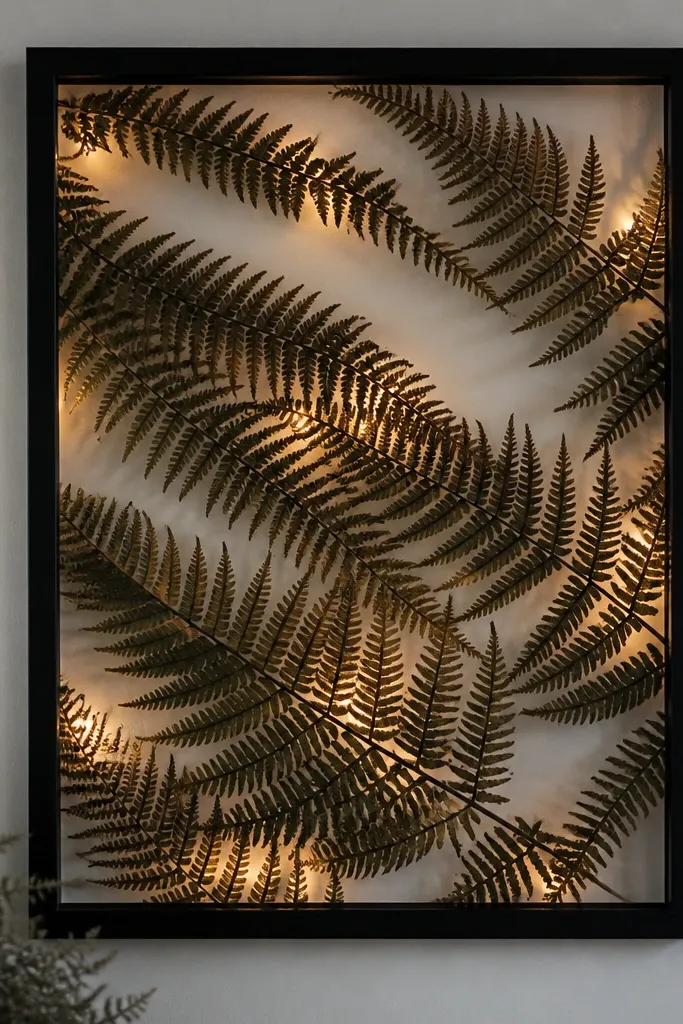
Fern fronds look best when you treat them like brush strokes. Amber tint warms the green and makes the fronds look deeper, almost like stained wood. I keep the composition diagonal so the glow follows the motion. This design gives "cozy dark academia" energy without needing candles.
Use a black frame with a backing you can pin into. Arrange fern fronds diagonally, overlapping lightly so the light can pass through gaps. Hide warm amber LED string behind the fronds and secure the wire with small stitches of fishing line to the backing corners.
Pro tipChoose LED lights labeled 2700K and avoid blue or "daylight" settings; amber looks right with greens.
AvoidDon't use glossy backing paper - reflections fight the fern texture.
7. Rustic Twine Frame With Red Berry Accent Lights
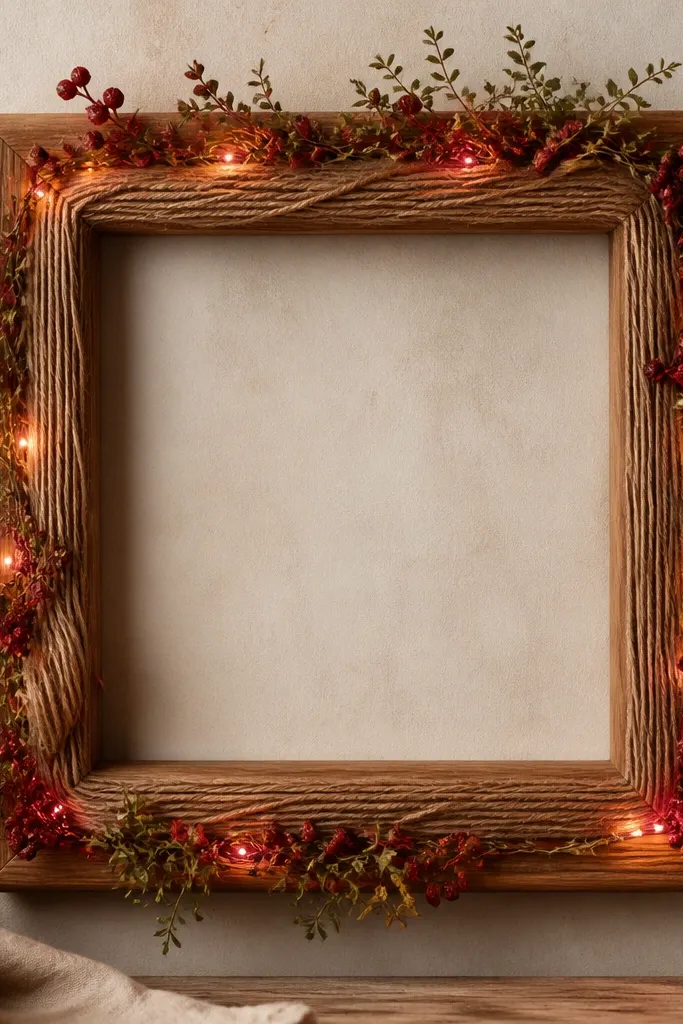
Twine wrapping makes the frame feel handmade, and berry accents add seasonal color. The trick is to keep the lights mostly hidden behind the twine so you get glow, not visible wiring. When berries dry with a matte skin, warm light makes them look like tiny lanterns. This one screams fall even if you leave it up all winter.
Wrap the frame perimeter with jute twine in tight coils. Leave a small channel on the inside edge for the LED wire. Glue berries in small clusters, then place lights behind the twine so the bulbs are covered from the front.
Pro tipAnchor the twine with hot glue at the corners only - too much glue makes lumps that show under light.
AvoidDon't use shiny ribbon as a frame accent; it reflects the bulbs and looks cheap fast.
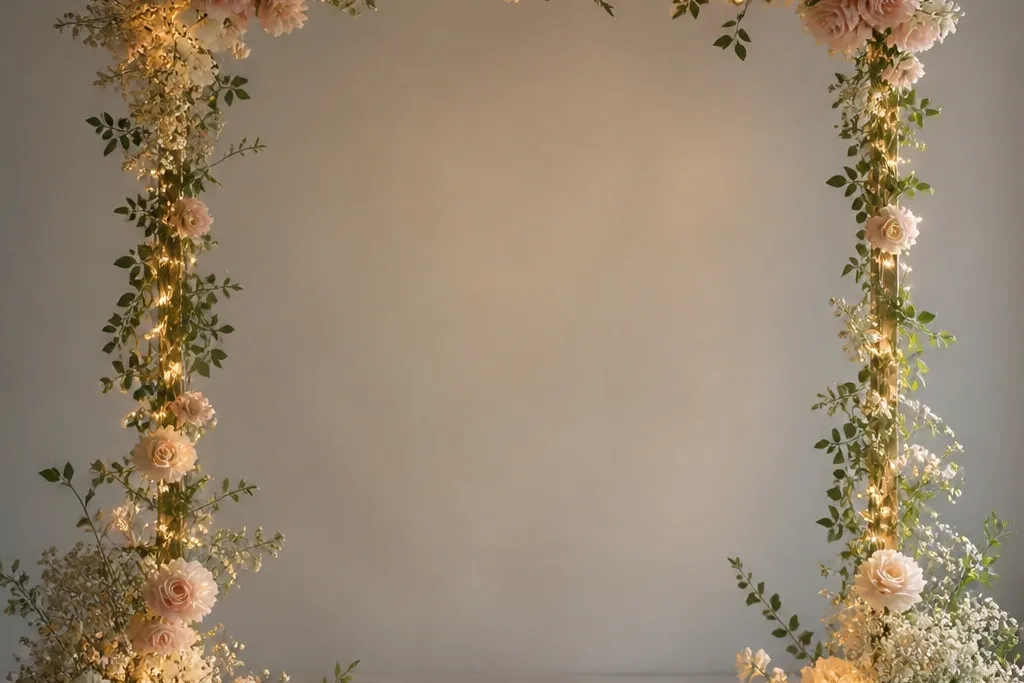
8. Pink and Mauve Flower Confetti on Light Sheet
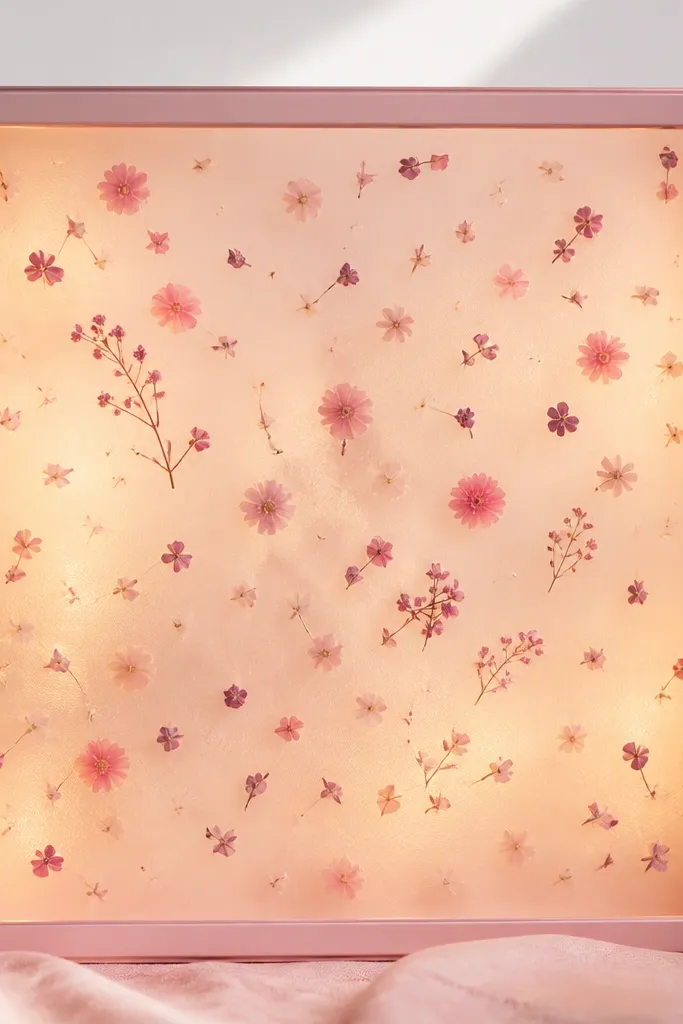
This design works because it treats the frame like a light box. You scatter small dried pieces instead of building one big bouquet, and the diffusion makes everything glow evenly. Pink and mauve stay flattering under warm light, and the confetti layout reads playful. It also hides minor imperfections in flower placement.
Use a frame with a flat backing and a translucent sheet like frosted acetate or thin vellum. Tape warm LED strip to the back of the translucent sheet so it evenly lights the surface. Sprinkle dried micro blooms and tiny petals across the sheet, securing with a light mist of clear craft adhesive spray on the backing side.
Pro tipLet adhesive spray dry fully before turning lights on - wet adhesive catches heat and warps the sheet.
AvoidDon't glue individual petals directly to the LED strip - heat and uneven thickness show through.
9. Monochrome Black-Eyed Susan Ring
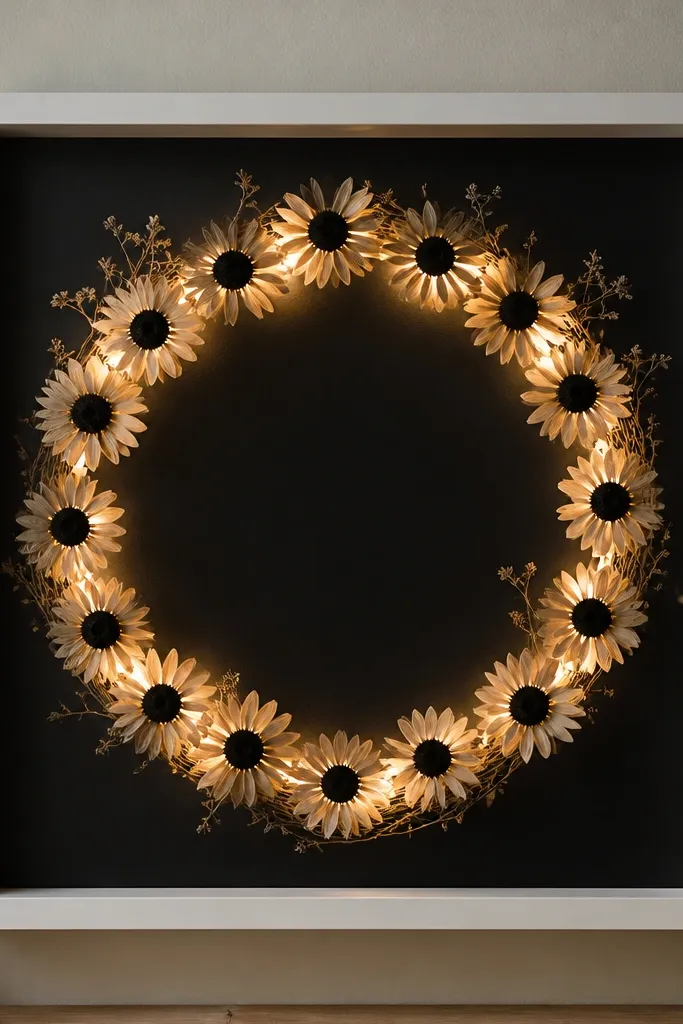
Black-eyed Susan has strong center contrast, so monochrome looks intentional. With a dark backing, the warm lights make the petals pop without turning the whole frame orange. I arrange the flowers into a ring and keep the center mostly empty so the glow has a focal point. It looks graphic from across the room.
Use a white frame with removable backing and a black paper or fabric background. Glue dried black-eyed Susan blooms into a ring pattern, keeping stems hidden behind the flowers. Place warm mini lights behind the ring at even intervals so each flower edge catches light.
Pro tipMeasure the ring diameter with a string - keep the gaps between blooms uniform for a clean circle.
AvoidDon't crowd the center with extra flowers; it kills the ring effect.
10. Sunflower Petals With Golden Thread Lights
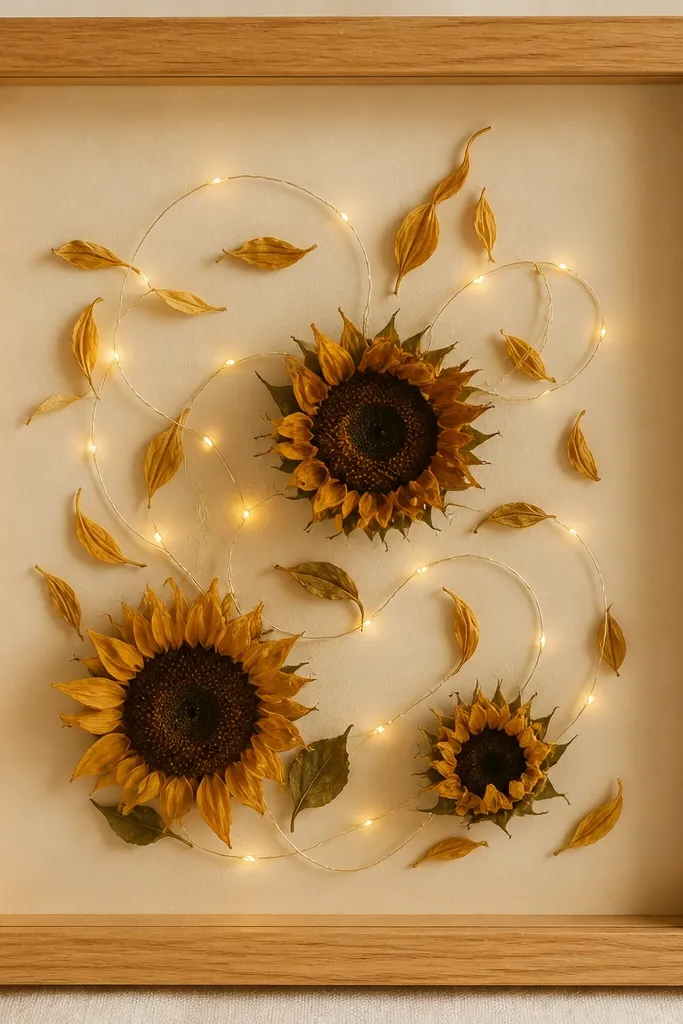
Sunflower petals are already golden, so the lights should match the tone instead of fighting it. Thread-like micro lights add a delicate sparkle that feels like sunlight. I build a swirl behind the flowers so the glow moves diagonally across the frame. It looks cheerful without being loud.
Use a light oak frame and a cream mat board. Arrange dried sunflower petals in a loose spiral on the mat, then glue a few whole mini heads at the ends. Tuck golden micro lights behind the mat and secure with small dots of hot glue along the back edge.
Pro tipKeep the mat opening slightly smaller than the frame so the glowing petals don't touch the borders.
AvoidAvoid cool white LEDs - they make sunflower yellows look sickly.
11. Eucalyptus + Dried Lemon Slice Accent
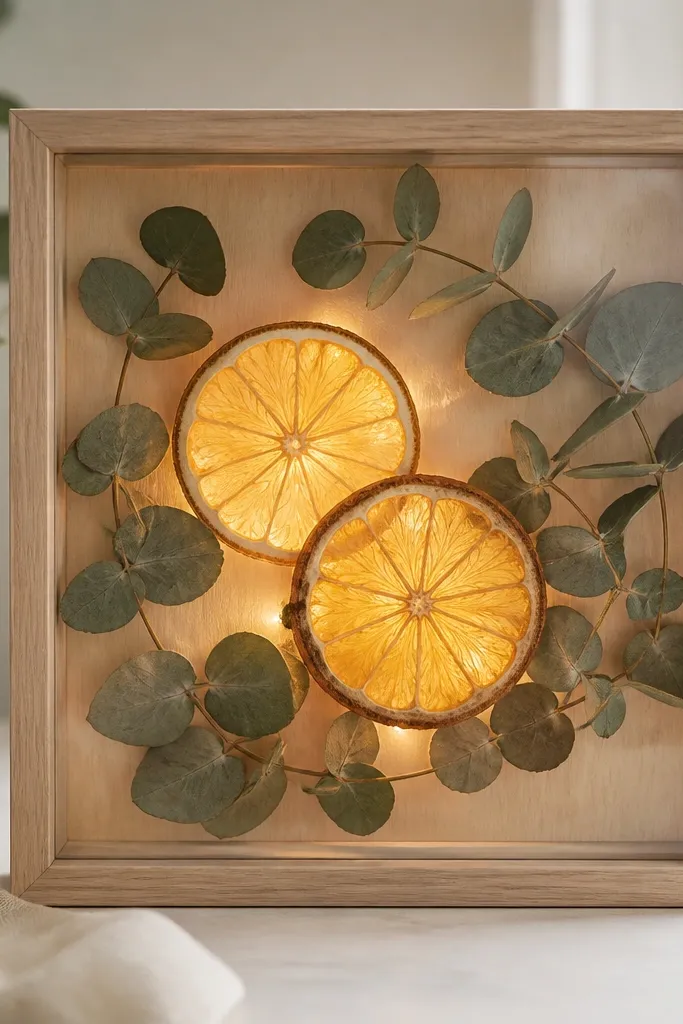
Dried citrus gives you a natural "window" effect. When you backlight dried lemon slices, the membranes look translucent and golden, like stained glass. Eucalyptus frames the center and keeps the palette fresh. This is the design I hang in late winter when I want brightness without bright colors.
Use a glass frame with a back spacer if your lemon slices are thicker. Arrange eucalyptus in a loose wreath, then glue lemon slices at the center with small dots of glue on the rind edges. Place warm LEDs behind the center so the lemon is the brightest point.
Pro tipSeal lemon slices with a tiny brush of clear matte medium so they don't shed powder onto the backing.
AvoidDon't place lights directly touching citrus - it can dry out further and shed.
12. Lavender Sprig Frame With Purple-Tinted Warm LEDs
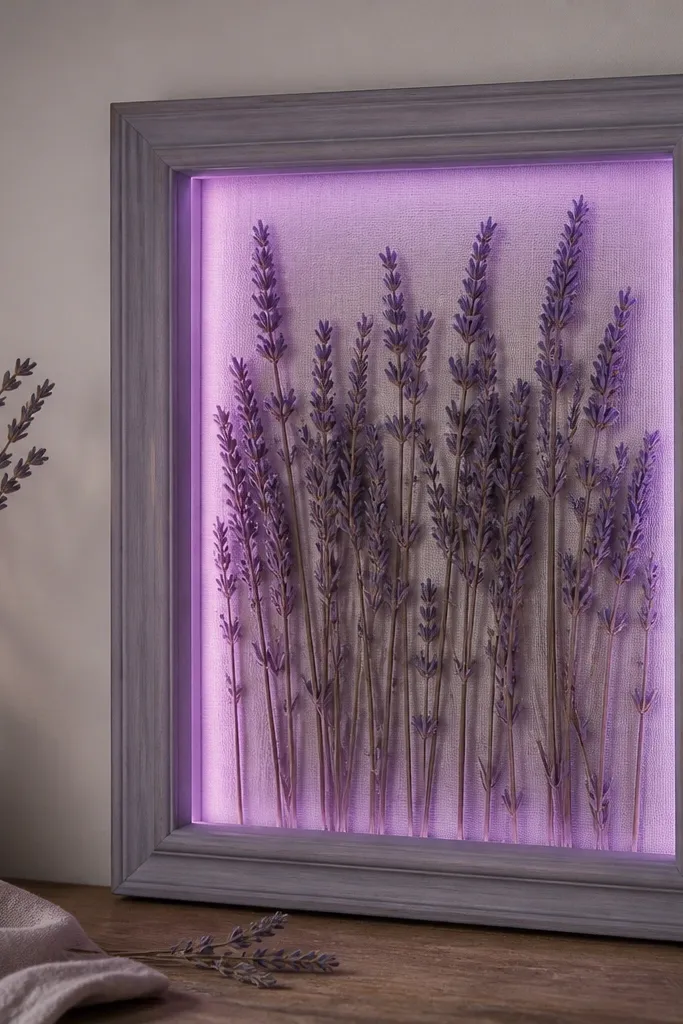
Lavender is naturally purple-gray, and it pairs well with warm purple-tinted LEDs. The glow makes the sprigs look like they're floating, especially when the frame backing is light gray. I keep the lavender mostly vertical with a few angled stems so the light has places to fall. The effect feels calm, not neon.
Use a light gray or matte white frame. Arrange lavender sprigs in a "V" shape and leave breathing room between stems. Put the LED strip along the inner edge behind the stems, then add a thin diffusion layer like tracing paper so bulbs don't show.
Pro tipBuy LEDs labeled warm purple or use a warm white strip with a thin translucent lavender sheet in front of it.
AvoidDon't use bright violet bulbs with no diffusion - it looks like a party sign.
13. Red Barn Farmhouse Frame With Faux Candle Flicker Lights
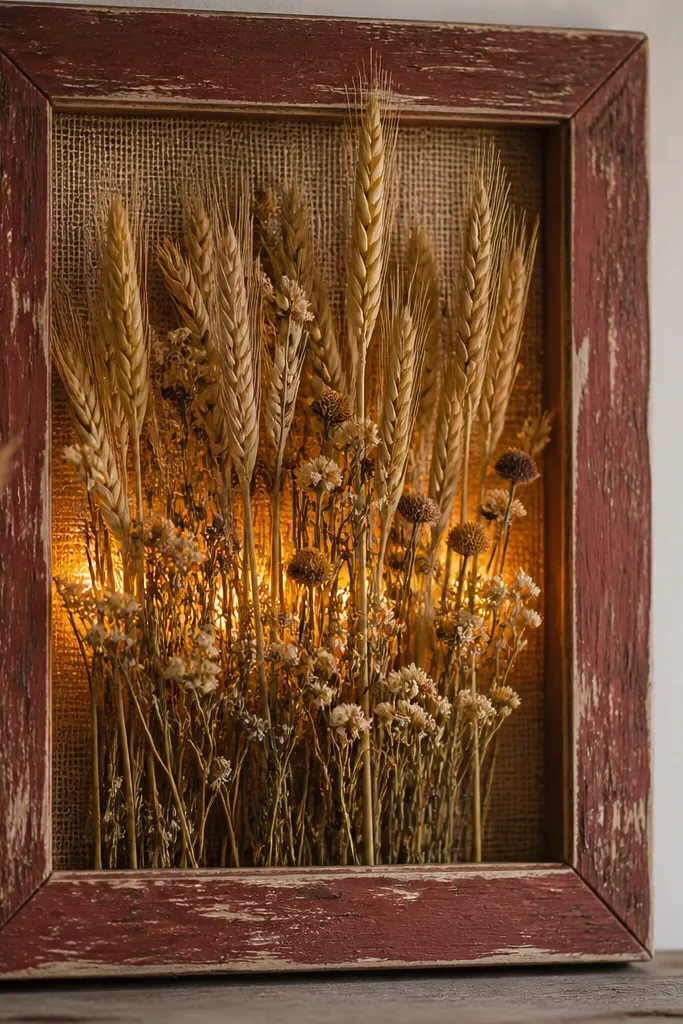
Flicker lights make dried wheat feel alive. The wheat stalks already look like they're lit by firelight, so the moving glow adds realism. I keep the flower mix simple - wheat, a few dried cornflower petals, and tiny sprigs of greenery. The distressed red frame ties it to farmhouse decor without needing a theme sign.
Use a distressed red or weathered wood frame. Glue dried wheat in a diagonal bundle, then tuck small wildflower pieces between stalks. Hide flicker LED string behind the wheat and secure the wire with hot glue dots along the back edges.
Pro tipTest the flicker mode on a dark wall first; if it looks too fast, switch to steady warm lights.
AvoidDon't put flicker lights directly behind a dense cluster - the center will look chaotic.
14. Coastal Sea Glass Backdrop With White Starfish and Lights
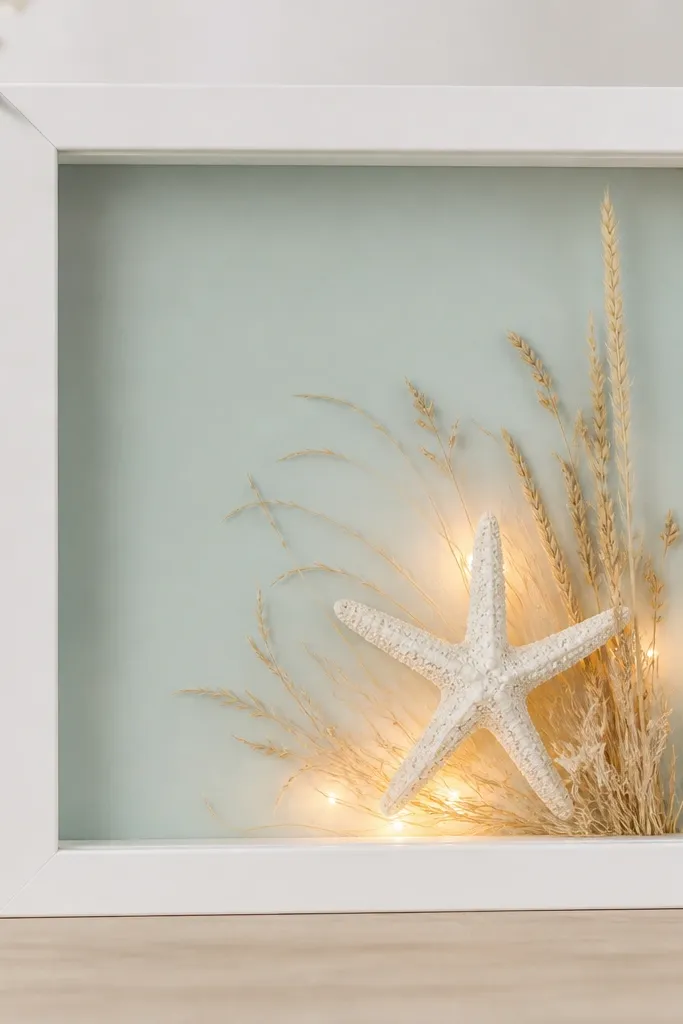
Sea-glass colored backing makes the whole frame feel coastal even when the flowers are dried. A white starfish is perfect because it's light and reads well under warm illumination. I place the starfish slightly off-center so the glow isn't dead in the middle. Beach grasses add movement and keep it airy.
Use a frame with a backing you can swap out. Cut sea-glass green paper or fabric to fit, then glue dried beach grasses around the edges. Place warm mini lights behind the starfish and use a small piece of vellum between the light and the starfish to soften glare.
Pro tipKeep the starfish dry and dust-free; wipe gently with a dry makeup brush before gluing.
AvoidAvoid shiny "sea glass" vinyl - it reflects bulbs as bright spots.
15. Christmas Green Pine Needles With Gold Snow Dot Lights
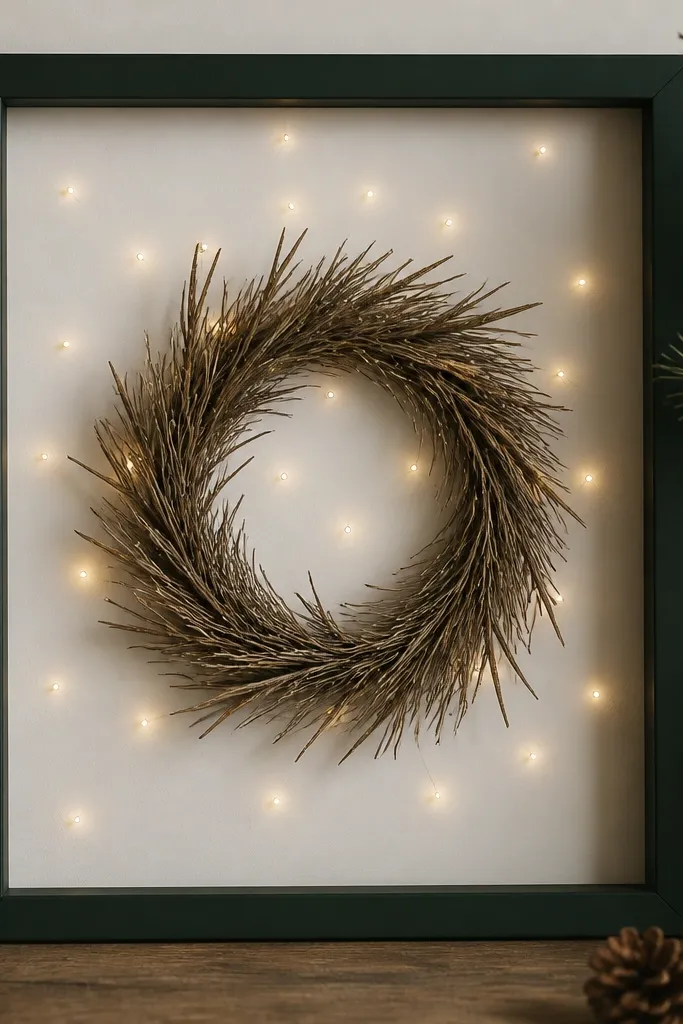
This looks like Christmas without the usual red-and-green overload. Pine needles give texture, and gold micro LEDs scattered behind the wreath create a snow-dust sparkle. I keep the pine wreath small so the lights have room to show. The gold reads warm and cozy, especially when the rest of the room is dim.
Use a dark green frame and a white backing. Glue pine needles into a compact wreath, leaving gaps. Scatter warm gold micro LEDs behind the wreath area and secure the wire with tape on the back so the front stays clean.
Pro tipUse a denser scatter near the top half of the wreath so it looks like falling snow rather than random glitter.
AvoidDon't use large bulbs - they look like holiday lights stuck on paper.


