1. Cream + Terracotta Stripe Band
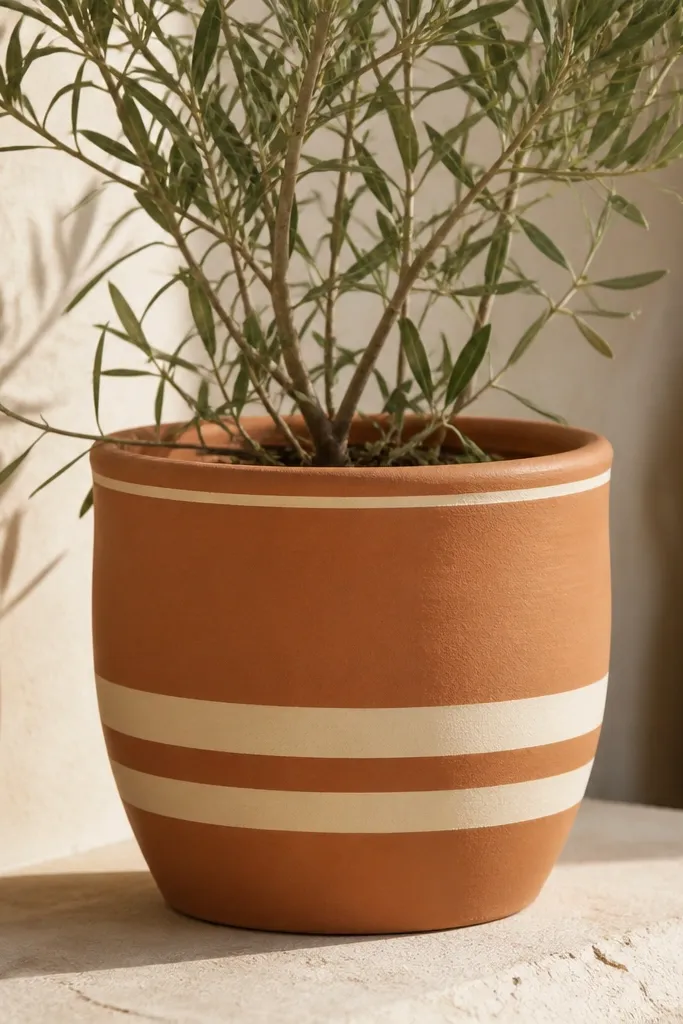
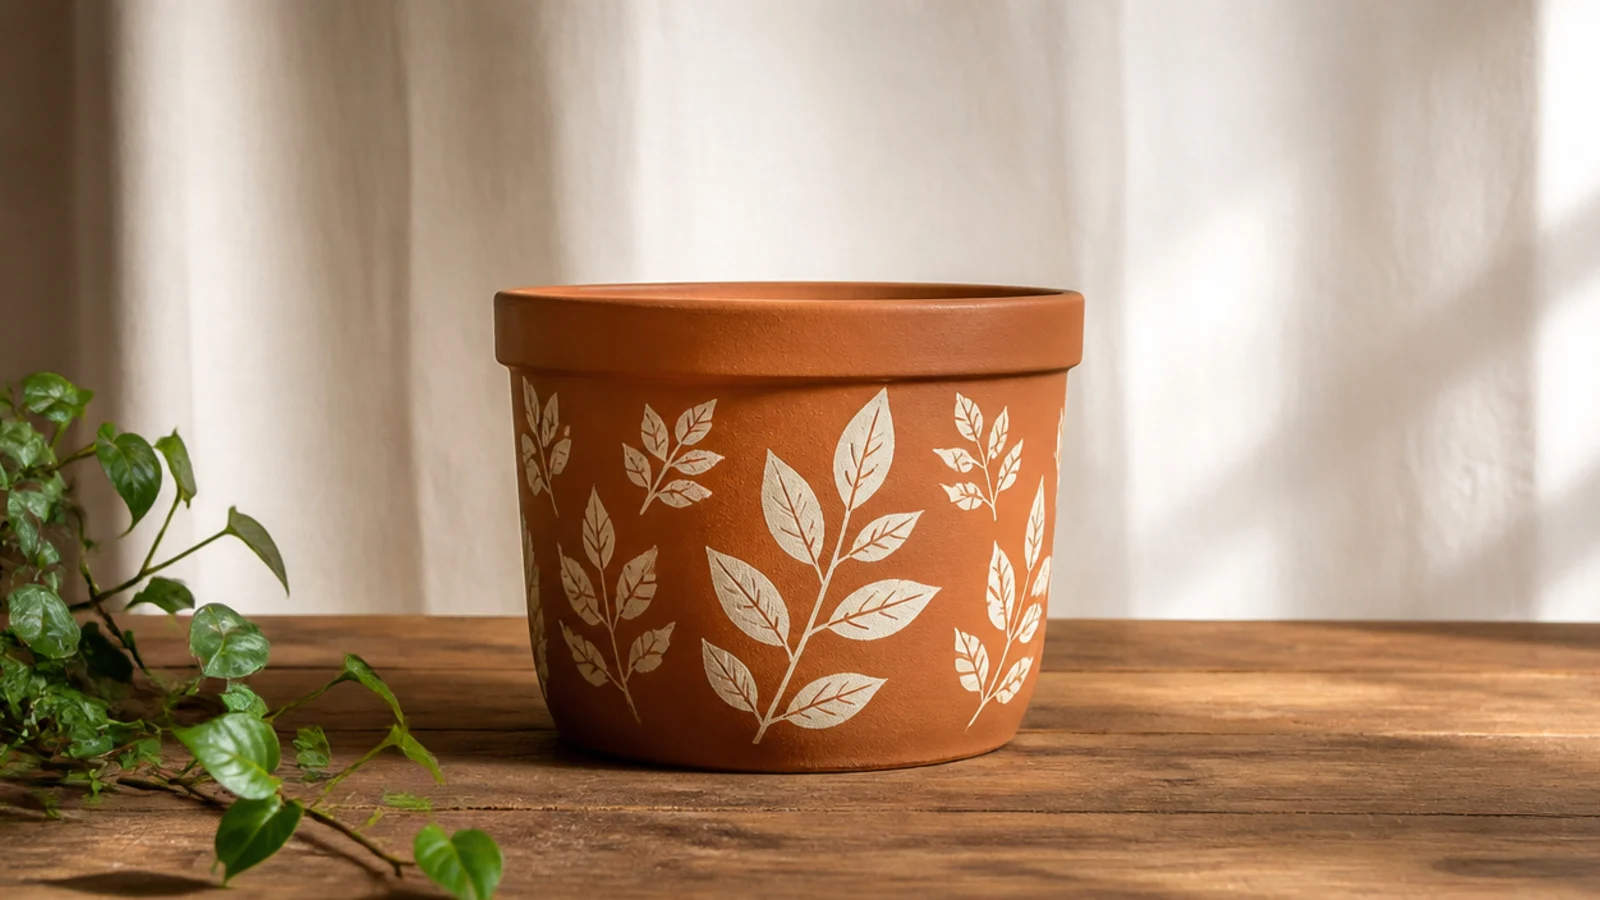
This one looks cozy because the stripes mimic candlelight bands on a wall. The cream gives contrast without feeling harsh, and the terracotta base keeps it warm. I like adding a thin rim line so the pot feels finished even when only the top half is visible.
Tape a straight line around the pot at the height you want the stripes, then paint the stripe areas with cream in two thin coats. After the paint dries, tape again and add a second stripe above or below with the same width. Seal with matte clear spray once everything cures overnight.
Use a 1/4-inch angled brush for the stripe edges so you don’t get wobbly tape bleed.
Don’t paint thickly right over tape — it creeps underneath and blurs the lines.
2. Evergreen Ombre with Gold Speckles
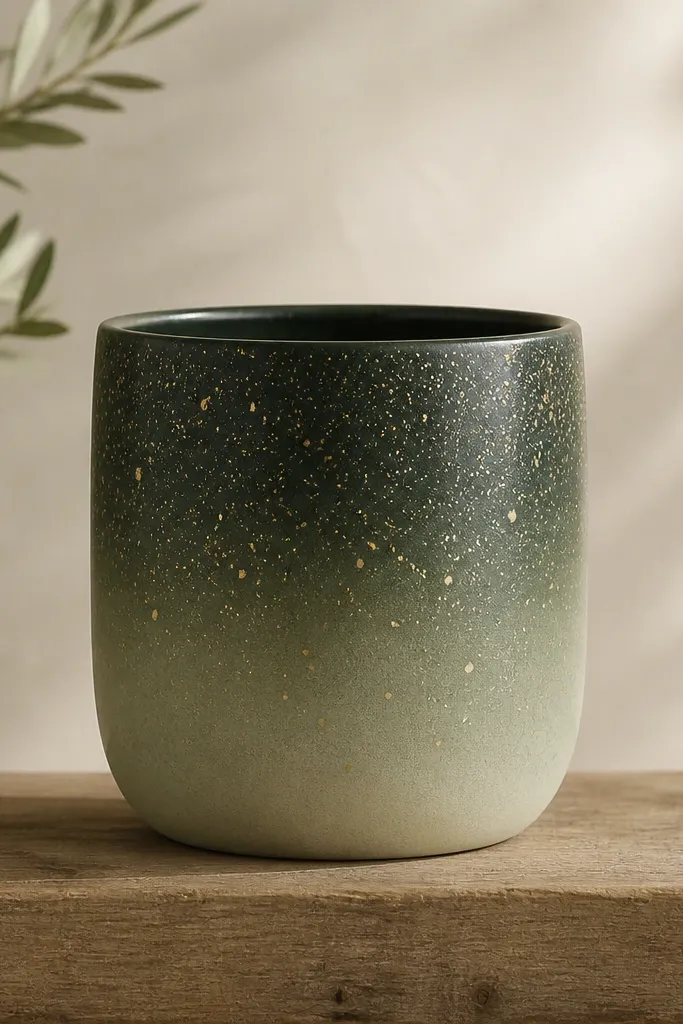
Ombre reads “cozy winter” fast, especially when the darker shade sits near the rim like evening shade. The gold speckles act like soft lights, not glittery chaos. Keep the gold sparse — a few dozen dots look intentional.
Editor's noteIf you want a smoother fade, do three light sponge passes instead of one heavy one.
Paint the rim area with evergreen, then blend downward with a damp sponge using sage and a little white. Let it dry between passes so the fade stays smooth. For speckles, flick diluted gold acrylic with an old toothbrush held 8-10 inches away.
Skip thisSkip metallic paint over wet ombre — it turns patchy and dull.
3. Snowy Windowpane Grid
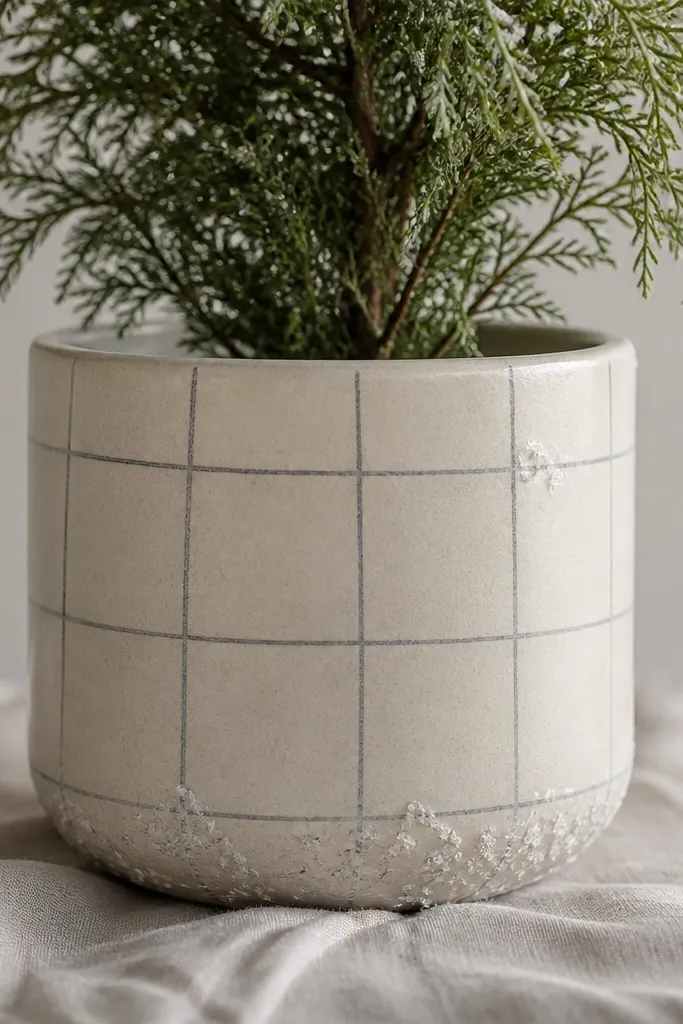
Windowpane lines feel cozy because they look like winter views. The trick is using thin, consistent line width so it resembles glass, not marker scribbles. The snow flecks make the grid look lived-in instead of flat.
Base coat in cream or off-white. Use painter’s tape to map a grid: vertical bands spaced 1.5-2 inches apart on a 6-8 inch pot, then tape horizontal bands to match. Paint the grid lines with gray-blue, remove tape while paint is still tacky, then add tiny flecks with a dry brush and white.
Let the first grid layer dry fully before adding flecks so you don’t smear lines.
Don’t use glossy paint for the grid — it catches light and looks less like painted glass.
4. Rusty Berry Dots Around the Rim
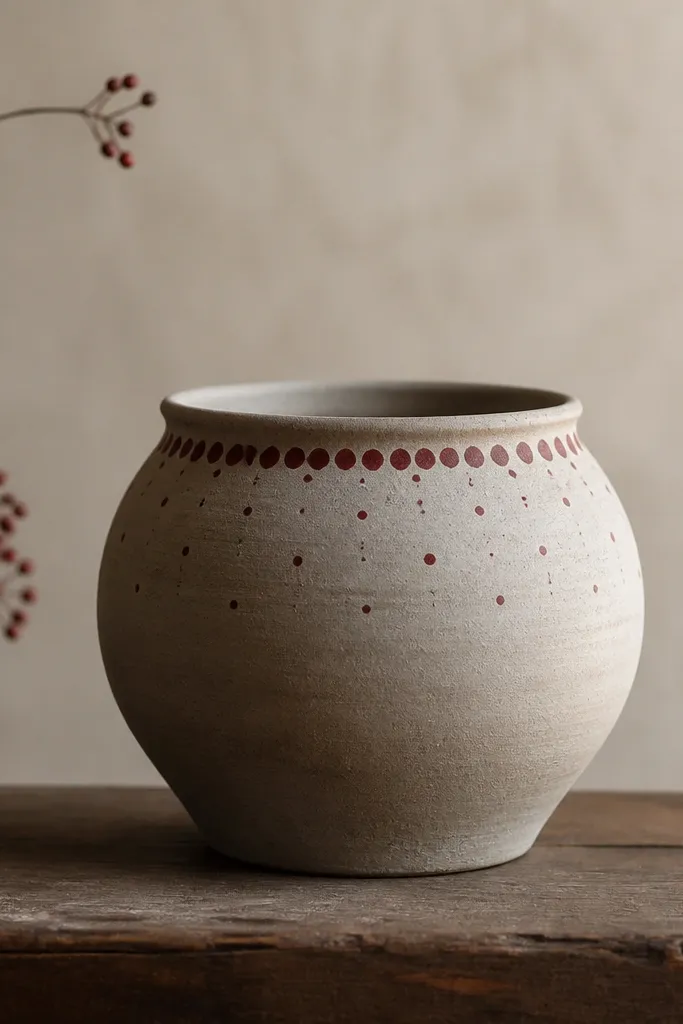
A rim dot ring is a low-effort look with high payoff. It frames the pot opening so it reads “intentional decor” even when the plant hides most of the design. Berry-red dots also play well with evergreen, pine branches, and winter greens.
Choose a clay or taupe base. Mix berry red with a touch of brown for a grounded tone. Dab dots with a foam craft sponge or the tip of a round brush; aim for 10-16 dots around the rim, then add 5-8 dots down the side. Seal with matte spray.
Make dot sizes smaller as you move downward to keep the eye moving gently.
Don’t crowd dots — if you fill the whole pot, it stops looking cozy and starts looking busy.
5. Tape-Resist Half-Moon Blocks
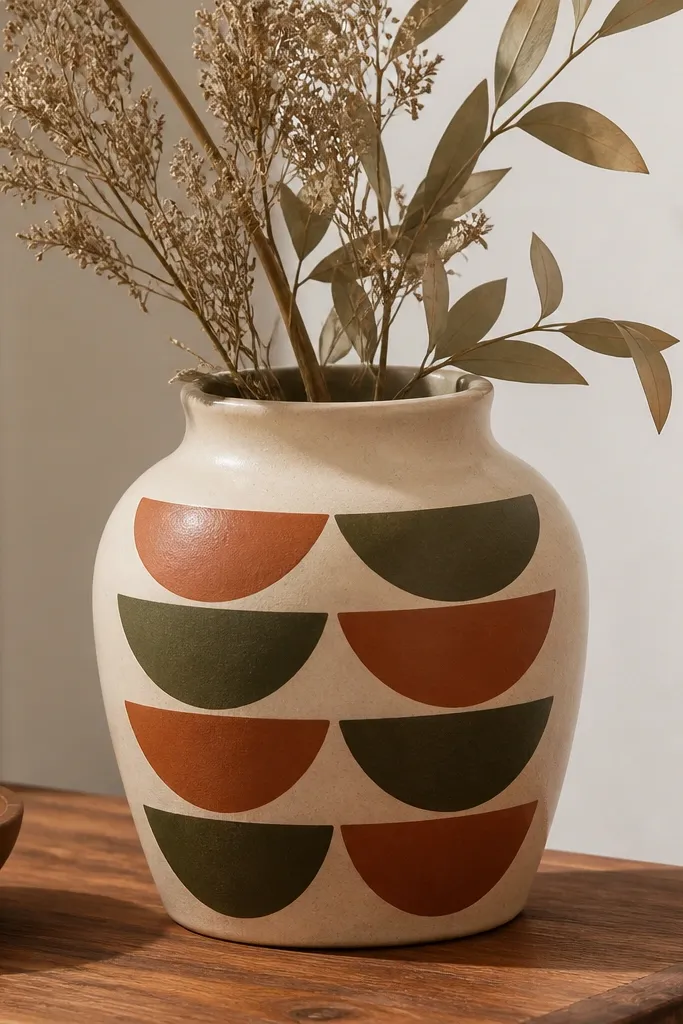
Tape-resist half-moons look sharp but still soft because the shapes curve. I use this when I want a modern cozy look without complicated drawing. The deep olive blocks keep it grounded, while terracotta adds warmth.
Base coat in warm beige. Cut painter’s tape into semi-circles and press them lightly where you want terracotta shapes. Paint over with terracotta, remove tape, then repeat for olive half-moons. Aim for 3-4 stacked rows so the pot has breathing space.
Press tape down with a fingernail, then run your nail along the edge to prevent paint seepage.
Don’t remove tape once paint is fully hard — you’ll pull up the edges and chip the design.
6. Warm Checkered Lower Third
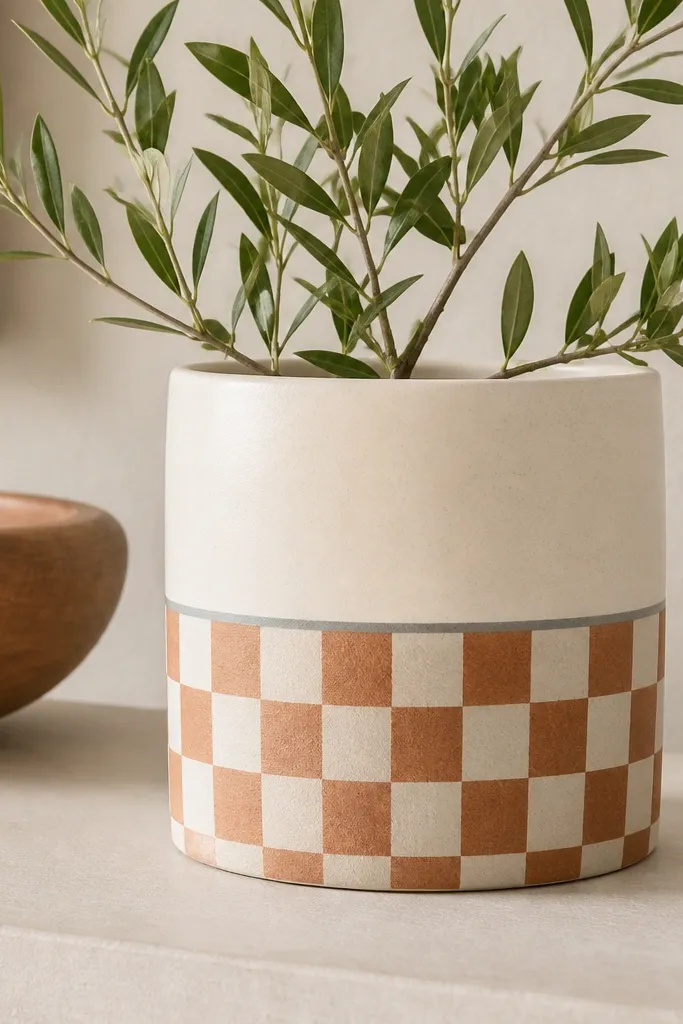
Checks read cozy because they feel like fabric. Painting only the lower third keeps it cute instead of overwhelming. The border line above makes it feel like a designed panel, not a random pattern.
Base coat cream. Tape a horizontal boundary line where the check pattern starts. Then tape a grid for squares: for an average 7-inch pot, use 3/4-inch squares and adjust based on your pot’s width. Fill alternating squares with terracotta and soft gray, remove tape while slightly tacky, then seal.
If your squares don’t line up perfectly, paint a thin border line to hide the seam.
Skip tiny squares — under 1/2 inch looks messy on curved pots.
7. Dry-Brush Pine Needles
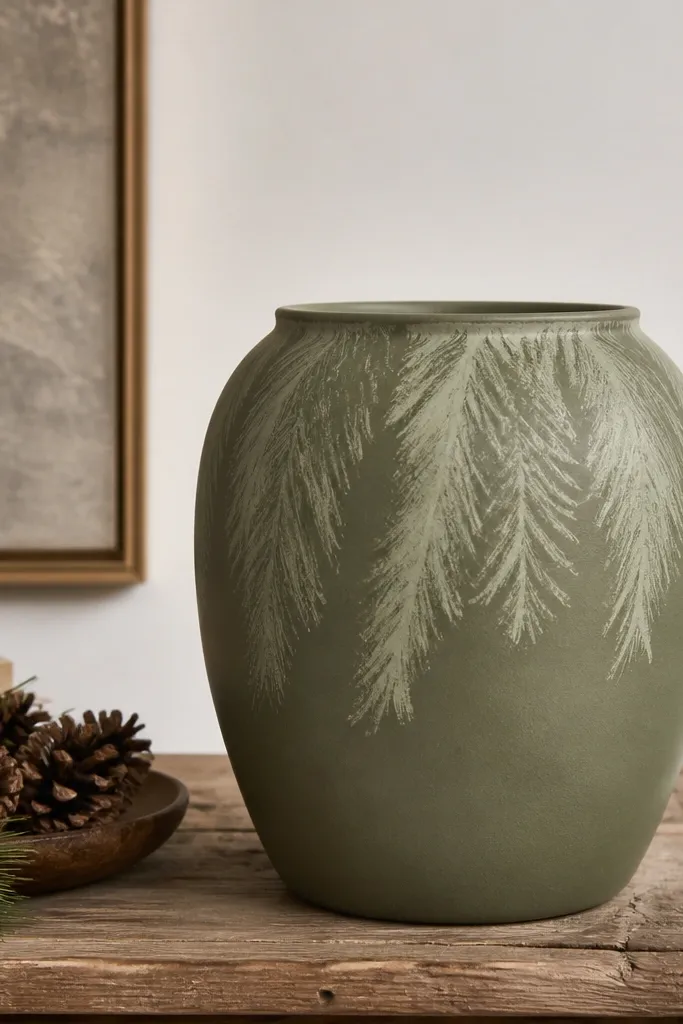
Dry brushing looks like natural texture because you’re not trying to draw each needle. I like it on matte pots because it catches light softly. Keep the strokes angled upward so it resembles a branch reaching for light.
Editor's notePractice on cardboard first — the right amount of paint gives a dusty, needle-like effect.
Paint the pot a muted base green (not bright). Load a dry stiff brush with lighter green, wipe most off on paper towel, then brush in short angled strokes from top down. Add a few darker streaks with a second brush for depth. Seal once fully dry.
Skip thisDon’t overwork the strokes — repeated brushing turns it into a muddy patch.
8. Mini Stocking Stripes for Holiday Pots
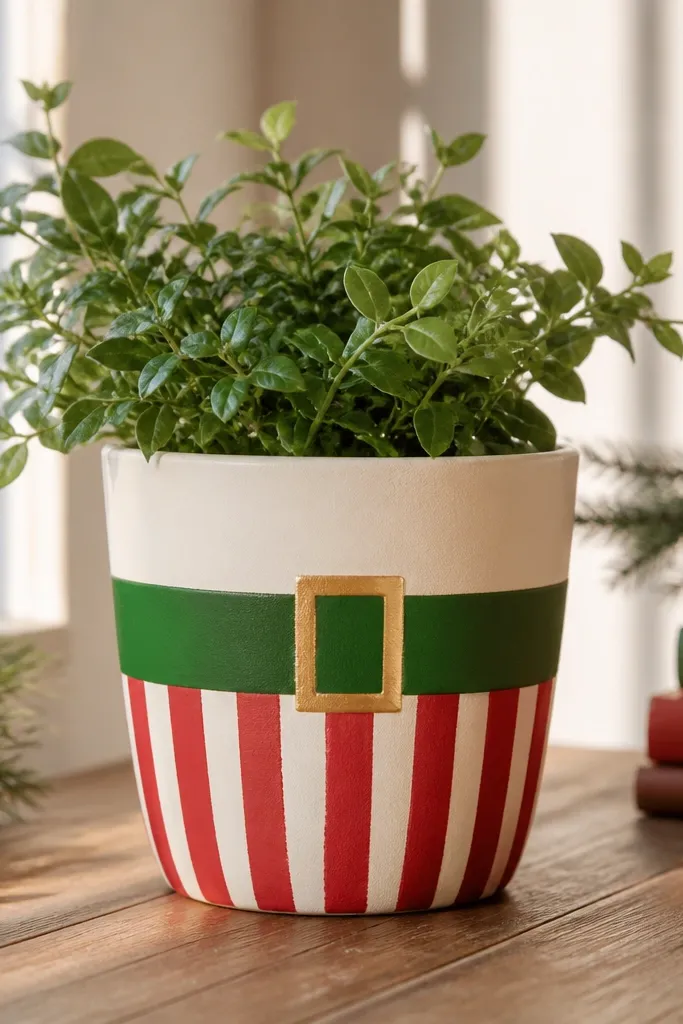
This looks adorable because it turns a plain pot into a tiny holiday object. The cuff area makes it feel like a real stocking, and the buckle adds a focal point. I’ve used this for small herbs and it makes the whole shelf look seasonal.
Base coat cream. Paint red-and-white stripes in the lower half using tape strips about 1/2 inch wide. Add a green cuff band above the stripes, then paint a small gold rectangular buckle in the center. Use matte sealer so the paint doesn’t look plastic.
Use a ruler to plan cuff height — keep it around one-third of the pot height.
Don’t use glossy red — it looks cheap and reflects hard light.
9. Cinnamon Swirl Gradient
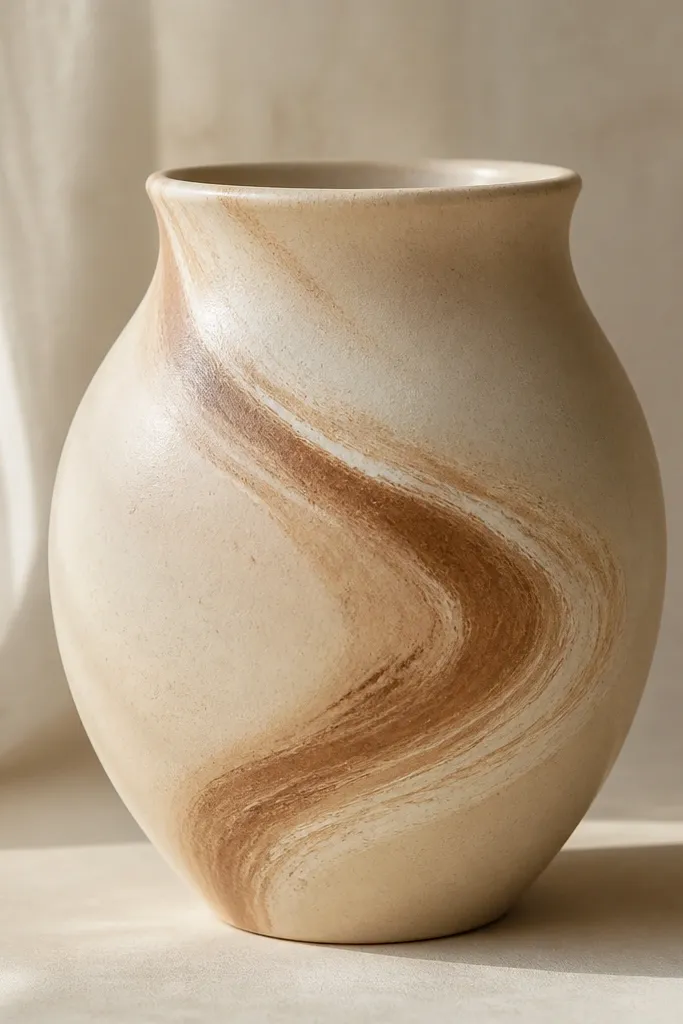
Swirls feel cozy because they look like warm spices and hand-drawn holiday baking. The gradient makes it look like a painted frosting swirl instead of a flat graphic. This design hides small brush mistakes because the curves distract the eye.
Editor's noteStart the swirl from a spot slightly off-center so it looks more natural.
Base coat beige. Mix cinnamon brown with a little water for a translucent layer. Paint a broad swirl line, then add lighter highlights by dragging a nearly dry brush along one edge of the swirl. Let layers dry between passes.
Skip thisAvoid straight, perfect curves — they make it look like a sticker.
10. Charcoal Hearts with Cream Outline
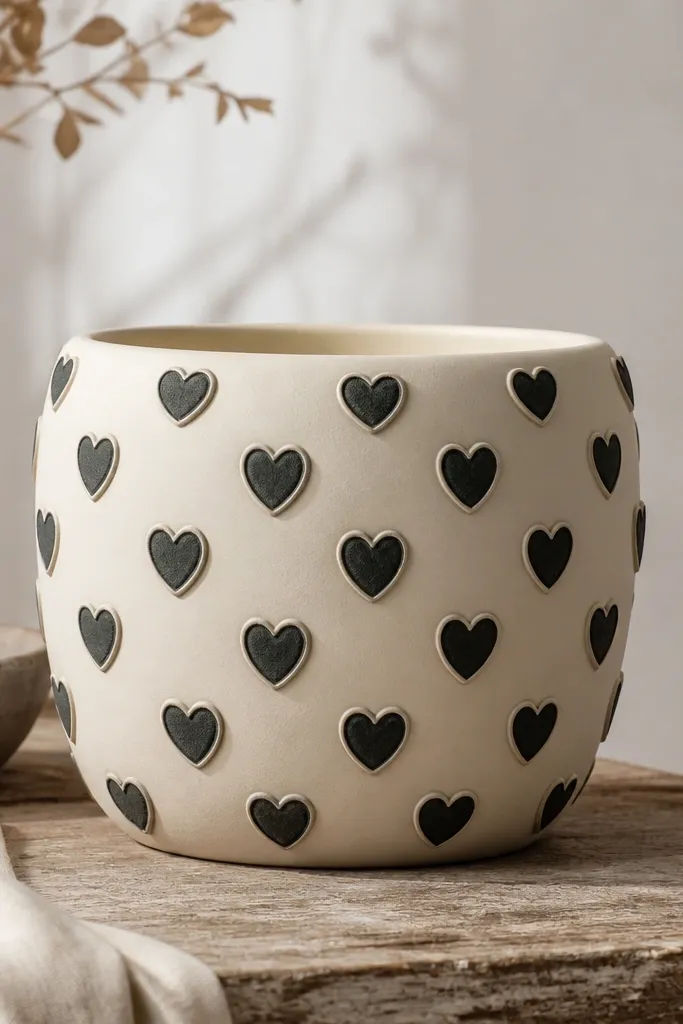
Hearts are cozy without being childish when you use muted colors and small scale. The cream outline makes the hearts pop while keeping the palette soft. I like spacing them evenly in a vertical line so the design reads neat on a curved surface.
Editor's noteIf you can’t draw hearts confidently, trace a small heart stencil onto paper first, then use it to guide dots and curves.
Base coat cream. Lightly sketch heart placement with a pencil, then paint hearts in charcoal. While charcoal is still tacky, add a thin cream outline around each heart using a detail brush. Seal after drying.
Skip thisDon’t make the hearts too big — they warp on curves and look lopsided.
11. Sponge-Stamped Sweater Texture
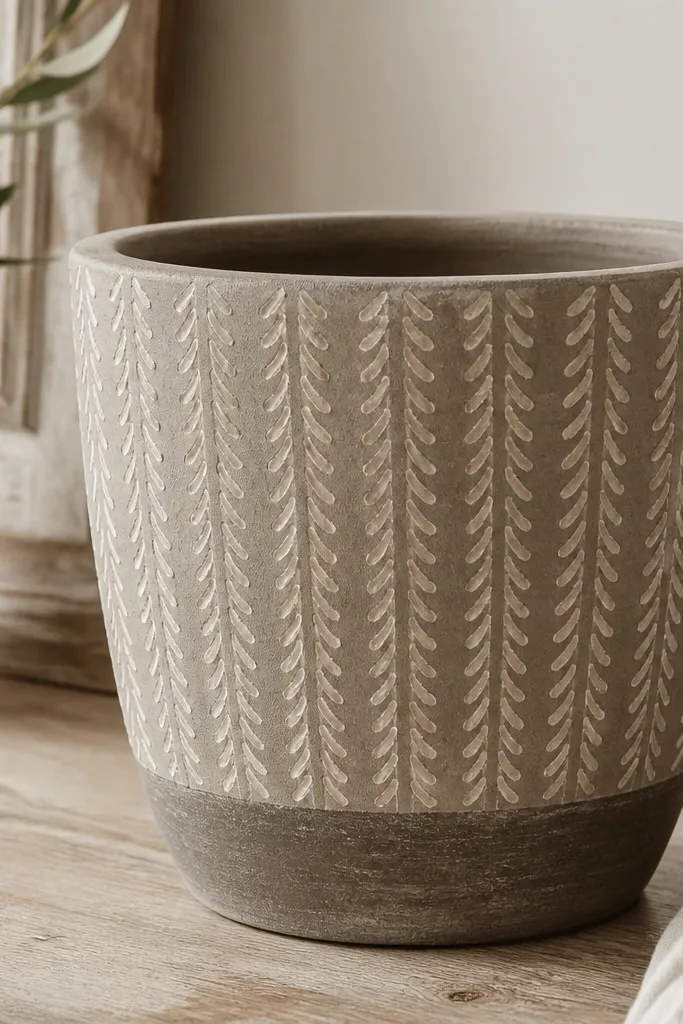
Knit texture is cozy in a way paint alone can mimic. Sponge stamping creates little irregularities that look like fabric loops. The bottom band in a darker shade makes it feel like a sweater cuff.
Editor's noteUse a small craft sponge, not a big one — it keeps the texture scale right.
Base coat taupe. Dab a sponge with a slightly darker taupe and stamp in vertical rows using light pressure. Leave gaps so the texture doesn’t fill the whole pot evenly. Add a cuff band by painting a smooth darker rectangle around the lower third, then seal.
Skip thisDon’t stamp too wet — it smears and loses the knit effect.
12. Gold Leaf Veins on Deep Forest
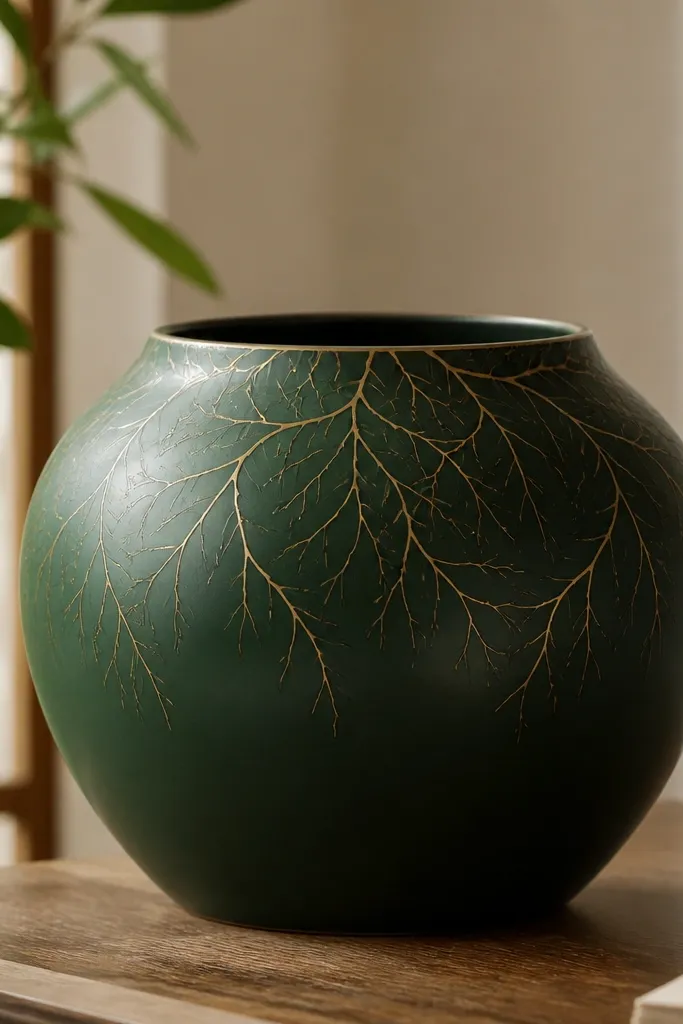
Gold veins look fancy but still cozy because the base is dark and warm-toned. It reads like a leaf you’d find pressed in a book, not a loud party decoration. Keep the lines thin and let the green show through.
Editor's notePlan 3 main veins first, then add branches — it keeps the pattern from looking random.
Base coat deep forest green. Paint a few main vein lines with gold acrylic thinned slightly so it flows. Add smaller branches off the main lines with a fine brush. Seal with matte clear so the gold looks like painted metal leaf, not glitter.
Skip thisAvoid thick gold strokes — they look like marker lines.
13. Cream Pot with Terracotta Half-Arch Steps
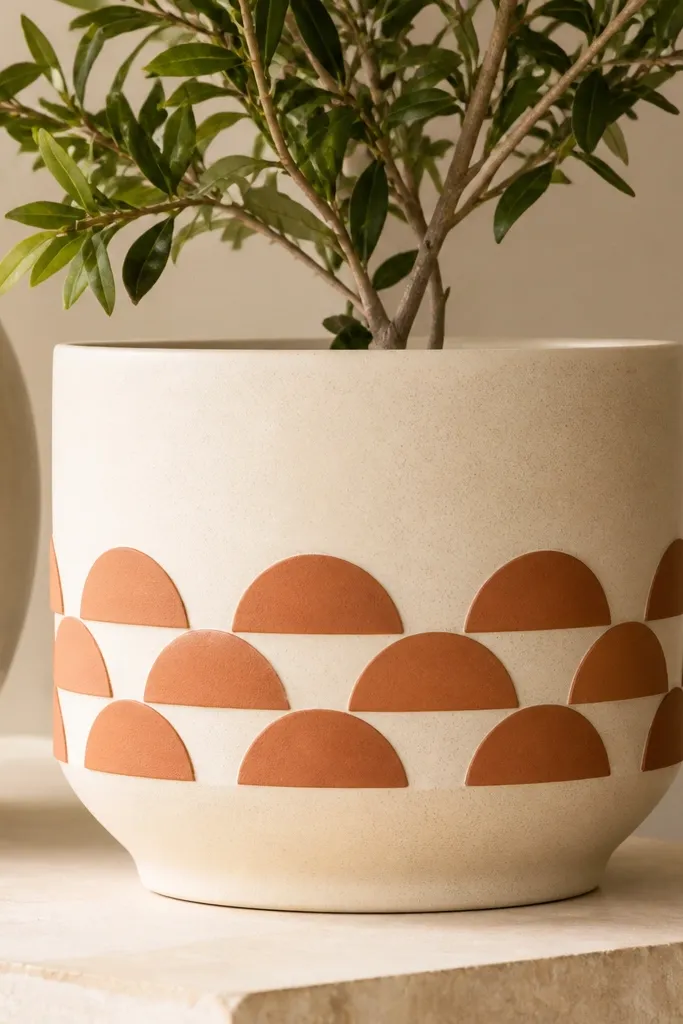
Half-arch steps feel like cozy architecture: brick arches, porch steps, warm entryways. The stacked pattern gives rhythm without needing lots of colors. Terracotta on cream looks like sunlit clay pots.
Editor's noteKeep arch widths consistent — measure once with a ruler and repeat.
Base coat cream. Tape a horizontal band where the arches will sit. Use a small cup or stencil to draw repeating half-arches, then paint them terracotta. Add a thin cream line between rows if the arches merge too much.
Skip thisDon’t let arches touch edge-to-edge; curved pots need breathing space between shapes.
14. Sage Wash with White Dot Constellations
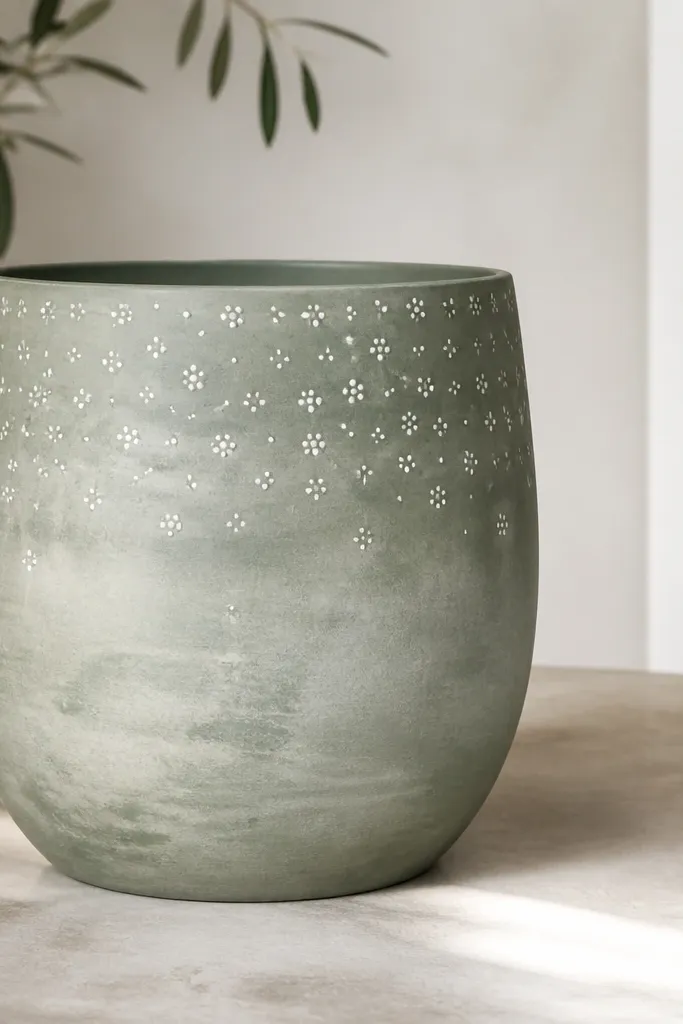
A sage wash feels like winter air. Dot constellations look cozy because they’re delicate and quiet. Keep dot clusters small and uneven — nature does not place stars on a grid.
Editor's noteWipe your brush on paper towel before dotting so you get pin-size dots.
Thin sage paint with water to create a wash, then apply in two layers so it’s translucent but visible. Add white dots with a fine brush or toothpick, concentrating near the rim and fading downward. Add one slightly larger dot cluster for balance on the opposite side.
Skip thisSkip big blobs — they look like spilled paint.
15. Terracotta Base with White "Linen" Crosshatch
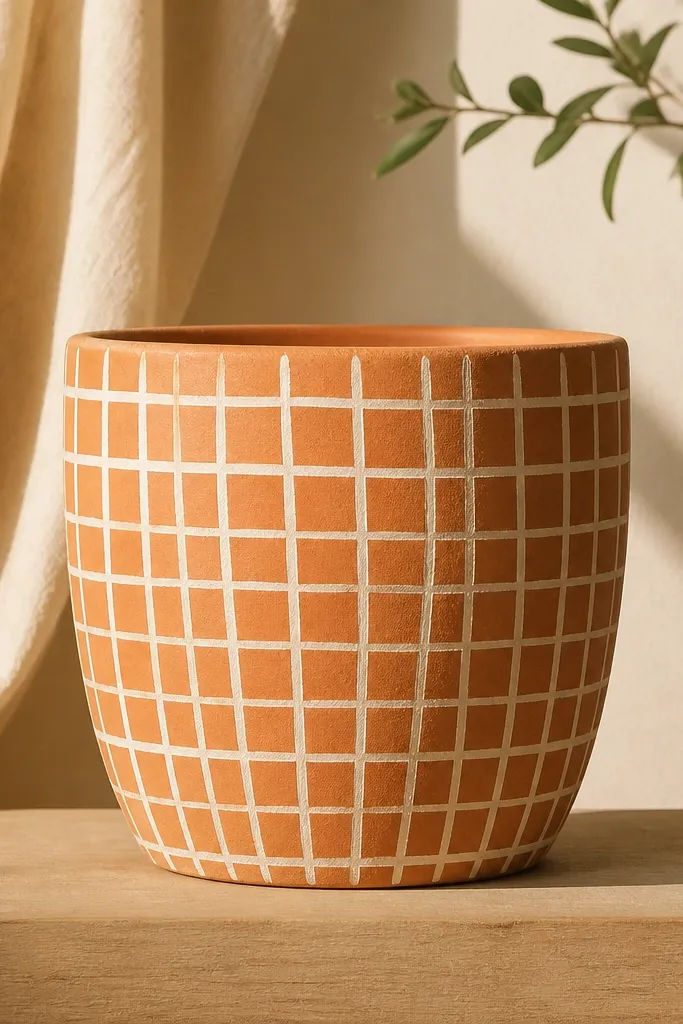
Crosshatch mimics woven linen, which reads cozy fast. The key is using thin lines and letting terracotta show through. This looks great on larger pots where you can see the texture from a step away.
Editor's noteWork in sections so the paint doesn’t dry while you’re still drawing the next lines.
Paint the pot terracotta. Use a liner brush to draw diagonal lines in one direction, spaced about 1/2 inch apart for a 7-9 inch pot. After dry, repeat with the opposite diagonal direction. Add a few thicker “thread” lines so it looks hand-made.
Skip thisDon’t make lines too thick — it turns into a blocky pattern.
16. Matte Black Pot with Cream "Cocoa" Drips
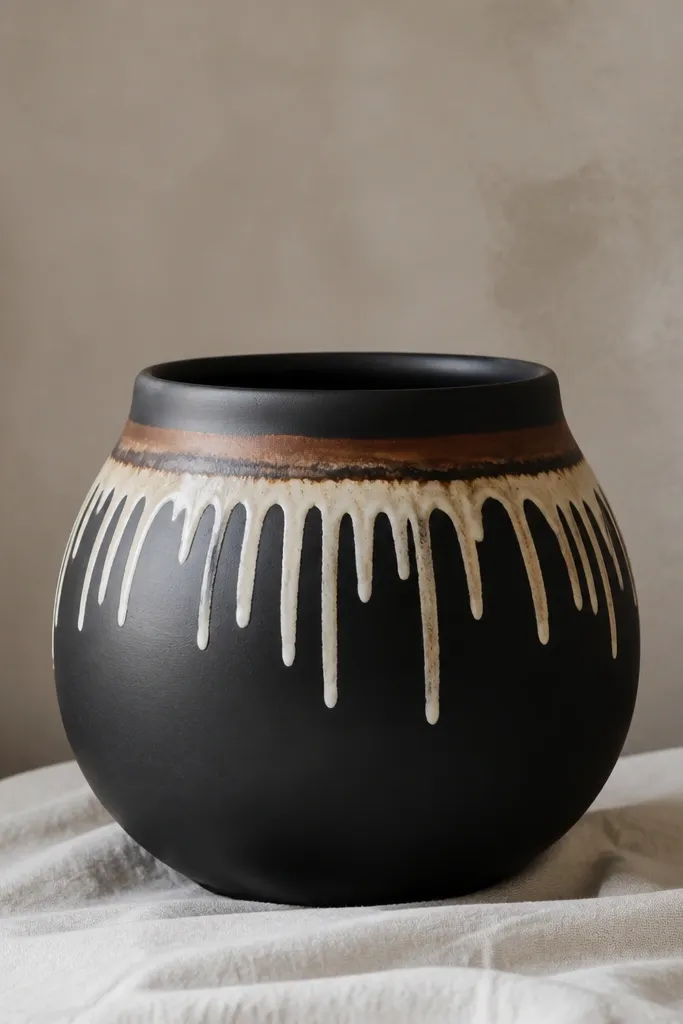
Black + cream looks cozy because it imitates dark chocolate and warm milk. Drips add movement and make the pot look styled for winter nights. A small brown accent keeps it from looking too stark.
Editor's notePull drips with a controlled wrist: shorter drips at the edges, longer in the center.
Base coat in matte black and let cure fully. Paint a horizontal cream band around the upper third, then pull drips downward with a damp brush. Add a tiny sprinkle of cinnamon-brown dots near the top band for a spice hint. Seal with matte clear.
Skip thisDon’t flood the drips — thick cream paint looks heavy and glossy.
17. Soft Rose Ombre with Charcoal Bands
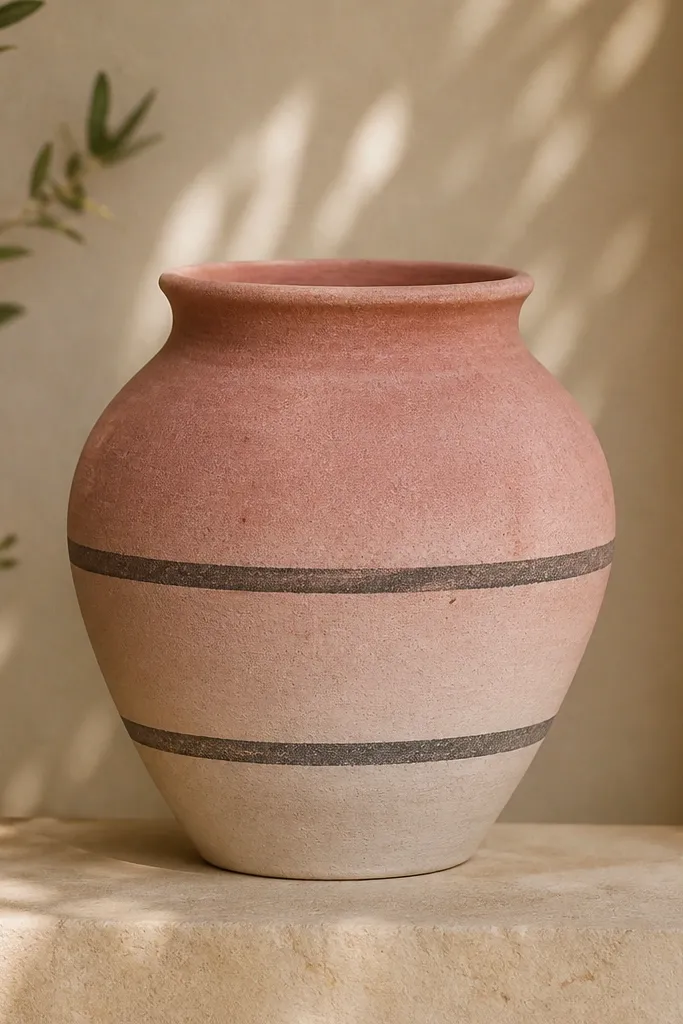
Rose ombre feels cozy and romantic, especially with charcoal grounding it. The two bands give structure so the gradient doesn’t look like a random wash. This one looks great with white flowers or winter greenery.
Editor's noteUse matte charcoal paint so the bands look like painted fabric, not plastic.
Base coat a medium dusty rose. Blend to a lighter rose or cream at the bottom using a sponge. Tape and paint charcoal bands in two spots: one around the middle, one around the lower third. Remove tape right after painting and seal.
Skip thisAvoid metallic charcoal — it reads too party-like.
18. Warm White Pot with Terracotta Dipped Bottom
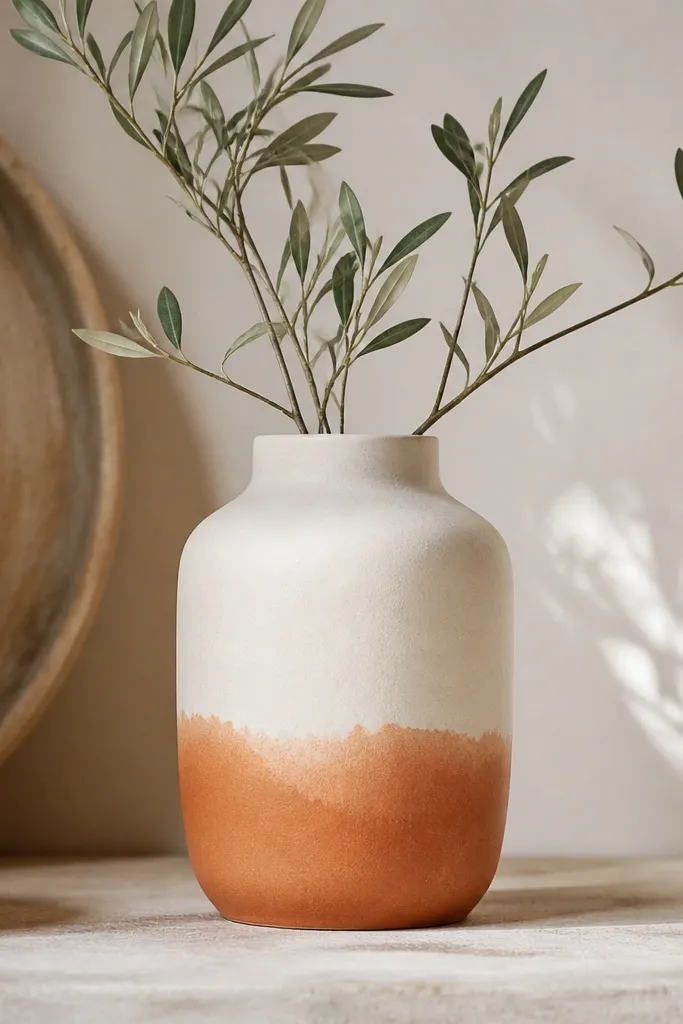
This looks like a ceramic glaze effect. The dip hides brush marks and it’s fast. The uneven edge keeps it organic, which is what makes it cozy instead of factory-perfect.
Base coat warm white. Thin terracotta paint with water and apply to the bottom third using a foam brush, leaving the top edge irregular. Add a second thin coat only where you need more coverage. Seal when dry.
Practice the dip edge on a scrap pot first — that’s where the magic is.
Don’t use thick paint for the dip — it creates a hard line that feels cheap.
19. Small Pinecones in Umber and Cream
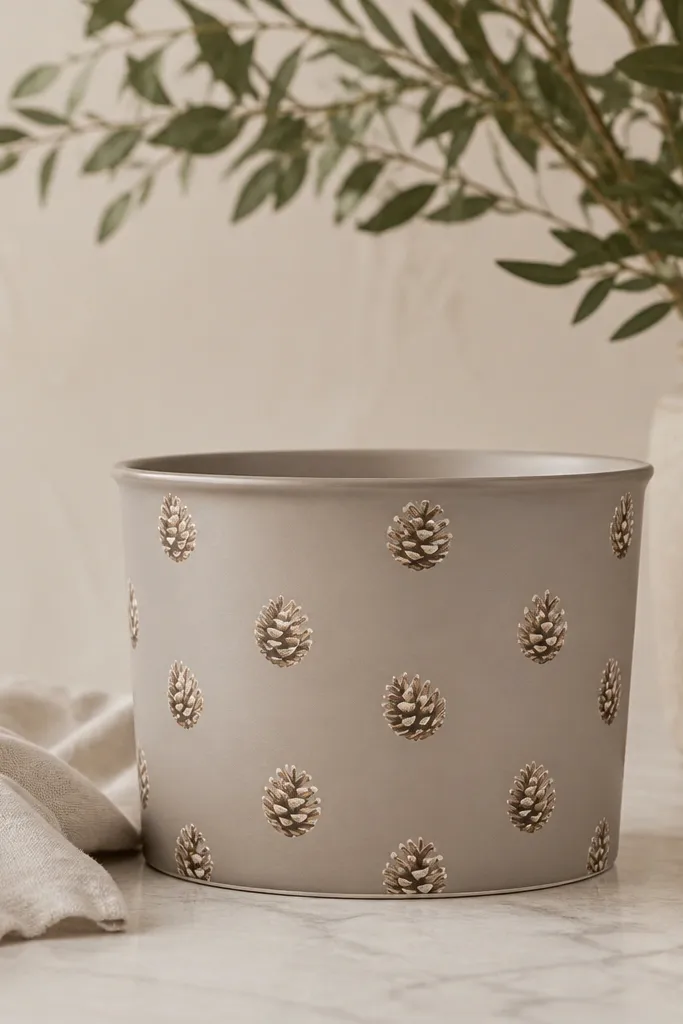
Pinecones are cozy without screaming holiday. Tiny pinecones look charming even when the plant covers part of them. Using umber and cream keeps the colors natural.
Base coat taupe. Paint pinecone shapes in umber using a small round brush, then add cream highlights on the outer “scales.” Place them in clusters of two or three around the pot rather than evenly everywhere. Seal matte.
Add one pinecone near the front-facing side so it anchors the design.
Skip bright green pinecones — they look like cartoons.
20. Satin Gold Rim + Mini Holly Leaves
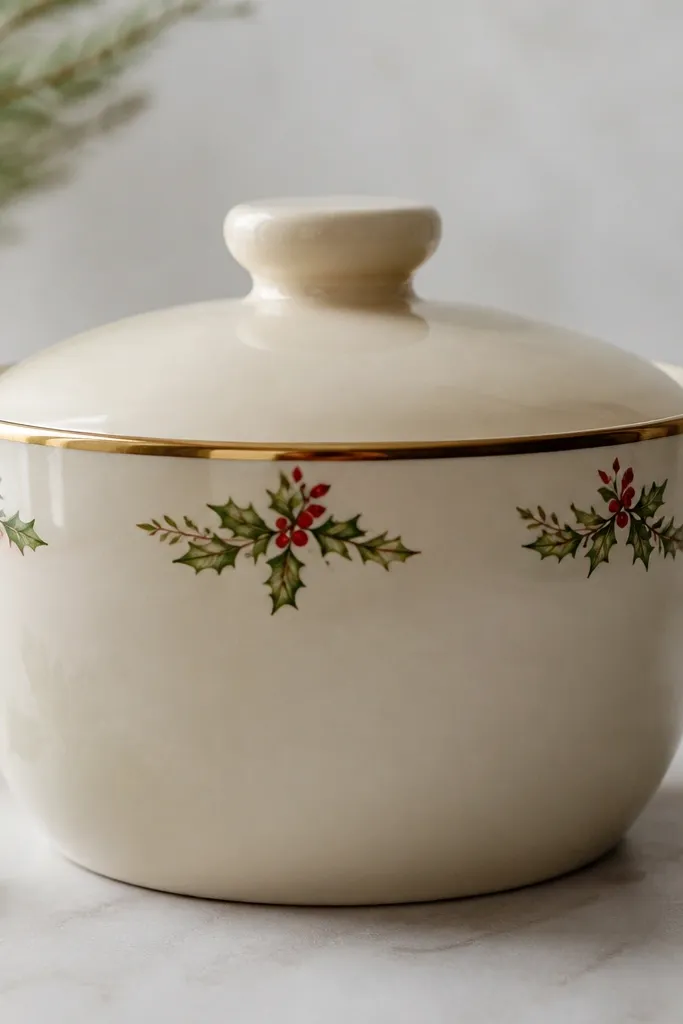
The gold rim makes the pot look finished in seconds. Mini holly leaves add that holiday wink without covering the whole pot. Keep leaves small and spaced so they look like ornaments, not a repeating sticker sheet.
Base coat cream. Paint a thin gold line around the rim with a fine brush, then add 3-5 holly leaves on one side. Use deep green for leaves, tiny red dots for berries, and a lighter green highlight on leaf edges. Seal with matte clear to reduce shine everywhere except the rim.
If your gold looks too bright, mix it with a drop of brown acrylic to warm it.
Don’t paint gold too thick — thick lines crack on curved surfaces.
21. Chocolate Brown Cables with Cream Highlights
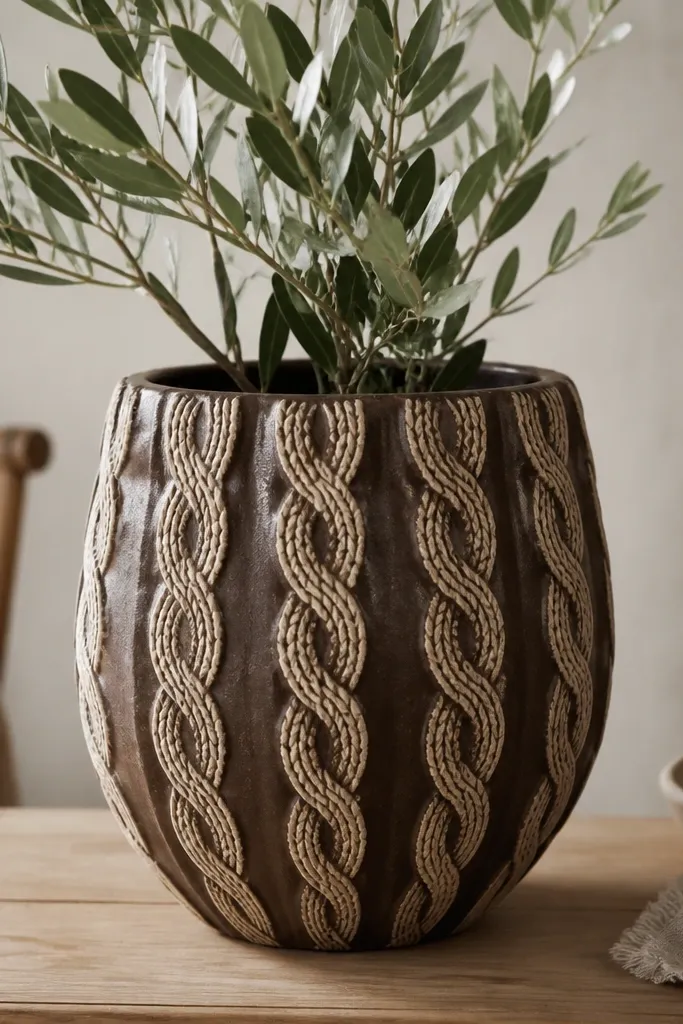
Cable knit patterns look cozy because they mimic thick winter sweaters. The contrast between chocolate and cream makes the raised look believable. Small shadows between cables make it feel textured even though it’s flat paint.
Editor's noteUse a small foam brush to dab highlights — it blends better on curved surfaces.
Base coat dark brown. Tape or freehand two vertical cable columns with V-shaped curves, then paint the “cable” areas cream. Add a thin dark brown shadow line between cable sections using a fine brush. Seal matte.
Skip thisAvoid wide cables — they look stretched and messy on small pots.
22. Winter Berry Wreath Band
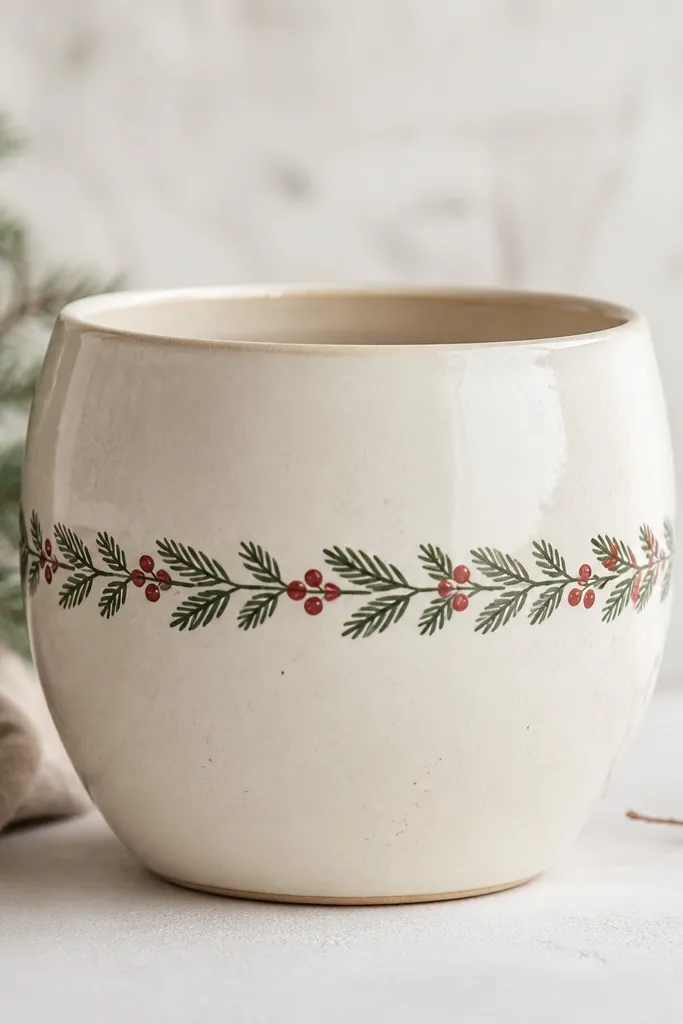
A wreath band looks styled because it frames the pot like a garland. Evergreen leaf shapes keep it wintery, and red berries bring warmth. I like painting the band around the middle so it shows even when the plant grows.
Base coat cream. Paint a band across the middle with evergreen leaves: use a leaf stencil or freehand small teardrops with a pointed tip. Add berry dots in red and a few smaller brown dots for shadow. Finish with a thin cream border line above and below the wreath band.
Keep berries clustered in groups of three — that spacing looks natural.
Don’t spread berries evenly all over — it loses wreath shape.
23. Sponge Gradient with Dusty Rose Fade
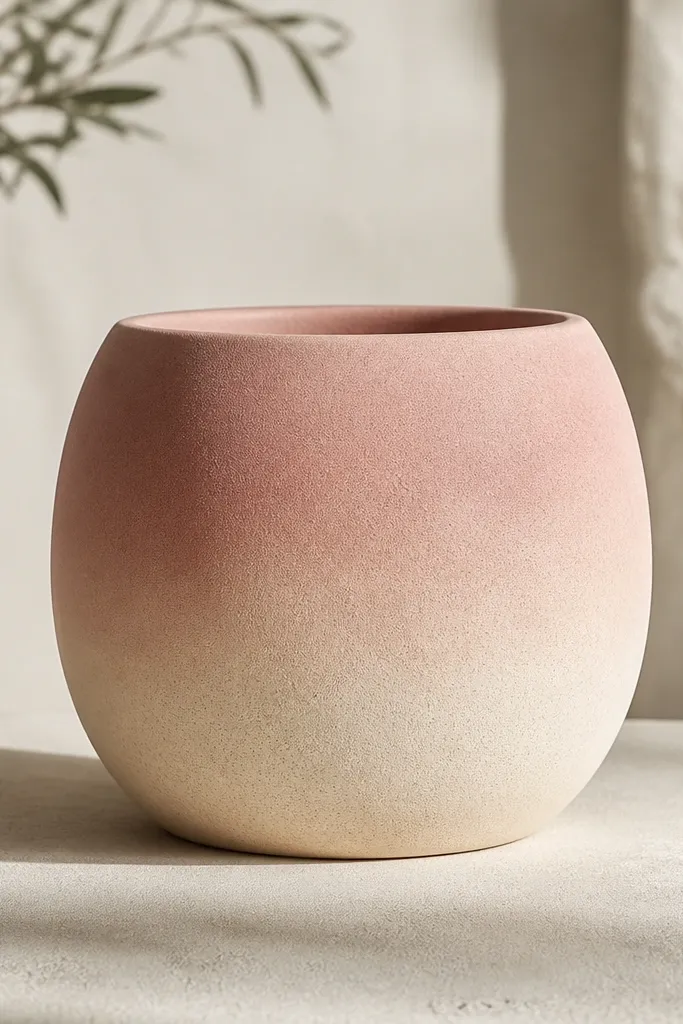
Soft sponge gradients feel cozy because they mimic watercolor and fabric dye. The no-hard-edge look is forgiving on curves. Dusty rose stays warm, not bubblegum.
Editor's noteRinse and dry your sponge between passes so you don’t muddy the fade.
Base coat a light cream. Sponge on dusty rose from the middle up, then blend into the cream at the bottom with a nearly dry sponge. Do three light passes until you get the intensity you want. Seal with matte clear.
Skip thisAvoid using too much water in the paint — it can create streaks and thin spots.
24. Terracotta Pot with Hand-Drawn Doodles Border
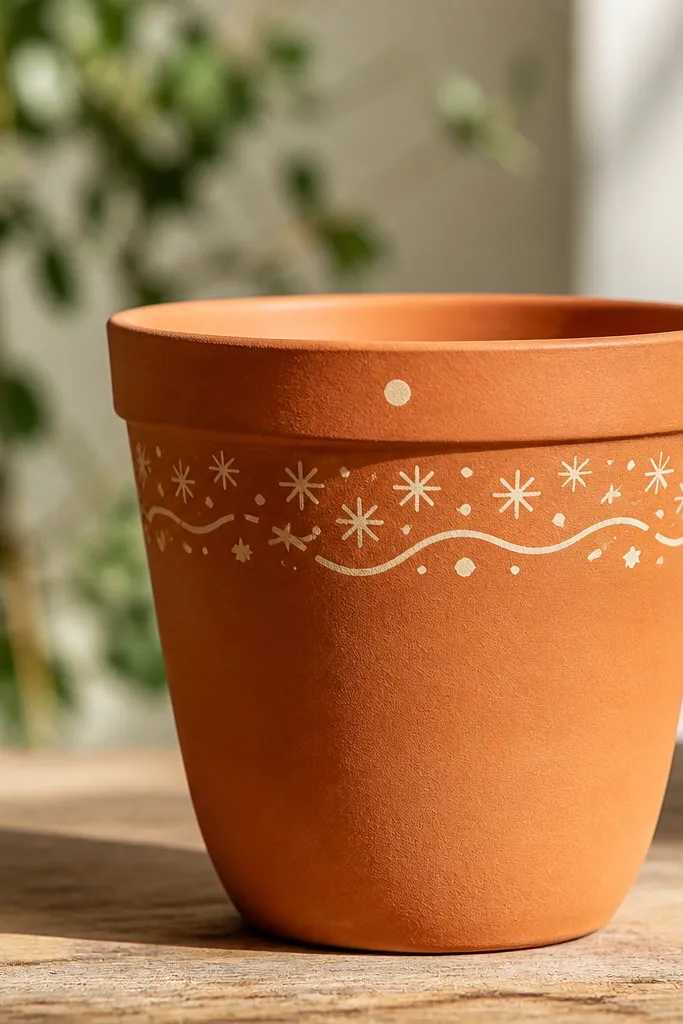
Doodles look cozy because they feel handmade, not printed. The border gives structure while still letting you add personality. I use this when I want a pot that looks like it came from a crafty afternoon.
Base coat terracotta. Paint a thin cream line around the upper third, then add small doodles inside: tiny stars, dots, and curved arcs. Keep doodles limited to one band so it doesn’t look scattered. Seal matte.
Use the same brush size for all doodles so the border looks consistent.
Don’t doodle the entire pot — borders look intentional, full coverage looks messy.
25. Cream Pot with Brick-Style Vertical Rows
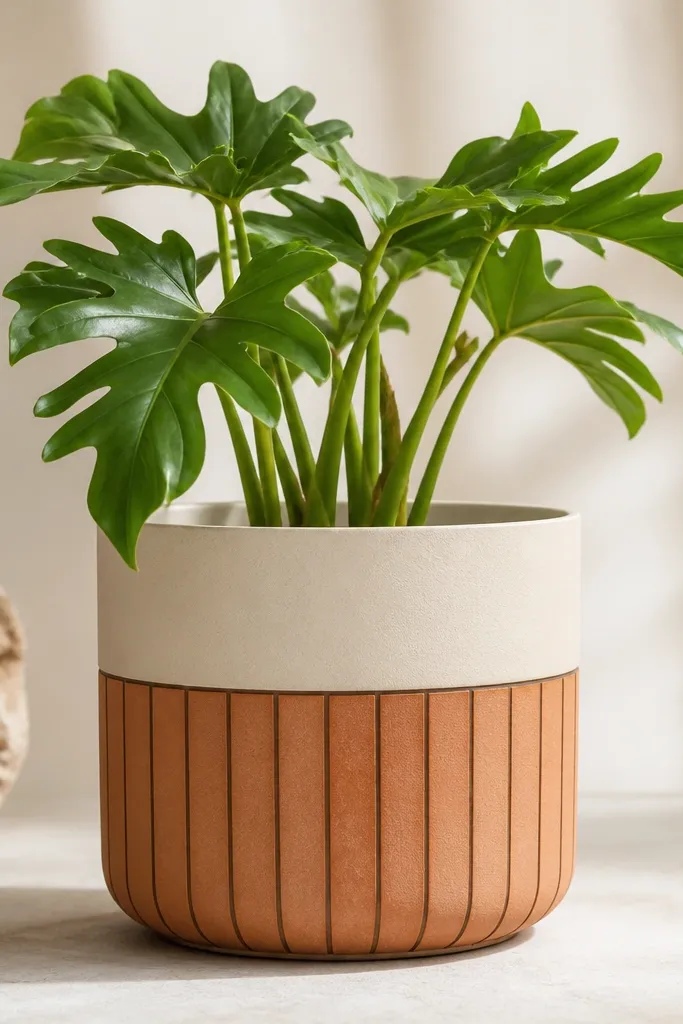
Brick-style rows feel cozy because they imitate warm masonry. The vertical rows also work well on round pots because they align with the curvature. A thin shadow line at the top makes the brick section look like a panel.
Editor's noteIf your columns drift, outline the whole brick section with a thin brown line to clean it up.
Base coat cream. Tape a horizontal boundary where the brick section starts. Paint vertical terracotta columns about 1 inch wide, then add thin lines between them with a darker terracotta or brown. Stagger the columns slightly so it feels like brick, not stripes. Seal matte.
Skip thisDon’t make the brick lines too thick — they flatten the texture.
26. Olive Pot with Cream "Candle Wax" Caps
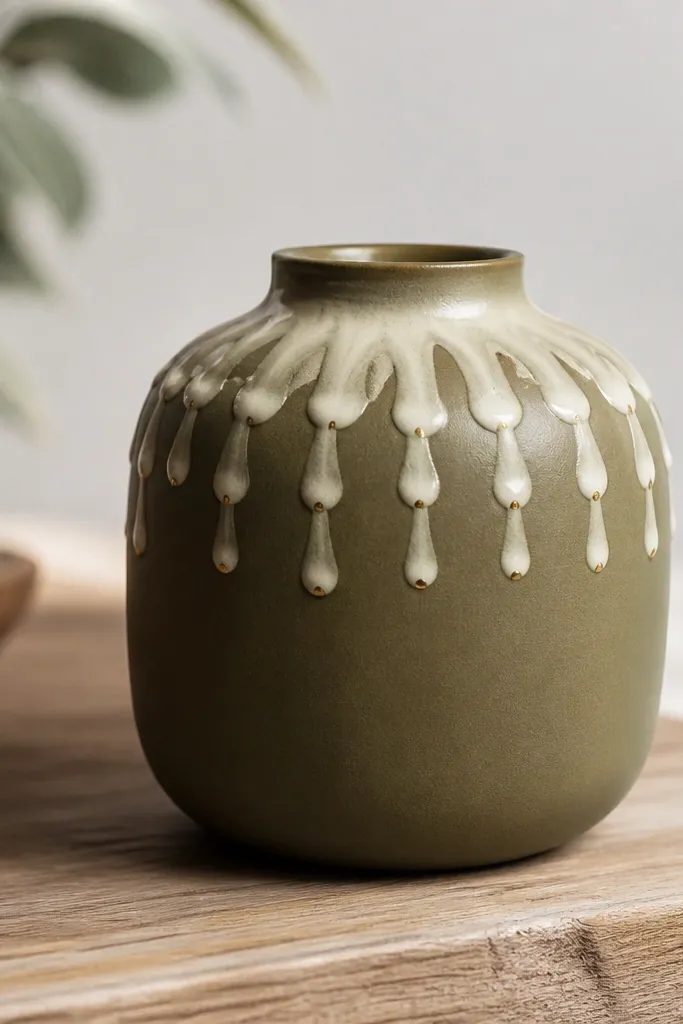
Wax-cap shapes look cozy because they mimic the top of melting candles. The olive base makes it feel earthy instead of holiday-only. Gold dots near the caps give a soft glow effect without glitter.
Editor's noteUse a flat brush edge to pull a tiny taper so the wax looks intentional.
Base coat olive. Paint cream shapes that start as small blobs and taper slightly downward like stopped drips. Keep 6-8 caps across the upper half. Add a few tiny gold dots next to two of the caps. Seal matte.
Skip thisDon’t smear wax drips together — separate caps read cleaner.
27. Warm Taupe Pot with White "Marble" Veins
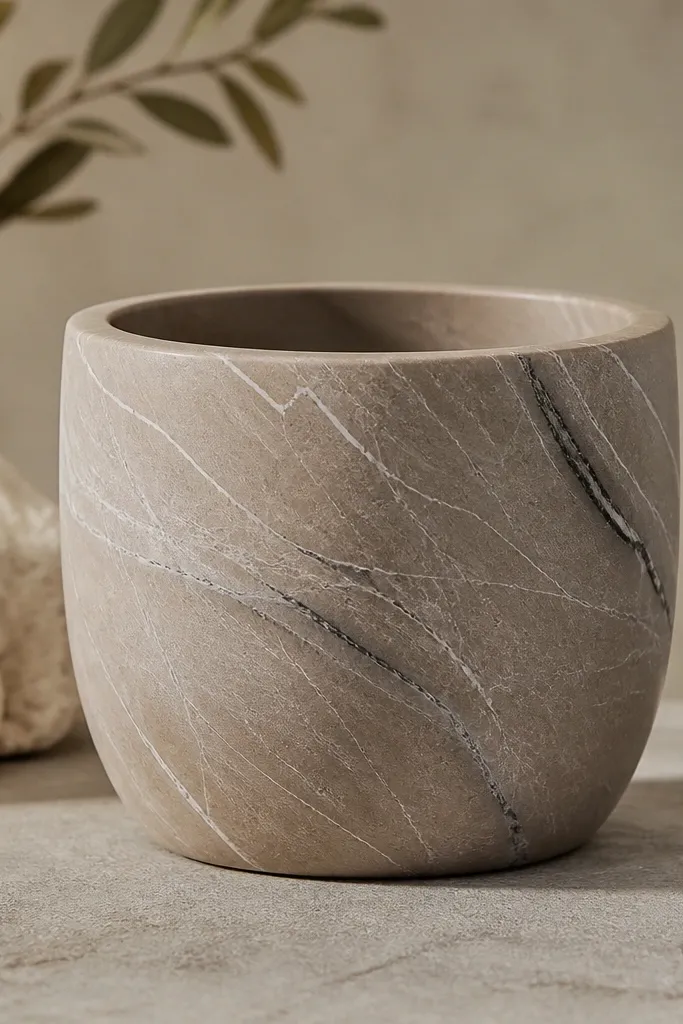
Marble veins make a pot look expensive while still cozy because the base is warm. Veins also hide minor unevenness in paint coverage. Keep the veins thin and varied so it looks like stone, not doodles.
Editor's noteDo fewer veins than you think — 8-12 good lines look better than 40 thin ones.
Base coat warm taupe. Use a detail brush to draw thin white veins, then add a few light gray veins that cross them. Add one or two darker taupe lines to deepen the veining. Seal matte to avoid plastic shine.
Skip thisAvoid straight lines only — straight veins look like cracks in paint.
28. Evergreen Pot with Cream Laurel Leaves
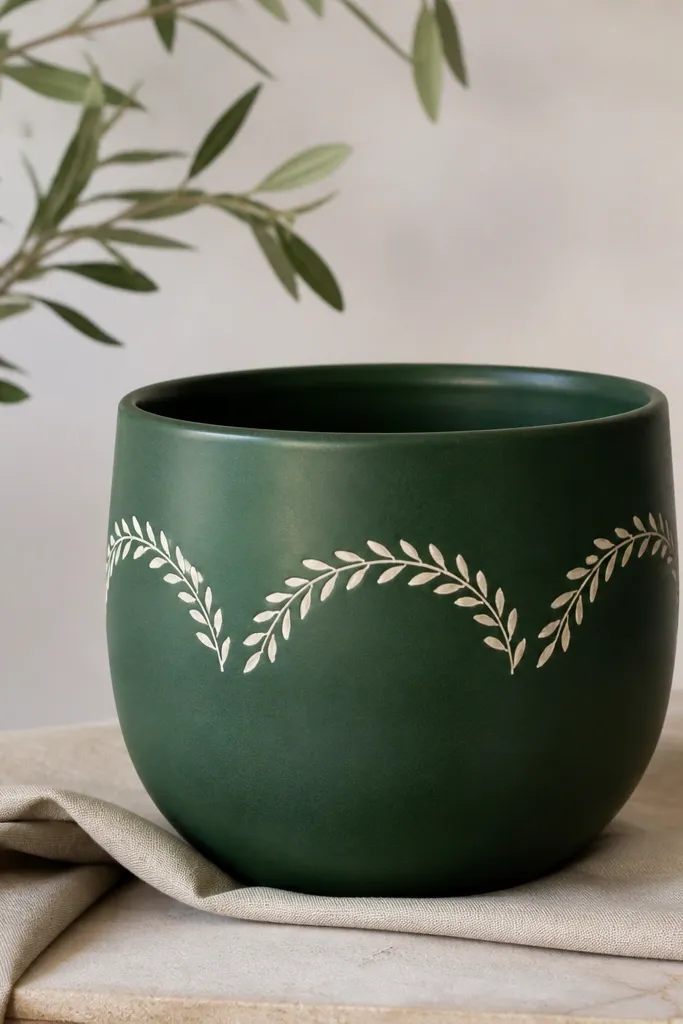
Laurel leaves read cozy because they’re classic and calm. The cream on evergreen pops without using bright red. I like drawing them in an arch so the pot has a natural focal curve.
Editor's noteKeep leaf stems thin and consistent so the arch looks balanced.
Base coat deep evergreen green. Draw a gentle arch line across the midsection, then paint paired leaf shapes along both sides of the arch. Add tiny light-green highlights on leaf edges. Seal after drying.
Skip thisDon’t overcrowd leaves — leave some green space between shapes.
29. Sandy Beige Pot with Terracotta Sunburst
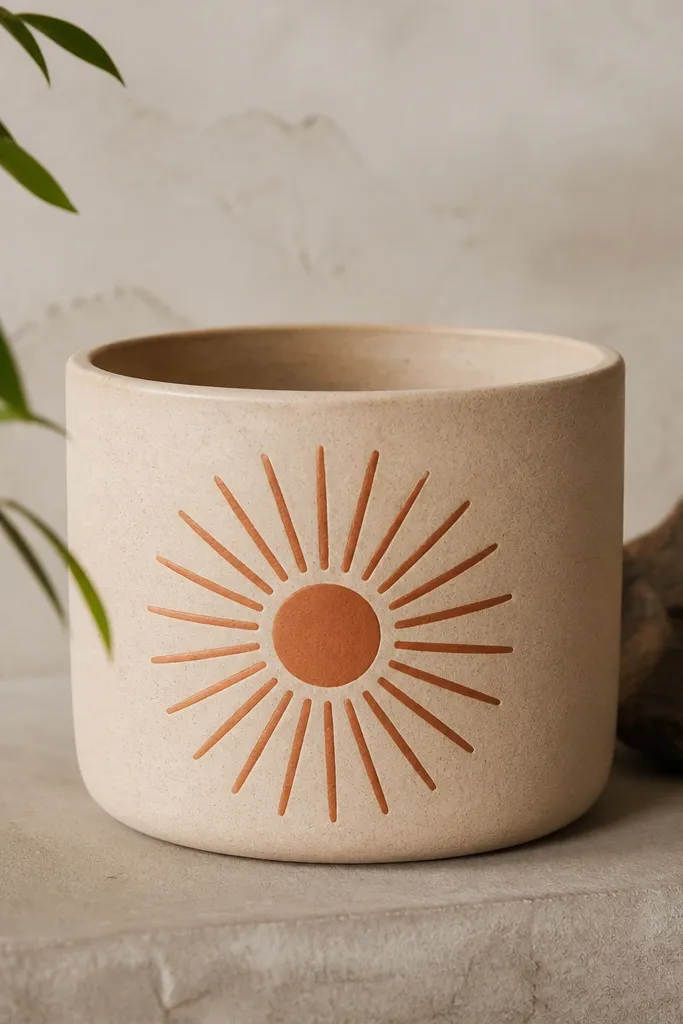
Sunbursts feel cozy because they bring warmth like early morning light. The rays are easy to repeat, but the center circle keeps it from looking like random lines. Terracotta on beige looks like baked clay.
Editor's noteMark ray angles lightly with pencil first — it keeps the burst symmetrical.
Base coat sandy beige. Paint a small terracotta circle in the center panel area, then draw 10-14 rays outward using a ruler or guided template. Vary ray length slightly so it looks hand-drawn. Seal matte.
Skip thisAvoid wavy rays that all curve the same direction — it makes the pattern look off.
30. Cream Pot with Dark Olive "Mistletoe" Berries
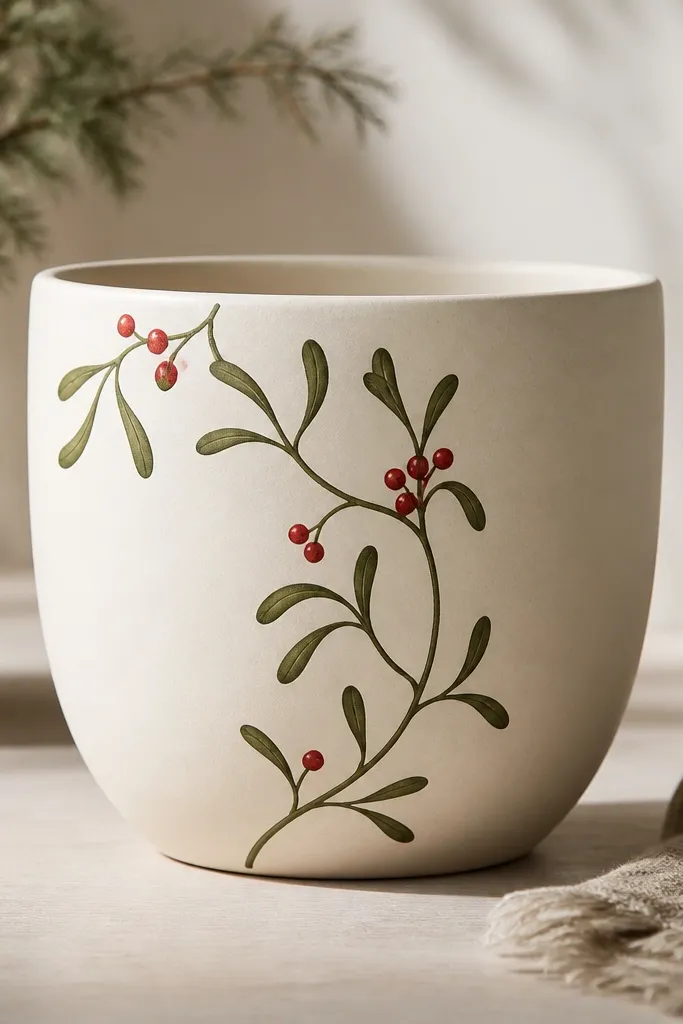
Mistletoe is cozy because it’s small, playful, and familiar. The vine curve makes the pot feel like it has movement. Tiny berry clusters keep it festive without covering the whole surface.
Base coat cream. Paint a curved vine line in dark olive with a thin brush, then add small leaf ovals along it. Finish with 2-3 berry clusters: red dots grouped in threes, with a tiny brown dot under each group for depth. Seal matte.
Let the vine line be slightly thicker at the bend — it looks more natural.
Don’t make berries the same size and same spacing — it looks mechanical.