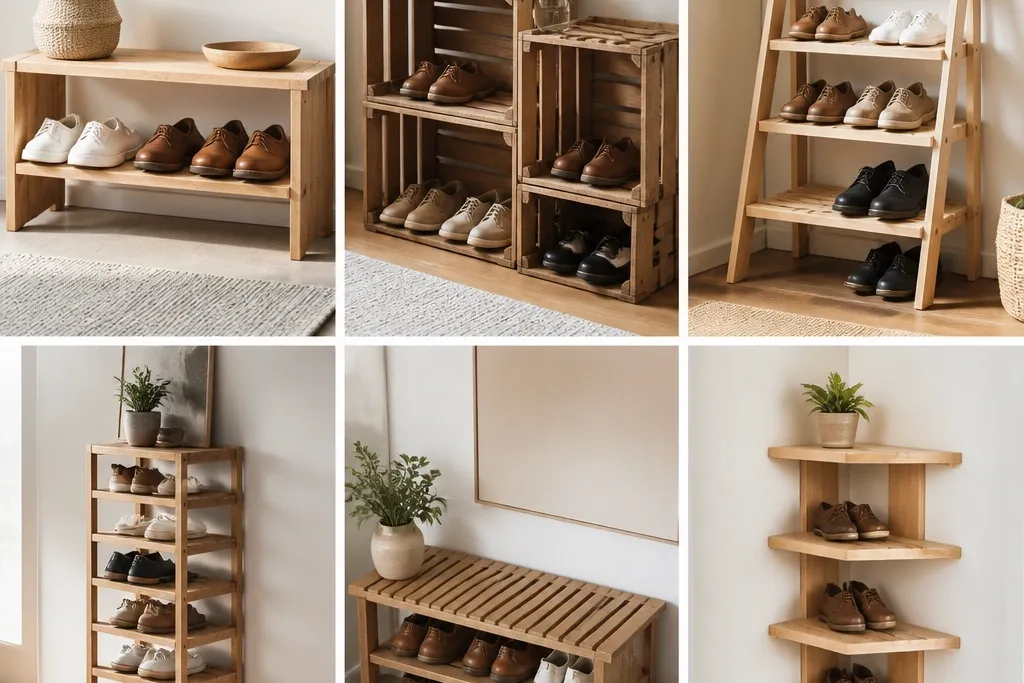
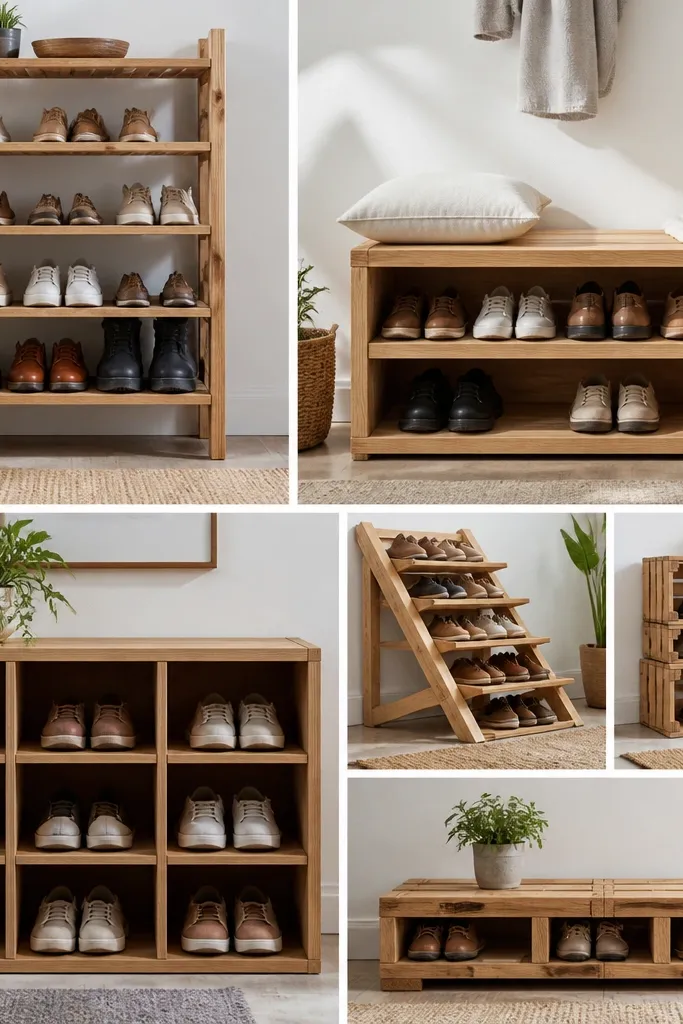
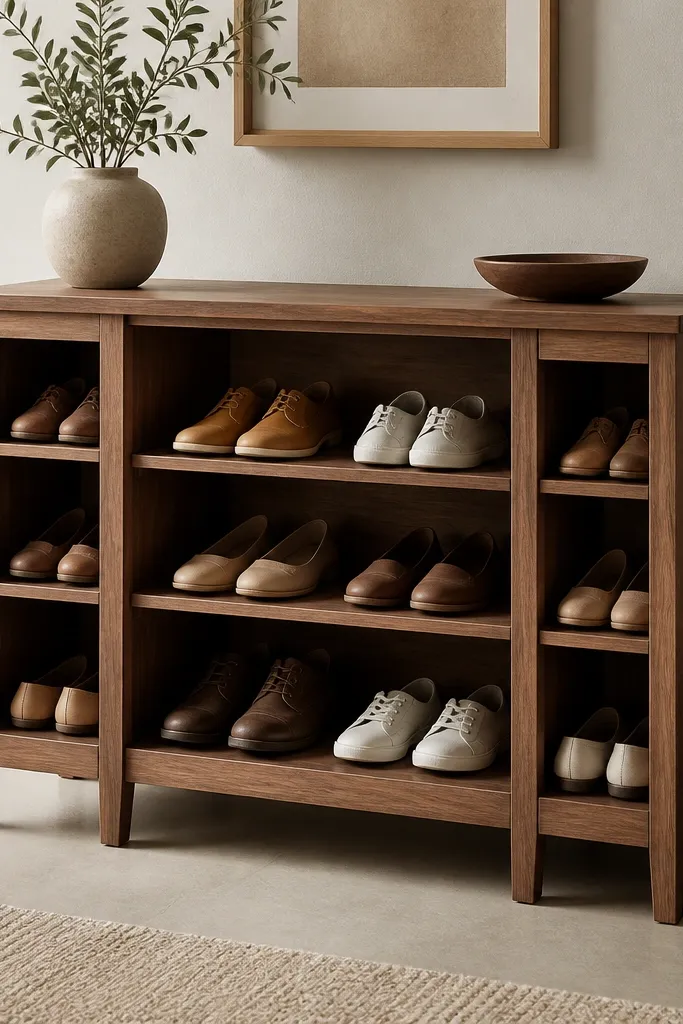
1. Slim 3-Shelf Rack with Chamfered Edges
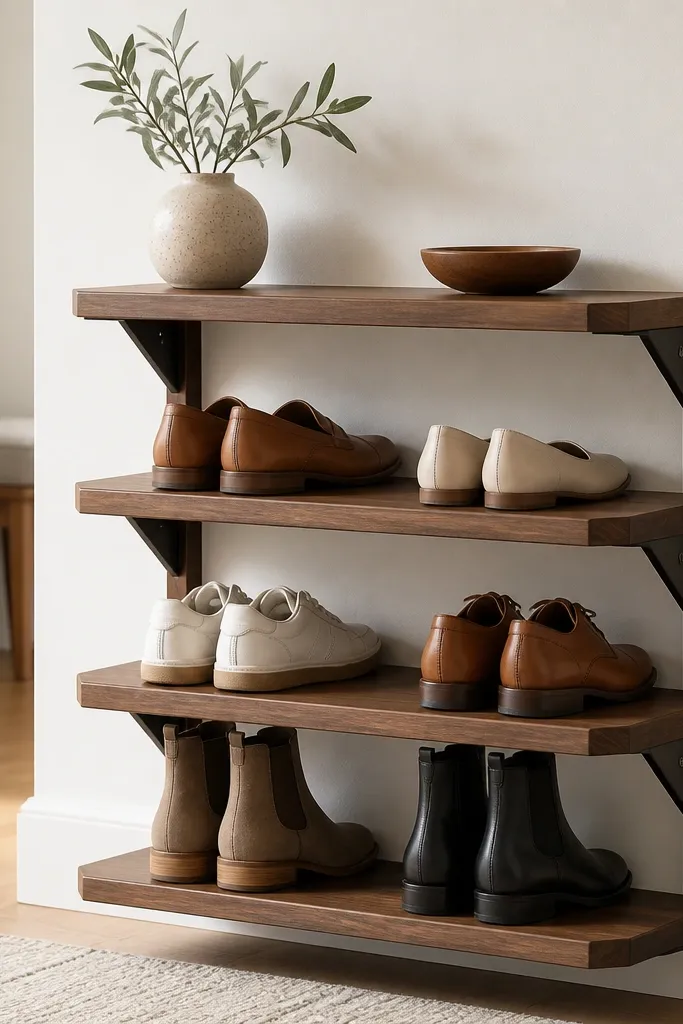
This one looks finished because the front edges are chamfered, not just sanded flat. The walnut stain gives depth to the grain, and the open shelves keep the footprint small while still letting shoes breathe. I like it for apartments where you want a clean entry without a bulky cabinet.
Cut two side panels from 3/4-inch plywood, then add three shelf boards sized to fit between the sides with a consistent gap. Aim for 12 inches deep, and space shelves about 7 inches apart from shelf surface to shelf surface for low shoes. Use 1x2 trim on the front lip for a crisp line if you want it to look extra custom.
Pro tipAfter staining, wipe on two thin coats of satin polyurethane and sand with 320-grit between coats so the chamfers feel smooth.
AvoidAvoid leaving sharp shelf corners - shoes snag and the rack looks unfinished fast.
2. Wall-Mounted Shoe Ledges with Hidden French Cleat
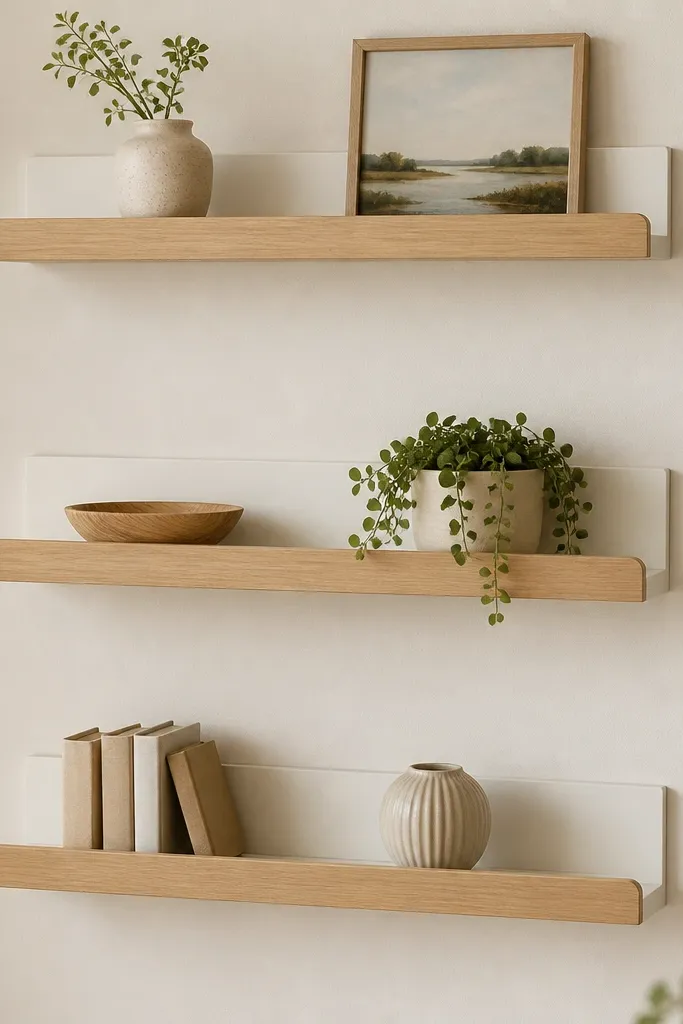
Wall-mounted ledges keep the floor clear, and the slight front lip stops shoes from sliding forward when someone kicks the rack with a heel. The French cleat makes install clean - no visible brackets. I built one in a narrow hallway and the whole space looked taller immediately.
Use 3/4-inch plywood for ledges and cut a 1-inch front lip strip. Mount a cleat strip to studs, then screw the matching cleat to the back of each ledge box. Keep ledges 11.5-12 inches deep and leave about 7-8 inches vertical space between levels.
Pro tipPaint the wall-side surfaces and stain the ledge faces so you get contrast without painting the whole piece.
AvoidDon't mount into drywall alone - anchors alone look shaky and fail once boots hit the front lip.
3. Vertical Boot Rack with Slanted Compartments
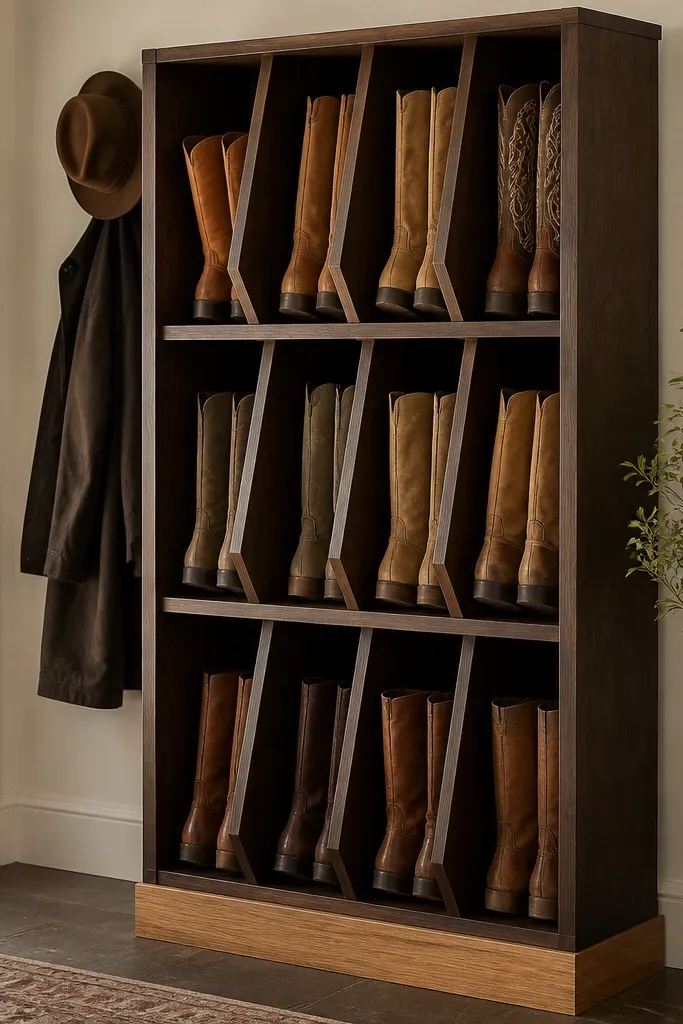
Slanted compartments hold boots upright without crushing the shaft. The staggered layout also makes the unit look like furniture, not a shoe pile organizer. I've used this style in winter entries where wet boots need airflow and a clear place to dry.
Build a back frame from 2x2 lumber or 2x2 equivalent hardwood strips. Create boot slots using 3/4-inch plywood dividers cut at about a 15-20 degree slant. Make compartments 7-8 inches wide and 14 inches deep so tall boots don't tip.
Pro tipAdd a removable bottom drip tray using thin plywood sealed with marine varnish.
AvoidAvoid straight vertical dividers for boots - they tilt and force you to cram.
4. Reclaimed Pallet Shoe Rack with Wire-Grid Front
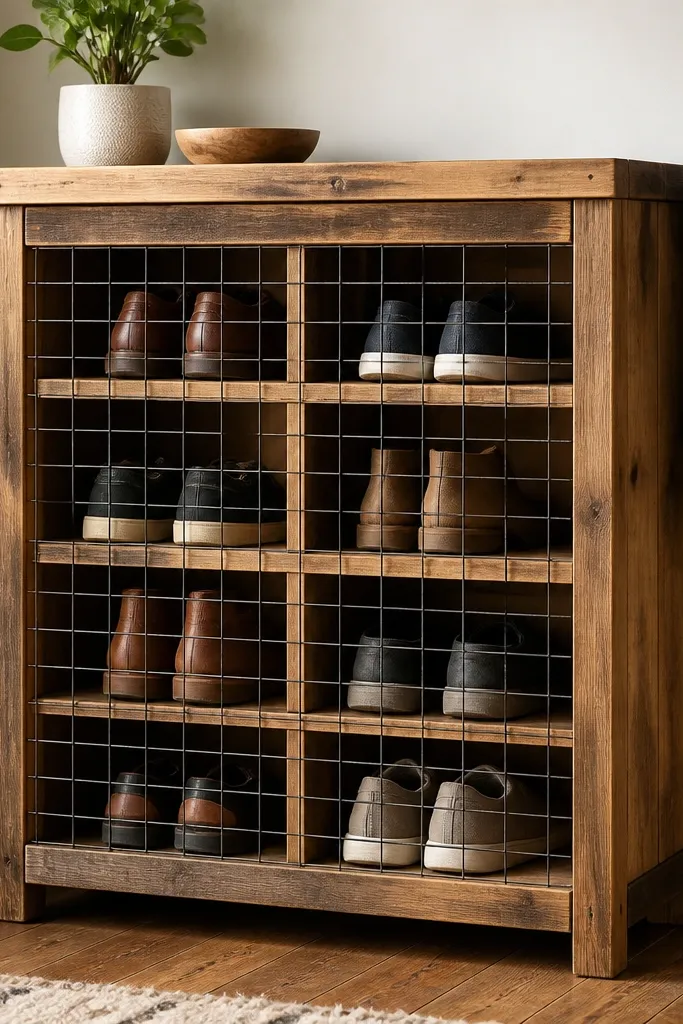
Pallet boards give you instant texture, and the wire grid lets you see shoes while stopping them from tipping forward. It also hides scuffs because the grid breaks up the view. This one looks industrial and works well in garages, laundry rooms, or a mudroom.
Disassemble a pallet carefully and sort boards by thickness - aim for 3/4-inch-ish uniformity for shelves. Build a simple rectangle frame and attach shelf boards with 1.5-inch screws. Stretch a cut-to-size wire grid across the front and fasten it with small screws and washers to prevent sagging.
Pro tipSeal pallet wood with a clear hardwax oil so it doesn't keep absorbing dirt from shoes.
AvoidDon't skip cleaning and sanding pallet stamps and rough spots - it looks dirty even after assembly.
5. Two-Tone Shoe Rack with Paneled Side Frames
Two-tone paint and natural wood reads "designed" because your eye sees clean planes. Paneled sides also make the rack feel like a small cabinet even though it's open for shoes. I did this for a Scandinavian-style entry and it matched the rest of the room better than a single stain.
Use 3/4-inch plywood for shelves and build side frames from 1x3 boards. Add panel inserts from thin plywood cut to fit, then paint the frames with satin interior cabinet paint. Stain only the shelves with a light oak tone and topcoat with satin finish.
Pro tipUse painter's tape to mask shelf edges before painting so the stain line stays crisp.
AvoidAvoid painting over stained wood without sanding and priming - it peels at shelf corners.
6. Rolling Shoe Rack on Casters with Slatted Bottom
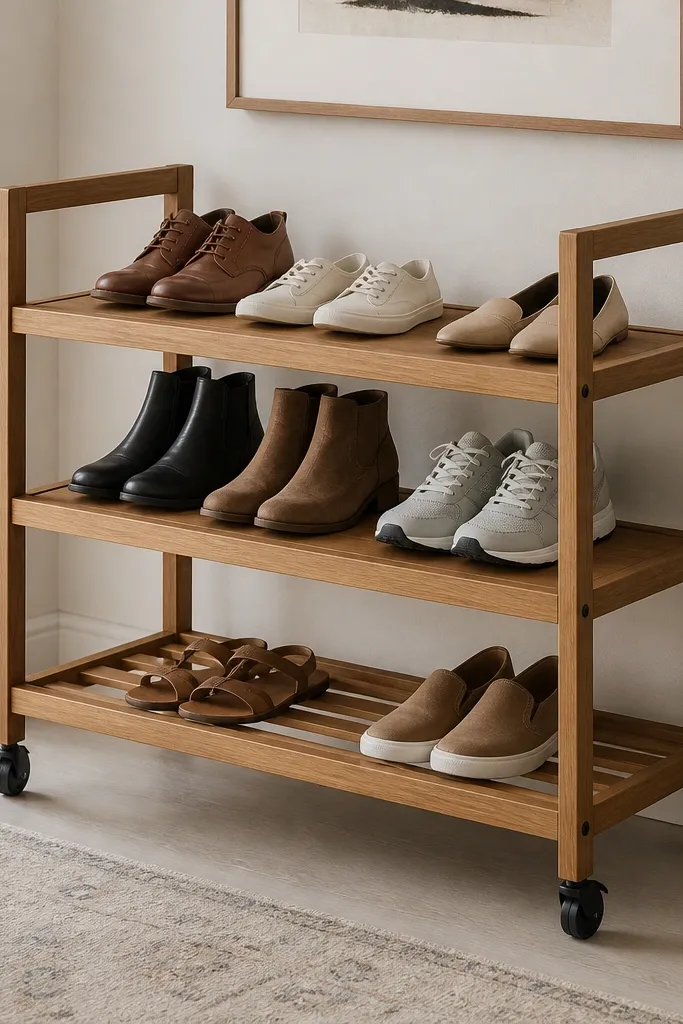
Casters make this practical because you can pull it out to clean and to dry damp shoes. The slatted bottom helps moisture escape instead of pooling. It's the style I recommend for entries where people track rain in and you need quick airflow.
Build a frame from 2x2 or 1.5-inch thick hardwood strips, then add two shelf levels using 1x3 slats for the bottom. Make it 13 inches deep and 28-30 inches wide for a small family. Install locking casters rated for at least 100 lbs total load.
Pro tipAdd a removable catch tray under the slats using a thin sealed sheet so drips don't hit the floor.
AvoidAvoid non-locking wheels - the rack slides every time someone steps too close.
7. Bench-Style Shoe Rack with Lift-Up Seat Storage
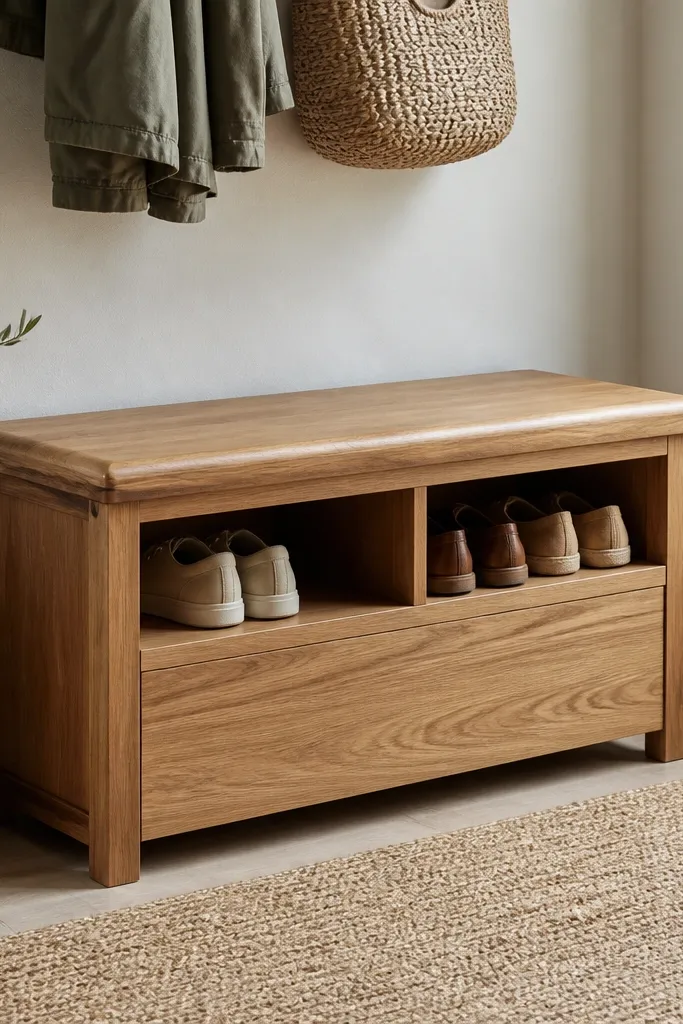
A lift-up seat hides shoes and gives you a place to sit while tying laces. The open compartments under the seat keep shoes from steaming in a closed box. I built one for my own entry and the seating alone made the whole area feel more usable.
Frame the base from 2x3 lumber and add two internal dividers for compartments. Use a hinged seat board with soft-close hinges if you want it quiet. Size compartments to 12 inches depth and 7-8 inches height per level.
Pro tipAdd a thin foam weatherstrip on the seat edge to cut rattling and protect the wood finish.
AvoidAvoid flimsy seat hinges without support - sagging makes the lid scrape over time.
8. Corner Shoe Rack with Triangular Shelves
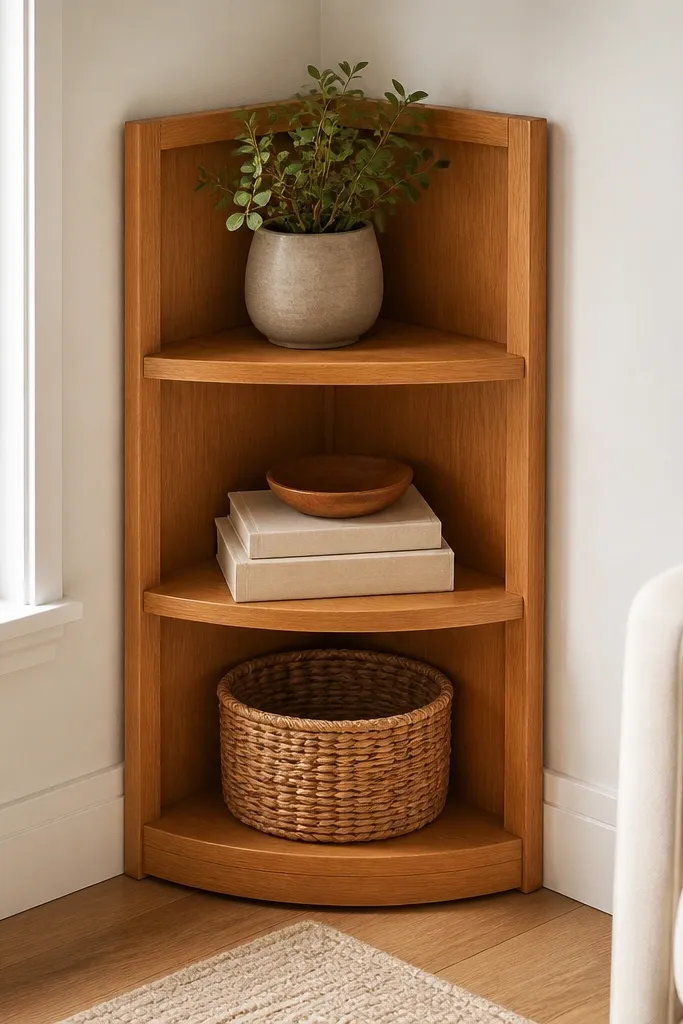
Corner storage fixes wasted space and the triangular shelves prevent shoes from turning sideways. This style looks tidy because the lines follow the room's angles. I made one for a tight foyer and it freed up the wall for a mirror.
Use a wedge frame built from two side panels at 45 degrees and cut triangular shelf boards that match the wedge. Plan 12-13 inches depth along the longest edge so shoes sit flat. Add a back support strip to keep shelves from bowing.
Pro tipSand the shelf edges at a slight radius so shoes slide in smoothly.
AvoidAvoid sizing corners too tight - narrow triangle shelves force overcrowding and scuffed toes.
9. Shiplap-Inspired Shoe Rack with Open Cubes
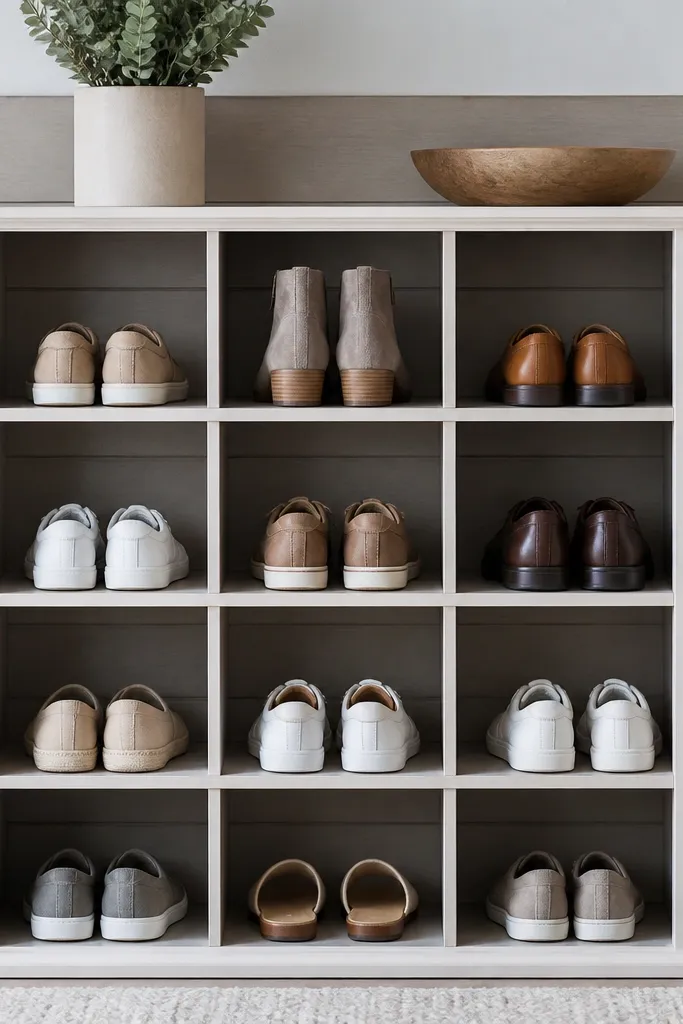
Horizontal back slats make the unit look architectural even with simple cube spacing. Open cubes keep the rack easy to load and unload, and the white trim frames each cubby. This one works in farmhouse rooms without looking like a barn prop.
Build a cube grid from 3/4-inch plywood and use 1x4 slats for the back panel. Cut cubbies to about 6.5-7 inches wide and 9 inches tall for low shoes; adjust height for sneakers. Paint trim in satin white and stain the slats in a light gray to match the floor tones.
Pro tipUse 18-gauge brad nails for trim so it stays aligned and doesn't split plywood edges.
AvoidAvoid a plain flat back - the unit looks unfinished from the side.
10. Minimal Floating Rack with Thin Sides and Thick Shelves
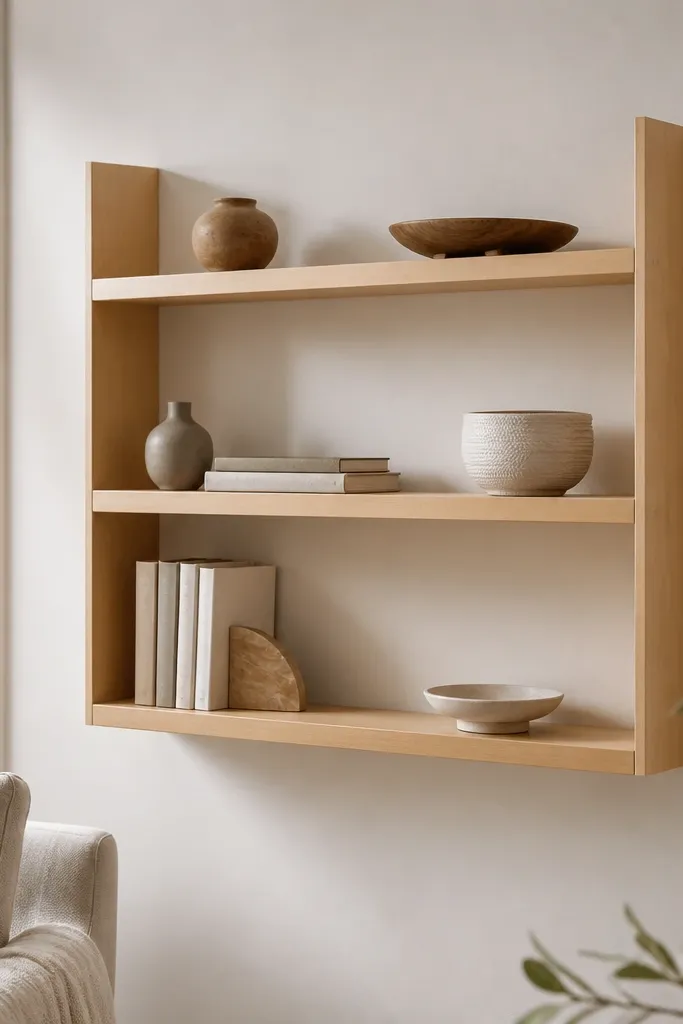
This style reads modern because the sides are slim and the shelves look substantial. It also hides fasteners when you use cleats or rail brackets behind the thin sides. I like it in rooms with light walls because it doesn't visually weigh things down.
Cut shelves from 1-inch thick boards or laminated plywood for a chunkier look. Make side panels from 1/2-inch plywood and attach shelves with hidden cleats inside the side recess. Space shelves at 7 inches for low shoes and keep depth around 11.5-12 inches.
Pro tipFinish with matte clear coat - it hides scratches better than glossy topcoats.
AvoidAvoid visible bracket hardware - it instantly turns the build into a shelf project instead of furniture.
11. Barn Door Style Shoe Rack with Sliding Wood Front
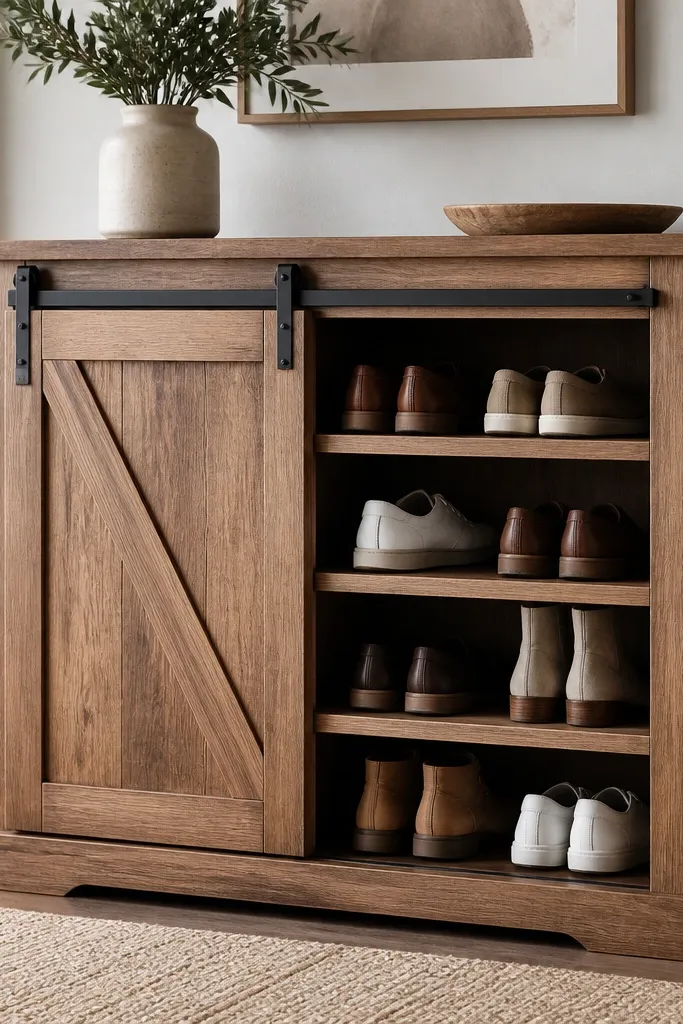
The sliding door hides clutter while still letting you access shoes fast. I built this for a main entry where guests see everything, and it changed the vibe instantly. Black iron track hardware adds a strong focal point.
Build an open shoe cabinet base with 12-13 inch depth. Add a door sized to fully cover the front; leave about 1/2 inch gap around edges. Use barn door track hardware rated for wood doors and mount to studs.
Pro tipAdd magnetic door stops or a soft-close hinge so the door doesn't slam and chip the wood finish.
AvoidAvoid mounting track to drywall - the door will sag and scrape within months.
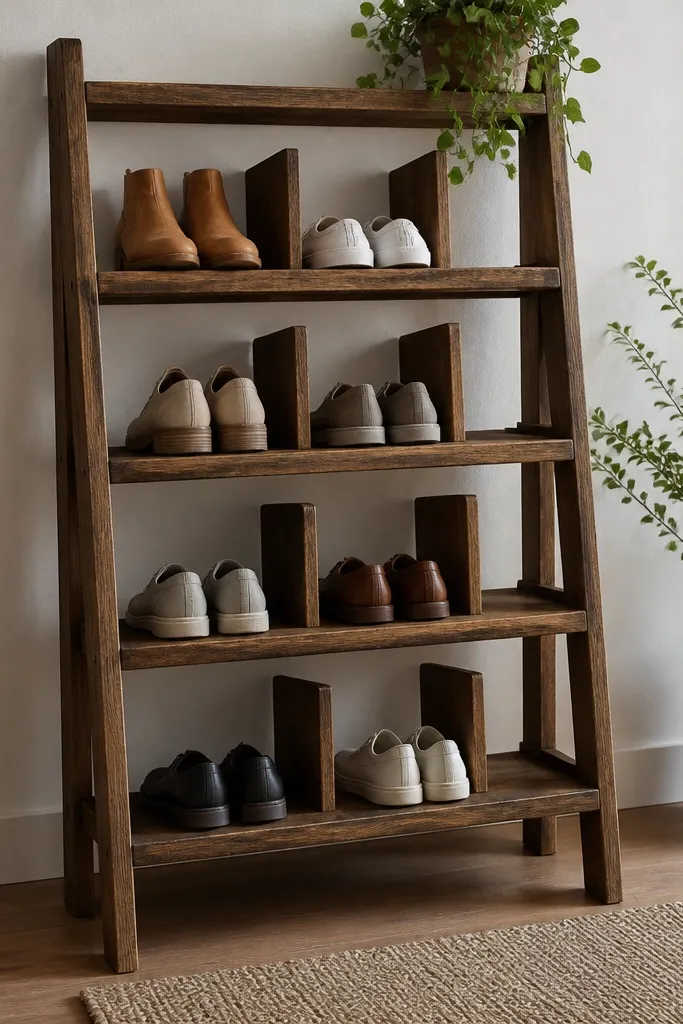
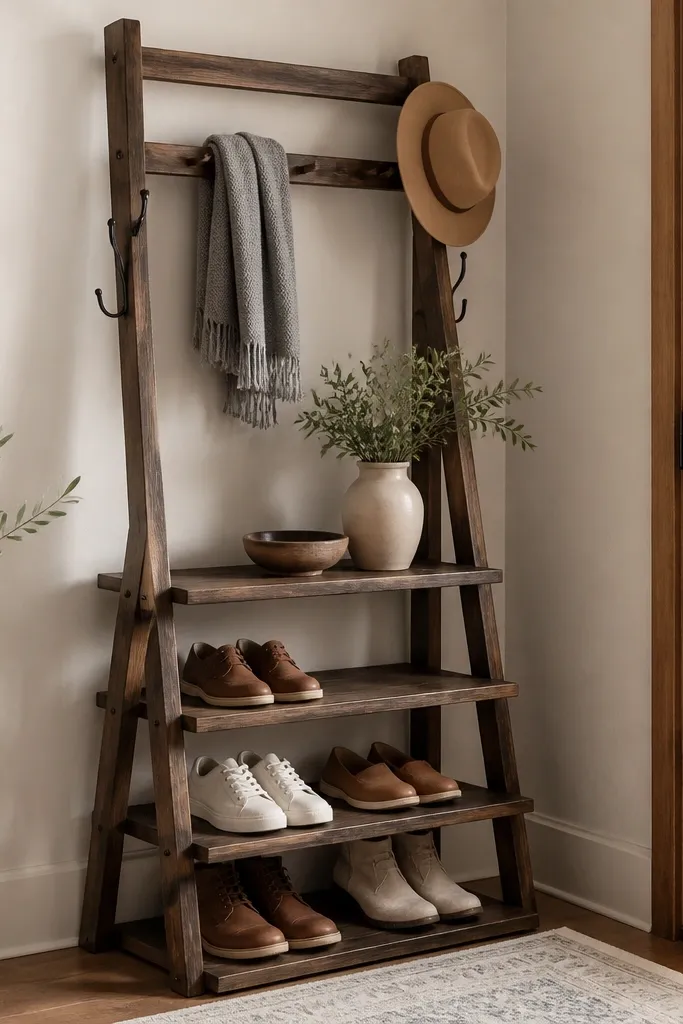
12. Ladder Shelf Shoe Rack with Steps for Sneakers
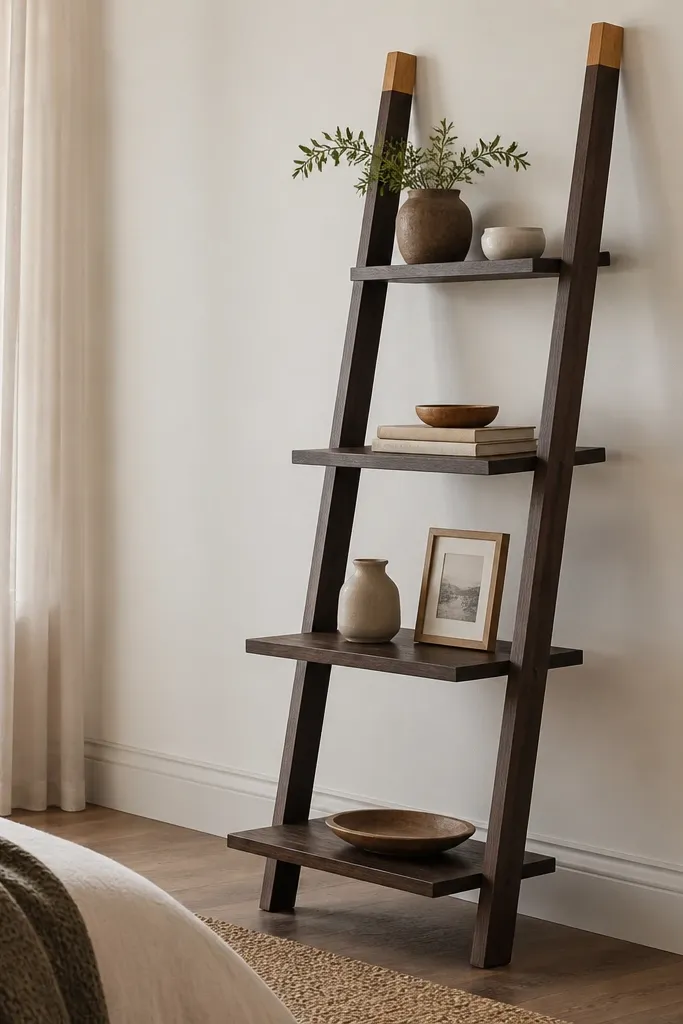
A ladder shelf looks like decor, not storage. Uneven step spacing gives your rack character, and it's easy to scale to your shoe count. I like using this for sneaker displays because the shoes sit high enough to keep soles clean.
Use two ladder rails and attach shelves with pocket holes for clean joints. Keep the shelf depth around 10-11 inches for sneakers and 12 inches if you store bigger sizes. Space steps so each shelf holds about one to two pairs, depending on shoe width.
Pro tipAdd felt pads on the bottom rails so it doesn't scratch floors or slip on smooth tile.
AvoidAvoid leaning it without a floor stop - it tips when you pull boots out.
13. Open Shoe Rack with Drawer for Shoe Care Items
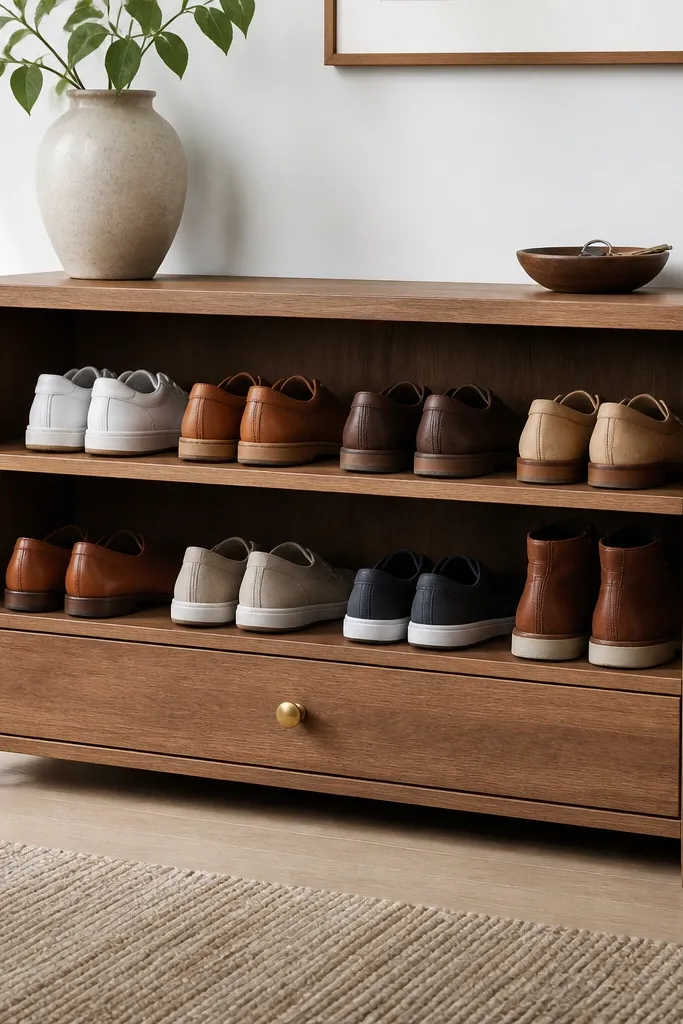
If you keep polish, wipes, and laces nearby, a small drawer makes the rack feel like a real station. The open shelves handle shoe storage, and the drawer handles the clutter that always piles up around shoes. Brass hardware makes it look warmer without needing fancy wood carving.
Build a basic two-level open rack with 12 inches depth. Frame a bottom drawer box from 1/2-inch plywood and mount drawer slides centered. Keep drawer height around 4-5 inches so it fits brush tins and spray bottles.
Pro tipLine the drawer bottom with thin cork sheet so bottles don't rattle and wood stays clean.
AvoidAvoid tiny drawer openings - you'll stop using it and the rack becomes harder to keep tidy.
14. Recessed Shoe Rack with Backer Board and Vent Slots
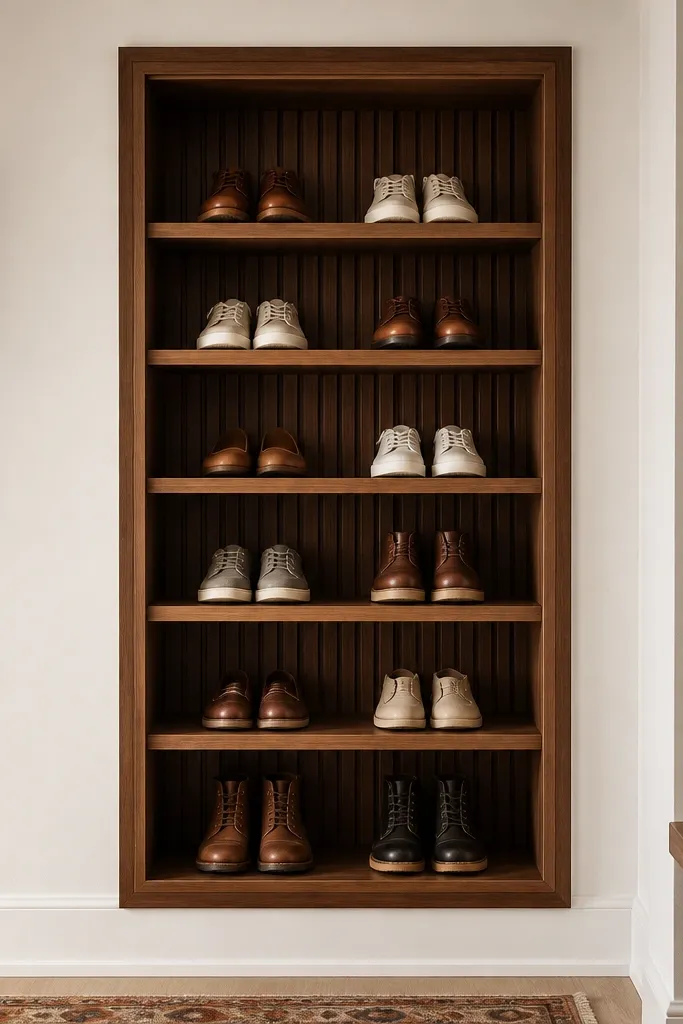
Recessing it makes the whole entry look built-in, and vent slots help air move behind shoes. When you have a wall niche or can create one, this style hides the rack so your hallway looks calm. I used it in a narrow space where freestanding units always looked crowded.
Frame a niche with 2x2 boards and add a trim border. Build shelves from 3/4-inch plywood and cut vent slots in the back panel using a jigsaw. Keep the same 12-13 inch depth and seal all interior edges with varnish so moisture doesn't soak into raw wood.
Pro tipUse a small quarter-round trim on the shelf faces for a finished edge that matches baseboards.
AvoidAvoid skipping venting - closed backs trap odor and make the wood smell musty.
15. Two-Sided Shoe Rack for Shared Entry
If two people share an entry, two-sided storage prevents one side from becoming a dumping zone. The center frame keeps it sturdy and turns the rack into a divider you can place in the middle of a foyer. I've built one for roommates and it reduced the daily argument about whose shoes were where.
Build a rectangular frame and create matching shelf boxes on both sides. Use 3/4-inch plywood for shelves and 1x2 for dividers. Keep depth around 12 inches per side, with a divider thickness that gives each person clear space.
Pro tipAdd a top tray lip so keys and wallets don't slide off.
AvoidAvoid uneven shelf heights - shoes stack crooked and you lose usable space.
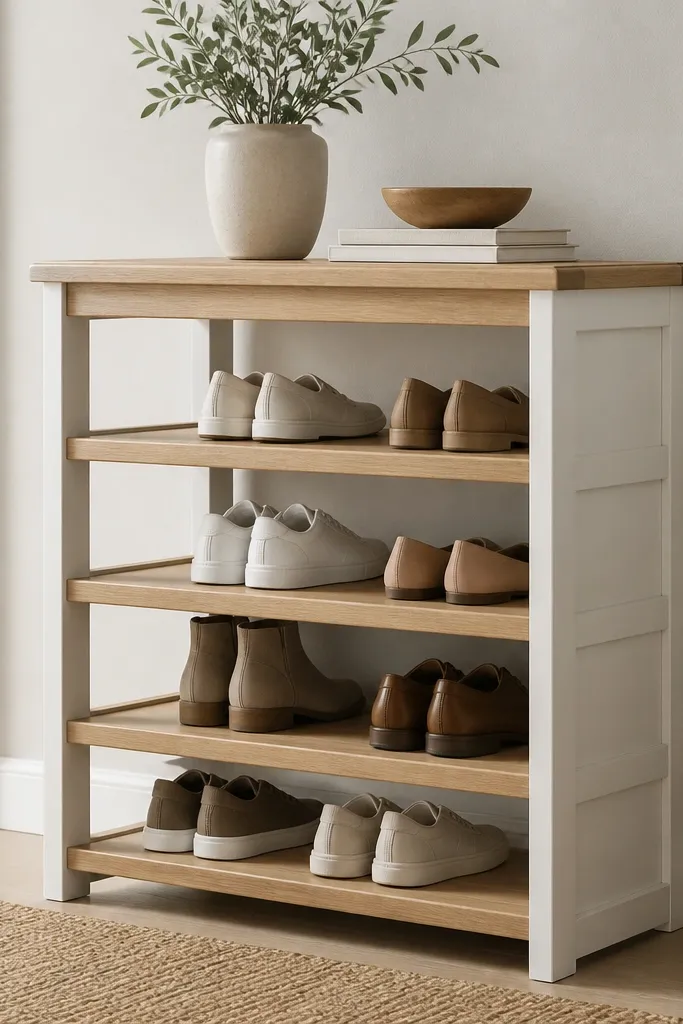
16. Painted White Shoe Rack with Walnut Top and Peg Detail
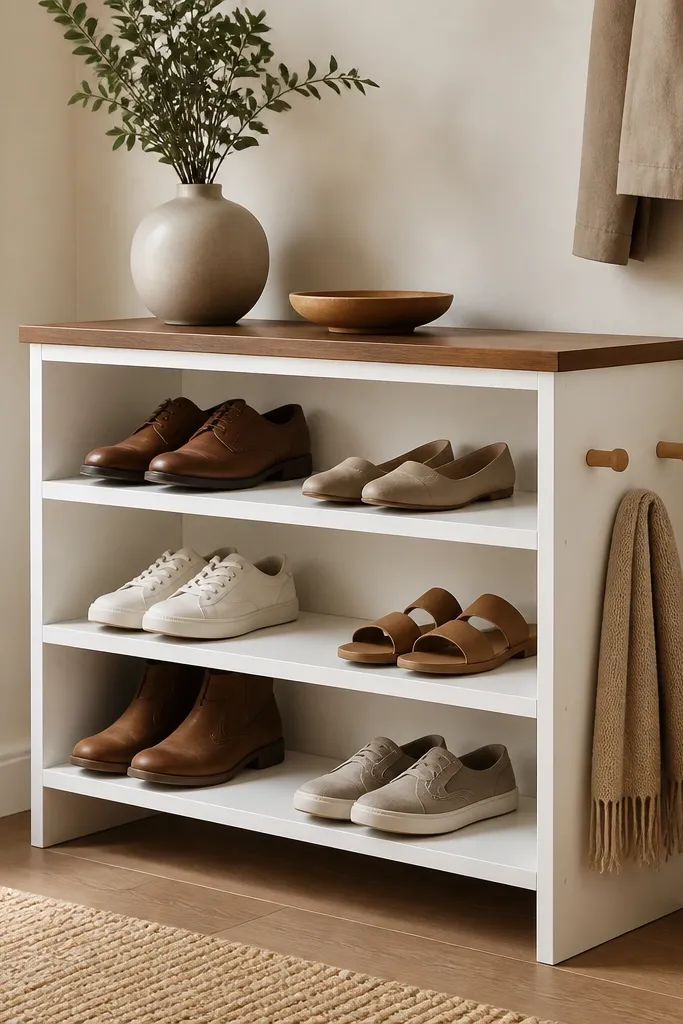
White paint makes the unit look clean and the walnut top adds warmth. The small peg detail is a simple design trick that breaks up flat surfaces. This is the style I reach for when the rest of the room has white cabinets and wood accents.
Paint the main frame in satin white and stain the top plank walnut. Use 3/4-inch shelves and keep depth around 11.5-12 inches. Add peg accents using 3/4-inch dowels glued into evenly spaced holes on the side panels.
Pro tipSeal pegs and end grain before painting so you don't get dark bleed-through.
AvoidAvoid thick paint coats on dowel holes - it fills the holes and looks sloppy.
17. Wood Slat Shoe Rack with Removable Inserts
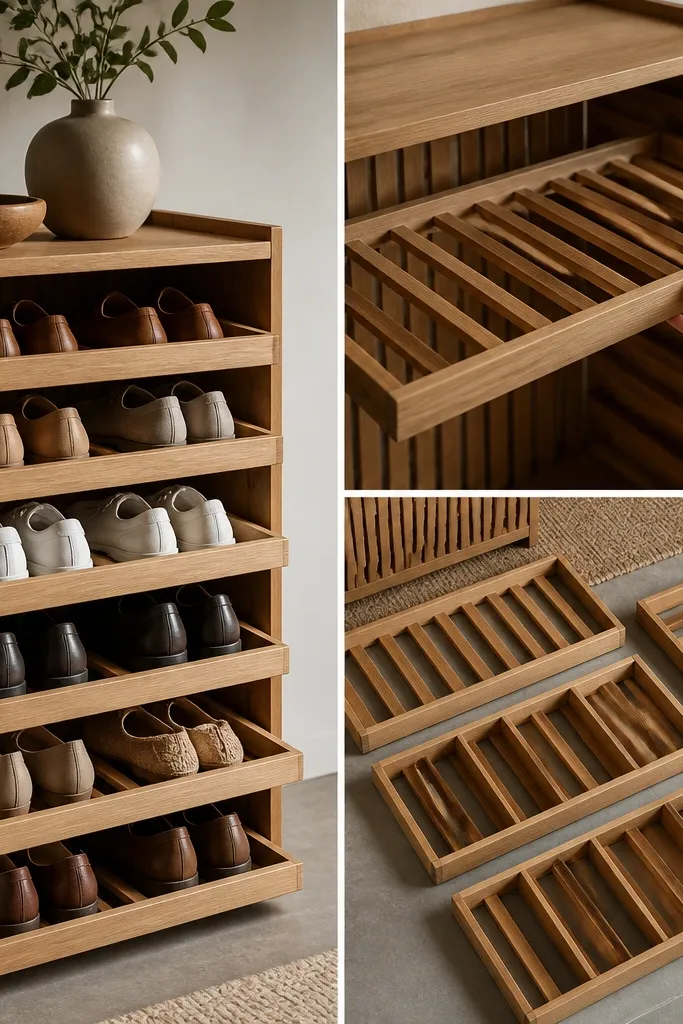
Removable inserts let you switch spacing when your shoe collection changes. I've used this for seasonal swaps - winter boots get wider inserts, summer flats get tighter ones. The slat look also hides scuffs because shoes touch slats, not flat shelf surfaces.
Build a base frame with rails and add fixed side rails inside. Make inserts from 1x3 slats on a thin plywood backing, sized to slide in. Set base depth to 12 inches and make insert heights around 7 inches for low shoes.
Pro tipLabel the inserts on the underside with pencil and a date so you can swap quickly.
AvoidAvoid inserts that fit too tight - swelling from humidity makes them stick.
18. Rustic Ladder Shoe Rack with Reversible Stacking Dividers
Reversible dividers let you adjust for boots versus sneakers without rebuilding the whole rack. The ladder frame gives stability, and the rustic stain makes each piece look consistent even if the wood boards vary slightly. I built one for a family entry where shoe sizes change constantly.
Use ladder rails and mount divider boards with pegs or screws through pre-drilled holes. Cut dividers so one side creates a 2.5-inch gap and the other side creates a 3.5-inch gap. Keep shelf depth around 12 inches and make sure the dividers lock so they don't shift.
Pro tipDrill divider holes with a stop collar so every hole lines up at the same depth.
AvoidAvoid dividers that rely on friction alone - they slide when you pull a shoe.
19. Wood and Leather Strap Shoe Rack
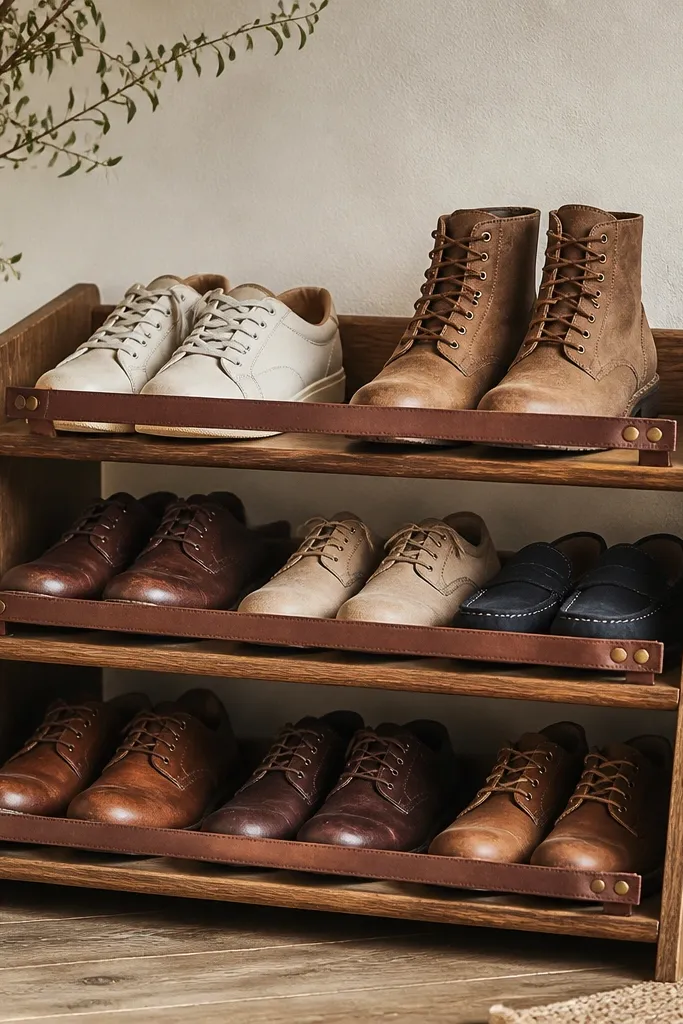
Leather straps add a strong, warm look and they also act like a stop so shoes don't creep forward. I like this for boots and loafers because the strap keeps them aligned without adding bulky rails. It's a small detail that makes the rack feel custom.
Build a two-shelf rack with 12 inches depth. Attach leather straps to the front using brass studs or screws with washers. Space straps low enough to catch the shoe toe area, not the midsole, so you don't crush the shape.
Pro tipCondition the leather after installation so it doesn't crack and so it darkens evenly.
AvoidAvoid straps that are too tight - shoes should slide under without you forcing them.
20. Half-Open Cabinet Shoe Rack with Glassy Finish Back Panel
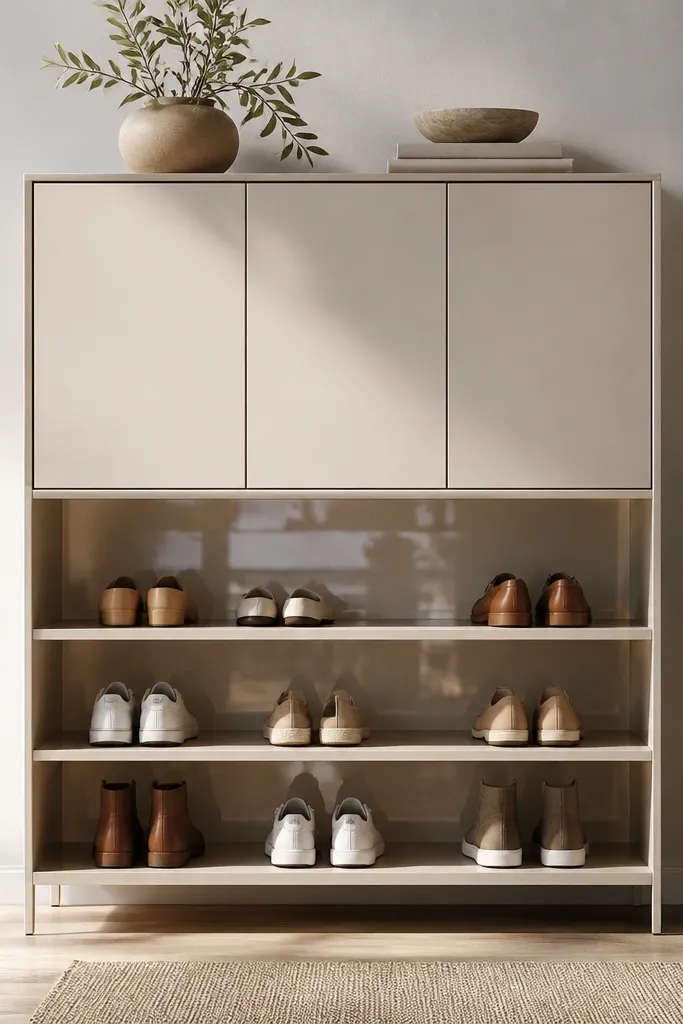
The closed top section hides items you don't want visible, like extra insoles or shoe sprays. A glossy back panel reflects light and makes the inside feel cleaner. This is a good build when you want a furniture look but you still need airflow for shoes.
Use 3/4-inch plywood for the carcass and add a door on the top using simple hinges. For the back panel, paint it with a clear-coat compatible sealer or use a clear acrylic sheet backed behind the wood. Keep lower cubbies 7-8 inches tall and 12 inches deep.
Pro tipUse magnetic latches on the top door so it closes flush and stays quiet.
AvoidAvoid untreated back panels - condensation stains the wood and looks messy.
21. Minimal Japanese-Inspired Modular Shoe Rack
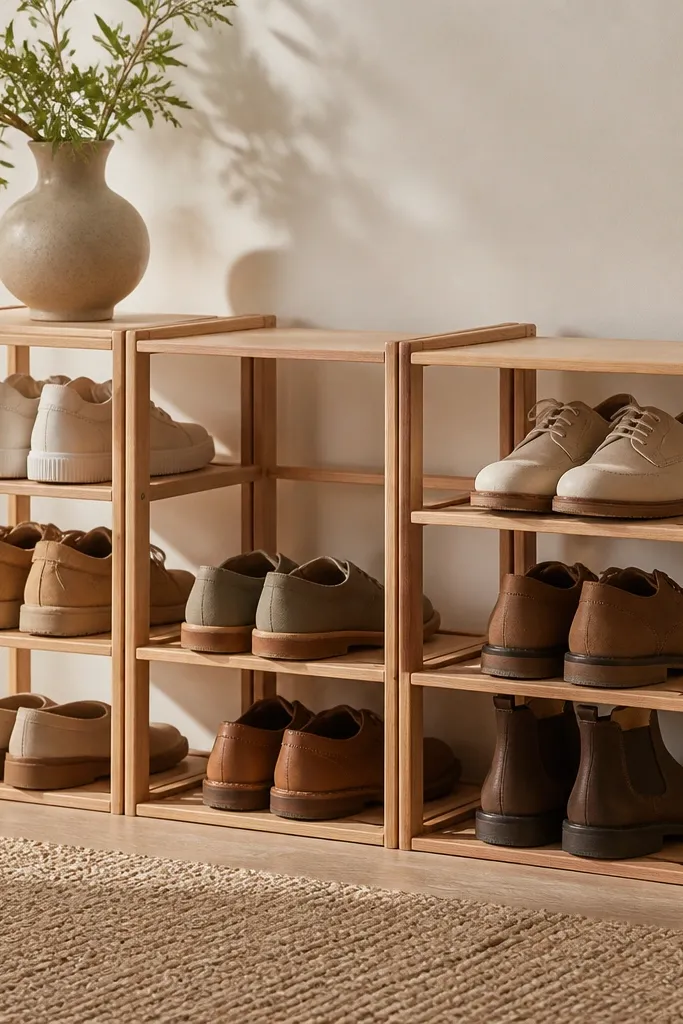
This style looks calm because it keeps the wood tone light and the lines straight. Modular slots let you rearrange the layout as you add shoes. I built one for a small entry and it made the space feel more intentional than a tall cabinet.
Build a low frame, then add removable dividers that create 2-3 inch gaps per slot. Use light oak or birch plywood and finish with matte water-based polyurethane. Keep depth at 11.5-12 inches and shelf height around 6.5-7.5 inches per level.
Pro tipUse edge banding on plywood cut edges so the rack looks smooth and store-bought.
AvoidAvoid high-gloss finishes - they show every scuff from daily shoe movement.
22. Thick-Framed Shoe Rack with Picture-Frame Trim
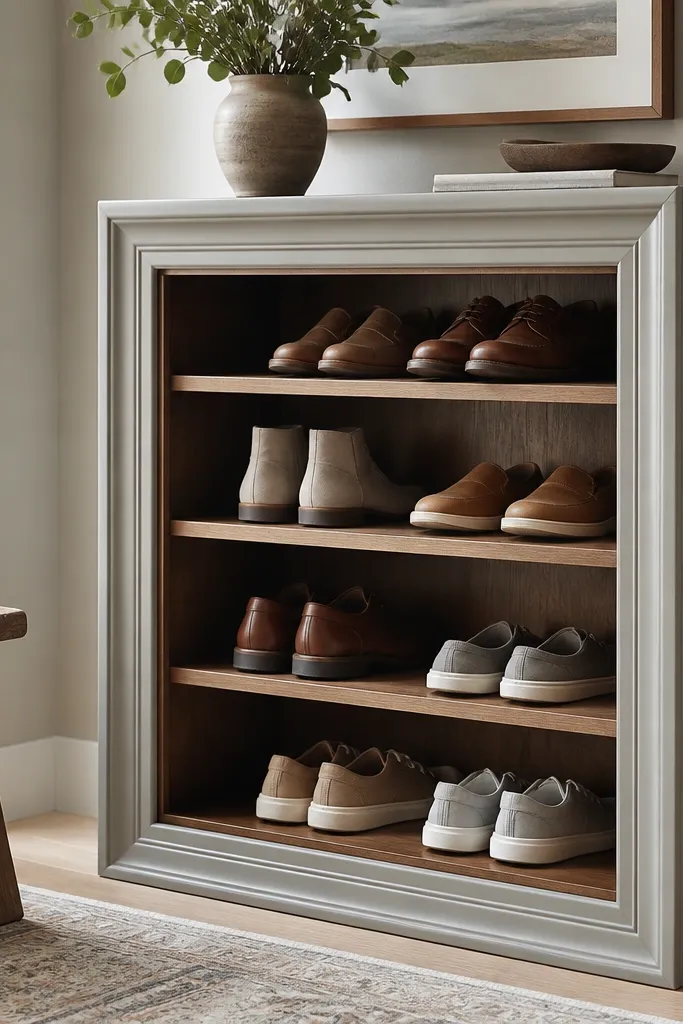
Picture-frame trim makes even a simple open shelf look like furniture. The thick frame hides imperfect plywood edges and gives you a clean shadow line. I used this build in a rental where the walls weren't straight, and the trim made the rack look aligned anyway.
Construct a rectangular frame from 1x3 or 2x2 strips and attach it to a shelf grid inside. Use 3/4-inch plywood for shelves and paint the frame in satin gray. Stain the interior shelves in a medium walnut tone and topcoat both with compatible satin finish.
Pro tipCut trim lengths with a tight miter and test-fit on a scrap board before committing to the final pieces.
AvoidAvoid thin trim - it warps and makes the edges look cheap.
23. Wooden Shoe Rack Ideas to DIY for Kids with Low Front Stop
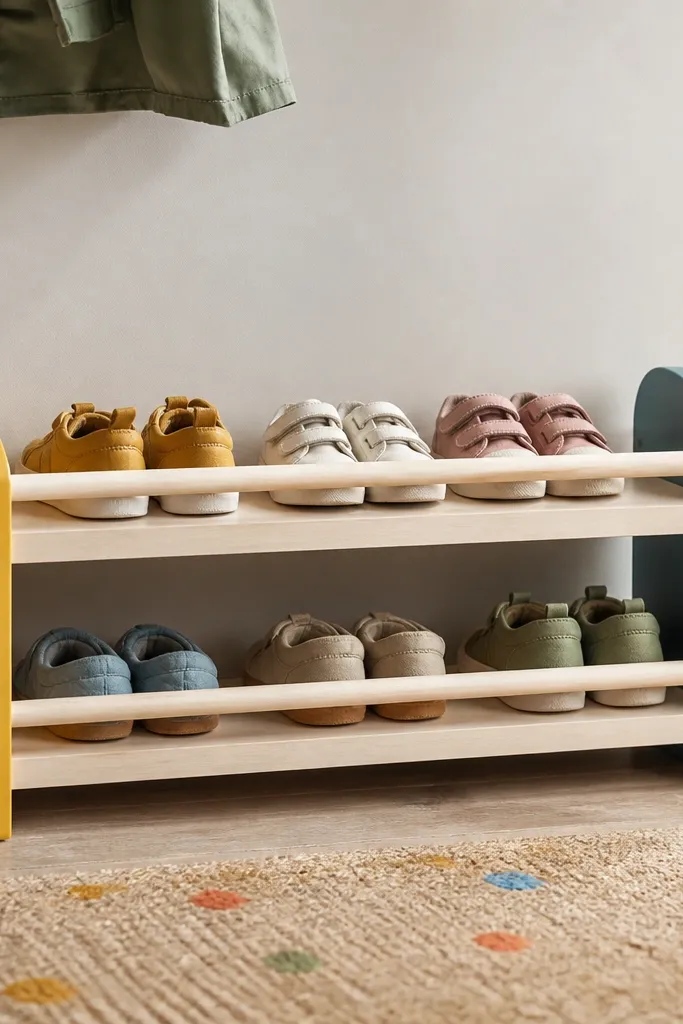
A low rack teaches kids to put shoes away because it's reachable and it doesn't require climbing or bending. The front stop rail keeps sneakers from sliding onto the floor, and the brighter end caps make the rack easy to spot. I built one after finding shoes under the couch every single day.
Build a low unit about 18-20 inches high with two shelves. Use 10-11 inch depth so kids can grab and drop shoes quickly. Add a 1-inch front stop rail and keep shelf spacing around 6.5-7 inches for sneakers and sandals.
Pro tipUse non-slip clear coat on the shelf surface so shoes don't skate.
AvoidAvoid tall shelves for kids - they end up stuffing shoes sideways.
24. Wooden Shoe Rack with Ladder-Style Back Support and Hooks
The ladder back makes the rack strong without a bulky panel, and the hooks handle daily gear like leashes and umbrellas. This build looks good because the back frame has repeating lines. I made one for a mudroom and the hooks cut down on clutter on the floor.
Build a front shelf frame with 12 inches depth and add a back ladder made from 1x2 rails. Attach hooks to the side uprights using screws into solid wood. Keep shelf spacing at 7-8 inches for sneakers and add a top ledge if you want to set items temporarily.
Pro tipPre-drill hook holes and use washers so the wood doesn't split near the grain.
AvoidAvoid flimsy backs - side-to-side wobble makes the whole rack look poorly built.
25. Round-Corner Shoe Rack with Curved Slat Front
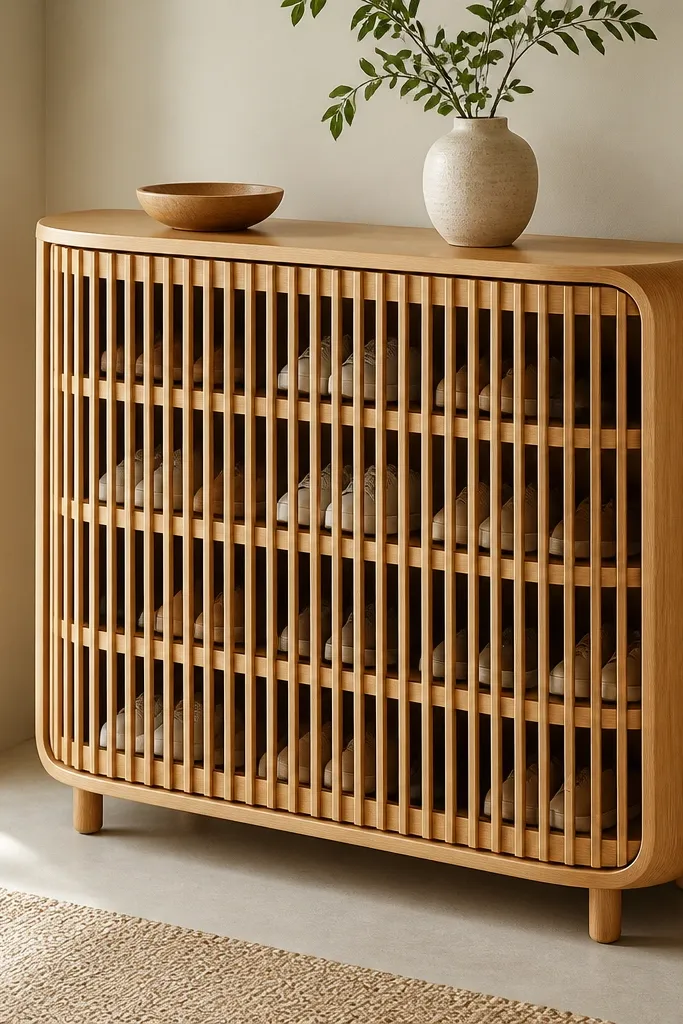
Rounded corners make the rack feel friendly and safe in busy hallways. The curved slat front gives it a sculptural look, and the slats still allow shoes to sit with airflow. I built one for a home with lots of foot traffic, and it doesn't look harsh against the rest of the decor.
Use plywood cut for rounded corners with a template - trace a 12-inch radius curve for each corner. Build a simple open shelf frame and add a slat front with 1x2 slats spaced 1 inch apart. Depth stays at 12 inches and shelf spacing around 7 inches.
Pro tipUse a flexible sanding block on the curves and finish with satin clear coat for a smooth feel.
AvoidAvoid sharp corner transitions between frame and slats - they catch shoes and hands.


