1. Crisp lemon outline on pre-primed canvas

This looks clean because the outline paint sits on top instead of soaking deep. I used pre-primed canvas or I applied a thin fabric primer, then drew the lemon with a brush pen style liner. The dark olive line stays sharp because the base layer was dry and not tacky.
Use a 12-14 oz canvas tote or a tote that feels sturdy and holds shape. Prime with a thin coat of fabric primer or a watered-down acrylic gesso meant for fabric, then let it dry until it feels matte, not sticky. Paint the lemon in 2-3 light coats with a foam brush, letting each coat dry.
Pro tipTrace your design lightly with chalk pencil first, then go over the lines with a liner brush only after the chalk stops smearing.
AvoidI painted my outline on un-primed fabric and it bled into the weave, turning the lines fuzzy.
2. Watercolor-styled stripes using a damp sponge
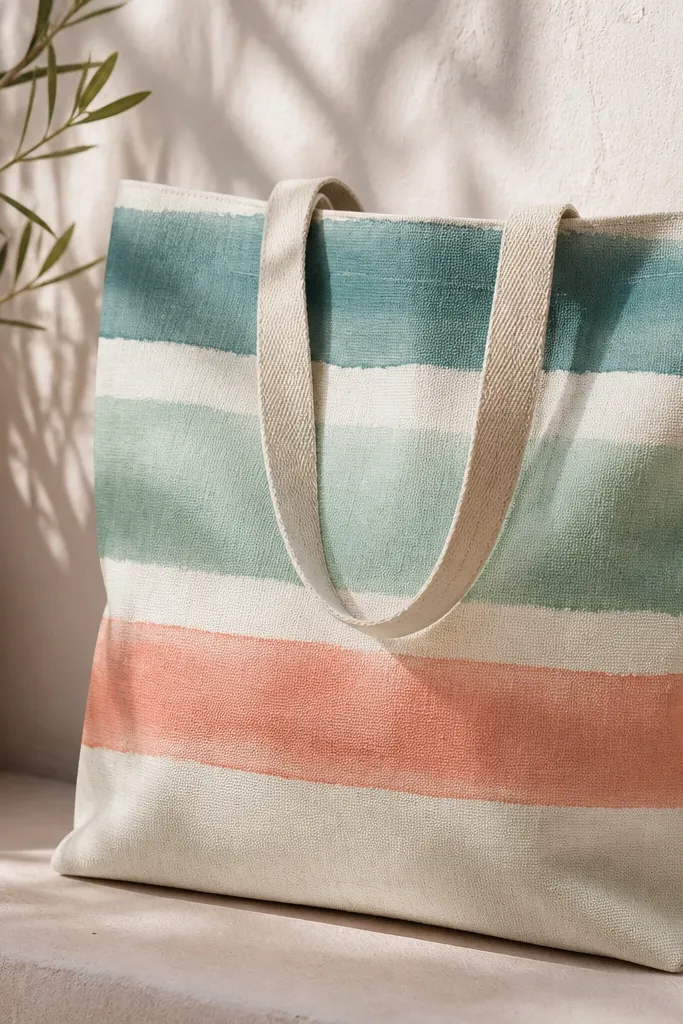
Soft edges happen when you control moisture, not when you rush. I loaded a sponge lightly, then dabbed on the tote while the sponge surface was damp but not dripping. Because the base coat was sealed, the color spreads just enough to look watercolor without turning blotchy.
Start with a base coat in white or very light cream. Use fabric paint thinned slightly with textile medium, or acrylic with fabric medium, then sponge in stripes from top to bottom. Keep each stripe narrow enough that you can blend the next one while it's still damp.
Pro tipWipe the sponge on a paper towel until it stops leaving heavy dots, then dab on the tote in short bursts.
AvoidI added too much water to acrylic and got muddy edges that looked like accidental stains.
3. Black marker-like lettering with acrylic liner and medium
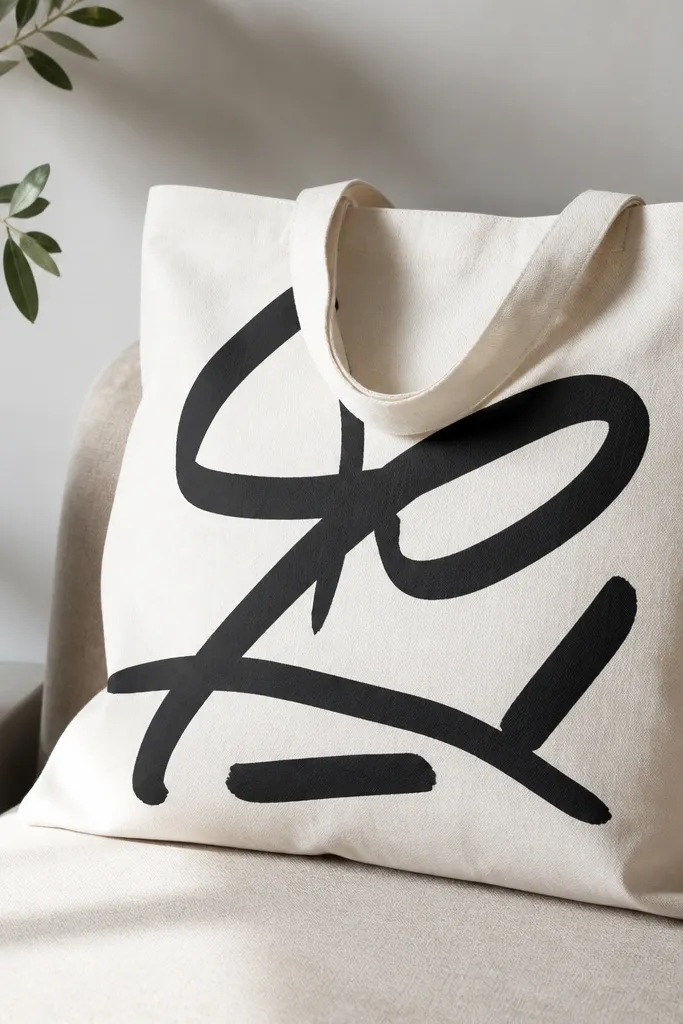
Opaque lettering looks professional when the paint film is consistent and flexible. I used acrylic paint mixed with fabric medium so it stays bendy, then applied it with a fine liner brush. The key is building up opacity in thin layers so you don't get thick ridges on the letters.
Stencil or freehand your words. Mix acrylic 1:1 with fabric medium for smooth flow. Apply one thin coat, let it dry fully, then add a second coat only where the fabric shows through.
Pro tipAfter the first coat dries, check under a bright desk lamp at an angle - thin spots show up instantly so you can fix them before sealing.
AvoidI tried to cover in one thick coat and the letters cracked when I bent the tote.
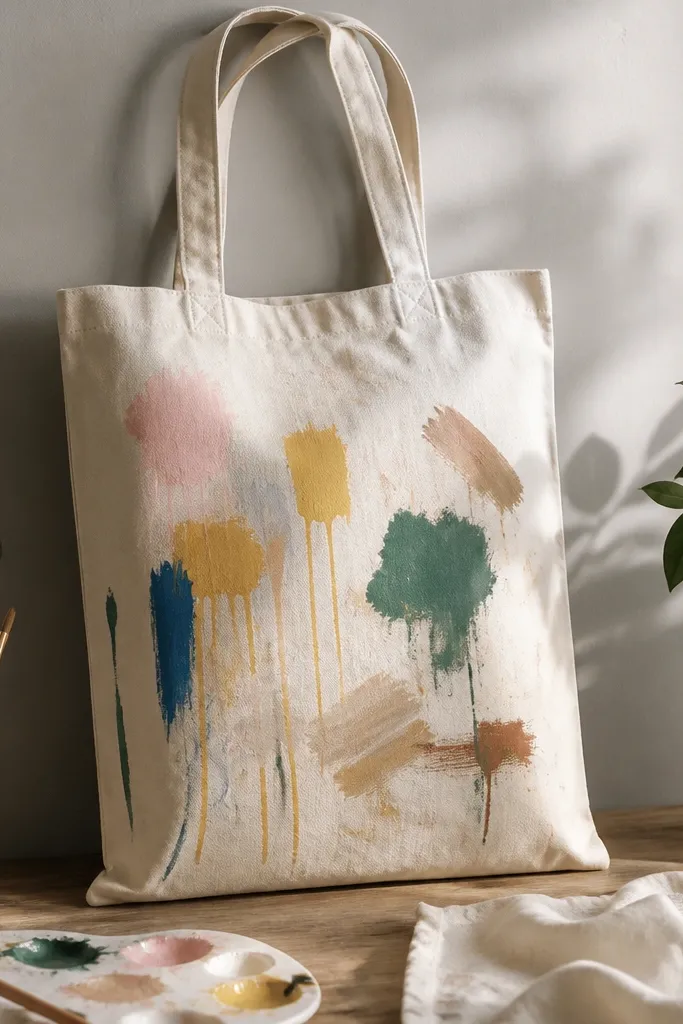
4. Galaxy speckles with a toothbrush splatter guard
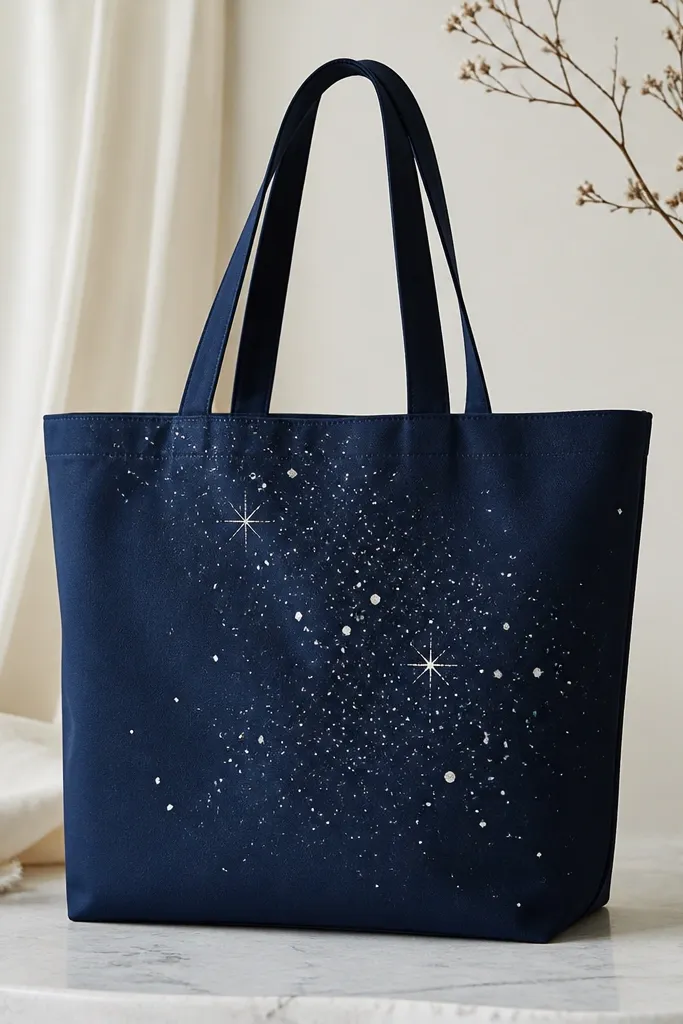
Speckle looks intentional when you block the areas you don't want. I set a simple paper shield around the design area and used a toothbrush dipped in thinned paint to flick small dots. The navy base helps the silver pop, and the shield keeps the splatter from drifting into the handle area.
Paint the tote navy first and let it cure dry. Thin your paint with fabric medium until it flows like cream, then test splatter on scrap fabric. Hold the toothbrush close, flick with your thumb, and move the shield as you build density.
Pro tipFor tiny stars, tap the brush harder and use less paint on the bristles; for bigger stars, load more paint and flick from farther away.
AvoidI splattered on a wet base and the dots merged into smears.
5. Geometric block print with painter's tape edges
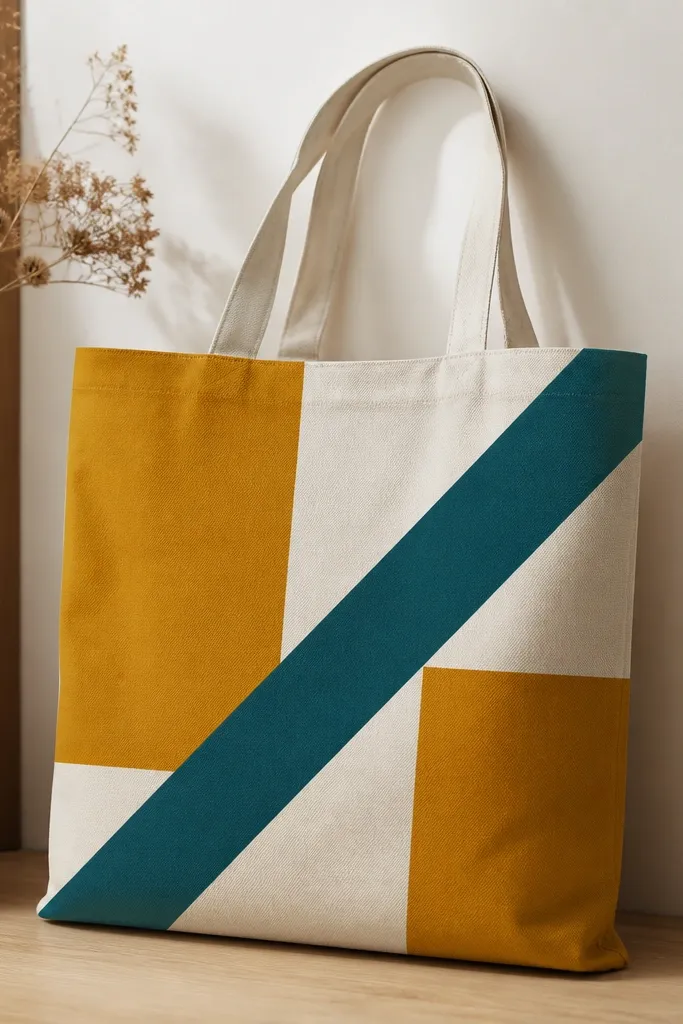
Tape looks crisp when you seal the edges and pull it at the right time. I pressed down painter's tape firmly, then brushed a thin "seal coat" of the base color right along the tape edge so paint couldn't creep under. When you peel too late, tape can tear the paint film; peel too early, and the wet paint smears.
Plan your shapes first so you don't need to re-tape constantly. Use medium-width painter's tape and burnish it with a plastic card. After painting one block color, wait until it's touch-dry (not wet), then remove tape while still slightly tacky.
Pro tipIf you want super-straight diagonals, draw the diagonal with chalk pencil first, then tape to the line.
AvoidI laid tape on unsealed fabric and paint seeped under, making a fuzzy border.
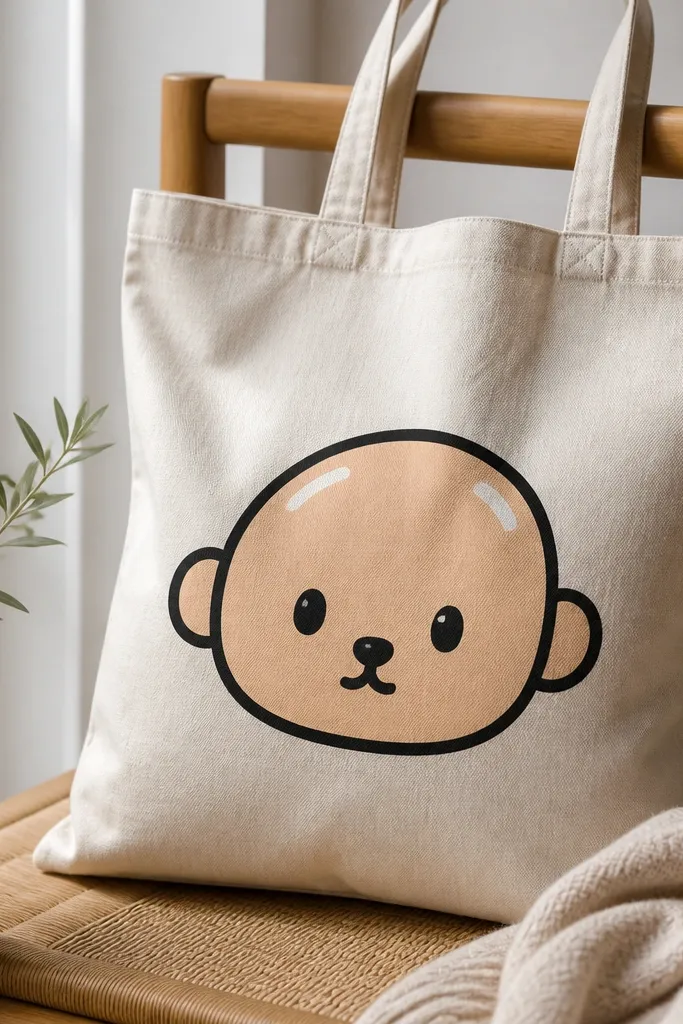
6. Heat-set stenciled flower with layered opacity

Stencil halos happen when paint leaks under the stencil or when you overload the brush. I used a stencil brush with a small amount of paint and dabbed lightly instead of dragging. Layering works because you let the first stencil pass dry before adding the next color.
Use a reusable stencil and tape it down on all corners. Dab fabric paint through the stencil with a foam stencil brush. Let it dry completely between colors, then heat set according to your paint instructions once the final layer is dry to the touch.
Pro tipWarm the stencil with your hands for 10 seconds before painting - it lays flatter and reduces gaps.
AvoidI kept repainting the same stencil spot while it was wet and got a blurry halo.
7. Outline + fill combo using brush + fabric markers
This method gives you control over line quality and color coverage. I used a small round brush for the outline so it flexes like a hand-drawn line, then filled with a thicker fabric paint for even coverage. The fill stays smooth because I used a foam brush and kept the layer thin.
Outline first with a fabric marker or brush pen style paint, then let it dry completely before filling. For the fill, mix fabric paint to a creamy consistency and apply with a foam brush in two thin coats. Avoid overworking the fill or you'll lift the underlayer.
Pro tipKeep a damp rag nearby and wipe your brush edge often - it prevents thick paint ridges along the boundary.
AvoidI tried to fill while the outline was still tacky and the colors bled together.
8. Bleach resist pattern on dyed tote
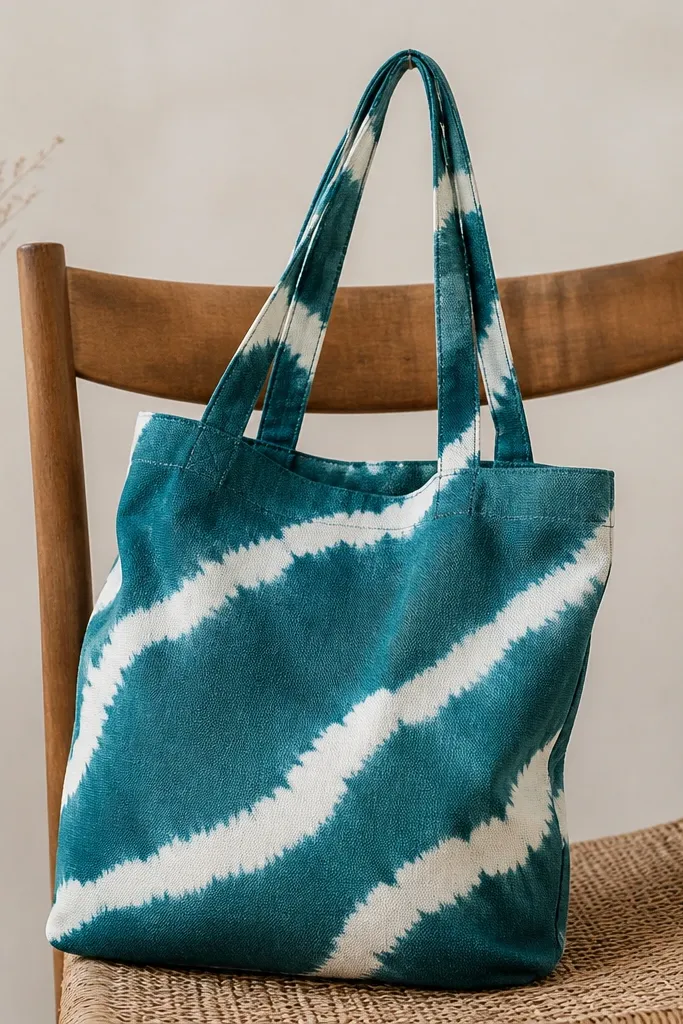
Resist work looks best when the fabric is evenly dyed first and the resist is applied with control. I dyed the tote solid teal, then used a squeeze bottle to apply bleach in a wave pattern. The bleach eats the dye at the surface, so you get contrast without needing to paint every white area.
Use gloves and do this over a sink or plastic tub. Apply bleach resist with a squeeze bottle for consistent lines, then rinse thoroughly after the effect appears. Neutralize if your product recommends it, then dry flat and heat set the remaining dye if instructed.
Pro tipTest on a scrap piece of the same fabric - bleach strength changes how fast the pattern appears.
AvoidI sprayed bleach too broadly and the pattern turned into a cloudy mess.
9. Pastel ombre from handle to bottom
Ombre looks smooth when you blend while the paint is still workable and you keep a consistent amount on your sponge. I used three diluted pastel shades and blended them in bands, then lightly feathered the boundary areas with a clean damp sponge. The tote looks intentional because the blending happens before paint grabs.
Paint a base layer in cream or off-white first. Mix lavender and pale pink with fabric medium so they stay flexible and don't crack. Sponge in horizontal bands from top to bottom, then blend the edges with a mostly clean sponge before it dries.
Pro tipBlend in one direction only - back-and-forth makes streaks on canvas.
AvoidI kept adding color after the paint started to set and got hard lines between shades.


