1. Sunburst with Tape Rays on a Pocket Tote
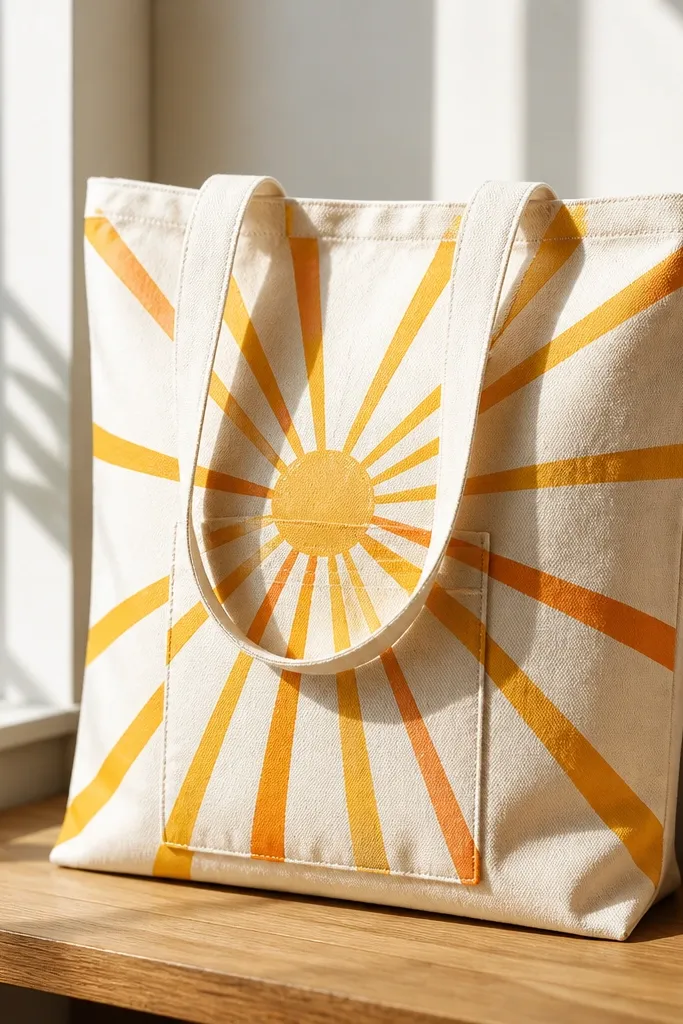
This looks sharp because the rays are straight and evenly spaced, so your eye reads it as "graphic print" instead of paint. I use a limited palette: warm yellow for the center, orange for the mid rays, and a thin red line as the outer accent. The tape keeps the color boundaries crisp on woven canvas, even if your tote is a little wrinkled.
Lay the tote flat and tape a paper template for the circle so you don't chase it. Use painter's tape to mark 10-14 rays, each about 1/2 inch wide, then paint from the outside toward the center. Peel tape after 10-15 minutes when paint is tacky, not fully dry. Leave the pocket area untouched or paint only a tiny highlight inside the pocket opening.
Pro tipPress tape down with your fingernail along every edge; paint will creep less if the tape is sealed.
AvoidDon't peel tape once the paint is hard - you'll lift fibers and get ragged edges.
2. Two-Color Geometric Block Front
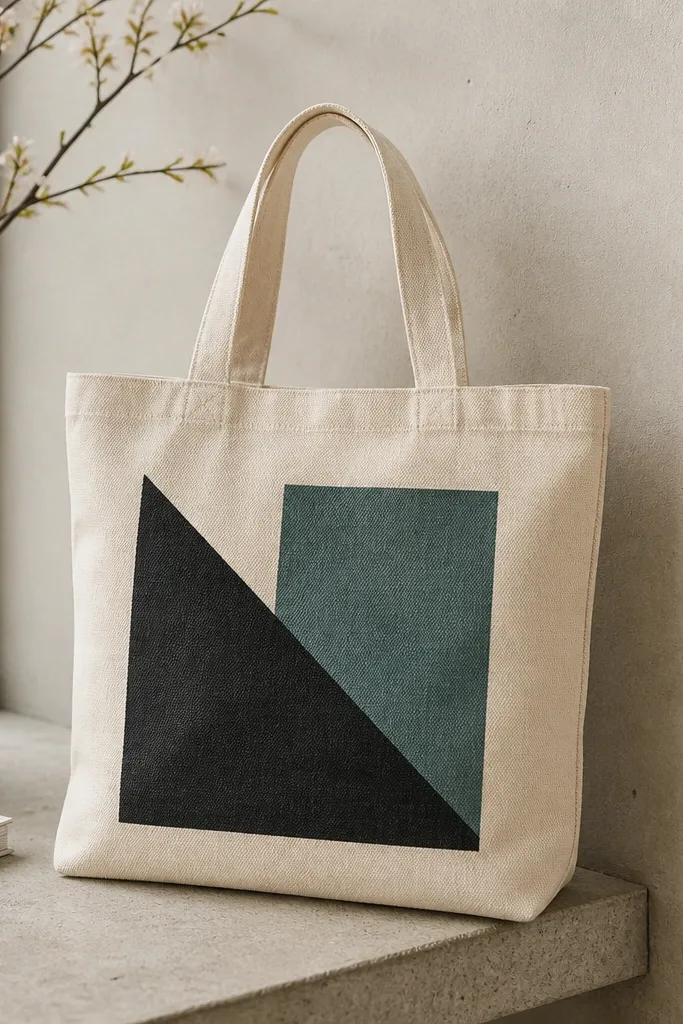
Geometric blocks hide tote wrinkles because the design is mostly flat color fields. The contrast between black and teal reads clean from a distance, which matters for tote bags you grab quickly. I like this because it's forgiving - if a corner is slightly imperfect, it still looks intentional like a screen print.
Mark a rectangle grid on the tote front using chalk pencil: for example, a 9x6 inch main area. Paint one shape black and the other teal, keeping a 1/4 inch border between shapes so colors don't bleed. Let the first color dry at least 20 minutes before filling the second.
Pro tipUse a foam brush for big blocks so you don't leave visible streak lines in the paint.
AvoidSkip watery paint - thin wash colors bleed into the weave and blur the edges.
3. Stencil Botanicals in One Spot Color
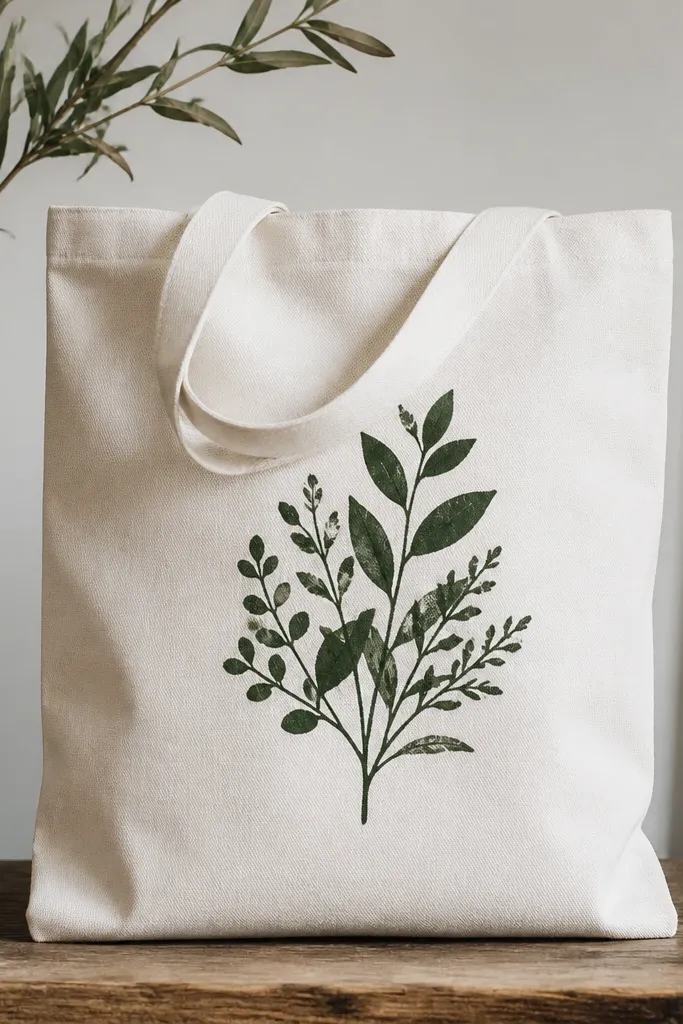
Stencils give you "illustration" without the sketching stage. One spot color looks intentional and clean, especially on small-space totes where you don't want a busy collage. I use forest green because it pops against off-white canvas and looks good even with minimal detail.
Tape stencil corners down with painter's tape so it doesn't shift. Dab paint on with a stencil brush (not a regular flat brush) using short taps. Build coverage in 2 light passes - thick paint makes edges fuzzy when it hits the canvas texture.
Pro tipTest the stencil on scrap fabric first to see how much paint your brush loads.
AvoidDon't drag the brush across the stencil - it smears under the edges.
4. Sponge Ombre from Bottom Hem
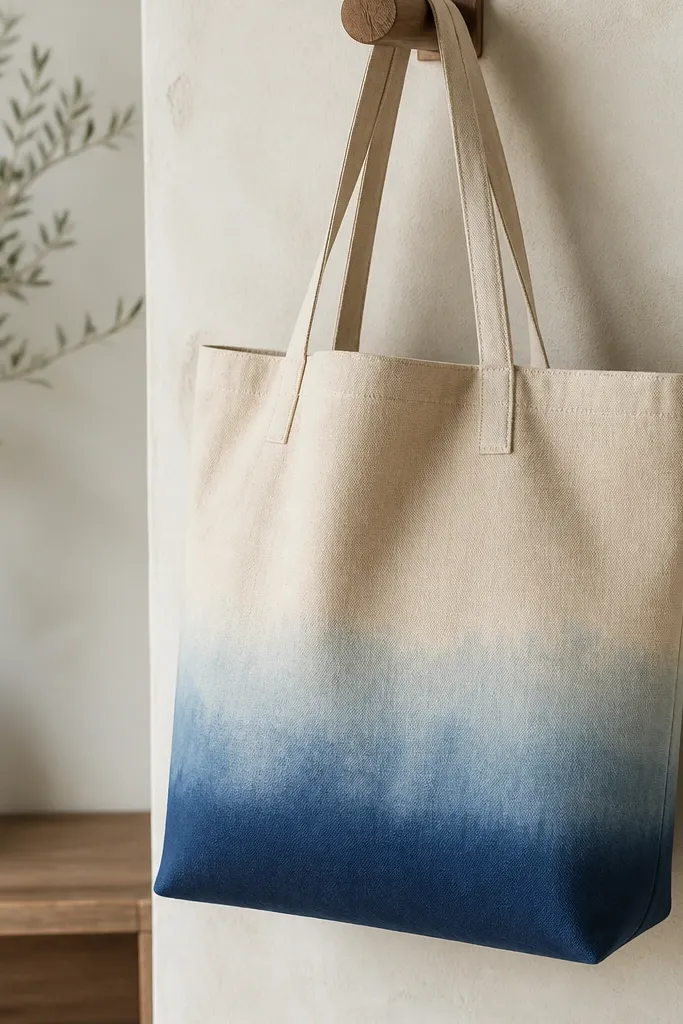
Ombre hides uneven absorption because the fade is gradual. The sponge texture also matches the tote's woven look, so nothing looks pasted on. I like using indigo to sky blue because the transition is pretty even with quick layering.
Mix indigo paint with a little fabric medium for better flexibility. Use a sea sponge and keep it mostly dry - dab, lift, dab. Work upward in horizontal bands: 1-2 inch steps, rinsing the sponge between colors. Stop at about 3-4 inches from the top of the gradient so it doesn't swallow the whole tote.
Pro tipUse a scrap cardboard strip under the tote front so paint doesn't soak through to the back.
AvoidDon't soak the sponge - wet paint creates tide marks.
5. Dry-Brush Waves with a Single Accent Dot
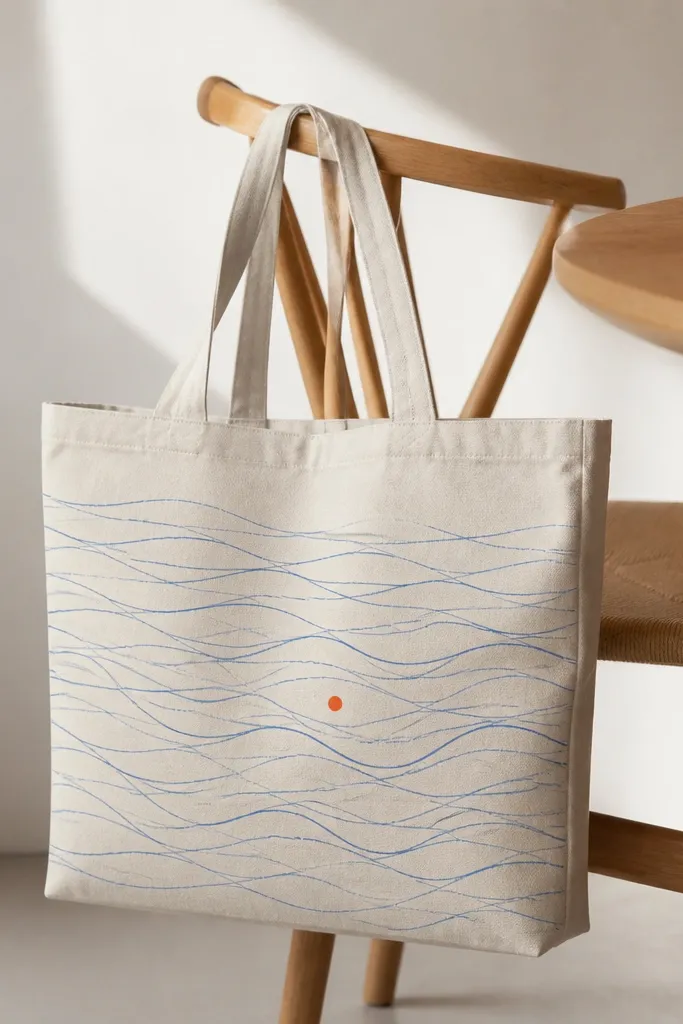
Dry-brush waves look airy and take almost no space, which is perfect for small tote fronts. Using only one accent dot stops the design from feeling empty but keeps it minimal. The light blue lines also show the canvas weave underneath, which makes it look more handmade than fully covered paint.
Load a flat brush with light blue paint, then wipe most of it off on a paper towel until it looks like dusty color. Paint 6-10 short wave arcs across the lower-middle. After drying, add one coral dot with a small round brush.
Pro tipRotate the brush angle while painting waves so the line thickness varies naturally.
AvoidDon't fully load the brush - thick dry-brush turns into blotches.
6. Lettering Only: Curved Name with Paint Pen
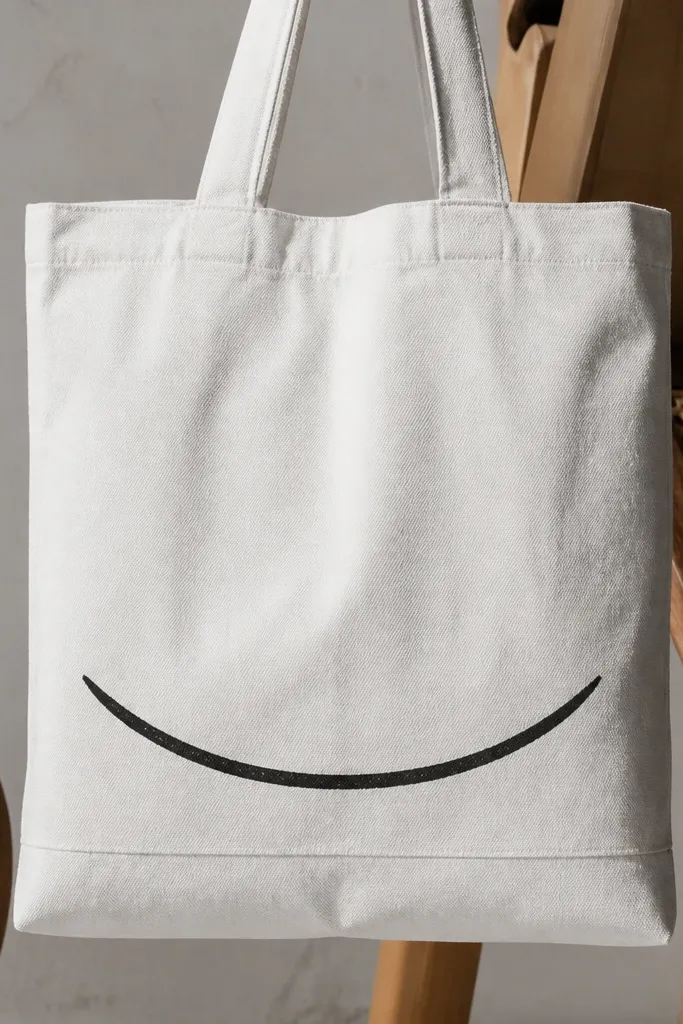
Minimal lettering is the easiest way to look polished without filling every inch. A curved baseline makes it feel designed instead of random scribble. I've done this for library totes and it always gets compliments because the typography looks intentional.
Use a fabric paint pen or paint marker made for fabric. Lightly sketch the curve with chalk pencil first, then trace the outline. Fill only if your pen is translucent; otherwise just outline to keep the look crisp.
Pro tipPractice the curve on paper first - tote fabric stretches slightly and your line will follow your hand's rhythm.
AvoidDon't write directly on wet paint - marker bleeding makes fuzzy letters.
7. Coffee Stain Style Background with Marbling Top
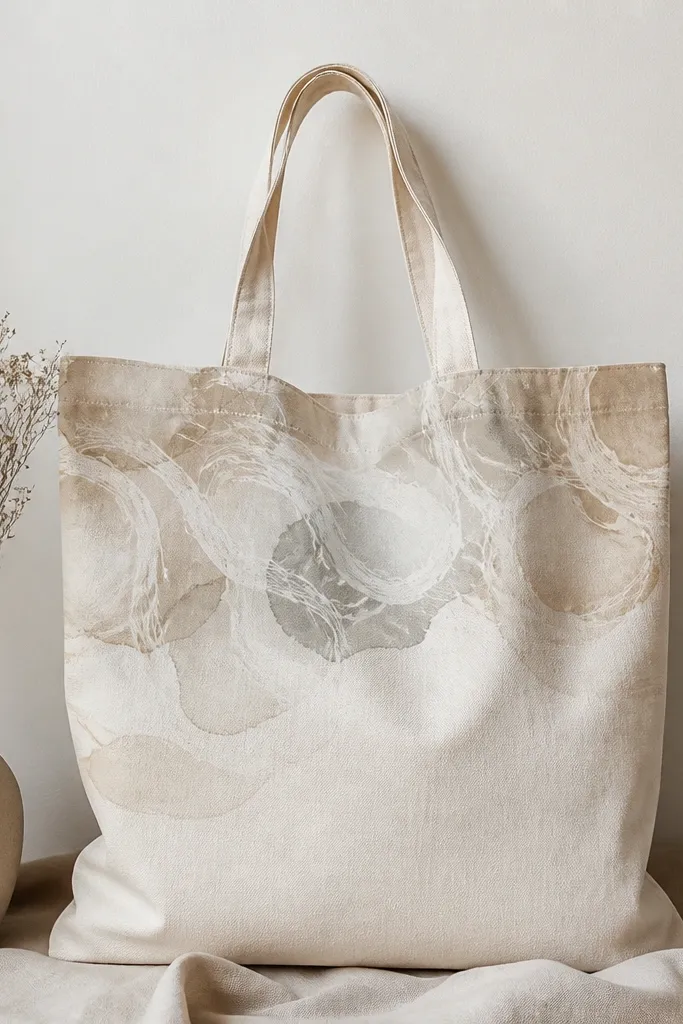
This is my "I want texture but not chaos" method. The stain look hides small application marks, and the marbling layer adds movement. It also works on smaller tote fronts because the background stays airy.
Mix watered-down brown paint (about 1 part paint to 2 parts water) and dab it with a crumpled paper towel to create irregular circles. While it's still damp, add off-white paint in thin lines and swirl gently with a toothpick. Let it dry fully before adding any darker outlines.
Pro tipKeep the brown wash lighter than you think - canvas dries darker.
AvoidDon't add marbling after the background fully dries - it won't blend and will look like separate layers.
8. Polka Dot Grid with Balloon-Pattern Contrast
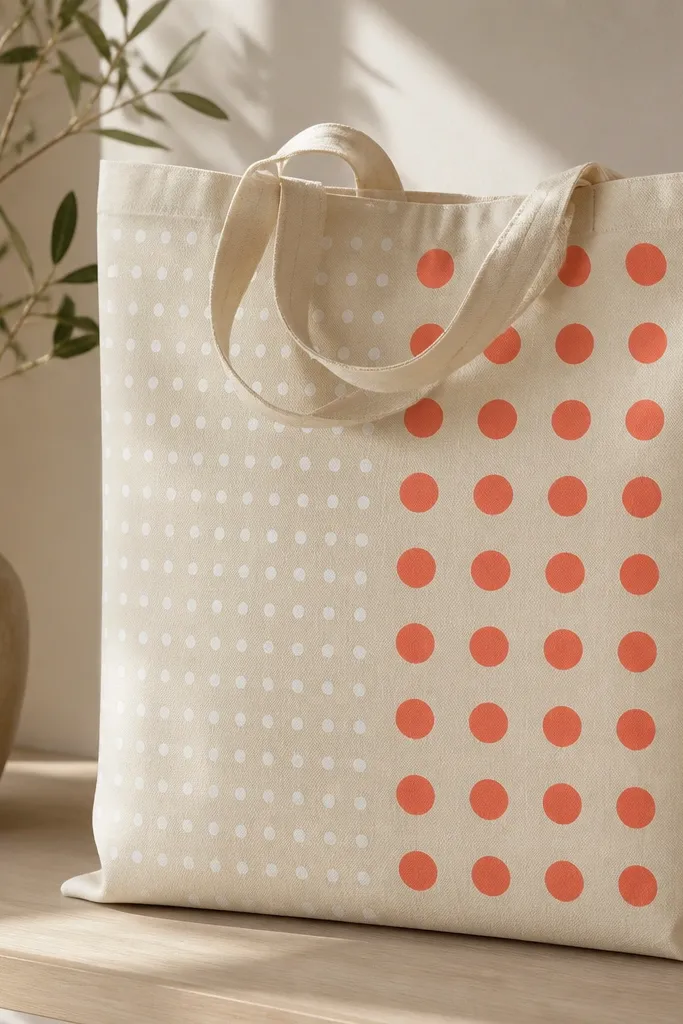
A dot grid is easy to repeat, and it disguises the unevenness of tote weave. The balloon-pattern contrast (small dots on one side, big dots on the other) creates a fun rhythm without adding extra elements. I like white-on-coral or off-white-on-black for contrast that still feels playful.
Use a dot stencil or make your own by cutting holes in cardstock. Stamp dots with a small foam dabber, keeping spacing consistent at about 1 inch between centers. Paint one side with small dots and the other with larger dots (about 1.5 inches apart) using a different color.
Pro tipCount rows before you start - it's easier than fixing uneven spacing later.
AvoidAvoid painting dots too close to seams - they distort where fabric bends.
9. One-Color Triangle Mountain Range
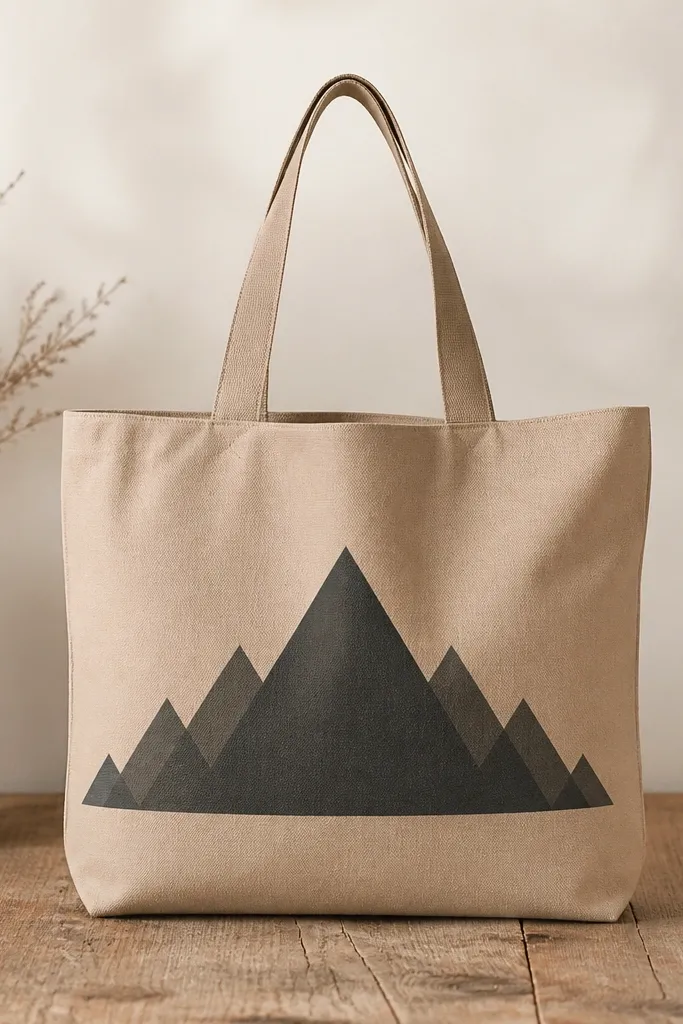
Triangle ranges look clean because they're geometric, and that's exactly what tote fabric needs. One color keeps it from looking cluttered. This design also hides brush texture because triangles are sharp by definition.
Sketch a horizon line about 4 inches from the bottom seam. Draw 7-9 triangles with the tallest in the middle, using chalk pencil. Paint with a small angled brush, then clean edges with a damp cotton swab if needed.
Pro tipMake the triangle widths uneven on purpose - it looks more like real peaks.
AvoidDon't use a wide brush - it smears triangle edges into the weave.
10. Neon Outline Sticker Look Using Masking Fluid
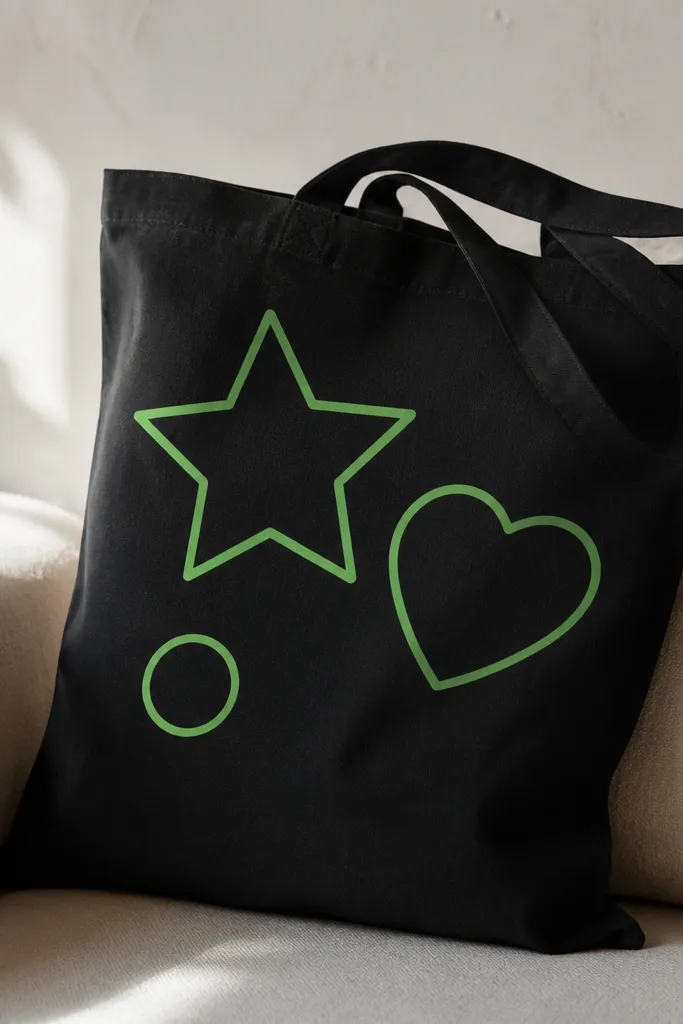
Masking fluid lets you keep clean negative space without tape lines. The neon outlines pop hard on darker totes, and the sticker look feels modern even with simple shapes. This one looks great when your tote is already dark and you don't want to cover all the fabric.
Trace simple shapes lightly with chalk. Brush masking fluid over the areas you want to stay unpainted, then paint the background with neon green or neon yellow. Let everything dry, then rub off masking fluid with a fingertip or soft eraser.
Pro tipUse thin masking fluid coats; thick layers can create ridges that show through paint.
AvoidDon't rush removal - if paint is still tacky, it smears.
11. No-Sew Patch Panel with Paint Borders
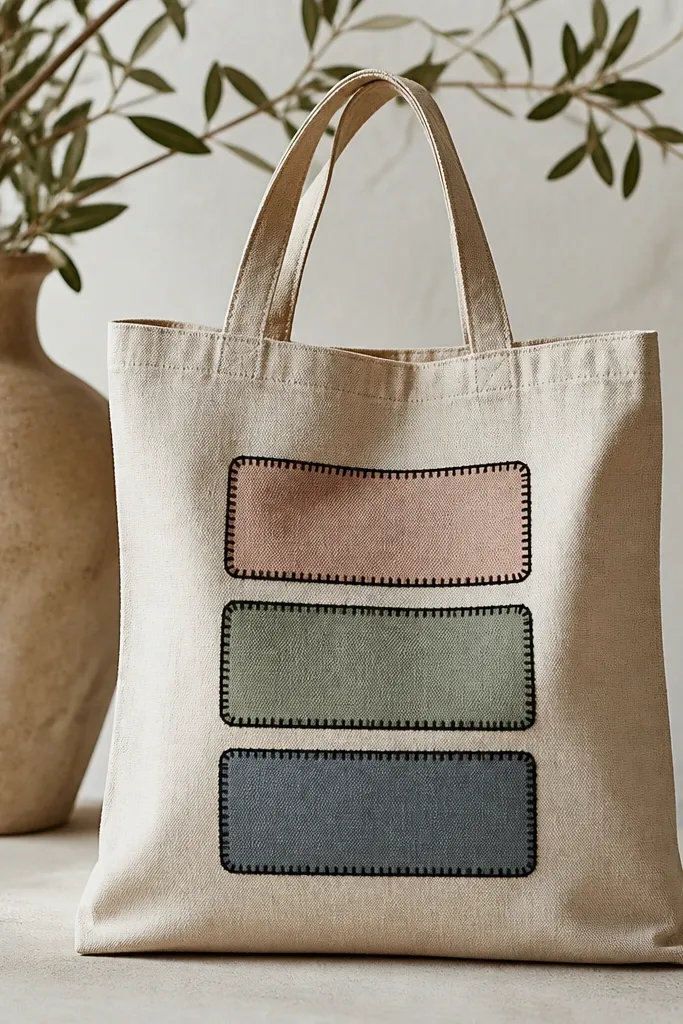
Faux patch panels make a small tote front feel structured. The rounded rectangles give a softer look than straight blocks, and the black border makes it read like fabric patches. It's a great option when you want color without full-coverage painting.
Tape off three rounded rectangles about 3.5x5 inches each, leaving 1/2 inch gaps. Paint each panel a different muted tone (sage, dusty rose, faded blue). Add a "stitched" effect by tapping a small brush along the border with white or light gray paint.
Pro tipLet panel colors dry before outlining so the border stays crisp.
AvoidSkip thick paint borders - they crack where the tote flexes.
12. Handprint Accent with Watercolor Wash
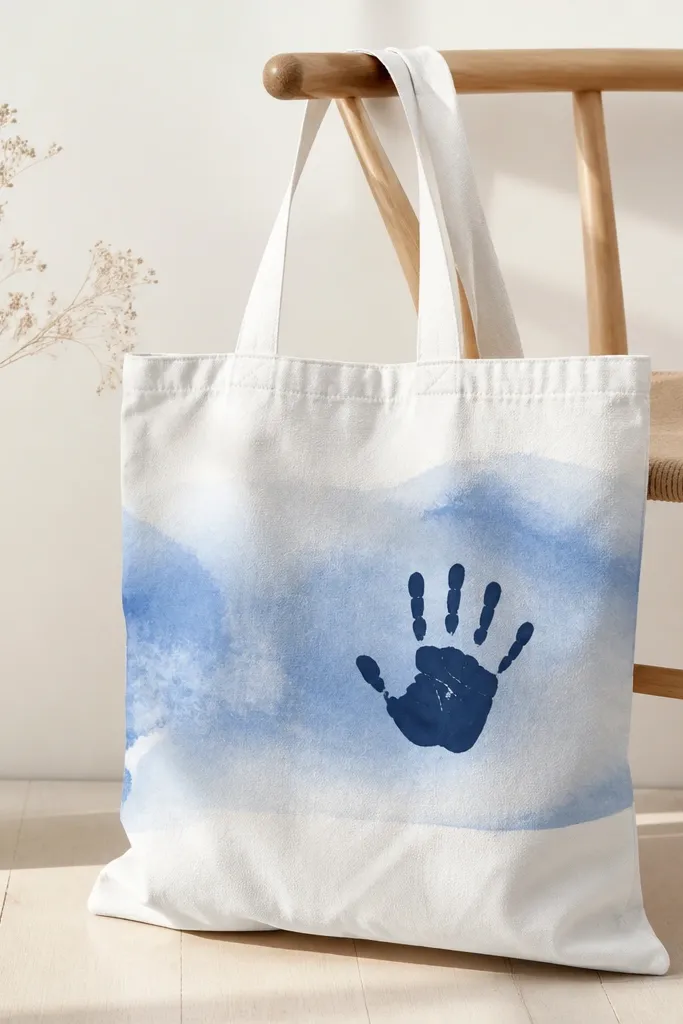
This works because the wash is soft and forgiving, while the handprint provides a clear focal point. It's also a personal design that still looks graphic. The navy handprint makes the wash feel intentional rather than accidental splatter.
Brush a diluted blue wash across the tote using a flat brush, leaving edges uneven. Press a hand (or use a cut-out hand stencil) lightly onto navy paint on a sponge, then stamp for a clear print. Dry flat, then optionally add small dots around the print.
Pro tipProtect the back side with cardboard so the wash doesn't bleed through.
AvoidDon't use too much water - soaked paint can stain the back permanently.
13. Tape-Resist Checker Corner
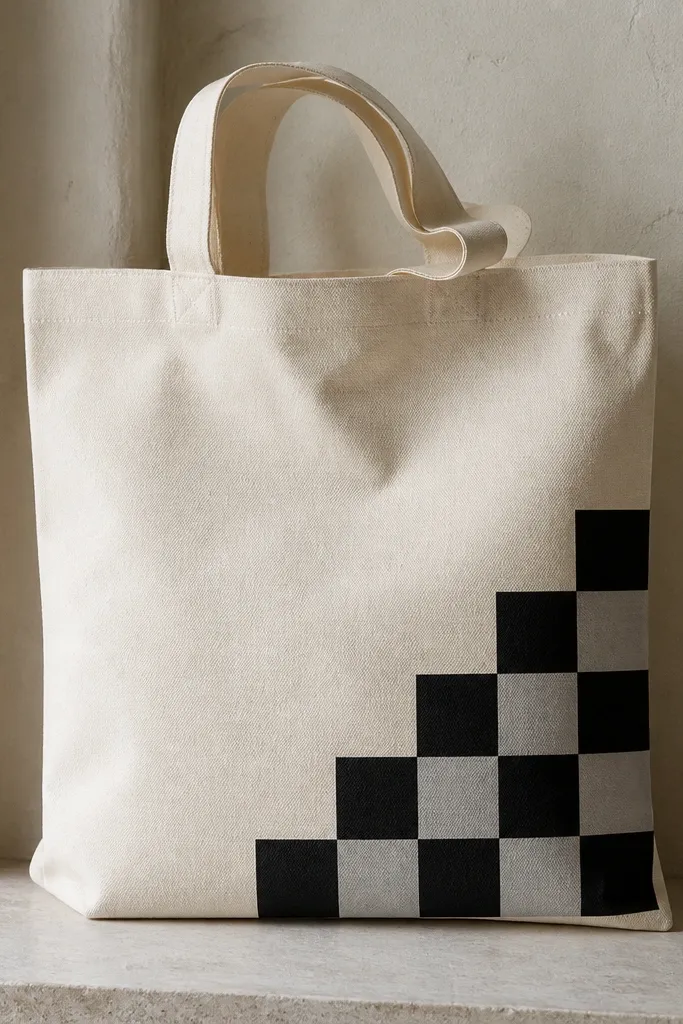
A corner checkerboard keeps the design small but high-impact. Tape-resist means your edges stay clean even if the tote fabric is wrinkled. Black and gray look classy and don't scream "kids craft," which I like for everyday bags.
Tape a small square area, then cross-tape strips to create check cells. Paint over with gray first, then remove some tape after it's tacky and paint black on the remaining cells. Aim for a 5x5 inch checker area so it fits without warping around seams.
Pro tipUse a ruler and press tape firmly along each line for crisp checks.
AvoidDon't paint both colors at once - it blurs when tape moves.
14. Splash Background with Stencil Name Strip
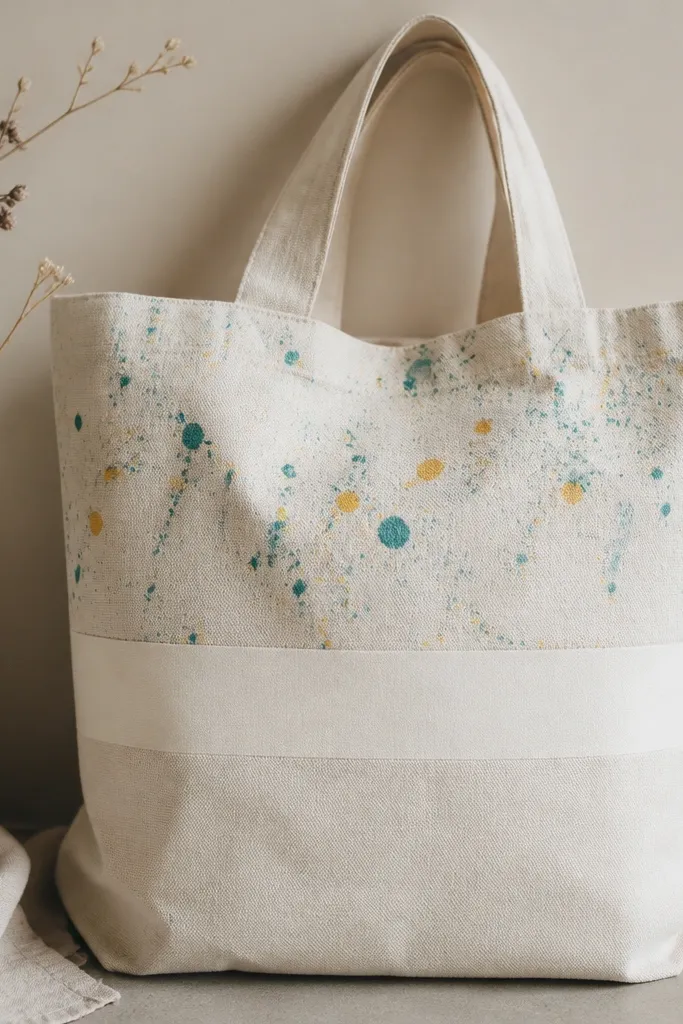
Splashes add energy without covering the entire tote. Keeping the text in a clean strip makes the overall look balanced. The trick is to stencil the label so the chaos stays behind it.
Cover the tote area where you want the label with painter's tape and a stencil. Flick paint from an old toothbrush for splashes - hold the brush 8-10 inches away. Let splashes dry, then paint the stencil label in black or navy.
Pro tipUse a test flick on scrap fabric to get the right droplet size.
AvoidDon't flick too close - you'll get big blobs that look messy.
15. Rainbow Border Around the Bottom Seam
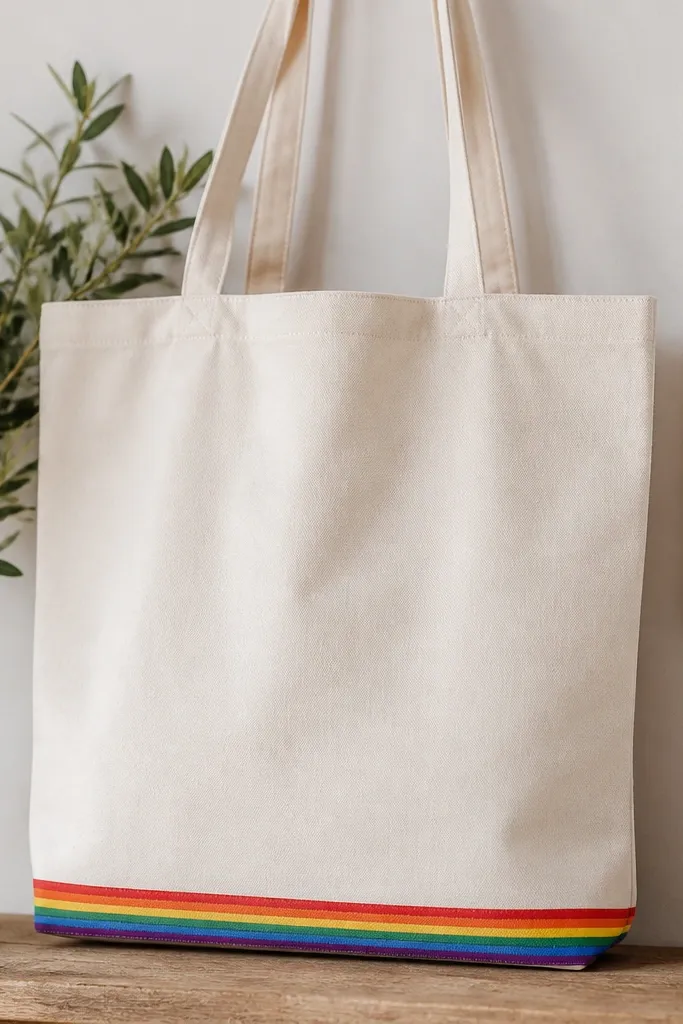
A bottom border is one of the easiest ways to add color without fighting the tote's vertical wrinkles. It also looks tidy because it follows an existing straight seam. I like thin bands because they look like a printed design rather than hand-painted decoration.
Use painter's tape to mask a 1/2 inch strip along the bottom seam. Paint 7 narrow bands (about 1/4 inch each) with a small flat brush. Peel tape while the last band is slightly tacky for the cleanest line.
Pro tipKeep each band thin - thick paint makes the border stiff.
AvoidDon't paint over tape after it's fully dry - paint can chip when you peel.
16. Botanical Leaf Rubbing with Chalk Pencil
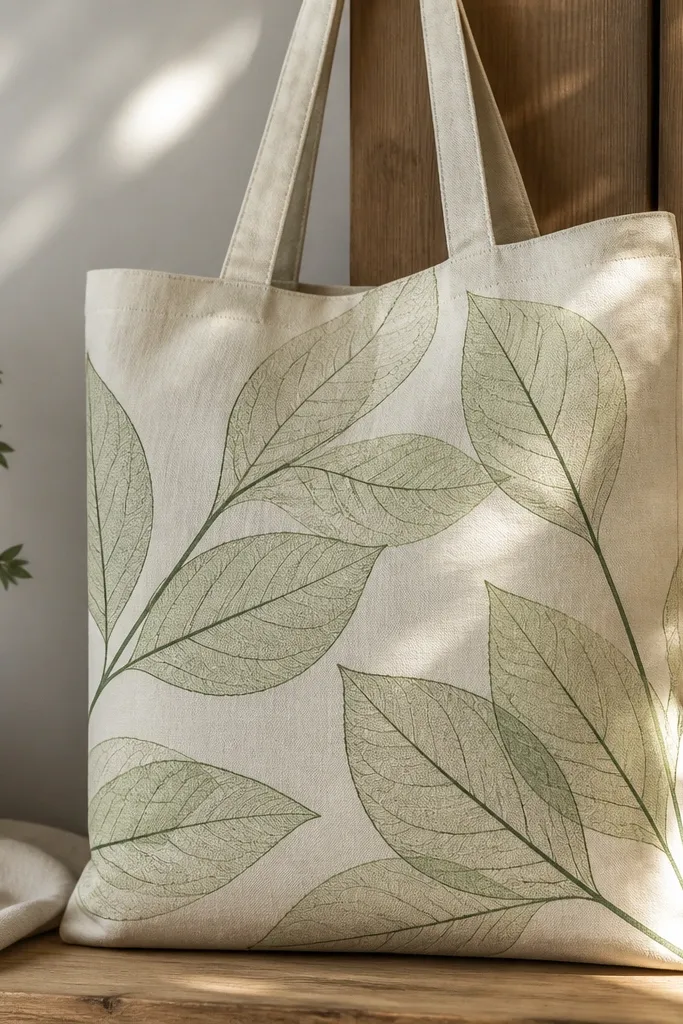
Leaf rubbing gives you realistic veins without drawing every line. It looks best in a limited palette: light green shading and a darker outline. The texture reads like printmaking, which makes a small tote front feel more artful.
Place a real leaf under a thin paper sheet, then rub chalk pencil over it to transfer vein shapes onto the tote. Color the leaf areas with watered-down green paint, then trace the vein lines with a smaller brush in dark green. Paint 2-3 leaves max so it doesn't get busy.
Pro tipUse leaves with strong veins (like basil or a thick garden leaf) for a clearer transfer.
AvoidSkip glossy leaves - they don't transfer well and smear the chalk.
17. Starry Night Dots with a Sponge Halo
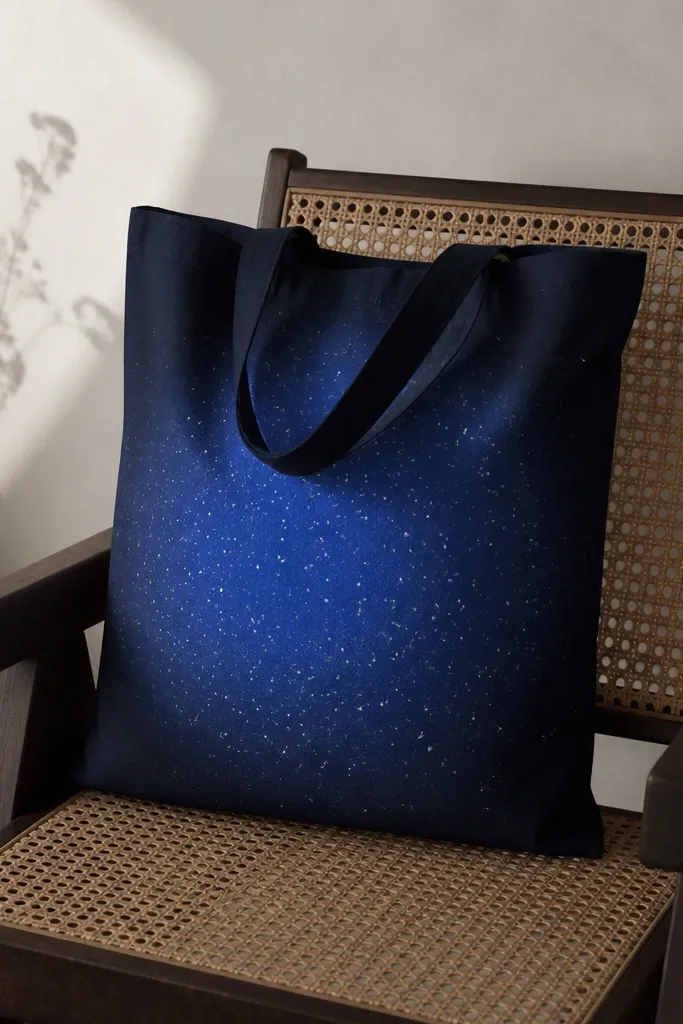
A halo plus scattered dots looks like a night scene without painting any planets. The sponge halo is forgiving and covers uneven tote texture. White dots are quick and give a "sparkly" effect even with simple supplies.
Sponge a lighter blue circle around the center using a makeup sponge. While it's still slightly damp, tap white paint with a small brush tip for stars. Keep dots random - 30-60 dots looks better than 10 big ones.
Pro tipUse a toothpick to place tiny dots for better control.
AvoidDon't use one thick white paint - it dries lumpy and can crack.
18. Monogram in Bubble Letters with Black Shadow
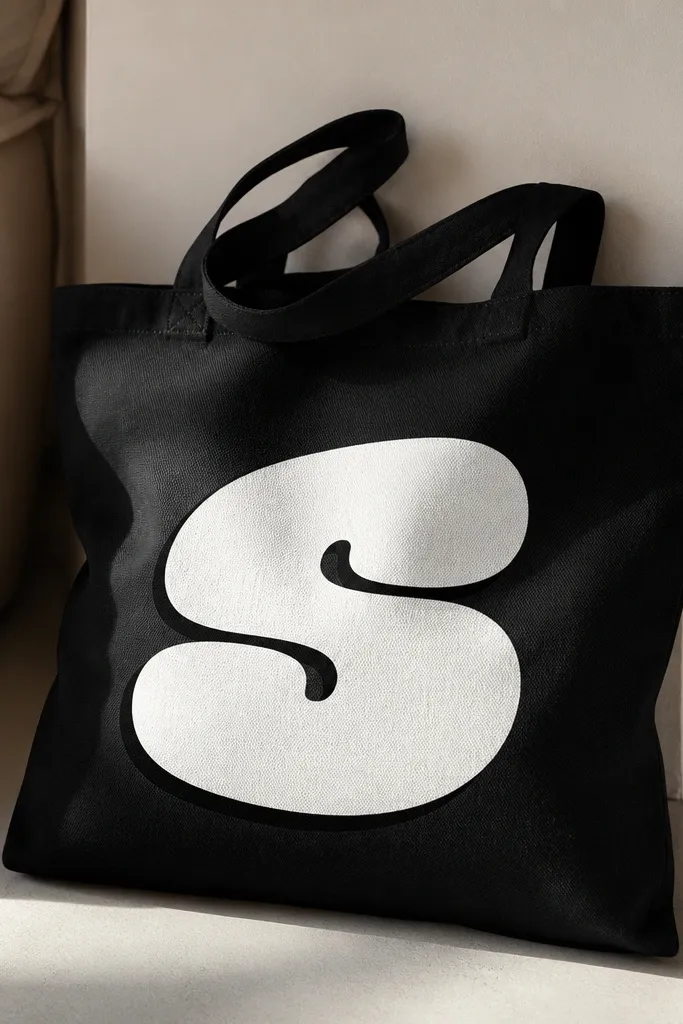
Bubble letters look playful but still neat when you add a black offset shadow. The shadow makes the monogram pop from distance, which matters for tote bags you see while walking. I like white + black because it stays clean and doesn't need extra colors.
Sketch the bubble letters lightly with chalk. Paint the interior white first. After it dries 20-30 minutes, lightly trace the outline with black, shifting it 1/8 inch down and right for the shadow effect.
Pro tipUse a ruler to keep letter height even across the panel.
AvoidDon't outline before the fill dries - the colors will bleed together.
19. Painted Pocket Liner Look with Vertical Stripes
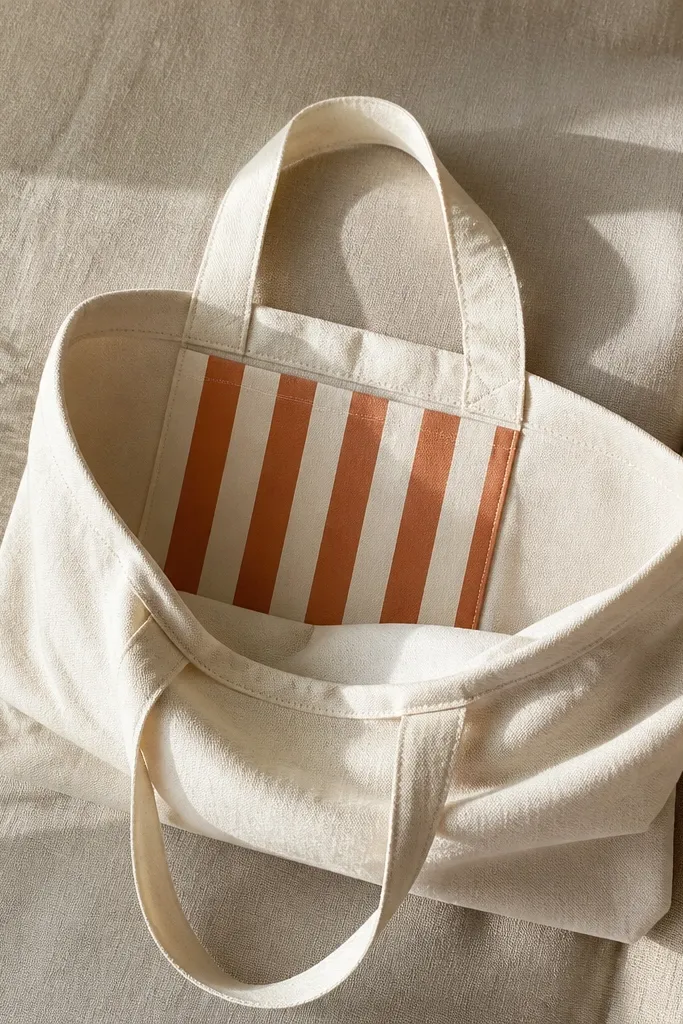
Painting inside the pocket area makes the design feel hidden until you use the bag. Vertical stripes also flatter because they follow the bag's natural direction and don't fight the tote shape. Rust orange looks warm and reads like a lining detail.
Mask the pocket opening with painter's tape so paint stays inside. Paint 5-7 stripes, each about 1/2 inch wide, using a small brush. Let dry, then remove tape carefully so you don't pull pocket fabric threads.
Pro tipUse a small angled brush to reach the corners of the pocket opening.
AvoidDon't paint over the seam edges - that's where stripes crack first.
20. Geode Slice with Metallic Acrylic Tips
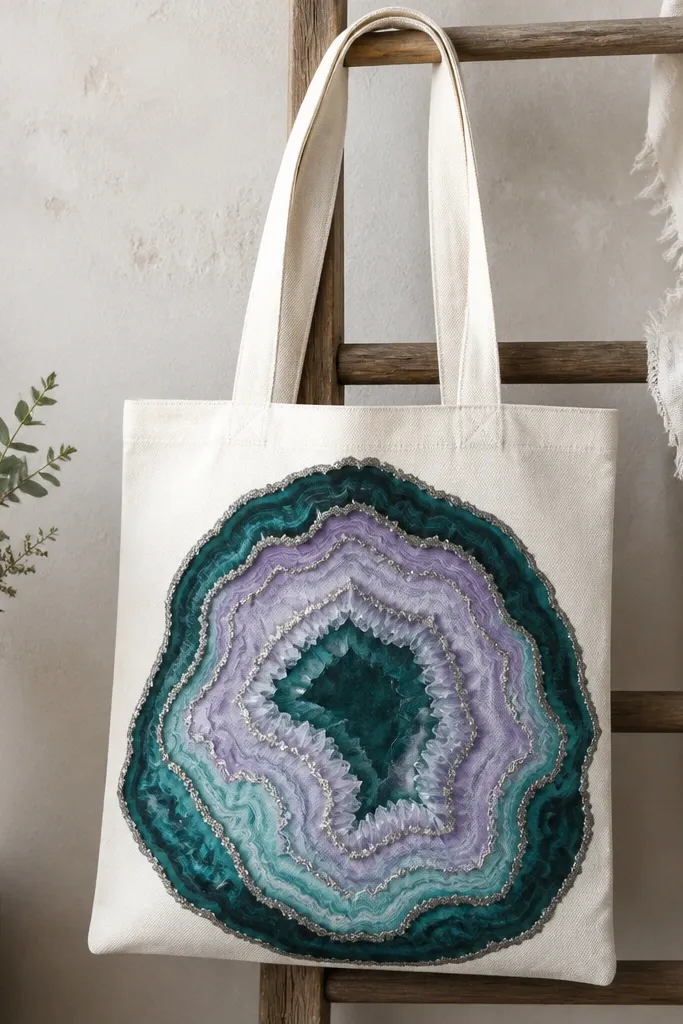
A single geode slice looks fancy without filling the whole bag. Metallic silver lines add that crystal edge effect, and the dark teal border keeps the design grounded. I've used this for gift totes and it always looks like more work than it is.
Paint a rounded geode outline first with dark teal. Fill inside with layered aqua and lavender, then add thin "crystal" lines using metallic silver paint. Keep the metallic lines narrow (about the width of a hair) for a crisp geode look.
Pro tipDo the metallic lines last - they don't need coverage, just highlights.
AvoidAvoid thick metallic paint - it dries raised and can flake.
21. Ink-Look Leaves with Diluted Black
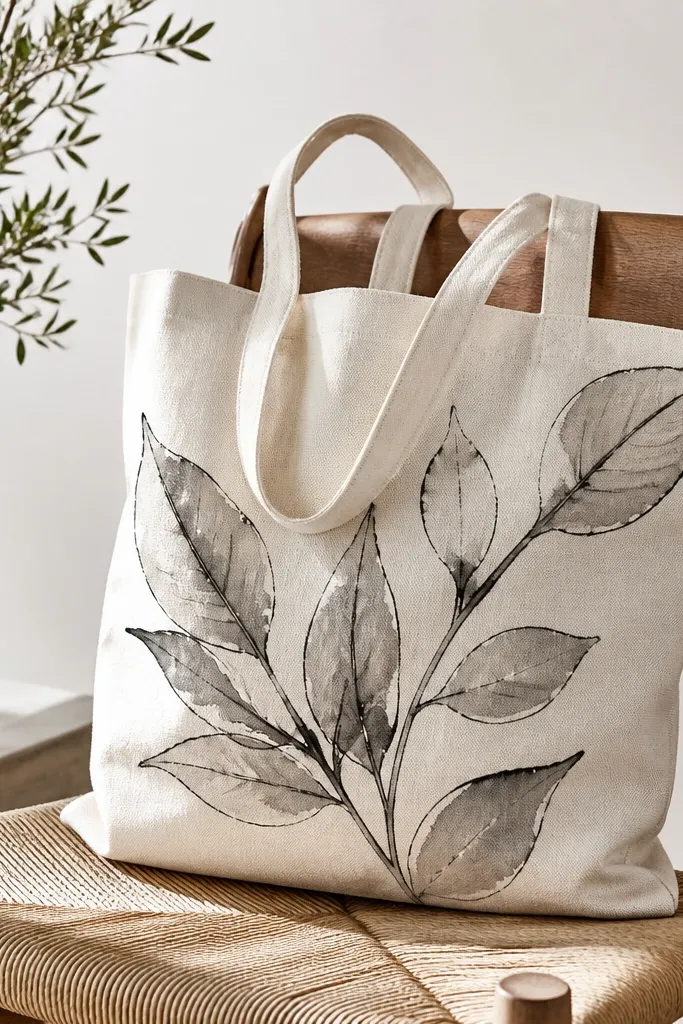
Diluted black gives you that ink-wash effect without actual ink. The gray wash inside leaves softens the look and makes it feel organic. This is a great choice if you want something artsy but still simple enough for a small space.
Mix black acrylic with water and a tiny bit of fabric medium. Paint 5-8 leaves with a liner brush, then add lighter washes by tapping a damp brush inside the silhouette. Let it dry fully before adding any final dark outlines.
Pro tipUse a paper towel to blot the brush - it keeps washes from pooling.
AvoidDon't add more water than the paint can handle - it turns transparent and uneven.
22. Emoji-Style Face with Rounded Features
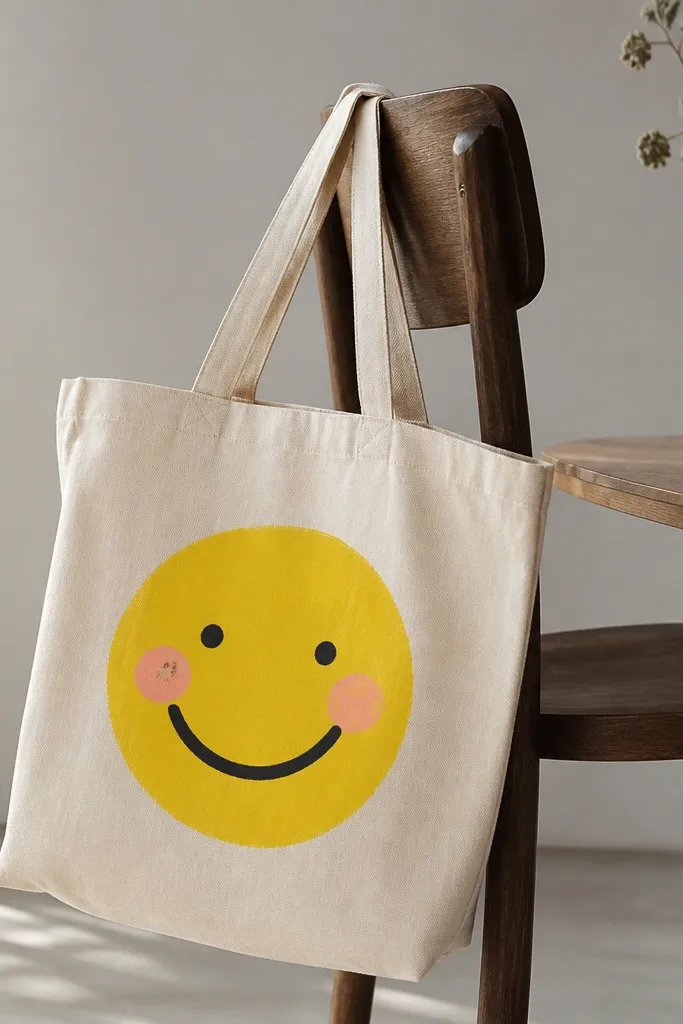
Rounded features are forgiving and look cute even if your lines wobble. Bright yellow against a neutral tote reads instantly. This one is a hit for quick custom totes for friends because it's fun and fast.
Paint a circle head in yellow, leaving space around the edges so it doesn't blend into tote seams. Add eyes as filled circles, cheeks as small pink dots, and a thick smile line. Keep the face centered and about 5-6 inches wide for a balanced look on typical totes.
Pro tipUse a bottle cap or small lid as a tracing guide for a perfect head circle.
AvoidSkip thin outlines - they look faint and uneven on canvas.
23. Checker Stripes Frame Around a Quote Area
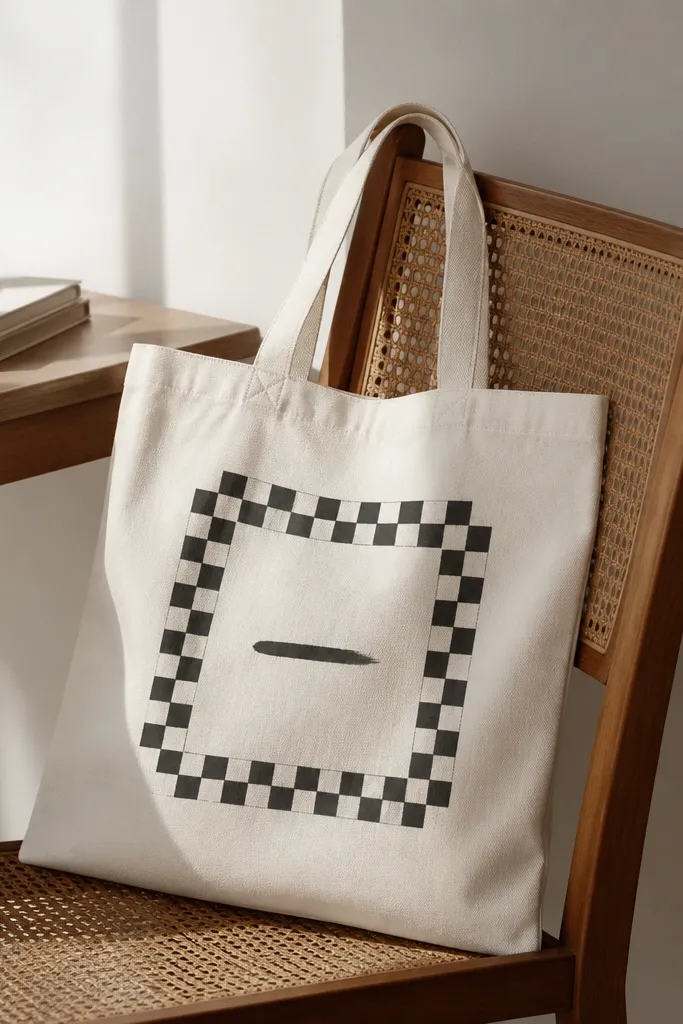
A frame makes the tote look like a printed poster. The checker pattern gives texture, and the quote area stays minimal so it doesn't get messy. Dark gray text inside keeps it readable and calm.
Tape a rectangle frame about 8 inches wide and 5 inches tall. Paint alternating squares with a small brush, then remove tape and fill the inside text area. Use chalk pencil to sketch the text line before painting.
Pro tipPaint squares in rows, not random - it keeps the frame straight.
AvoidDon't rush the tape removal; peeling too early can smear the last painted squares.
24. Satin Finish Metallic Triangle Confetti
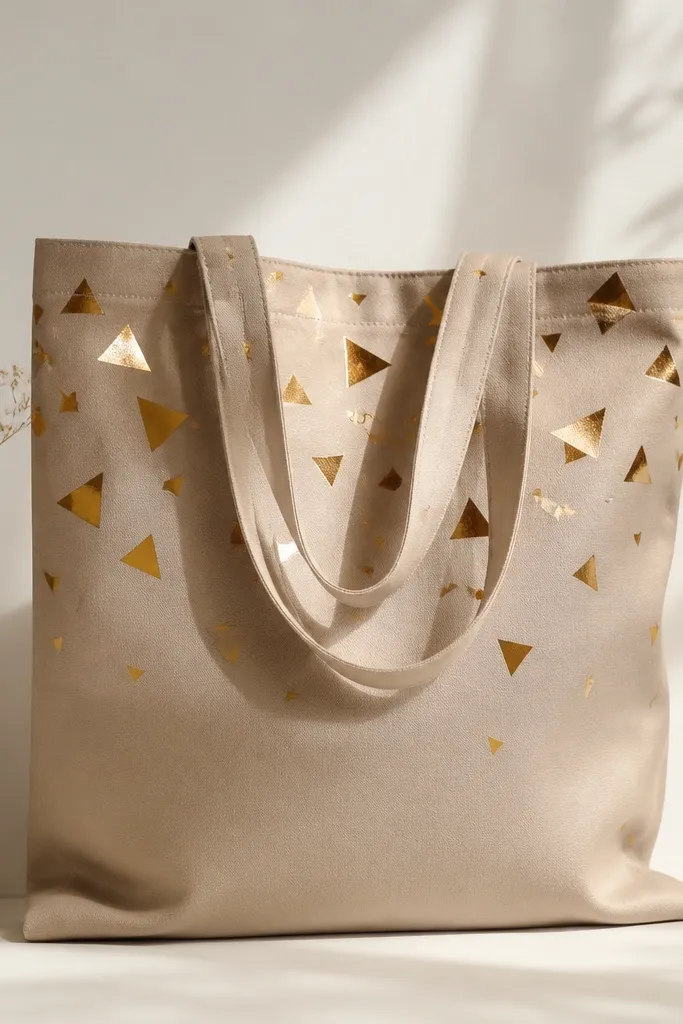
Metallic triangles catch light when you move the bag, which makes the design feel alive. Scattered confetti keeps it light and doesn't fight tote creases as much as a big block. I use gold plus bronze because together they look dimensional instead of flat.
Cut small triangle templates from cardstock in 1 inch, 1.5 inch, and 2 inch sizes. Tape one triangle at a time and paint over with metallic acrylic, then remove the template. Do 15-25 triangles total so it looks intentional, not empty.
Pro tipShake metallic paint well and use a light hand; heavy metallic coverage looks lumpy.
AvoidAvoid painting metallic over wet matte paint - it can dull and streak.
25. Marble Swirl Lines with Toothpick Veins
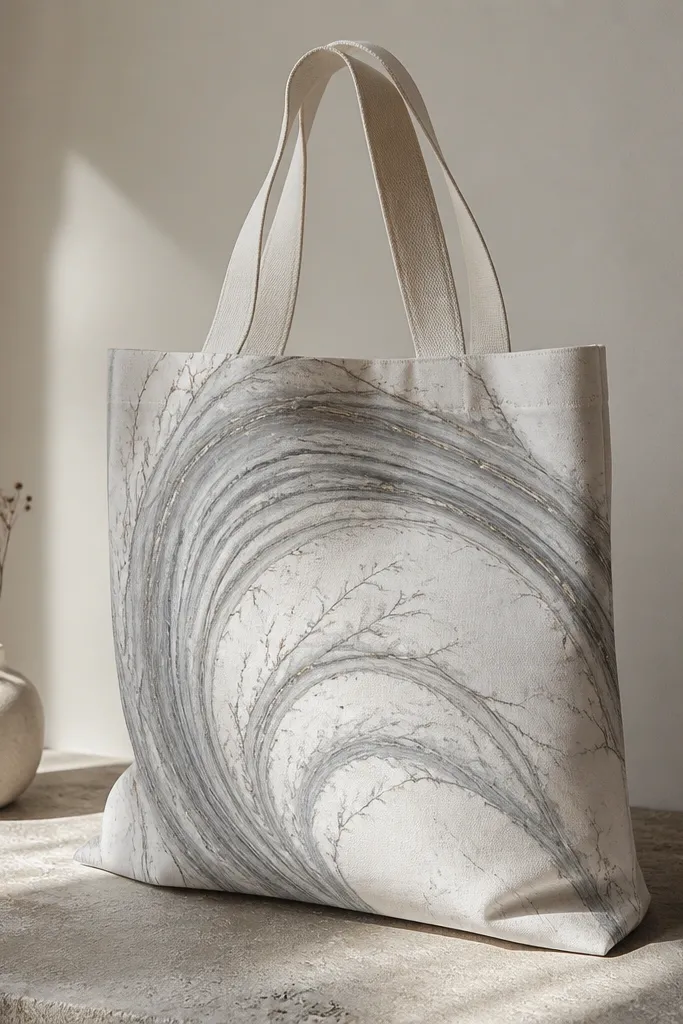
Marble swirls look complicated but you're really doing controlled streaks. The toothpick veins add the "stone" illusion and keep the design from looking like random brush strokes. I like gray/white because it looks modern and doesn't stain as easily as bright colors.
Paint a light gray base oval first and let it set 10-15 minutes. Add white streaks while the gray is still tacky, then drag a toothpick through the streaks to create vein patterns. Keep the oval about 6 inches wide so it fits nicely on a small tote front.
Pro tipWipe the toothpick between swirls so you don't muddy the colors.
AvoidDon't keep swirling after it dries - it turns into muddy gray.
26. Hand-Stamped Leaves with Foam Roller
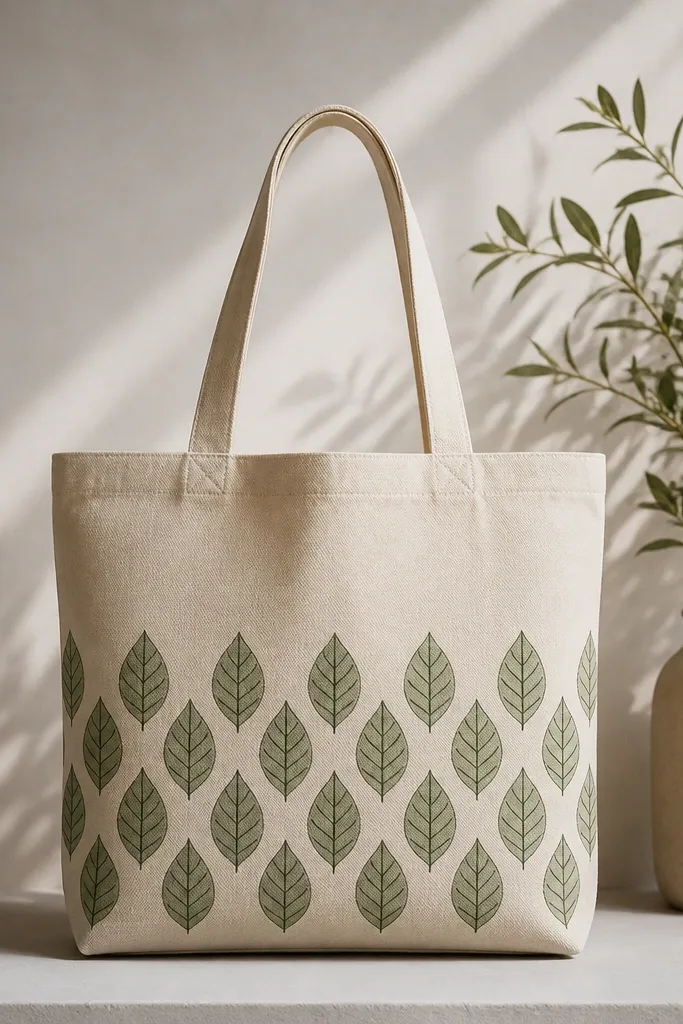
Repeating stamps look intentional and forgiving. Foam roller stamping is fast - you stamp a band of leaves at once, which helps when you're working in a tight apartment. Muted green pairs well with natural canvas and looks good even with imperfect alignment.
Use a foam roller and a leaf-shaped stamp pad or fabric-safe stamp paint. Roll horizontally across the lower half, then rotate the roller slightly for variety. After drying, add darker outlines to a few leaves using a small brush so the pattern looks layered.
Pro tipPut cardboard inside the tote so stamp paint doesn't transfer to the back.
AvoidAvoid thick stamp paint - it creates heavy edges that crack when the tote flexes.
27. Painterly Portrait Silhouette Mini
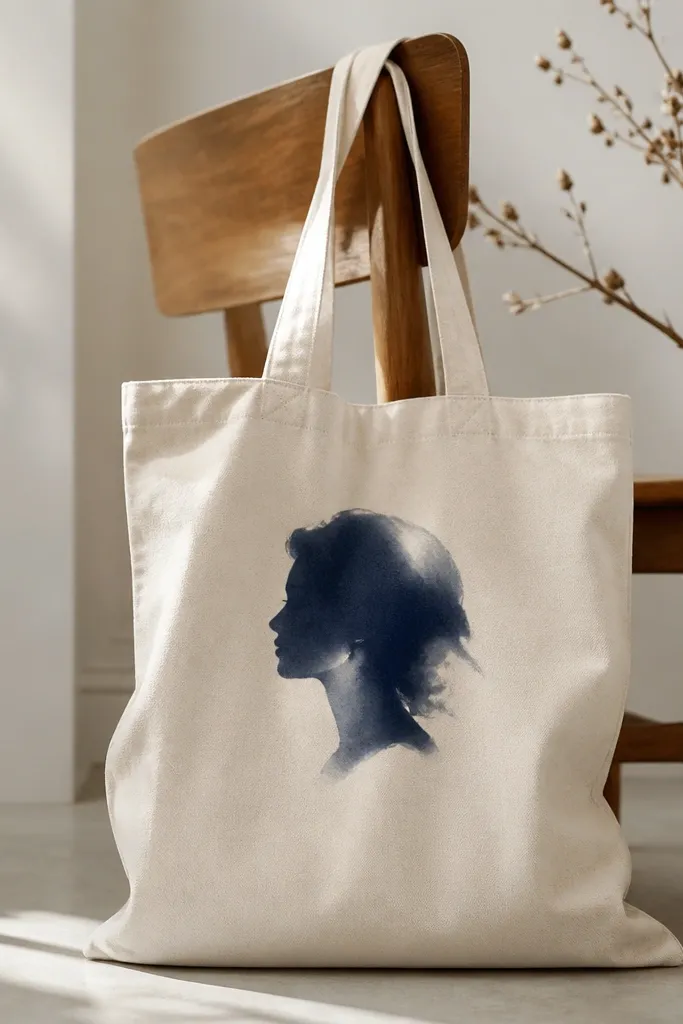
A mini portrait keeps the tote from getting busy while still feeling artsy. The navy silhouette looks classy and doesn't demand multiple colors. I use a soft edge intentionally so it looks brush-painted, not like a sticker.
Print a small face reference and transfer the outline lightly with chalk pencil. Block in the silhouette with navy acrylic + medium, then add two small lighter highlights in periwinkle and a tiny white dot for an eye catch. Place it centered about 6 inches above the bottom seam.
Pro tipUse a damp cotton swab to soften edges before the paint fully dries.
AvoidDon't add too many facial details - small faces on totes look better with fewer marks.
28. Abstract Ribbon Loop with Curved Masking Tape
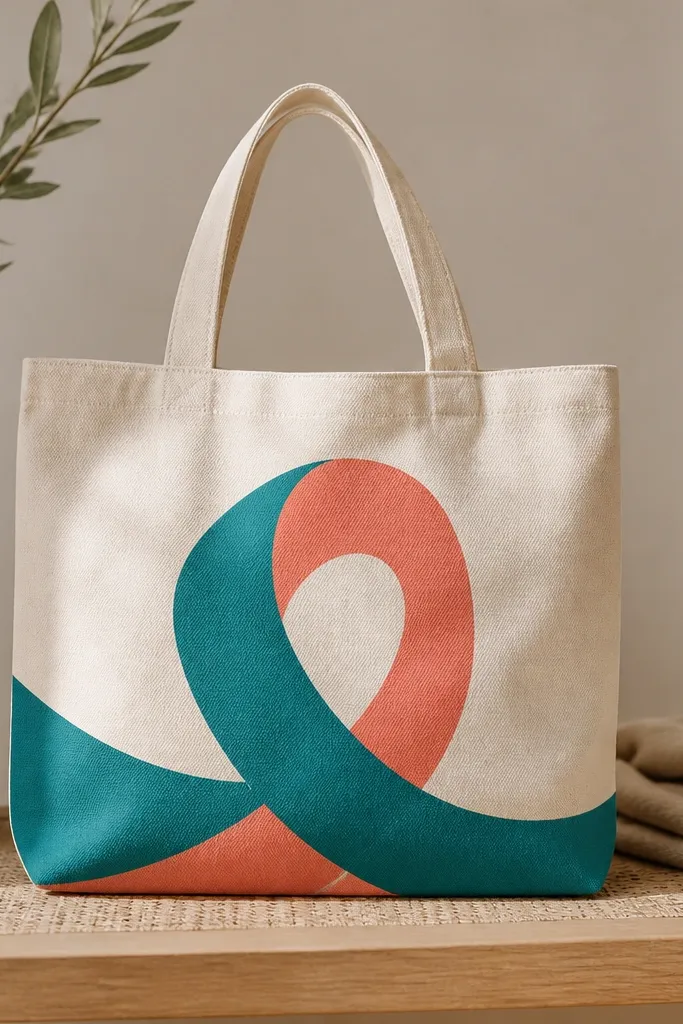
Curved masking tape gives you those smooth ribbon lines without relying on brush control. Teal and coral give a pop that reads well on neutral totes. The loop shape also fills space without covering the entire bag, which is good for small space tote bag painting ideas.
Mask a ribbon path using flexible masking tape strips about 1/2 inch wide. Paint the first color inside the masked path, let dry, then remove tape and mask again for the second color. Keep the ribbon width consistent so it doesn't look wobbly.
Pro tipMake the tape strips longer than you think - shorter strips shift as you curve them.
AvoidAvoid overpainting under tape - it seeps and ruins the crisp curve.
29. Minimal Frame Line Art with Corner Doodles
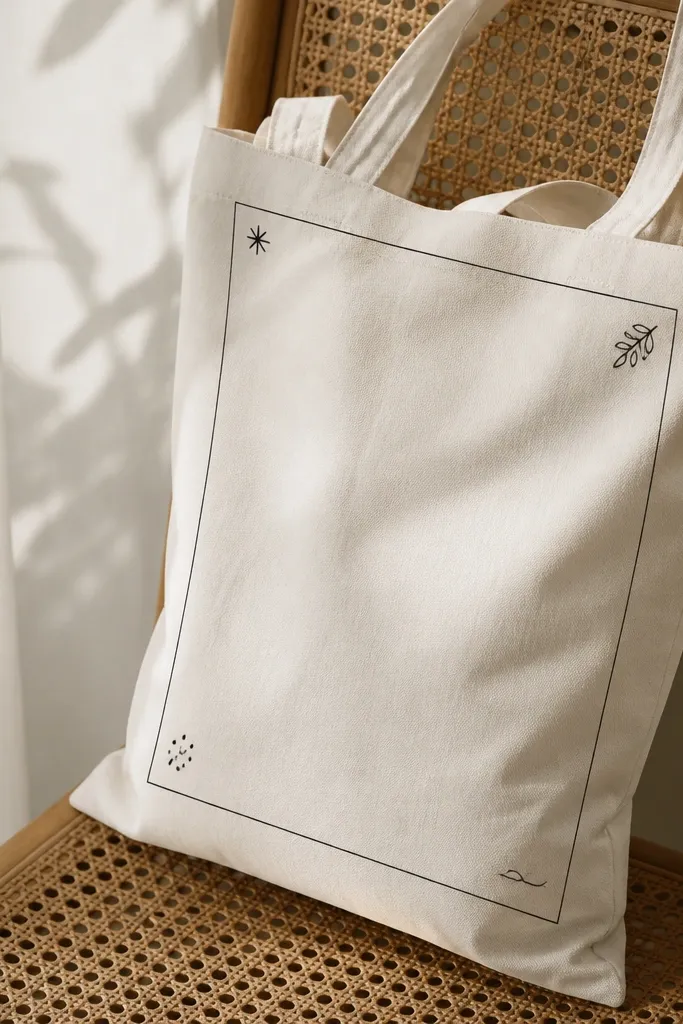
Thin line art looks clean and takes almost no paint. It also works well for smaller totes because the design stays on the front panel and doesn't spill into seams. I like keeping the doodles tiny so the frame stays the main element.
Use a fabric paint pen to draw a rectangle frame about 7x5 inches. Add small corner doodles using the same pen and a dotting tool for consistent dot size. Let dry overnight before using the bag.
Pro tipIf your pen skips on canvas, go over the line once more with a slightly thicker paint mix.
AvoidDon't press hard on the pen - it can leave dents in softer cotton totes.
30. Color-Block Side Panel with Split Diagonal
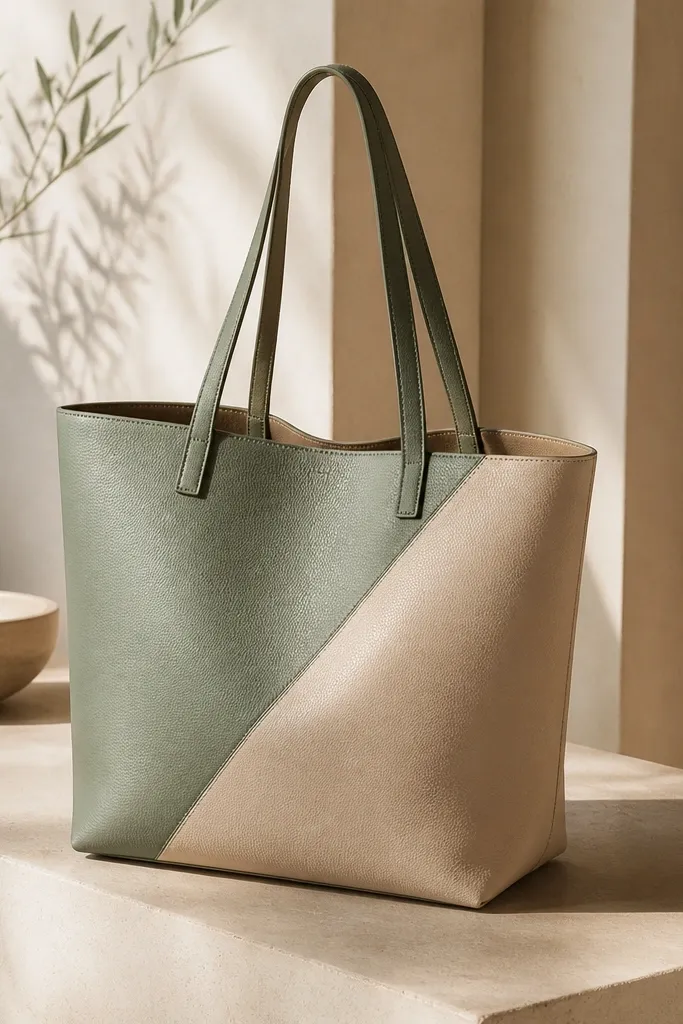
Side panel designs look modern and don't fight the tote's front creases. The diagonal split makes it feel designed, even though it's just two colors. This also keeps the painting area smaller, which is perfect for limited workspace.
Mask the diagonal line using painter's tape and a ruler. Paint one side sage green, the other a warm neutral like tan or cream. Let each side dry before removing tape so the diagonal stays razor clean.
Pro tipUse a small foam roller for the larger color field so coverage is even.
AvoidAvoid painting over tape edges repeatedly - it builds paint ridges.


