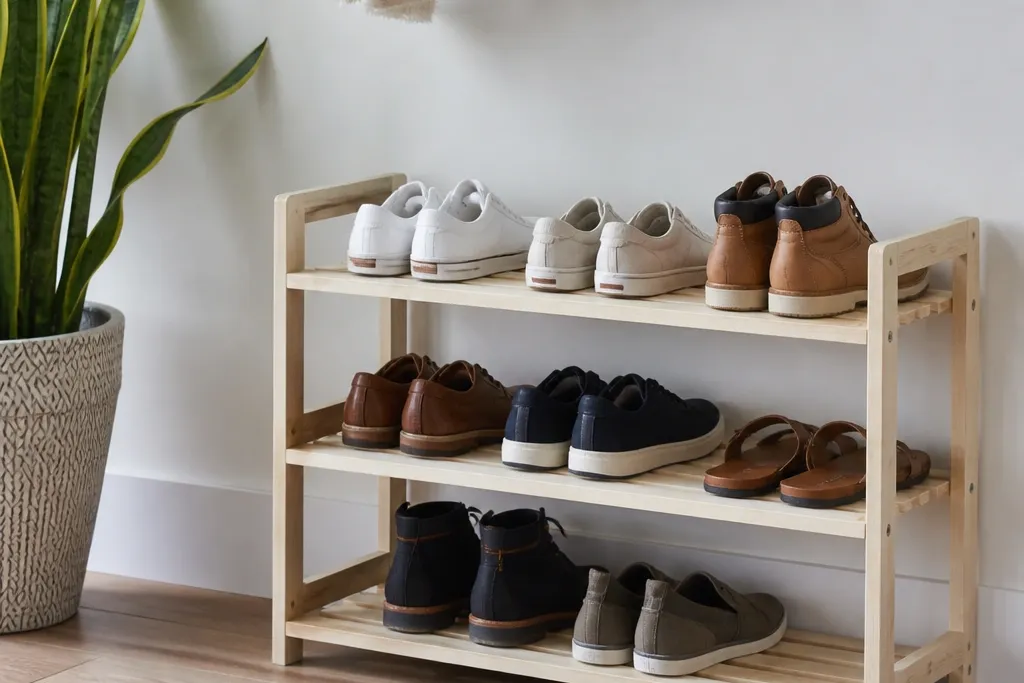
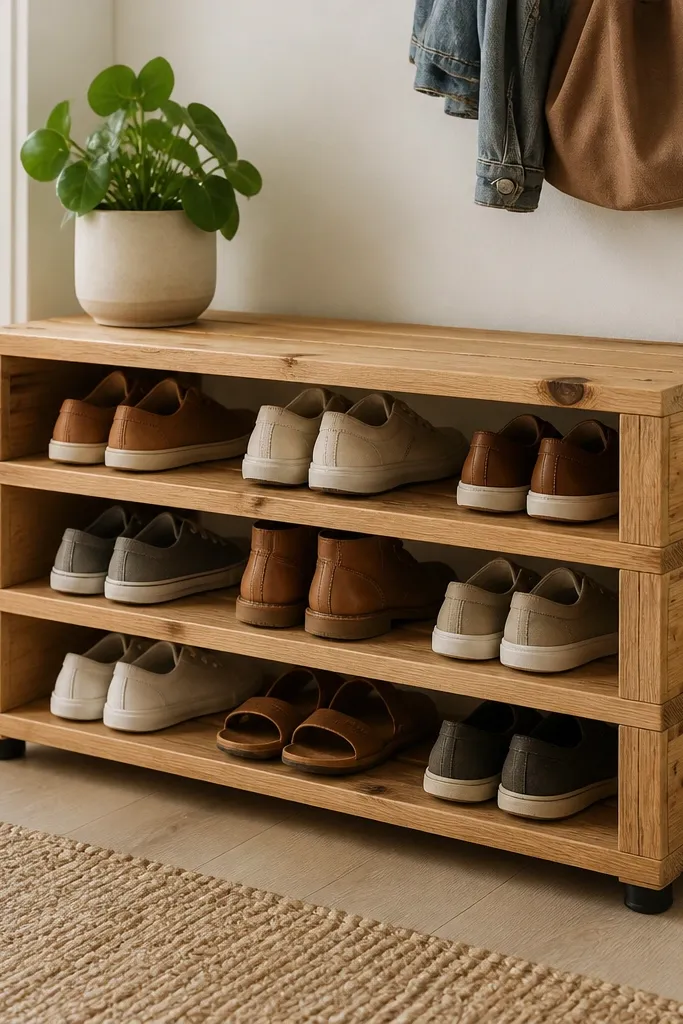
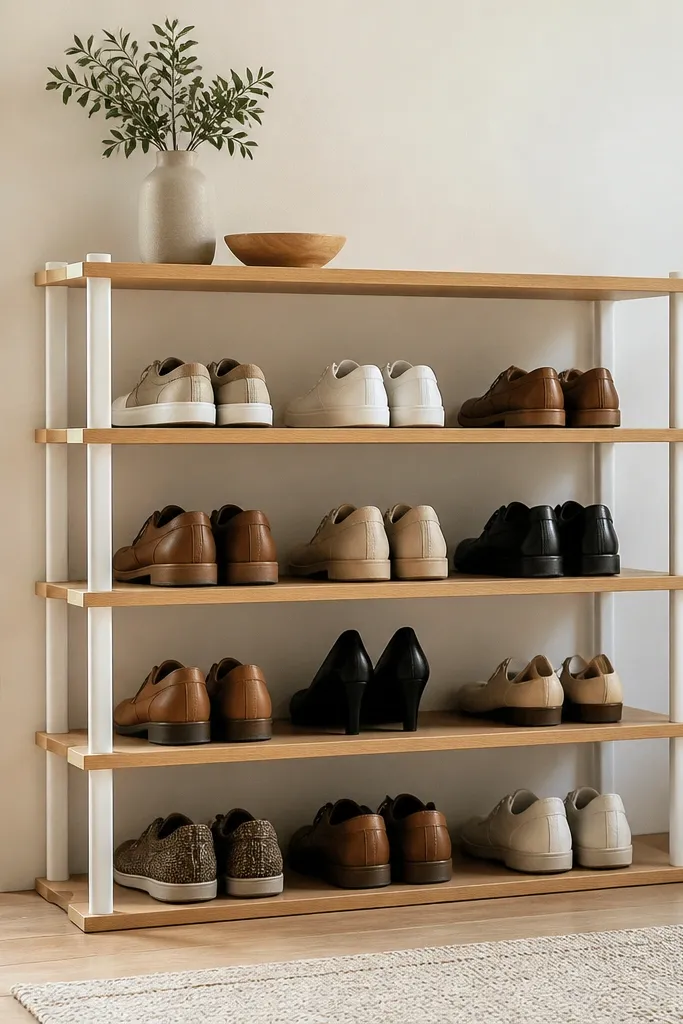
1. 1x2 Pine Slat Rack with a Clean Front Frame
This looks "store-bought" because the front has a straight frame, not just random boards. The slats let air move under shoes, so the bottom doesn't stay damp. I like painting it satin white and leaving the slat edges sharp - it hides small wood gaps. The consistent spacing also makes the rack feel organized instead of clutter storage.
Build a frame from 1x2 pine cut to your width and height, then attach slats across the face with 1.5 inch spacing. For sneakers, set shelf depth to 8-10 inches so they don't overhang. Use pocket holes or corner braces, then paint with primer + satin topcoat for a smooth wipe-clean finish.
Pro tipUse a scrap board as a spacer while you nail or screw slats - it keeps every gap identical.
AvoidSkipping a front frame makes it look wobbly even if the structure is solid.
2. Wire Closet Shelf Rack with DIY Side Panels
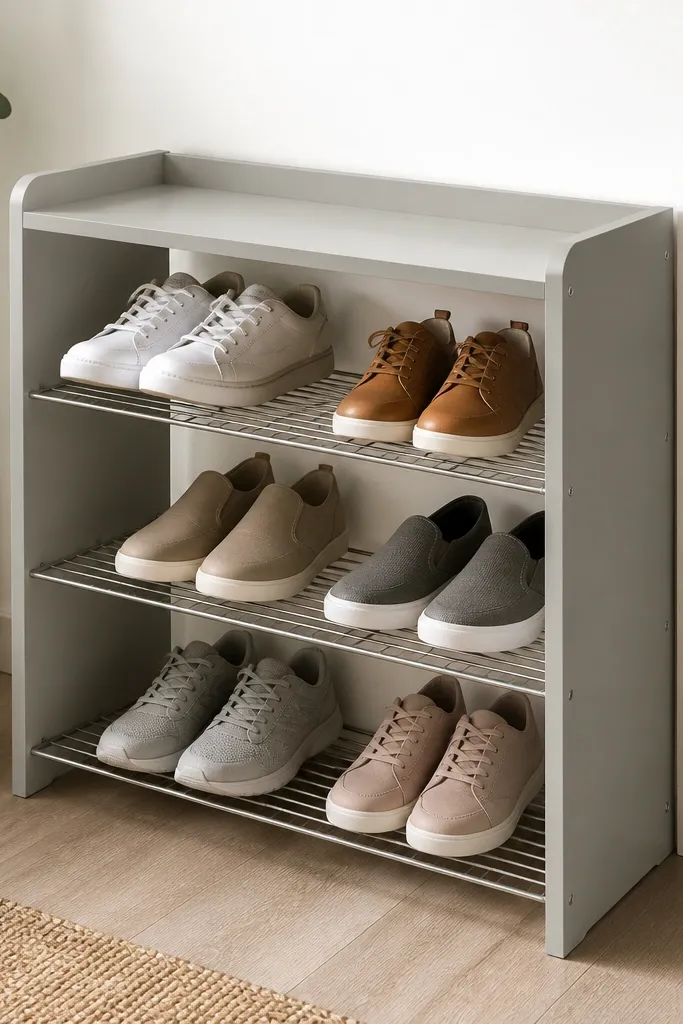
Wire shelves give you airflow instantly, which is why this design works in real entryways. The DIY side panels make it look intentional and stop shoes from catching on wire ends. I've used this in small apartments where you need light visuals; the rack doesn't block the room. A wood top lip keeps boots and clunky sneakers from tipping forward.
Buy a basic wire shelving frame (the kind with adjustable shelves), then cut 1/2 inch plywood panels to fit the sides. Add a 1x2 "stop" strip on the front edge of each shelf using screws and wood glue. Paint the wood panels to match trim, and seal with matte clear so scuffs wipe off.
Pro tipWrap the panel edges with thin edge banding or sand them smooth so they don't look rough next to the wire.
AvoidLeaving the wire ends exposed makes it look like an unfinished garage shelf.
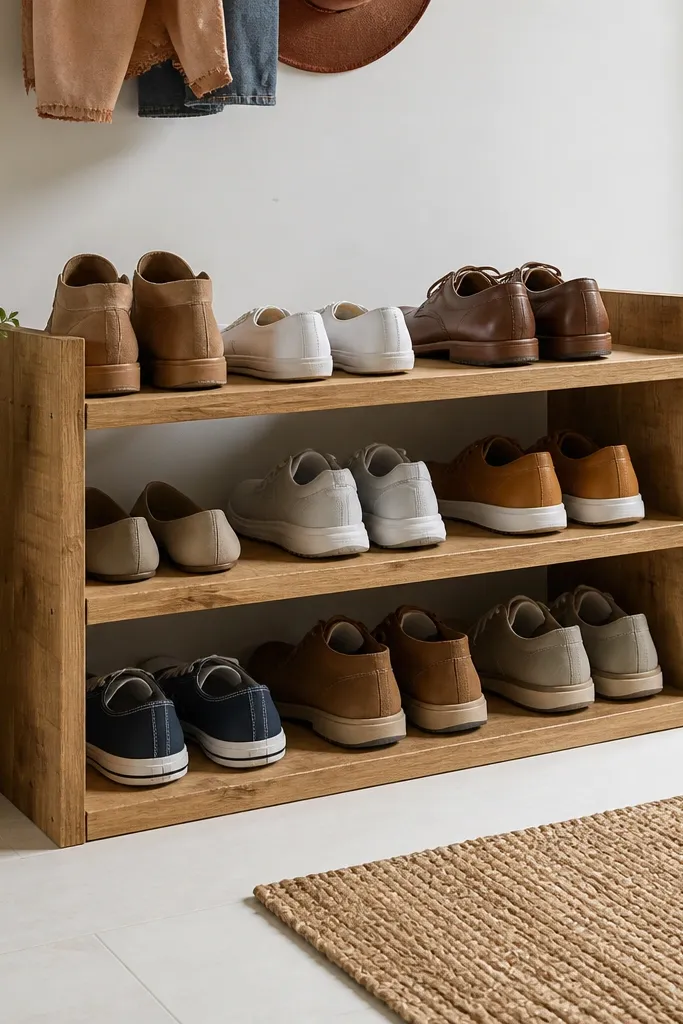
3. Cedar Fence Board Shoe Rack with Slanted Top
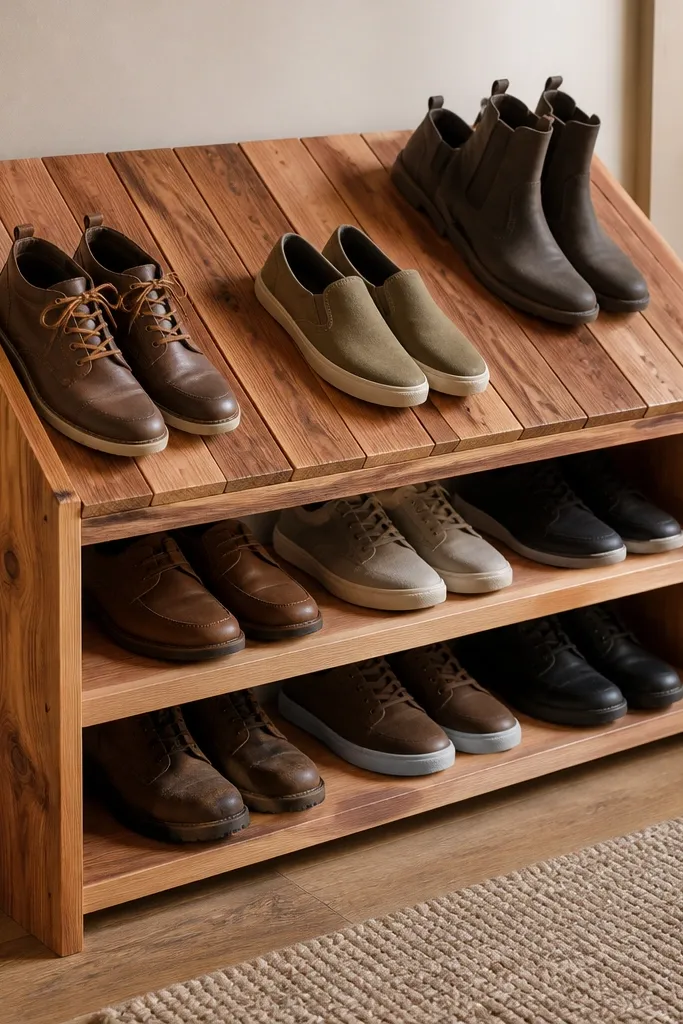
Cedar smells good and wears well, and the slanted top helps shoes stay put without straps or clips. Fence boards already have a textured surface, so you get grip for wet soles. This one looks great in a mudroom because it feels like real wood furniture. The slant also creates a small gap underneath for airflow.
Use two side rails (2x2 or 1x3 stacked) and attach fence boards across them with small gaps. Build a slight pitch by raising the back side about 1.5 inches higher than the front. Finish with a clear outdoor oil or hard wax so it handles shoe scuffs.
Pro tipPre-drill every board - cedar splits if you rush the screws.
AvoidA flat top that doesn't grip makes shoes slide and look messy fast.
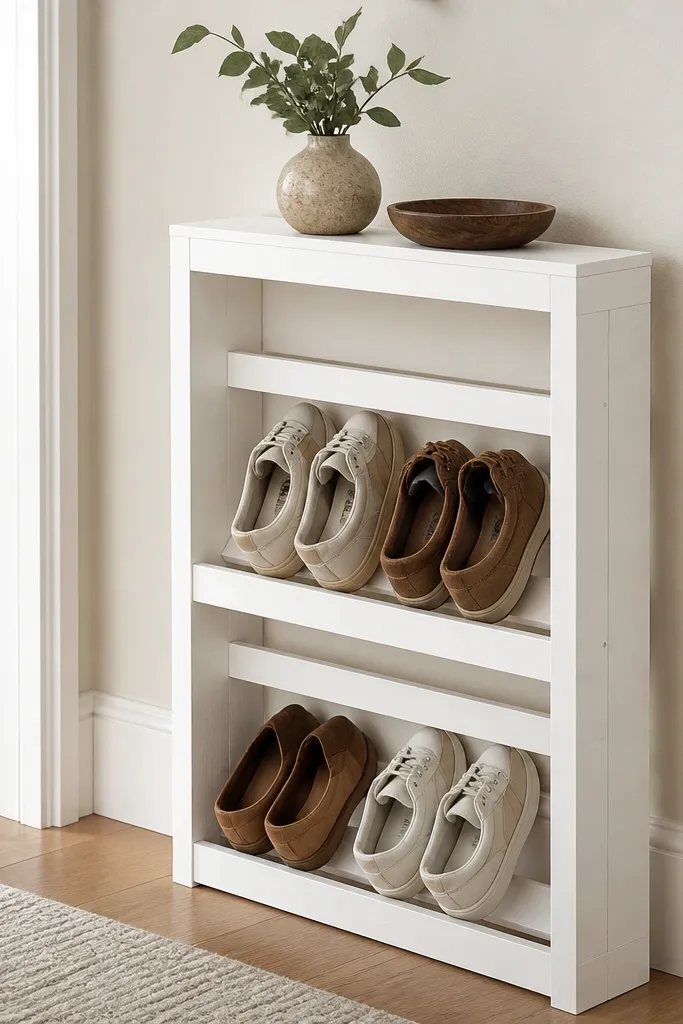
4. Plywood Box Rack with Vent Holes and a Front Door Frame
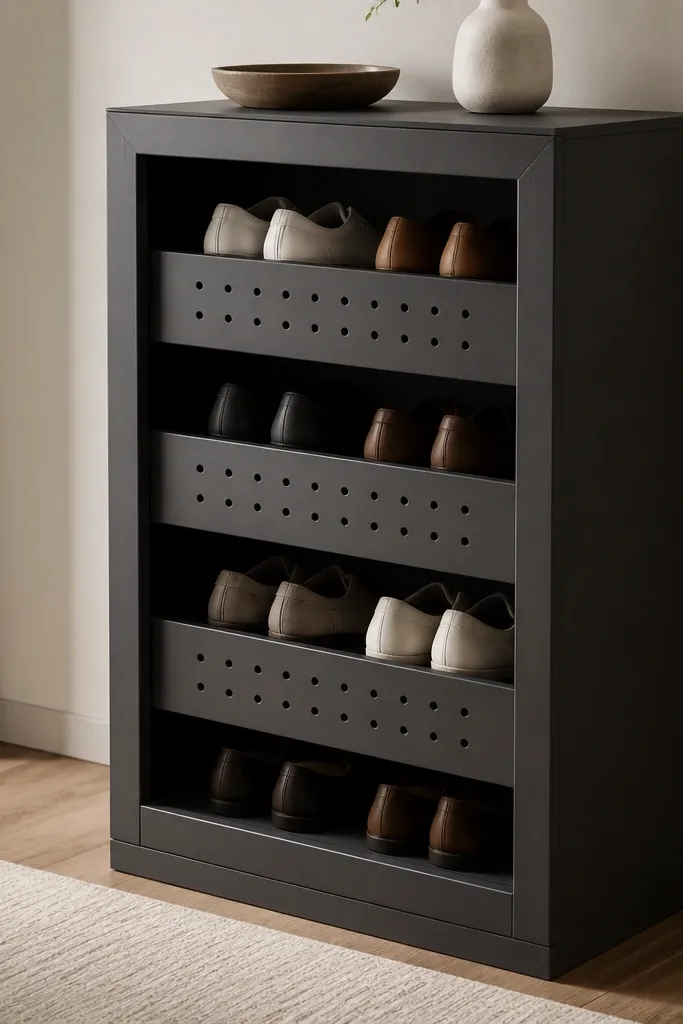
If you want shoes hidden but still breathable, drill ventilation holes in the solid shelves. The front frame gives the cabinet a finished look while the holes keep airflow. I like charcoal paint because it hides scuffs from daily use. This design works when you share space and want less visual clutter.
Cut plywood for a shallow cabinet: 10-12 inches deep, with shelves spaced 6-7 inches apart for sneakers and 10 inches for boots. Drill 1/2 inch holes in a grid pattern across each shelf panel, leaving 1 inch edge spacing. Paint the interior with a primer + enamel coat so it wipes clean.
Pro tipDrill holes before assembly so you can sand edges and keep the pattern straight.
AvoidBuilding a fully closed box with zero ventilation - shoes will smell inside.
5. Reclaimed Pallet Rack with Sanded Feet and a Light Stain
Pallet wood already has the right thickness for shoe shelves, and the open slats let air through. Sanding it to a smooth finish keeps it from looking rough and cheap. The light stain brings out grain without going too dark. I use leveling feet because pallet boards aren't perfectly flat and floors vary.
Disassemble a pallet, then cut 1 inch-thick pieces into side rails and shelf supports. Reassemble with screws, then sand to 120 grit and stain with a water-based light oak. Add feet (rubber furniture glides) at the corners so it doesn't scrape and wobble. Seal with matte polyurethane for easy cleaning.
Pro tipCheck each board for nails before sanding - it saves your sandpaper and your fingers.
AvoidLeaving pallet edges sharp makes it snag socks and looks messy.
6. Corner Rack from 1x2 Boards with Triangular Side Braces
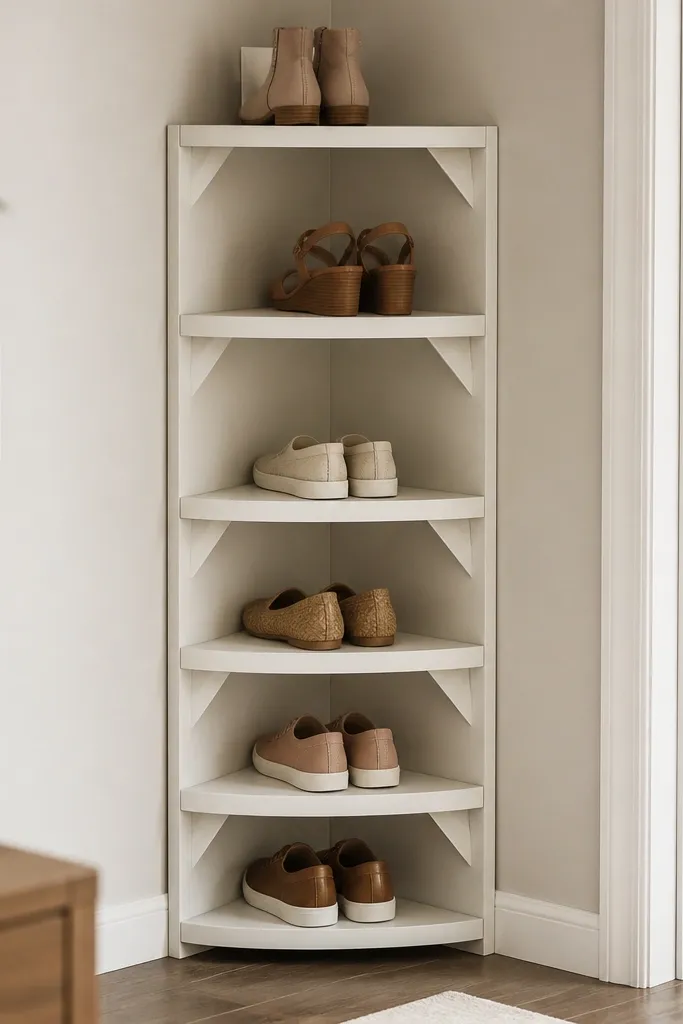
Corners are wasted space, and this uses the geometry to keep shoes visible without taking over the room. Triangular braces make the rack feel solid, even when it's made from lightweight boards. The angled shelves shed water drips from rain boots and keep shoes from sliding into the corner. Off-white paint keeps it bright in tight hallways.
Cut two side panels that match your corner angle, then build shelves as trapezoids from 1x2 and plywood strips. Space shelves 6-7 inches for sneakers and 10 inches for boots in the bottom tier. Use wood glue + screws at the triangular braces so it doesn't rack.
Pro tipDry-fit in the corner before painting so you can trim for baseboards.
AvoidBuilding a corner rack with square shelves - shoes slide into the walls and it looks crooked.
7. PVC Pipe and Wood Shelf Rack for Sneakers
PVC is straight, cheap, and tough, and it makes the rack light enough to move when you clean. The wood shelves look warm while the PVC gives clean vertical lines. This works best for low sneakers because it's more airy than a fully enclosed cabinet. I like the white PVC with light oak shelves - it looks modern without trying.
Cut 1x10 or 1x12 boards into shelf lengths, then drill evenly spaced holes for PVC posts. Use 1.5 inch PVC for sturdy posts and add end caps for a finished look. Glue the fittings, screw shelves to the posts, and stain or paint the wood before assembly.
Pro tipSand shelf edges and round the corners with a hand plane or sandpaper - shoes slide in without catching.
AvoidUsing the wrong PVC diameter makes shelves flex and wobble.
8. Stacked Crate Shoe Rack with a Bottom Tray
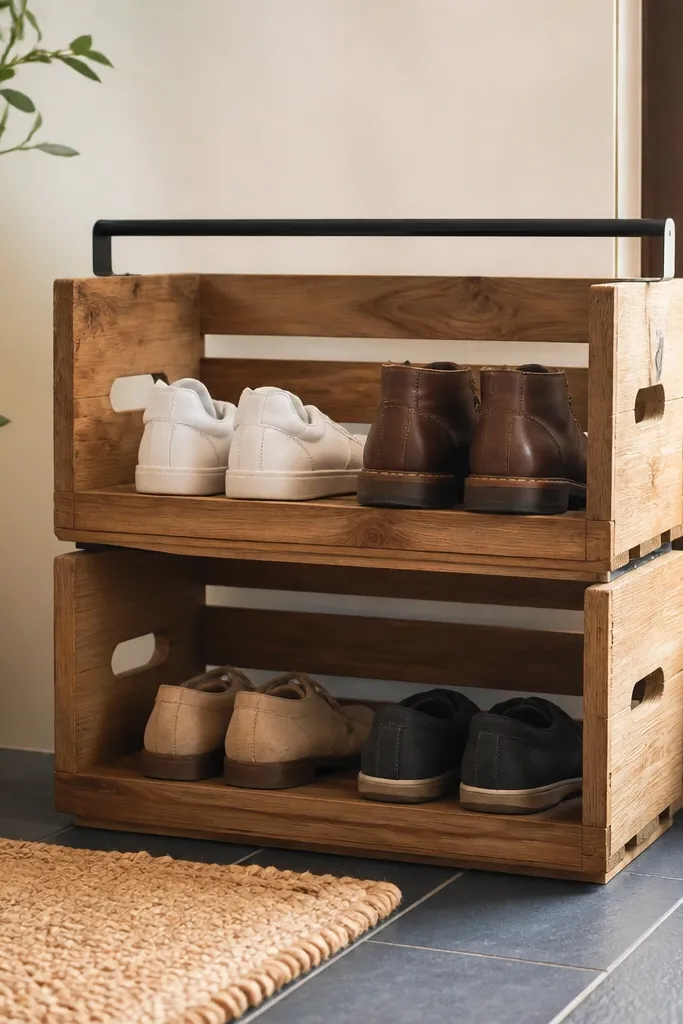
Crates look industrial and warm at the same time, and they already have open airflow. The bottom tray keeps dirt from migrating across your floor, which matters if you live somewhere with wet weather. I've made this for a friend who is always coming in from rain - it stays tidy. A black top rail makes it feel intentional.
Use two matching wooden crates sized for your shoe count, then mount the top crate to the bottom with screws through the crate frames. Add a thin plywood or metal tray under the bottom crate edge. Finish with clear matte sealant or paint the inside surfaces so they wipe clean.
Pro tipAdd felt pads under the tray and crate feet so it doesn't scratch tile.
AvoidStacking crates without securing them - they shift and the top crate tilts.
9. Bookcase-Style Rack with Adjustable Dividers
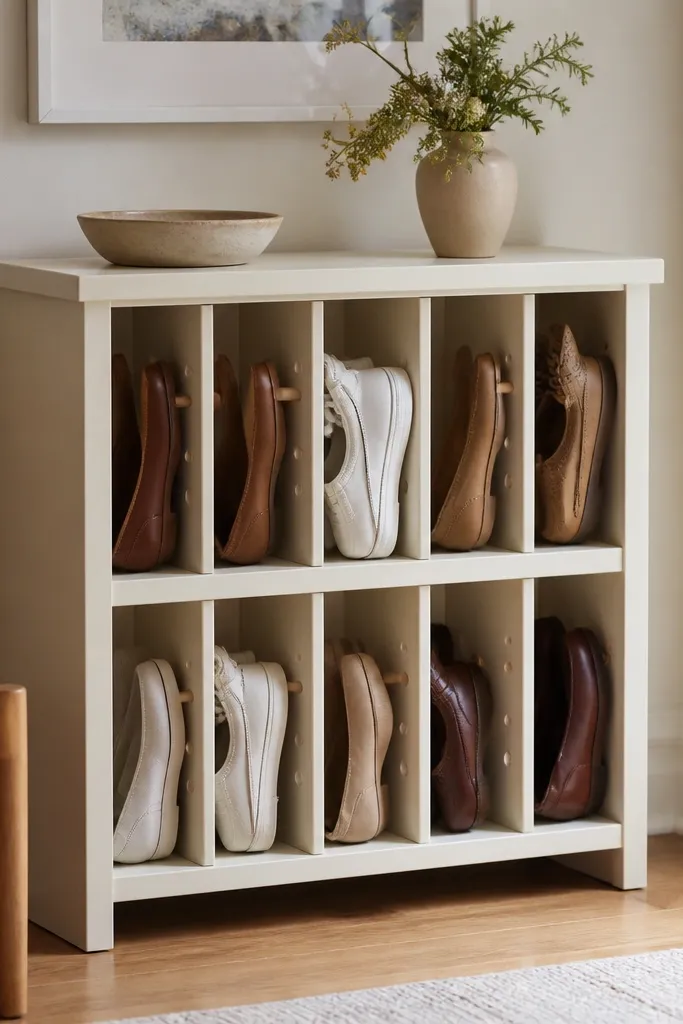
This is the one I build when shoe types change every season. Adjustable dividers let you set the spacing for sandals today and boots next month. The bookcase styling looks neat because every compartment lines up. I've seen this reduce clutter because you can fit odd pairs without forcing them.
Build a shallow cabinet frame from 3/4 inch plywood, then add vertical rails on the sides. Cut dividers from 1/2 inch plywood and add 1/4 inch holes for pegs at 2-inch increments. Make the base shelf slightly deeper for larger shoes so they don't hang over.
Pro tipLabel the divider spacing with a tiny pencil mark on the inside - you'll remember fast.
AvoidDividers that aren't rigid - thin strips bow and shoes fall into gaps.
10. Hanging Shoe Rack from a Wooden Rod and Fabric Pockets
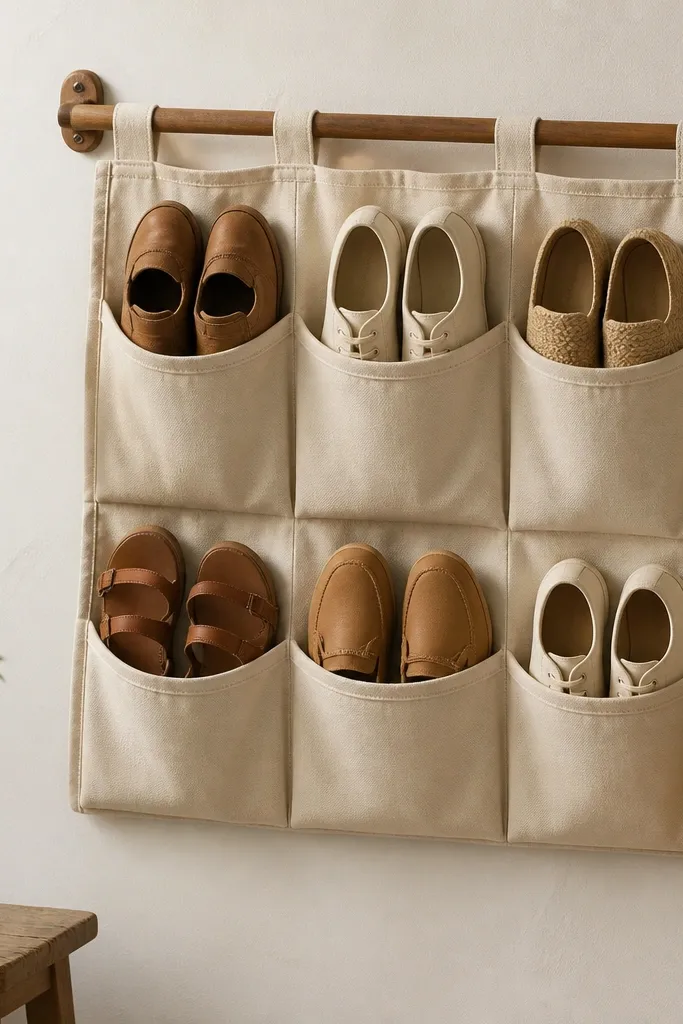
This is the cleanest way to store shoes when your floor is tight. Fabric pockets look soft, and they keep shoes from sliding around like they do in wire baskets. I've used canvas pockets because they're sturdy and don't stretch as quickly as thin polyester. It also works for kids' shoes because it's easy to grab quickly.
Mount a 1x2 ledger or rod bracket to studs at about 6-8 inches above the floor. Sew or buy canvas pockets sized for your shoes, leaving 1/2 inch gaps between pockets. Add a stiff strip at the top edge so the pockets hang straight, then secure the bottom with a simple hem weight.
Pro tipUse grommets and a cord tie at the bottom so the rack stays flat when pockets fill.
AvoidMounting only on drywall anchors - the rod pulls out once shoes get heavy.
11. Ladder Rack with Stained Wood and Hanging Hooks
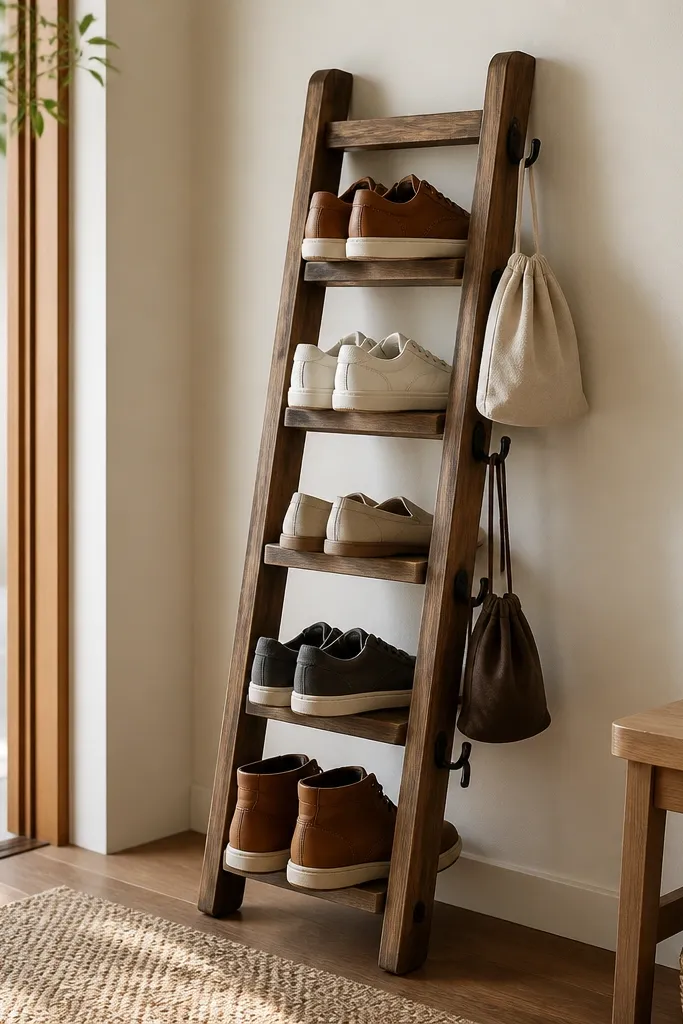
A ladder rack looks artsy without being fussy, and it's fast to build if you find a narrow ladder. Shoes sit on rungs with natural spacing, so you don't need fancy measurements. I like adding hooks because you can hang cleaning brushes or a small shoe bag. Staining it darker makes the wood feel grounded.
Sand the ladder, then stain with a mid-tone walnut. Add rubber feet to stop wobble and protect floors. For rungs, I keep 8-10 inches between levels for sneakers, and I place boots on the lower two rungs. Use a clear matte topcoat so it wipes clean.
Pro tipAttach a wall strap on the upper rung so it doesn't shift while you're grabbing shoes.
AvoidUsing a ladder with wide rungs - boots fall through and it looks sloppy.
12. Recessed MDF Shoe Niches with Brass Handles
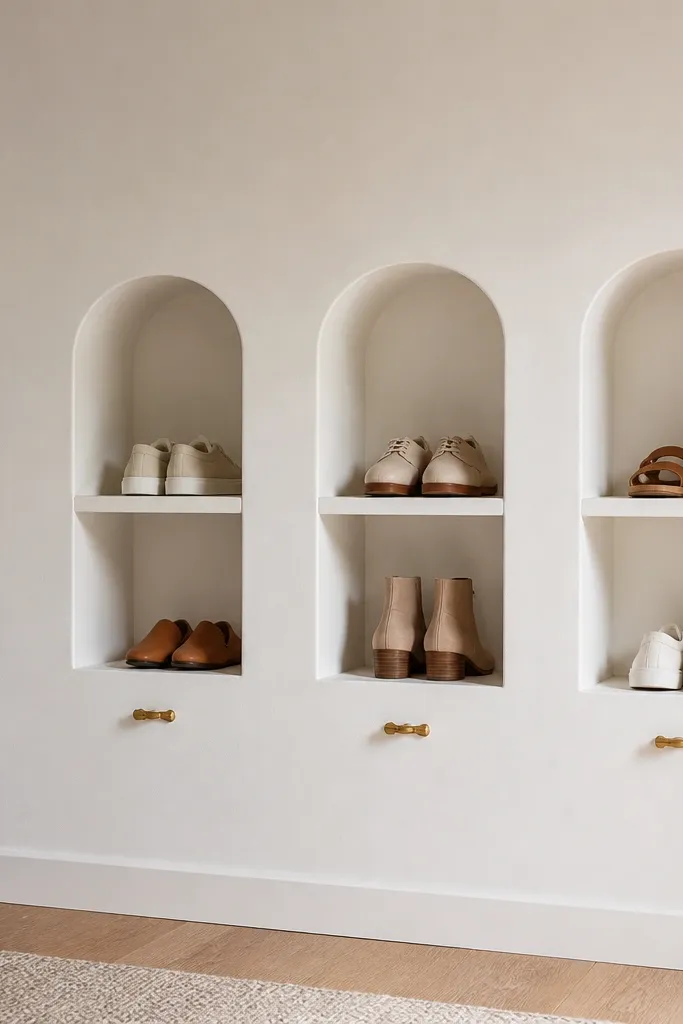
Recessed niches make the shoes disappear into the wall, which is why it looks high-end. You can keep airflow by using slatted shelf inserts or drilling small ventilation holes in the back panel. Brass handles add a clean focal point that doesn't look like cheap plastic. I've done this in hallways where you can't spare floor space and people keep tripping over racks.
Build boxes from 1/2 inch MDF and mount them into a wall section with proper clearance. Use slatted inserts for the shoe resting surface or drill 1/2 inch holes behind each niche. Paint the niches matte white and seal with primer + paint so scuffs don't soak into MDF.
Pro tipPlan a removable dust panel under the lowest niche if you get grit from shoes.
AvoidSkipping ventilation - recessed storage traps odor quickly.
13. Industrial Pipe Shoe Rack with Two-Tier Wooden Shelves
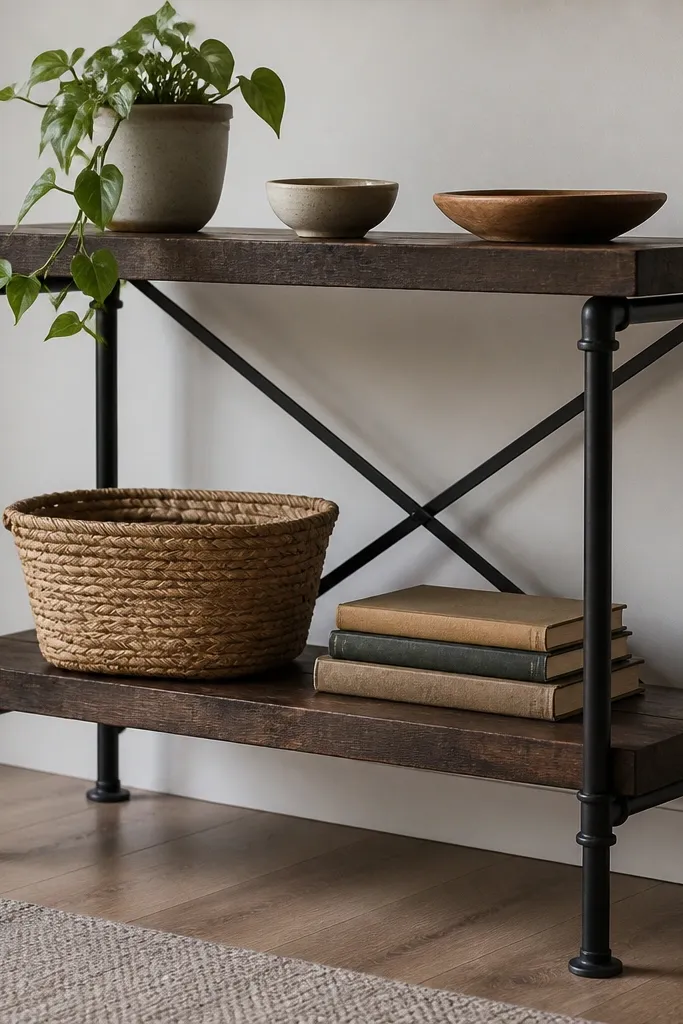
Pipe racks look sharp because the hardware is the design. The open frame also keeps shoes from trapping moisture. I like two tiers because it keeps the proportions clean and prevents the shelves from becoming too deep. For a home entry, the black metal and dark wood combo hides stains better than light finishes.
Use black steel pipe and flanges to build a rectangular frame, then attach 3/4 inch plywood shelves cut to 12 inches deep. Add a back brace using another pipe segment so the shelf doesn't rack. Seal the wood with a hard topcoat like matte polyurethane and add rubber pads under the flanges.
Pro tipSand the shelf top edge and apply edge sealant - shoes slide in without catching on rough plywood layers.
AvoidOverbuilding the frame without leveling it - crooked pipe makes the whole rack look off.
14. Stackable Drawer Unit Shoe Rack from Rolling Bins
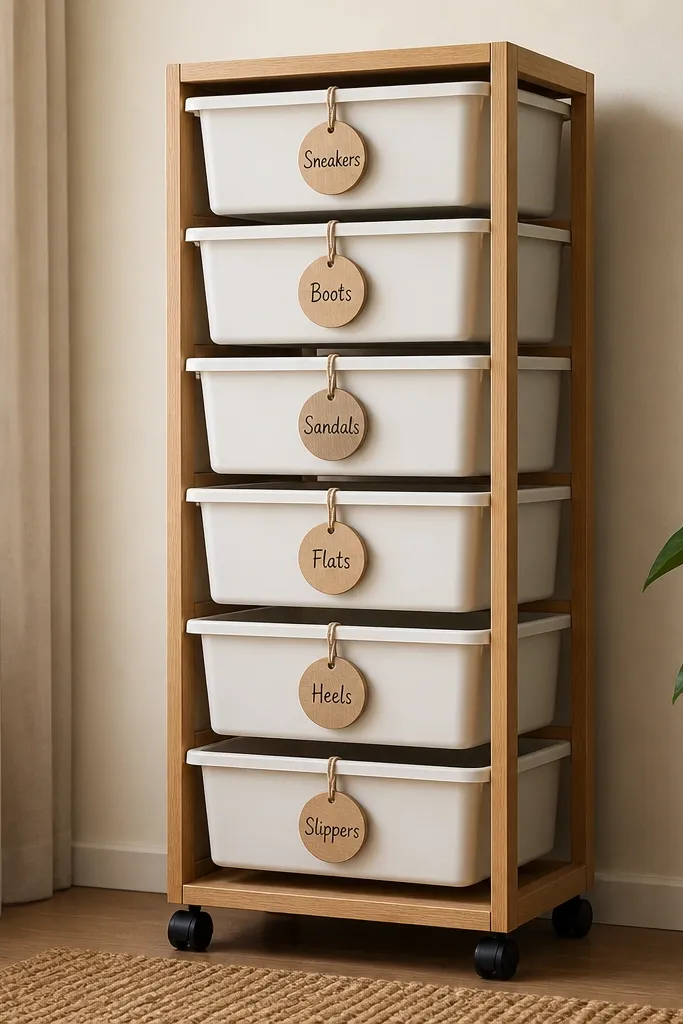
Rolling bins keep shoes contained and make it easy to find sizes fast. The wooden frame hides the plastic look, so it looks like furniture instead of storage. I've used this for people who change shoes by the day - it keeps the mess inside bins. Add small ventilation gaps in the bin lids if you store wet shoes.
Use a wooden frame built from 1x3 or 2x3 lumber with bin cutouts sized to your rolling bins. Attach the frame to studs or anchors for stability. If your bins have solid fronts, drill 1/4 inch holes across the back panel area for airflow. Paint the frame to match your wall trim.
Pro tipUse clear tape labels on the inside lip of each drawer so they don't peel from shoe spray.
AvoidSkipping a stability anchor - stacked drawers tip when someone yanks one out.
15. Slanted Entry Bench with Built-In Shoe Compartments
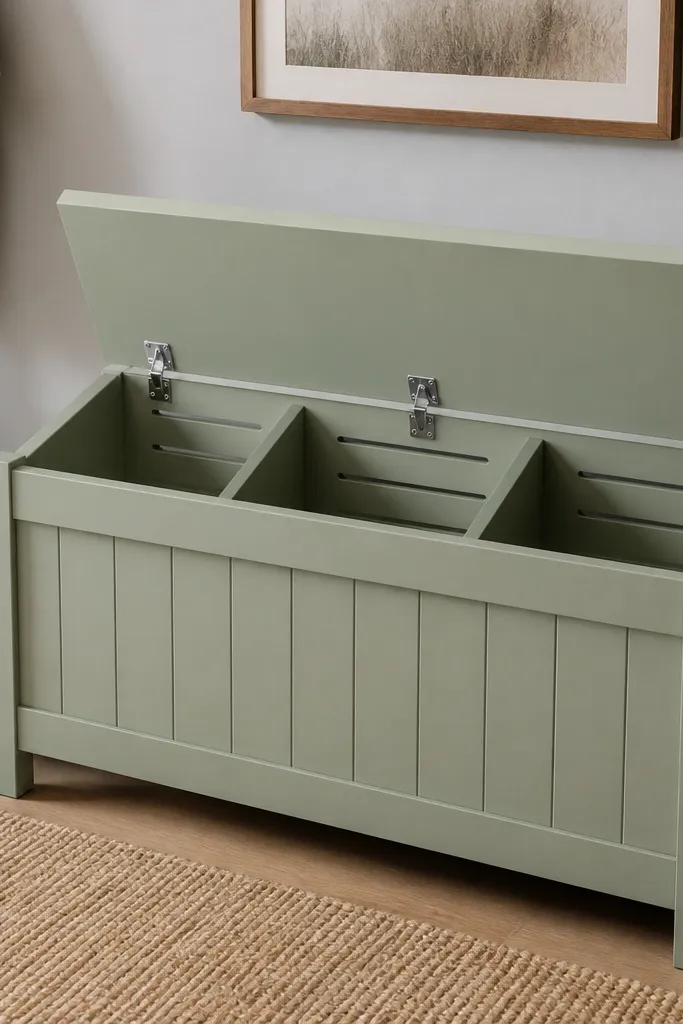
This is the solution when you want seating and shoe storage without a separate rack. The slanted dividers keep shoes from falling forward and you get airflow from small gaps. I like a hinged lid because it hides the daily mess when guests walk in. The bench height feels right at around 18 inches to sit comfortably.
Build a bench frame from 2x2 legs and 3/4 inch plywood panels. Inside, create dividers using 1/2 inch plywood angled about 15 degrees so shoes rest back. Add ventilation by drilling holes in the back panel and using a slatted base insert. Finish with paint and a durable topcoat on the lid.
Pro tipAdd soft-close hinges or a simple prop rod so the lid doesn't slam and loosen screws.
AvoidMaking compartments too shallow - shoes get wedged and the lid won't close.
16. Bamboo Mat Shoe Rack with Raised Side Rails
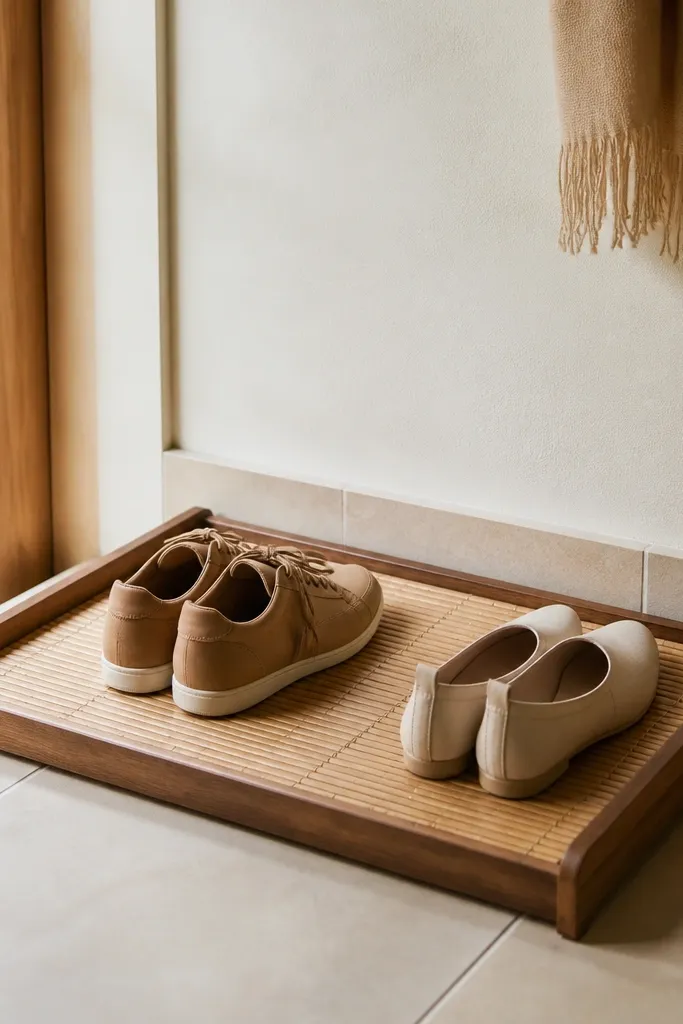
A bamboo mat base is great when you deal with rain, because it handles moisture better than many particle boards. Raised side rails keep shoes from sliding off, especially when you kick them in quickly. This design looks calm and natural, and it's easy to clean - sweep it and wipe the frame. It also works for drying shoes because the surface isn't sealed like a typical wood shelf.
Build a shallow frame from 1x3 boards, cut to fit your mat size, and screw corners together. Leave a 1/2 inch gap between rails and shoes so air can circulate. Seal the wood frame with a water-resistant clear coat, but leave the mat unsealed so it can breathe.
Pro tipUse a removable mat insert - you'll thank yourself when you need to wash it.
AvoidSealing the mat like a countertop - it traps moisture and leads to odor.
17. Cinder Block Shoe Rack with a Cut Plywood Cap
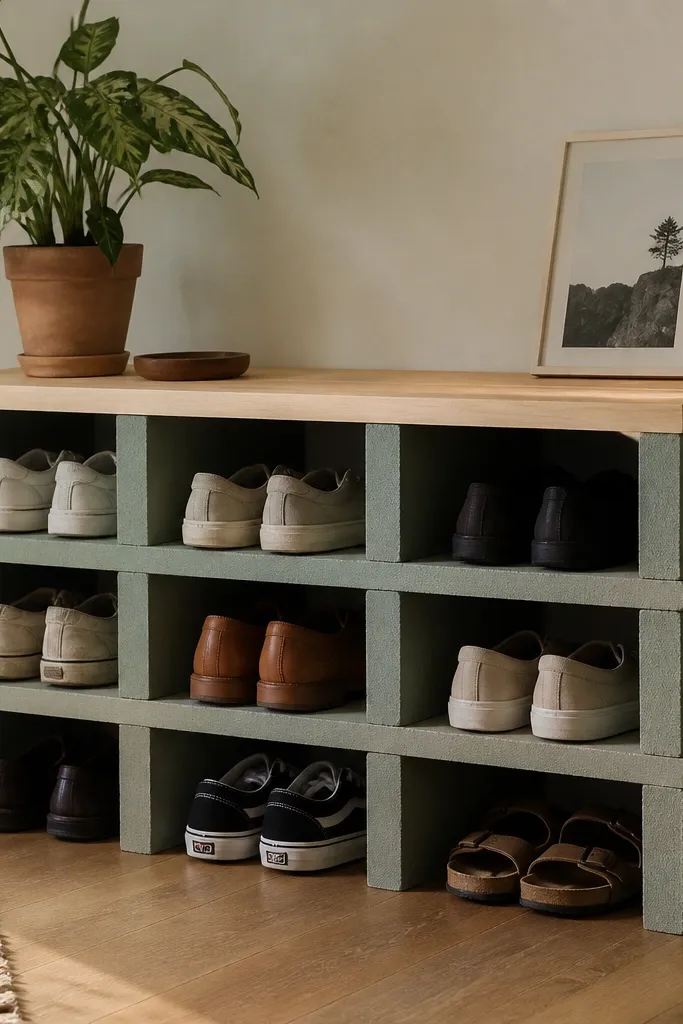
Cinder blocks are heavy, so the rack won't slide when you shove shoes in. The hollow structure gives airflow, and the open top makes it easy to grab pairs fast. I paint the blocks matte so they don't look like raw construction material. A plywood cap keeps the top from collecting dust and helps shoes sit flatter.
Stack cinder blocks in a stable pattern, then add a plywood top panel cut to the block footprint. If you want two rows, stack blocks so each tier has clear openings for shoe toes. Paint with a masonry primer + exterior paint so scuffs don't chip off quickly.
Pro tipAdd a thin rubber pad under the blocks to protect tile and reduce vibration.
AvoidStacking blocks without checking balance - a slight wobble makes it unsafe.
18. Fold-Up Shoe Rack from Hinged Wooden Panels
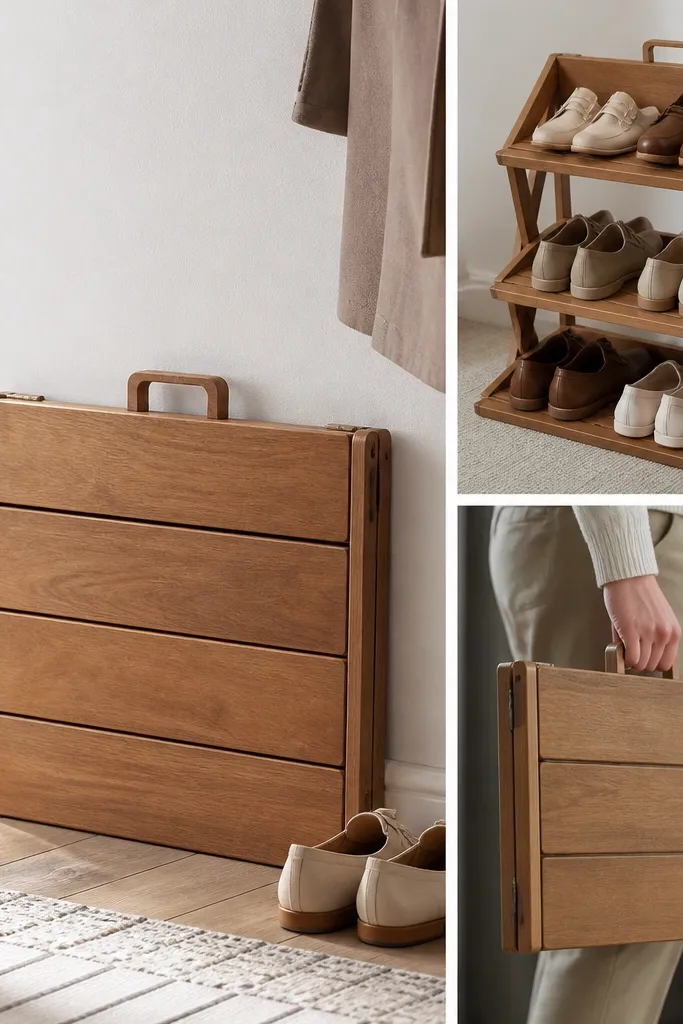
This is the rack I recommend when you need storage that doesn't hog space. Hinged panels let you expand for a busy week and fold it away when you're done. It looks clean because the panels align into straight lines. I used this style in a rental where we couldn't mount anything to walls.
Build two hinged sides from 1x3 boards and attach cross slats between them, leaving 1.5 inches between slats. Add a locking latch at the top so it doesn't collapse when you pull a shoe out. Finish with paint or poly so the wood wipes clean.
Pro tipTest the fold with empty shoes first so you don't end up with binding hinges.
AvoidUsing flimsy hinges - the rack sags once shoes add weight.
19. Pegboard Shoe Rack with Dowels and a Bottom Tray
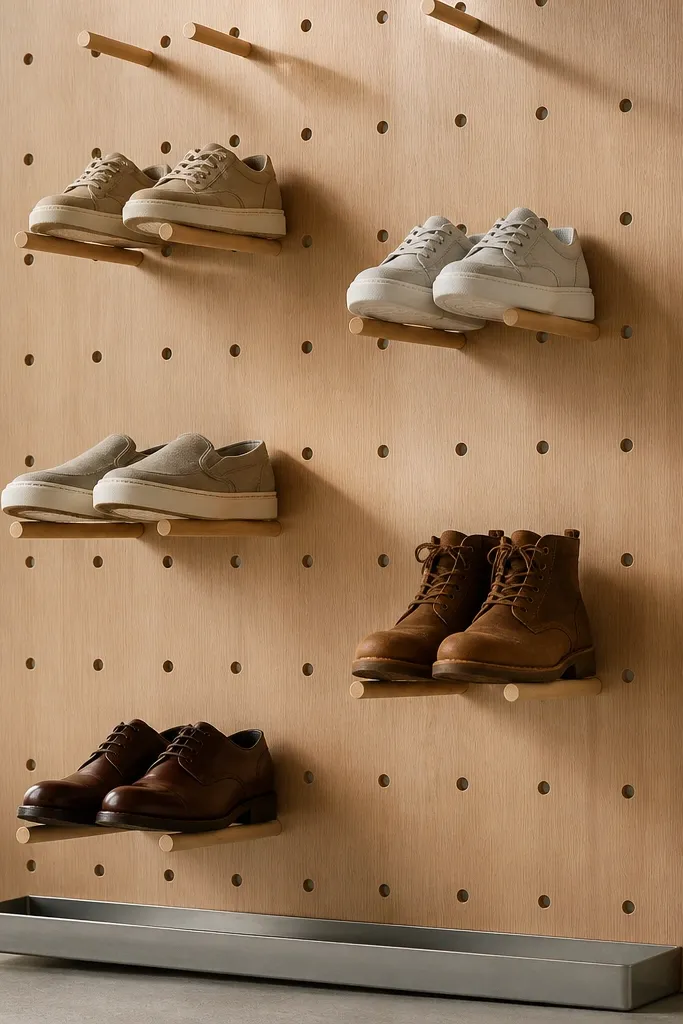
Pegboard lets you customize spacing without rebuilding the whole rack. Dowels give consistent support under shoe soles, and the board looks neat when you keep the holes in straight rows. I like this for entryways where you want vertical storage and easy reconfiguration as kids grow. A bottom tray keeps the dust from collecting on the floor.
Mount pegboard to studs, then insert 3/4 inch dowels at a height that matches your shoe sole. Use 2 inch spacing between dowels for sneakers and wider spacing for boots. Add a metal or plywood tray under the pegboard edge, screwed in with spacers so it sits slightly away from the wall.
Pro tipUse a level and mark the pegboard grid before drilling any dowels so the rack looks straight.
AvoidMounting pegboard on drywall only - it bows once shoes hang on dowels.
20. PVC Grid Shoe Rack with Removable Shoe Stops
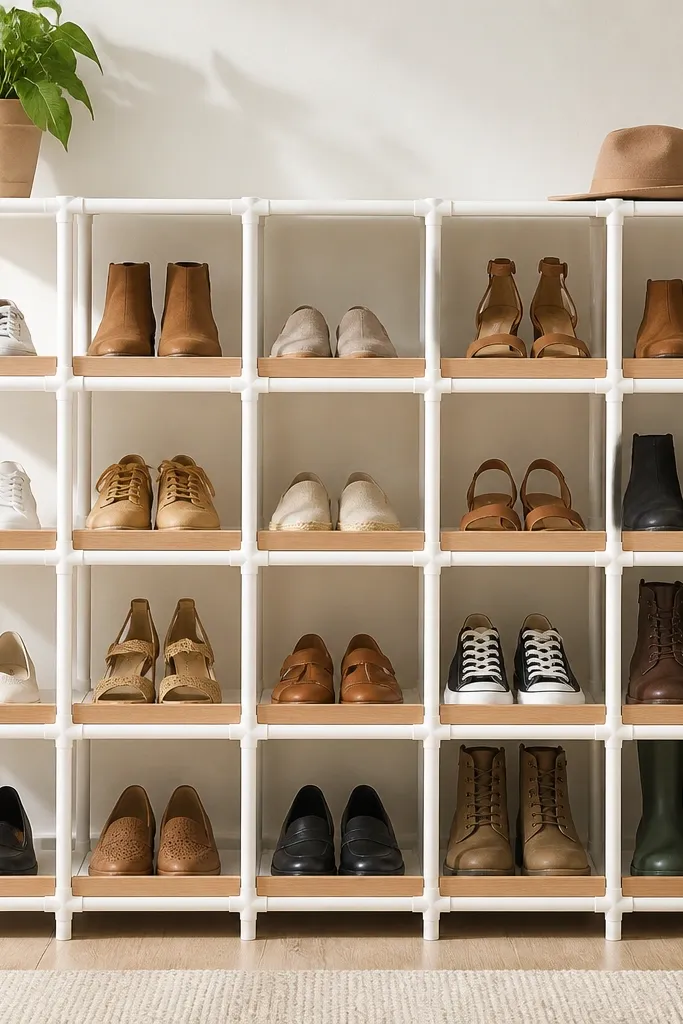
PVC grid storage looks clean because the lines are uniform, and it's easy to build to any width. The open squares keep airflow, so shoes don't sit in a sealed box. Removable stops let you adjust the rack for different shoe sizes without rebuilding. I used this for a small office entry where people bring in wet shoes during winter.
Use PVC tees and elbows to make a grid frame on a base board or directly on a plywood base. Build rows 7 inches apart for sneakers, and add extra height for boots. Add small wooden stops that screw in at the front edge using two screws so you can swap them for different pairs.
Pro tipLabel the stop sizes with a marker on the underside for quick changes.
AvoidMaking the grid too tight - shoes get jammed and you end up forcing them.


