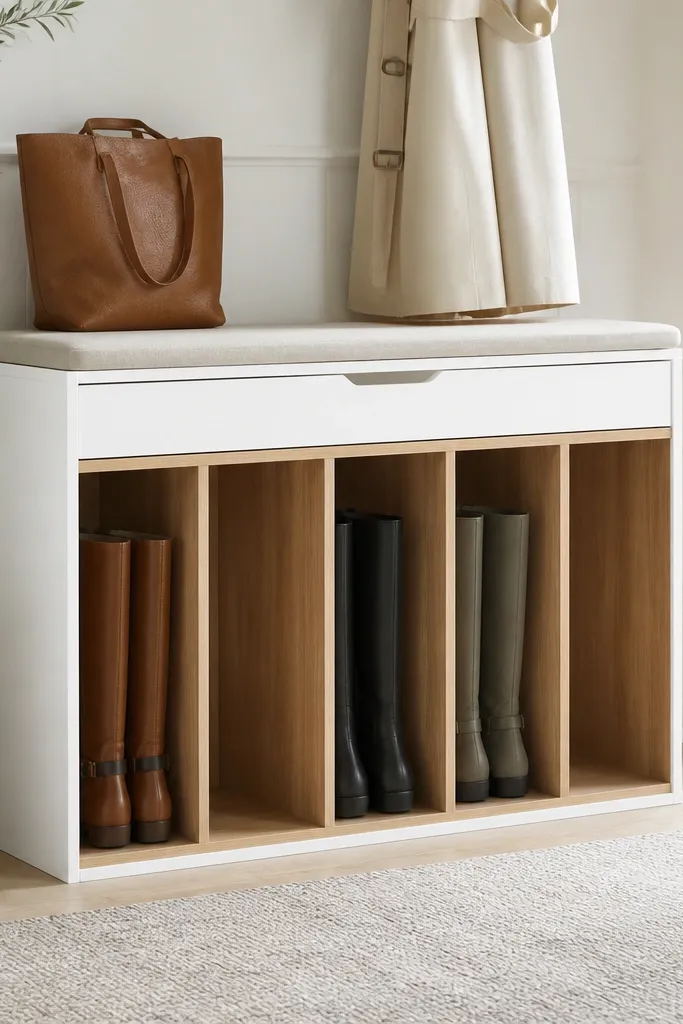
1. Flip-top shoe bench with hinged seat and 3 vertical shoe columns
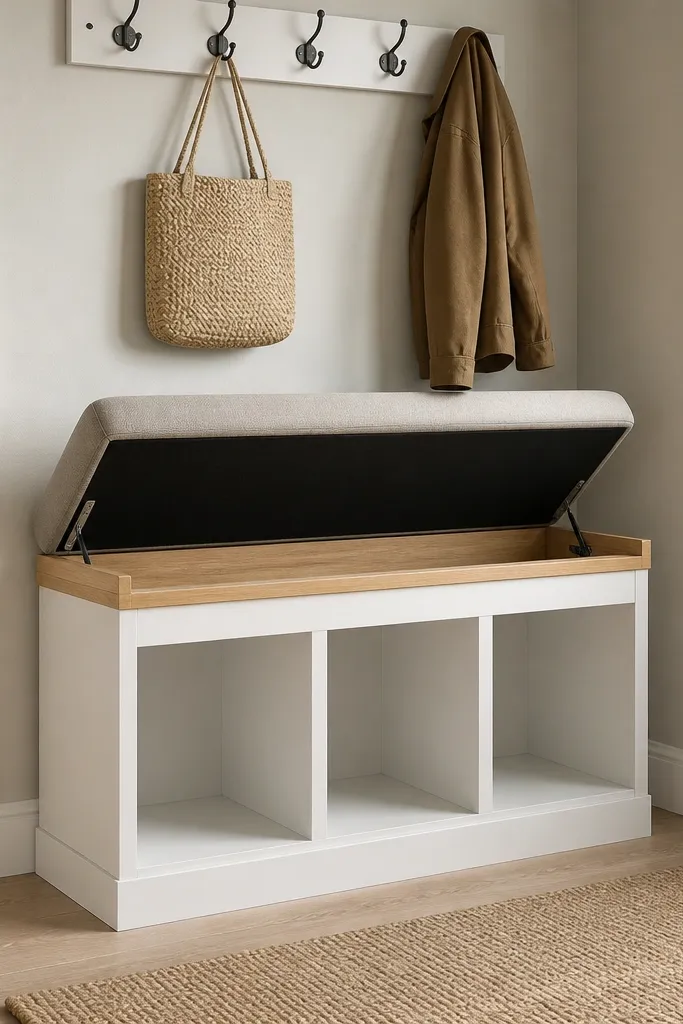
This design keeps the front looking tidy while making daily shoe storage fast. The flip-up seat hides the compartments, so the entryway stays visually calm even when people kick off shoes. Three vertical columns work well for sneakers and flats because each opening can be sized to a specific shoe type. The padded top gives you the seating comfort without needing a separate chair.
Build the bench carcass from 3/4-inch plywood. Make the seat lid the full width of the bench and hinge it at the back edge; add a gas strut or a strong stay hinge. For the columns, divide the interior into three equal bays and leave 4 inches of height per row if you're storing mostly sneakers.
Pro tipUse a hinge with a built-in soft-close and add a magnetic catch so the lid lands quietly.
AvoidAvoid making the seat lid too shallow - if the foam is thin, it looks cheap and feels wobbly.
2. Lift-lid storage bench with a slatted shoe rack base
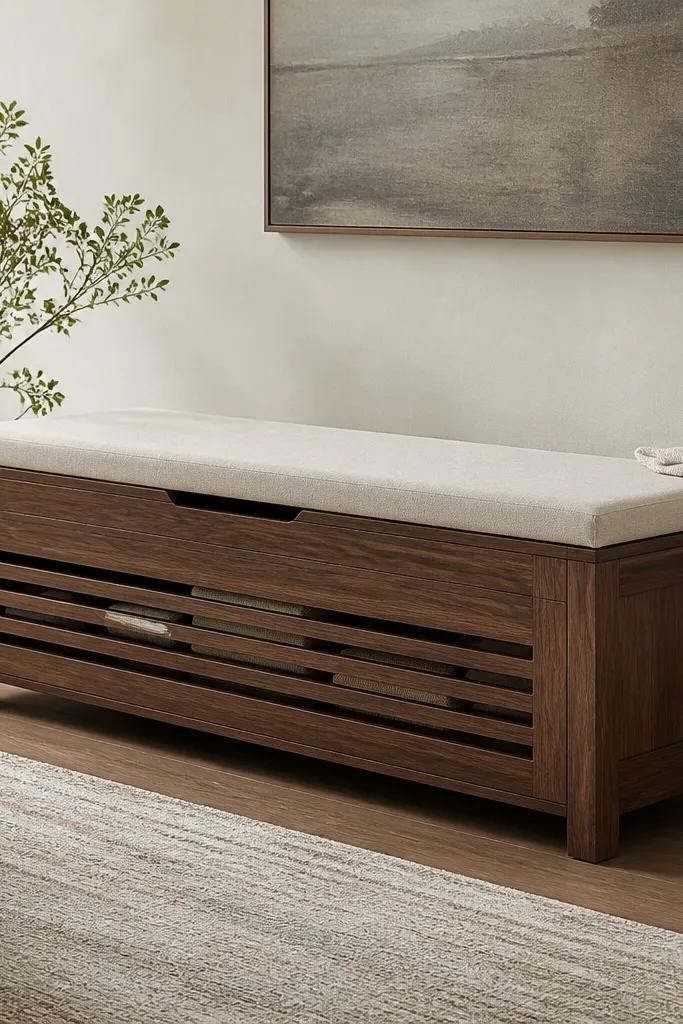
The slatted base is the secret when shoes come in damp. Air gaps help shoes dry faster, and you're not trapping moisture in a sealed box. The lift lid keeps everything hidden, so the entryway still looks designed. Staining the slats dark makes the interior look intentional even when you peek inside.
Use 1x2 slats spaced about 3/4-inch apart on top of simple side rails. Set the shoe compartment height around 9-10 inches for most sneakers; for boots, increase to 13-14 inches on one side. The lift lid needs a strong hinge line at the back and a lid support that won't drift down.
Pro tipLine the inside walls with felt only where shoes rub; felt helps reduce scuffs without trapping too much moisture.
AvoidSkipping airflow by using solid panels all around makes damp shoes smell faster.
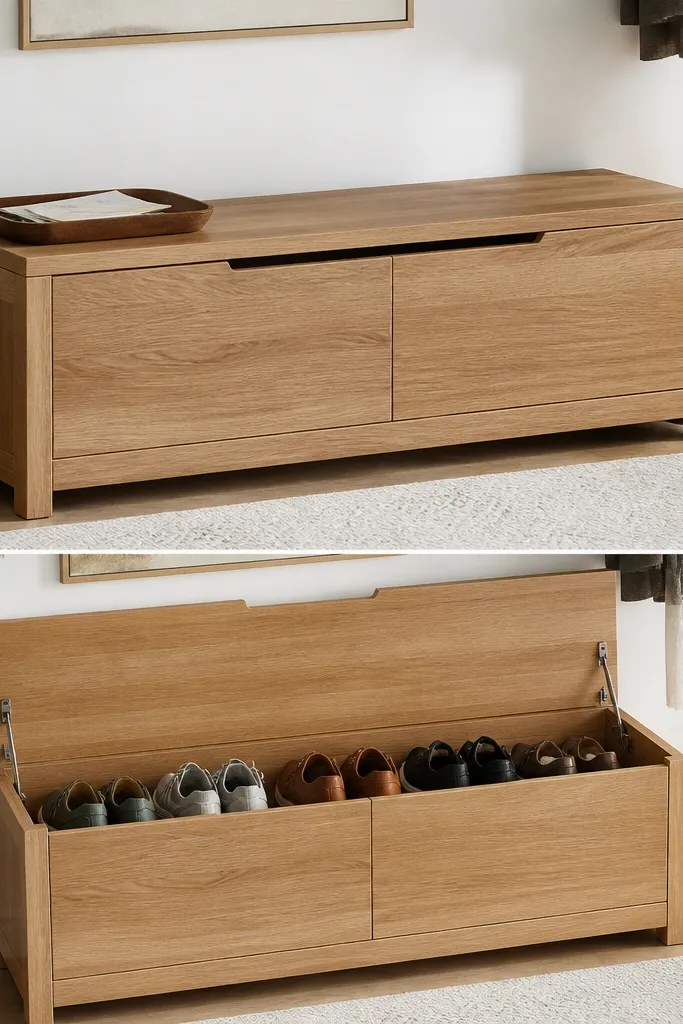
3. Drawer-front shoe rack with a cushioned seat top and two open cubbies

This one looks like real furniture, not a DIY crate. Drawers hide clutter and make it easy to separate everyday shoes from extras. The two open cubbies above are for items that get moved constantly - like flip-flops, a small basket for keys, or a rolling shoe horn. The cushioned top gives you a comfortable place to sit while you lace up.
Build the drawers with 1/2-inch plywood sides and 1/4-inch bottoms, sized to fit 10-11 inch shoe lengths. Keep the cubbies at about 7-8 inches high each so they don't swallow tall items. Add a seat cushion 2 inches thick with a washable cover, and anchor the seat with corner cleats so it doesn't shift.
Pro tipInstall full-extension drawer slides rated for at least 75 lbs so the drawers don't sag after months.
AvoidDon't use tiny drawer pulls - small hardware makes the whole piece look underbuilt.
4. Corner shoe bench with seating and wedge-shaped shoe compartments
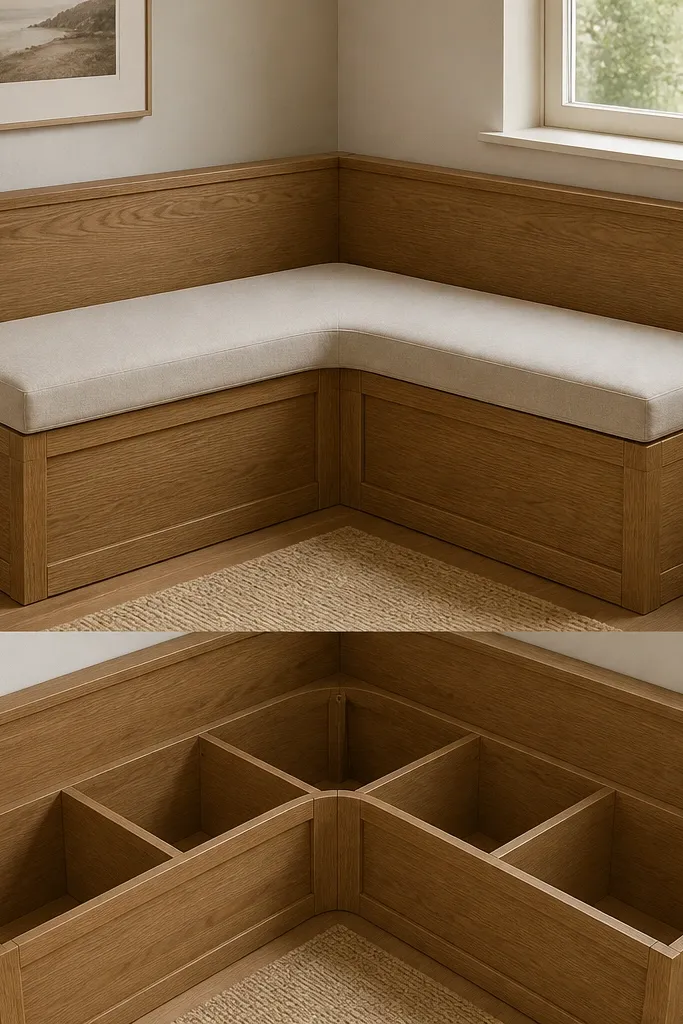
Corners waste space unless you shape storage to the geometry. Wedge compartments fit into the corner footprint and give you usable shoe capacity without blocking the hallway. The single corner seat looks cohesive, and it's comfortable because your legs have room even when the storage is tight. Staining the wood makes the curved interior feel smooth instead of boxy.
Use a triangular base frame with 3/4-inch plywood sides and cut wedge dividers from 1/2-inch plywood. Make the front opening wider than the back opening so shoes slide in without snagging. For the cushion, use a foam wedge cut to match the corner shape and cover it in vinyl or performance fabric.
Pro tipSand all wedge edges round-over with a 1/4-inch radius so laces don't catch.
AvoidAvoid sharp interior corners - they snag shoes and chip finishes.
5. Bench with flip-out side shelves for quick shoe access
If your entryway is narrow, side access beats digging into a front lid. Flip-out shelves let you grab the pair you need without lifting the seat every time. The shallow slots are perfect for slip-ons and kids' shoes you grab daily. The clean front keeps the look calm and furniture-like.
Build the main bench as a 12-14 inch deep frame. Install side shelves using piano hinges and a support prop so they stay open at about 70-80 degrees. Make each side shoe slot about 8 inches high and 9-10 inches deep for sneakers and flats.
Pro tipUse a rubber bumper on the shelf edge so it doesn't clack into the frame.
AvoidAvoid making the shelves too narrow - if a shoe can't slide in smoothly, you'll stop using it.
6. Two-tone bench with countertop-style top and concealed shoe bin
Two-tone finishes make this look expensive even when the build is simple. The countertop-style top reads like furniture, and it also resists scuffs from shoe toes. Under the lid, a concealed bin keeps shoes out of sight and makes the entryway look staged. The contrast between black base and warm top hides scratches better than full light paint.
Use a butcher-block board as the top, trimmed to the bench width and sealed with multiple thin coats of polyurethane. The shoe bin under the top can be a simple open box with a back stop so shoes don't fall through. Add a hinge at the back and a latch at the front center for alignment.
Pro tipSand the top to 220 grit, then apply at least 3 coats of polyurethane for a smooth, wipeable finish.
AvoidSkipping edge sealing on the top - unsealed end grain drinks water and stains fast.
7. Shoe bench with seating and pull-out tray for boots
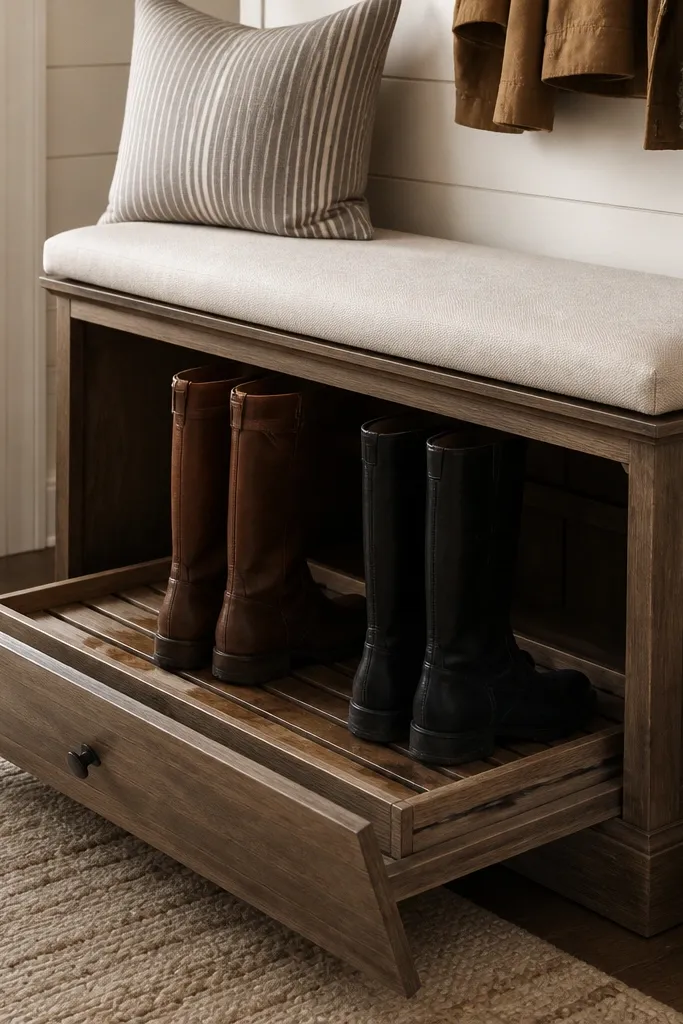
Boot storage is where most entry benches fail - they cram boots sideways and they flop around. A pull-out tray holds boots upright, so they don't crease as badly and you can see what pair you're grabbing. The padded seat makes it usable day-to-day, not just a storage box. Slats keep the boot opening ventilated.
Build the tray from 1/2-inch plywood with side rails and a slatted insert. Use drawer slides rated for 100 lbs if the boots are heavy. Set the tray opening height to 16-18 inches for tall boots, and keep the bench depth near 18 inches so boots don't jam.
Pro tipAdd a small foam strip at the tray stop so the tray glides in and doesn't slam.
AvoidDon't store boots in a compartment that's too short - forcing them upright without height makes them deform.
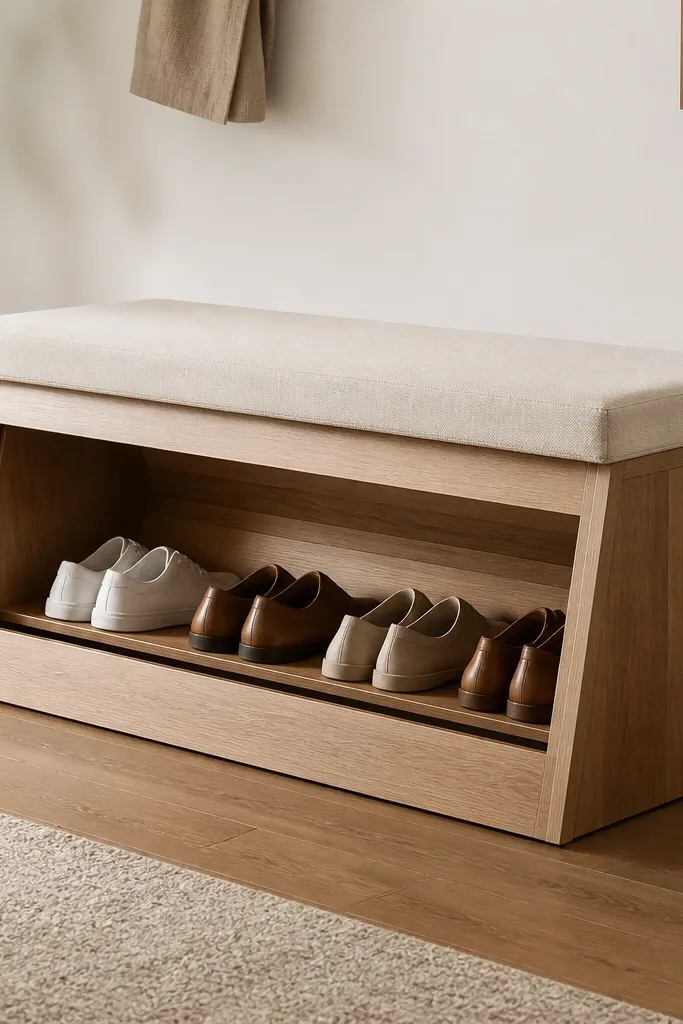
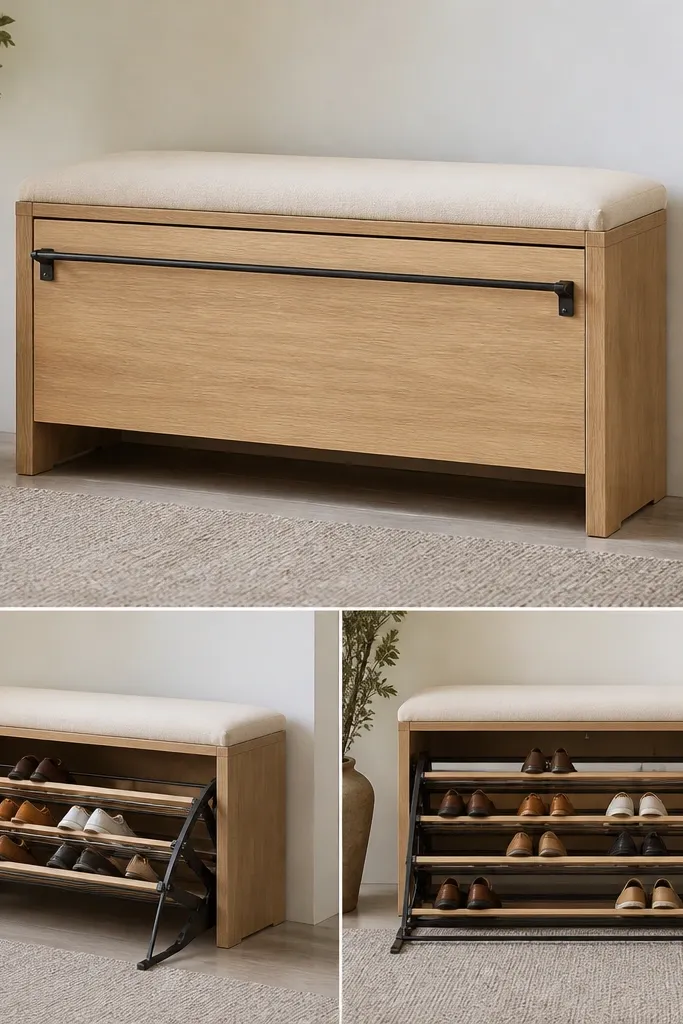
8. Minimalist bench with open shoe rack under a padded seat
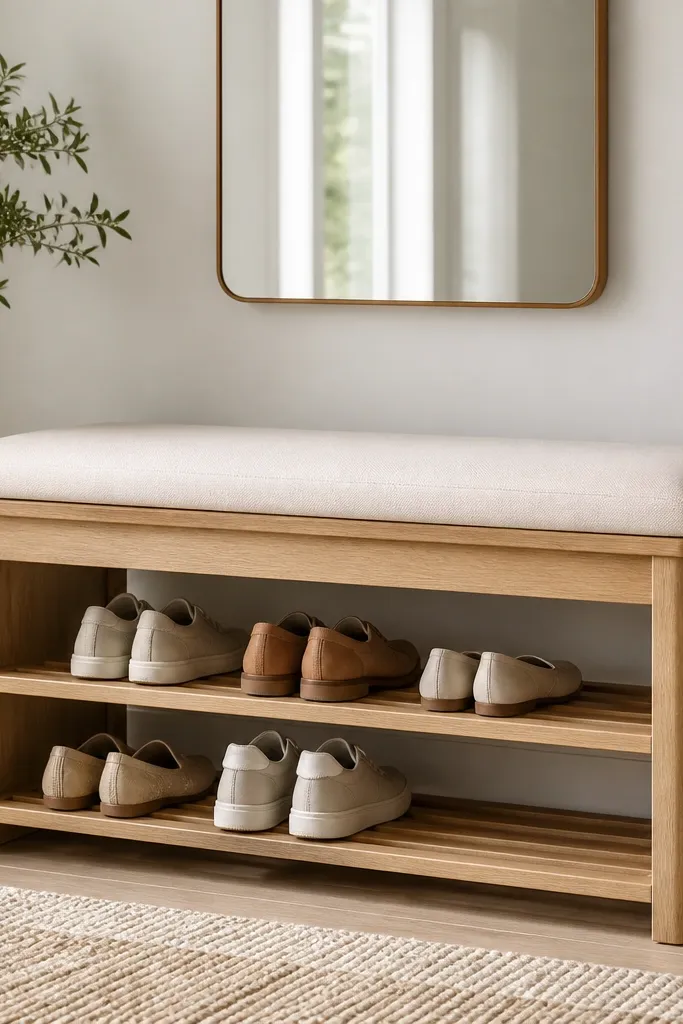
When you want the entryway to feel bright, an open rack looks lighter than enclosed storage. Horizontal shelves show shoe pairs at a glance, so you're less likely to toss shoes in randomly. The padded seat stays the focal point, while the open rack keeps the design honest. Use light wood and a simple finish so the open storage doesn't look messy.
Make the shelf spacing 7-8 inches for sneakers and 10-11 inches for loafers. Use 1x3 boards for shelves with a clear finish or a light stain. Add a backer strip to keep shoes from sliding forward, and anchor everything with pocket screws or dowels.
Pro tipUse shoe dividers made from scrap plywood cut to 1/8-inch kerf so pairs line up evenly.
AvoidAvoid uneven shelf spacing - it makes the whole piece look thrown together.
9. Bench with seating and a rotating shoe carousel behind a door
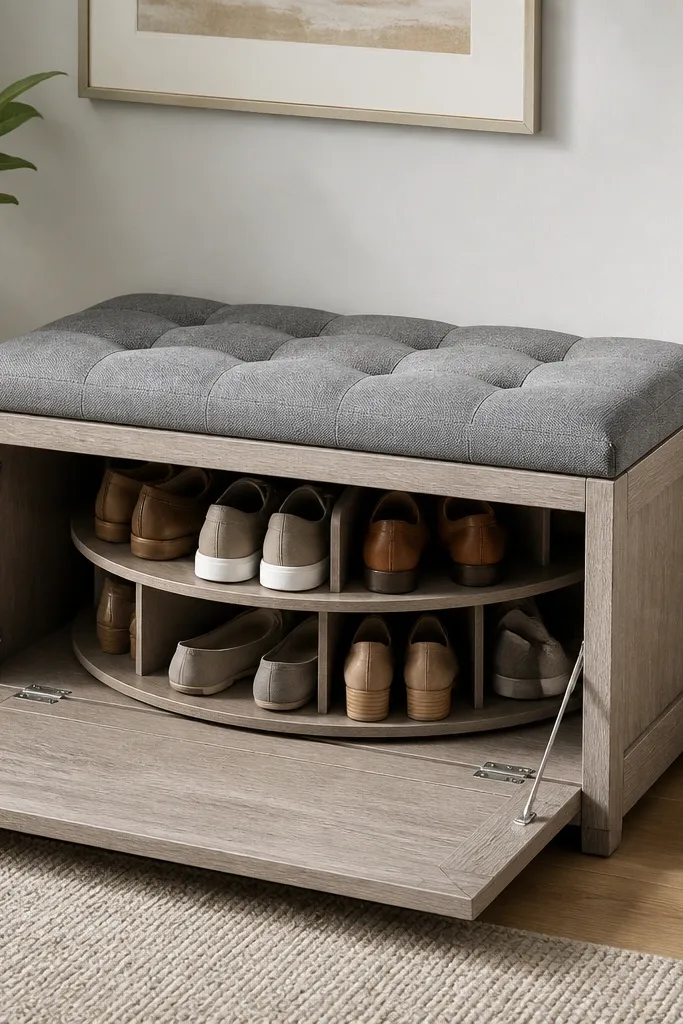
A carousel is the fastest way to find a specific pair because everything is visible and accessible. The door hides the mechanism so it looks like a normal bench from the outside. In entryways, that visibility matters - you stop digging and you stop stacking shoes on the floor. Upholstered seating keeps it comfortable even if you use it every morning.
Mount a carousel insert sized to the bench width and depth, then frame it with 3/4-inch plywood. The door should be wide enough to clear the carousel lip when it turns. Use soft-close hinges on the door and a latch that holds the door open without drifting.
Pro tipPlan the carousel height so the top of shoes sits at least 2 inches below the seat underside.
AvoidDon't cram the carousel too tight to the door - rubbing makes it hard to rotate.
10. Bench with seating and a slanted shoe rack for quick drop-in
A slanted rack makes shoes easier to drop in and easier to grab because gravity helps. People can kick off and slide shoes down without pushing them deeper into a tight box. The slant keeps the entryway looking neat because shoes don't pile up at the front. It also works well for kids' shoes since they don't need perfect placement.
Set the rack at about a 10-15 degree slope. Build the compartment with side rails that guide shoes into place, and add a front lip about 1 inch tall so shoes don't slide out. Keep the shoe opening wide enough for a hand grip, around 14-16 inches.
Pro tipSand the slant edges smooth and seal with a wipe-on finish so scuffs don't soak in.
AvoidAvoid making the slope too steep - boots can slide out when you open the seat.
11. Shallow entryway bench with seating and pull-out basket shelf
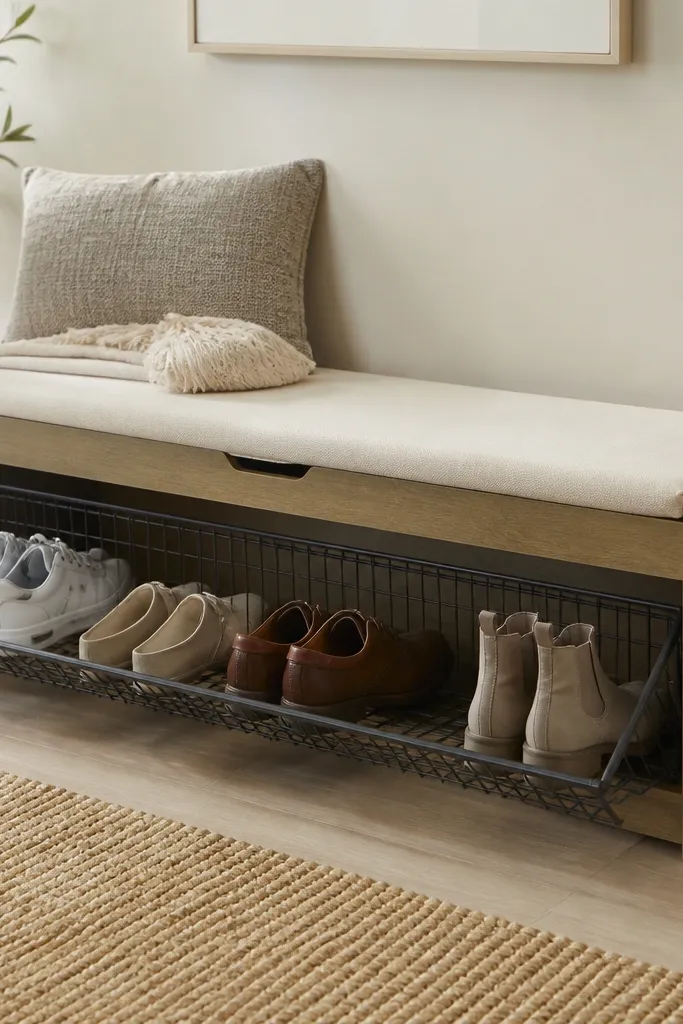
Wire baskets hide the mess while still letting air move, which helps shoes dry. The pull-out action means you can grab everything at once for wiping the floor or swapping seasons. This is also one of the easiest builds for small entryways because the storage depth stays shallow. The seat cushion keeps the whole thing comfortable even if you're only sitting for a few seconds.
Use a basket insert sized to your opening and mount it on drawer slides. Build the bench frame at 14-15 inches deep. Make the opening height around 10-12 inches so you can fit sneakers and slip-ons without bending them.
Pro tipAdd a small stop block so the basket doesn't overpull and rack the slides.
AvoidSkip cheap slides - wobbly slides make the basket look shaky fast.
12. Bench with seating and vertical cubbies for boots plus a top drawer
This layout is for people who own real boots and actually wear them. Vertical cubbies keep each pair separated, so they don't lean into each other and scuff. The top drawer is for small entry stuff like shoe polish, wipes, or a roll of tape for umbrellas. The seat makes the unit feel like a bench, not storage shelves.
Make cubby widths around 8-9 inches for standard boots and 10-11 inches if your boots are wider. Keep the cubbies tall - 15-17 inches - and add a base shelf inside each cubby to prevent boot toes from dropping. The top drawer needs a clean face frame so it blends with the bench front.
Pro tipUse felt pads at the cubby base so boot heels don't bounce and scratch.
AvoidDon't make cubbies too tall with no base support - boots sag and look sloppy.
13. Bench with seating and a hinged shoe lid that doubles as a mail shelf
This is one of my favorite "entryway multitask" builds because the top surface gets used constantly. When the seat is closed, you have a flat place for mail and small packages. When it's open, it turns into shoe storage, so you don't need a separate bench tray. The key is making the hinge action smooth so the lid doesn't feel heavy or annoying.
Use a flat top ledge that's about 1-1.5 inches deep above the opening, with a lip so mail doesn't slide off. Inside, keep the shoe compartment around 9-10 inches high if you're storing sneakers. Add a soft-close hinge and a latch so the lid lines up perfectly every time.
Pro tipAdd a removable mail tray made from thin plywood with a handle so you can pull it out for cleaning.
AvoidAvoid a lid that swings too far - if it blocks your walking path, you'll stop using it.
14. Bench with seating and upholstered side panels hiding shoe stacks
Upholstered panels make shoe storage feel like part of the room instead of furniture clutter. The doors hide stacks and keep the entryway looking controlled. Fabric also softens scuffs from bags and coats that brush the bench. The seat feels cozy, especially if you choose a performance fabric with a tight weave.
Frame the doors with 1x2 lumber and attach fabric with a staple gun, pulling tight on the edges. Use magnetic catches inside so the doors close without bulky hardware. For shoe storage, create two compartments with dividers set to match sneaker heights - about 7-8 inches per section.
Pro tipUse a foam layer under the fabric on the doors so they look padded, not thin.
AvoidAvoid loose fabric edges - fraying at corners makes the whole build look unfinished.
15. Slim entryway bench with seating and a flip-out shoe rack ladder
This is a smart solution for tiny entryways where you can't spare depth. The ladder-style rack stores shoes upright and uses vertical space, so the floor stays clear. The flip-out motion means you only open it when you need to put shoes away. It looks modern when you keep the hardware matte black and the wood natural.
Build a compact base frame with a hinged ladder rack made from 1x2 rails and 1x2 rungs. Set the ladder so it flips down to horizontal storage and flips back when closed. Keep the opening height around 12 inches for sneakers; add an extra wide rung spacing if you store slip-ons.
Pro tipTest the flip range with empty rungs first so nothing hits the seat underside.
AvoidDon't use thin hardware - a wobbly ladder makes the build feel flimsy.


