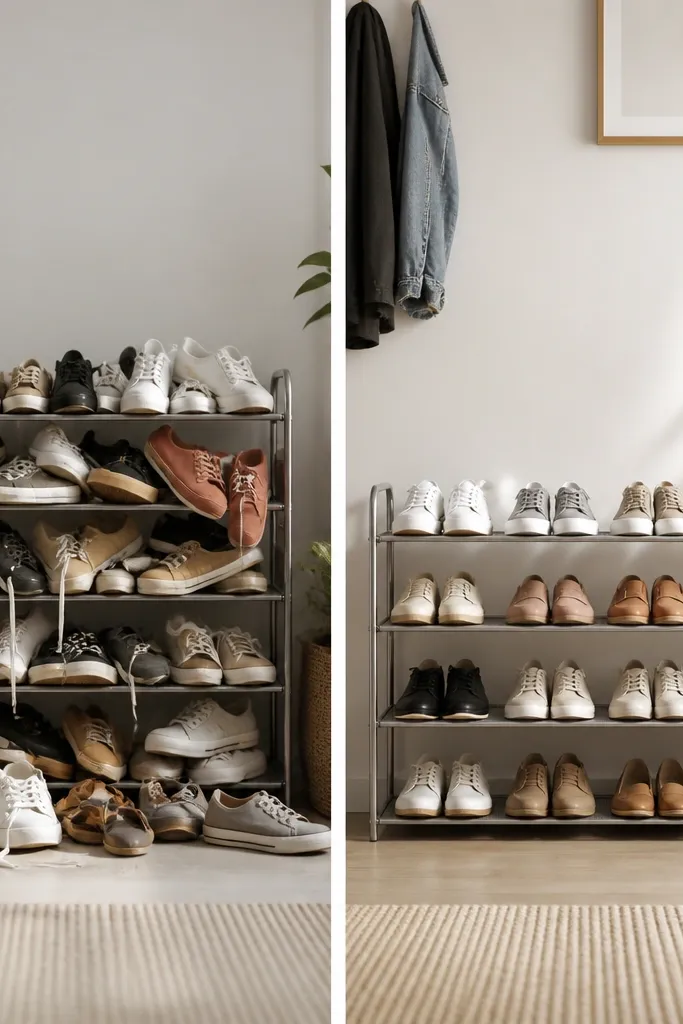
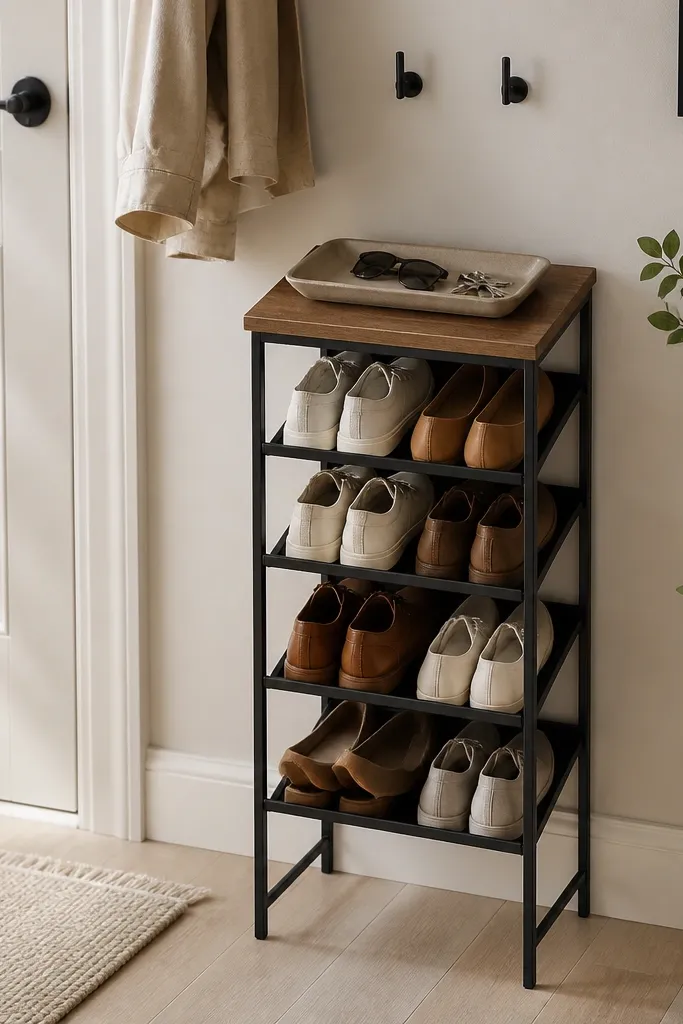
1. Shallow wire-front rack that stops shoe funk
I used to store shoes in a deep cabinet where nothing could breathe. The wire-front rack solved it because air moves through the shelves and around the sides. I chose wire for the shelves and left the back open, so moisture can escape after wet days. It looks lighter too, even when it holds the same number of pairs.
Build it with a frame in matte black metal or stained wood, then use wire shelving sized to fit the frame. Keep shelf depth around 10 to 12 inches for most entry shoes. Put the top surface at about 36 inches from the floor if it's a drop zone; keep the lower shelves slightly deeper for boots.
Pro tipIf you deal with rain or snow, add a tray at the bottom for boot mud and slide it out weekly.
AvoidAvoid a solid-back, fully enclosed rack - it traps moisture and makes shoes smell worse.
2. 3-inch spacing shelf trick for thick soles

My mistake was copying a "standard" shelf height and then stuffing chunky sneakers anyway. After a month, the rack looked strained and shoes didn't sit flat. I fixed it by spacing each tier 3 inches apart for sneakers and 4 inches for boots. That extra room keeps the shoes from leaning and reduces scuffs.
Use a simple jig: cut 1.5-inch thick spacers (scrap wood or plywood strips) and place them between shelf supports while you screw in the shelves. For sneakers, aim for 3 inches of vertical clearance from shelf to shelf. For boots, create a dedicated upper or lower section with 4 inches clearance.
Pro tipMeasure the height of your tallest shoe with the insole seated, then build the clearance based on that number plus 1 inch.
AvoidAvoid tight shelf gaps that force shoes to stand at an angle - it makes the whole rack look crooked.
3. Anti-wobble base with two leveling feet
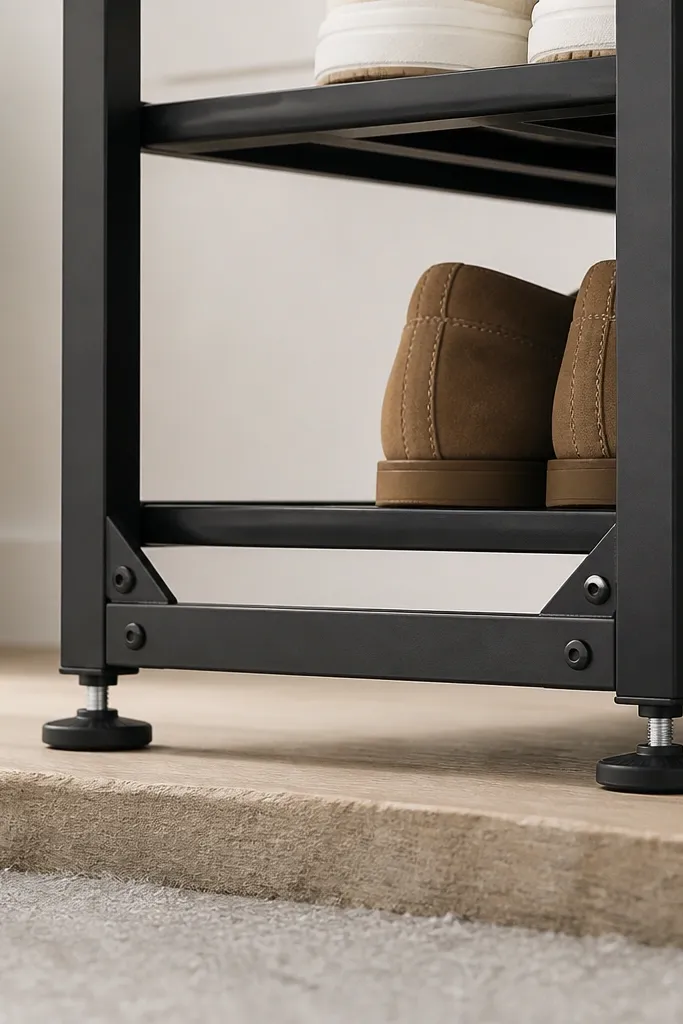
My first rack wobbled because I built it like a table, then set it on a slightly uneven floor. Every time someone grabbed shoes, it shifted and the shelves misaligned. I fixed it by adding leveling feet and corner braces so the rack stays square even if the floor isn't. The difference is obvious: doors or baskets don't rack out of line.
Install two adjustable leveling feet on opposite corners of the base. Add L-brackets or corner braces inside the frame corners - I used 1.5-inch metal angle brackets. Before you screw anything down, set the rack on cardboard and check for rock by pressing down on each corner.
Pro tipUse a bubble level on the top surface after tightening the feet, then mark the floor with painter's tape so you can reinstall it in the same position.
AvoidAvoid relying on shims only under the back leg - it still twists the frame when weight shifts.
4. Boot zone with a slanted rack insert
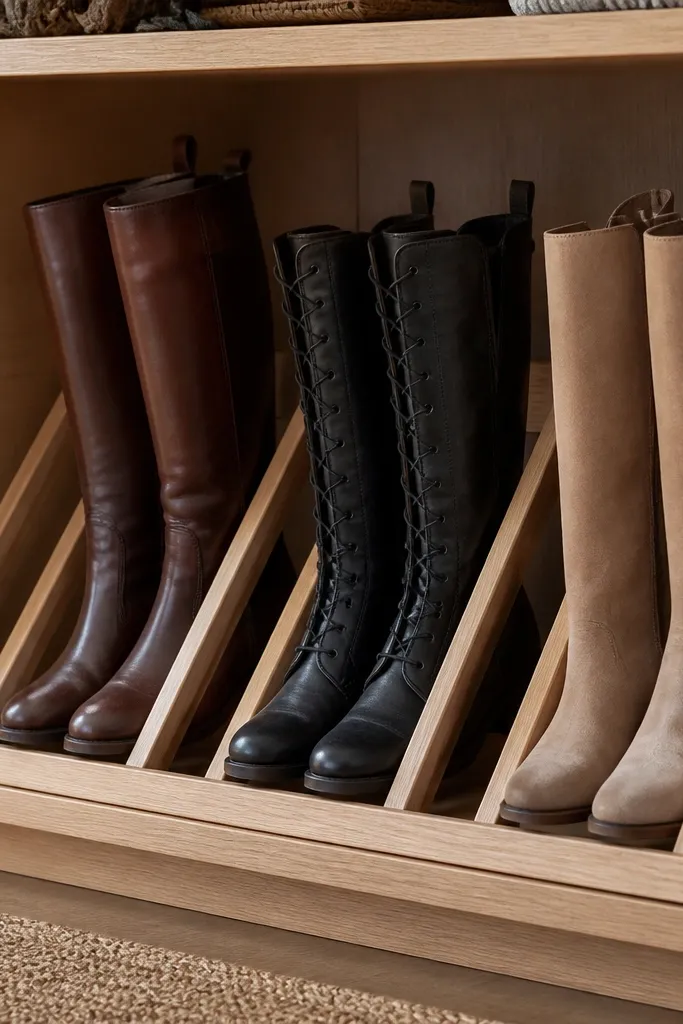
Boots ruined my spacing plan. If I stored them flat, they took up too much space and stayed damp. I fixed it with a slanted insert that supports boots upright, which lets air reach the leather and fabric. Shoes also look more intentional when boots have their own zone.
Build an insert from 1x2 wood strips, set at a 20 to 30 degree angle. Leave 2.5 to 3 inches between strips so laces and pant cuffs don't get crushed. Put the insert on the bottom tier or a dedicated larger compartment with 5 inches clearance to the next shelf.
Pro tipIf your boots are tall, add a small back stop so they can't tip forward when you pull them out quickly.
AvoidAvoid stacking boots on flat shelves with no spacing - the shaft folds and the rack looks overcrowded.
5. The "top surface" rule with a tray and hooks
My biggest mess wasn't inside the shelves. It was the top surface turning into a second pile: socks, mail, random shoes. I fixed it by giving the top one job - a tray for small items and hooks above for bags. Once the top has a "home," shoes don't migrate there.
Choose a tray with a lip so items don't slide off when you brush past. Size it so it covers about half the top - leave the other half clear for quick drop shoes. Mount hooks about 60 inches from the floor if you want adult reach; place them directly above the tray to keep everything in one zone.
Pro tipUse a washable tray material like metal or sealed wood so you can wipe it after muddy days.
AvoidAvoid a flat top with no boundary - it invites loose items and makes the rack look messy fast.
6. Wire basket drawers for small pairs and sandals
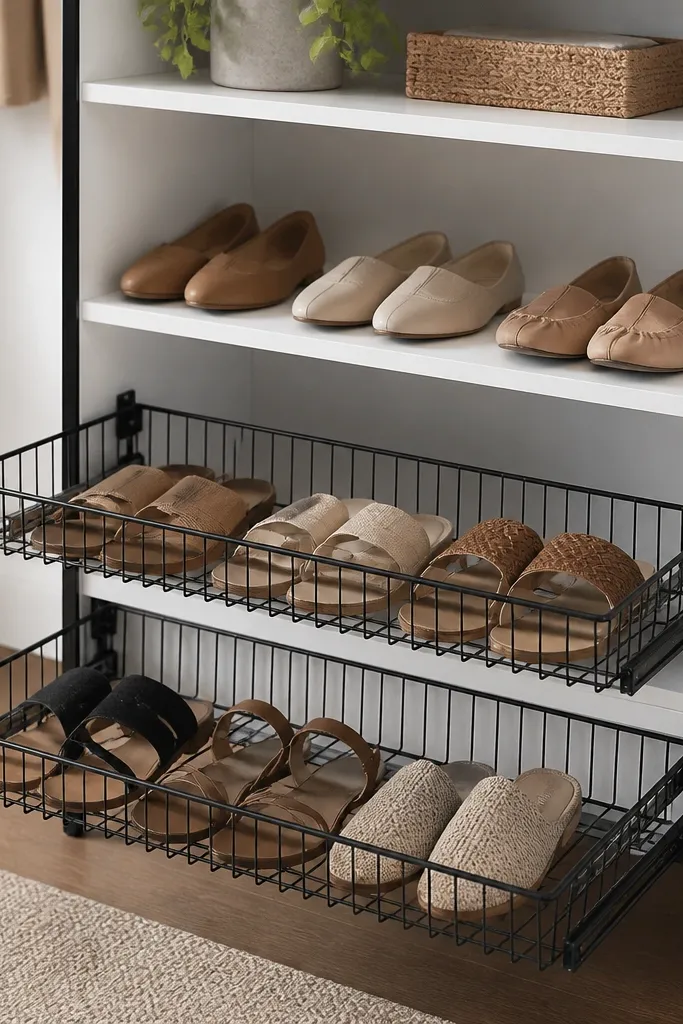
I kept sandals and flats in open piles and they always tangled. The fix was pull-out wire baskets so the shoes stay separated and you can grab without dumping everything. Wire baskets also dry faster than fabric bins, which matters when kids bring in wet weather gear. It looks tidy because the contents are always contained.
Use wire baskets that fit the rack opening with about 1/4 inch clearance on each side so they slide smoothly. Mount simple drawer slides or use sturdy basket glides if you're building from scratch. Keep baskets on the lowest tier so heavier pairs sit below and lighter sandals live where you can see them.
Pro tipLabel the baskets with painter's tape and a Sharpie, then switch to small vinyl labels once you know your real rotation.
AvoidAvoid fabric bins in a damp entry - they hold moisture and smell after a wet week.
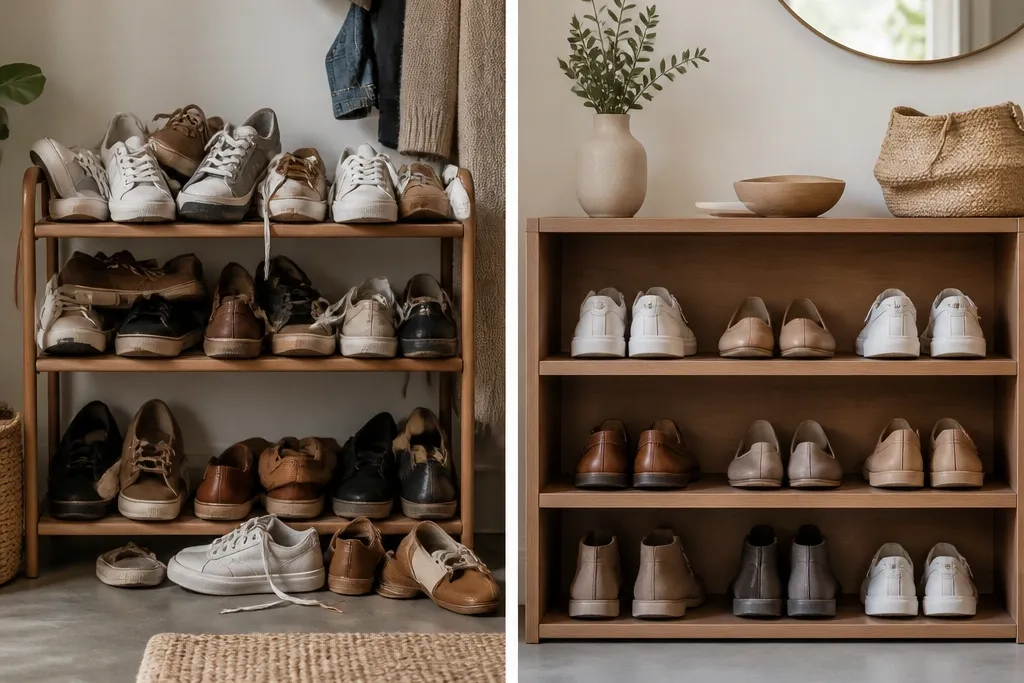
7. Reinforced plywood shelves that don't bow
I built shelves out of plain plywood once and it bowed after I loaded boots. The rack still looked "fine," but the shelves stopped being level and shoes ended up sliding forward. I fixed it by reinforcing each shelf with cleats or shelf braces underneath. The shoes sit flatter and the rack looks straight even when it's full.
Use 3/4-inch plywood for shelves if you're carrying heavier pairs. Add a cleat along the underside edges - even a 1x1 or 1x2 strip helps a lot. If you want extra stiffness, install two metal shelf brackets per tier, spaced about 8 to 10 inches apart along the length.
Pro tipFinish the underside too. Sealed wood resists moisture from wet soles and wipes clean.
AvoidAvoid thin shelves without supports - bowed shelves make everything look sloppy.
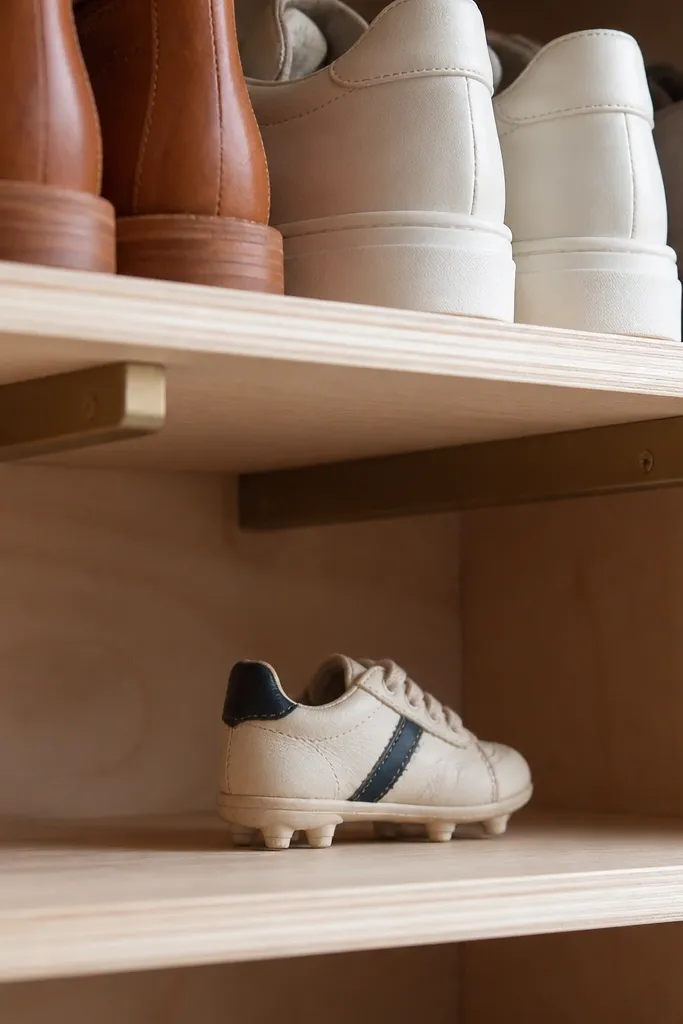
8. The "one-direction toe alignment" hack
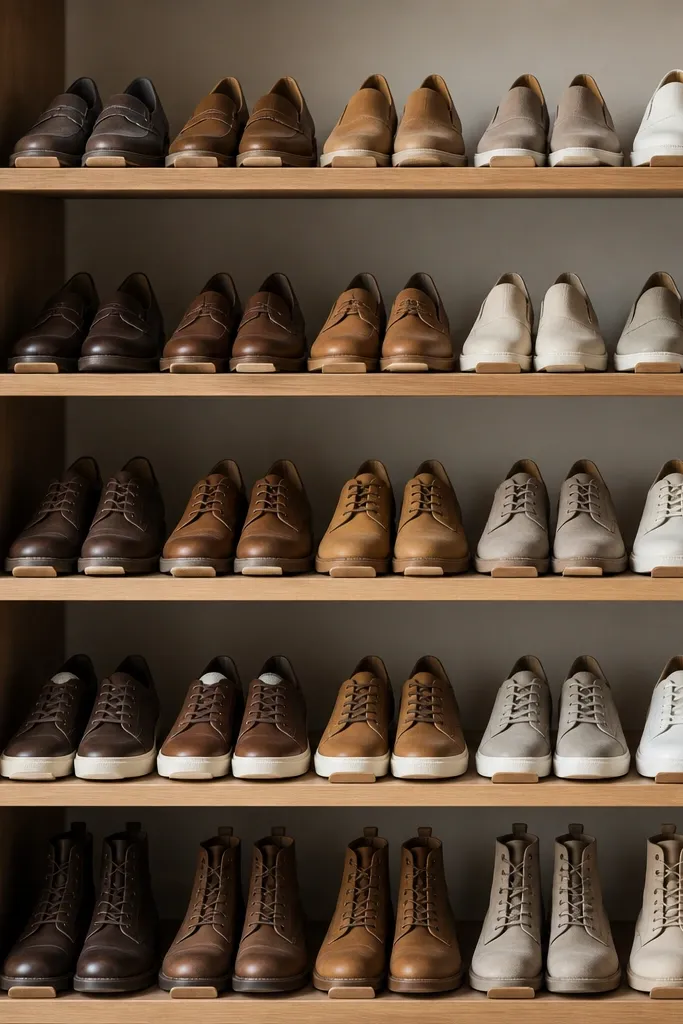
Random orientation made my rack look chaotic even when it was organized. The fix was simple: a front stop so every shoe toe lands in the same spot. When toes align, shelves look intentional and you can spot empty spaces fast. It also prevents the "push back into the corner" habit that makes pairs hard to grab.
Install 1/2-inch stop blocks along the front edge of each shelf. Leave a small gap behind the stop so you can slide shoes in without catching laces. Keep the stop height around 3/4 inch - tall enough to stop slides, low enough to not block ankle boots.
Pro tipUse a scrap strip as a spacer when you attach stop blocks, so every shelf gets the same front alignment.
AvoidAvoid storing shoes with no front boundary - they drift and start leaning, which makes the whole rack look uneven.


