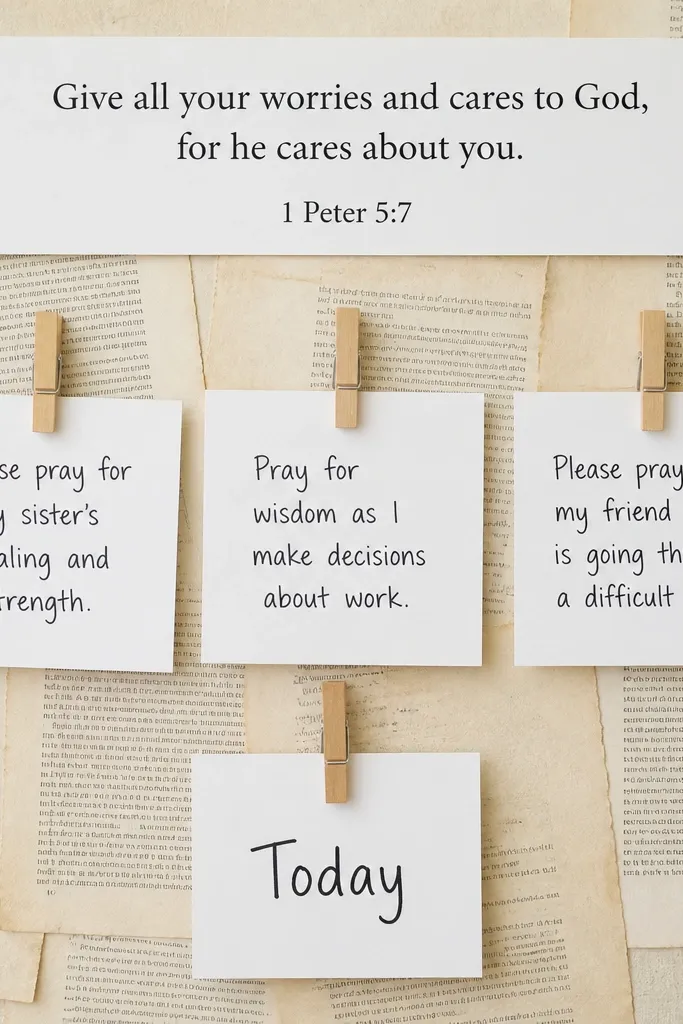
1. The 3-Zone Clipboard Prayer Board
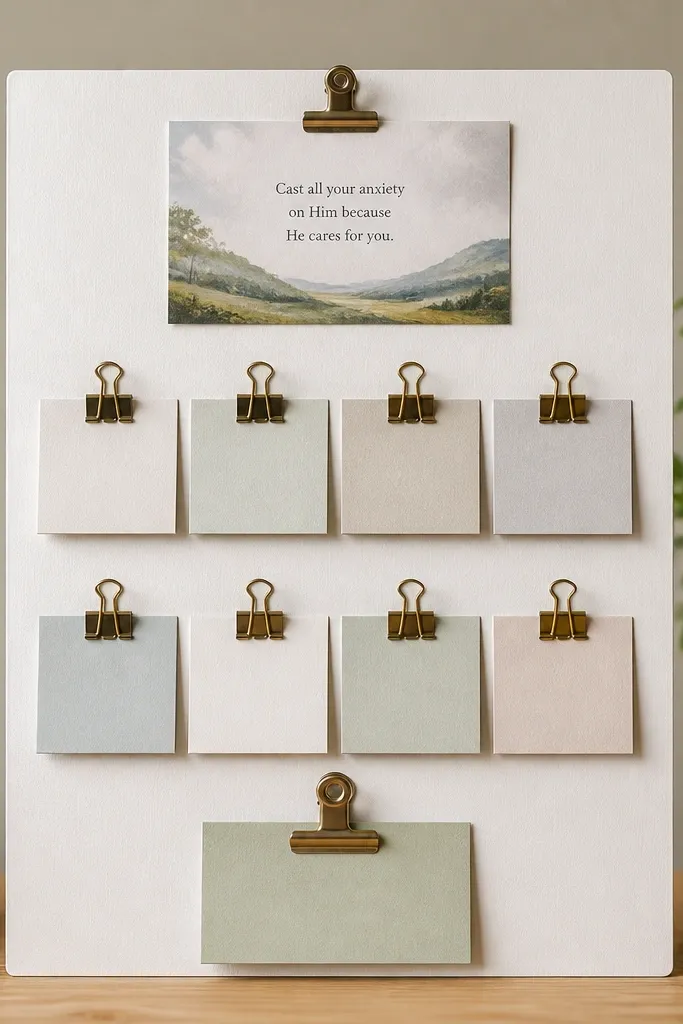
This layout works because you can see your verse first and your requests next. The clipboard clip style gives a tidy, elevated look without framing. Binder clips let you swap cards quickly without tearing paper or fighting tape. I like dark ink on cream cards because it reads from across the room.
Cut the foam board to 12x16 inches for a desk-friendly size. Use black binder clips for the middle zone and a small metal clipboard clip for the verse at the top. Print verse cards at 4x6 inches and request cards at 3x5 inches; fold the 3x5 cards in half so they look like mini note cards.
Pro tipAdd a thin strip of washi tape at the top of each zone label - write "VERSE," "REQUESTS," and "TODAY" in small caps on the tape.
AvoidAvoid random card sizes - mixed widths make the board look like a stack of papers instead of a system.
2. Cork Tile Grid with Color-Coded Pins
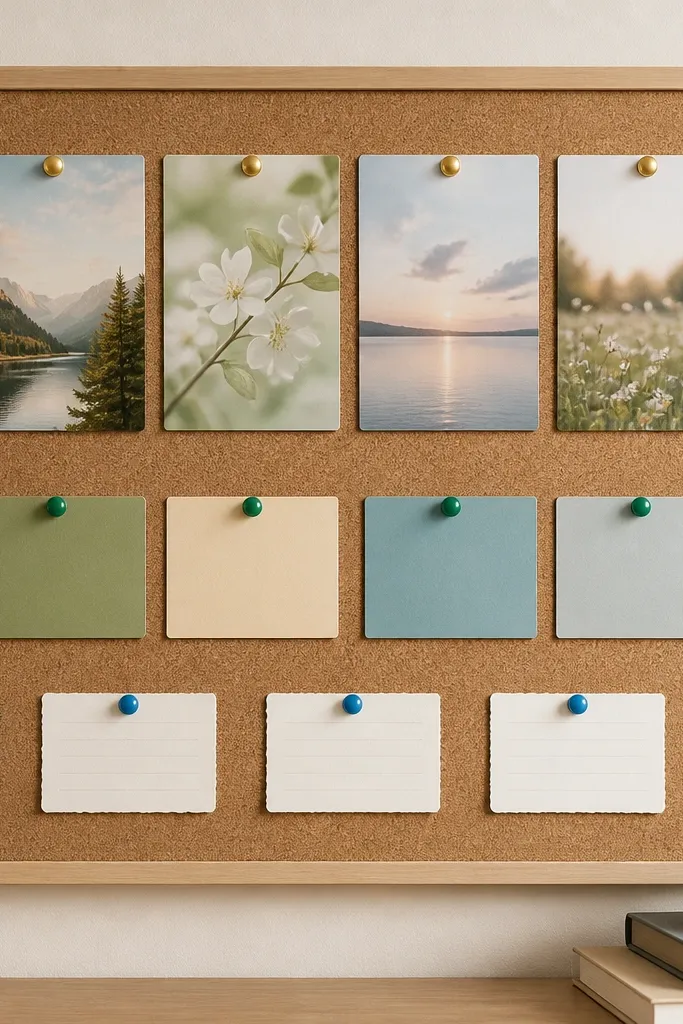
Cork is forgiving and fast, and pinning lets you rearrange without residue. The grid makes it feel organized even if you add new requests every day. Color-coded pushpins give quick visual sorting - verse stays gold, requests stay green, and "today" stays blue. It looks intentional because the hardware repeats.
Buy cork tiles and mount them on a simple frame or directly onto a backing board. Use 4x6 verse cards and 3x4 request cards so the pinned layout stays consistent. Keep pins about 1 inch apart and always pin the same corner of each card for a clean rhythm.
Pro tipWrite the category on the back of each card in pencil so you can flip and know what it is when you pin it quickly.
AvoidSkip clear pushpins mixed with colored ones - the board loses its sorting effect and looks messy.
3. Felt Board with Velcro Verse Strips
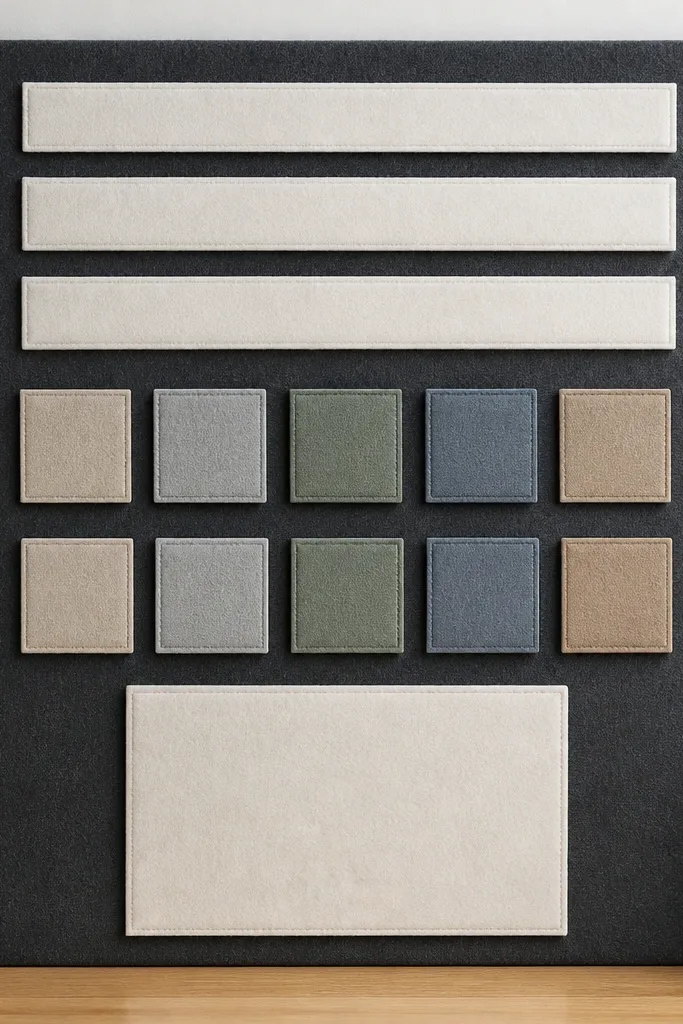
Felt hides messy edges and makes paper look like it belongs. Velcro strips let you remove and reattach verses without curling corners. The dark felt backdrop makes white or cream cards pop, and the horizontal strips read like headings. It's calm, not cluttered, because the cards sit flat.
Cut felt to 12x18 inches and wrap it over foam board or a thin wood panel. Add 1-inch wide Velcro strips along the top for verse strips and small 1-inch squares for request cards. Use 4x7 verse strips printed on cream cardstock and cut the request cards to 3x5.
Pro tipPress a clean ruler along the Velcro strip when you attach it so it sticks evenly - uneven edges lift later.
AvoidDon't use glossy paper - it catches light and makes the felt look smudged.
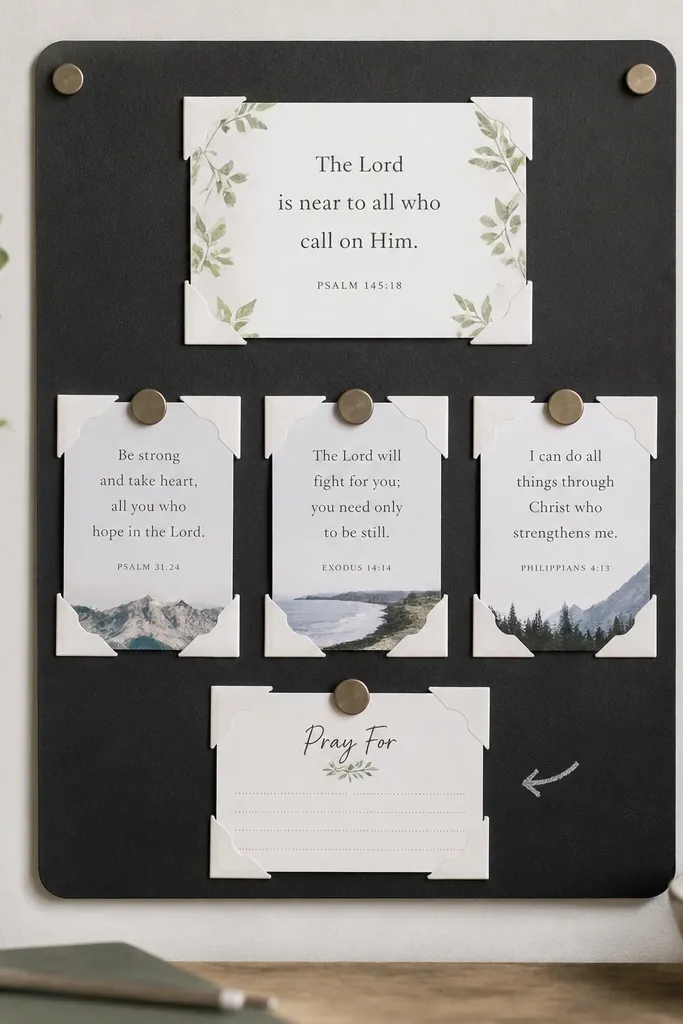
4. Magnetic Sheet Board with Floating Cards
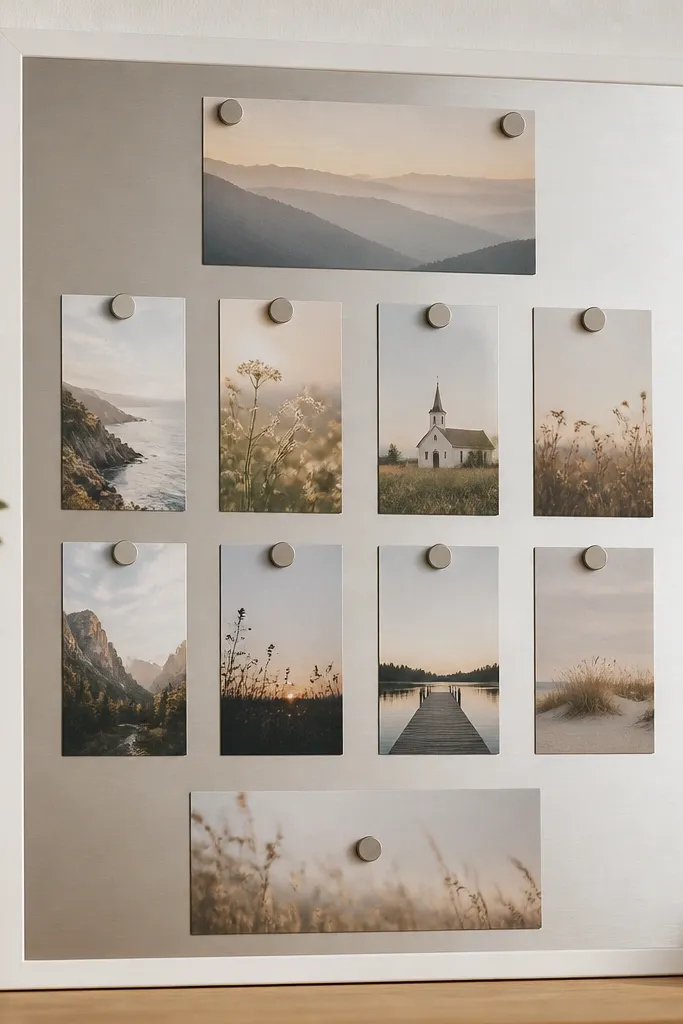
Magnetic boards are the fastest update option with a clean look. Cards look like they're floating because magnets don't create pin holes or clip shadows. Rounded magnets look softer than sharp clips, which makes the board feel less "office." I like this layout for kitchens and entryways where you glance and go.
Use a thin magnetic sheet (like 12x16 inches) mounted on a backing board. Print prayer cards at 3x4 inches and add a magnet backing with removable adhesive magnets or magnet sheets cut into small rectangles. Place the top verse card centered with two magnets, then stagger request cards slightly left and right.
Pro tipStick magnets on the back of each card, then test spacing by placing the cards in the exact positions before committing adhesive.
AvoidAvoid tiny magnets for large cards - the card bows and looks sloppy.
5. Pegboard Prayer Board with Mini Hooks
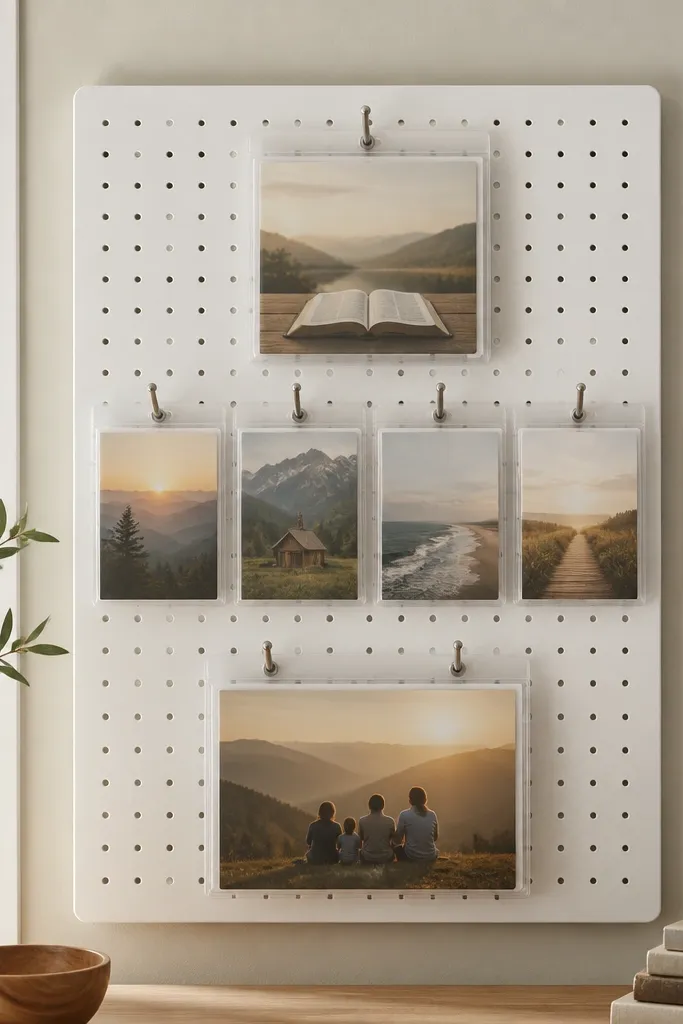
Pegboard gives you instant structure, and hooks make cards look like they're part of a display. Laminated sleeves are durable - I've wiped them with a damp cloth after coffee spills. The clear sleeves also keep paper from curling. This layout is great if you want it to look like a real wall feature, not a craft project.
Mount pegboard at 16x20 inches so you have room for sleeves. Use mini hooks spaced 4 inches apart and hang 3x5 laminated card sleeves. Add one larger sleeve at the bottom for weekly requests and rotate the cards each Sunday.
Pro tipPunch a tiny hole in each sleeve edge so the card slides in smoothly and you don't wrestle it every time.
AvoidSkip overcrowding - if hooks are closer than 3 inches, the board feels tight and hard to read.
6. Washed-Wood Frame with Mitered Photo Mat
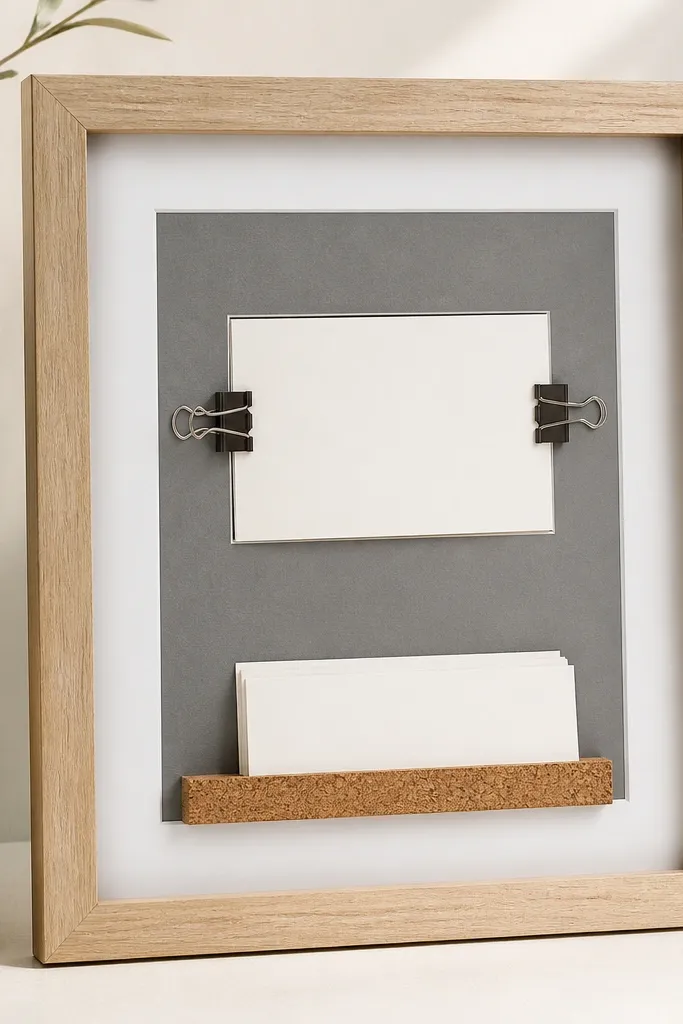
This one looks store-bought because the mat border creates a "window" for your cards. The cork strip at the bottom lets you pin requests without ruining the clean look. Binder clips on the sides keep the verse card crisp and easy to swap. The gray border makes black text look sharp.
Use a 12x16 or 11x14 frame and cut foam core to fit. Add a 3-inch tall cork strip at the bottom, then leave a centered open area for verse cards. Keep all verse cards at 4x6 and request cards at 3x4 so the layout stays consistent.
Pro tipUse painter's tape to map the mat opening before you glue anything - one millimeter off makes it look crooked.
AvoidAvoid thick foam borders that block the cards - it makes the layout look heavy.
7. Book Page Background with Minimal Clothespins
The background looks textured but still soft, which makes your cards the focus. Clothespins add a warm, natural feel that doesn't look like office supplies. The top verse strip keeps your eye moving in order. I like this layout when you want something cozy and slightly vintage.
Cover a 12x16 board with book pages using matte glue or gel medium so it doesn't wrinkle. Add a 1.5-inch wide white cardstock strip for the verse at the top. Use wooden clothespins and keep request cards at 3x5 so they clip neatly.
Pro tipSeal the book pages with a thin layer of matte Mod Podge - it prevents smudging from fingerprints.
AvoidDon't use dark card backgrounds on top of busy text pages - the verse becomes hard to read.
8. Watercolor Wash + Tape Frames
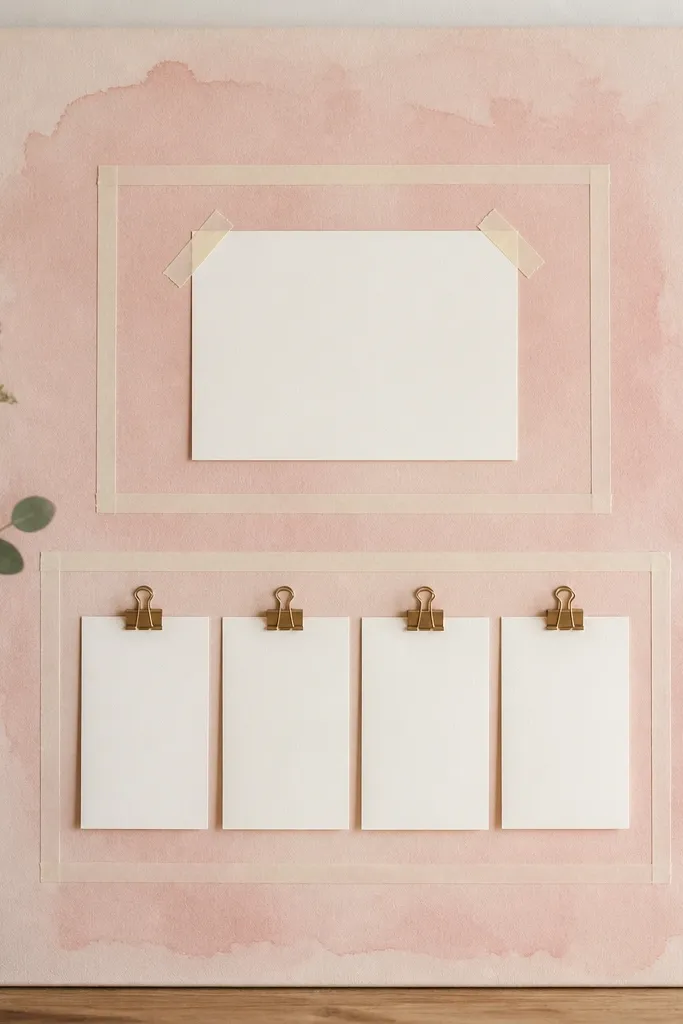
Tape frames create clean boundaries even if you're working on a simple board. The watercolor wash gives color without clutter. Using tape corners instead of glue lets you change cards later. This layout looks good for prayer boards that sit on a shelf because the tape lines catch light.
Paint a 12x18 board with diluted watercolor (or acrylic wash) in blush and light peach. Outline two rectangles with 1/2-inch masking tape and leave 1 inch margins. Put the verse card inside the top frame and clip request cards in the bottom frame with mini binder clips.
Pro tipBurnish tape edges firmly with a credit card so paint doesn't creep under it.
AvoidSkip glitter pens or metallic ink - they smear when you touch the cards.
9. Neutral Grid with Washi Numbers
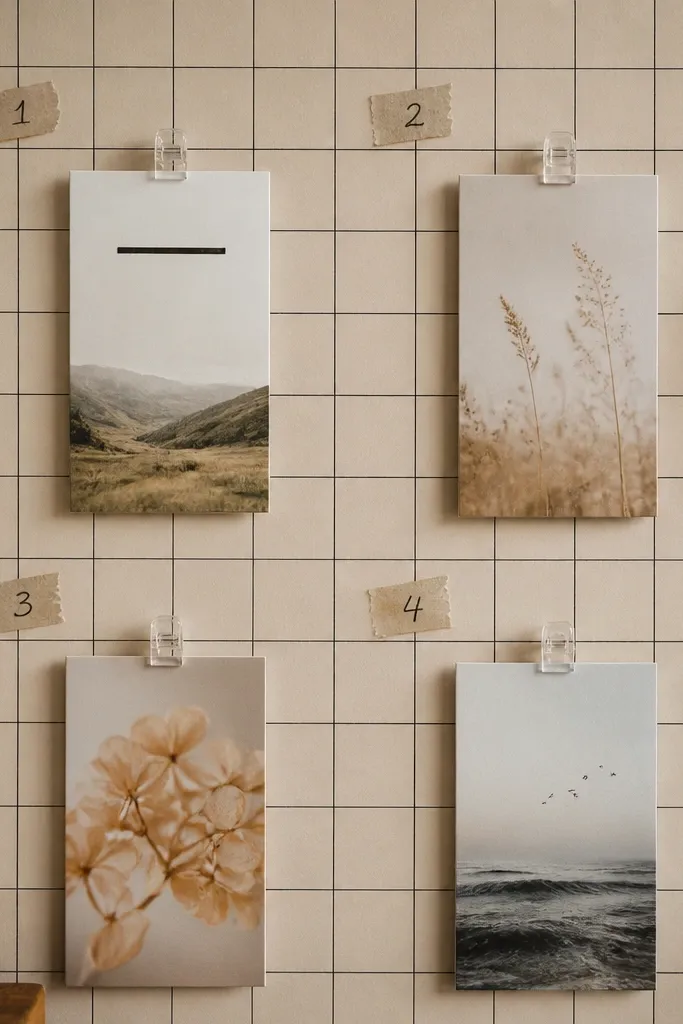
This is the layout I use when I want the board to feel like a plan, not a collage. Numbered sections help you rotate requests in a predictable way. Neutral colors keep it calm, and the washi labels make the board feel organized without looking rigid. It stays readable because each card sits in a defined square.
Draw a simple grid on a 12x16 board: four squares for requests and one top rectangle for verse. Use washi tape numbers in the corners and label "1-4" so you can swap cards quickly. Keep cards consistent at 3x4 inches, and use clear mini clips for the corners.
Pro tipWrite your rotation rule on the back of the board: "Move card 1 to today every Thursday."
AvoidDon't skip alignment - crooked tape lines make even pretty cards look sloppy.
10. Laminated Verse Cards on String with Clothespins
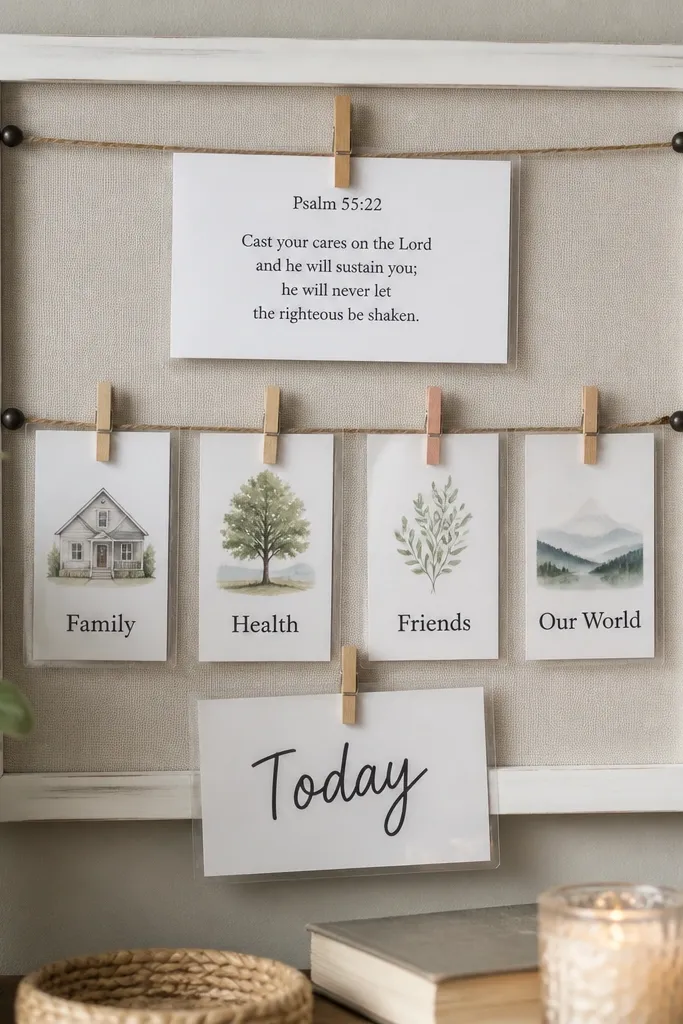
String lines let you hang cards at different heights, which gives the board a gallery feel. Laminating protects cards from daily handling, especially in busy homes. Clothespins make it easy to swap without tearing paper. I like this layout when the prayer board lives in a hallway where you pass by multiple times a day.
Mount a 14x18 board and screw two small eye hooks at the top corners. Tie twine between them and add a second twine line if you want more space. Use laminated 4x6 verse cards and 3x5 request cards clipped with mini clothespins.
Pro tipKeep lamination glare down by using matte laminate pouches, not glossy ones.
AvoidAvoid hanging heavy cards on thin twine - it sags and looks uneven.
11. Layered Shadow Box with Removable Inserts
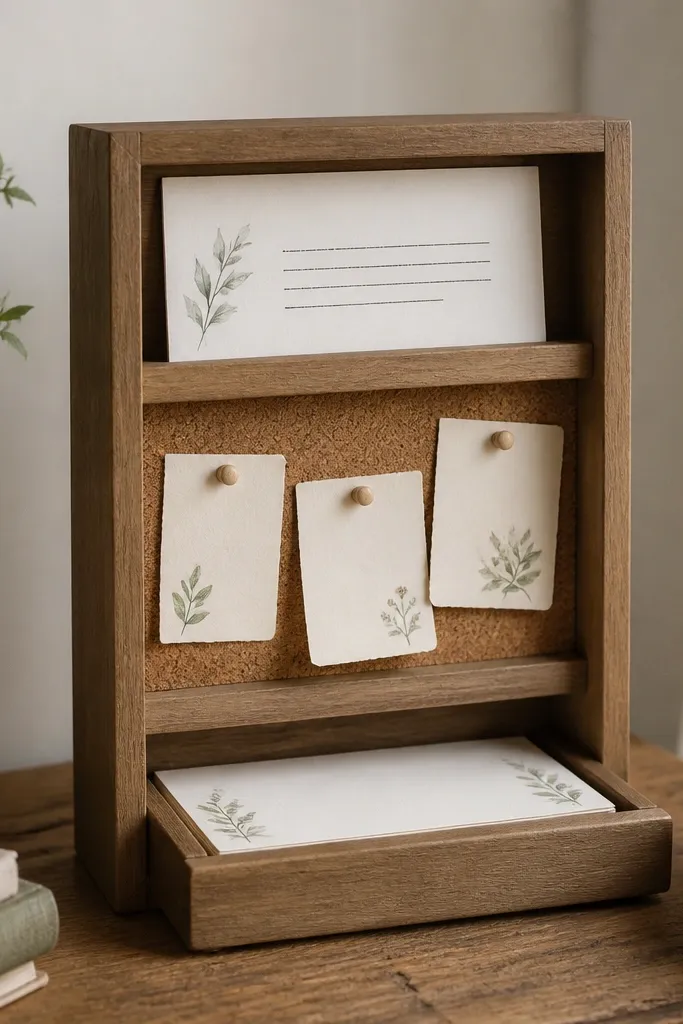
A shadow box makes the prayer board feel like a display, but you still get removable parts for updates. The layered tiers create depth, so cards don't blend into the background. Cork in the middle keeps requests flexible while the top verse stays clean and centered. This layout looks great on a bookshelf or bedside table.
Use a 10x12 or 12x12 shadow box style frame. Build a middle cork panel sized about 8x6 inches, leaving a 1-inch border around it. Make a bottom removable tray out of thin cardstock and slide it in and out for "today" swaps.
Pro tipLabel the back of each insert with a small dot color so you can grab the right set fast.
AvoidSkip glueing inserts permanently if you plan to rotate weekly - you'll end up redoing it.
12. Magnetic Chalkboard with Photo Corners
Chalkboard gives you a strong contrast so text stays readable. Photo corners keep your cards flat and neat without tape showing through. Magnets let you remove cards quickly and reuse the frames. This layout feels focused because the background stays dark and clean.
Use a small magnetic chalkboard panel, roughly 12x12 inches. Print prayer cards in white or cream cardstock and place them inside clear photo-corner frames or DIY corner pieces from thin plastic. Attach magnets behind the frames so you can rearrange the set anytime.
Pro tipUse a white gel pen for handwritten arrows - it doesn't look smudgy like liquid chalk markers.
AvoidDon't use heavy textured paper - it doesn't sit flat under corners.
13. Minimal Wooden Slat Board with Clip Rail
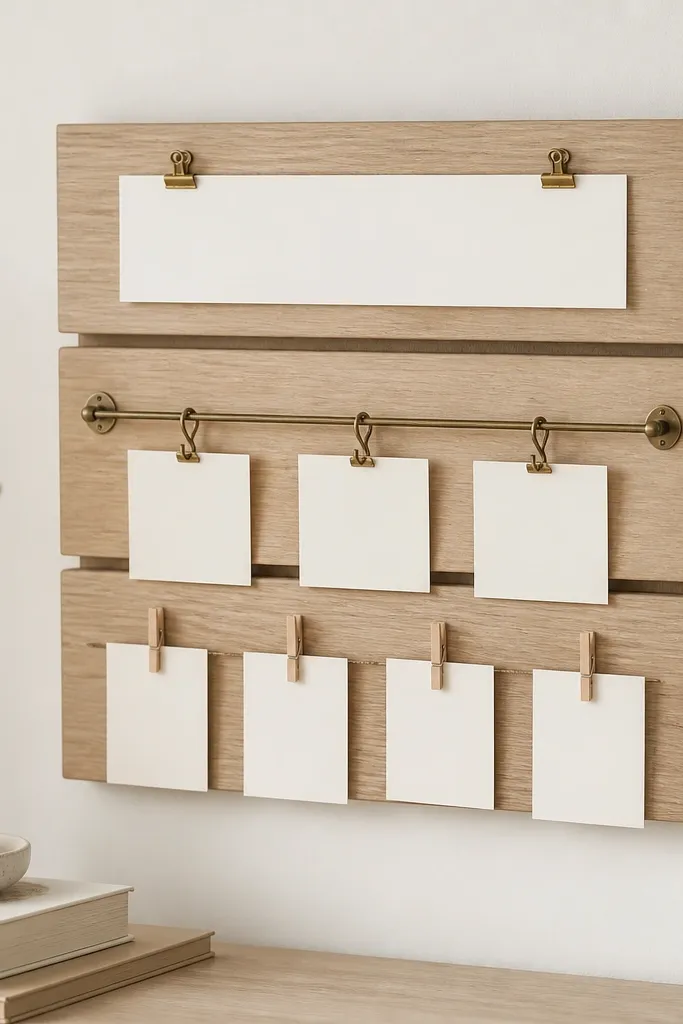
Wood slats add texture while keeping the layout tidy and structured. A clip rail gives you a consistent place for request cards, so you're not spreading clips all over. The top long verse card reads like a header. This is the layout I use when I want something that looks calm but not childish.
Buy or build a slat board around 12x18 inches. Add a clip rail in the middle at about 6 inches from the top. Use 4x6 verse cards and 3x4 request cards; keep the bottom row cards identical so the spacing looks deliberate.
Pro tipPaint the slats with a matte clear coat - fingerprints wipe off and the board keeps its warm tone.
AvoidAvoid mixing clip types on the same row - it looks random.
14. Pastel Binder Clip Rainbow Layout
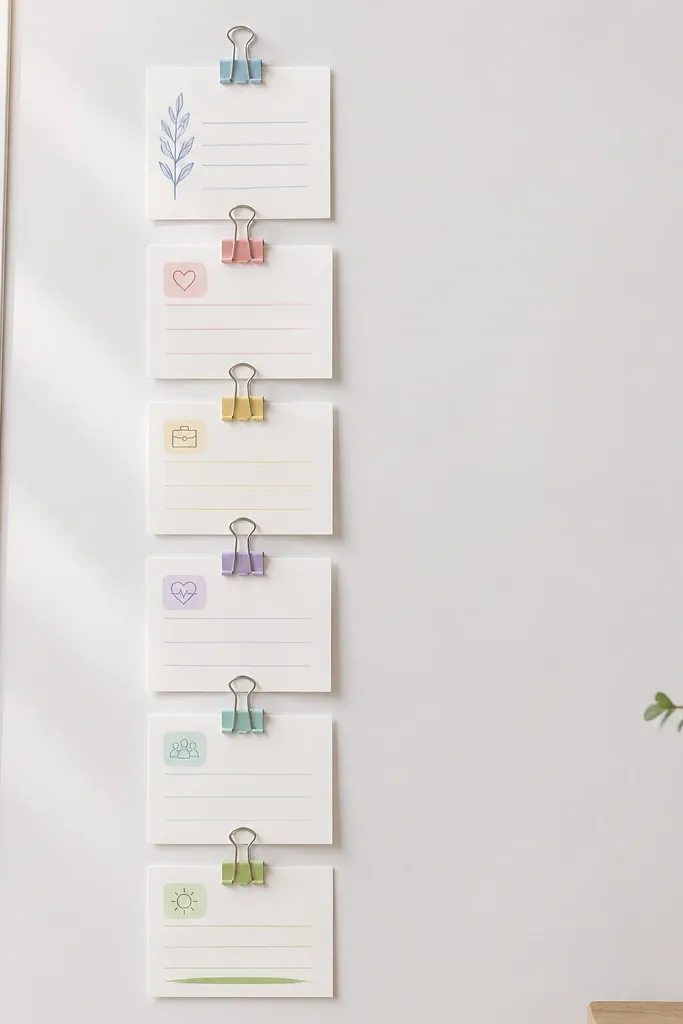
Pastel binder clips add color without adding clutter when the rest stays neutral. The vertical stack is easy to read, and the order helps you pray in sequence. Matching labels keep each request category clear. This layout works well for kids' prayer boards too because it's bright but structured.
Use a 10x14 inch board and place binder clips vertically every 2.5 inches. Keep cards at 3x4 and print category labels in matching pastel colors. Use one dark color for verse text so it doesn't compete with the clip colors.
Pro tipWrite the category on the back of each card so swapping is quick and you don't mix topics.
AvoidDon't use bright neon card backgrounds - pastel clips will still look harsh next to them.
15. Desk-Top Folding Prayer Board (Tent Style)
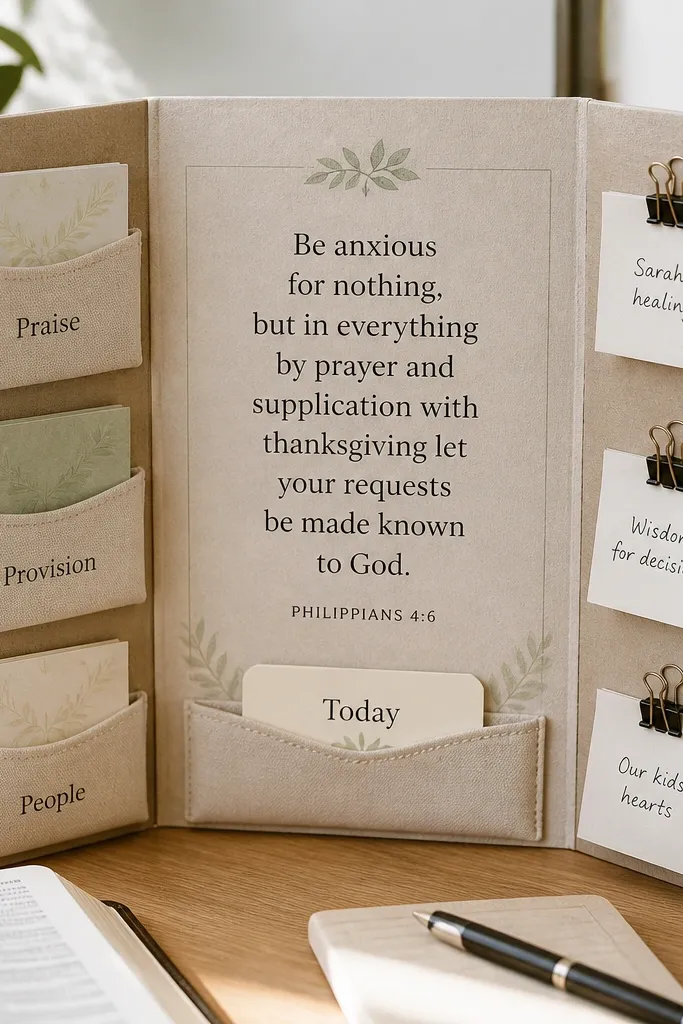
Tent-style boards are fast because you don't mount anything - you build a portable station. The pockets keep notes tidy and easy to grab during prayer. Cloth pockets look softer than plastic sleeves, so the board feels personal. I use this when I'm traveling or when I want a prayer space on a side table.
Use sturdy cardstock or thin cardboard and fold it into a tent using a 9x12 panel. Add fabric pockets made from cotton scraps sized about 3x4 inches for request cards. Attach a single verse card on the front with two small binder clips or Velcro dots.
Pro tipAdd a small elastic band around the folded board so it closes neatly when you pack it.
AvoidSkip flimsy paper pockets - they collapse and make the board look unfinished.


