1. Cork prayer board with warm edge glow
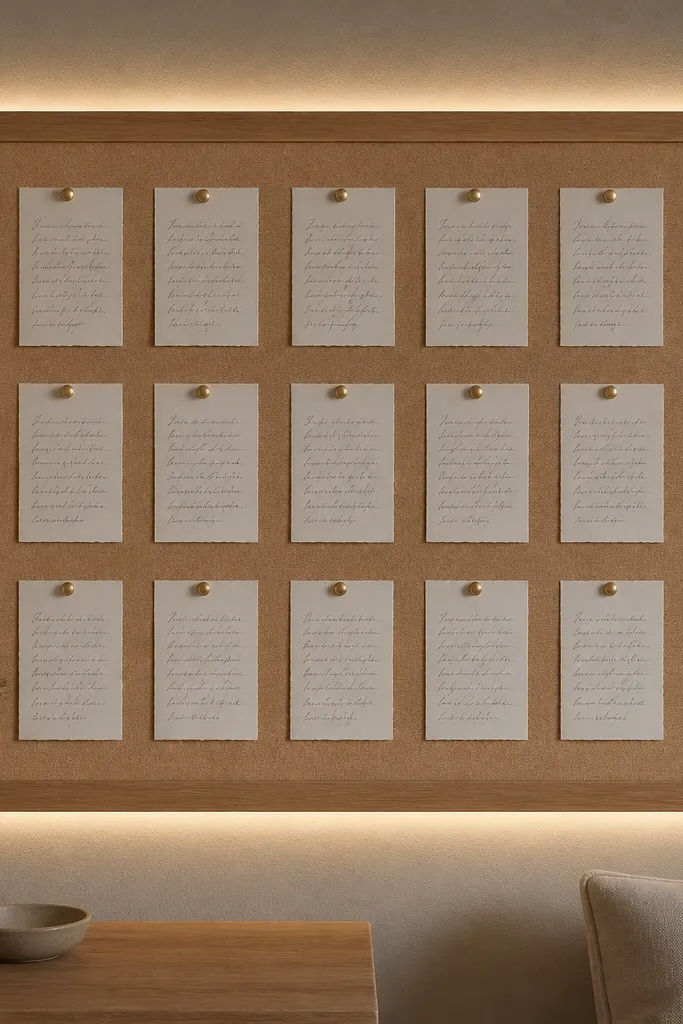
I used a cork board because it naturally eats glare and keeps the light looking gentle. The warm white LED strip sits 1/2 inch inside the frame, so you see glow, not the LED dots. Gold push pins and cream cards make the light look like candlelight instead of tech lighting.
Trace a rectangle on foam board or wood trim, then mount cork to it. Add a thin wood or MDF frame around the cork so the strip can hide behind the inner lip. Keep the cards 1 inch apart so the light doesn't blur together.
Pro tipTest brightness by holding the strip in place before you glue - you want soft edges, not bright spots.
AvoidDon't center the LEDs directly on the cork surface or the board will look harsh and uneven.
2. Whitewashed wood board with backlit cross
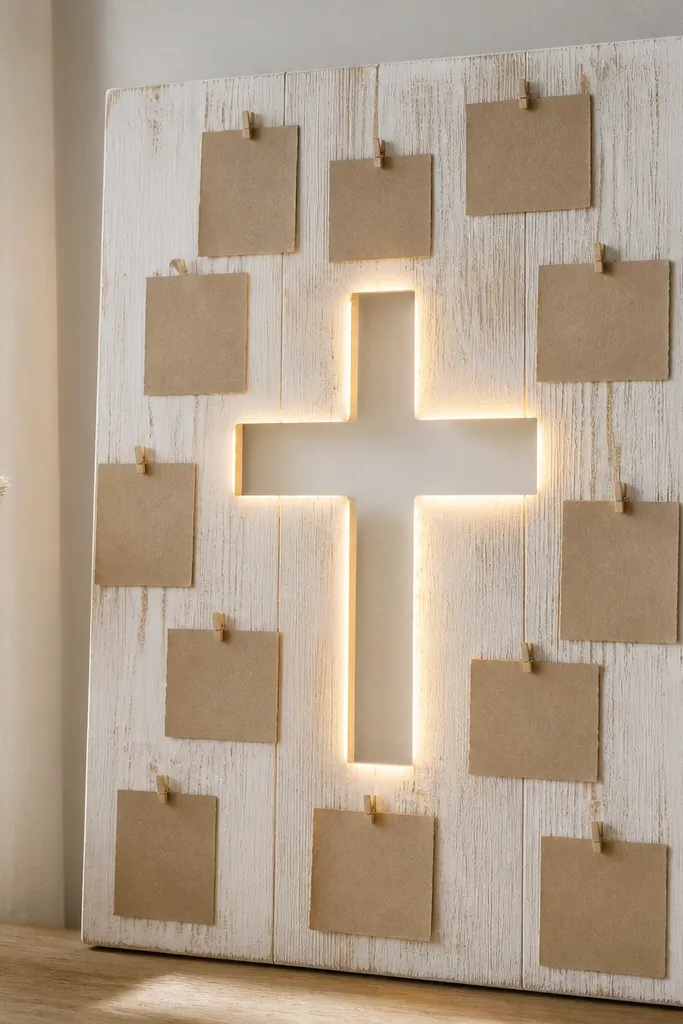
A backlit cross is the fastest way to make the whole board feel like one focal moment. The board stays calm in daylight, then the cross glows at night. Whitewashed wood gives a light background so the glow spreads instead of bouncing back as glare.
Use thin plywood or a whitewashed MDF panel. Cut a cross shape from thin acrylic or layered cardboard, then mount it with a 1/4-inch spacer so light can pass behind it. Run a thin LED strip behind the cross arms, not across the whole board.
Pro tipAdd a layer of white vellum or frosted craft film behind the cross to soften hotspots.
AvoidAvoid putting the LEDs directly against clear acrylic - it creates bright pinpoints.
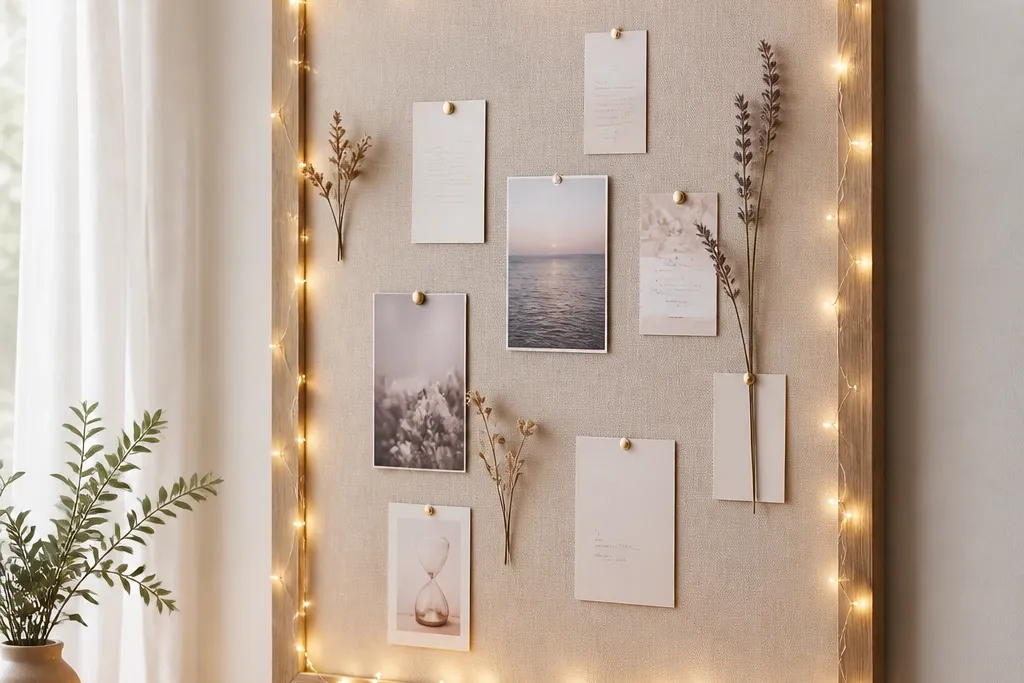
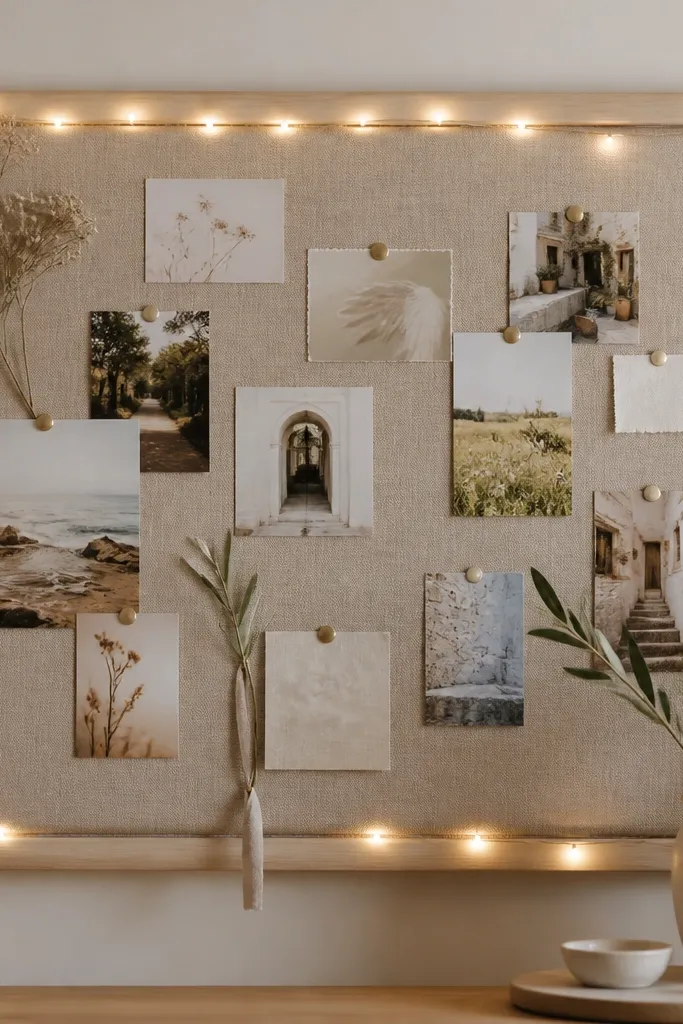
3. Green linen pocket board with string lights row
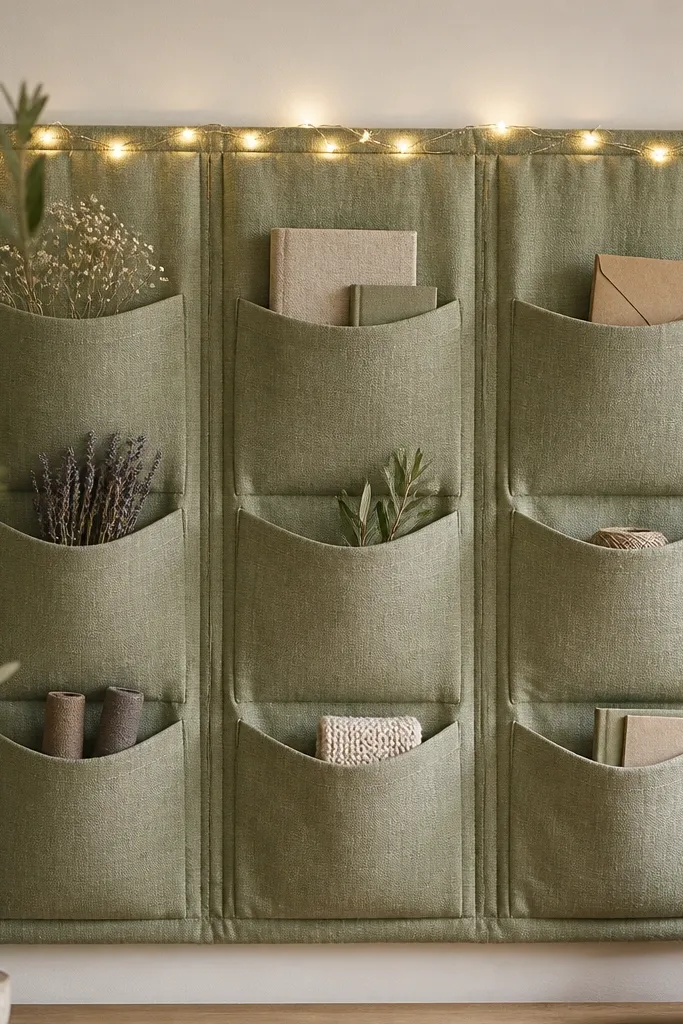
Fabric pockets make prayer board ideas with lights feel cozy because the lights bounce off cloth, not hard surfaces. I like sage or olive linen because it calms the warm bulbs. The lights sit above the pockets so each pocket feels highlighted without turning the board into one bright patch.
Sew or hot-glue pockets from cotton fabric, each about 4x6 inches, and space them 1 inch apart vertically. Stretch linen over a frame and staple on the back. Tuck the fairy lights into the top seam and anchor with a few stitches or hot glue dots.
Pro tipUse micro warm LEDs (smaller bulb size) so the glow stays delicate against linen texture.
AvoidDon't weave the lights into the pocket openings - it looks tangled and hard to swap cards.
4. Black metal frame with clear acrylic scripture strips
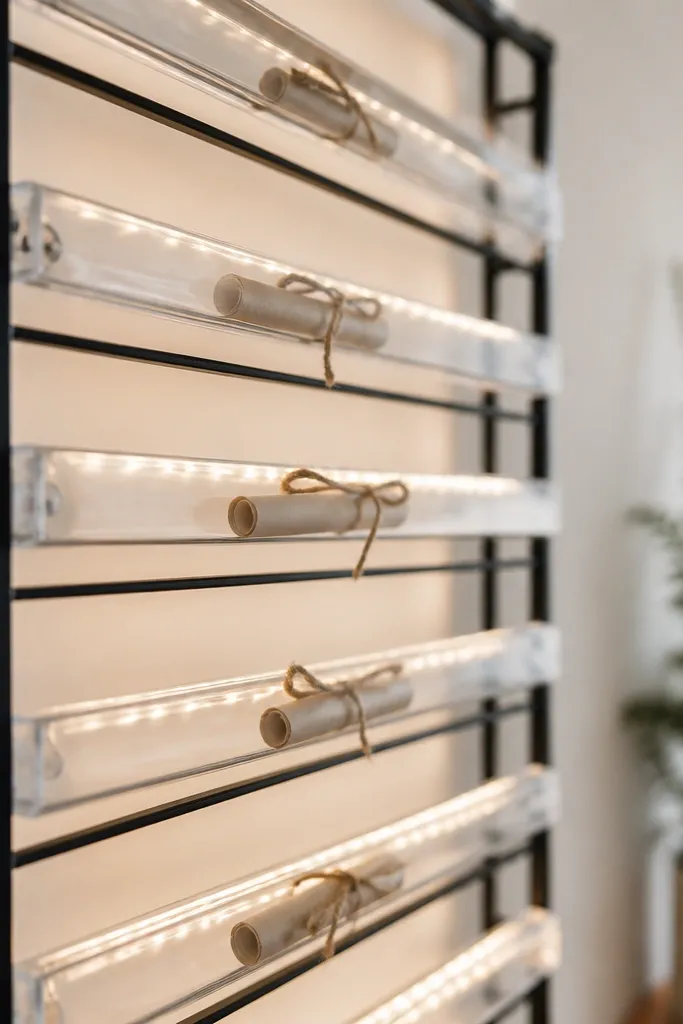
This one looks modern and clean because the light travels through clear acrylic and makes the text look like it's floating. The black frame adds contrast so the glow doesn't blend into the background. Use warm white so the clear plastic doesn't look icy.
Build a grid frame from black metal picture frame corners or buy a small wire grid. Attach acrylic strips with standoffs or small binder clips so there's a 1/2-inch air gap behind them. Run the LED strip behind the acrylic at the top and midline for even coverage.
Pro tipPrint scripture on matte paper, not glossy - the text stays readable through acrylic.
AvoidAvoid using cool white LEDs - they make clear acrylic look bluish and cheap.
5. Pastel rainbow prayer board with LED cloud border
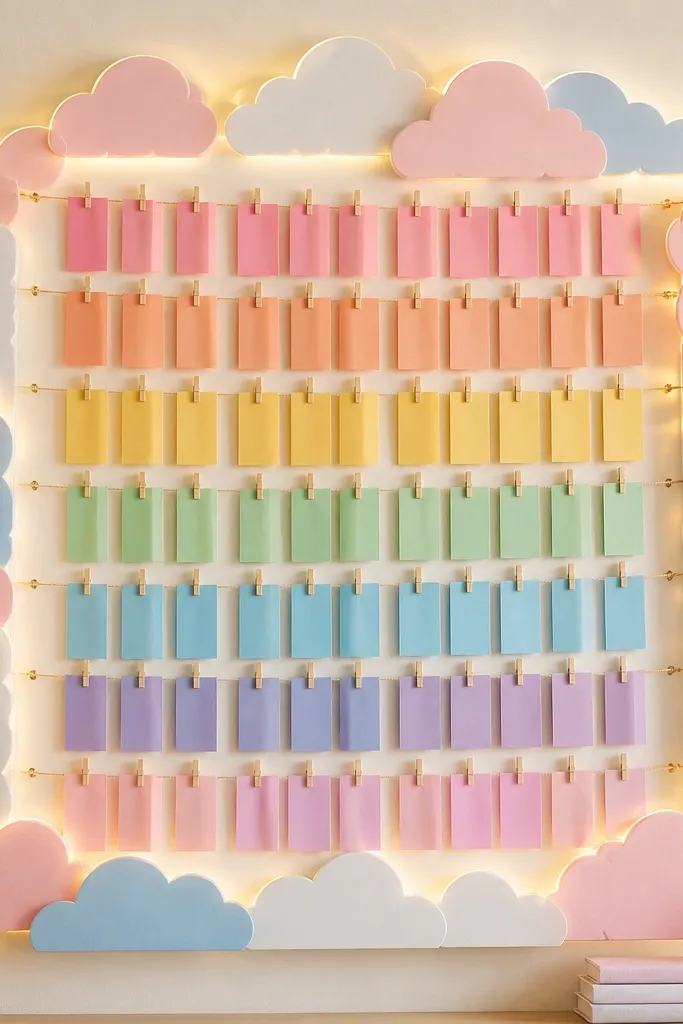
Soft pastel borders make the glow look like part of the artwork. I like a cloud border because it naturally hides the LED strip behind thicker shapes. Rainbow cards grouped by color keep it playful without getting messy.
Paint a foam board with a pale cream base. Cut cloud shapes from thicker cardstock or foam sheet, then glue them on top with a 1/4-inch gap behind. Place warm LEDs behind the cloud border and secure the strip to the foam base with tape.
Pro tipLeave 1/2 inch of blank space around the cards so the light doesn't smear across the paper edges.
AvoidDon't use neon-colored LEDs - the pastel board will look like a party sign.
6. Gold foil star map with twinkle lights
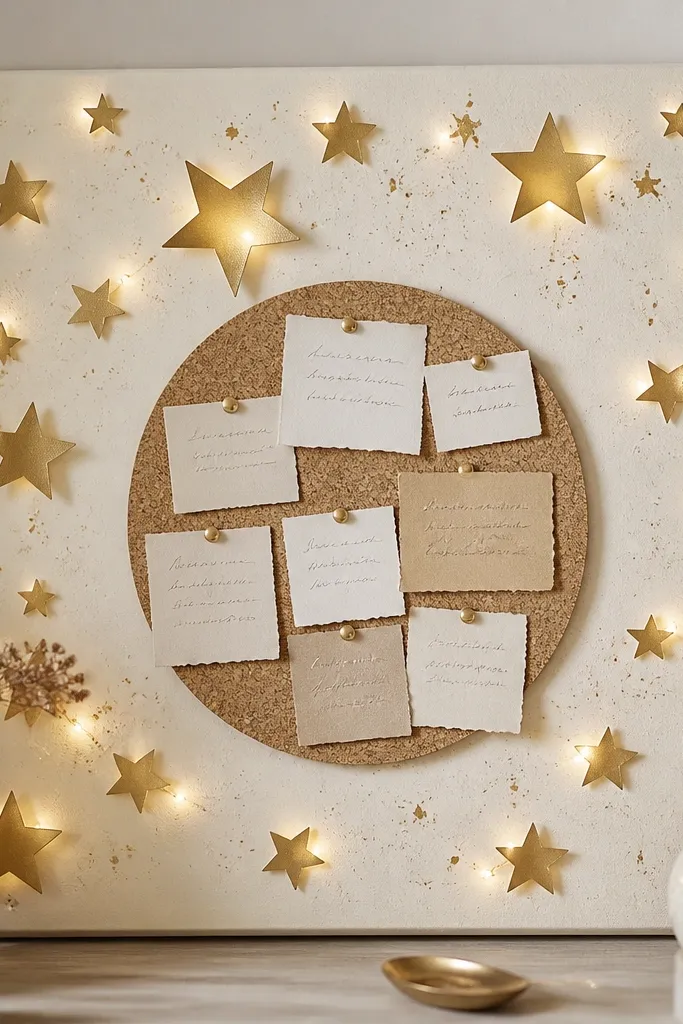
Stars plus warm twinkles make the board feel like a night sky without needing a full dark background. The gold foil reflects the light in tiny bursts, so it looks intentional instead of random. The center cork medallion anchors the layout so notes don't float away.
Glue gold star cutouts (craft foam or thin cardstock with foil) around the perimeter. Behind each star, tuck a single mini LED so only the glow shows through. Put a circular cork pad in the center and pin notes there.
Pro tipSpace stars about 2 inches apart around the edges for a balanced sparkle pattern.
AvoidAvoid dense star clusters - they create bright blobs and hide your notes.
7. Neutral farmhouse board with mason jar tea-light holders
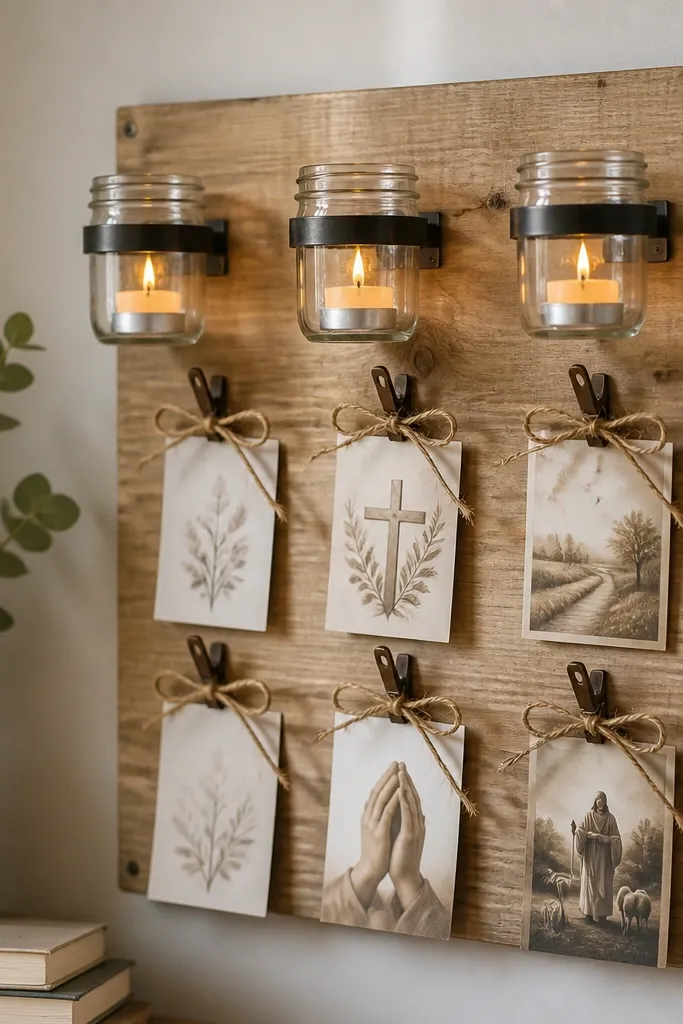
Tea-light style lights give you that "real candle" mood without the safety risk. The mason jar look feels farmhouse and makes the board look styled, not just lit. I like using flicker LEDs because they look alive during prayer time.
Attach three jar holders or small jar-shaped LED lantern cups to a wood backing. Keep them spaced 4-5 inches apart so they don't compete. Add twine loops for cards and pin them below the jars.
Pro tipUse battery tea lights with a timer so you don't have to remember turning them off.
AvoidDon't put the jars too close to paper cards or the heat-free LEDs still warm the surface over long sessions.
8. Black-and-cream typography board with LED script outline
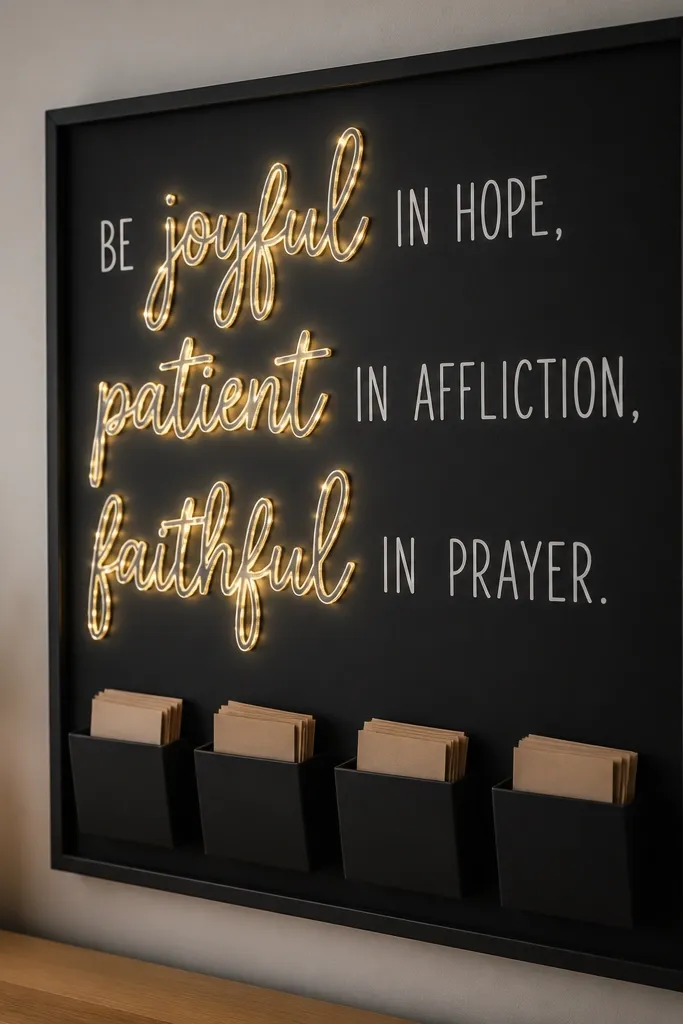
Tracing the lettering with light makes it feel like signage, but still personal. Black background absorbs stray reflections, so the glow stays crisp. White vinyl or painted lettering keeps the text readable and stops the LEDs from bleeding into the background.
Use a matte black board. Write the verse in a stencil, then apply white vinyl or paint. Hide a thin LED strip behind the vinyl outline or along the back of the stencil so only the edges glow.
Pro tipKeep the glowing outline width around 1/4 inch so it looks like a neat border, not a scribble.
AvoidSkip glossy black paint - it creates glare that kills the clean lettering look.
9. Corner shelf prayer board with strip lights under each shelf
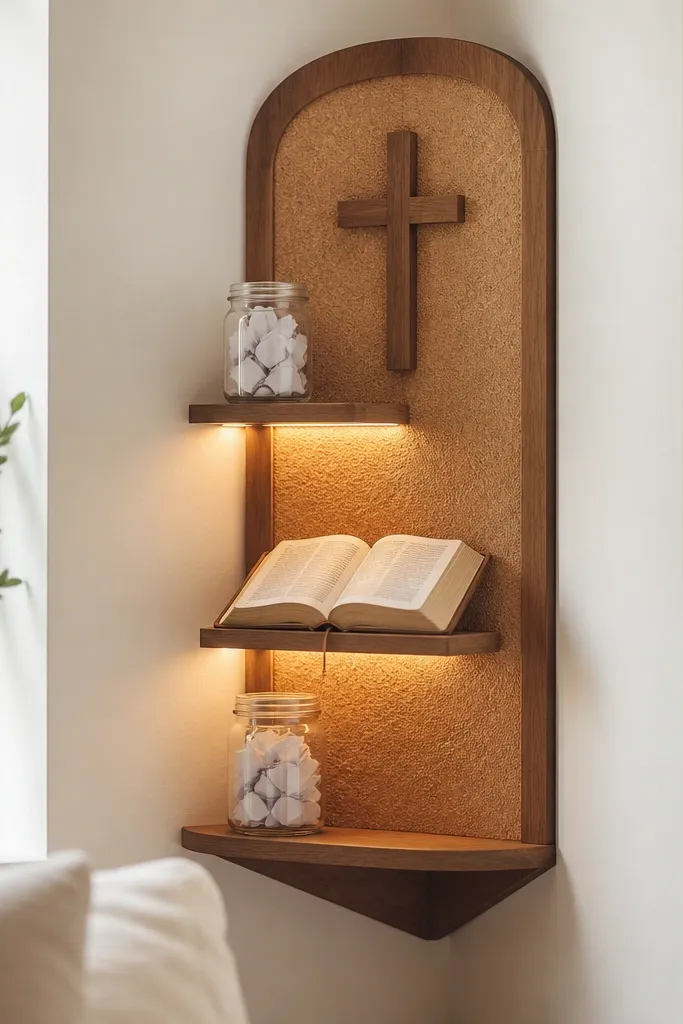
Under-shelf lighting makes the board look like built-in furniture. You get focused light on the jars and slips, and the wall behind stays calmer. This setup is great if you keep a lot of supplies on the board - pens, envelopes, and extra cards.
Mount a corner shelf unit or DIY small floating shelves from pine. Add warm 5V LED strips under each shelf, then mount a cork panel beneath for pinning. Keep the strip wiring routed through the shelf backing so it disappears.
Pro tipUse clear acrylic jar fronts or glass jars so the warm light looks golden instead of dull.
AvoidDon't place the LED strip too close to the shelf edge - you'll see the LED dots.
10. Beige felt banner prayer board with LED marquee dots
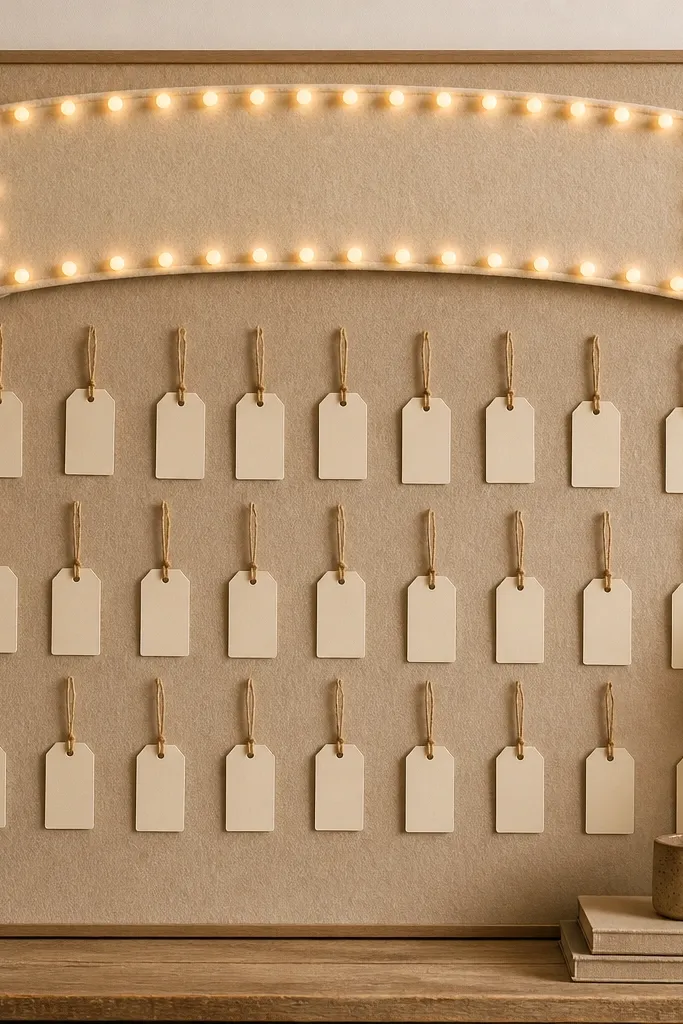
Felt hides light source flaws because it softens the glow. Marquee-style dots create a playful, handmade vibe that still looks organized. The felt banner gives you a place to hang tags without covering the whole board in pockets.
Cut a felt banner about 10 inches wide and 4 inches tall and stitch it onto a backing board. Place marquee LED dots behind the banner edge line, then secure with fabric glue. Hang small prayer tags using 1-inch ribbon loops.
Pro tipChoose felt in oatmeal or light tan - it makes warm LEDs look golden, not orange.
AvoidAvoid cheap thin felt - it sags and makes the light line look wavy.
11. Minimal white pegboard with warm fairy light border

Pegboards are perfect if you like swapping cards often. Warm fairy lights clipped to the frame edges make the whole board glow without hiding your cards. The white background keeps the cards readable and makes the lights look neat.
Mount a 24x36-inch pegboard, then add a thin wood trim frame. Clip fairy lights along the trim edges every 2-3 inches. Use clothespins and small card sleeves so cards slide in and out cleanly.
Pro tipKeep the cards consistent size (like 3x5 inches) so the glow doesn't bunch up behind different shapes.
AvoidDon't use thick ribbon loops - they cast shadows and make the board look cluttered.
12. Terracotta prayer board with copper LED strip corners

Corner lighting is a trick I use when a full border feels too bright. The warm glow starts at the corners and gently pulls your eyes toward the center grid. Copper accents make terracotta look richer without needing extra decoration.
Paint the board terracotta matte. Run LED strip segments in each corner, each segment about 10-12 inches long, and keep them inside the border by 1 inch. Pin cards in a tidy 3x3 grid so the glow has a place to land.
Pro tipUse a dimmable LED strip so the corners don't outshine the cards.
AvoidAvoid lighting the entire perimeter when you want a calm, grounded look.
13. Navy pocket board with silver LED line
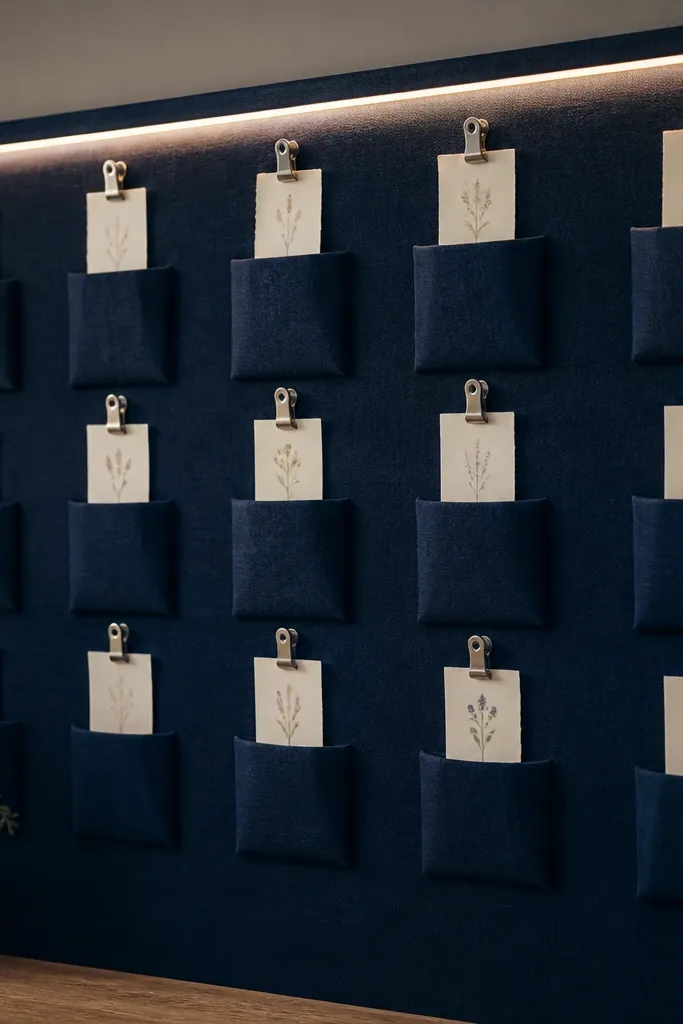
One clean LED line keeps the design modern and stops the board from looking crowded. Navy fabric makes the warm light look softer and less "techy." Silver clips add a cool contrast that still feels prayer-station calm.
Cover a backing board with navy felt or thick cotton. Sew pockets in two columns, each pocket about 4x5 inches. Mount the LED strip under a thin wood ledge at the very top so the light throws downward onto the pockets.
Pro tipUse clear label tape to label pocket categories on the back - the front stays clean.
AvoidDon't angle the LED strip upward - it creates glare on your slips.
14. Pastel floral frame with LED behind vellum flowers
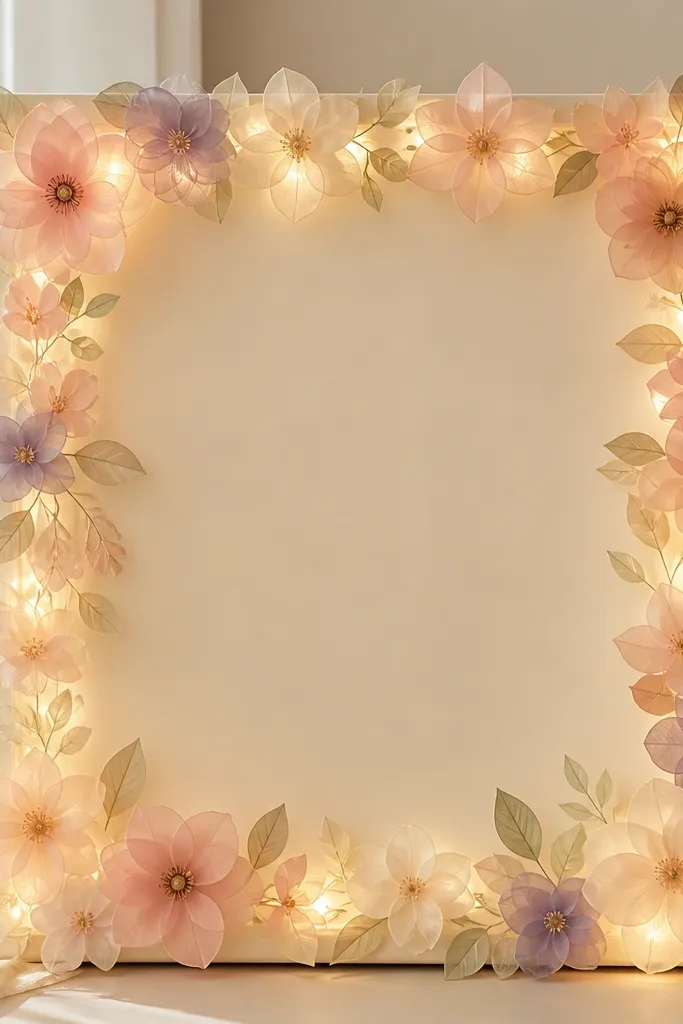
Vellum is the secret to soft glow because it diffuses light like a mini lantern. When you place LEDs behind vellum flowers, you get a gentle bloom effect around the border. The center stays uncluttered, which matters because prayer boards should feel breathable.
Cut flower shapes from vellum or frosted craft plastic sheets. Attach them with small spacers so there's room for the light behind. Place warm LED strip behind the border track, then tuck the wires along the back frame.
Pro tipUse matte pens for center writing so the light doesn't reflect off glossy ink.
AvoidAvoid clear plastic flowers - they create bright edges and look uneven.
15. Shiplap prayer board with hidden LED under-name plate
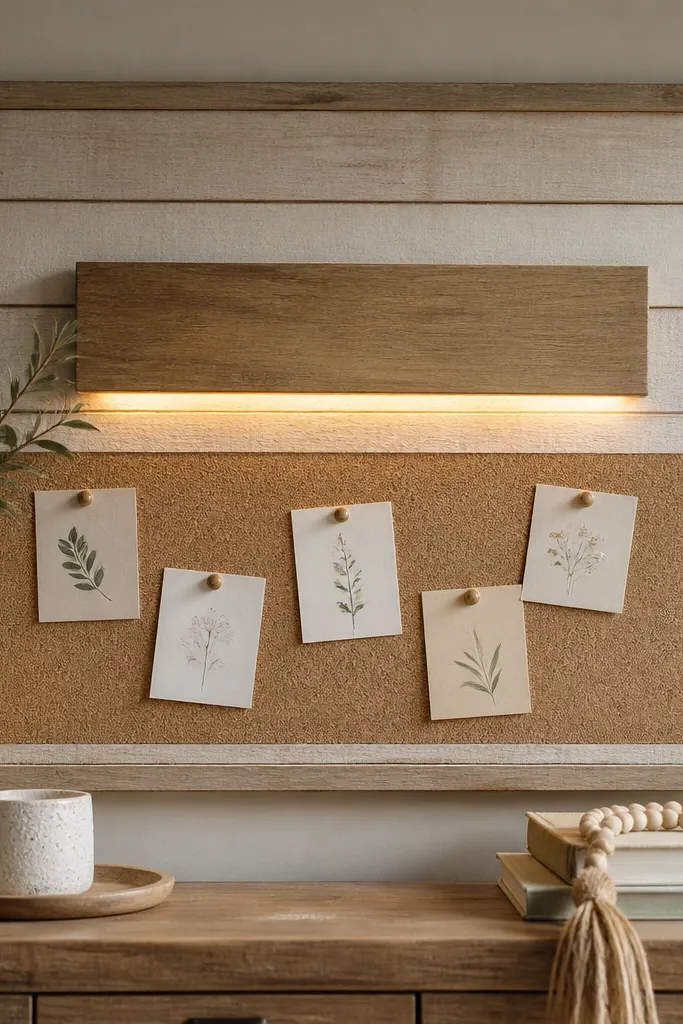
Hidden lighting under a name plate looks like you bought it that way. The shiplap texture gives depth, and the warm light makes the wood grain pop. I like this design when you want a "welcome" vibe for a prayer corner or entry area.
Use a shiplap-look panel or paint lines on plywood. Mount a small MDF name plate at the center with 1/4-inch spacers. Run a warm LED strip under the plate so it lights the area just below, then mount cork behind for cards.
Pro tipKeep the name plate matte (chalk paint or matte vinyl) so the light doesn't glare.
AvoidDon't use a shiny metal plate - it reflects the LEDs as bright streaks.
16. Rainbow washi tape prayer grid with mini LED dots
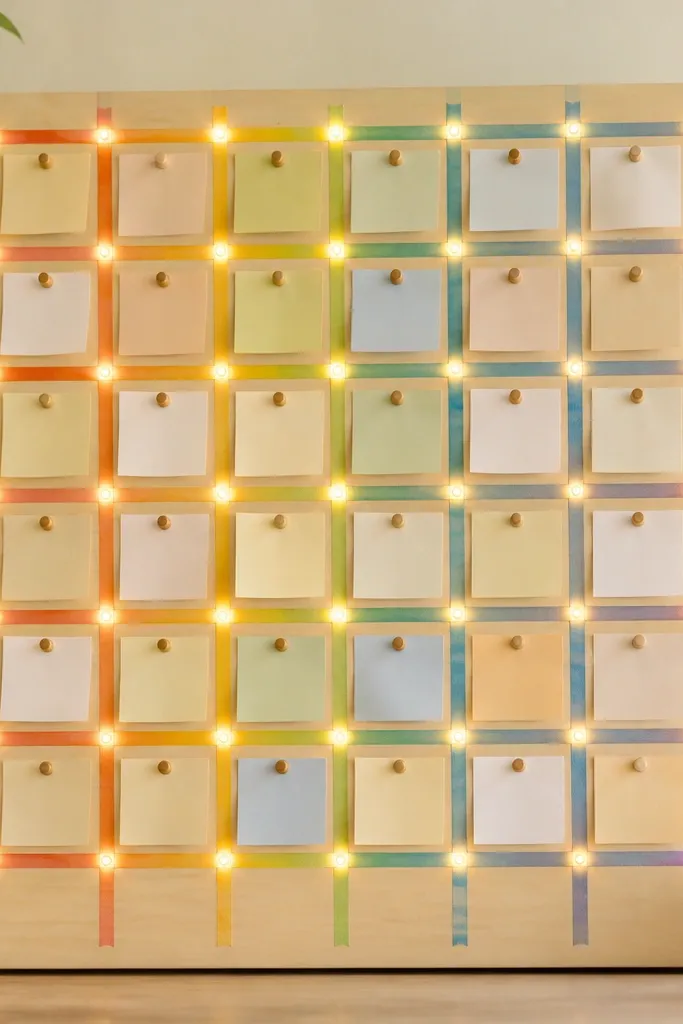
This looks playful and organized because the grid makes every request feel placed. Mini LED dots add a "constellation" effect right where the notes live. Washed wood keeps it cozy, and washi tape colors give you instant hierarchy without painting.
Mark a grid on the board with pencil, then lay washi tape strips at 1.5-2 inch widths. Place thumbtacks or small pins for each note cell. Add mini warm LEDs at a few key intersections (not every single one) so it stays readable.
Pro tipUse white paper notes with black ink so the LED glow doesn't tint the text.
AvoidAvoid covering the whole grid in LEDs - it turns into noise and your notes get lost.
17. Neutral stone-texture board with backlit scripture window
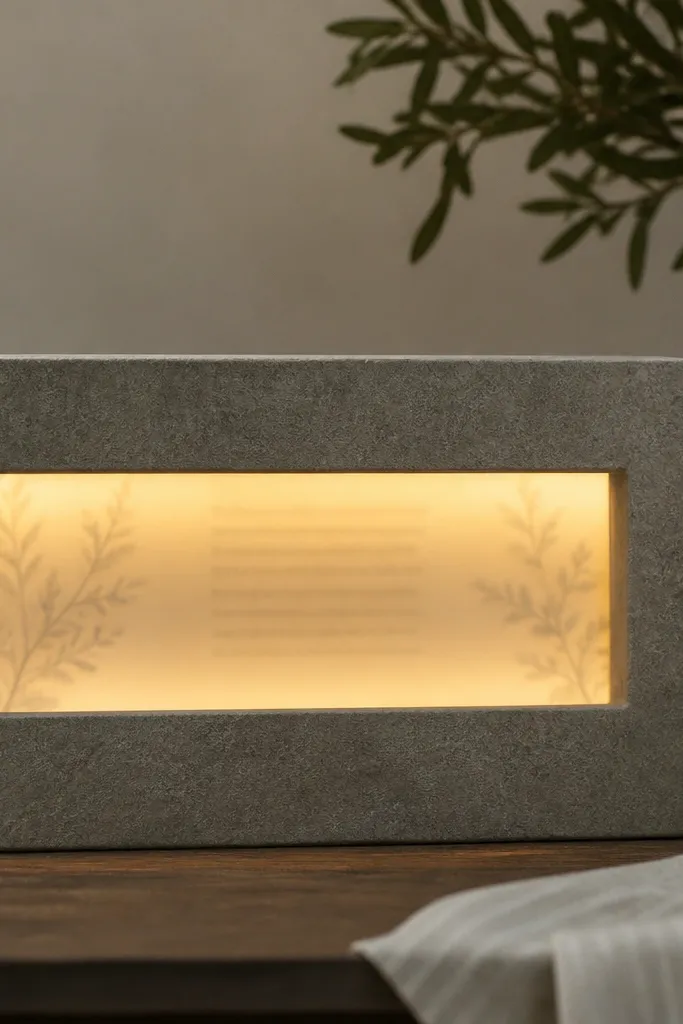
Stone texture makes the glow feel grounded, like lantern light on a wall. The backlit window gives you a clear focal point and makes the scripture look framed. Frosted vellum inside the window keeps the text readable and softens the LED points.
Use stone-texture contact paper or paint plus a sponge texture. Cut a rectangle opening and mount frosted vellum behind a printed scripture strip. Place warm LED strip behind the vellum, keeping the LED line at least 1/2 inch away from the text to reduce hotspots.
Pro tipPrint scripture on thick matte paper and trim edges clean so it doesn't curl when it warms slightly.
AvoidDon't use thin glossy paper behind LEDs - it warps and shows glare.
18. Blackboard prayer board with LED chalk line border
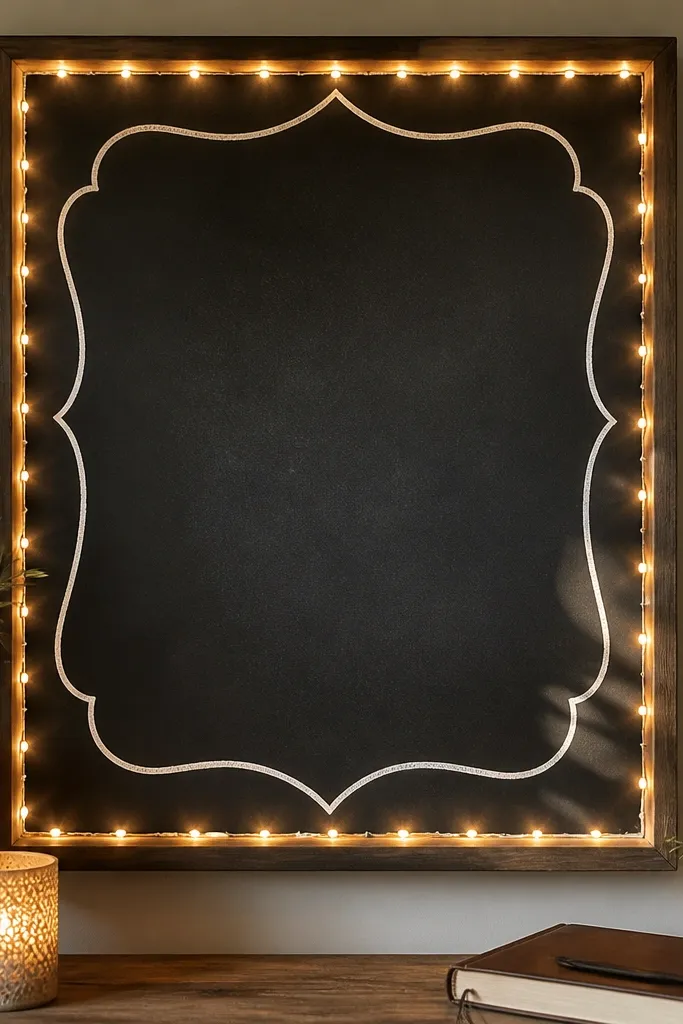
Blackboards are great because the writing stays the star, and lights frame it without competing. Warm border lighting makes chalk look like it's glowing. This is a solid choice if you update prayers weekly and want everything to stay cohesive.
Use a matte black paint or a real blackboard panel. Draw a border line with chalk, then tuck an LED strip behind the panel's inner frame edge so it lines up with the chalk border. Keep your writing area at least 2 inches inside the glowing strip.
Pro tipWipe and re-write with microfiber cloth so the black surface stays even and doesn't look streaky under the light.
AvoidAvoid shiny chalk markers - they reflect the LEDs and look smeared.
19. Light pink floral corner board with fairy lights in a heart shape
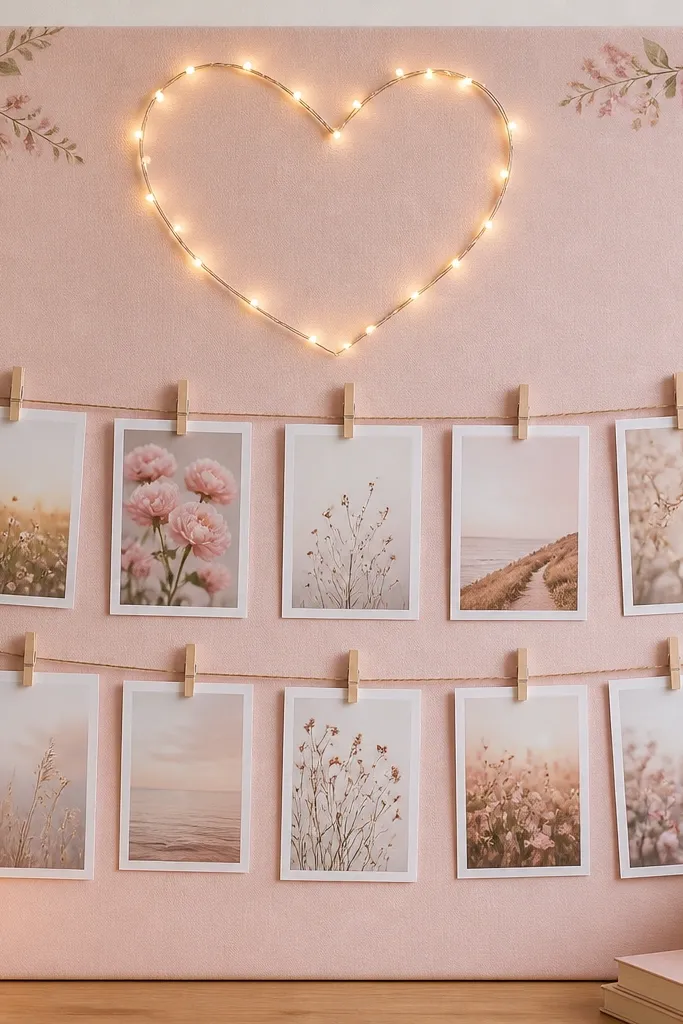
A heart outline is sweet without being childish when you keep the rest simple. The fairy lights look best when they're spaced evenly, not bunched. Light pink background makes the warm glow look like soft lighting in a bedroom.
Use a light pink backing board with a small floral corner decal or painted corner. Arrange fairy lights into a heart shape by pinning the wire lightly with small clear push pins. Place cards below the heart and keep the clothespins black or dark wood for contrast.
Pro tipLay the heart on the board first and measure - aim for the heart width to be about one-third of the board width.
AvoidDon't use multi-color LEDs - the heart turns into a decoration instead of a prayer space.


