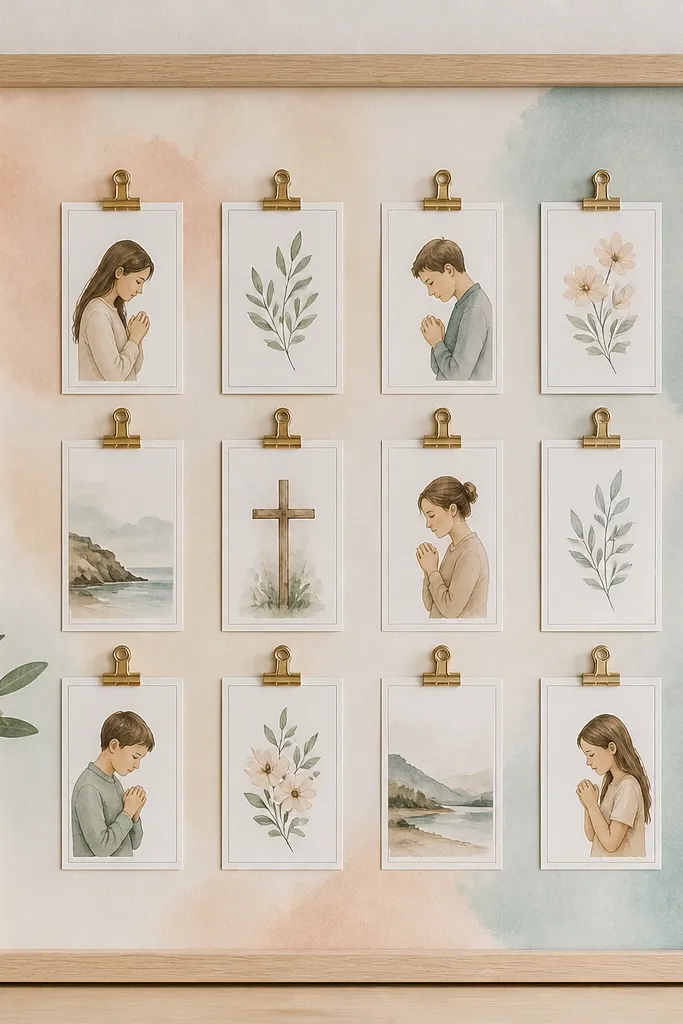
1. White Linen Pocket Prayer Board in a Thin Frame
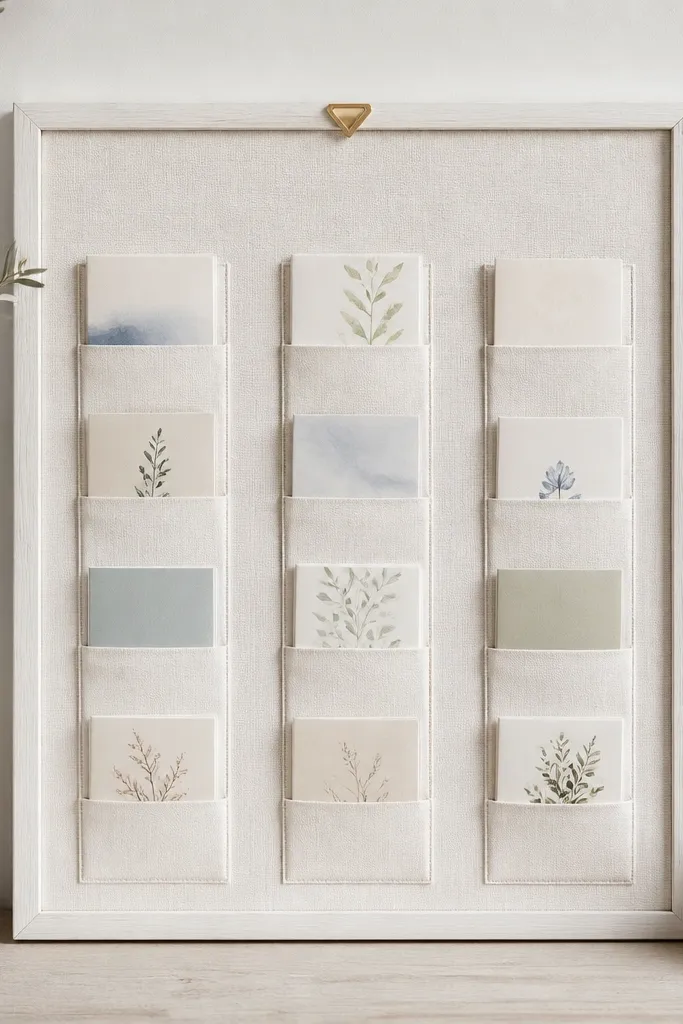
This one gives a clean, bright look that still feels soft. The linen texture makes the cards look intentional, and the pockets keep everything aligned without you fighting with clips. I used a slim white frame so the whole piece reads like wall art, not a bulletin board. The pockets also let you switch out prayers without disturbing the rest.
Use a 1/2-inch-thick foam board or thin plywood as the base, then wrap it with linen and staple the back. Sew or hot-glue fabric pockets (cotton is fine) in three columns, leaving 1 inch of space between pocket rows so cards slide in easily. Mount the framed board with Command-style strips rated for the frame weight, or hang it using two heavy-duty picture hooks.
Pro tipCut your prayer cards to a consistent size (like 4x6) so they line up perfectly in every pocket.
AvoidAvoid stretchy linen or loose-woven fabric - cards sag and the whole board starts looking messy.
2. Cork Grid Prayer Board with Gold Push-Pins
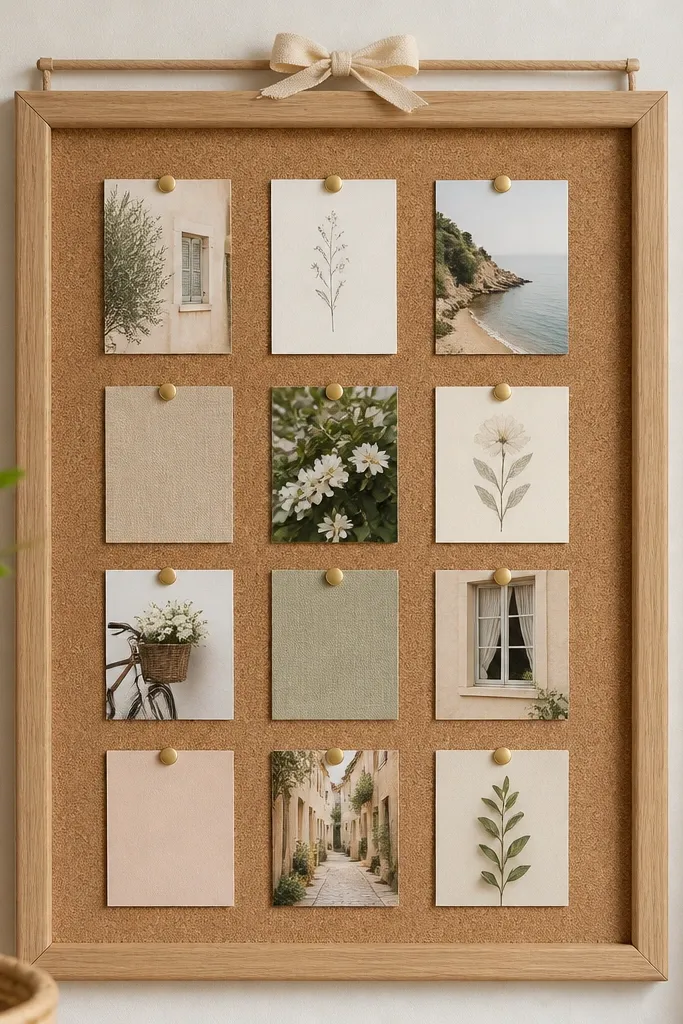
Cork is the easiest surface for a prayer board because it hides tiny dents and keeps cards flat. Gold push-pins make the board look styled, especially against warm cork. I like adding a simple grid organization - it makes the wall look calm instead of cluttered. Because cork holds pins well, you can update prayers multiple times a week without damaging the cards.
Buy a pre-cut cork sheet (around 1/4-inch thick) and mount it to a thin backing board. Trim the cork so it sits 1/4 inch inside the frame edges for a crisp border. Use 1-inch gold push-pins and keep card spacing consistent: leave about 1 inch between pinned pieces.
Pro tipUse a paper trimmer to keep all cards the same width, so the grid looks deliberate.
AvoidDon't pin heavy cardstock directly without pressing it flat - thick cards can snag and pull at the cork.
3. Magnetic Photo Frame Prayer Board with Sliding Cards
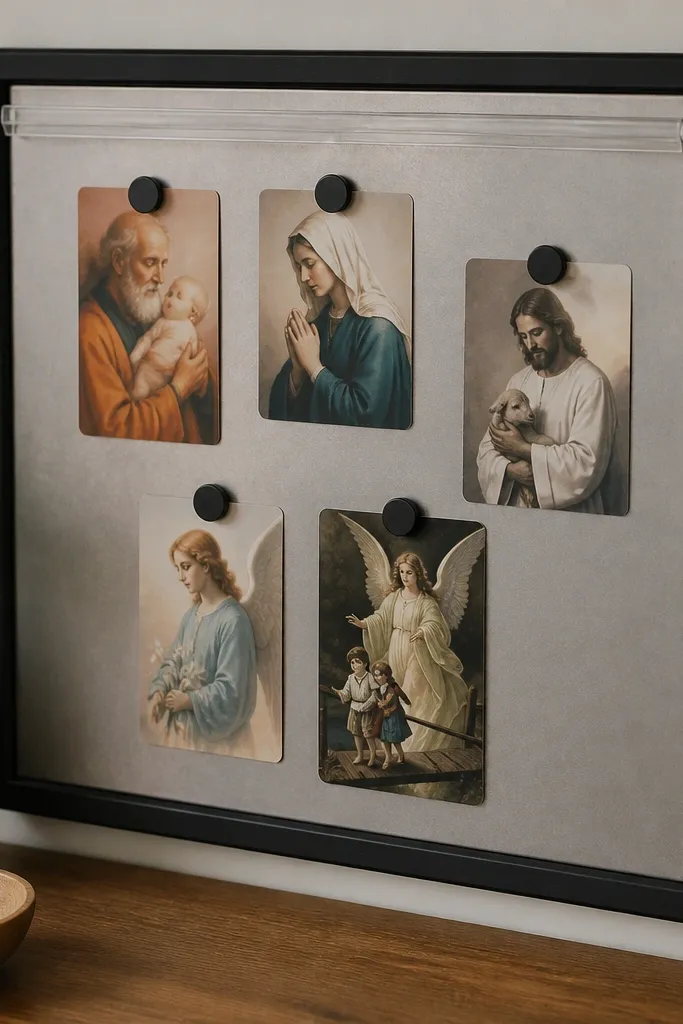
This is the swap-easiest option. Magnets let you change prayers in seconds, and laminated cards survive being handled every day. The clear top strip gives you a place to slide in a "today's focus" card without pinning it. The black frame makes everything look sharp and modern.
Cut a magnetic sheet to fit the inside of a shallow frame. Cover edges with self-adhesive felt so the sheet doesn't scratch cards. Add magnets behind laminated cards, plus a few tiny magnets for corners so cards don't curl. Mount the frame with two to four Command strips based on the weight.
Pro tipLaminate two sizes of cards: small 3x4 for quick swaps and larger 4x6 for longer prayers.
AvoidAvoid unlaminated paper if you touch the board often - paper edges get soft and curl.
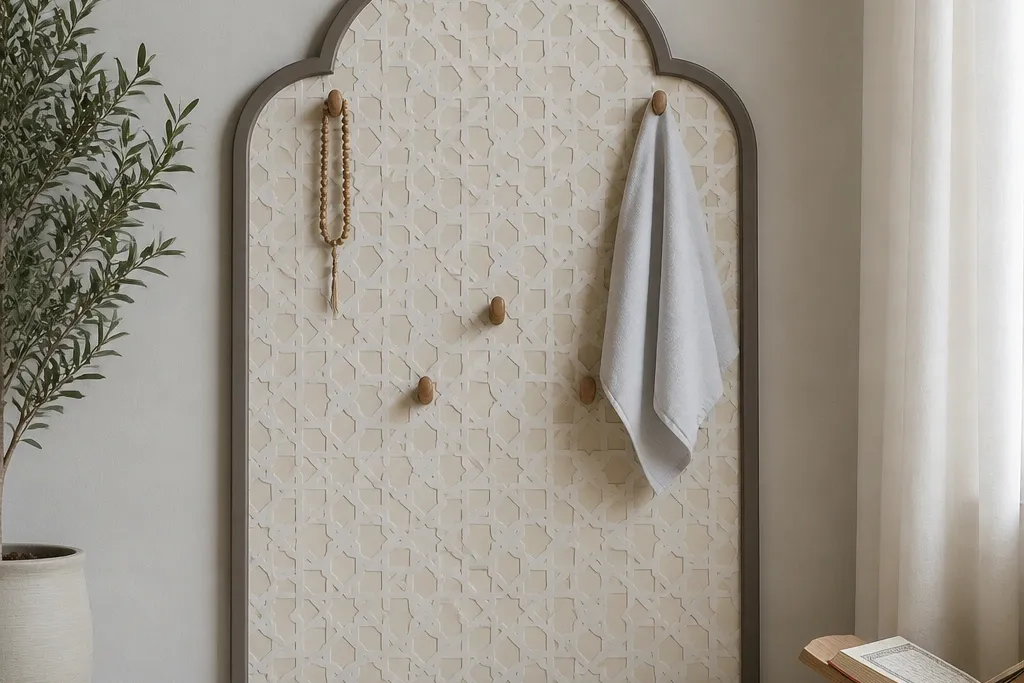
4. Felt Flower Prayer Board with Removable Ribbon Notes
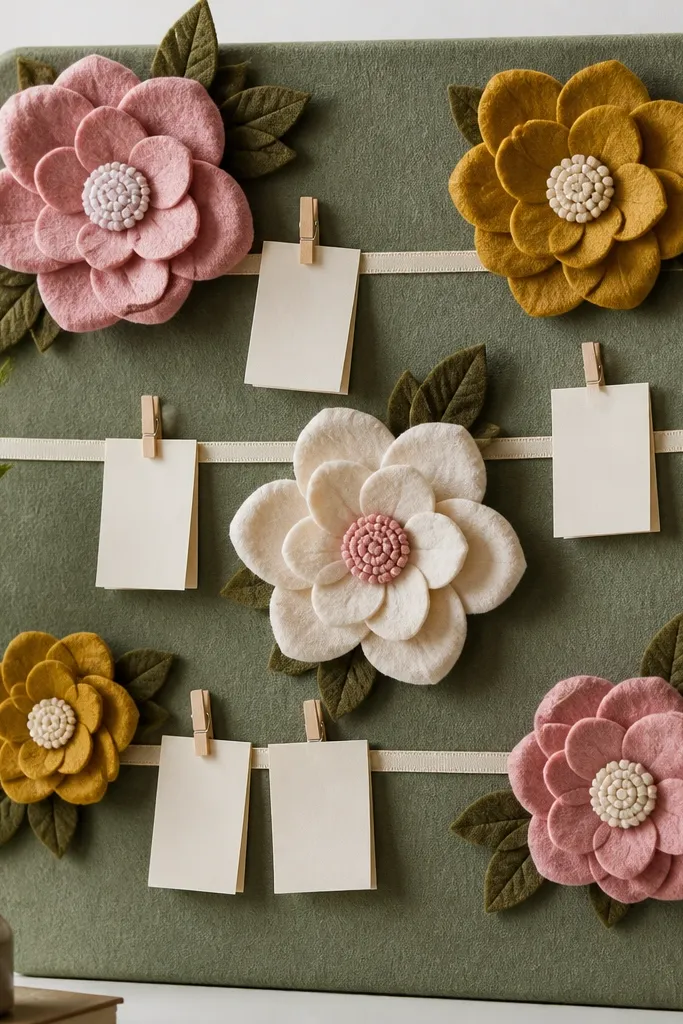
Felt makes everything look cozy and forgiving. The flower shapes give you a focal point, so the prayer cards feel like part of the design instead of random items taped on. Ribbon notes look cute and stay easy to swap - you pull one note out and replace it without wrestling with pins. This is a great option for kids' prayer time or a nursery hallway.
Use a stretched felt panel over foam board, then glue or stitch layered felt flowers. Add ribbon loops across the flowers - I space them about 3 inches apart. Attach mini clothespins to the loop ends or simply tuck notes behind the loop so they slide out.
Pro tipChoose felt in two shades only, then keep card colors consistent (cream and dusty pink look great together).
AvoidDon't use too many bright felt colors - the board turns into a craft project instead of wall art.
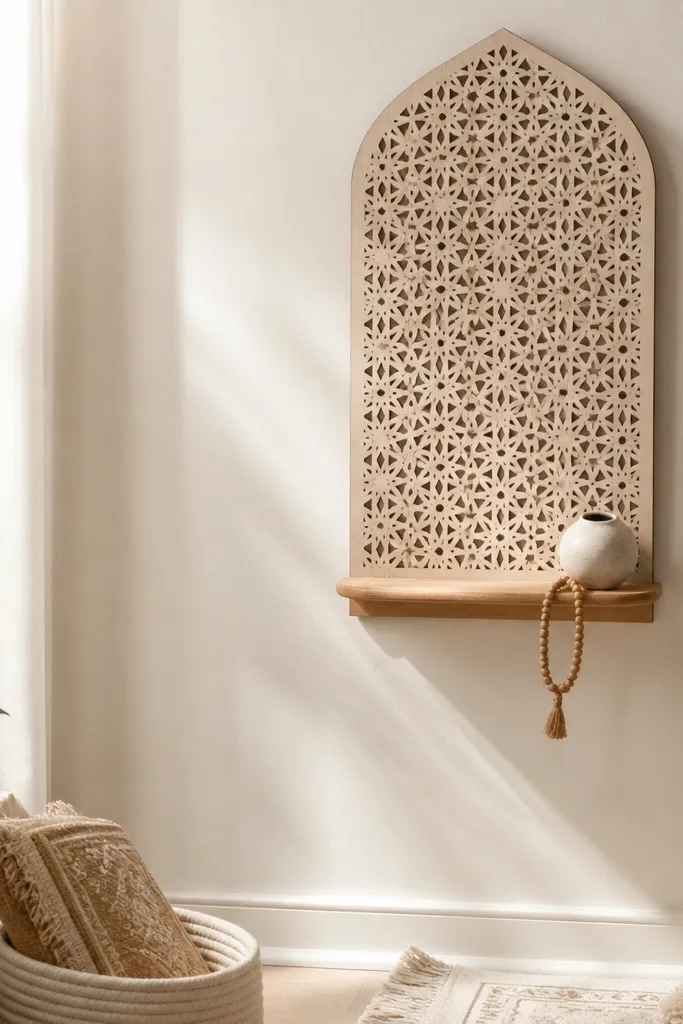
5. Rope and Peg Prayer Board in a Driftwood Frame
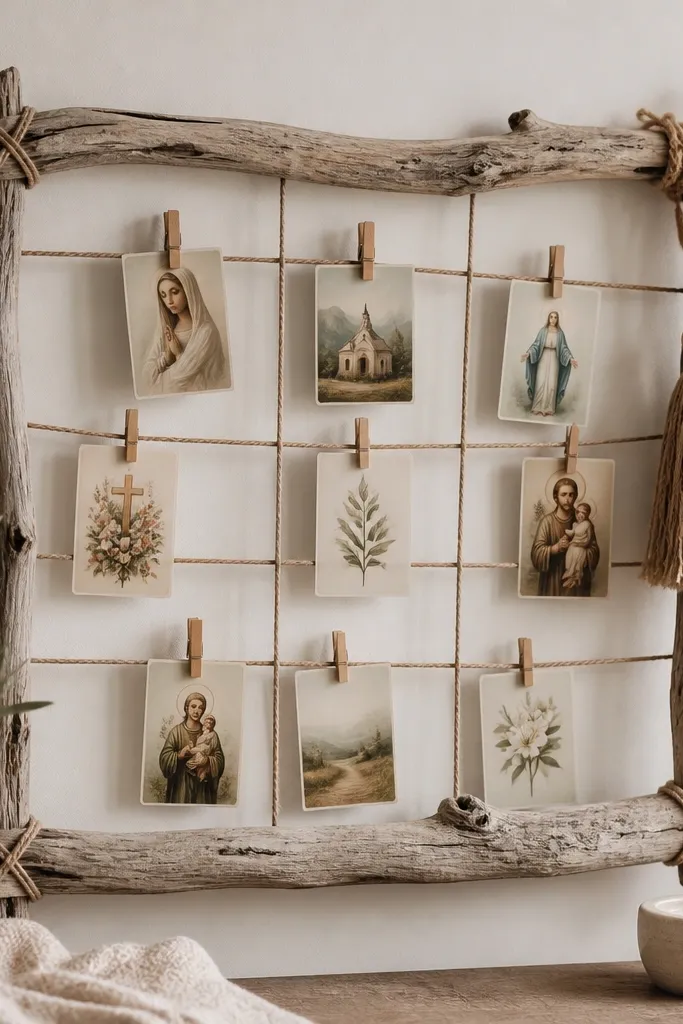
This style reads like farmhouse décor, but it's still practical. The rope lines act like a visual grid, and pegs let you swap cards instantly. I like it because cards don't need holes or magnets - they clip cleanly. It also looks good when you use fewer cards; the rope grid fills the space.
Screw nothing into the wall: screw only into the frame. Tie jute rope across the frame interior in a grid, then hot-glue rope ends to the back of the frame. Add clothespin-style wooden pegs or mini clamp pegs along the rope. Mount with two large Command strips on the frame back.
Pro tipUse mini binder clips first to test spacing, then swap to pegs once you like the layout.
AvoidAvoid shiny metal pegs - they look out of place against rope and driftwood finishes.
6. Fabric Wallpaper Prayer Board with Clip-On Photo Ledges
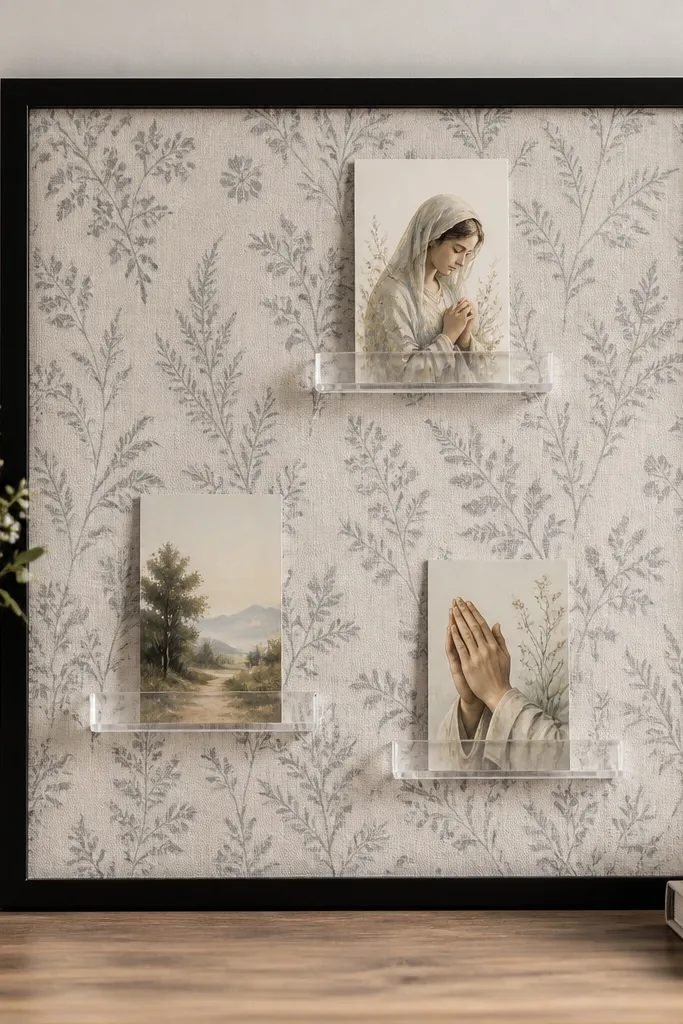
Patterned fabric makes the prayer board feel like décor from the first glance. Clip-on ledges keep cards visible without covering the whole board with pockets. I like the clear acrylic because it disappears, letting the fabric do the work. You can also add a small "praise" ledge and a "prayer request" ledge.
Wrap the backing with fabric and staple the back cleanly. Attach acrylic clip ledges to the frame interior with the manufacturer's included clips or strong craft adhesive pads on the back. Keep ledges 2 to 2.5 inches apart vertically so cards don't overlap. Mount with strip hooks rated for the board weight.
Pro tipUse fabric with a small repeating pattern so your prayer cards stay the visual focus.
AvoidSkip thick upholstery fabric - it makes the frame look bulky and the edges won't sit flat.
7. Pastel Washi Tape Prayer Board on Clear Acrylic
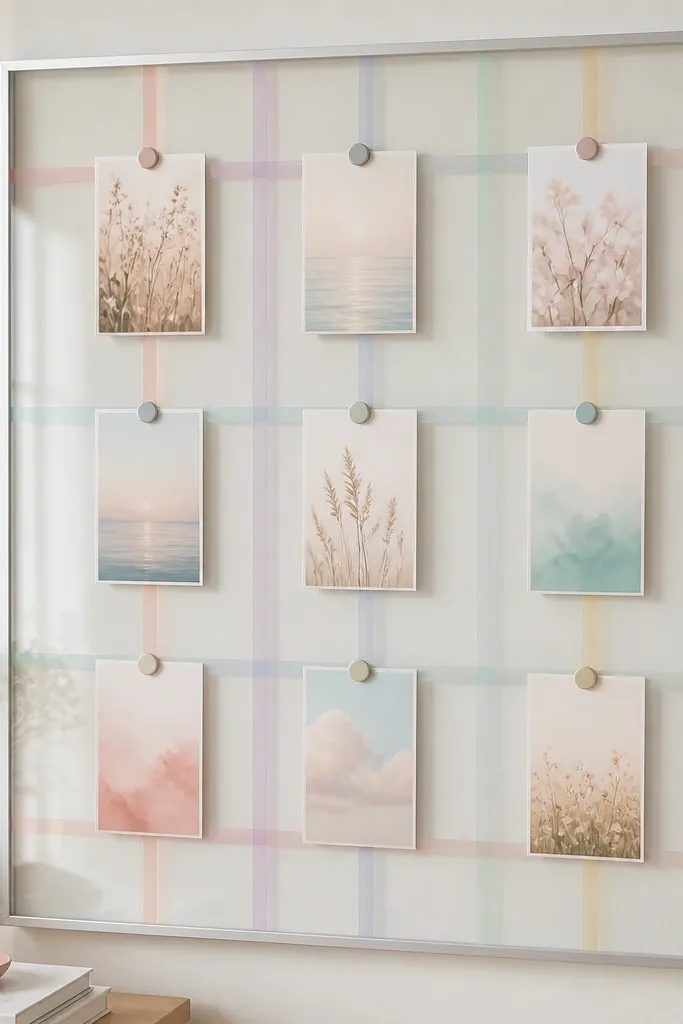
This one looks light and airy, like the board floats. The washi tape lines add structure without cutting into the design. Because the base is clear acrylic, it feels modern and clean, and the magnets make swapping easy. I used pastel tape in three colors max so it stays calm.
Use a thin clear acrylic sheet cut to frame size. Apply washi tape in a grid pattern, then place tiny round magnets at tape intersections. Add laminated prayer cards with matching magnet spots. Mount the framed acrylic with clear Command strips or picture hooks that won't warp the frame.
Pro tipPress tape down with a smooth ruler edge so it seals and doesn't peel at the corners.
AvoidAvoid heavy magnets - they can fog the acrylic with scratches over time.
8. Wood Slat Prayer Board with Clip Strings

Wood slats give you built-in organization and texture. The strings let you hang notes without pins, so cards stay intact. I like using neutral slats and adding color only through the cards, ribbon, and clothespins. It feels like a wall organizer that happens to hold prayers.
Build a shallow frame from thin wood strips and glue slats across the front. Thread cotton string from top to bottom slats and tie knots so they don't sag. Clip cards with small clothespins. Mount the whole thing with four points of Command strips for even weight distribution.
Pro tipKeep strings tensioned: pull each string tight before tying, then trim ends cleanly for a sharp look.
AvoidDon't hang cards too low - they will bump into furniture and look worn fast.
9. Chalkboard Prayer Board Insert in a Removable Frame

If you like writing prayers by hand, chalkboard style is the most satisfying. You can erase mistakes and update daily without printing new cards. I've done this in a hallway where I write one line each morning - it keeps the space active. The frame makes it look like art, not a classroom board.
Use a chalkboard panel cut to fit inside a removable frame. Attach a tiny chalk tray with adhesive pads inside the frame so it doesn't rattle. Add removable labels with chalk markers for section headers. Mount with weighted Command strips and avoid over-tightening if your frame is lightweight.
Pro tipUse white chalk for the main line and colored chalk only for section headers.
AvoidAvoid glossy chalkboard paint on thin panels - it smears and makes writing look uneven.
10. Photo Collage Prayer Board with Removable Corner Holders
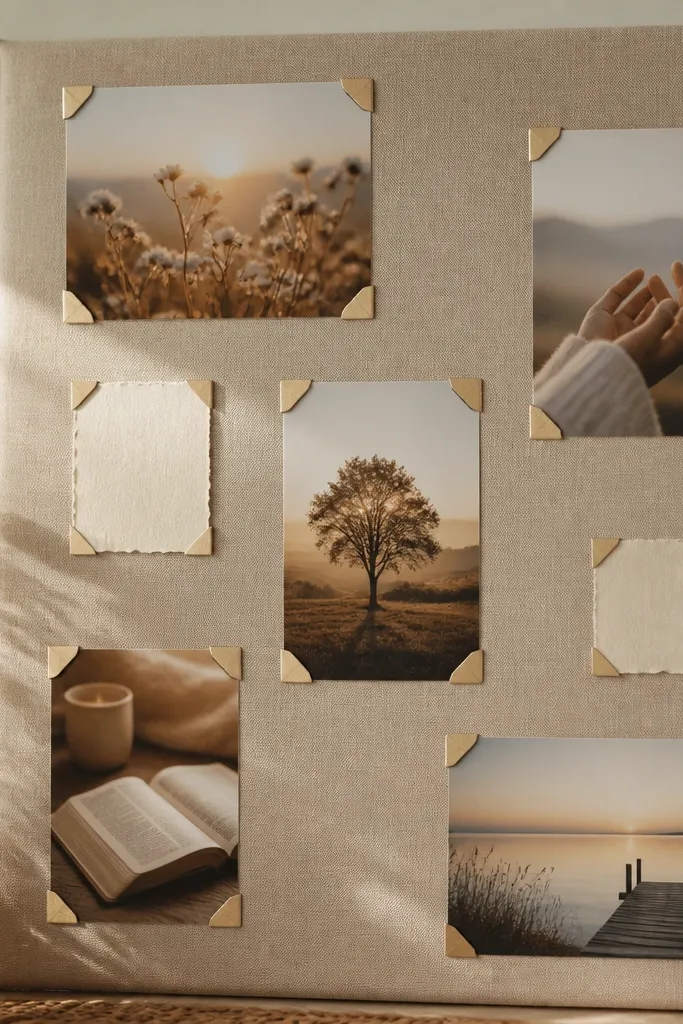
This looks like a curated memory wall, but it's practical for swapping. Photo corners keep images flat and aligned, so the board never looks lopsided. The fabric background softens everything and hides minor tape marks. I like it for families because you can add a new prayer card next to a photo without redoing the whole layout.
Cover foam board with textured cotton and trim edges neatly. Place small adhesive photo corners (the kind meant for lightweight frames) in a grid around the board. Insert printed cards or small photos into the corners. Mount the board in a larger frame using removable strips.
Pro tipPrint cards with a consistent margin so they slide into corners without showing uneven edges.
AvoidSkip heavy double-sided tape - it leaves residue that makes the board look tired when you remove it.
11. Magnetic Fabric Board with Removable Nameplate Labels
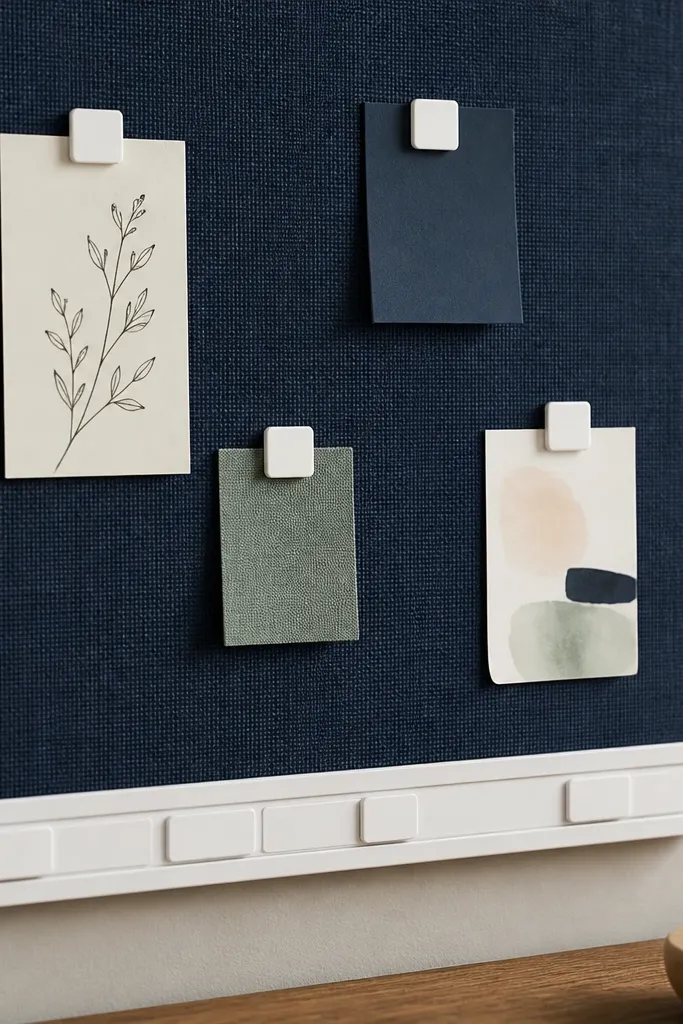
Fabric plus magnets gives you a soft look without losing the quick-swap convenience. The navy background makes paper and photos pop, and the label strip keeps your organization readable from across the room. I used square magnets because they hold corners without warping the card. This setup is great for a prayer board that changes by season.
Adhere or sandwich a magnetic sheet behind fabric-covered foam board. Keep the magnetic sheet centered so edges stay neat. Add small square magnets to the back of each card or label tab. Mount the framed board with a strip system placed near the corners and midpoints.
Pro tipStick to two label types: one for categories (Grace, Healing) and one for names (Family Member) so your layout stays consistent.
AvoidAvoid fuzzy fabric - it grabs paper edges and makes cards harder to remove.
12. Laminated Scripture Strips on a Removable Ribbon Rail
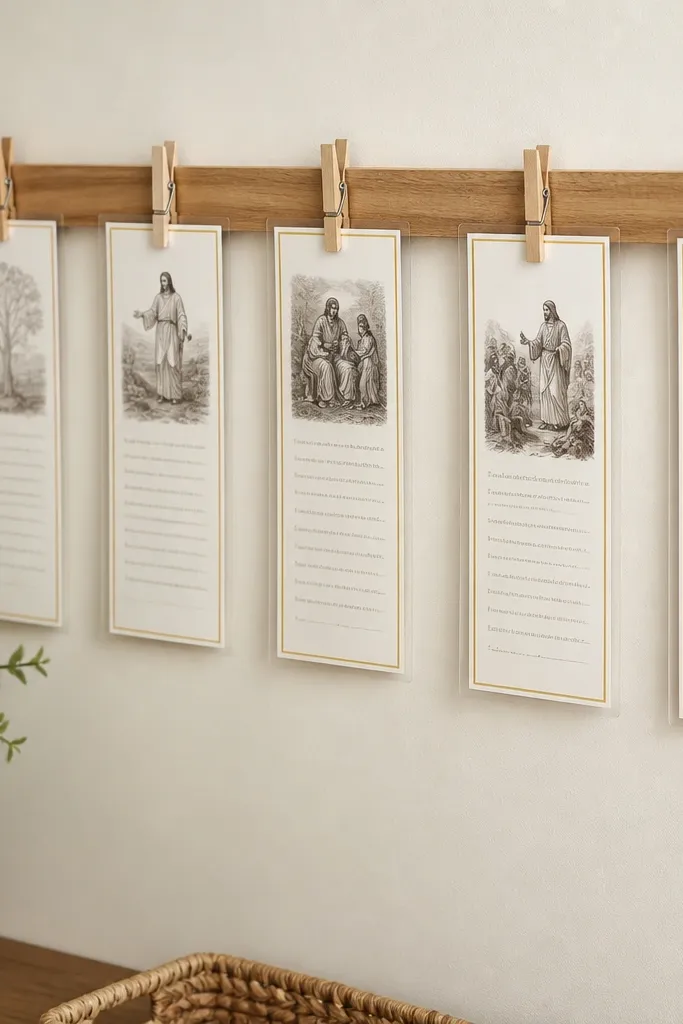
Hanging scripture strips look like wall décor, not a clutter board. The rail organizes everything in one line, and clothespins let you swap one strip without touching the others. I like laminated strips because they stand up to daily handling and wipe clean. The cream background makes the black text feel crisp.
Make a simple top rail from a thin wood dowel inside a shallow frame. Attach a row of small clothespins evenly spaced, then clip laminated scripture strips. Add a subtle backing fabric or thick paper for softness. Mount with two heavy-duty Command strips on the back of the frame.
Pro tipUse a consistent font size when you print strips so the board looks intentional even when you change the content.
AvoidDon't use loose paper strips - they curl and the clips look messy.
13. Watercolor Paper Prayer Board with Clip Frames
Watercolor background makes it feel like art first, prayer board second. The clip frames let you swap cards quickly and keep them separated so nothing overlaps. I like using light, airy colors because darker paper can fight the watercolor. When you keep card borders consistent, the whole board stays clean even as you change content.
Create a watercolor background on thick paper and mount it to foam board. Add small clip frames or binder clips attached to the front with strong adhesive pads. Use card sizes like 3x5 with a 1/4-inch border so they sit evenly. Mount in a light wood frame using removable strips.
Pro tipSeal the watercolor with a matte spray made for paper so it doesn't smudge when you handle cards.
AvoidAvoid glossy sealer - it creates glare and makes text harder to read.
14. Shiplap-Style Magnetic Board with Tiered Card Blocks
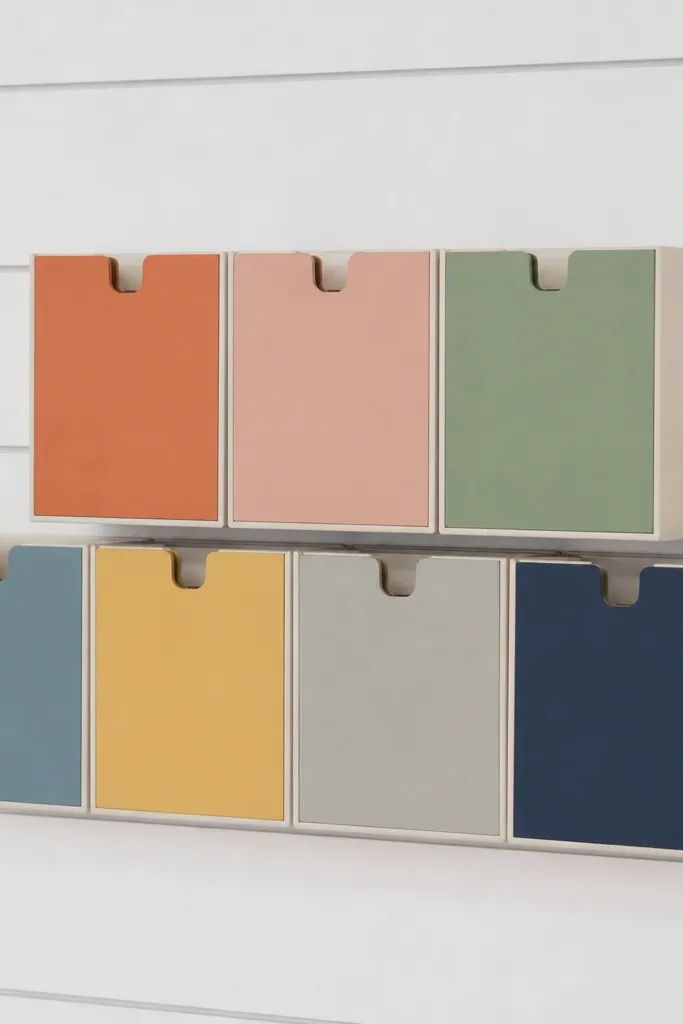
This looks like farmhouse décor but it still works like a modern prayer board. The magnetic sheet keeps cards stable, and the tiered blocks give you hierarchy: requests on top, praises below. I like the shiplap look because it hides minor imperfections in the backing. The layered labels make it easy to scan without reading every card.
Create a shiplap-style texture using thin craft wood strips glued to a backing, then add a magnetic sheet behind. Cover the surface with a thin white paint layer so the strips blend. Make card blocks from cardstock with small magnets at the back corners. Mount the framed board with strips placed on the top and bottom rails.
Pro tipKeep the top tier limited to 3 blocks so it doesn't look crowded.
AvoidDon't stack too many magnetic blocks - they pull forward and can warp the frame edges.
15. Blackboard + Cork Combo Board with Two Zones
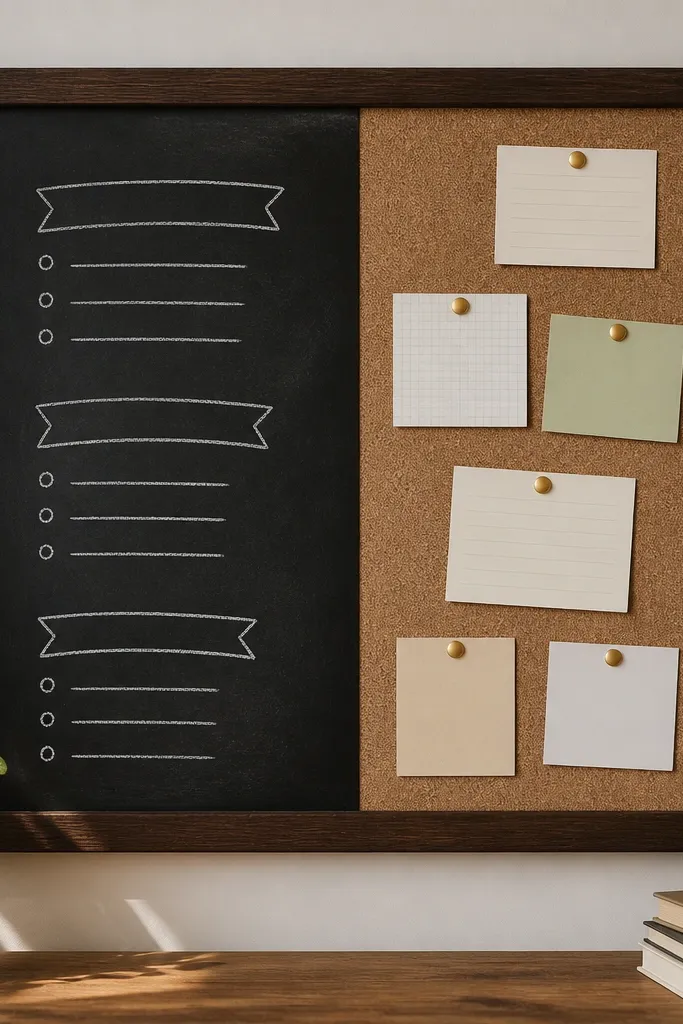
Two-zone boards give you the best of both worlds. Use cork for pinned requests and photos, then use chalk for today's focus or a short prayer you change daily. The split layout keeps the board from looking chaotic because each material has a job. Dark framing makes the contrast feel intentional and readable.
Cut cork to one half and use chalkboard panel or chalkboard paint on the other half of a foam base. Frame it with a dark wood or black-painted frame so the seam looks clean. Add gold push-pins for the cork side and keep chalk writing short. Mount with multiple Command strips spaced across the back for weight balance.
Pro tipUse chalk markers sparingly - regular chalk looks more consistent on matte boards.
AvoidAvoid mixing too many colors of chalk - it makes the board feel like a school assignment.


