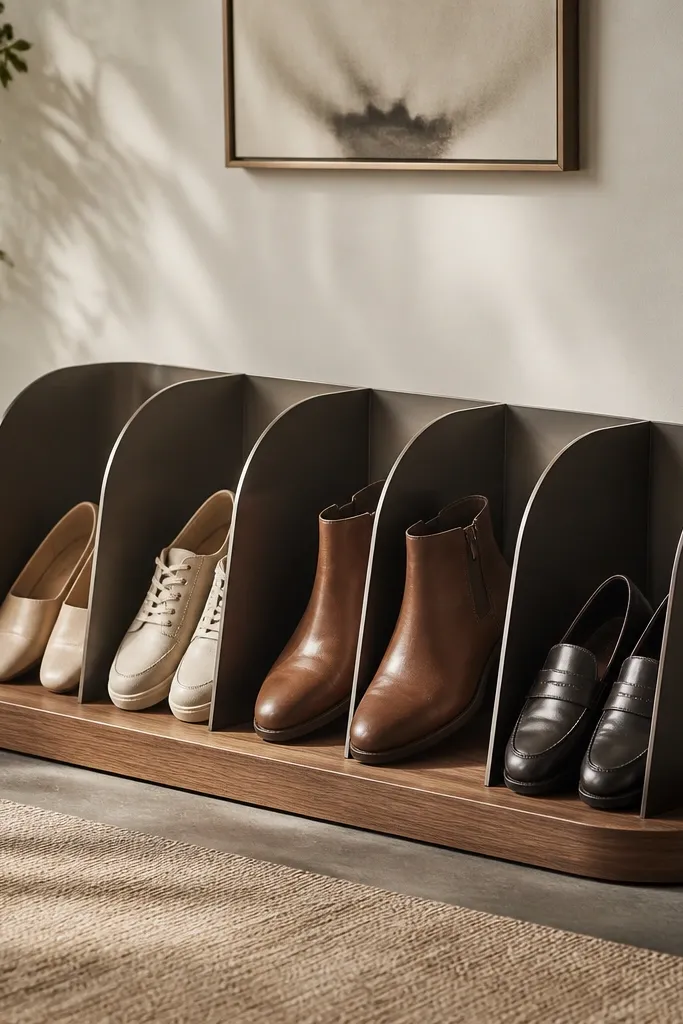
1. Matte black metal frame with angled slat dividers
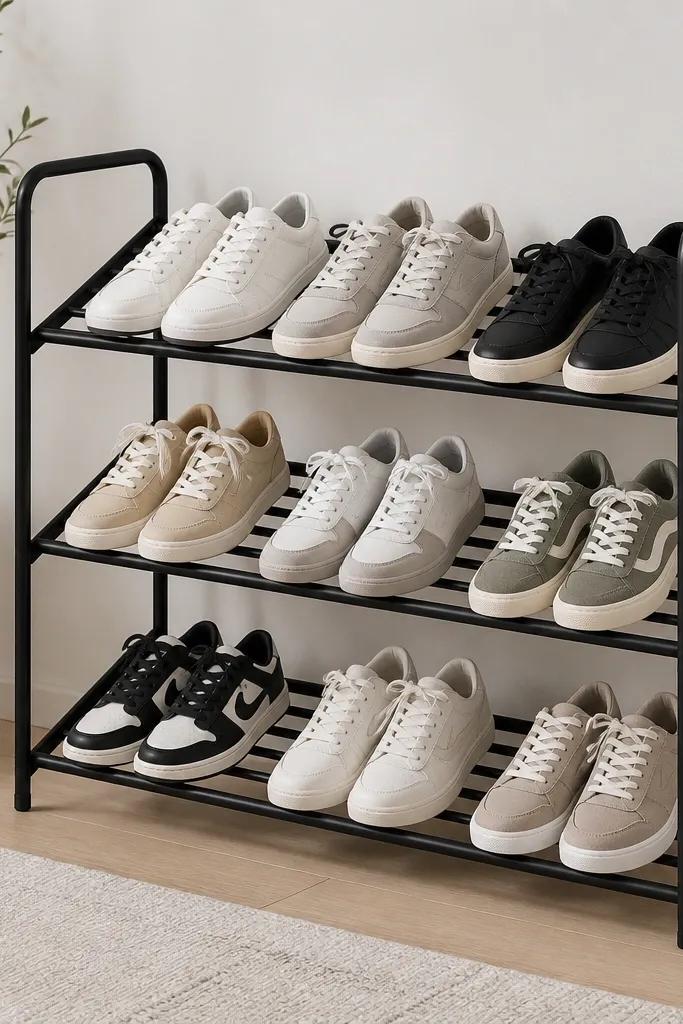
This setup looks expensive because the metal reads architectural and the angled slats control how shoes rest. When sneakers sit toe-forward, you see the same silhouette across the rack, which makes the wall look curated instead of messy. Matte black also hides scuffs on the frame and doesn't reflect harsh light like chrome. Pair it with a neutral shoe palette for the cleanest effect.
Build a rectangular frame with 1-inch square metal tubing. Set shelves at 10.5 to 11 inches deep and space the slats so each bay is about 7.5 to 8.5 inches wide. Use slats made from 1x2 wood strips or black powder-coated metal, then stain any wood and seal it before installing.
Pro tipSpray the frame with a matte black enamel made for metal, then let it cure 48 hours before loading shoes.
AvoidDon't use shiny spray paint on the metal - it catches every fingerprint and makes the rack look DIY.
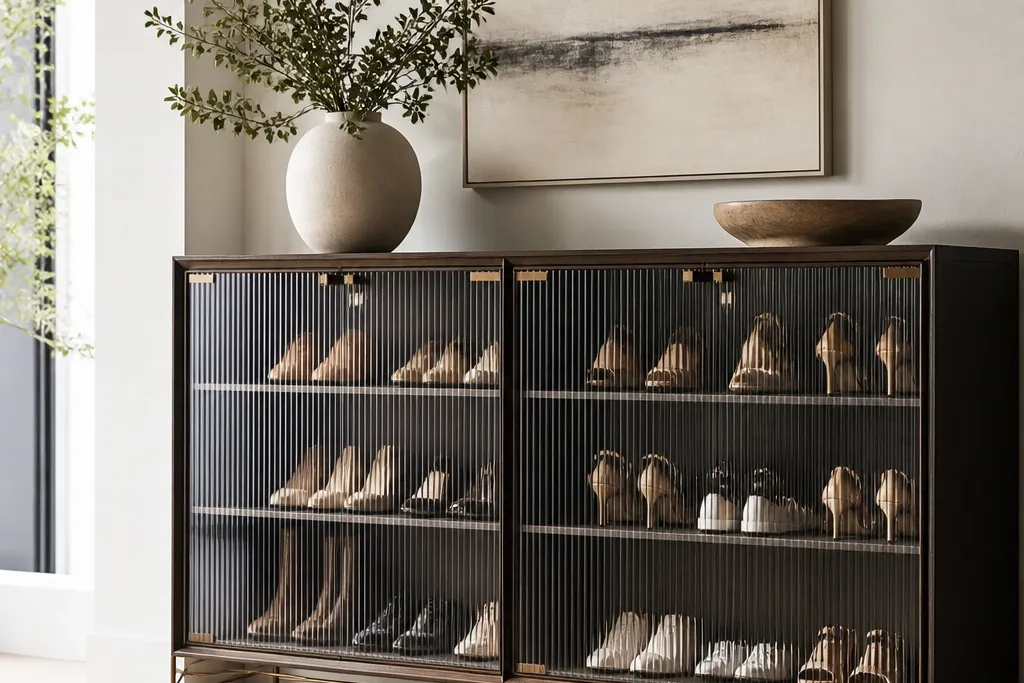
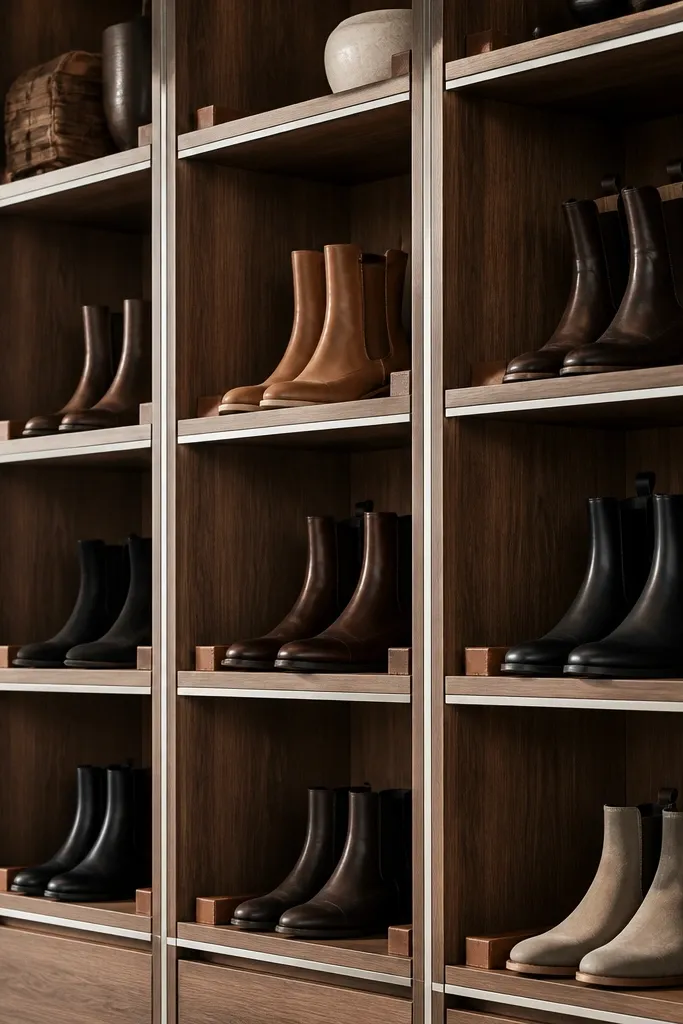
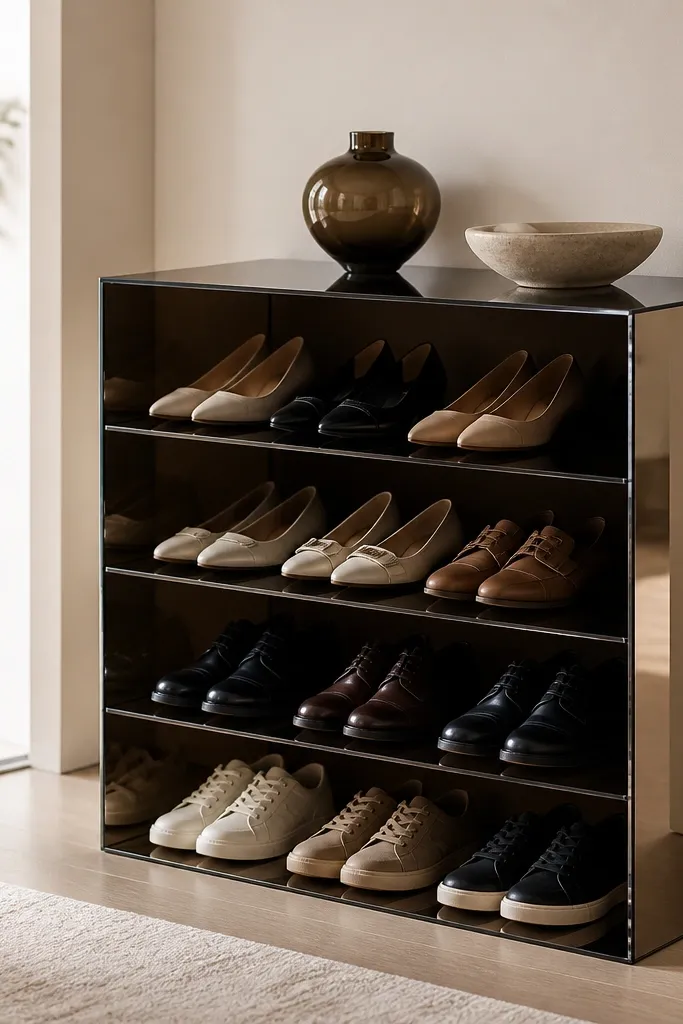
2. Tall cabinet style with smoked glass doors
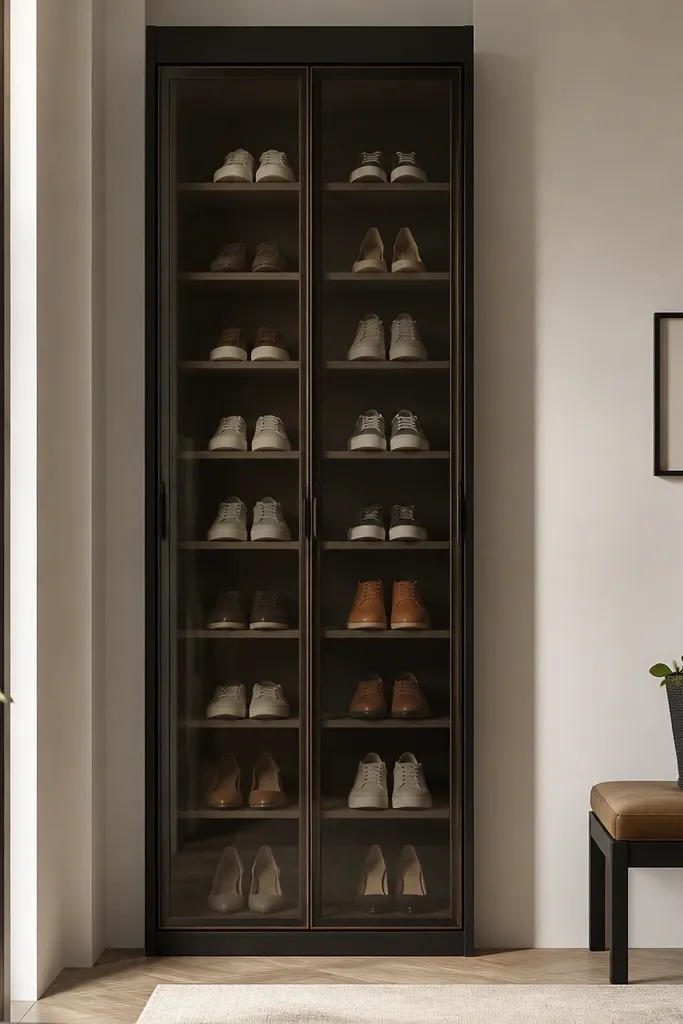
Smoked glass instantly upgrades the look because it hides scuffs and keeps the interior visually calm. The dark frame and consistent grid lines make it feel like furniture you'd buy for a hallway. Since glass has a premium vibe, you can use simpler internals as long as the dividers keep pairs straight. It also prevents dust buildup on shoes you don't rotate daily.
Use a plywood cabinet box (or build one) with a dark finish. Install glass doors with soft-close hinges if you can, and keep openings sized for your shoes: about 8 inches wide for sneakers, 10 inches for boots bays. Add vertical dividers every 7.5 to 8 inches so each pair stays in its lane.
Pro tipUse a satin black paint on the frame, not gloss, so the glass feels like part of a designer cabinet.
AvoidAvoid clear glass - it shows every scuff and turns the rack into a display of wear.
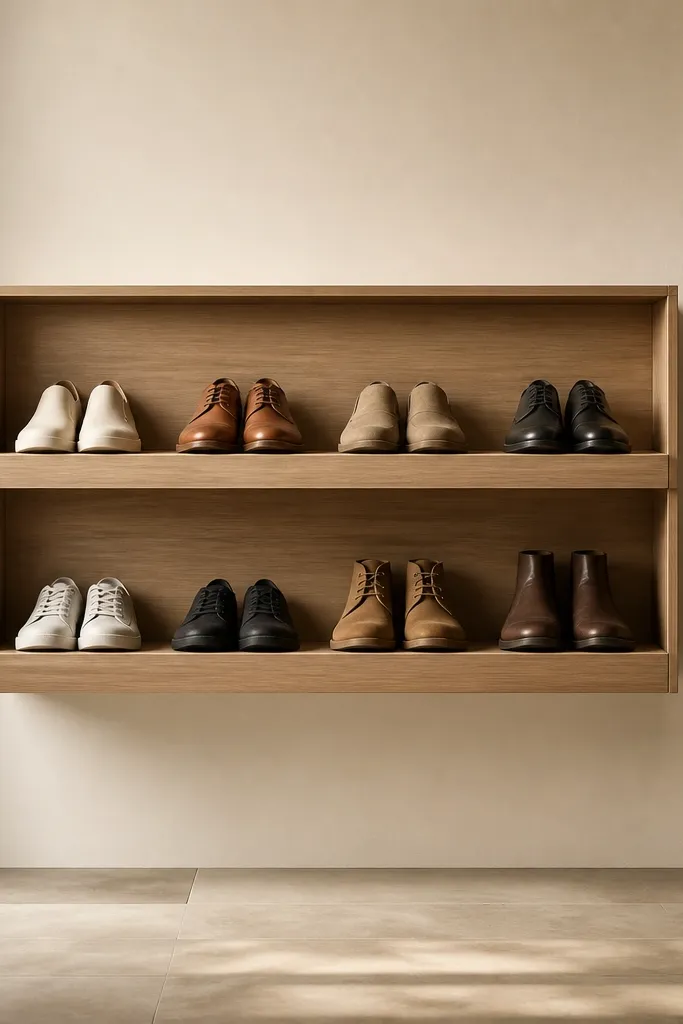
3. Oak veneer wall shelves with hidden cleat brackets
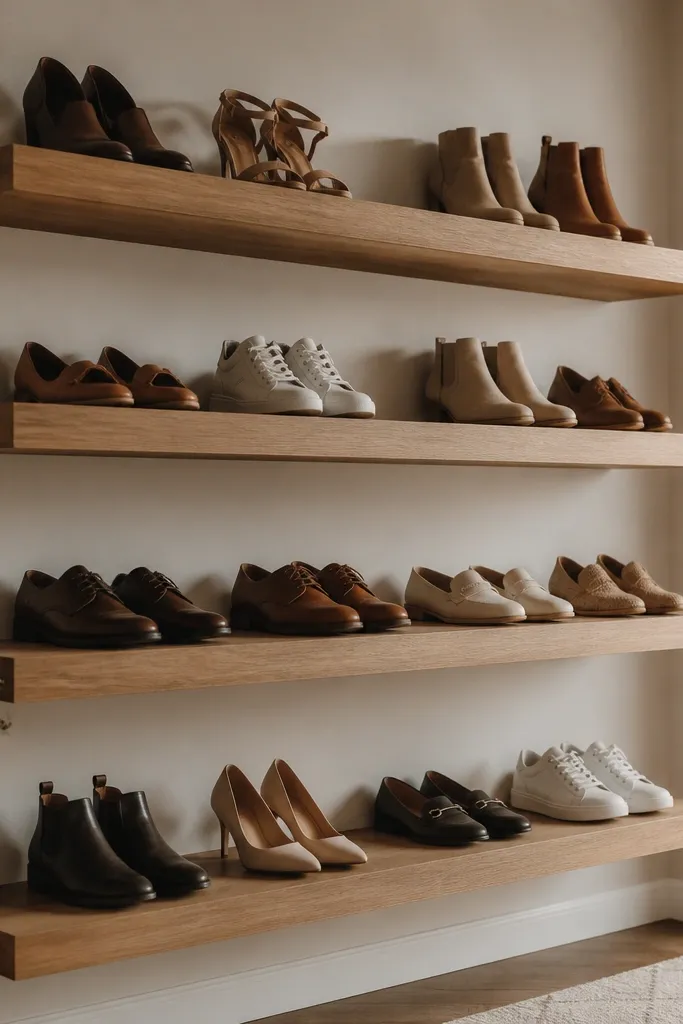
Floating shelves look expensive when the hardware disappears and the wood looks like a single piece. Oak veneer gives a warm, high-end tone, and the clean shelf edges make the arrangement feel intentional. If you keep shoe placement consistent, the wall reads like a minimalist shoe display. This works especially well in small entries where you want vertical storage without bulky furniture.
Buy oak veneer plywood or veneer boards and finish with a water-based stain (walnut or natural oak) then satin topcoat. Build a shelf lip (about 1 inch tall) to cover the cleat bracket. Keep shelf depth around 10 inches and leave 7 to 8 inches between bays.
Pro tipSand the veneer edges lightly and seal them before mounting - rough edges scream cheap.
AvoidDon't mount shelves with visible L-brackets - the hardware becomes the focal point and kills the expensive look.
4. White built-in look with shaker doors and soft-close hinges
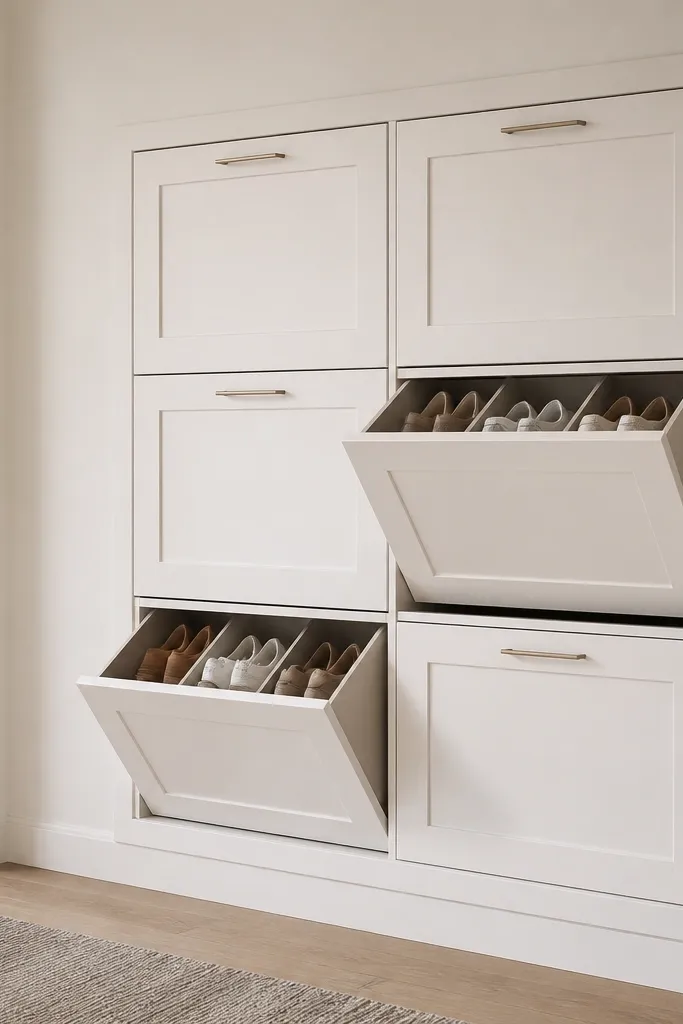
A shaker-style door profile reads classic and expensive fast, especially in white with clean shadow gaps. The doors hide shoe sides and scuffs, so even messy pairs don't ruin the look. Soft-close hinges add that "furniture" feel when you open it. This is one of the easiest ways to make your shoe storage look intentional.
Build a boxed frame from 3/4-inch plywood or use a prebuilt cabinet base. Size compartments to your shoes: 8-inch bays for sneakers, taller bays for boots. Use shaker door panels (pre-cut) and install hinges with a consistent 3/8-inch reveal for even spacing.
Pro tipPaint the whole unit with a cabinet-grade white (semi-satin) and do one extra light sand between coats.
AvoidDon't use thin MDF for the door fronts - it chips at the edges and looks rough within months.
5. Walnut slat shoe rack with vertical shoe heels-down inserts
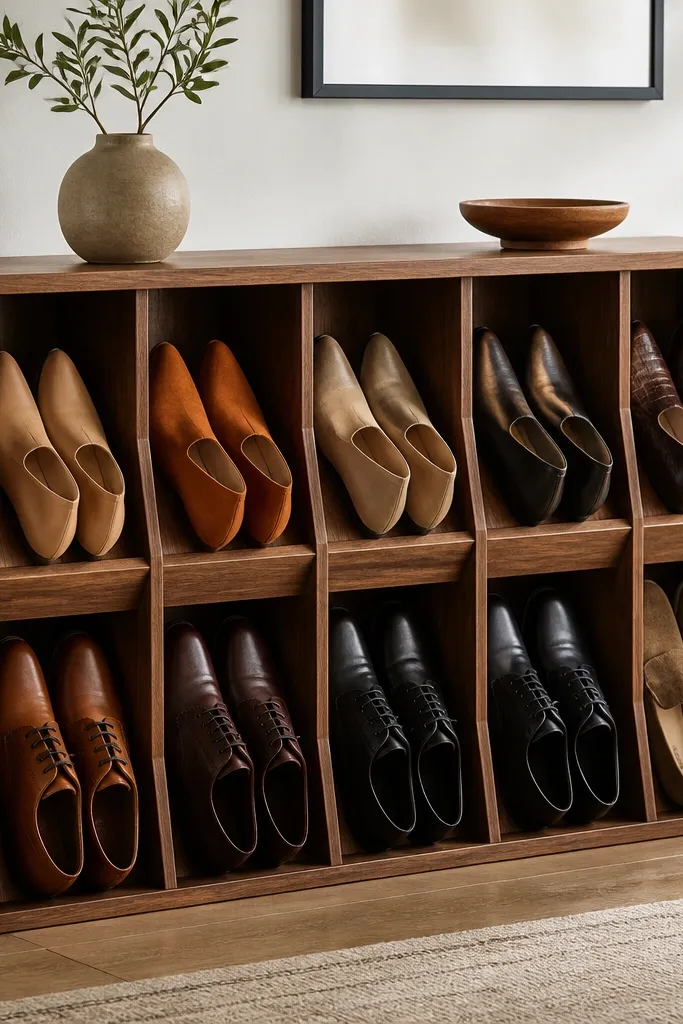
Vertical slats do two things: they separate pairs so they don't lean, and they make the rack look custom. Walnut stain plus satin finish reads warm and high-end, especially when the grain is visible. The inserts control foot shape so boots and loafers don't collapse into each other. It's a great option if you want shoes visible but still tidy.
Use 1x2 slats spaced 1/2 to 3/4 inch apart, then add a small plywood insert under each pair at a slight angle. Keep bay widths around 8 inches for flats and sneakers. Finish with walnut stain and a satin poly to protect the surface from scuffs.
Pro tipWipe a thin coat of stain, wait 5 minutes, then wipe off excess - it keeps the walnut tone from going blotchy.
AvoidAvoid leaving raw end grain inside bays - it looks unfinished and catches grime.
6. Clear acrylic front shoe organizer with black side rails
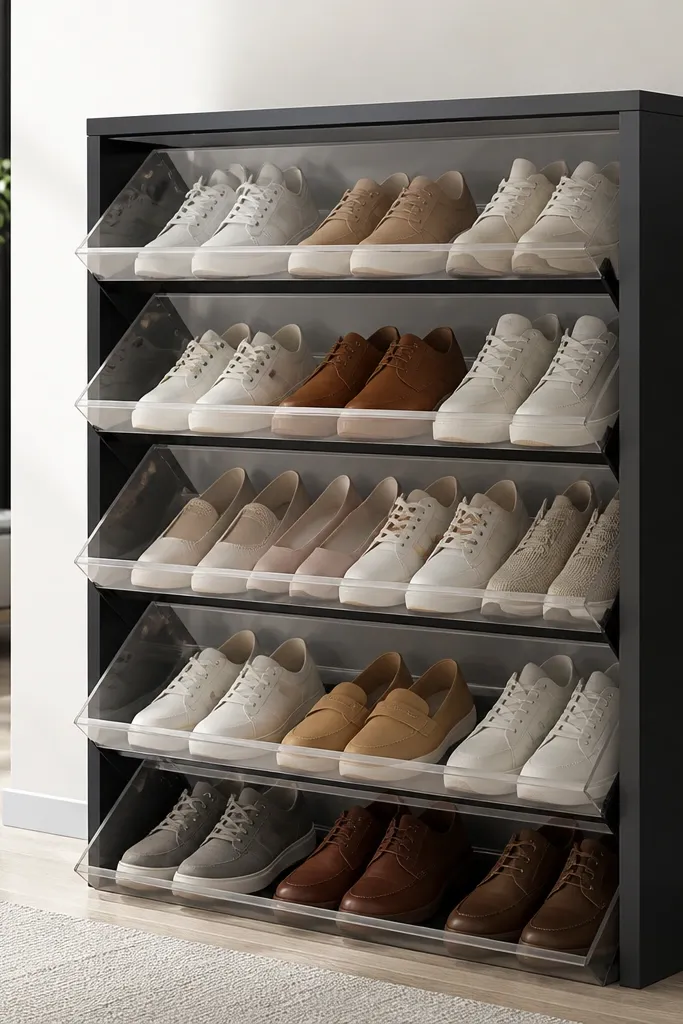
Clear acrylic plus black rails looks sleek because it creates a "display case" effect without the heaviness of glass doors. The acrylic lets you see shoes, but the black rails keep the grid crisp. Angled compartments prevent toe chaos, and the straight top rail makes it feel like a product, not a shelf. Great for entryways where you want visibility but still want structure.
Use acrylic sheets cut to compartment height and mount them to a black-painted frame. Make angled bases from wood strips so each bay holds shoes at about a 15 to 20 degree angle. Keep compartments 7.5 to 8.5 inches wide for most shoes and seal any wood edges before attaching acrylic.
Pro tipUse acrylic edging tape under the sheet so cuts look clean and don't chip.
AvoidDon't use cheap acrylic that scratches easily - it turns cloudy fast.
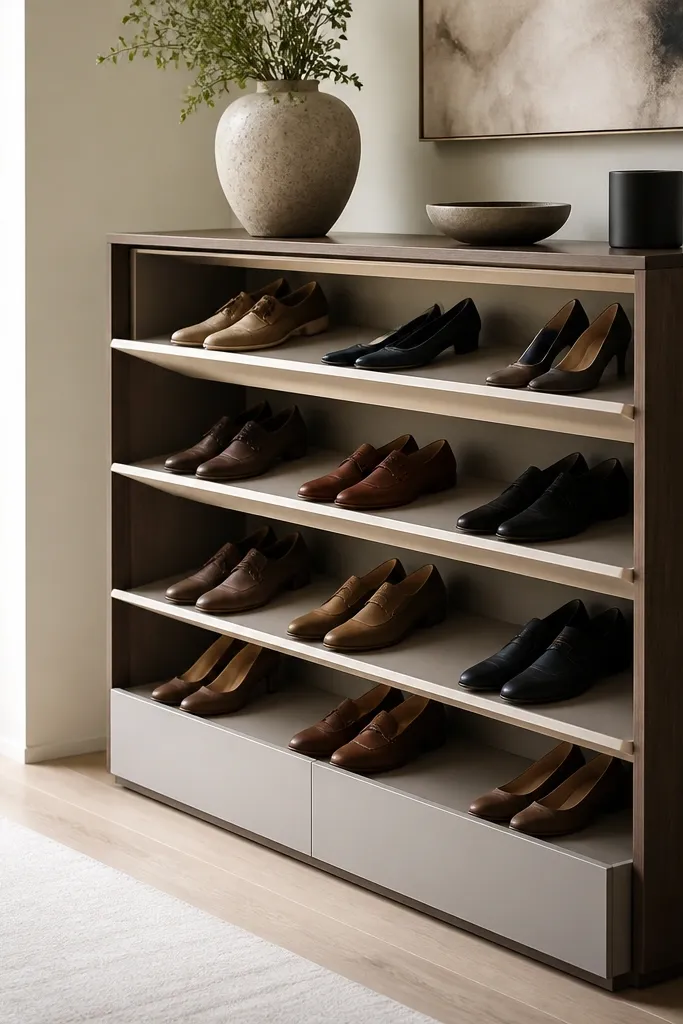
7. Two-tone console rack with dark base and light shelves
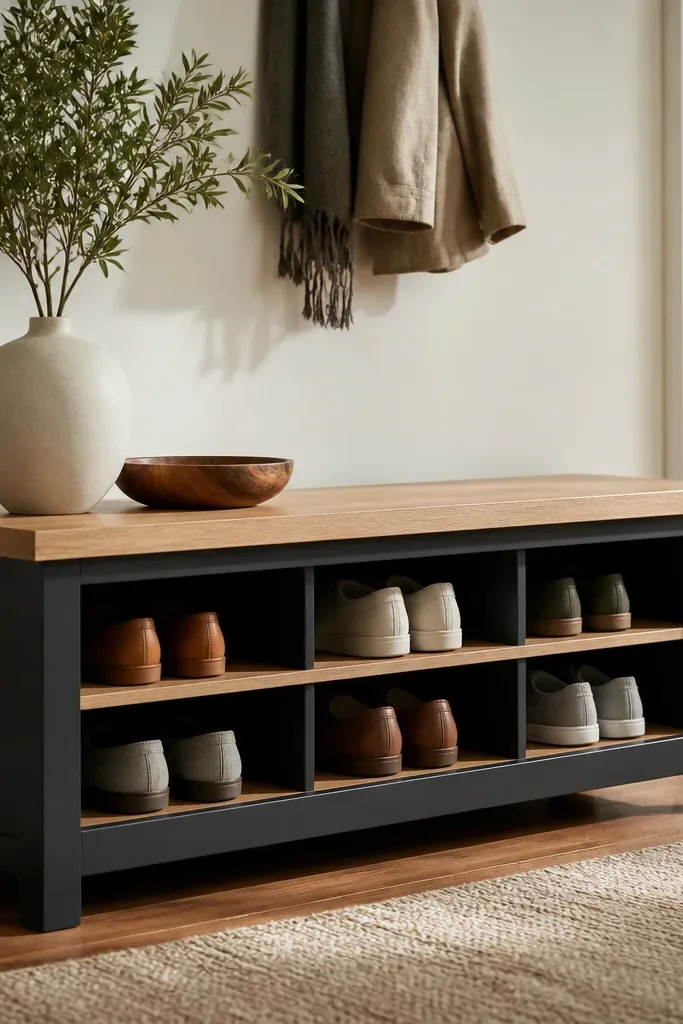
Two-tone furniture looks expensive because it has intentional contrast. The dark base grounds the piece, and light shelves make shoes look cleaner by comparison. This is the style you see in high-end apartments because it looks like a console table, not storage. Add a slim top surface and the whole unit reads more "designed."
Build a 12-inch deep console frame, then attach light shelves (oak plywood or birch) to a darker base. Use dividers every 8 inches and keep shelf depth around 10 inches for shoes. Finish the base with matte black or deep charcoal paint and the shelves with satin clear coat.
Pro tipAdd felt pads under shoes or divider bottoms to stop scuffs on the light shelves.
AvoidAvoid matching everything in one color - single-tone open shelves look flat and cheap.
8. Reclaimed wood frame with black powder-coated wire baskets
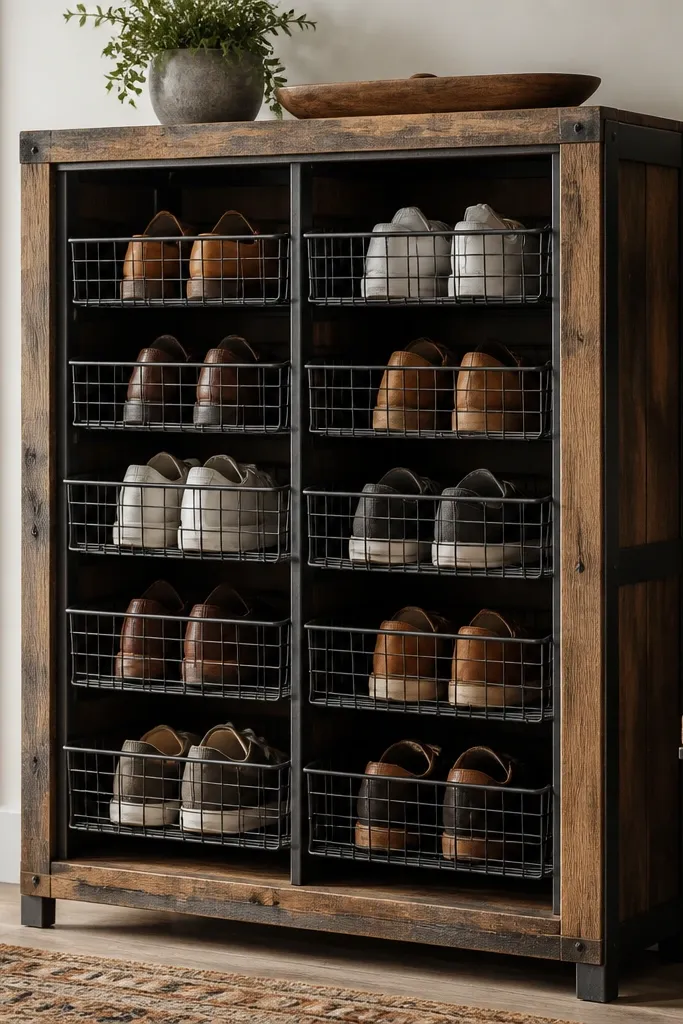
The contrast between reclaimed wood and black wire baskets reads industrial-modern, and it looks expensive when the wire is powder-coated (not rusty). Wire baskets keep airflow, so shoes don't smell as quickly. The uniform basket sizes make the rack feel built, not improvised. This works well if you rotate athletic shoes and want quick drying.
Use reclaimed wood for the frame but sand it down to a smooth finish and seal it. Mount standard wire basket units sized to fit between frame rails, then ensure each bay is 8 inches wide. Spray the wire baskets with black powder-coat if you're buying raw metal, then seal the wood with satin clear.
Pro tipLine the basket bottoms with thin black felt strips to reduce squeaks and protect soles.
AvoidAvoid rusty wire or unsealed reclaimed wood - the rack will look aged in a bad way.
9. Slim ladder-style shoe rack with fabric dust covers
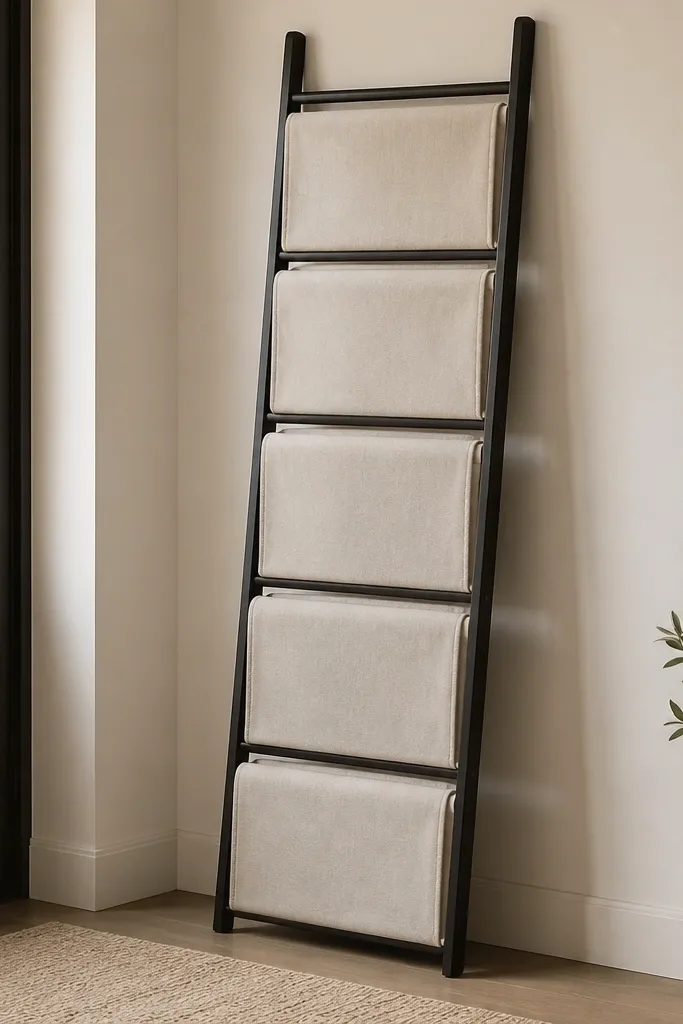
A ladder silhouette looks stylish even when it's simple, and the fabric covers make it feel intentional. I've done this in a rental where I couldn't drill deep shelves, and it still looked polished. The covers hide scuffs and keep shoes from visually cluttering the room. Choose thick cotton canvas so it holds shape and doesn't look like a shower curtain.
Build a narrow frame (about 16 inches wide) with rungs spaced 10 to 11 inches apart. Make fabric sleeves for each bay using heavy canvas and add a simple Velcro closure at the top. Mount the rack securely to the wall studs if it leans - use anti-tip hardware.
Pro tipCut the fabric slightly oversized and pull it tight on the inside so it doesn't sag.
AvoidAvoid thin polyester covers that wrinkle - they make the whole rack look temporary.
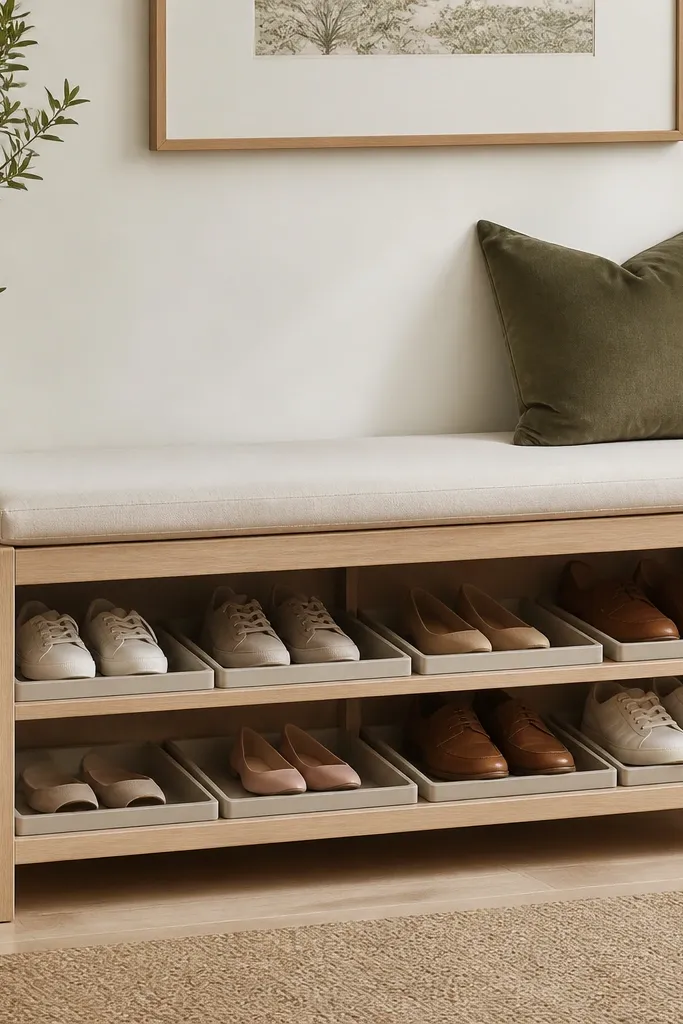
10. Hidden flip-door shoe rack under a bench top
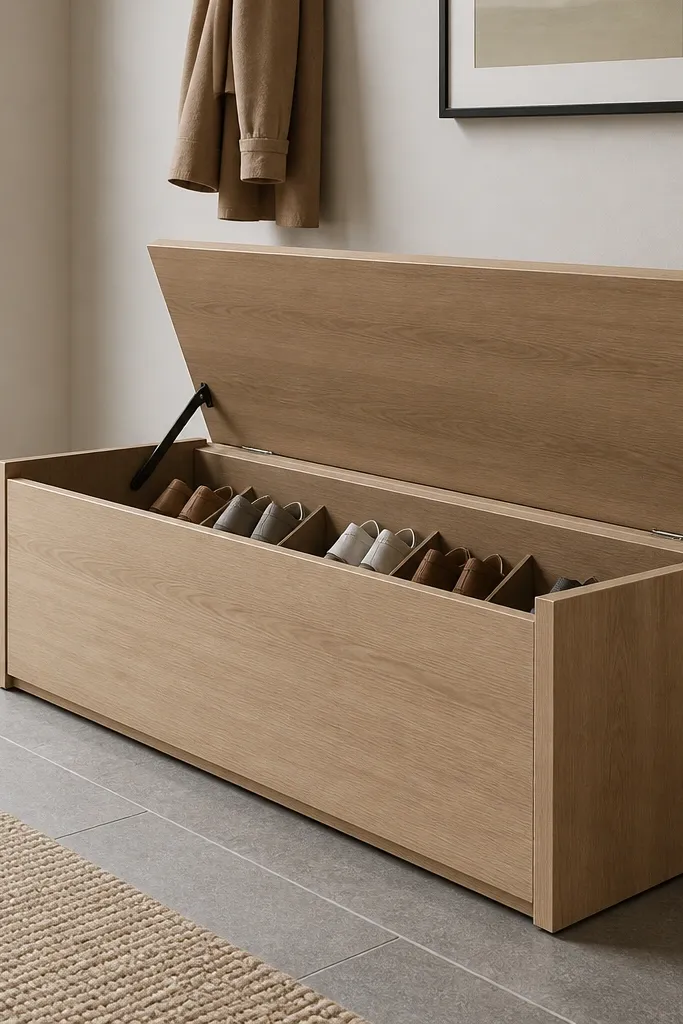
Nothing looks more expensive than storage that disappears. A bench with a flip top keeps the room clean while still giving you structured compartments inside. Angled dividers inside prevent shoe collapse, so you don't end up with a pile the second week. This is perfect for entryways where you want seating and shoe storage in one piece.
Build a bench box using 3/4-inch plywood, with internal depth around 12 inches. Install a hinge system for the top panel and add dividers to create 8-inch wide bays. Use a satin finish on the wood and add a soft-close hinge if you want a premium feel.
Pro tipAdd a small magnetic catch on the lid so it closes firmly and doesn't rattle.
AvoidAvoid leaving the inside raw - unfinished plywood inside makes the whole project look low-budget.
11. Corner shoe rack with mitered wood frame and angled bins
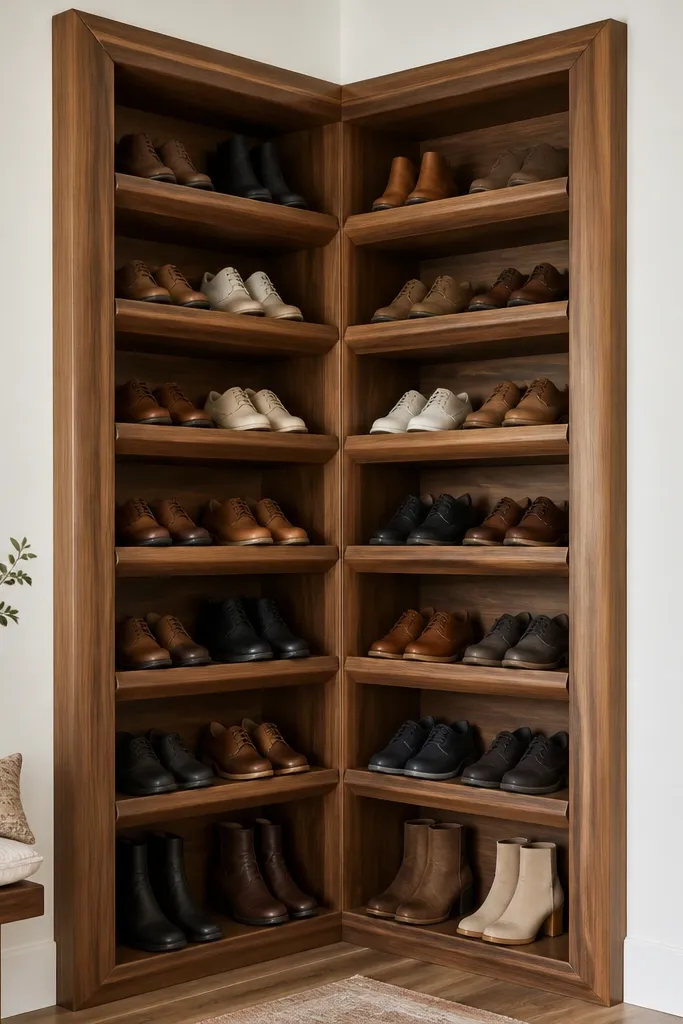
Corners waste space, but a mitered frame makes storage look intentional instead of awkward. Angled bins let you fit more pairs without the "stacked chaos" look. When the lines wrap around the corner, the rack reads architectural. This style is great for narrow entryways where straight racks block walkways.
Build a corner frame using mitered plywood panels so the face looks seamless. Keep bin depth around 11 inches and angle the bases so toes point toward the front face. Space bins 7.5 to 8 inches wide and add a divider between each pair for alignment.
Pro tipUse a laser level or a straight 4-foot level to keep the front face perfectly straight - corners exaggerate crooked lines.
AvoidAvoid gaps between panels at the corner - they look like a quick fix and cheapen the whole rack.
12. Satin black shoe rack with upholstered front panel
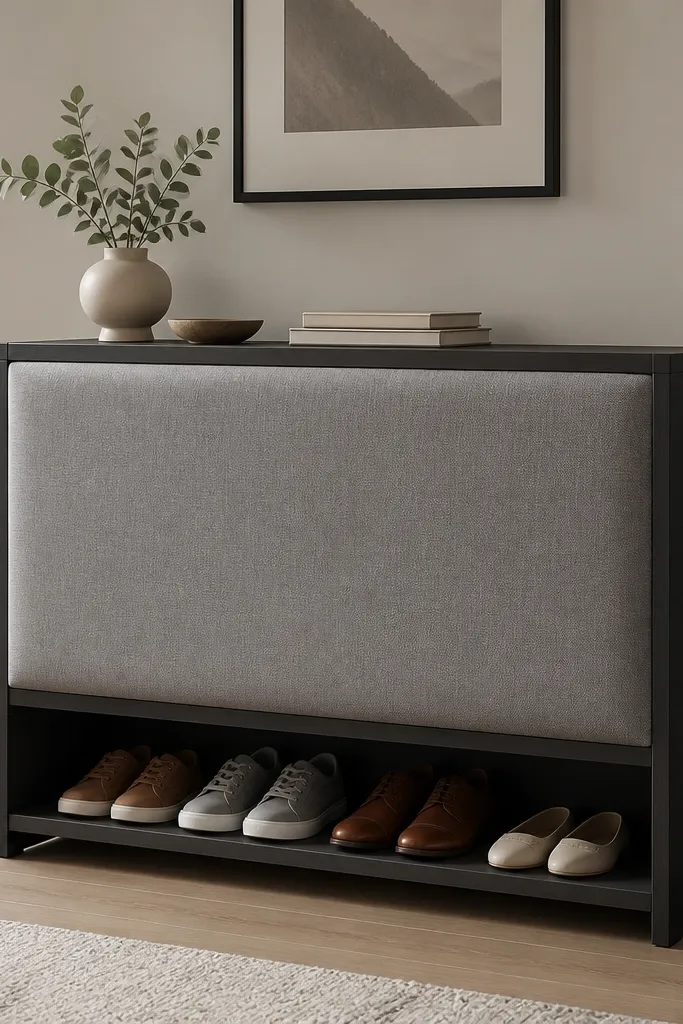
Upholstery reads expensive because it has texture and softness, and it hides the interior completely. The satin black frame gives modern contrast, so the fabric doesn't look like a craft project. This works well for apartments where you want storage that looks like part of the furniture. Choose a performance fabric if you have kids or pets.
Build a frame from 2x2 wood or metal and cover the front with a stretched fabric panel. Use foam backing about 1/2 inch thick for a smooth look. Inside, add dividers and keep bays 8 inches wide; stain and seal the interior wood so it wipes clean.
Pro tipWrap fabric tight around the edges and staple on the back - loose tension shows through and looks sloppy.
AvoidDon't use upholstery that sheds lint - it clings to shoes and makes the rack look dirty.
13. Modular cube rack with matching bins and label-free look
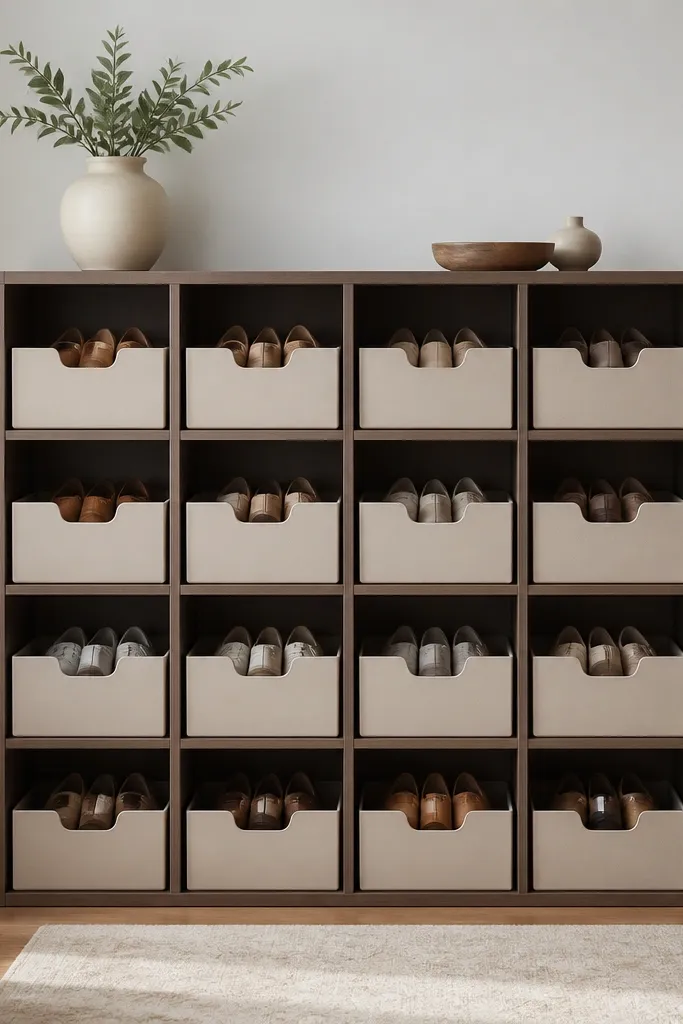
The expensive look here comes from uniform containers and a tidy grid. When every bin is the same color and shape, your eye reads it as one product. Use bins that cover shoe sides so scuffs don't show through. I've used this in a home office closet where shoes sit near the desk and the look needed to be calm.
Choose cube dimensions that fit your shoes: aim for 10-inch cube openings for sneakers and 12-inch cubes for boots. Use bins with rigid sides and dividers inside if needed. Paint or finish the cube frame in matte white or charcoal, then keep bin colors consistent.
Pro tipCut a thin strip of felt for each bin bottom so soles don't scratch the plastic or fabric.
AvoidAvoid mixed bin styles - different heights and textures make it look like storage clutter.
14. Veneered slat door shoe rack with recessed pulls
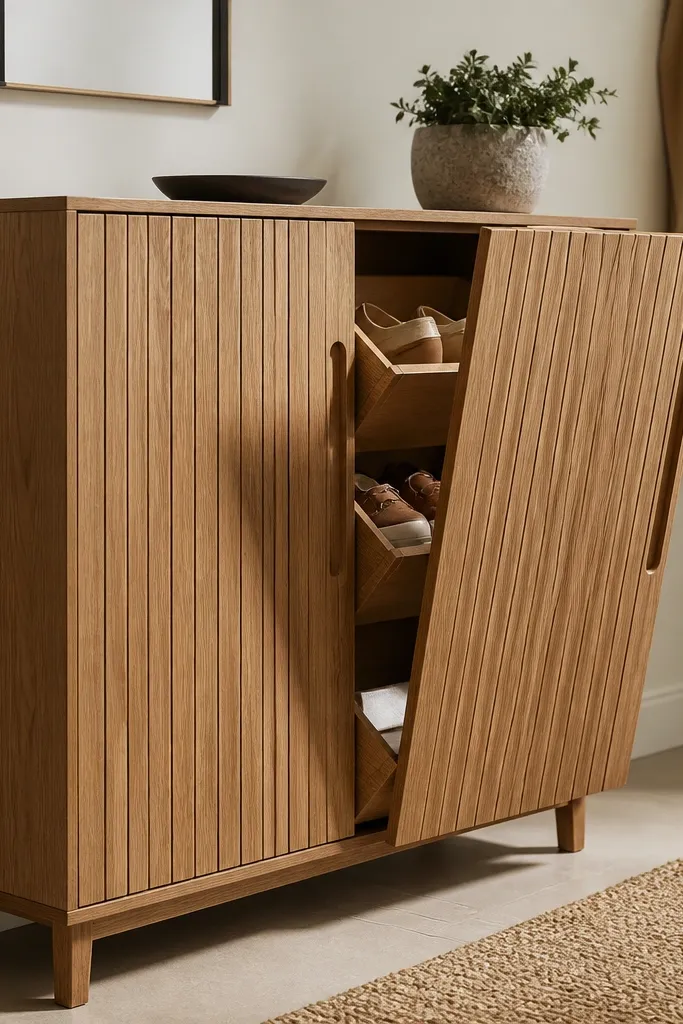
Slatted doors look expensive because they have depth and a pattern, but they still let air circulate. Veneer makes it feel custom, and recessed pulls keep the hardware from looking cheap. The interior stays hidden, so even worn shoes don't ruin the look. It's also easier to maintain because you're not dusting open shelves every week.
Build a cabinet frame and use thin veneer slats for the door fronts. Keep door openings aligned with internal dividers so the pattern stays straight when closed. Install recessed cup pulls and add angled dividers inside at 15 degrees for sneakers.
Pro tipUse a satin clear coat on the veneer doors so the slats catch light without glare.
AvoidAvoid mismatched veneer patterns - the doors will look patchy and store-bought.
15. Floating shoe rack with back panel and hidden wire supports
A back panel makes the whole rack look finished, like a built-in case. Hidden supports keep the silhouette sleek, so the eye focuses on the shoes and the lines. This is a great option for narrow hallways because you get storage without bulky sides. The back panel also blocks visual clutter from the wall behind.
Use 1/2-inch plywood for the back panel and attach it to the studs. Mount shelves at 10 to 11 inches depth and use wire shelf supports behind the panel so they're invisible from the front. Add dividers inside each tier with a 7.5 to 8 inch spacing.
Pro tipPaint the inside of the back panel the same color as the exterior so the rack reads uniform.
AvoidAvoid open sides with exposed studs - it looks unfinished in seconds.
16. Steel edge and walnut shelf shoe rack with leather boot stops
Steel edge trim makes wood shelving look like custom millwork. Walnut gives warmth, and leather boot stops keep tall boots from tipping, so they stay in a clean line. The combination reads expensive because the materials are tactile and the details are intentional. It also protects the shelf edge from boot buckles and scuffs.
Use walnut-stained plywood shelves around 10.5 inches deep. Add thin steel edge trim along the front and sides, then attach leather strips as boot stops at about 2 inches tall. Keep bay widths around 9.5 inches for boots and 7.5 inches for sneakers.
Pro tipUse a clear coat on walnut before attaching leather so glue doesn't stain the finish.
AvoidAvoid rough steel edges - they scratch shoes and feel unsafe.
17. Monochrome grey shoe rack with slanted drawer fronts
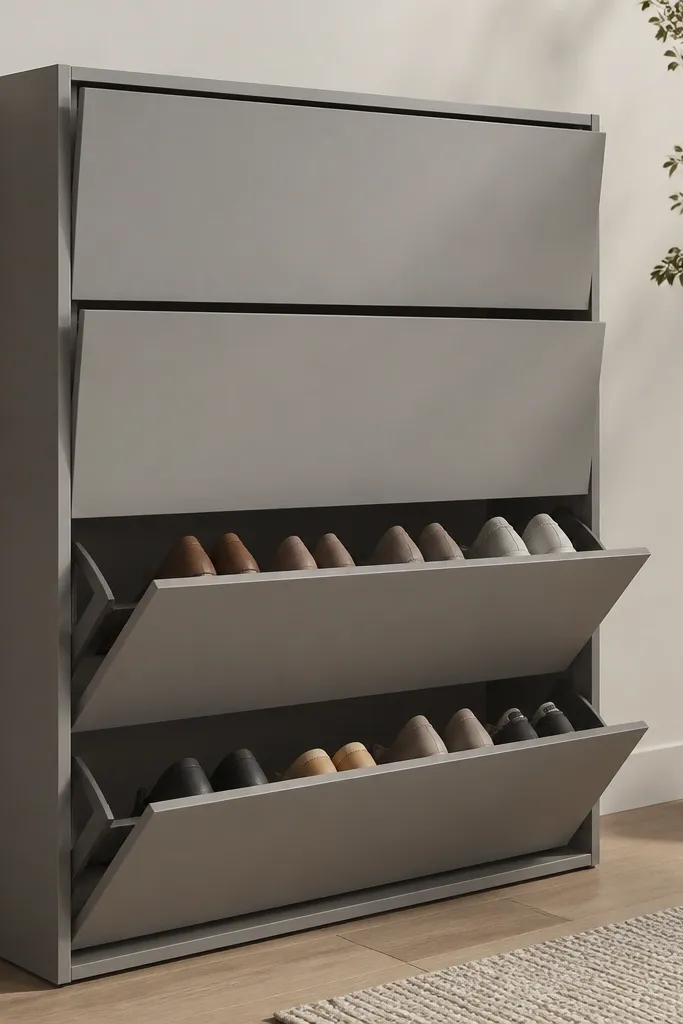
Monochrome looks expensive when the tone is consistent and the front has a deliberate shape. Slanted drawer fronts add movement and stop the front from looking like a plain box. The drawers hide shoes completely, so you don't see mismatched pairs. I used this style in a guest room closet and it made the closet look like a built-in cabinet.
Build a shallow cabinet with drawer compartments sized at 8 inches wide for most shoes. Use a grey paint with a satin finish, then add drawer fronts cut with a slight angle (about 10 degrees). Install soft-close slides so the drawers glide quietly.
Pro tipKeep drawer reveals even - measure the gap on one side, then match it on every drawer front.
AvoidAvoid mixing paint sheens (matte drawer fronts, glossy hardware) - it looks patchy.
18. Round-back metal shoe rack with wood base plinth
Curved metal reads designer because it's less common in DIY builds and it softens the geometry. The wood base plinth grounds it and keeps the rack from looking like a store display. Even spacing and dividers are what make it look clean instead of random. This style works great for apartments because it looks like a sculptural piece, not "storage."
Use metal rods bent into a gentle arc for the back supports and mount them to a rectangular base. Add dividers from wood or metal sheet at 8-inch intervals. Keep shelf depth at 10 to 11 inches and finish the wood base with satin clear coat.
Pro tipUse a template for divider spacing so every bay lines up and the grid looks intentional.
AvoidAvoid uneven divider heights - it makes the rack look crooked even if the frame is straight.
19. Slim slatted shoe rack bench with removable tray dividers
A bench shape makes shoe storage look like furniture, and removable tray dividers keep it tidy even when you clean. The slatted sides add airflow and look modern. When the trays come out, you can wipe them quickly and reset the layout. This is perfect for families because you can pull everything and reset in five minutes.
Build a bench that's 14 to 16 inches deep and about 36 inches wide. Make removable trays from plywood with a built-in divider wall, sized for 8-inch shoe bays. Keep tray depth around 10 inches and use rubber bumpers where trays slide in.
Pro tipPut a thin coat of water-based polyurethane on trays before assembly so they wipe clean.
AvoidAvoid open storage with no front lip - shoes slide forward and the bench looks messy fast.
20. Smoked acrylic shoe rack with mirrored side panels
Mirrored sides make compact storage look larger and more expensive, and smoked acrylic keeps the shoes from looking harshly lit. The combo creates a high-end "boutique" feel without building a full display case. If your rack is small, the mirror effect matters a lot. Keep shoe colors consistent to keep the look polished.
Use mirrored acrylic or mirror film on side panels so you avoid glass cracking. Build shelves from smoked acrylic or use clear acrylic tinted with a film. Keep tier spacing about 6 inches for flats/sneakers and 9 inches for boots, and angle shoe supports if needed.
Pro tipClean acrylic with microfiber and acrylic-safe cleaner - streaks show immediately on mirrors.
AvoidAvoid cheap mirror film that peels - edges ruin the clean look.


