1. Grid Calm Cork Board With Two Prayer Columns
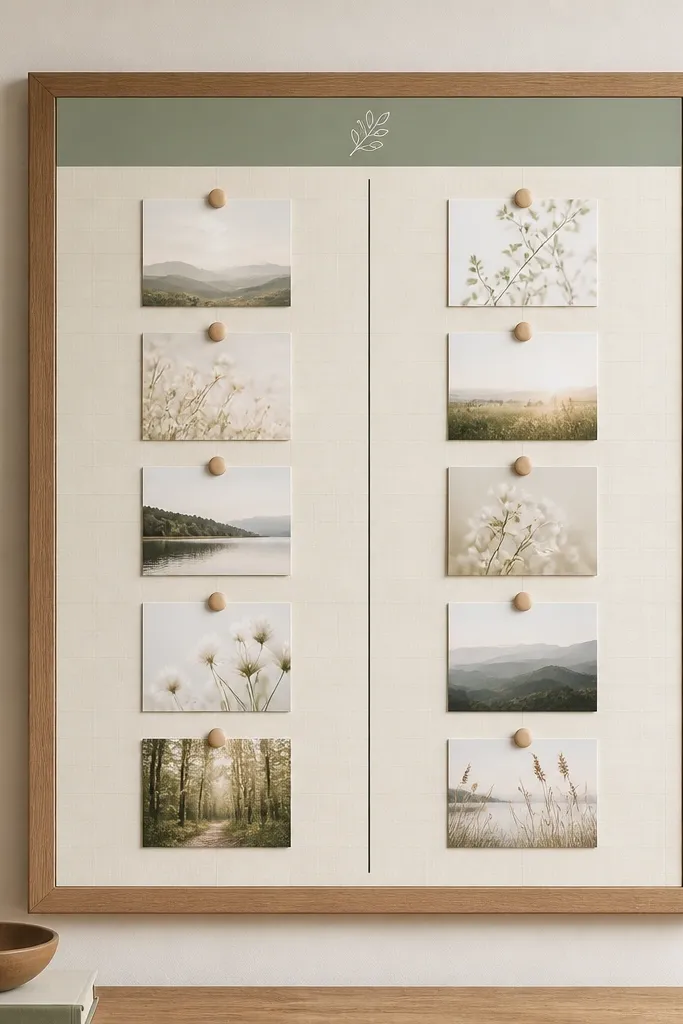
This setup looks modern because it uses a strict grid and lots of empty space. The cork texture stays subtle, while the cream paper and thin black lines keep everything readable. Cards are small and consistent in size, so your eye doesn't bounce around. I also like that the header is only a strip - no heavy blocks - so the board stays airy.
Use a 16x20 cork board and print cards at 3.5x5 inches and 3.5x2.25 inches for labels. Leave a 1-inch margin on all sides and pin in tidy rows with spacing of about 0.75 inch between cards. Attach the header strip with removable tape so you can swap seasons.
Pro tipPin one full card as a "master" and use it as your distance reference while pinning the rest.
AvoidDon't mix card sizes - it makes the grid look accidental.
2. White Wood Panel With Removable Corners and Minimal Labels
A painted panel plus removable corners gives you that clean, gallery look. The cards look like they're mounted, but you can swap them without tearing paper. Minimal label text keeps the board from feeling like a bulletin board. I like how the matte white background makes black text pop without extra decoration.
Use a 16x20 smooth panel (MDF or plywood) painted with flat white craft paint. Print cards in 4x6 inches and labels in 2x6 inches. Place removable photo corners at each card's four corners so the paper stays flush.
Pro tipUse a light pencil to place the first card row, then remove the pencil line with a soft eraser before you stick corners.
AvoidDon't use glossy spray adhesive - it can warp thin paper and looks shiny.
3. Sage + Charcoal Layered Quote Header With Foam Tape
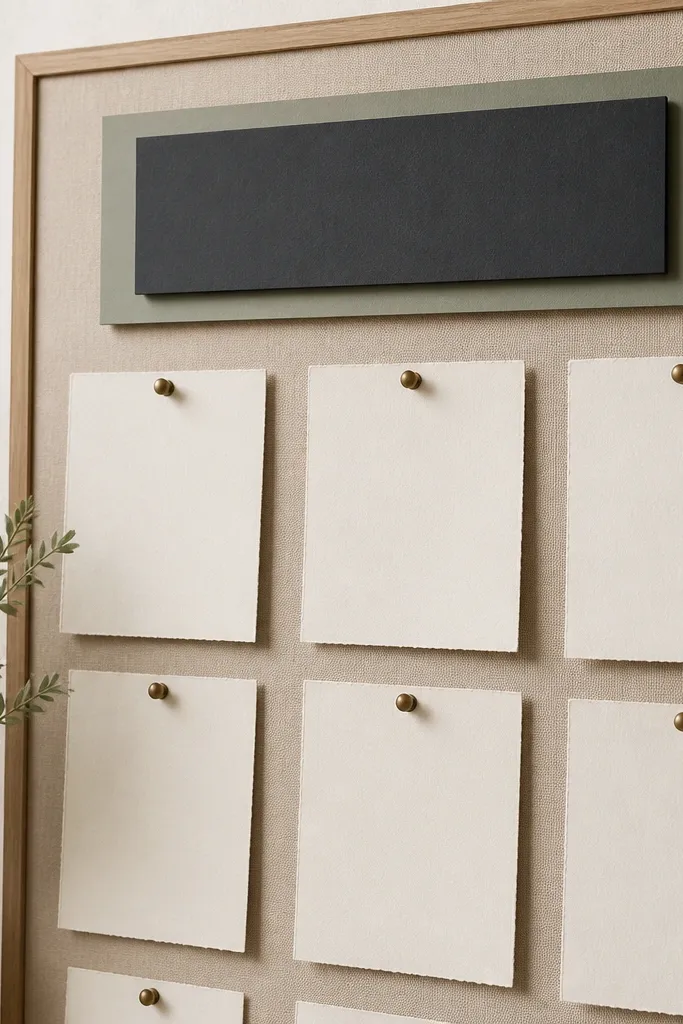
Layering a header makes the whole board look intentional without adding clutter. The sage rectangle softens the contrast, and charcoal keeps it modern. Foam tape creates a real shadow line, so it looks designed rather than pasted. This works best when your prayer cards are simple and the header carries the visual interest.
Print the sage header at 16x2 inches and the charcoal top layer at 13.5x1.5 inches. Use 1/8 inch foam tape strips only under the charcoal layer, centered. Keep the rest of the board minimal: off-white cards at 3.75x5 inches pinned or clipped in two columns.
Pro tipOffset the top layer by about 1/4 inch to the right so the shadow reads clearly from across the room.
AvoidSkip heavy ribbons - they make minimalist layouts feel busy fast.
4. Black Binder-Clip Photo Strip for Weekly Prayers
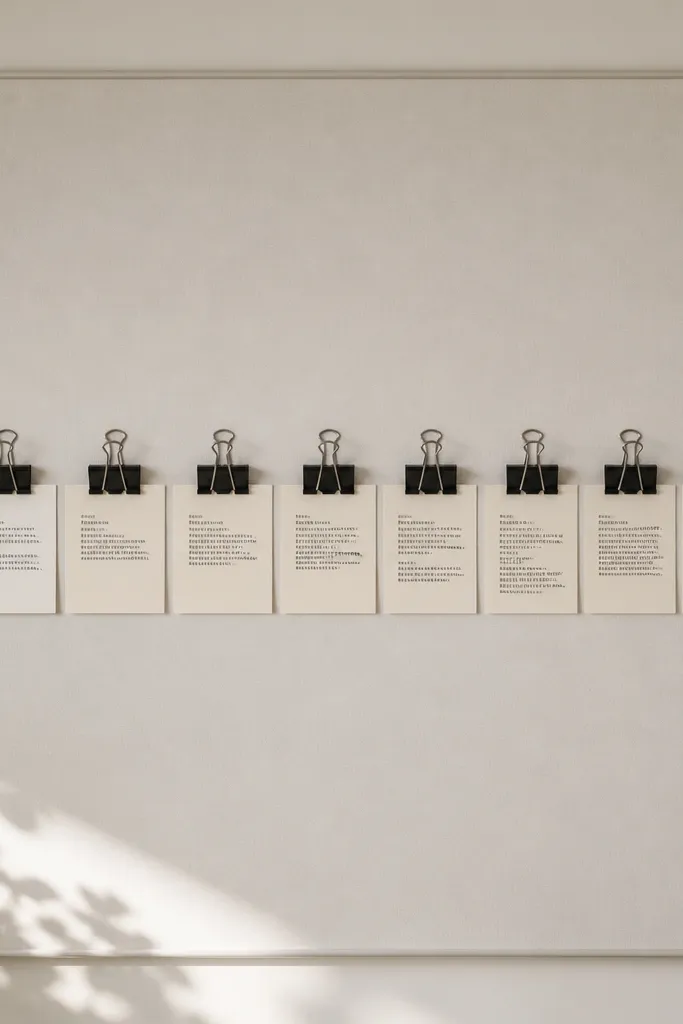
Binder clips give you functional minimalism. The clips look modern in a black finish, and you can slide in new weekly cards in seconds. The strip layout is clean because it's one line, not multiple stacked sections. I've used this in kitchens and entryways because it's easy to update without tools.
Use a 12x16 board. Print 7 cards at 3x4.5 inches, with one card per binder clip opening. Space clips so each card has about 1/2 inch overlap into the clip. Keep the cards aligned to the same baseline for a crisp look.
Pro tipWipe the clips with a microfiber cloth before attaching so fingerprints don't show through the matte black finish.
AvoidDon't use rusty clips - they ruin the modern look instantly.
5. Magnetic Frame System With Small Monthly Cards
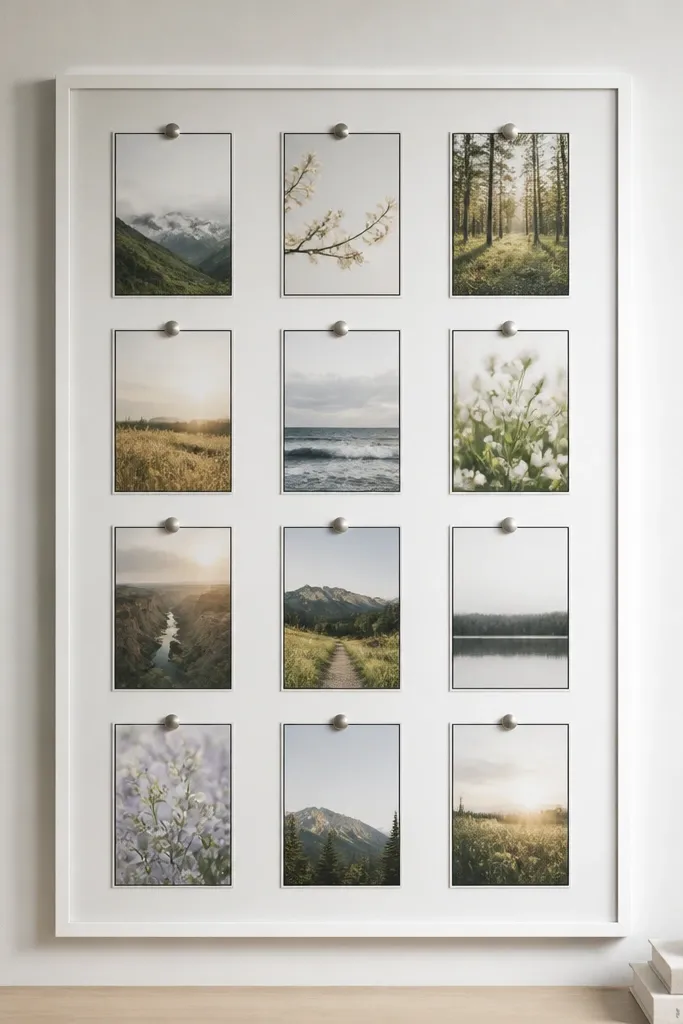
Magnetic frames look sleek and let you swap without pin holes. The thin borders keep everything consistent, and the grid makes the board feel organized without extra decoration. This works especially well if you want a board that stays neat year-round. It also photographs well because the frames create uniform edges.
Buy a magnetic sheet (or a magnetic photo display board) and a set of thin 4x6 magnetic frames. Use a 16x20 setup, placing frames in a 3x4 grid with about 1 inch gaps. Print monthly cards at 3.75x5.75 inches so they fit inside the frames.
Pro tipMark one corner of the grid with painter's tape, then build outward so spacing stays even.
AvoidDon't overload the grid with tiny text - frames shrink readability.
6. Terracotta Accent Border Around a Minimal Prayer List
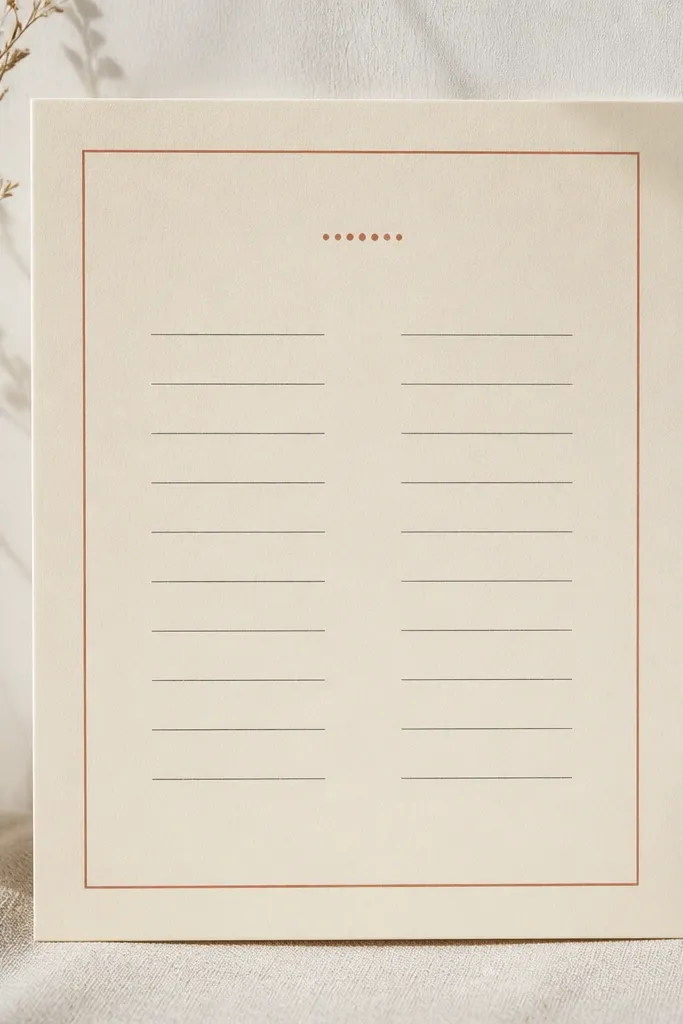
A thin accent border is the easiest way to add warmth while staying minimalist. Terracotta gives a softer, human tone than bright red, and it works with nearly any neutral font. The list stays the focus because the border is just one line weight. I like this when you want a board that feels calm but still looks alive.
Use a 16x20 board with a cream background paper or painted panel. Print a terracotta border at 15.5x19.5 inches with 0.5-inch inner margins. Place your prayer list cards at 5x7 inches or split into two columns on one 16x10 inch print.
Pro tipChoose a border line that's 2-3 pt thick so it doesn't look like it was drawn with a thick marker.
AvoidDon't add multiple accent colors - terracotta plus one more color max.
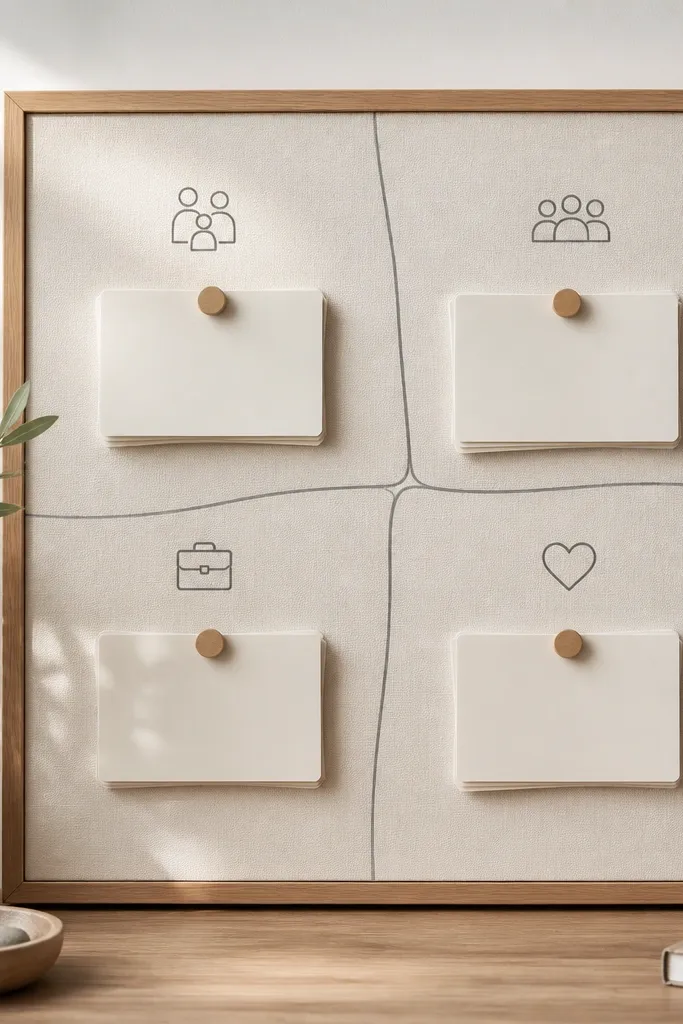
7. Monochrome Line Art Icons With Off-White Cards
This looks modern because the icons are consistent in line weight and size. Monochrome means you get visual structure without color chaos. Keeping icons small - like 0.5 inch - keeps the cards from looking like craft store stickers. The off-white paper makes black text and line art feel crisp.
Print cards at 3.5x5 inches on matte off-white cardstock. Use icons sized to 6-8 mm tall and place them in the top-right corner. Pin cards in two neat columns and add one title strip at the top in black on an off-white band.
Pro tipPrint a test sheet and check the icon thickness in daylight before committing to the final batch.
AvoidSkip multi-style icons; mixed line weights look sloppy.
8. Minimalist Map-Style Prayer Zones With Thin Grid Lines
Zone layouts help your brain sort prayers fast. The map-style grid stays minimalist because it's thin lines in one neutral grey. It also makes the board functional for people who pray in categories. I've seen this reduce the "where do I put this?" moment because the zones are clearly labeled.
Use a 16x20 board and print a grey line overlay at 15.5x19.5 inches. Make zone headings in a simple sans font at 0.9 inches tall. Place cards at 3.5x5 inches and keep each zone stack to 6-8 cards so it doesn't spill over.
Pro tipLeave at least 1 inch space between zone borders and the nearest card so the grid stays readable.
AvoidDon't use thick borders; thick lines make it look like a school chart.
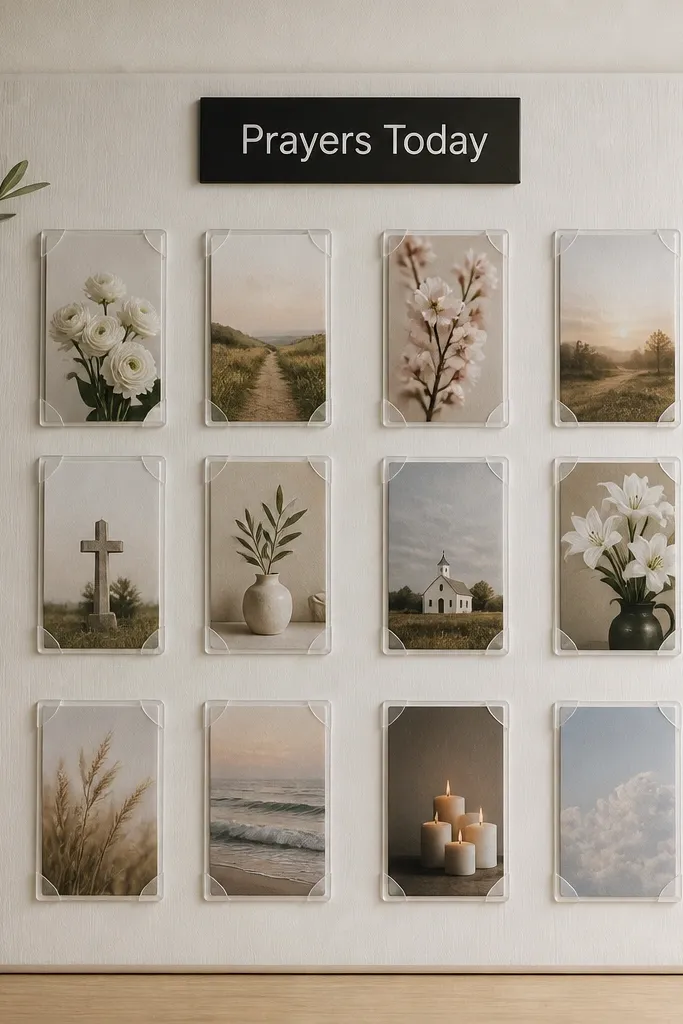
9. Floating Frames Look With Clear Acrylic Corners
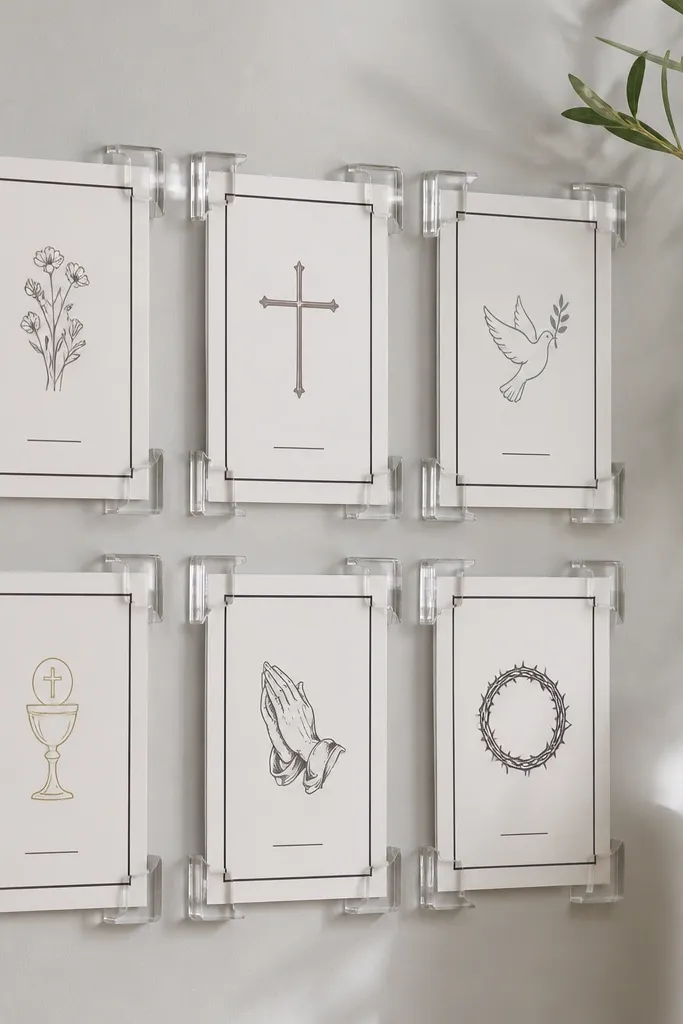
Floating corners give the modern look without bulky frames. Clear acrylic keeps attention on the paper, and the slight gap makes everything feel lighter. This style works best when your cards have clean borders and short lines, because the spacing does the design work. It also looks great in bright rooms because the acrylic catches subtle highlights.
Use a pale grey board or paint a panel with flat cool grey. Print cards at 4x6 inches with a thin 1-pt black border. Attach each card with four acrylic corner mounts so there's a small consistent gap from the background.
Pro tipKeep your card corners aligned by measuring from the top-left of the board and repeating the same offset each time.
AvoidDon't overfill with dense text; floating layouts need breathing room.
10. Corner-to-Corner Minimal Prayer Board With Single Central Card
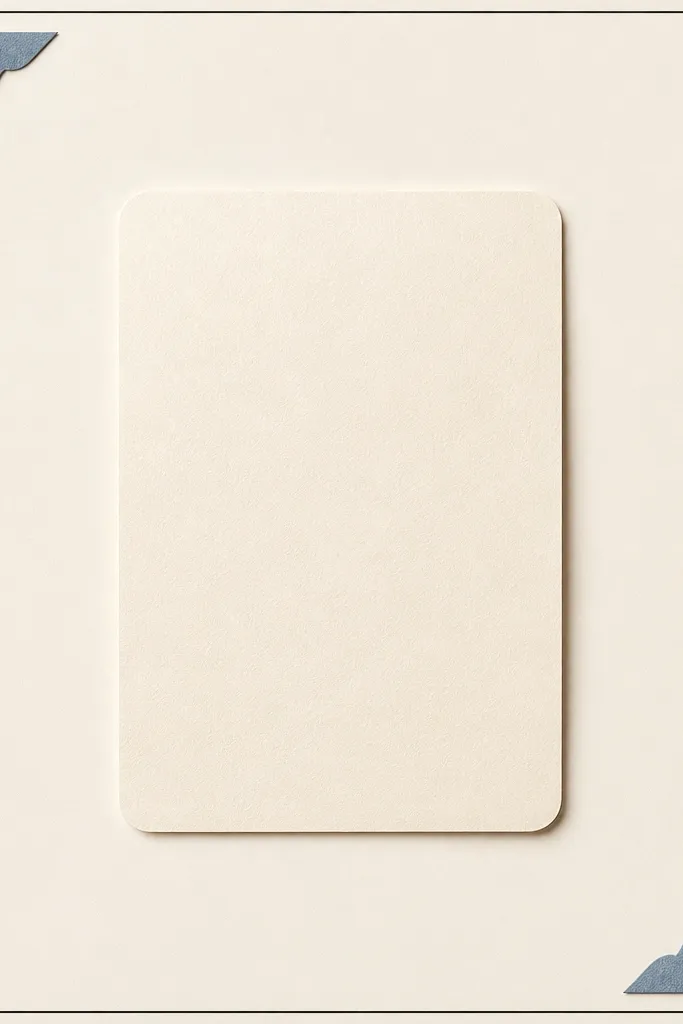
This is the cleanest modern minimalist prayer board ideas style because it leans on negative space. One central card creates a focal point, and the corner labels add structure without turning the board into a collage. I like it for quiet seasons when you want the board to feel like a calm surface, not a message wall. The minimal layout also makes it easier to read from across the room.
Use a 12x16 board. Print a central card at 8x10 inches and corner labels at 2x3 inches each. Add a thin black border at 0.25 inch inside the edges, then keep the rest plain. If you're pinning, use 2 pins at the card corners so it lies flat.
Pro tipUse matte paper for the central card; glossy paper reflects light and makes the text harder to read.
AvoidDon't add extra icons; the whole point is the one focal card.
11. Weekly Timeline Strip With Day Labels and Small Requests
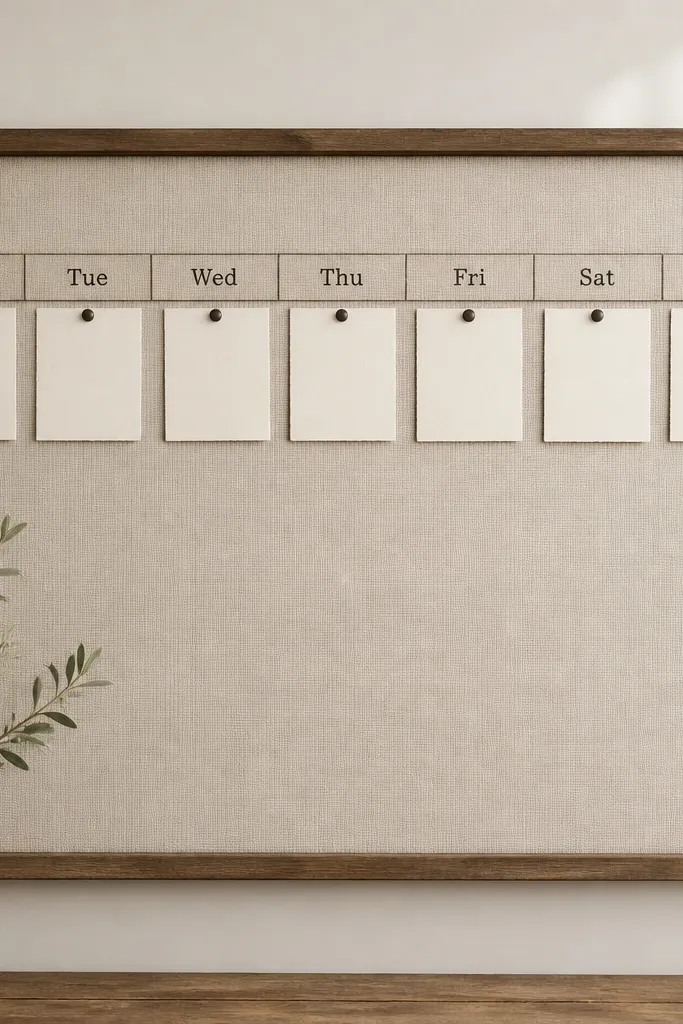
A timeline strip feels modern because it's linear and predictable. It also matches how people actually live their week - one day at a time. The day labels in a consistent style make it easy to update, and small cards keep the text from looking heavy. This layout is great for households where you want everyone to add one prayer for the day.
Use a 16x20 board with a timeline strip at mid-height. Print day labels at 2x1.2 inches and the request cards at 2.5x3.5 inches. Divide the strip into seven equal segments about 2.2 inches wide each, leaving 0.5 inch gap between segments.
Pro tipPin the cards first, then adjust the day label strip so it lines up with the centers of the card stacks.
AvoidDon't use mixed handwriting fonts; typed labels look cleaner.
12. Matte Black Frame With Off-White Cards and Sage Micro-Accents
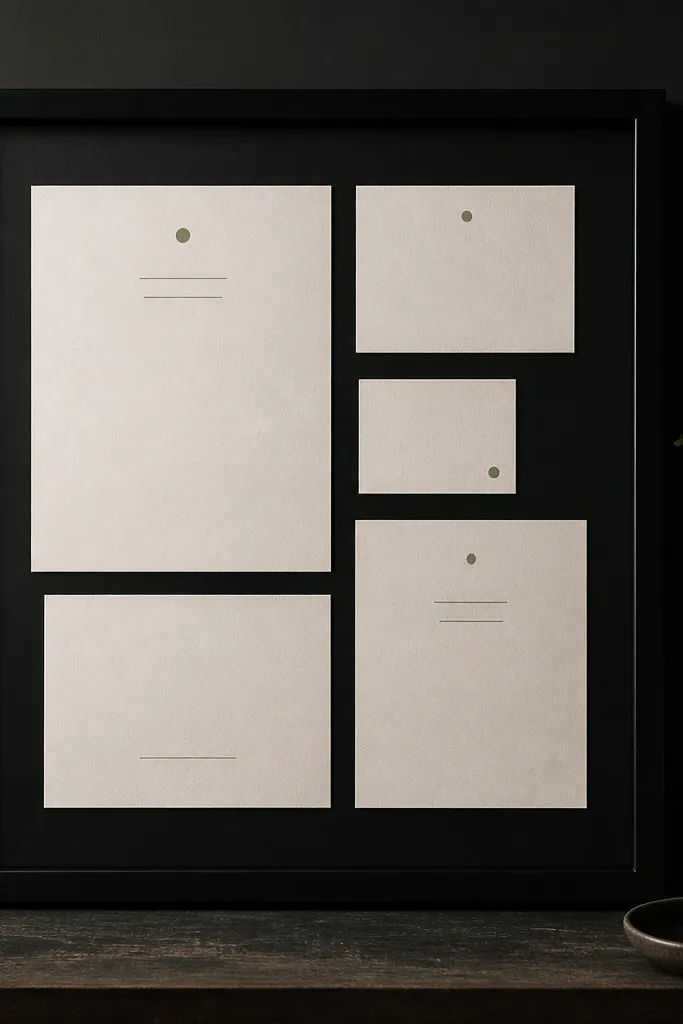
Dark background plus off-white cards looks high-end, but it's still minimalist when you limit accents. Matte black hides minor scuffs, and the sage marks add just enough softness. I like this for offices or entryways where you want the board to read clearly in low light. The key is that the cards stay consistent in size and the accents stay tiny.
Paint or buy a matte black frame board. Use off-white cardstock cards at 3.75x5.25 inches and keep the cluster to 10-12 cards max. Add sage accents as underlines or dot headers sized under 1 inch. Mount with binder clips or removable corners so you can swap quickly.
Pro tipUse a ruler to keep the sage underlines aligned across every card.
AvoidSkip neon sage; it looks harsh against matte black.
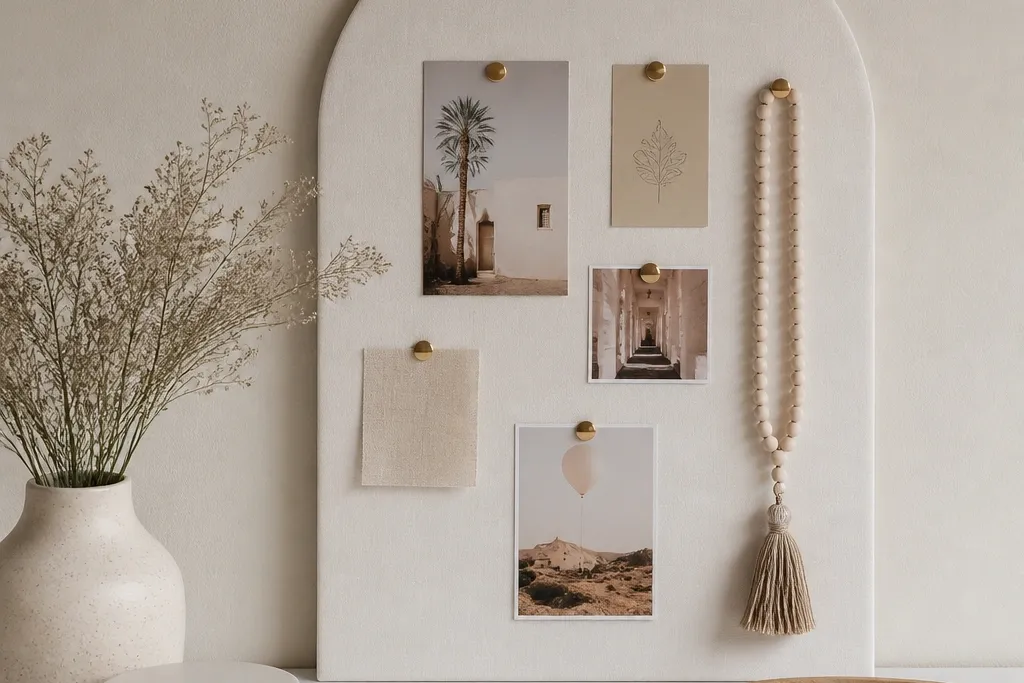
13. Botanical Minimal Corners on a Plain Prayer Board

Small botanical corners add warmth without turning the whole thing into a craft project. Muted green stays modern when you keep the scale tiny and repeat it in all four corners. This style works when you want a softer vibe but still want the board to look structured. The board stays readable because the plants don't cover text.
Use a light wood or painted panel. Print corner graphics at 2x2 inches and place them at each corner with removable tape. Put your main prayer cards at 3.5x5 inches in two columns, aligned to a centerline. Keep other decorations off so the corners do the job.
Pro tipUse matte laminate on the corner prints if you pin over them; it prevents curling.
AvoidDon't add full botanical borders; they crowd the layout.
14. Monogram Title Strip With One Accent Color Line
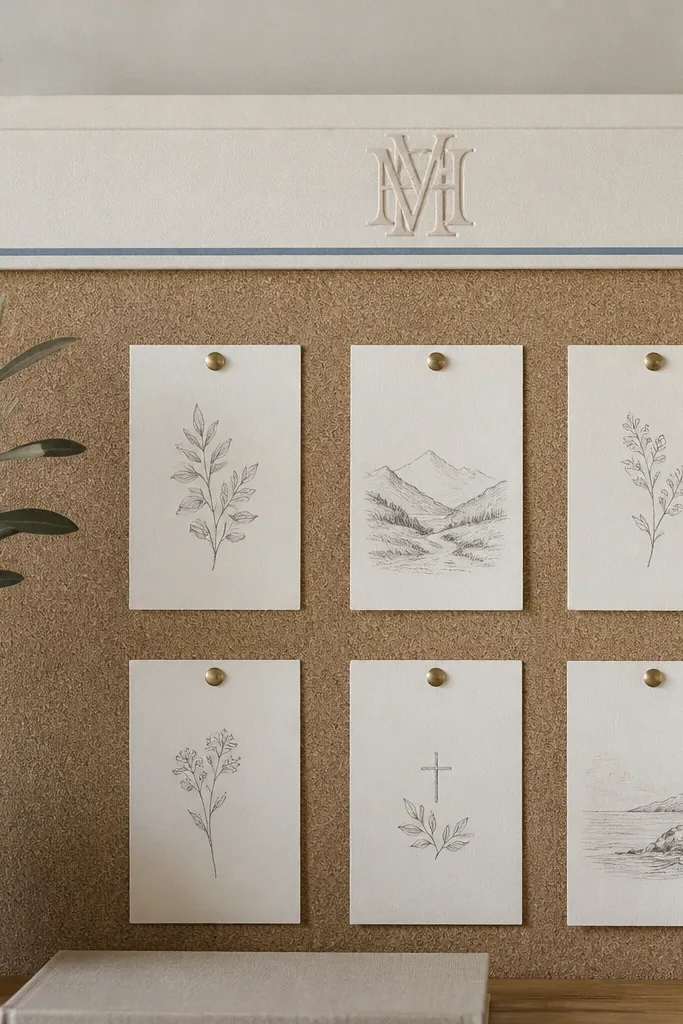
A monogram header feels personal without clutter when you keep everything else plain. The single accent line ties the whole board together and adds motion without adding more graphics. I've used this layout for "household prayers" boards because the monogram makes it feel like it belongs to one specific space. The rest stays minimal so the cards read clearly.
Print a title strip at 16x1.5 inches with a monogram sized around 1.25 inches tall. Choose one accent line color like dusty blue and make the line 0.5 inch tall under the monogram. Use off-white cards at 3.5x5 inches and pin them in two columns with consistent spacing.
Pro tipSelect a monogram font that has thin strokes, not chunky ones - thin strokes match minimalist cards.
AvoidDon't add multiple title lines or decorative flourishes; keep it to one strip.
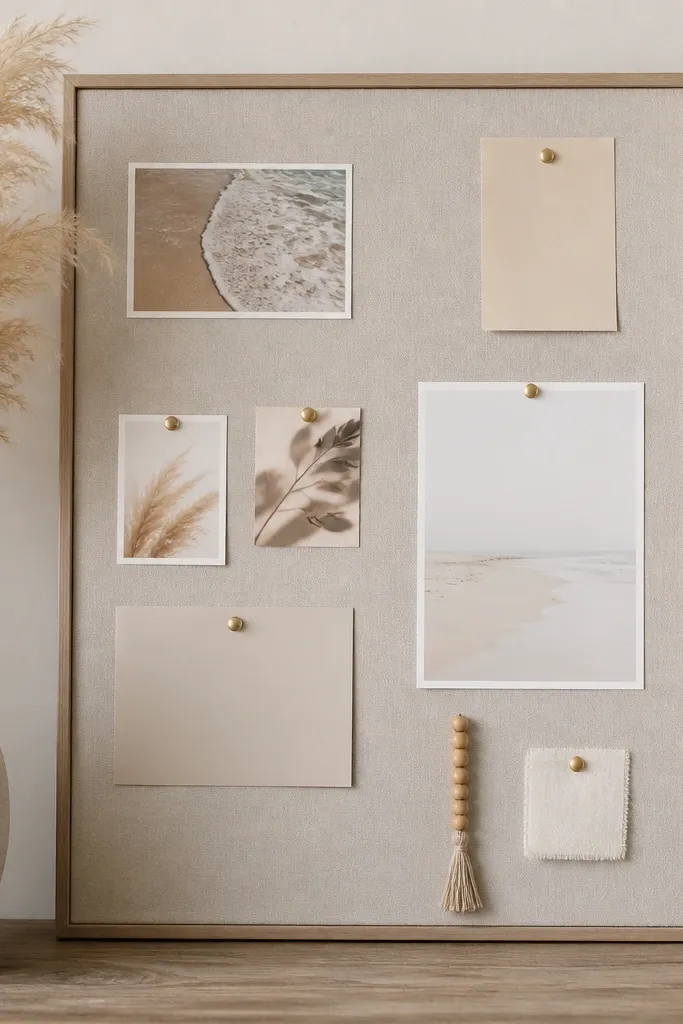
15. Two-Texture Board With Woven Fabric Pocket Row
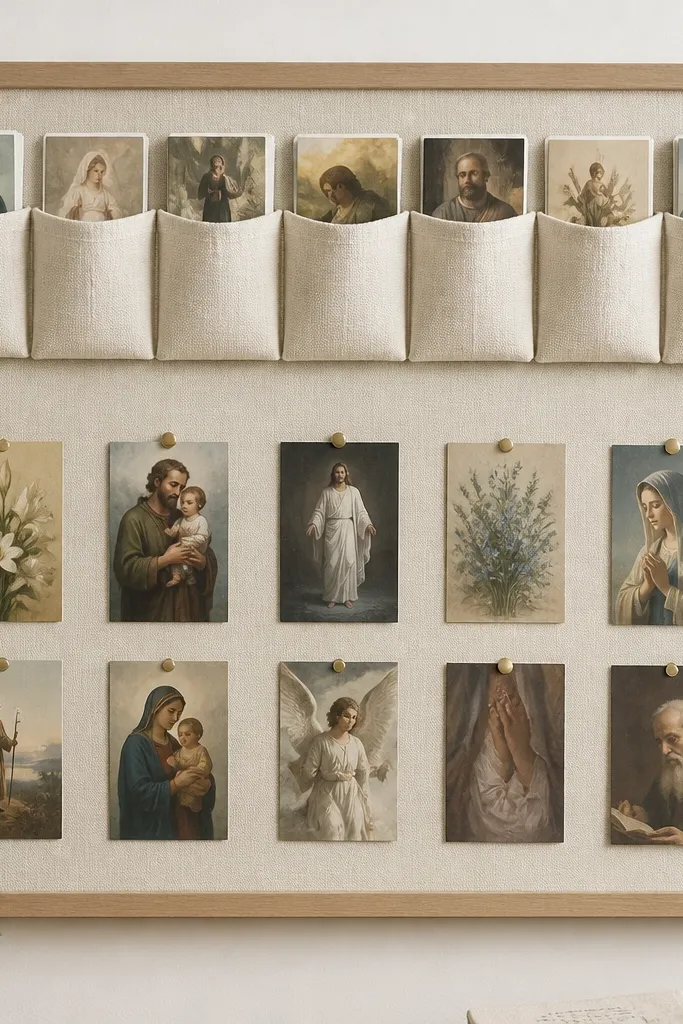
Texture is the secret weapon for modern minimalist prayer board ideas when you keep color simple. The woven pockets add softness, while the rest of the board stays structured with pinned cards. This setup is practical because folded cards slide in and out without tearing. It also looks warmer than all-paper layouts.
Use a 16x20 board. Sew or buy 6 small fabric pockets sized about 3x4 inches and attach them along the top edge with fabric glue or a stitched strip. Print folded cards sized to fit the pocket opening, then add a simple pinned grid below with 3.5x5 cards. Keep fabric color at oatmeal or light linen, and use charcoal text on the cards.
Pro tipPress the folded card crease with a bone folder so it slides in cleanly and stays aligned.
AvoidDon't use shiny fabric; it looks cheap against matte paper.


