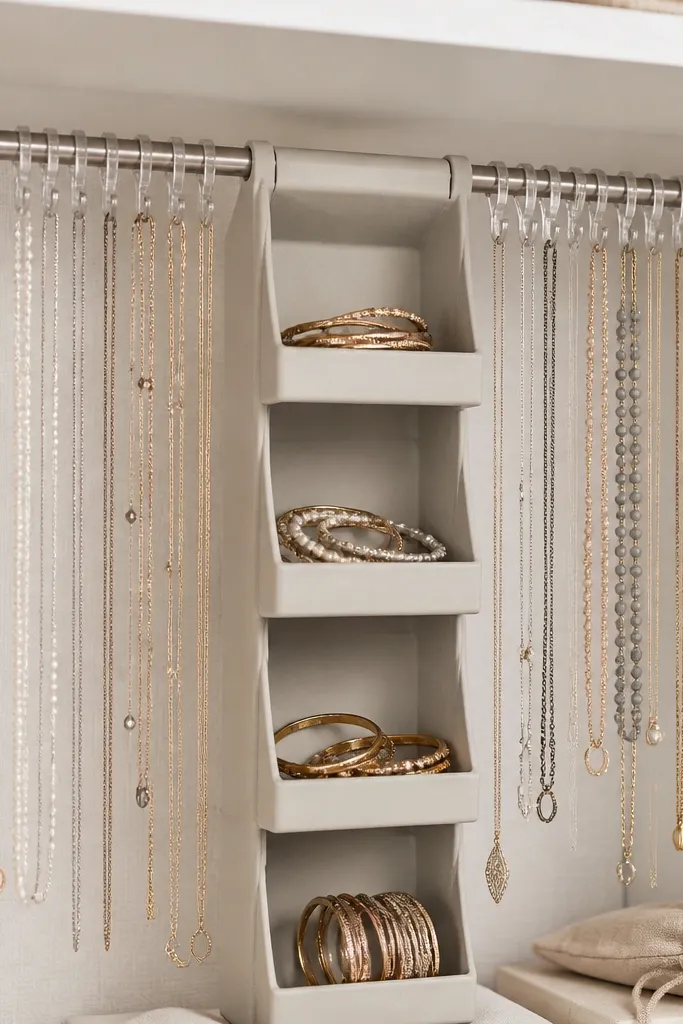
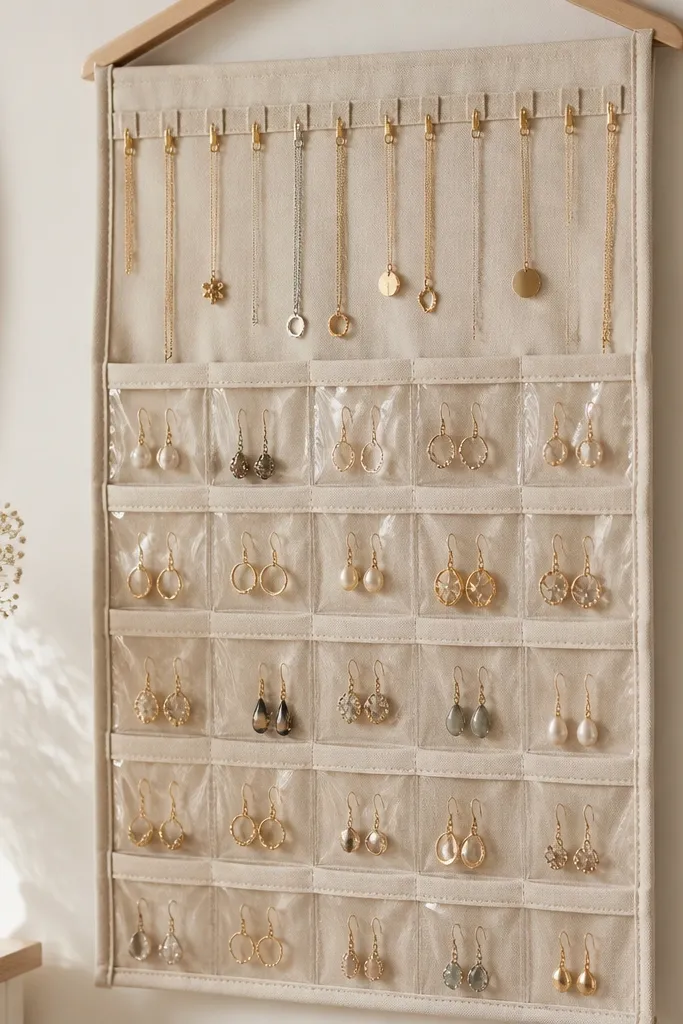
1. Pegboard + matte black hooks + clear acrylic catch tray
This setup looks modern because the pegboard grid creates clean lines and the matte black hardware matches most metal jewelry. The clear acrylic tray keeps tiny parts from falling behind the board, and it makes the organizer feel lighter than a solid cabinet. Hanging necklaces on hooks at consistent spacing keeps the chain links from twisting together.
Use 1/4-inch pegboard, then paint it with matte black spray paint after sanding lightly. Space hooks about 2 inches apart for chains and 1 inch apart for shorter pieces. Attach a clear acrylic sheet (about 12x6 inches) under the bottom row with standoffs so it sits a few millimeters away from the board.
Pro tipLabel the hook rows with tiny dots of nail polish in two colors: one for necklaces, one for bracelets.
AvoidDon't mount hooks too close - tight spacing makes chains braid themselves.
2. Cork sheet jewelry wall with brass push pins and mini ring wells
Cork is forgiving and grabs onto chain clasps so they don't slide. Brass push pins add a warm modern look without going full rustic. The ring wells keep bands from leaning and stacking, which is the fastest way rings end up scratched.
Cut cork to the size of a standard picture frame backing, then glue it to a thin MDF backing. Make ring wells by cutting 1-inch cork circles and gluing them in a grid with 3/4-inch spacing. Use brass push pins for chains and small hooks for stud earrings.
Pro tipLightly mist cork with a matte clear sealant so the surface wipes clean after jewelry dust.
AvoidAvoid glossy sealant - it makes cork look plastic and shows smudges.
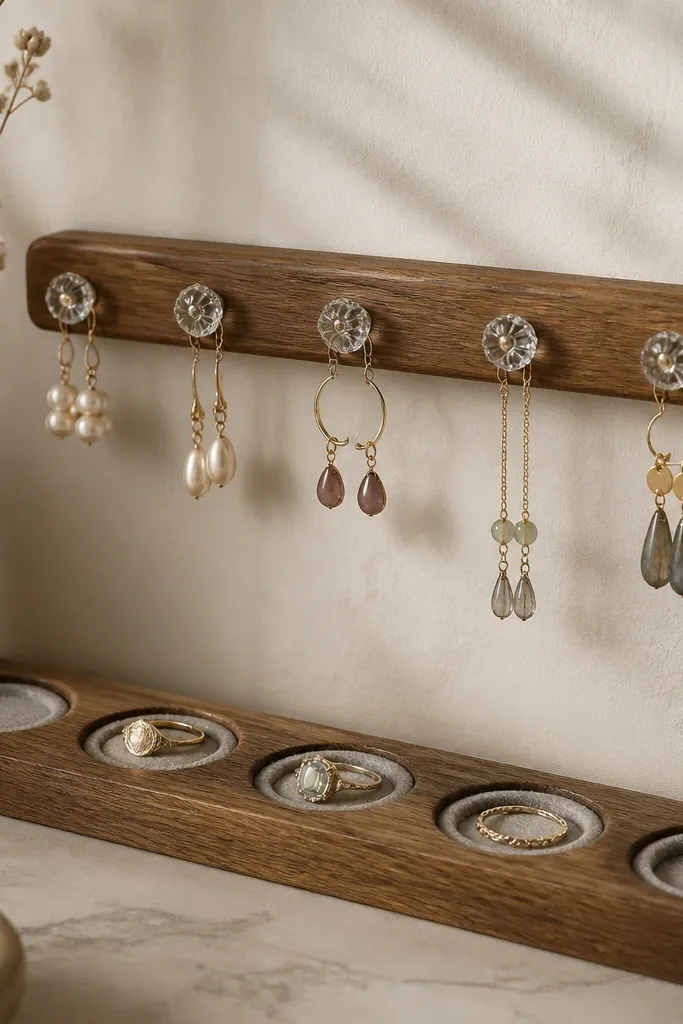
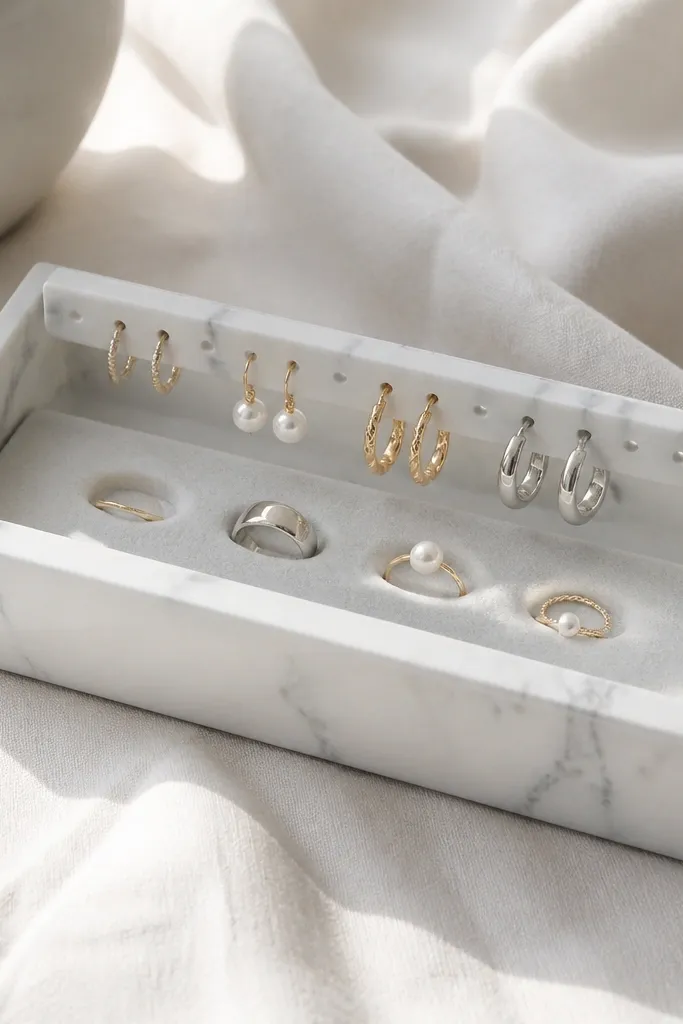
3. Wooden tray with felt-lined compartments and a vertical necklace rod
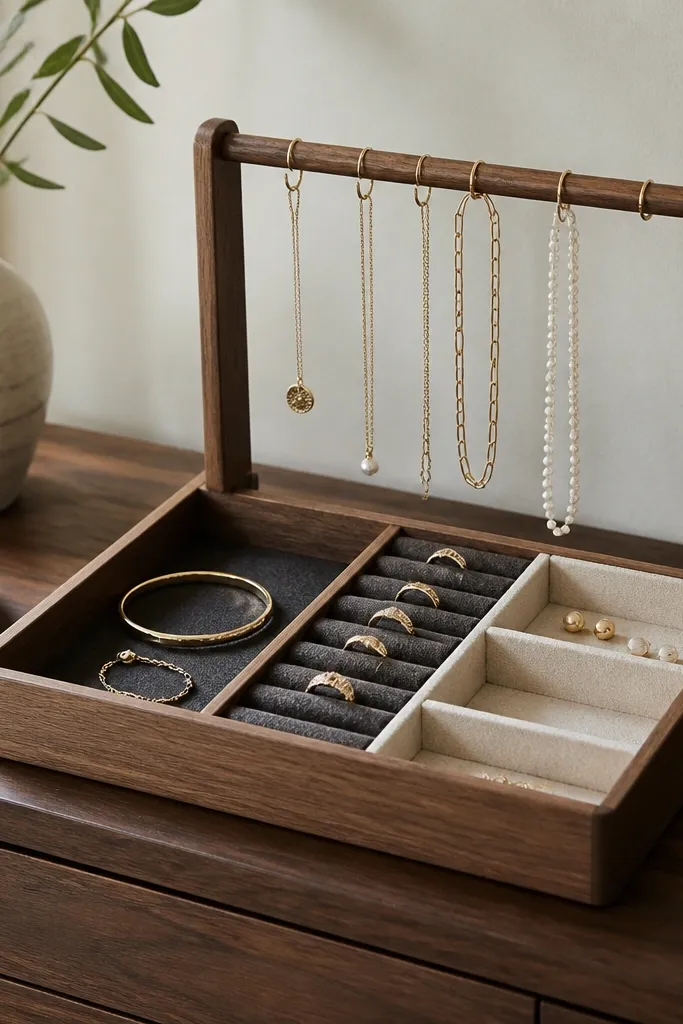
Felt gives you friction so earrings don't skid, and the compartments keep everything from mixing. The vertical dowel separates necklaces from the flat compartments, which stops tangles. The charcoal-and-cream combo looks modern and hides wear better than bright colors.
Use a store-bought wooden tray or build from 1/2-inch pine. Cut felt to fit each compartment and glue with spray adhesive. Add a 1-inch diameter dowel at the back using two small wood blocks and screws from underneath. Add tiny screw hooks to the dowel at staggered heights.
Pro tipMake the felt compartments slightly taller than the jewelry so pieces sit below the rim.
AvoidDon't skip the felt - bare wood makes earrings slide and scratch.
4. Clear acrylic drawer insert with silicone earring dots
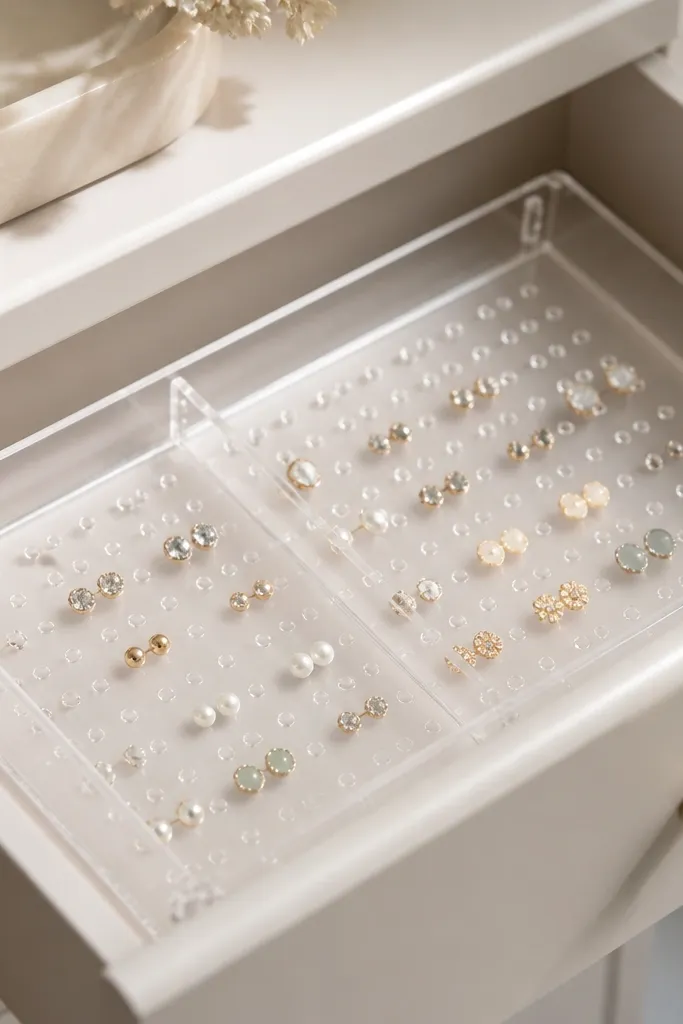
This is the cleanest way to organize without building a whole cabinet. Clear acrylic makes the organizer look modern, and it lets you spot pairs instantly. Silicone dots hold studs and small hoops in place so they don't tip over.
Buy a sheet of clear acrylic and cut it to drawer size, leaving a 1/4-inch gap on each side. Add a divider strip (3/8-inch wide) to split rings and earrings. Glue silicone craft dots in a grid using a strong acrylic-safe adhesive, then press your earrings into the dots.
Pro tipDust the silicone lightly with cornstarch before pressing earrings in to reduce sticking.
AvoidAvoid thick dividers - they waste space and make rings fall into empty corners.
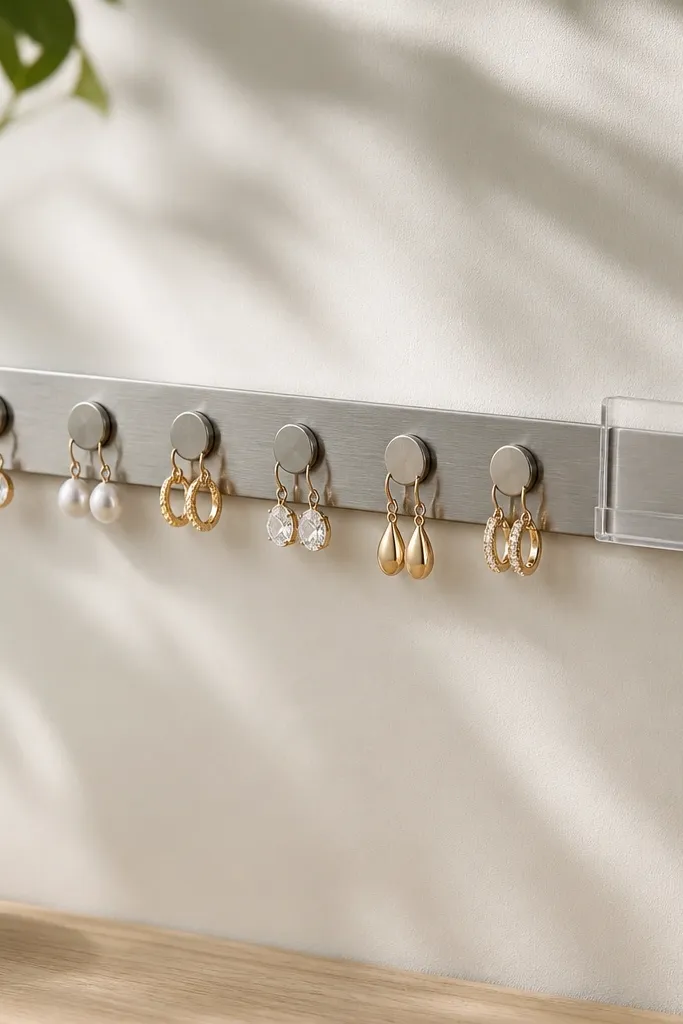
5. Metal peg rail with S-hooks and a marble-look contact paper base
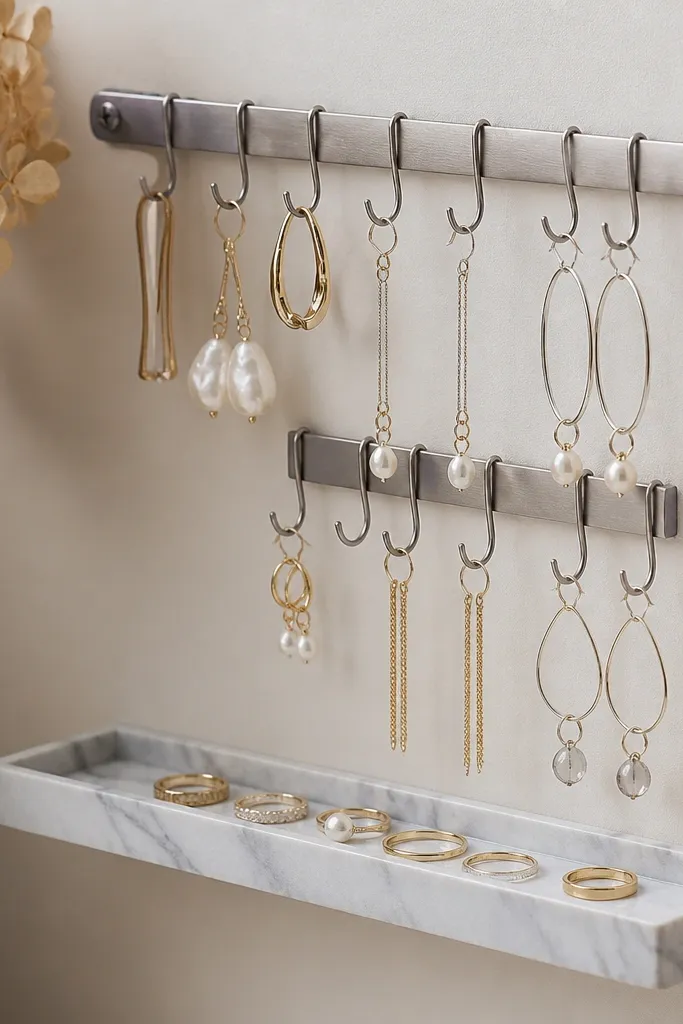
The metal rail keeps everything off the surface, which prevents chain tangling and keeps the dresser clear. Marble-look contact paper gives the modern look without expensive stone. The S-hooks let you remove pieces fast while keeping them separated.
Mount a 24-inch metal peg rail with two wall screws into studs. Place a 12x6-inch board below and cover it with marble-look contact paper, smoothing edges with a plastic card. Add a small ring dish or felt strip on the board so rings don't roll.
Pro tipUse two lengths of S-hooks: shorter for studs and longer for necklaces so they don't overlap.
AvoidSkip glossy contact paper if your room lighting is harsh - it shows every fingerprint.
6. Drawer-within-a-tray: repurposed small cutlery organizer + ring roll
This takes something already designed for separation and makes it jewelry-specific. Narrow slots work great for earrings and small bangles because they keep items from leaning. The ring roll protects bands and keeps them from snagging on each other.
Use a plastic or painted cutlery organizer with removable dividers. Line each narrow slot with thin felt strips so metals don't scratch. Make a ring roll from faux leather: cut a strip about 4 inches wide, fold into a roll, and stitch or hot-glue the seam, leaving small notches for ring sizing.
Pro tipMark the ring roll with tiny numbers using a paint pen to match your ring sizes.
AvoidDon't leave the cutlery organizer bare - the hard plastic edges chip paint and scratch jewelry.
7. Hanging macramé cord with dowel bar and clipped mini baskets
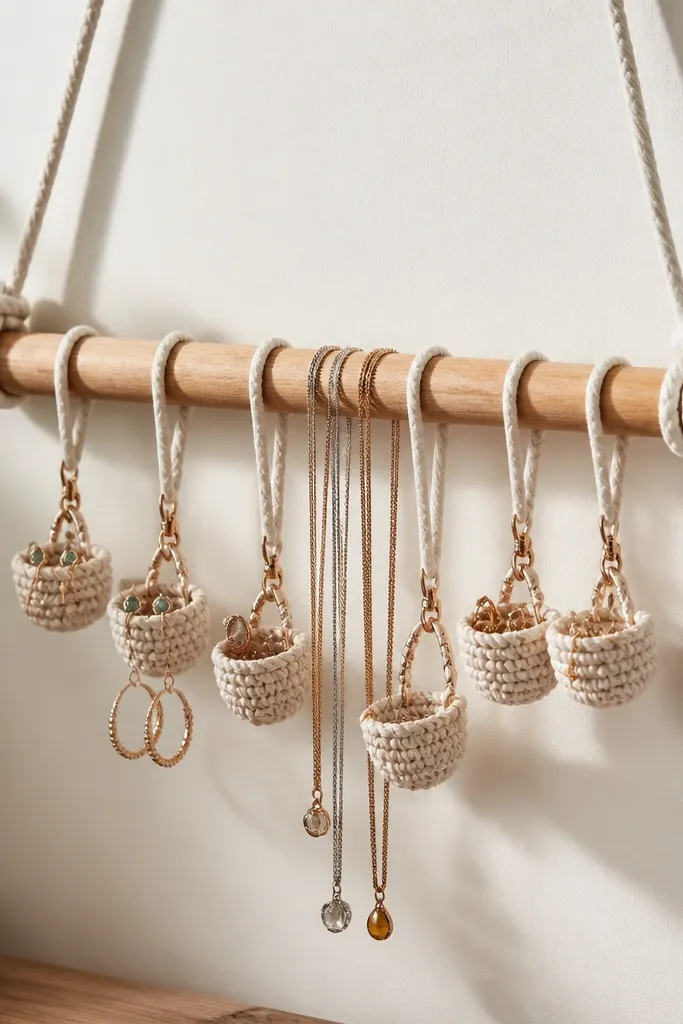
This one looks modern because it's minimal and the baskets are the only "busy" element. The cord creates a soft vertical grid, so necklaces rest in separate lanes. Mini baskets keep small items from scattering across the floor when you grab a pair.
Use a 30-inch dowel, drill two holes for rope ends, and hang it from a wall hook or ceiling hook. Attach mini baskets with spring clips so you can remove them for cleaning. Keep chain lanes separated by placing small spacers between baskets or tying knots at measured intervals.
Pro tipUse two cord colors - like natural beige and black - by tying a stripe section so it looks intentional, not messy.
AvoidAvoid slippery cord types - satin rope makes chains slide and tangle.
8. Stair-step jewelry organizer made from plywood strips and dowel pegs
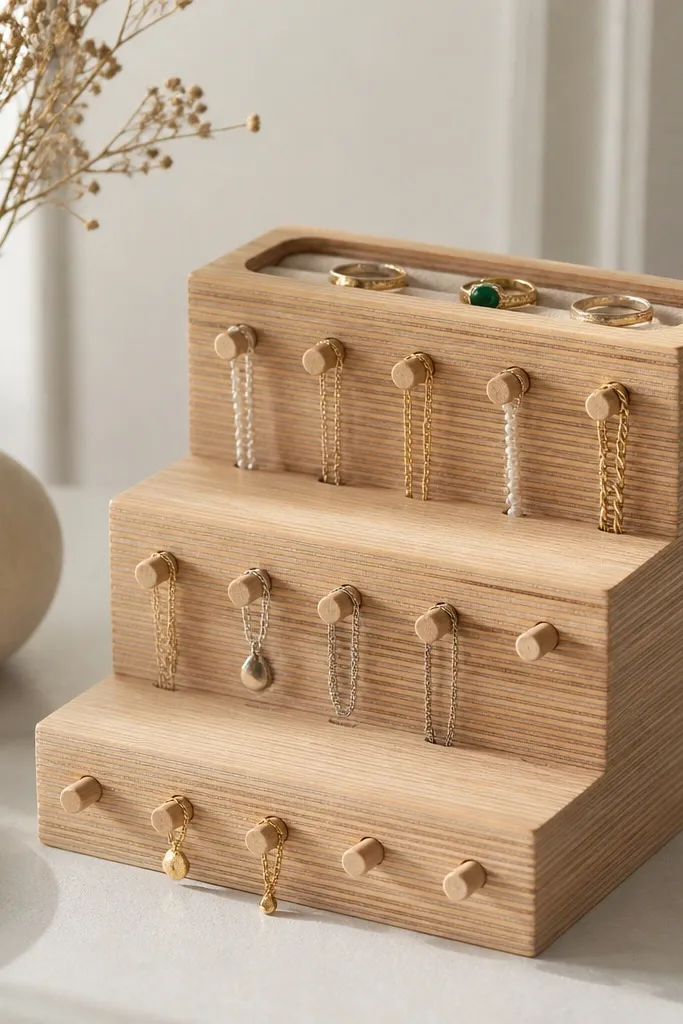
The stepped design puts pieces at different depths, which stops the "everything falls forward" problem. Dowel pegs create consistent hanging points for chains and keep them from bunching together. The recessed ring area keeps bands from rolling off the edges.
Cut plywood into three steps: 10x6 inches, 10x7 inches, and 10x8 inches. Sand edges, then stack with wood glue and screws from underneath. Drill 3/8-inch holes for dowel pegs on each level, spacing pegs 1.5 inches apart. Add a shallow recess on the top step using a wood chisel or buy a small pre-made ring groove insert.
Pro tipPaint the structure in matte off-white, then stain the recessed area for contrast.
AvoidDon't skip sanding the top edges - sharp corners snag chains.
9. Resin-style tray with embedded wire loops for necklace ends
Wire loops act like tiny docks, so chain ends don't drag across the tray and tangle. The glossy surface looks modern and makes small metal pieces catch light. Splitting the tray into two zones - loops for chains and felt for rings - keeps everything from mixing.
Use a store-bought silicone mold tray or pour resin into a shallow mold. Before it cures, place thin coated wire loops at a slight angle and secure them to the base with tape. After curing, glue a felt pad section on the opposite side and add a ring dish if you want extra protection.
Pro tipUse coated wire so it doesn't scratch resin or snag clasps.
AvoidAvoid uncoated copper wire - it can leave marks and discolor over time.
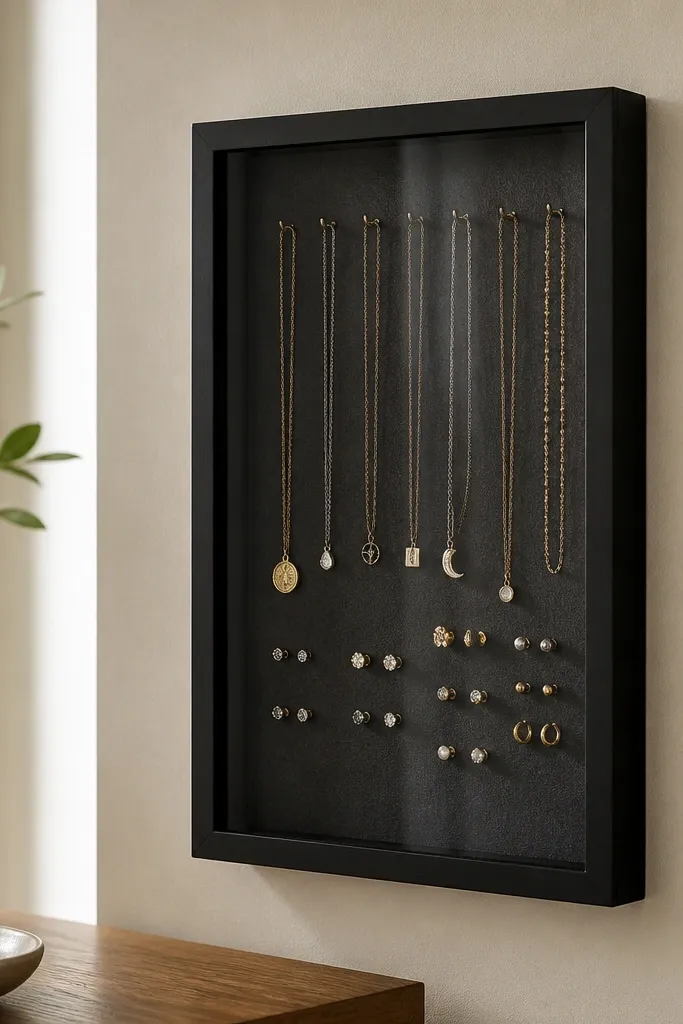
10. Acrylic photo frame turned organizer with chain clips across the top
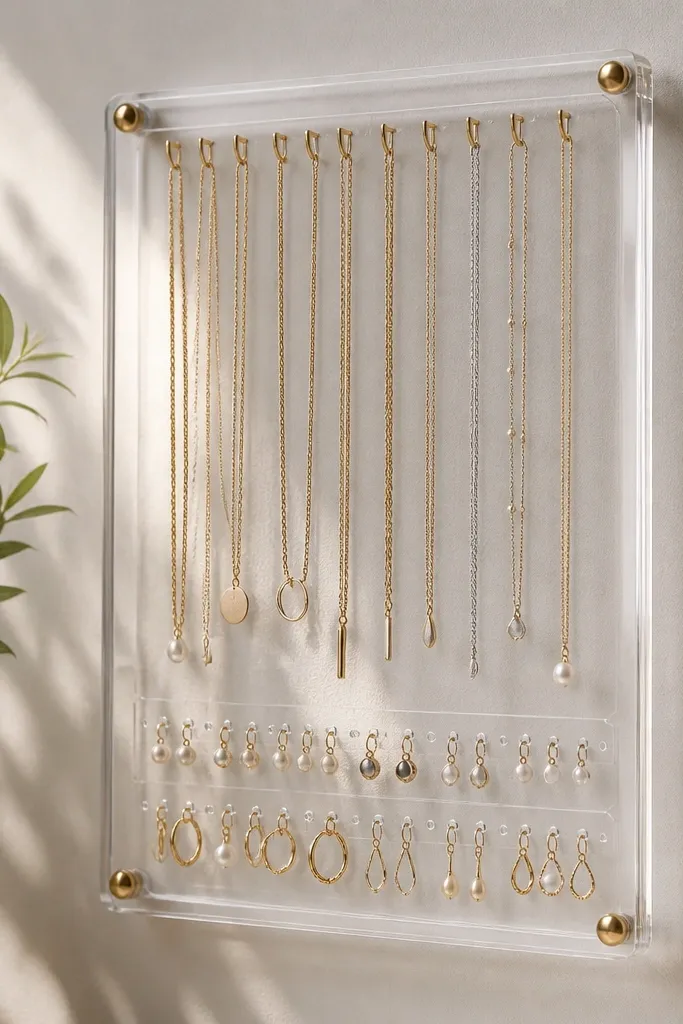
This is a modern wall piece that still works like a functional organizer. The frame keeps everything contained, so earrings don't end up all over the room. Chain clips hold strands flat, and the clear front makes the layout easy to see at a glance.
Buy an acrylic frame or make one from clear acrylic sheets. Drill small holes in the backing for earring hooks, then mount the frame to the wall. Attach chain clips along the top edge using super-strong adhesive or small screws through the backing.
Pro tipKeep the chain clips evenly spaced by measuring from the center and marking with painter's tape.
AvoidDon't use heavy clips - they warp cheap acrylic frames.
11. Peg rail + glass knob knobs: earrings on knobs, rings in lined wells
Glass knobs look clean and modern, and they stop earrings from sliding down the peg. The ring wells keep bands separated so you don't end up with a ring stack that's hard to pull apart. The pale gray felt gives a soft landing for metals.
Mount a peg rail at eye level. Attach small glass knobs to the rail using screws and washers. For ring wells, glue small felt circles into shallow wood cutouts or use pre-made drawer ring slots. Keep spacing around 1 inch between wells for easier grabbing.
Pro tipUse one knob color per category - clear knobs for studs, smoked knobs for hoops.
AvoidAvoid too-deep wells - rings get jammed and scratch when you pull them.
12. Magnetic strip organizer with tiny labeled steel discs for pins
Magnet storage looks modern and it's fast. You can rearrange pieces without fiddling with hooks. The labeled steel discs make it easy to remember which pair goes where, and it prevents the "single earring" mystery.
Mount a magnetic strip with strong wall anchors. Add steel discs (about 1 inch diameter) spaced 1.5 inches apart and label each with a thin label sticker. If your jewelry isn't magnetic, glue a tiny magnetic backing to the earring back using industrial-strength adhesive.
Pro tipSeal labels with clear tape so they don't peel from oils on your fingers.
AvoidAvoid weak magnets - heavy hoop earrings will slide down the strip.
13. Upcycled picture ledge with fabric pockets for earrings and bracelets
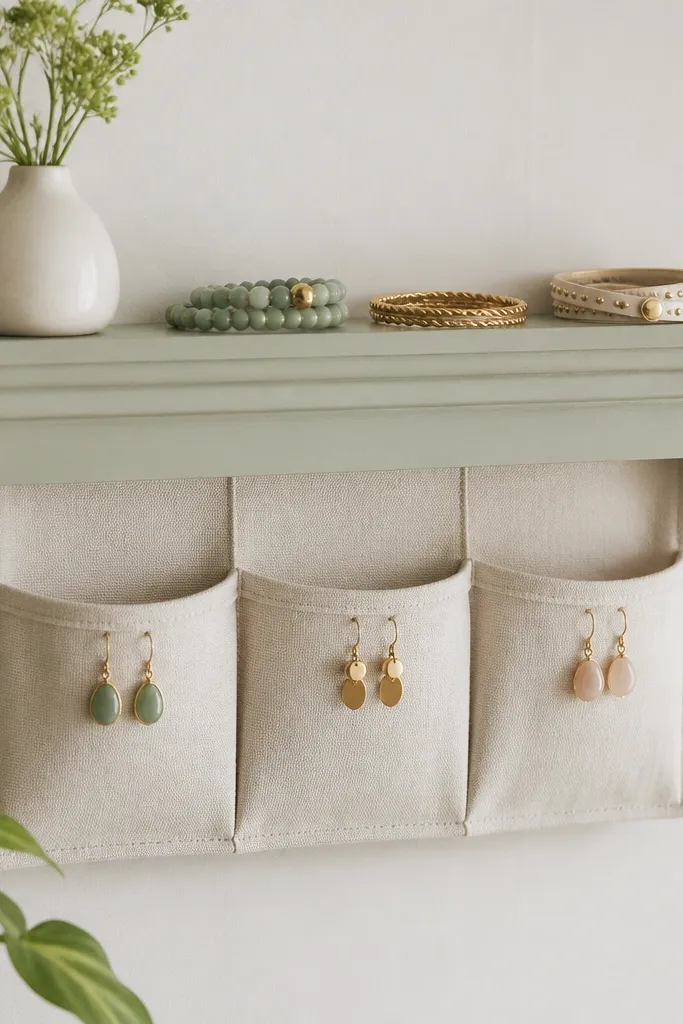
Fabric pockets keep earrings upright and stop them from rolling, which is the biggest problem with ledge-only storage. The ledge gives you a modern horizontal line, and the pockets add softness. It's also forgiving if you have a mix of sizes and shapes.
Use a shallow picture ledge and screw it into wall studs. Sew or glue fabric pockets onto a thin backing board that hangs under the ledge. Make pockets about 5 inches wide and 4 inches tall for earrings, then add longer pockets for bracelets. Line the pocket bottoms with felt to reduce scratching.
Pro tipUse a fabric with a tight weave like cotton drill so it doesn't stretch out after weeks of use.
AvoidDon't use stretchy knit - pockets sag and jewelry escapes.
14. Slim rotating earring rack using a lazy Susan base
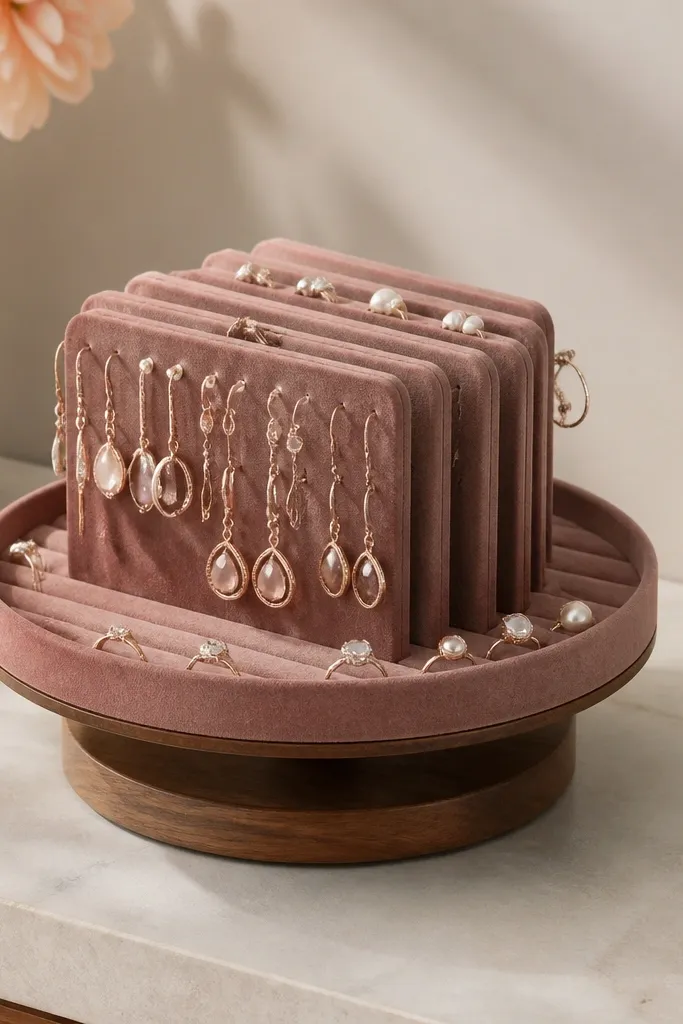
Rotation makes picking earrings painless. It also keeps earrings from being shoved into one pile because the rack gives each pair its own spot. Velvet-covered foam looks luxe but still feels modern when the base is minimal and clean.
Buy a small lazy Susan (about 8-10 inches diameter). Cut foam strips to create compartments, then cover with black or deep green velvet. Glue compartments onto the rotating top and leave a 1-inch gap near the edge for rings or a small dish. Add a non-slip mat under the base.
Pro tipPaint the base in satin white and keep jewelry accents in silver or gold for a consistent look.
AvoidSkip oversized foam - it steals space and makes slots hard to reach.
15. Tension rod + mini shelves organizer for necklaces and bangles
This works when you have wall space but no interest in drilling. Tension rods create a clean vertical line, and the mini shelves give you a place for rings and bangles without stacking chaos. Clips keep chains separated so they don't braid.
Use two tension rods in a closet or inside a wardrobe. Add clips or small S-hooks to the rod for necklaces. For shelves, use thin wood boards supported by small brackets anchored to the rod ends. Line shelf sections with felt or anti-slip drawer liner.
Pro tipPut the necklace side higher and the bangles side lower - gravity does the rest.
AvoidDon't overload clips - too many chains on one rod twists them together.
16. Floating shelf with dowel row and removable ring cups
A floating shelf gives you that modern, built-in look without a bulky cabinet. Dowel hooks separate necklaces and keep them straight. Removable ring cups mean you can lift the cups during a quick cleaning session and wipe the shelf.
Install a 24-inch shelf into studs. Glue small dowels (about 1 inch diameter) into evenly spaced holes drilled into a board mounted under the shelf, then add hooks. Use small ceramic ramekins or silicone ring molds as ring cups and place them on a felt strip for grip. Add a thin ledge so cups don't slide forward.
Pro tipChoose ring cups in two colors so you can sort by metal tone.
AvoidAvoid smooth glass cups on slick wood - rings slide and clink.
17. Stacked acrylic blocks with drilled holes for studs
Clear blocks look modern and give you a sculptural organizer, not a tray. Drilled holes keep studs from disappearing into fabric or tipping. Because each block is separate, you can dedicate one block to one size range of earrings.
Cut acrylic blocks to about 3x3x2 inches each. Drill 3-4mm holes with a slow drill speed and keep a steady grip to avoid cracks. Sand and polish the hole edges with fine sandpaper. Stack blocks with acrylic risers or small spacers so the holes stay aligned.
Pro tipDrill a few extra holes off to the side for future earrings.
AvoidDon't rush drilling - acrylic cracks easily if you force the bit.
18. Wood slice base with rope-wrapped ring holders and hook ladder
Wood slice organizers look grounded but still modern when the shapes are clean and the colors stay neutral. Rope-wrapped pegs prevent ring scratches and keep bands from sliding. The hook ladder separates necklaces by height, so chains hang without tangling.
Use a 10-12 inch wood slice sealed with matte clear. Drill shallow holes for ring pegs and glue dowel stubs in place, then wrap rope tightly around the top 1 inch and secure with glue. Build a small hook ladder from a thin board and metal hooks, then attach it to the stand behind the slice.
Pro tipKeep rope color consistent - natural jute or black only - so it reads intentional.
AvoidAvoid frayed rope ends - they snag chains.
19. Blackboard-style jewelry board with chalk labels and metal clips
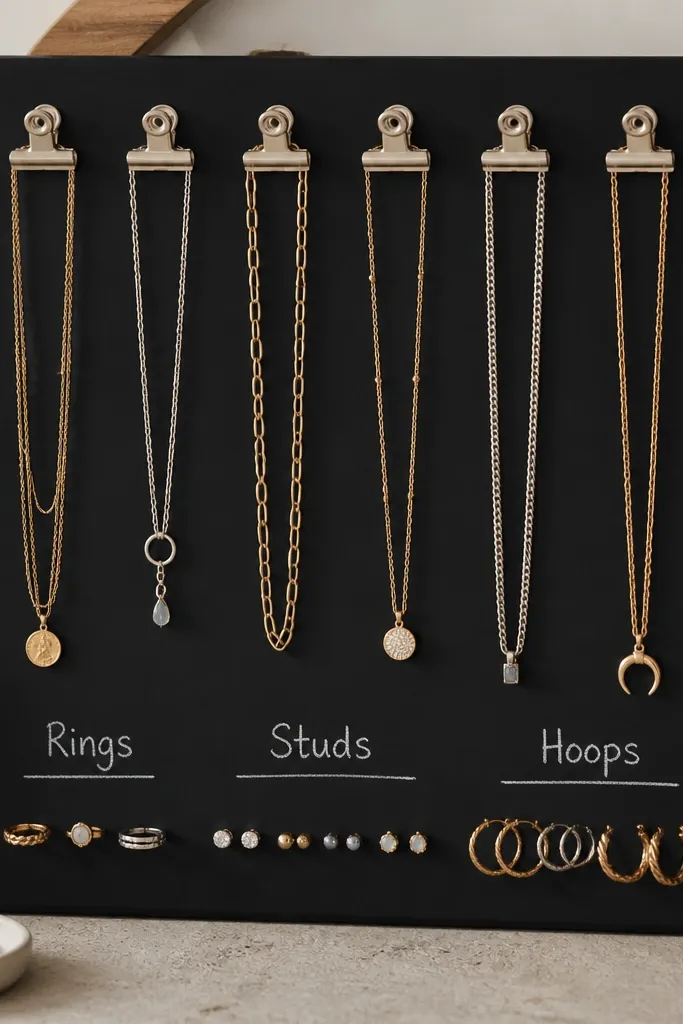
Matte black looks modern and hides smudges better than glossy surfaces. Chalk labels make it easy to reorganize without printing new labels. Metal clips keep chains from slipping and keep the layout consistent.
Paint a cork board or thin wood panel with chalkboard paint in matte black. After curing, add a border frame with thin wood strips. Attach metal clips with screws or strong adhesive depending on thickness. Write labels with white chalk marker and wipe clean with a dry cloth.
Pro tipUse a small ruler for label lines so the board looks designed.
AvoidDon't use glossy varnish over chalkboard paint - it makes chalk smear.
20. Drawer organizer made from foam sheets covered in suede fabric
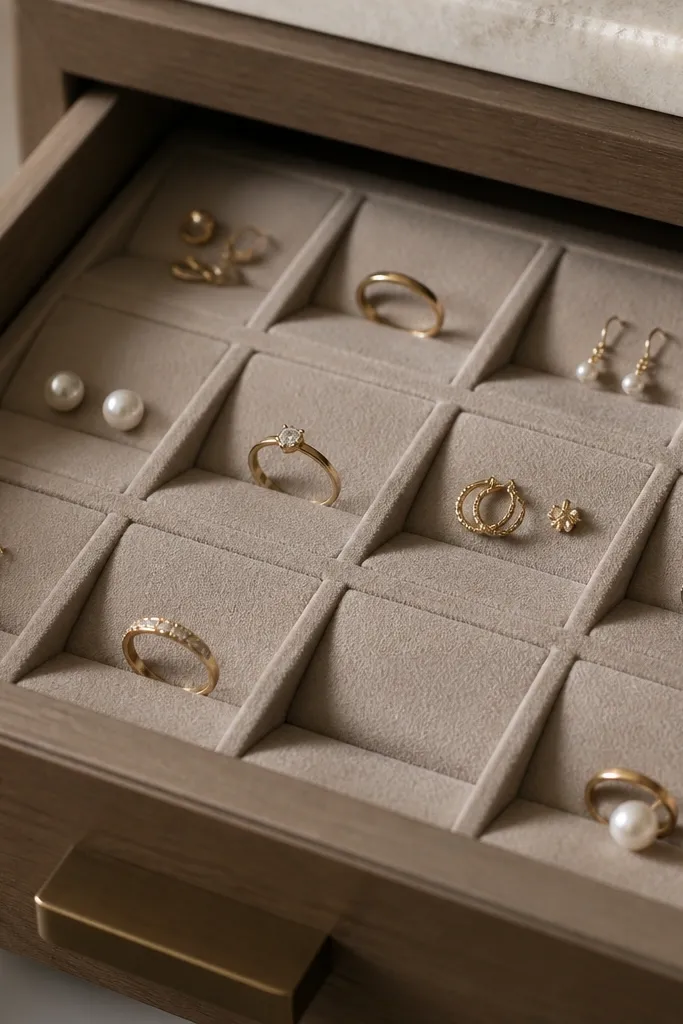
Suede fabric has the right amount of grip without being sticky. Foam compartments create separation, and the slight slope helps earrings land upright. This is a clean look for modern dressers because it reads soft and intentional.
Cut foam to fit your drawer base, leaving 1/2 inch clearance from edges. Cover foam with suede fabric using spray adhesive, then trim carefully. Cut small channels for rings and make deeper pockets for hoops. Add a thin felt sheet under the foam to prevent slipping.
Pro tipUse two foam heights: taller pockets for hoops, shorter ones for studs.
AvoidSkip thick glue blobs - they create lumps that press into jewelry.
21. Brass wire ring tree with cork base and rotating arm layout
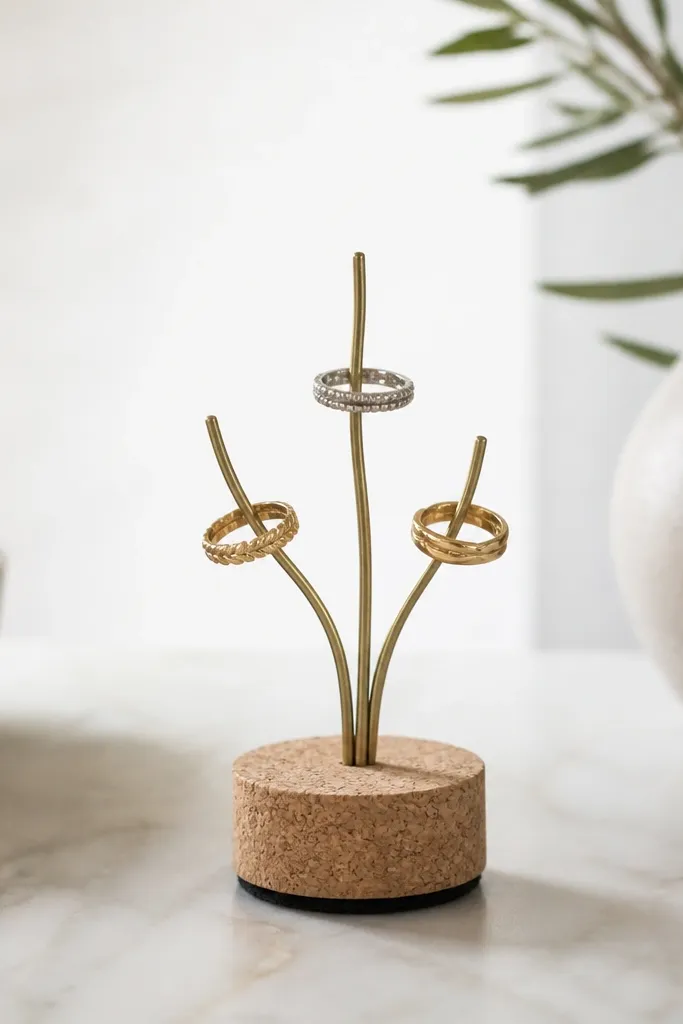
A ring tree looks modern because the lines are thin and airy, not bulky. Brass wire prevents harsh shadows and matches gold-toned jewelry well. The cork base gives grip so the tree doesn't slide when you grab a ring.
Buy or bend brass wire into a three-armed tree shape. Heat-bend slowly so the curves are smooth. Glue the base to a cork disc, then add a felt pad underneath. Position arms at different heights so rings don't stack on one arm.
Pro tipIf rings slip, add tiny silicone tube sections on the wire where rings sit.
AvoidDon't use thick wire - it makes rings sit too high and they wobble.
22. Bathroom shelf-style organizer: wire basket + peg strip for earrings
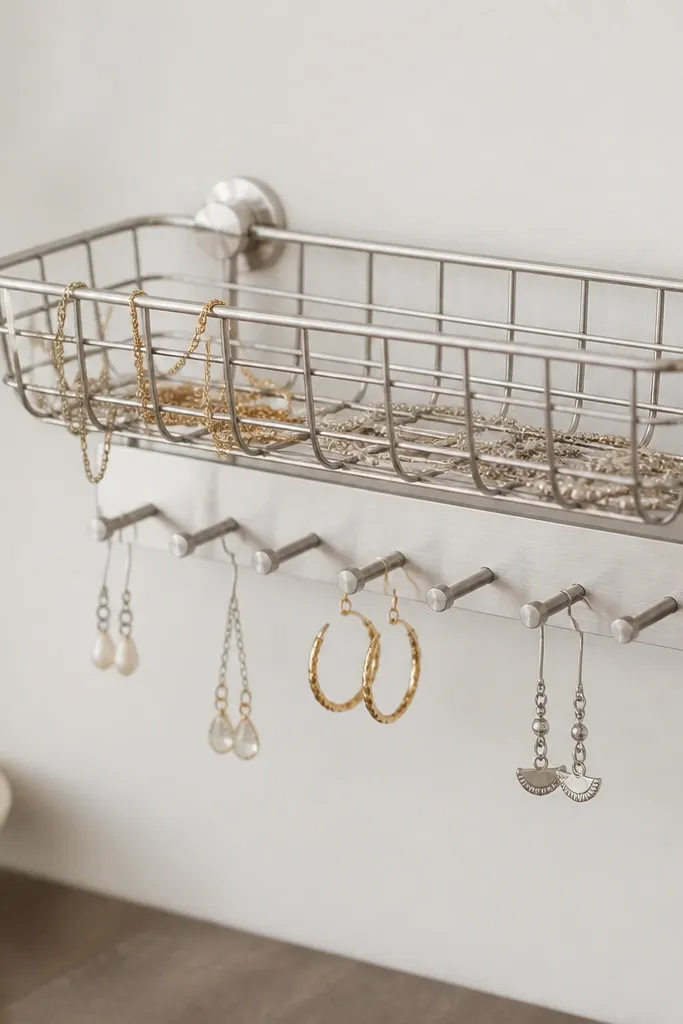
Wire baskets look modern and they keep jewelry visible without a lid. The peg strip beneath holds earrings upright and stops them from falling into the basket. This setup also works well if you store pieces near a mirror and want quick access.
Mount a wire basket using two brackets. Add a small peg strip under it and attach hooks at 1-inch intervals for stud earrings. Use a thin felt liner in the basket so chains don't scratch against the metal grid.
Pro tipKeep one basket only for necklaces and one for bracelets - mixing makes grabbing messy.
AvoidAvoid bare metal contact for chains - it creates scuffs on plating.
23. Geometric marble-look tray with removable ring insert

Contact paper on a geometric tray gives you modern lines without expensive materials. The removable felt insert is the part that makes it practical - you can lift it to clean and keep rings separated. Marble-look surfaces also make gold jewelry pop under daylight.
Choose a tray with straight edges (like a 9x6 inch angular tray). Cover it with marble-look contact paper and smooth with a plastic scraper. Make a felt insert from craft felt, cut ring slots using a hole punch, and glue the felt insert to a thin plastic base so it lifts out.
Pro tipUse a hole punch slightly smaller than your ring band width so rings fit snugly.
AvoidDon't use loose contact paper edges - they peel and catch on jewelry.
24. Shoe organizer turned jewelry station with clear vinyl pockets
Clear pockets make it easy to find the exact pair without digging. The pocket grid keeps small jewelry from mixing and losing pairs. The hanging format saves dresser space and keeps everything at eye level.
Use a hanging organizer with clear vinyl pockets, then add small clips inside the top section for necklaces. Put earrings in pocket rows by size: studs in one row, hoops in another. For rings, use small zip pouches inside pockets so bands don't press into each other.
Pro tipLabel rows with a washable fabric marker on the outside of the pocket header.
AvoidAvoid overcrowding pockets - stacked jewelry presses together and tangles chains.
25. Foldable jewelry screen using canvas and zipper pouches
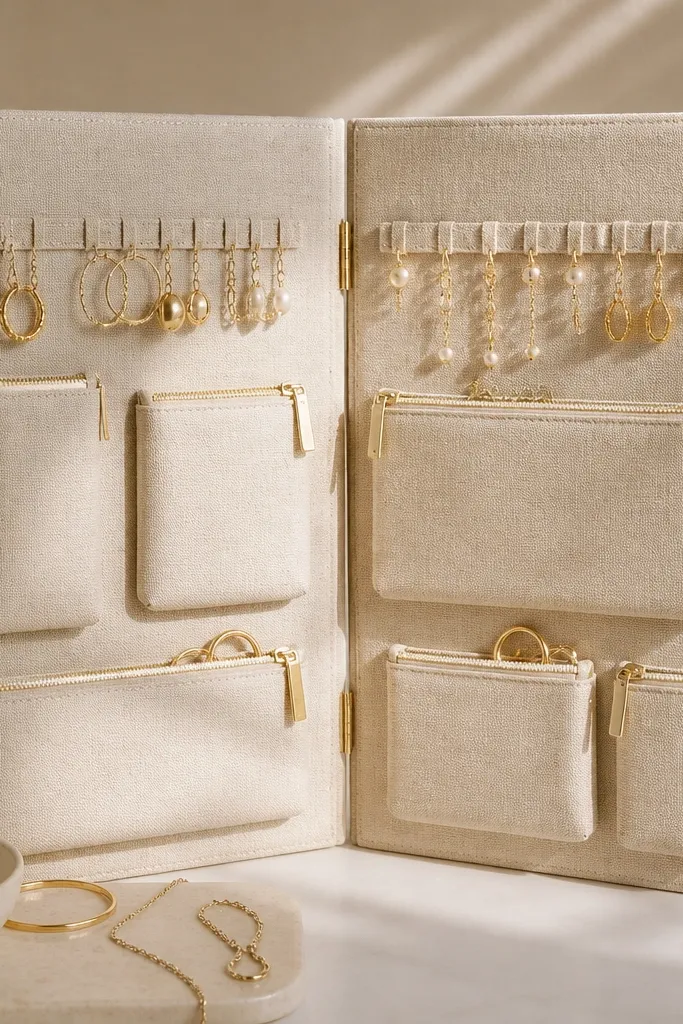
A foldable screen looks modern because it's basically a piece of furniture, not a clutter tray. Zipper pouches keep dust off and stop pieces from falling out when you move the organizer. The folding design is great if your jewelry has to share space with other things.
Use two lightweight panels hinged together. Sew or attach fabric pouches with zippers onto each panel. Add small elastic loops for earrings on the inner side so studs don't vanish. Keep pouches sized: 3x4 inches for studs, 5x4 for rings and small charms.
Pro tipChoose canvas in a neutral like oat or stone and use black zippers for contrast.
AvoidSkip thin flimsy fabric - it sags and makes zippers catch.
26. Studio-style peg rail with adjustable sliding hooks and ruler markings
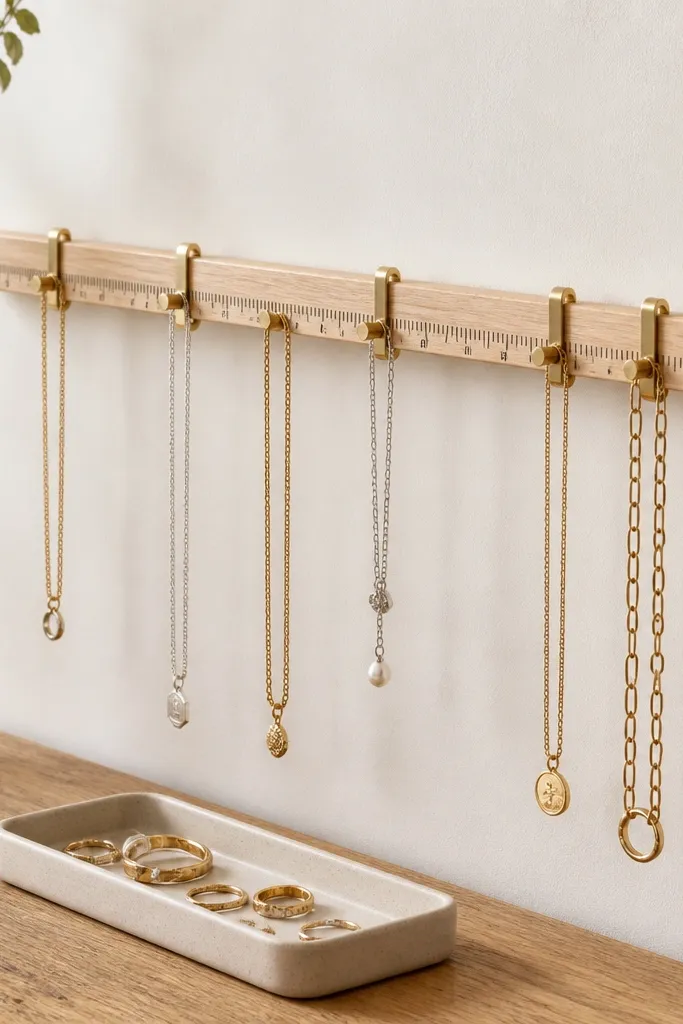
Adjustable hooks let you re-space your jewelry as your collection grows. The ruler markings are practical because you can recreate the same layout for daily wear sets. This setup looks modern because the lines are straight and the hardware is the design.
Mount a peg rail and add a ruler strip underneath using adhesive or small screws into a thin backing strip. Use sliding hook attachments so you can move each hook without removing hardware. Add a tray below for rings and small clips, lined with felt for grip.
Pro tipMark your favorite daily set layout with two colored dots on the ruler.
AvoidAvoid mixing hook sizes randomly - it creates a messy look even if everything is technically organized.
27. Stacked terracotta tiles with felt pads and wire grid top
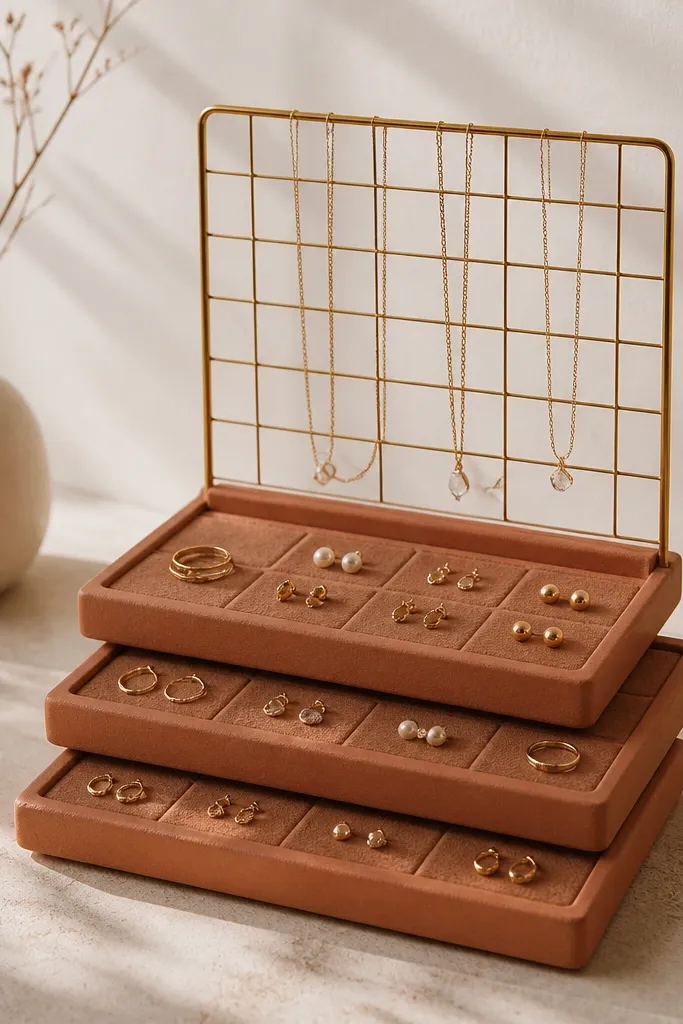
Terracotta tones look modern when you keep the shapes clean and the palette limited. Felt pads create grip and reduce scratching on delicate finishes. The wire grid top separates necklaces by letting them hang on different intersections.
Stack 2-3 terracotta tiles on a cork base so it doesn't slide. Glue felt pads onto each tile in a grid. Build a small wire grid frame from thin metal wire and place it on top using corner feet. Keep the grid size slightly smaller than the top tile so it doesn't wobble.
Pro tipSeal terracotta tiles with matte clear so they wipe clean after jewelry oils touch them.
AvoidAvoid glossy sealant - it makes terracotta look like plastic and shows glare.
28. Monochrome marble-look ring tray with snap-in earring bar
The snap-in bar makes this organizer flexible. You can remove the earring bar to clean and to switch between "earrings only" and "rings only" modes. Marble-look tray surfaces keep the visual modern, and felt cutouts prevent rings from sliding.
Start with a white marble-look tray or cover a wooden tray with contact paper. Make a bar from thin acrylic or metal with holes spaced 1 inch apart. Use snap fasteners so the bar clicks into two side slots. Line ring cutouts with felt and keep each cutout shallow enough that rings can't tip.
Pro tipUse two ring insert sizes: one for thick bands and one for thin rings.
AvoidDon't make hole spacing too tight - studs crowd and look messy.
29. Slim wall shadow box with foam backing and mini necklace hooks
A shadow box gives you that modern display look while still being functional. Foam backing grips clasps and keeps chains from shifting behind the glass. Mini hooks create clean vertical hanging points, and magnets help keep tiny earring parts from falling.
Use a slim shadow box frame with glass. Cover the inside backing with dark foam and cut it to the frame size. Install mini hooks into foam with small screw eyelets or glue anchors into the wooden frame backing. Add small magnets for earring backs by gluing magnet discs to foam.
Pro tipKeep your foam color dark so metal pieces look crisp through the glass.
AvoidAvoid bulky foam - it pushes jewelry into the glass and makes it look cramped.
30. Wall-mounted fabric tape organizer with color-coded binder clips
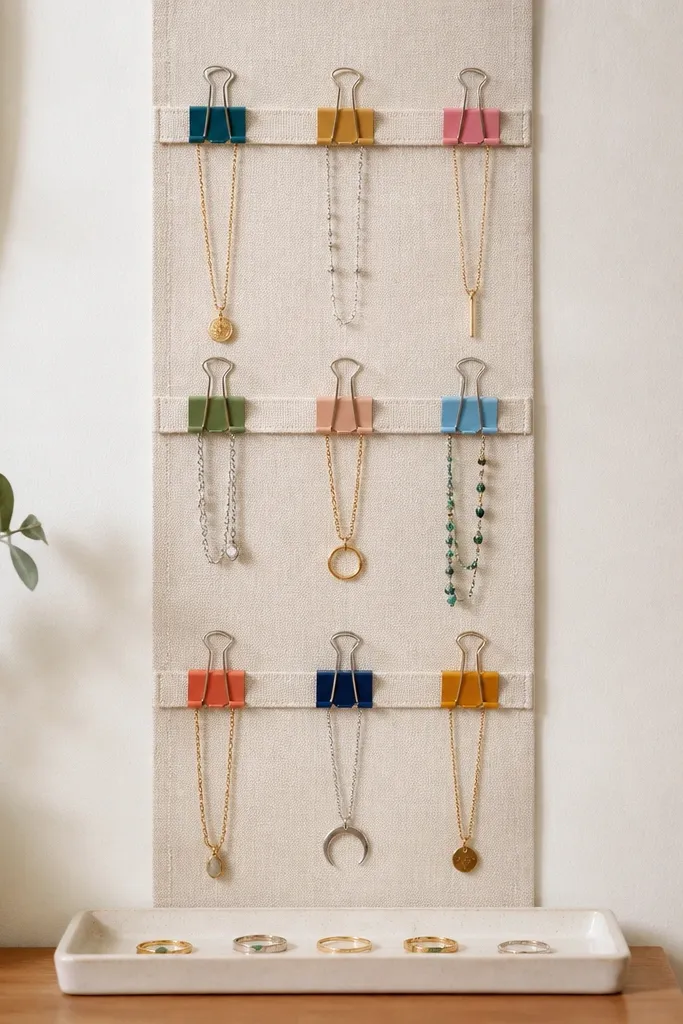
This is modern because the design is flat and graphic - it reads like a wall organizer, not a craft project. Binder clips hold chain links securely, and the color-coding makes it fast to grab the right set. The tray beneath catches anything that falls during quick use.
Mount fabric tape or canvas strips using small screws. Add binder clips at measured heights: 8 inches for long necklaces, 6 inches for shorter ones. Under the bottom row, attach a small wooden tray lined with felt. Keep clip colors to two shades so it stays clean.
Pro tipUse painter's tape to mark clip positions before installing so spacing stays even.
AvoidAvoid too many clip colors - it stops looking modern and starts looking random.


