1. Black micro-suede zipper clamshell with a chain channel
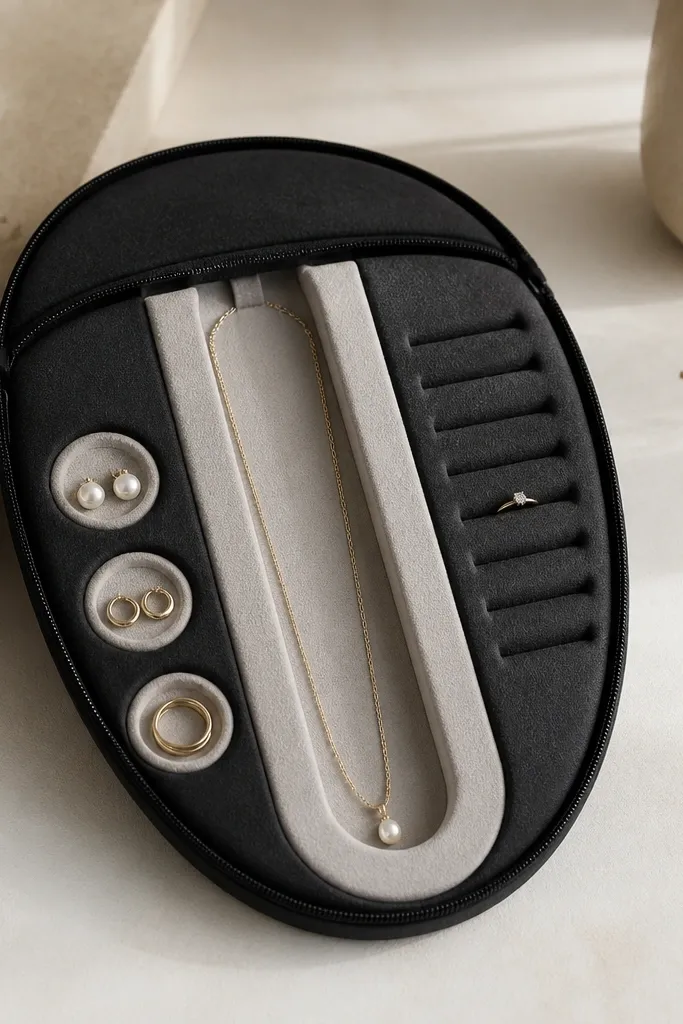
This one looks luxe because the fabric face is matte and smooth, and the inside is intentionally color-coordinated. The chain channel keeps a necklace from braiding itself into a knot. I line the earring section with a slightly lighter felt so posts and backs are easy to find in dim hotel light.
Use a clamshell pattern from a small makeup case, about 9 inches wide and 6 inches tall when closed. Cut a 1/4-inch foam layer for the base, then glue micro-suede to the outside and felt to the inside. For the chain channel, stitch a U-shaped divider about 1/2 inch wide using felt strips, then leave 1 inch of open space at the top so the clasp can sit there.
Pro tipAdd a clear vinyl window pocket on the inside lid for spare studs and a tiny pill organizer for ring spacers.
AvoidDon't use thin, fuzzy fabric inside - loose fibers snag earring backs and make the whole thing look worn fast.
2. Velvet fold-over roll with elastic loop rows
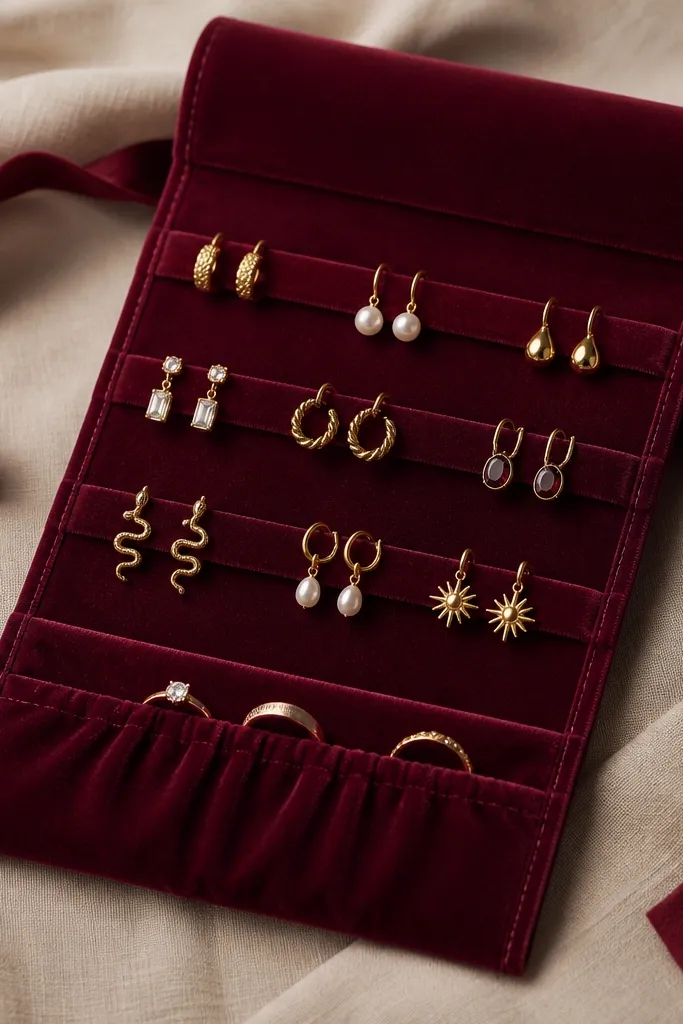
Velvet reads expensive instantly, and the roll format keeps your jewelry from sliding around during transit. Elastic loops create a gentle hold - earrings don't flop, and hooks don't catch on other pieces. The pocket end is perfect for rings because you can separate them with a small foam square.
Cut velvet fabric 12 x 18 inches and backing cotton or satin 12 x 18. Add a batting layer about 1/8 inch thick. Sew elastic strips in rows: loops spaced 3/4 inch apart for studs, and 1 inch apart for hoops. Fold into thirds and secure with a ribbon tie sewn to the outside corners.
Pro tipUse fabric glue to tack the first elastic row before sewing - it prevents the loops from drifting when you roll it up.
AvoidSkip bulky seams inside the loops - thick thread ridges make the roll feel lumpy and cheap.
3. Clear PVC organizer sleeve with pearl-white felt backing
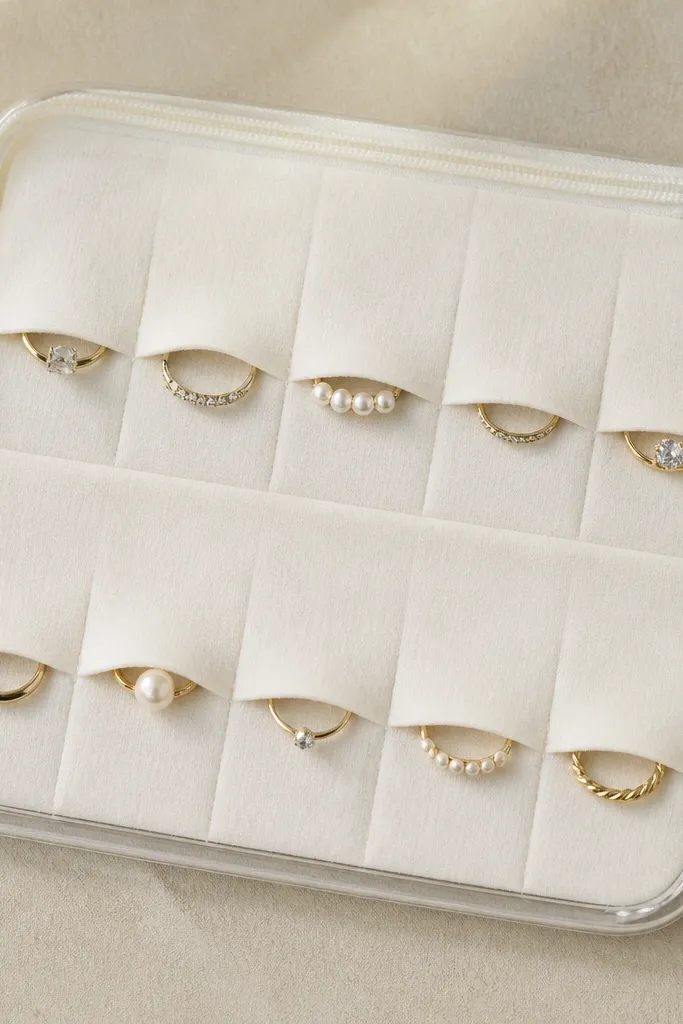
If you want "luxe" but also want to see everything instantly, clear PVC is the answer. The felt backing keeps pieces from rattling and prevents scratches. The dividers make it look designed, not like a repurposed bag.
Buy clear PVC by the yard (or a clear tote panel) and cut it to 10 x 13 inches. Line the back with 10 x 13 inch felt. Stitch dividers using felt strips 1/2 inch wide, spaced so rings have their own 1.5 x 2 inch pockets and earrings have 2 inch long sections.
Pro tipChoose pearl-white felt instead of bright white - it hides makeup smudges and looks softer under warm lighting.
AvoidDon't skip a backing - clear PVC alone makes everything clack and scratch.
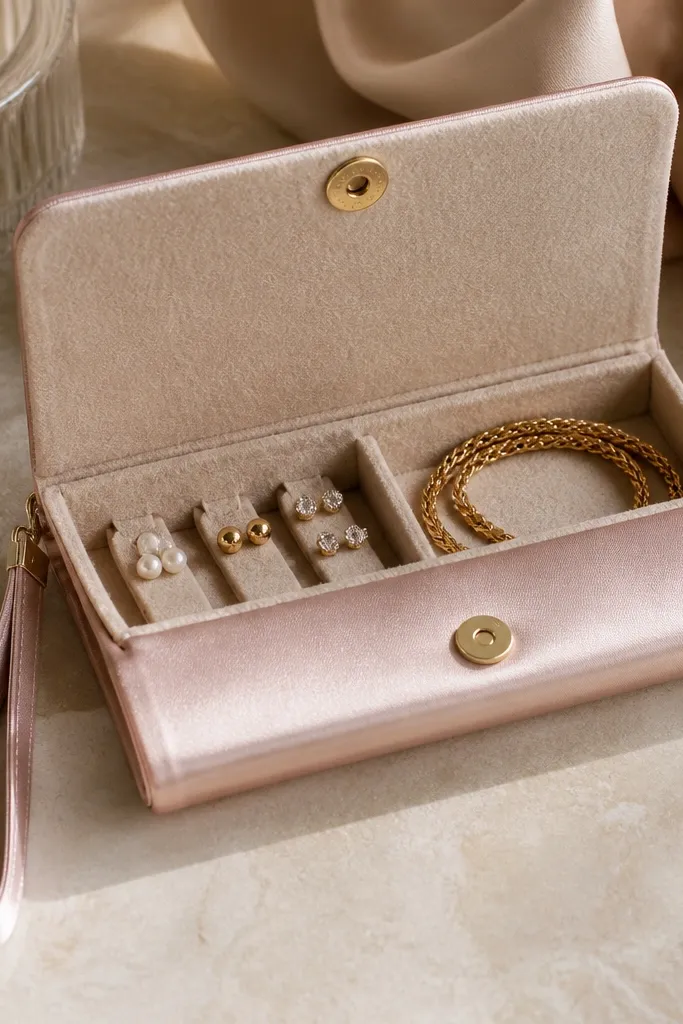
4. Satin drawstring pouch with color-coded insert cards
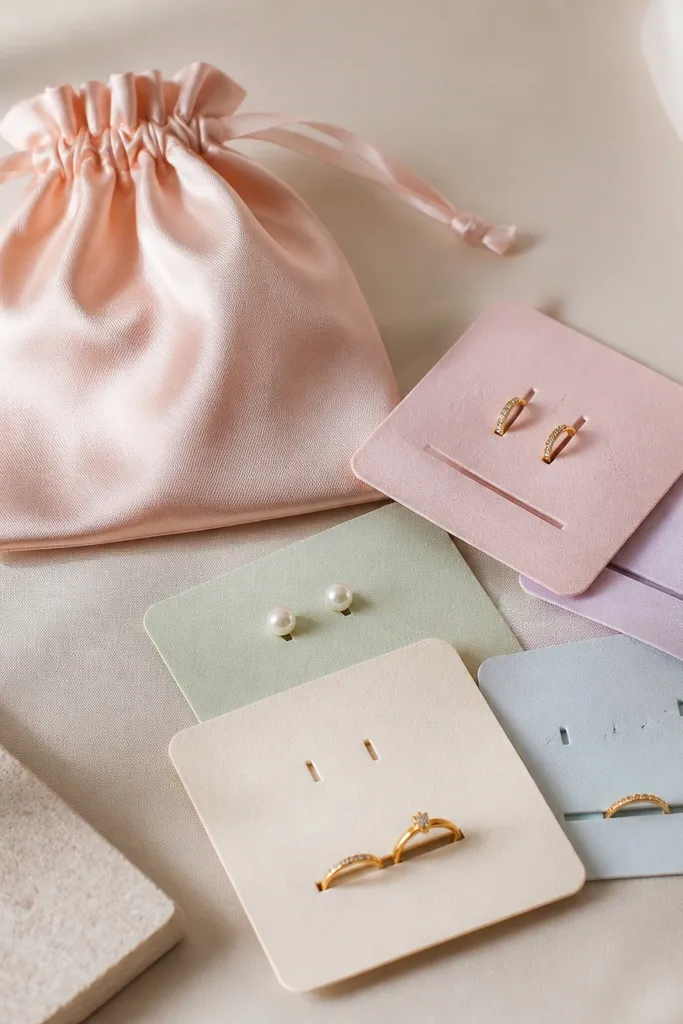
This is for people who hate fumbling. The satin pouch looks polished, and the insert cards make it feel like a boutique system. I use different insert colors for quick sorting: one card for studs, one for rings, one for a necklace wrap.
Use a 9 x 10 inch satin pouch (or make one with satin and a cotton lining). Cut three insert cards from thin foam board and cover them in felt. Make earring cutouts 3/8 inch wide for posts, and add a slit for a ring stack about 1 inch long. Drop the cards in and tie the pouch shut with a 1/4-inch satin ribbon drawstring.
Pro tipAdd a small snap inside for the necklace wrap so it doesn't slide into the earring area.
AvoidDon't use plain felt-only compartments without a card - your jewelry shifts and the pouch stops looking intentional.
5. Mini hard-shell makeup case with felt grid and ring foam wells
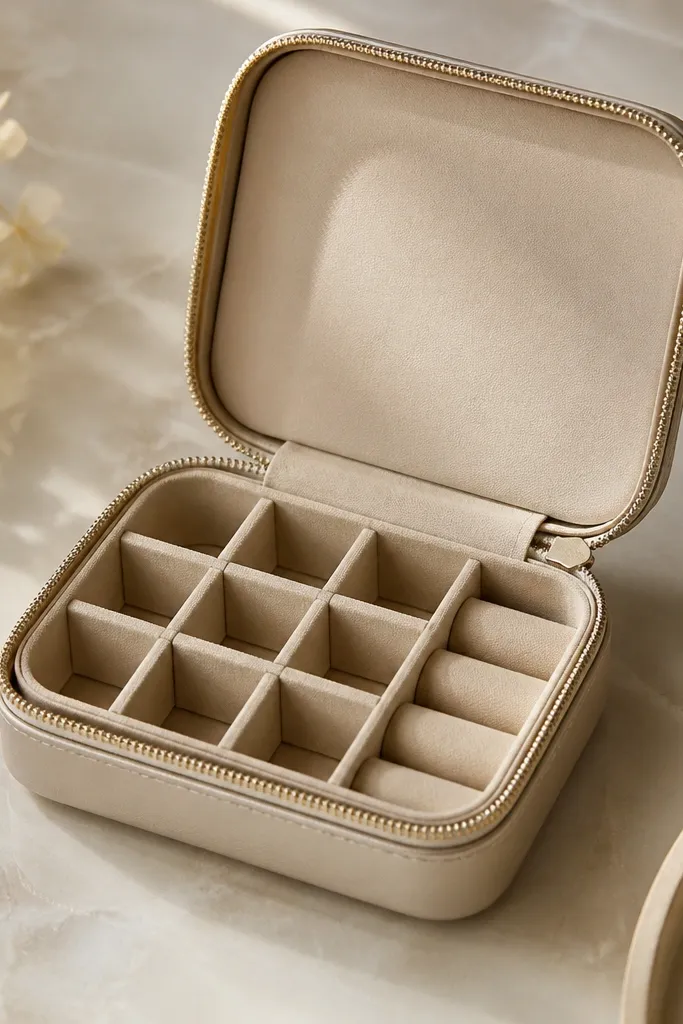
Hard-shell cases look luxe because the shape stays crisp in a suitcase. The felt grid gives structure, and the carved foam wells keep rings from snagging. This one feels "expensive" even when you're using budget materials.
Pick a hard-shell case about 8 x 6 inches with a flat lid. Line the inside with 1/4-inch felt and mark a grid: 1.5 inch squares for studs and 2 inch squares for small hoops. Carve ring wells from 1/2-inch foam: each well is about 3/4 inch diameter, then cover with felt and glue in place.
Pro tipUse a slightly darker champagne exterior fabric with gold zipper - the whole case photographs better.
AvoidDon't glue felt directly to shiny plastic without roughening - it peels after a few trips.
6. Linen travel tray with removable earring bar and magnetic ring snaps
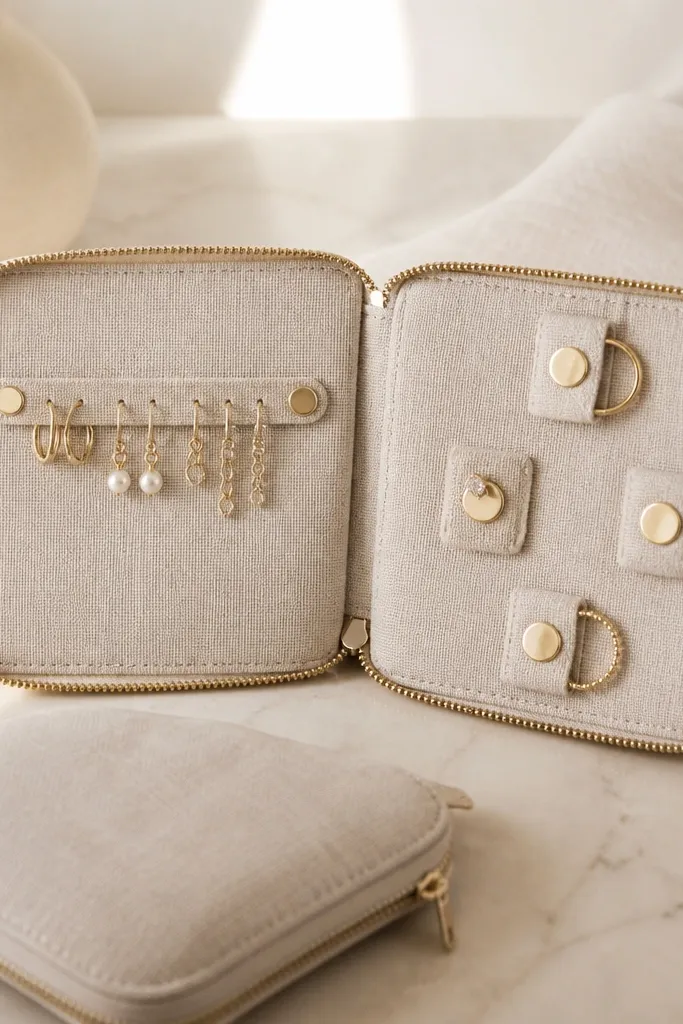
Linen makes everything look calm and expensive, especially in light travel photos. The removable earring bar is my favorite detail - you can carry it separately at the hotel sink. Magnetic ring pads keep rings from sliding even when the case shifts.
Make a tray from linen and stiff interfacing, sized to 10 x 7 inches. Create an earring bar from a thin wood strip or stiff acrylic, cover it in felt, then attach 12 small loops made from thin elastic cord. For rings, cut 1 inch fabric pads, glue small magnets behind, and sew the matching magnet to the felt base.
Pro tipTest your magnet strength by tossing the closed tray gently - rings should stay put without crushing the band.
AvoidAvoid super-strong magnets - they can scratch delicate ring stones when you open the tray.
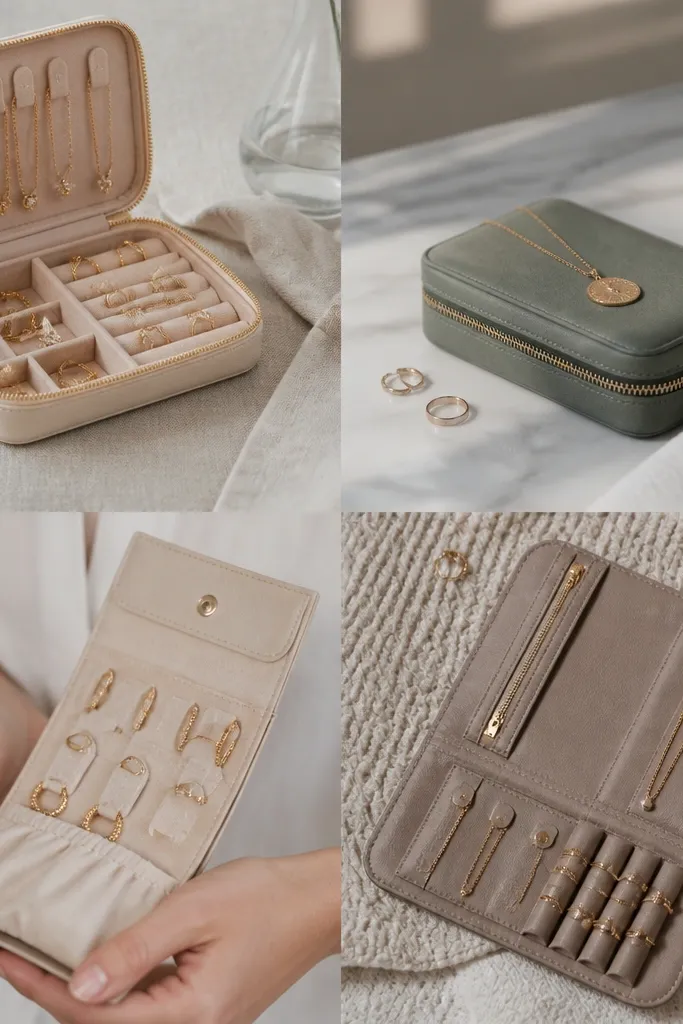
7. Marble-print faux leather folio with stitched necklace hanger
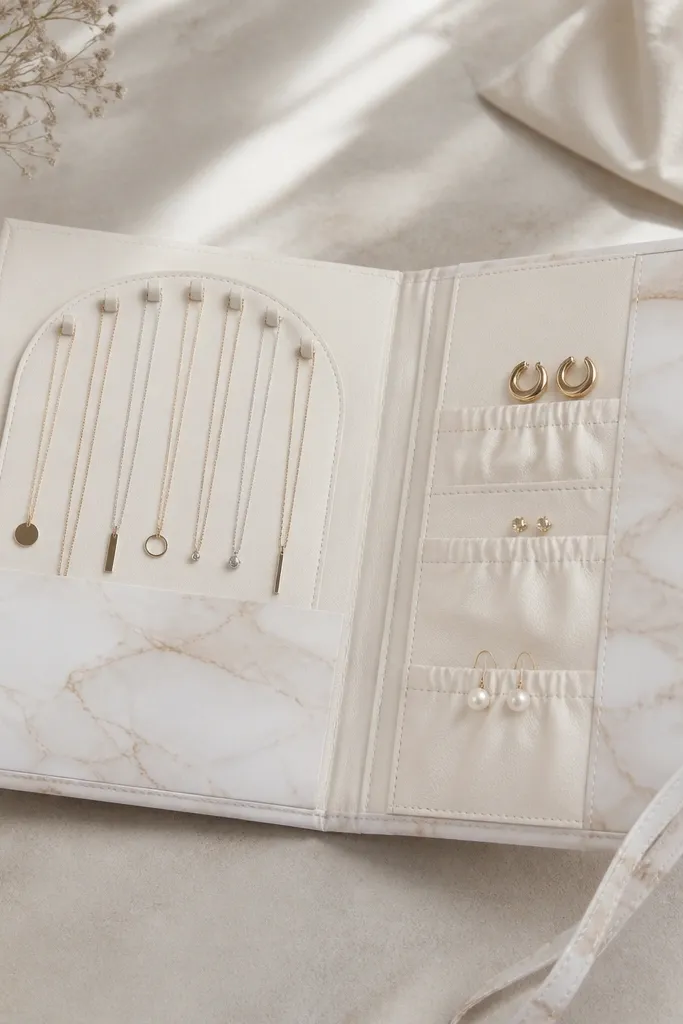
Faux leather reads luxe because it holds shape and catches light. The marble print looks high-end without needing actual stone. The stitched necklace hanger keeps the chain from knotting while still letting you see the necklace.
Cut an 11 x 15 inch folio using faux leather on the outside and soft lining like microfiber on the inside. Make a necklace hanger channel: stitch a shallow arch divider 1 inch wide, then add a small elastic loop at the top for the clasp. Add elastic pockets for earrings sized 1.75 x 2 inches each.
Pro tipUse a walking foot or slow sewing speed for faux leather - uneven stitches are what make these look handmade in a bad way.
AvoidDon't skip edge finishing - raw faux leather edges curl and look messy fast.
8. Embossed leather-look card wallet with ring slots and earring holes
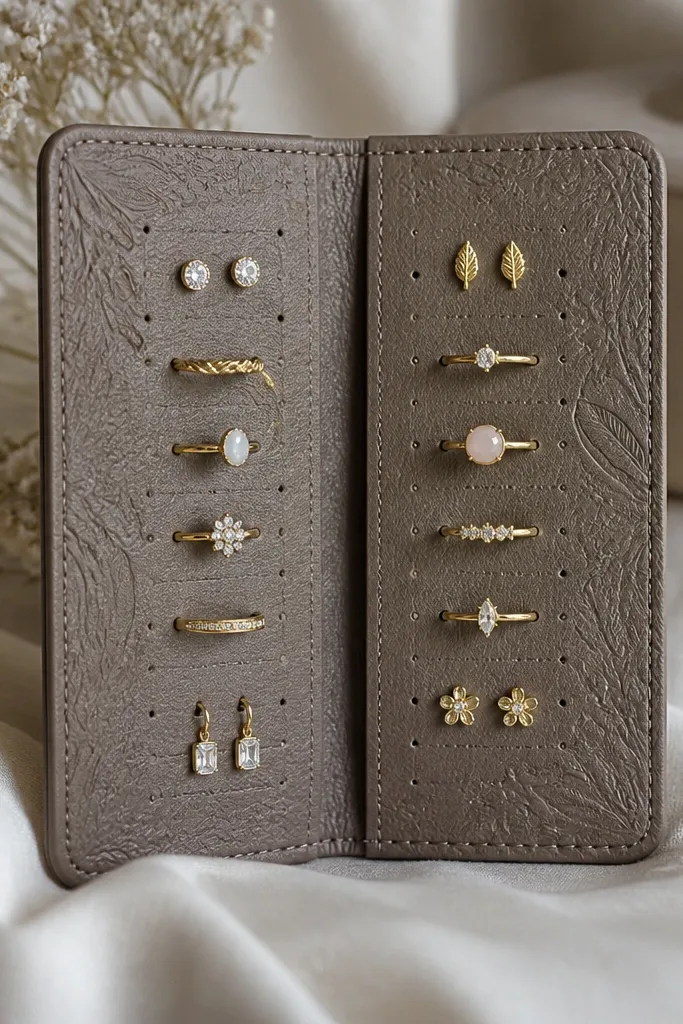
This is the travel organizer I reach for when I pack light and want everything flat. The card format keeps jewelry from tangling because pieces stay in fixed positions. Ring slots prevent bands from twisting, and the earring holes keep posts from bending.
Use a 4 x 8 inch embossed leather-look material or vegan leather. Back it with firm cardstock covered in felt. Punch earring holes with a 1/4 inch hole punch, then reinforce with small eyelet rings. Add ring slots by cutting 1/2 inch wide slits and backing them with felt strips so rings slide in smoothly.
Pro tipStick a tiny strip of non-slip fabric inside so the wallet doesn't slide in your bag.
AvoidDon't make the earring holes too big - loose fit makes earrings fall and snag.
9. Turquoise quilted organizer with satin zip pockets for bracelets
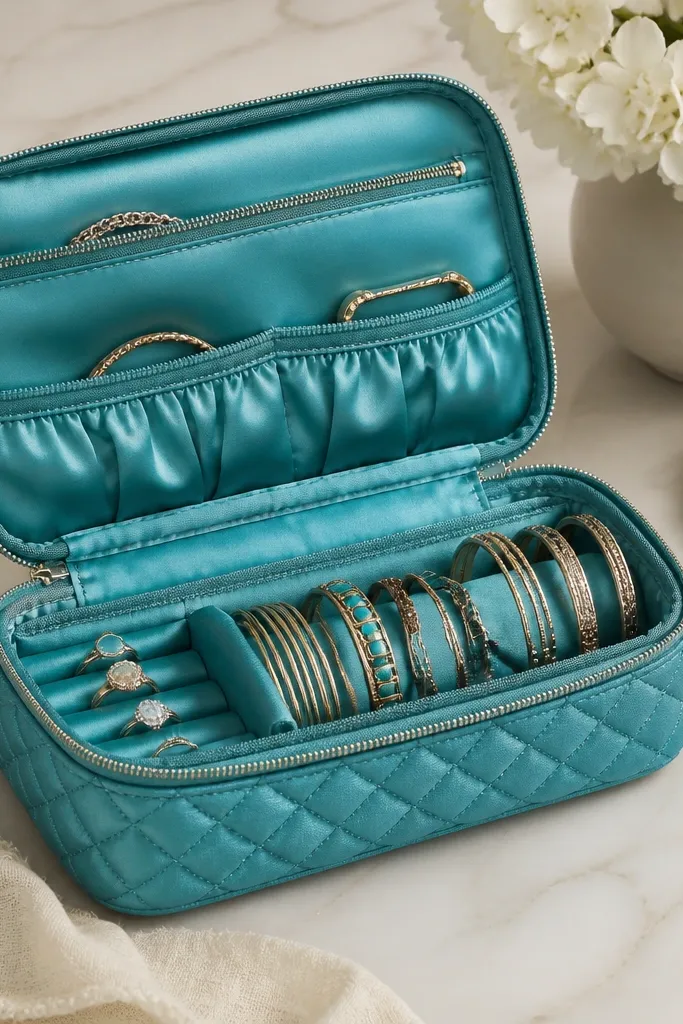
Quilting makes it look expensive because the texture reads intentional. Satin-lined zip pockets stop bracelets from rubbing and scratching. I like having separate zip pockets for bracelets because they never tangle with earrings.
Use 1/2-inch thick quilted fabric or sew your own: sandwich cotton batting between two layers and quilt in diagonal lines 1 inch apart. Add two satin zip pockets about 7 x 3 inches each. Inside the main panel, stitch a bangle strip with soft elastic barriers spaced 2 inches.
Pro tipChoose satin in a slightly darker shade than the outside fabric so scuffs don't show immediately.
AvoidSkip thin fabric for the pockets - flimsy satin collapses and makes the organizer feel cheap.
10. Monochrome felt board with mini drawer dividers and snap lid
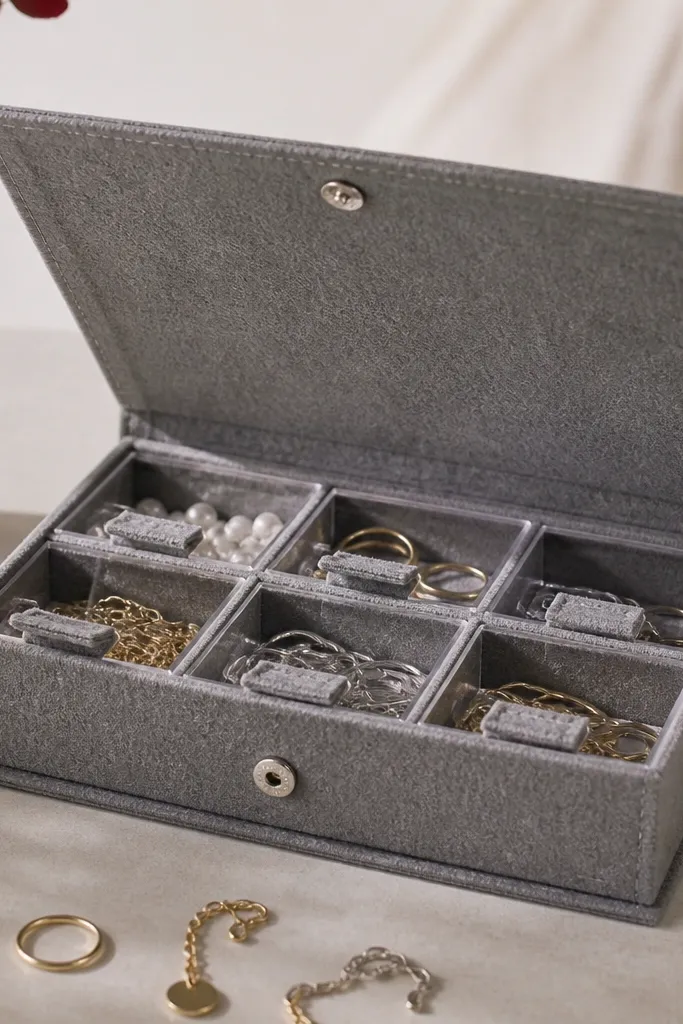
This one looks like a designer product because the dividers feel like tiny furniture. The snap lid keeps everything aligned, even when you shove it into a tote. I use it for travel days where I'm wearing one set and storing the rest quickly.
Start with a base rectangle 10 x 7 inches using thick felt plus a foam backing. Make drawer compartments from thin plastic folders covered in felt, sized about 3 x 2.5 inches each. Stitch in a track so drawers slide under the lid, then add snap closure points at the corners.
Pro tipLabel the underside of the lid with tiny fabric tags for "earrings / rings / chain" so you don't open it like a mystery box.
AvoidDon't rely on friction-only drawer fit - things pop out in transit.
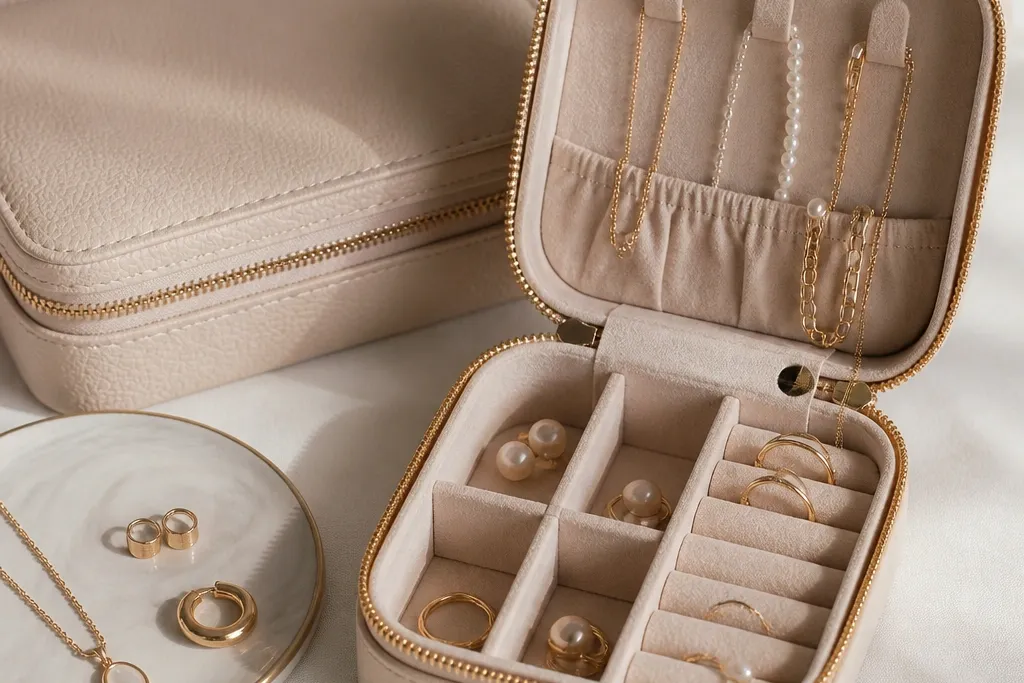
11. Gold-tone zipper pouch with felt "leaf" compartments for earrings
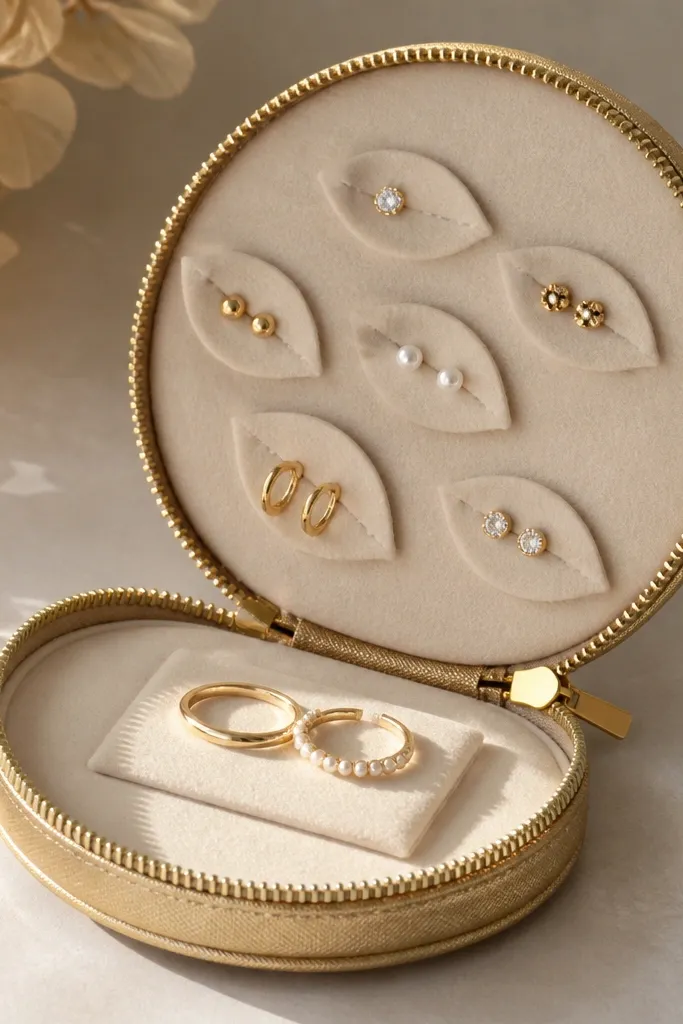
Gold-tone hardware and a warm fabric color give instant luxe. Leaf-shaped compartments keep earrings from sliding because the curved walls guide them into place. It also looks pretty when opened - it's not flat and boring.
Use a 9 x 10 inch pouch base with a gold zipper. Cut leaf compartments from 1/2-inch felt using a template: each leaf is about 3 inches long and 1.5 inches wide. Stitch a felt "floor" and glue the leaves in rows, leaving a 1/2-inch gap between them. Add a flat ring patch at the bottom using thinner felt so rings sit lower.
Pro tipUse contrasting thread in cream or light gold - it makes the stitching look deliberate instead of hidden.
AvoidSkip glue-only construction inside - compartments peel when the pouch flexes.
12. Clear-top organizer tray with removable roller for necklace wrapping
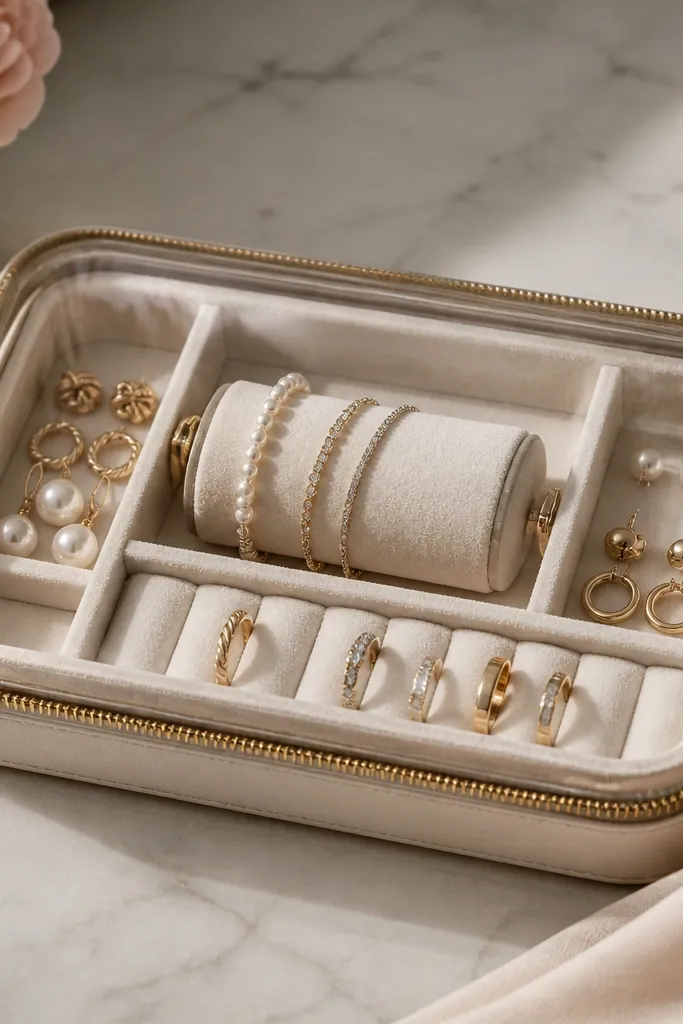
The removable roller is what makes this feel luxe and smart. You can wrap a necklace around it in one smooth motion, then store it without tangling. The clear top lets you check what you packed without opening the whole thing at your hotel.
Build a tray frame from acrylic or heavy plastic, about 11 x 8 inches. Add a base of felt and cut a center roller holder: a small cylinder 1 inch diameter wrapped in felt. Store earrings in two side wells made from foam covered in felt. Use a clear zipper cover or clear lid panel attached with zipper tape.
Pro tipWrap the necklace roller with a thin layer of satin under the felt so it slides smoothly when you wrap and unwrap.
AvoidDon't use rough felt for the roller wrap - it snags fine chains.
13. Rose quartz color organizer with ribbon ties and mini earring cards
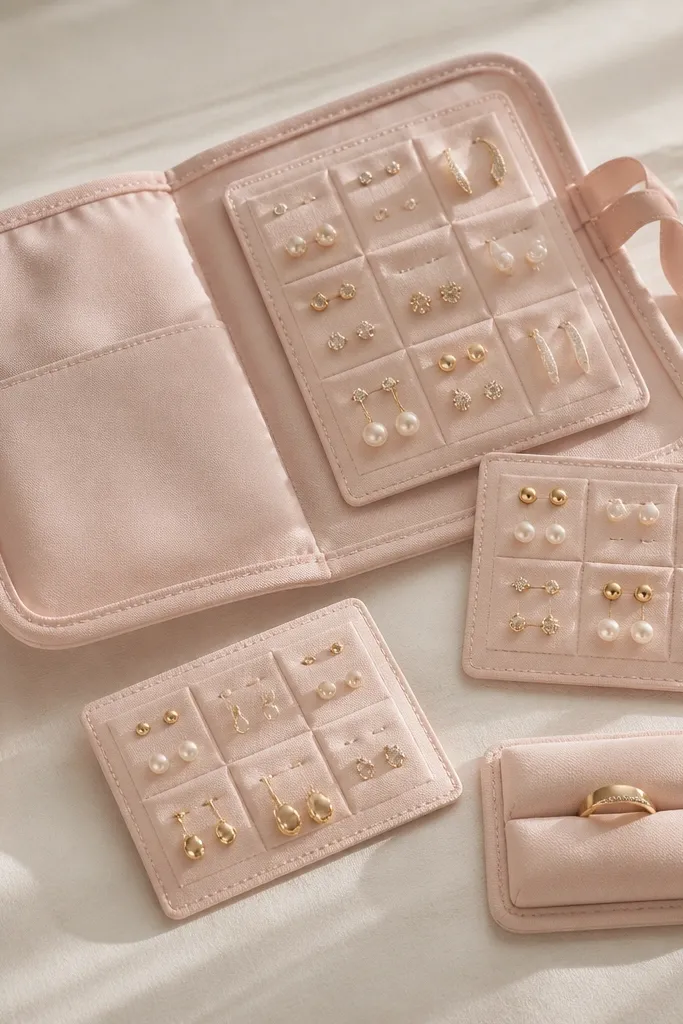
This is the romantic aesthetic version that still works. Ribbon ties keep it closed without bulky zippers, and the mini cards stop earrings from mixing. I like using blush because it photographs well and makes gold jewelry stand out under warm bulbs.
Use blush cotton sateen or micro-cotton outside, and back it with thin interfacing. Make a base 10 x 12 inches and add three mini insert cards about 3.5 x 5 inches each. Cover cards with felt and sew tiny pockets for studs sized 1 x 1 inch, spaced 1 inch apart. Attach ribbon ties at the corners so the case closes flat.
Pro tipAdd a small clear pocket behind the ring card for tiny earring backs you always lose.
AvoidDon't skip padding under the cards - hard backing makes earrings press into the fabric.
14. Candle-style ring stand inside a travel case with pull-out drawer

This setup solves the ring-sliding problem. The upright ring stand keeps one statement ring centered and easy to grab, while the drawer keeps earrings from mixing in the same space. It looks boutique because the stand is sculptural, not flat.
Use a small drawer-style container base, around 8 x 6 inches. Make the ring stand from a small foam cylinder 2 inches tall, cover with felt, and add a shallow top notch for the ring band. Build two horizontal slots from felt strips under the drawer lip for earrings. The drawer should pull out 3/4 so you can access jewelry without dumping it.
Pro tipCut a tiny circle of non-slip fabric under the ring stand base so it doesn't slide when the drawer moves.
AvoidAvoid tall stands that hit the lid - if it compresses, rings get scratched.
15. Two-layer satin and felt wristlet organizer with magnetic clasp
A wristlet organizer looks luxe because it's wearable, not just stored. The satin exterior gives that smooth shine, while felt keeps jewelry from shifting. I use a magnetic clasp because it snaps shut quickly when you're juggling a passport and coffee.
Make a wristlet pouch about 8 inches wide. Line it with 1/4-inch felt and add two compartments: elastic loops for earrings (1 inch tall loops) and a necklace coil section with a stitched spiral guide. Use a magnetic snap closure with a felt guard so it doesn't scratch metal plating.
Pro tipPut the magnetic clasp on a felt-covered tab, not directly on satin - it keeps the snap from snagging fabric fibers.
AvoidDon't use a weak snap - the wristlet opens in your bag and ruins the whole point.


