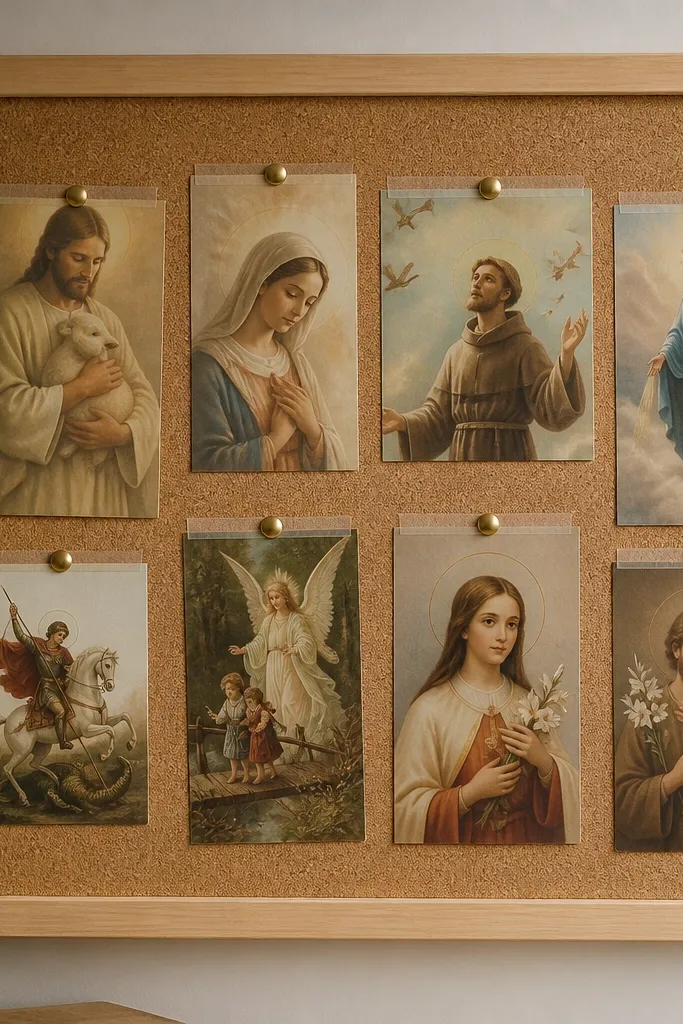
1. Acrylic-covered verse cards in a 12x18 frame
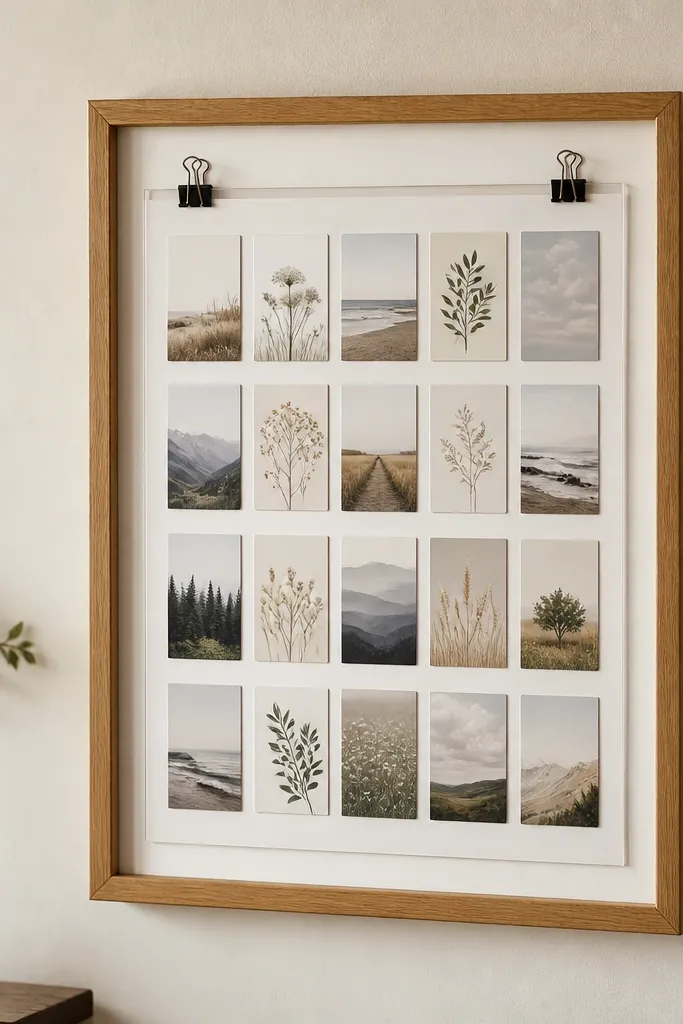
This setup looks clean because the acrylic gives you one smooth viewing surface. The white backing makes the black text pop, and the cards stay protected from fingerprints and light scuffs. I used binder clips so the cards can slide in and out without peeling anything off the backing.
Use a 12x18 inch frame with a backing board. Cut a sheet of 3/16 inch acrylic to fit the inside opening, leaving 1/8 inch clearance on each side. Print cards on 80 lb cardstock, then mount them with binder clips along the top edge so you can swap them fast.
Pro tipPrint your verses in two font sizes and keep line breaks consistent so the board looks styled even when you swap cards.
AvoidDon't glue paper directly to the backing - once it wrinkles or lifts, it looks messy fast.
2. Pegboard prayer board with stain-proof hooks
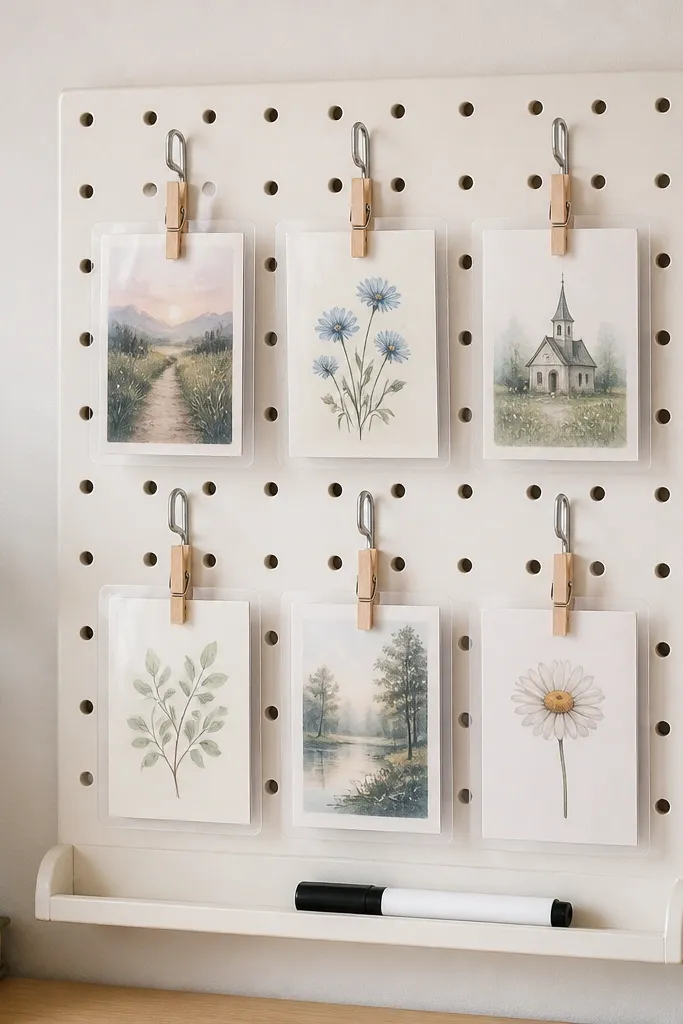
Pegboard is low maintenance because it's already durable and easy to rearrange. Laminated cards resist smudges, and metal hooks don't loosen like glued-on hardware. The off-white paint keeps it bright without looking clinical.
Buy a 12x12 inch pegboard panel. Paint with a bonding primer first, then two coats of satin off-white. Add hooks or small screw-in pegs spaced 2 to 3 inches apart, then clip laminated cards using small clothespins.
Pro tipLabel the back of each card with a tiny number in pencil so you can put them back in the same order after swapping.
AvoidSkip glossy paint - it shows glare that makes the cards harder to read.
3. Magnetic prayer board on a sealed wood panel
Magnetic boards are my favorite for low maintenance because nothing is stuck permanently. You can move cards in seconds, and magnets handle daily use without tearing paper. Sealing the wood matters - it keeps the surface smooth so magnets stay put.
Use a 16x20 inch plywood panel, sand smooth, then wipe clean. Seal with two coats of matte polyurethane. Cut laminated verse strips to 1x6 inches, then attach a small magnet to the back of each strip with super glue gel.
Pro tipUse rare-earth magnets (about 1/2 inch) so the strips don't slide when the board shifts.
AvoidDon't skip sealing - raw wood can grab adhesive and stain the back of your cards.
4. Ribbon and clothespin prayer board on a foam core backing
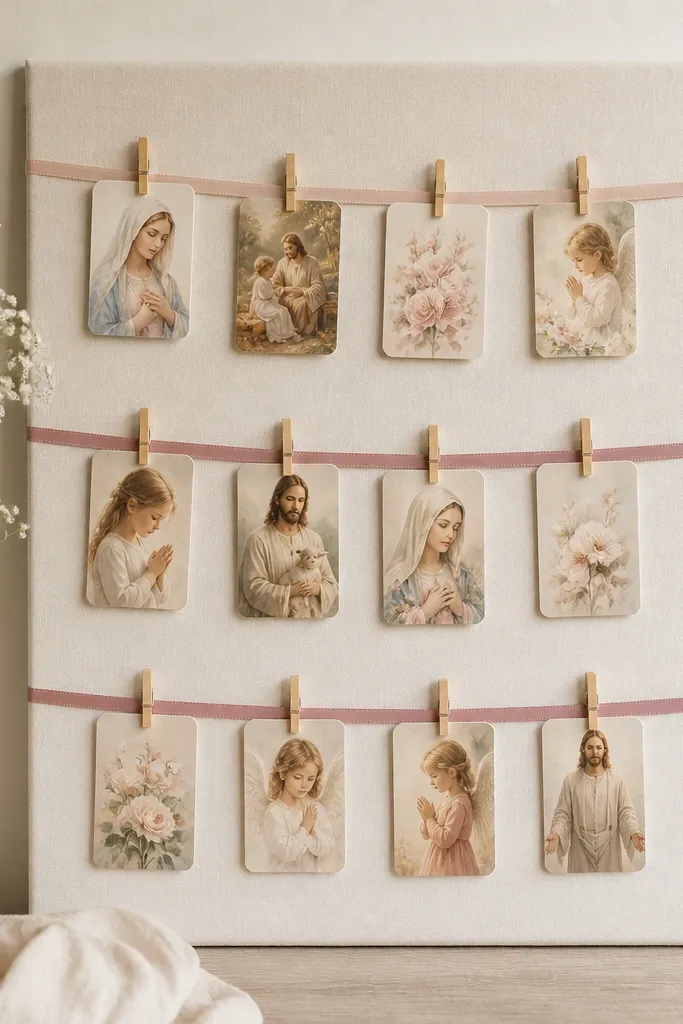
This one looks airy and soft, and it stays low maintenance because the cards clip on and off. Fabric over foam core hides edges and makes the board feel intentional. The ribbons also cover small gaps where you might see staples or tape.
Cover foam core with fabric using spray adhesive or a thin layer of matte medium. Stretch three ribbon rows across the back with a little slack, then staple or tack the ends on the back. Print cards on cardstock, round the corners with a corner punch, and clip them onto the ribbon using mini clothespins.
Pro tipChoose one ribbon width (about 1/4 inch) so the board looks cohesive instead of random.
AvoidAvoid glossy ribbon - it reflects the light and makes the cards look washed out.
5. Chalk marker prayer board with vinyl labels
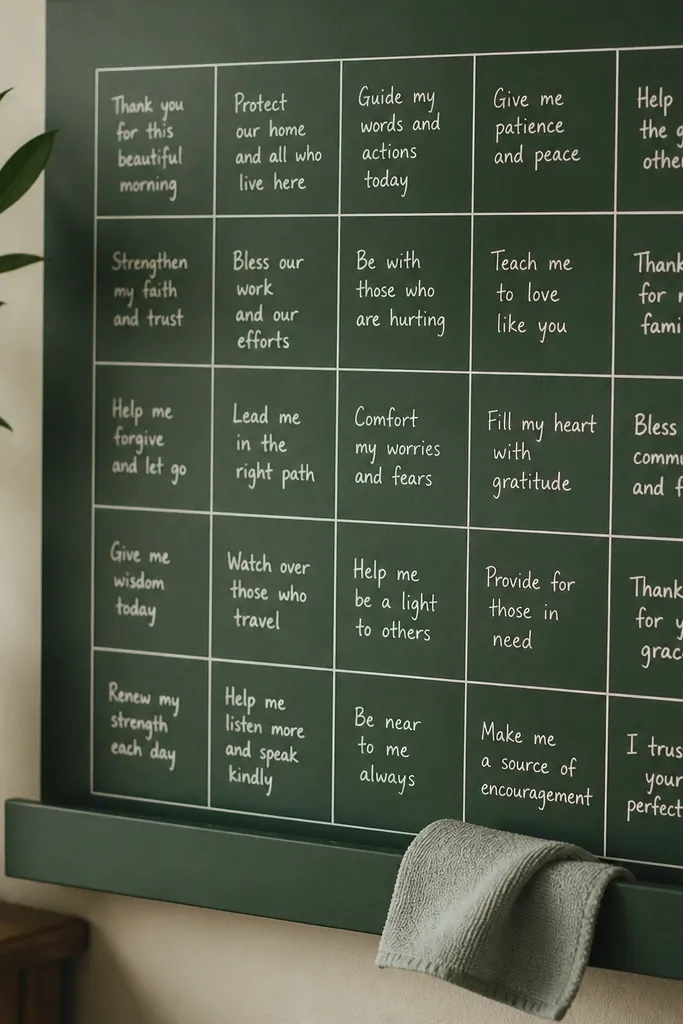
This design is low maintenance because you update by wiping, not replacing. Vinyl labels keep your layout neat, so the board always looks structured even as you change words. The dark green background makes white marker and vinyl pop.
Paint a wooden board with matte chalkboard paint or matte interior paint in deep green. Apply removable vinyl squares (about 2.5x2.5 inches) and press edges firmly. Write prayers with a chalk marker, then wipe with a damp microfiber cloth when you want changes.
Pro tipTest your marker on a scrap first; some chalk markers smear on smoother paint.
AvoidDon't use permanent marker - you'll regret it the first time you want to wipe.
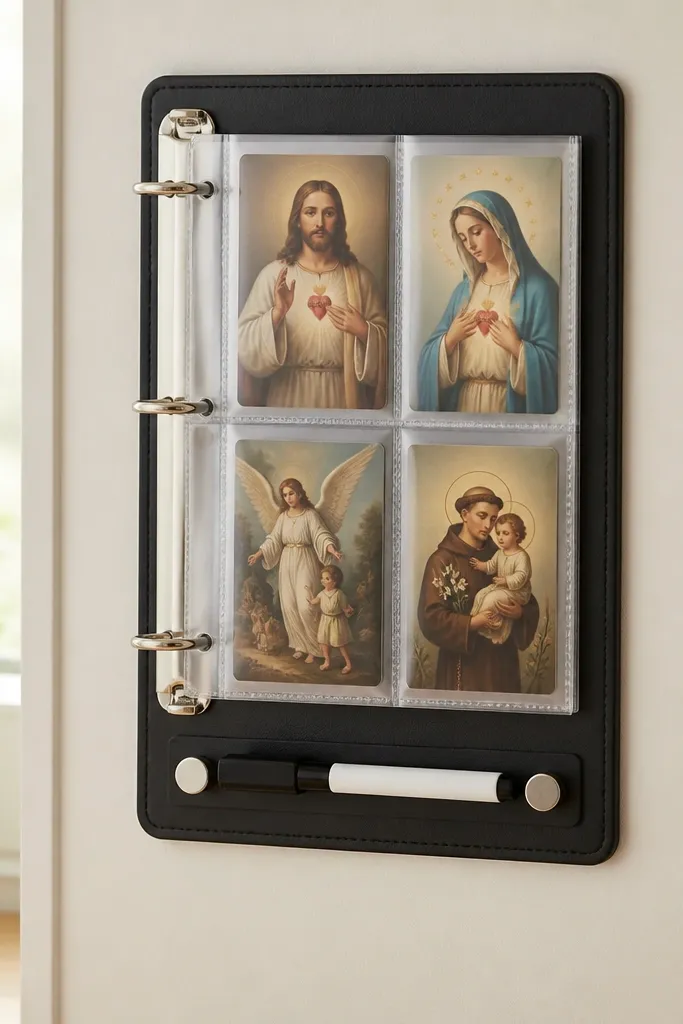
6. Laminate sleeve prayer board for quick swaps
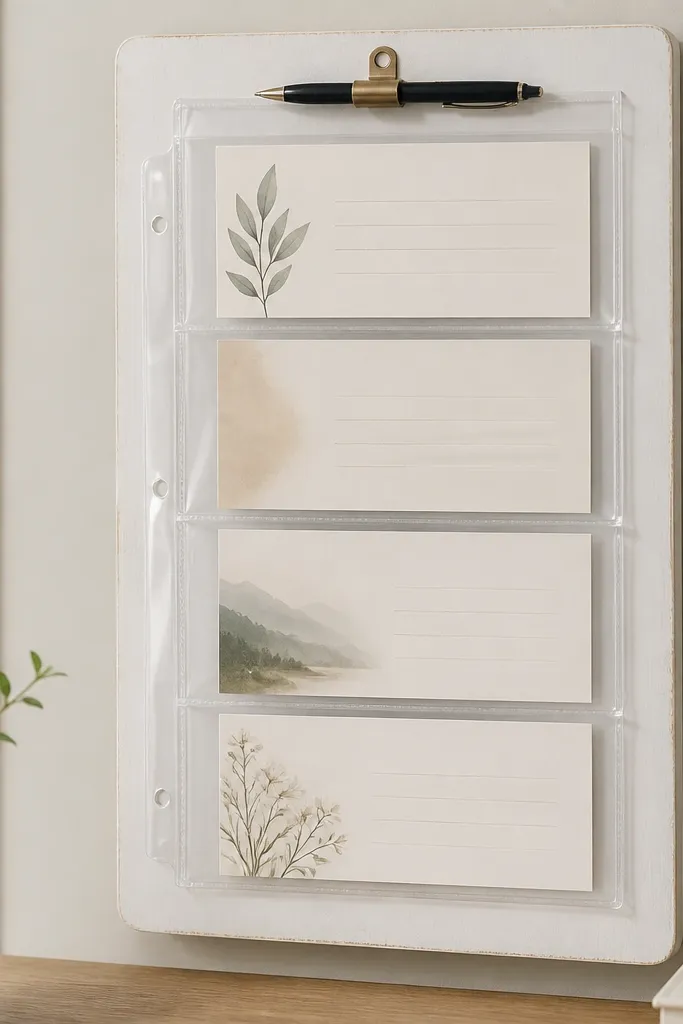
Laminate sleeves protect your cards from spills and thumb smudges. You can slide in new prompts without peeling or reattaching anything. The pockets also keep cards aligned so the board looks organized from across the room.
Attach a clear laminate sheet or use individual laminate pockets mounted onto a backing panel. Leave enough space between pockets for finger access. Print cards at consistent size (for example 4x6 inches), then slip them into the pockets.
Pro tipUse a thin strip of black washi tape around each pocket edge to hide minor mounting imperfections.
AvoidAvoid thin, wrinkly laminate - cheap sleeves look cloudy and cheap fast.
7. Cork prayer board with clear tape edges
Cork holds pins well and doesn't fight you when you add or remove cards. Clear tape along the top edge keeps card corners from curling, which happens a lot with glossy paper. Brass pins look warm against cork and don't rust as fast as cheap steel pins.
Use a framed cork board, ideally 12x16 or 16x20. Pin cards with brass push pins, then add a small clear tape strip over each top corner. Choose matte cardstock for the verses so they don't glare.
Pro tipPin one "home verse" card at eye level and keep it there for stability while you rotate the rest.
AvoidSkip paper thinner than 60 lb - it bends and looks tired quickly.
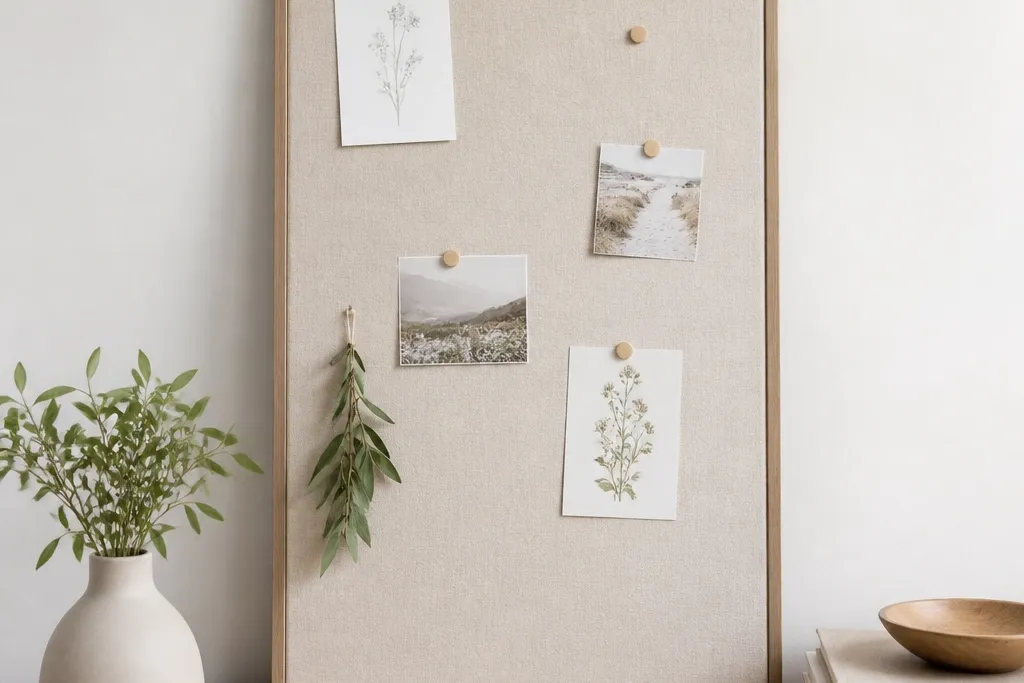
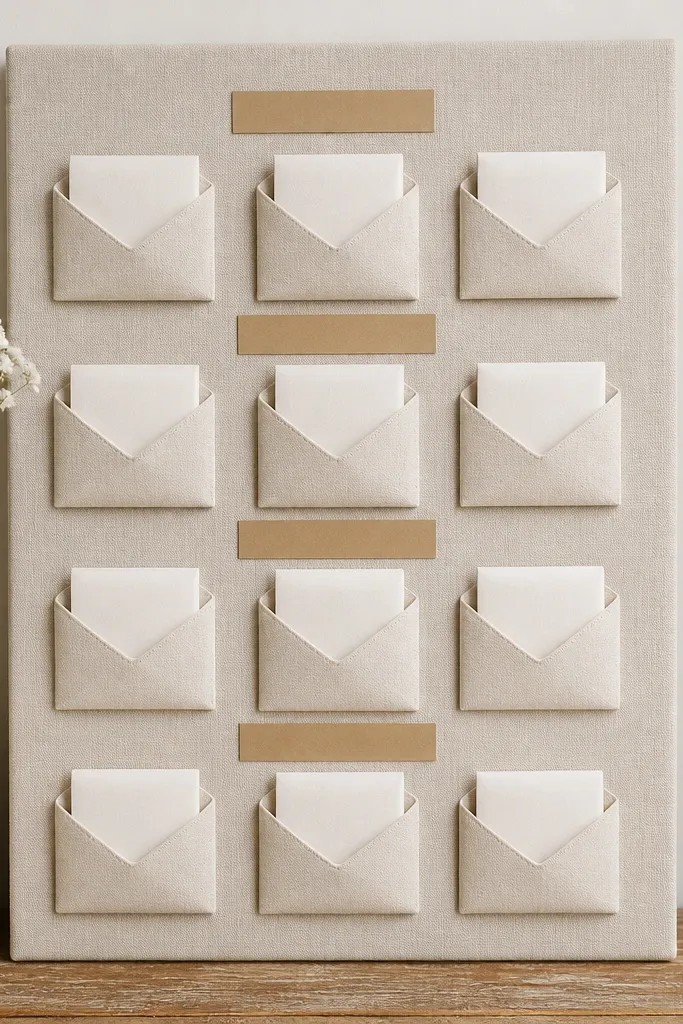
8. Picture frame prayer board with a washable fabric backing
Fabric backing makes the board feel soft and warm, and it hides the mess of tape ends. Binder clips keep cards removable, and the linen texture adds depth without needing extra decorations. I like this when the board sits in a bedroom or nursery area where everything is light and gentle.
Use a deep picture frame so you have room for clips. Stretch linen across the backing and staple on the back. Place binder clips at consistent intervals to hold 3x5 inch cards, then add a small handwritten theme label under the grid.
Pro tipWash the linen first, then press it - wrinkled fabric makes the layout look sloppy.
AvoidDon't use slippery satin fabric; clips slide and cards drift.
9. Wood slat prayer board with removable mini frames
Slats keep your cards off a flat surface, which makes the board feel designed instead of cluttered. Mini frames make everything look finished, even when you change the content. You also get a clean border around each verse for a consistent look.
Mount 1x2 inch wood slats spaced 3 to 4 inches apart. Use small peg hooks or removable brackets so mini frames slide on. Print verses on cream paper and mount behind clear acrylic or plastic so the paper stays protected.
Pro tipKeep your mini frame color consistent - I use black for contrast or natural oak for warmth.
AvoidAvoid mixing frame sizes randomly; it makes the board look like a craft pile.
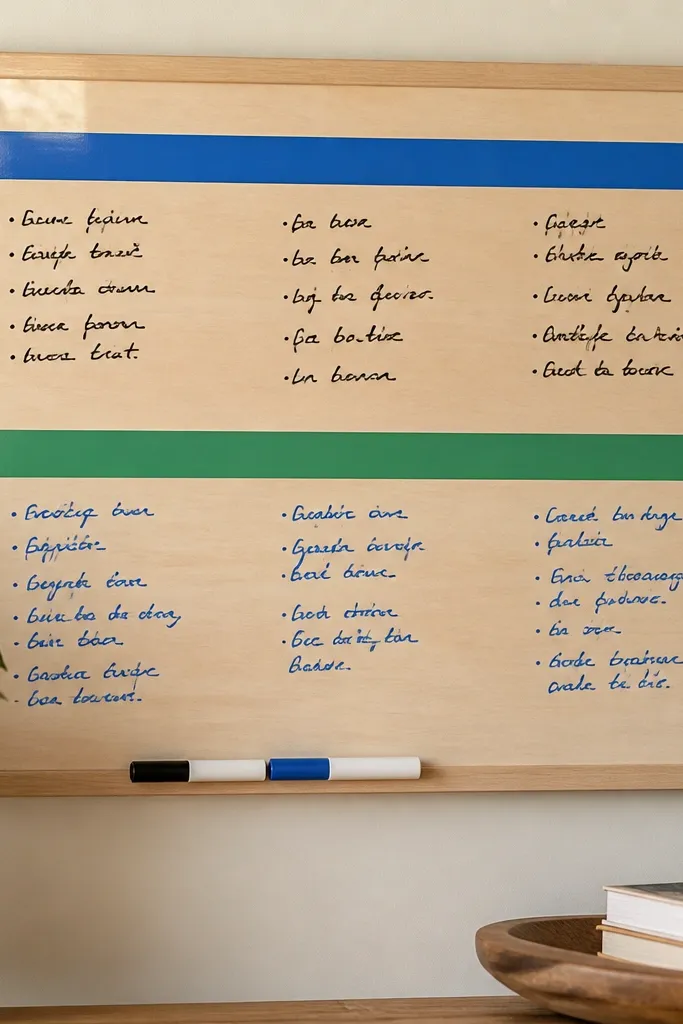
10. Whiteboard prayer board with monthly stickers
If you like changing prompts weekly, a whiteboard is the easiest low maintenance answer. Vinyl month labels keep spacing consistent, so it never looks like messy scribbles. The surface wipes clean in seconds and doesn't degrade like paper.
Use a small 12x16 whiteboard panel. Apply vinyl labels for months or prayer categories, like "Family" and "Guidance." Write with low-odor whiteboard markers, then erase with a microfiber cloth for best results.
Pro tipStick a small magnet strip under the board for a spare marker so you don't lose it.
AvoidDon't use dry erase markers on glossy ink labels - smears happen fast.
11. Floating shelf prayer board with vertical photo clips
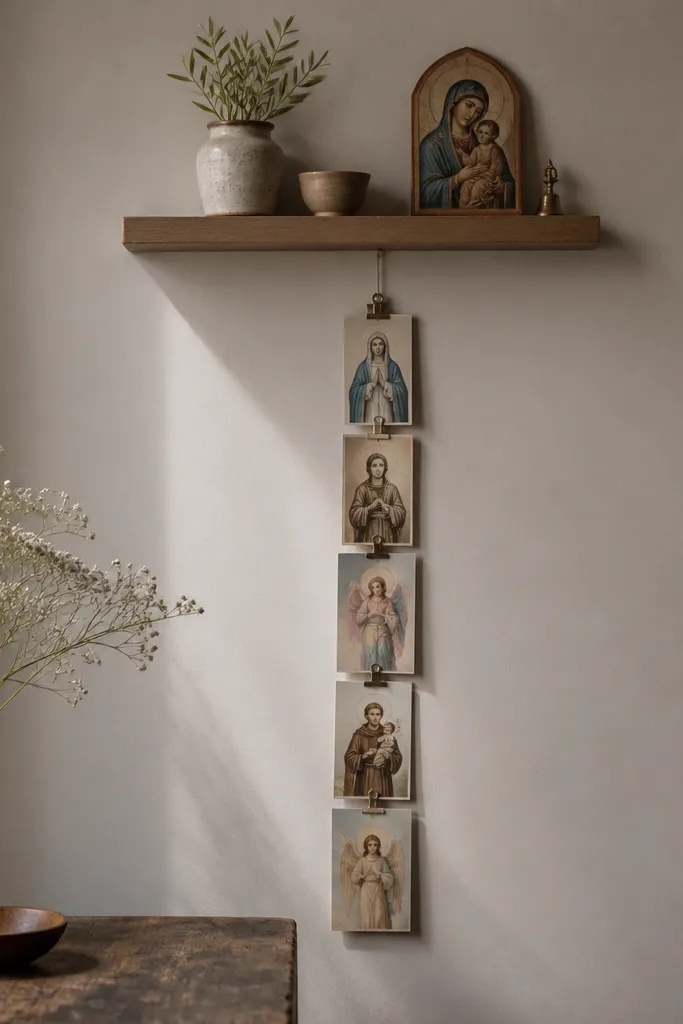
This works because it uses gravity and a simple clip system to keep cards aligned. The shelf hides hardware and gives you a place for a candle or small journal. It's low maintenance because you're not constantly re-sticking anything.
Mount a shelf 8-10 inches above where you want the cards to hang. Add a vertical dowel or string line under the shelf, then attach photo clips along it. Use laminated cards sized around 3x4 inches so they resist curling.
Pro tipUse two clips per card - one at the top edge and one at the middle - so cards don't twist.
AvoidAvoid using heavy cardstock without lamination - it sags and looks uneven.
12. Fabric-covered magnetic board with metal corner brackets
Fabric makes the board look soft and homey, and magnets keep everything removable. Corner brackets stop fabric from loosening over time, which is where most DIY boards fail. The magnets also let you adjust spacing when you add new tiles.
Start with plywood and seal it with matte polyurethane. Wrap with fabric and pull tight, then fasten the fabric on the back. Screw metal corner brackets at all four corners on top of the fabric to create a neat edge, then glue small magnets behind the verse tiles.
Pro tipUse 1-inch magnets for tiles up to 3x3 inches so they stay flat.
AvoidDon't stretch fabric loosely - it puckers and makes the magnets sit unevenly.
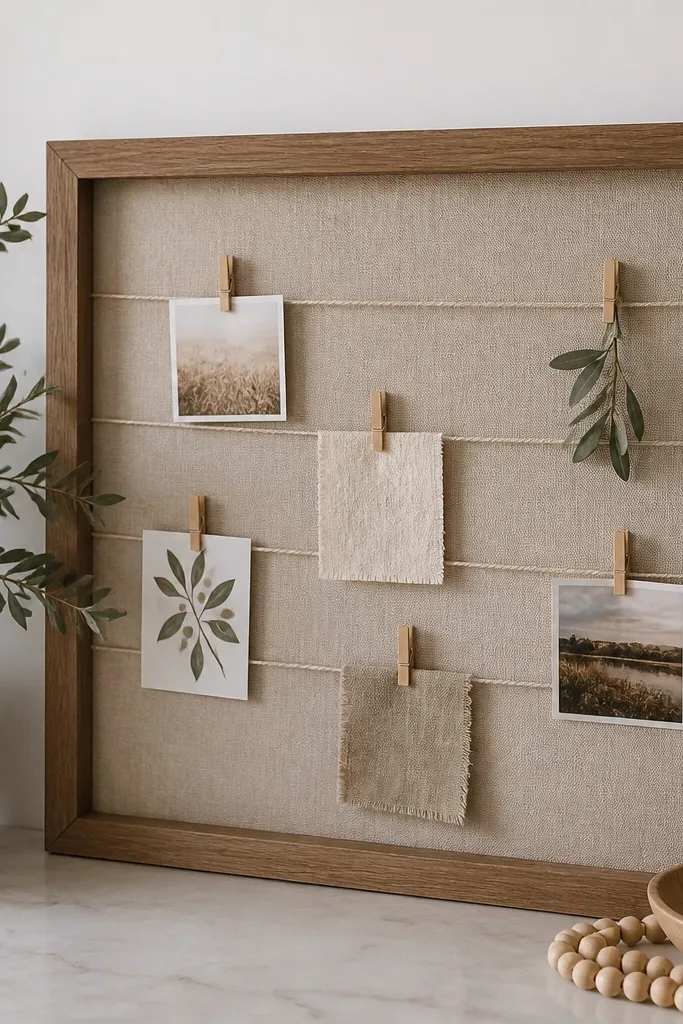
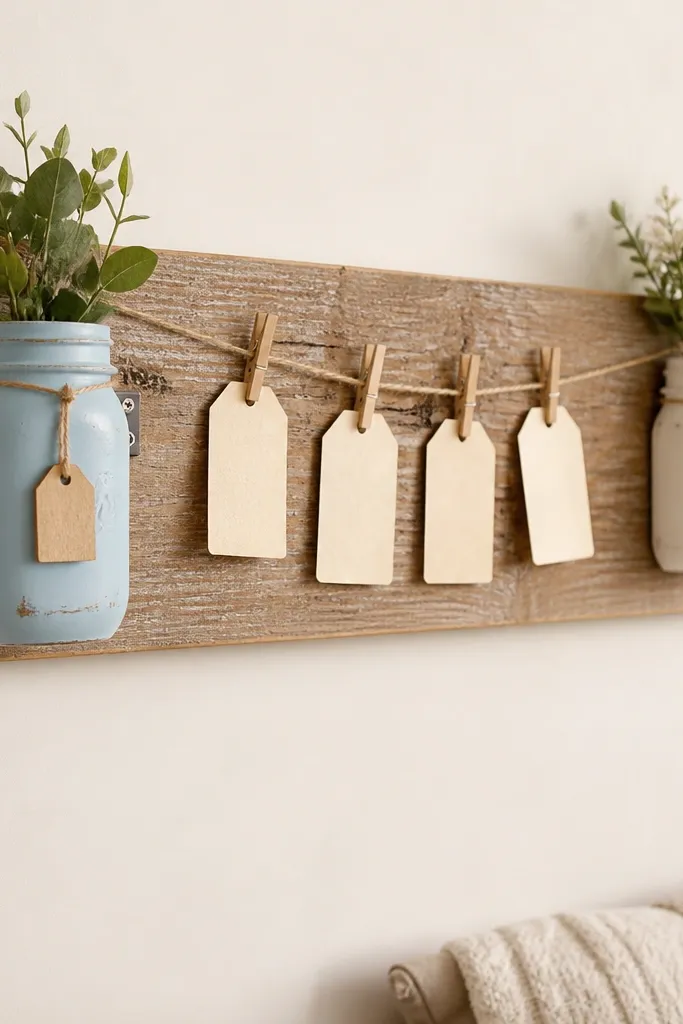
13. Wooden bead prayer board with thread-hung mini cards

Beads add texture without extra maintenance. The thread-and-clothespin system lets you swap cards in seconds, and the beads keep the spacing consistent so the board looks tidy. This is a great option if you want a handmade look but still need wipeable cards.
Mount a strip of dowel or bead garland across the top of a board. Drill small holes for thread runs, then tie thread securely. Clip laminated mini cards to the thread with small clothespins.
Pro tipUse consistent card thickness and lamination so clothespins clamp the same way every time.
AvoidAvoid stretchy thread - it droops and makes the cards look sloppy.
14. Shadow box prayer board with sealed inserts
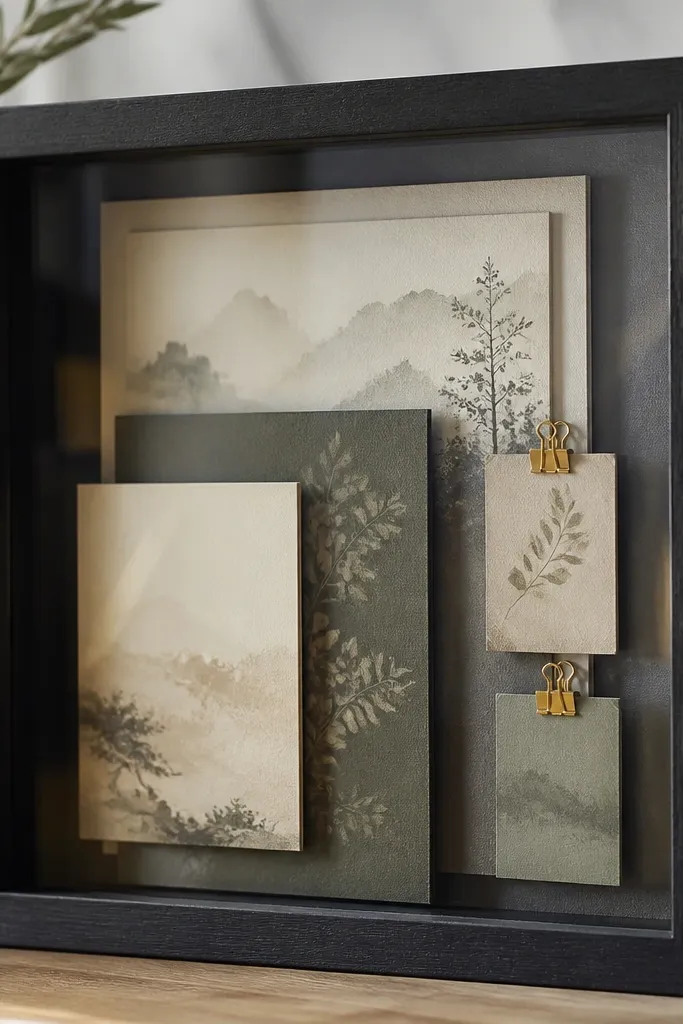
Shadow boxes look polished because you get depth and a finished border. Using glass or clear acrylic over sealed inserts keeps the paper from fading and protects from dust. You can still swap inserts by using clips instead of permanent glue.
Use a deep shadow box (at least 2 inches deep). Mount your first set of cards onto thin cardstock panels, then attach those panels with removable clips. If the box has glass, replace it with acrylic if you want easier cleanup and less breakable material.
Pro tipKeep inserts under glass at least for the main verses; open areas collect dust quickly.
AvoidDon't use glossy photo paper - glare kills readability.
15. Corner triangle prayer board with command strips
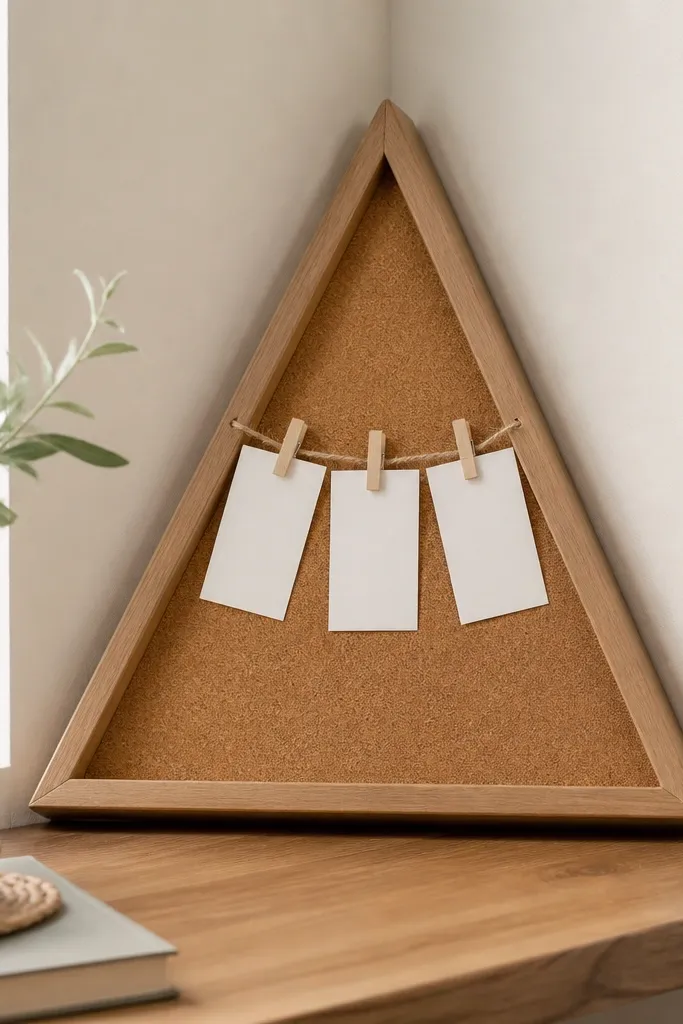
This layout fits awkward corners where you want something meaningful without taking up wall space. The triangle shape also hides uneven spacing because the lines converge. Low maintenance comes from cork holding pins and clothespins holding cards without glue.
Make a triangle using plywood or thick cardboard sealed with matte medium. Cover the center with cork and pin or clip laminated cards. Mount the triangle using heavy-duty command strips so you don't drill and then regret it later.
Pro tipHang it at about eye level, then keep card rows parallel to one side so it looks intentional.
AvoidAvoid placing it too high - tiny cards become unreadable from a couch.
16. Stainless ring binder prayer board for rotating themes
This is low maintenance because you're basically using a system that already exists to organize paper. Rotating themes becomes simple: remove a page protector and slide in a new one. The binder rings also keep everything aligned so the board looks neat even when you update often.
Use a small binder, then mount it with two screws into wall studs or heavy-duty anchors. Put printed verse cards into sheet protectors sized to fit your binder. Add one divider page per category and label them with vinyl.
Pro tipPrint your cards in identical margins so the sheet protectors look consistent across pages.
AvoidDon't mount with weak hooks - binder weight plus paper makes it sag.
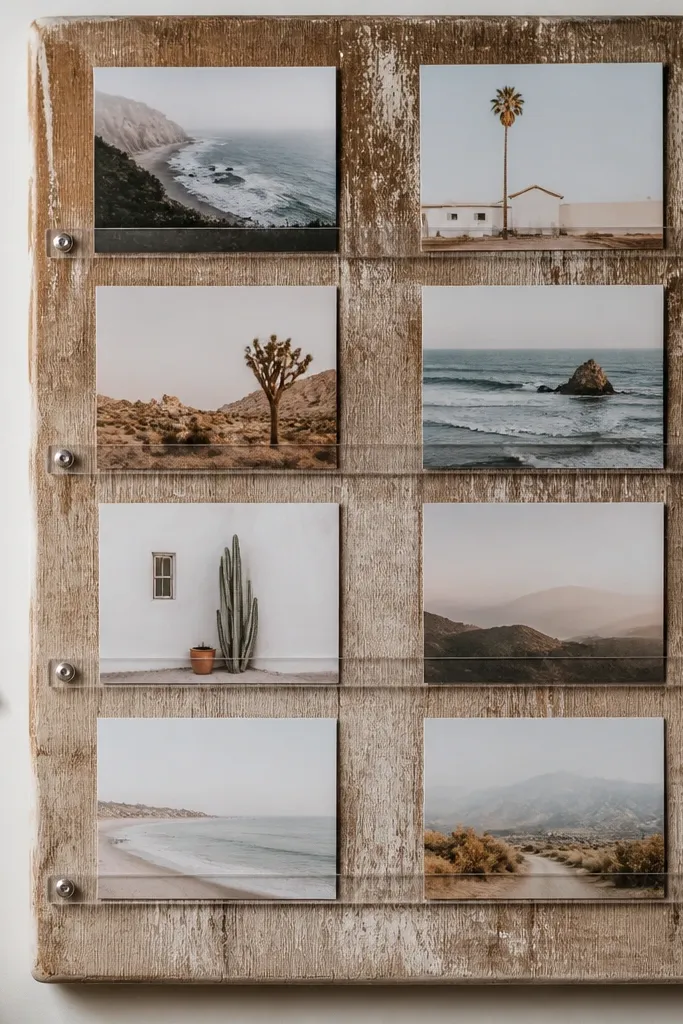
17. Clear acrylic pocket wall for prayer requests
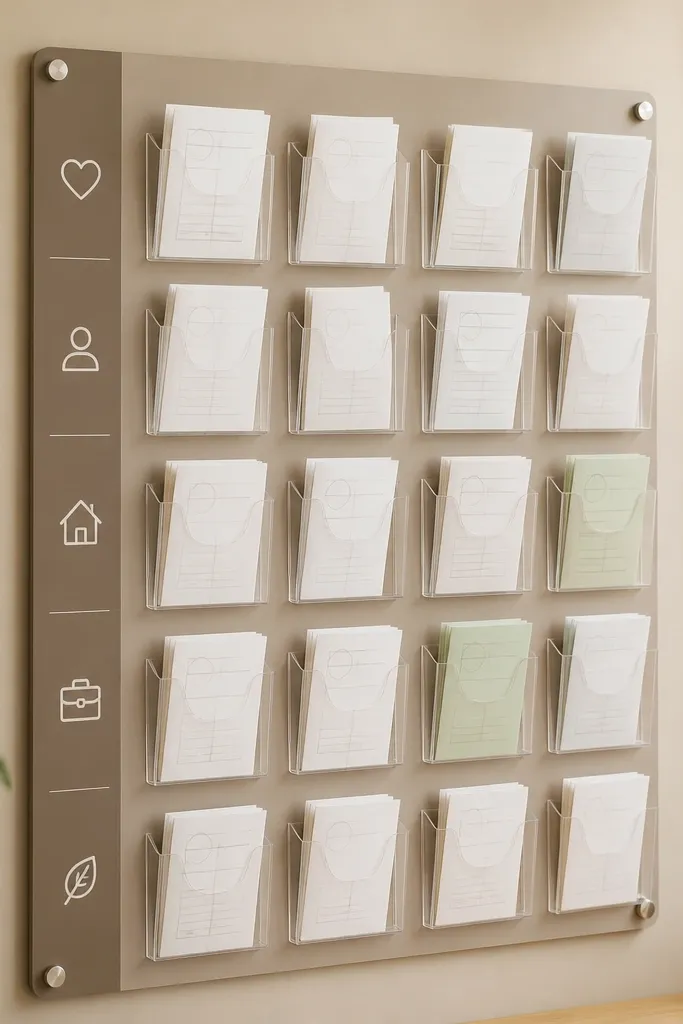
Clear pockets look modern and keep folded requests contained. You can wipe the acrylic pockets clean without disturbing the papers inside. The grid layout makes it easy for anyone in the house to place a new request.
Use a sealed wood or plywood backing panel. Attach clear acrylic pockets using screws or strong adhesive strips designed for clear plastic. Fold prayer cards to fit the pocket opening, then add category labels along the side.
Pro tipKeep pocket sizes consistent (for example 3x4 inches) so the grid looks uniform.
AvoidAvoid cheap acrylic that scratches easily - it turns cloudy after a few wipes.
18. Tea-stained paper prayer board sealed under glass
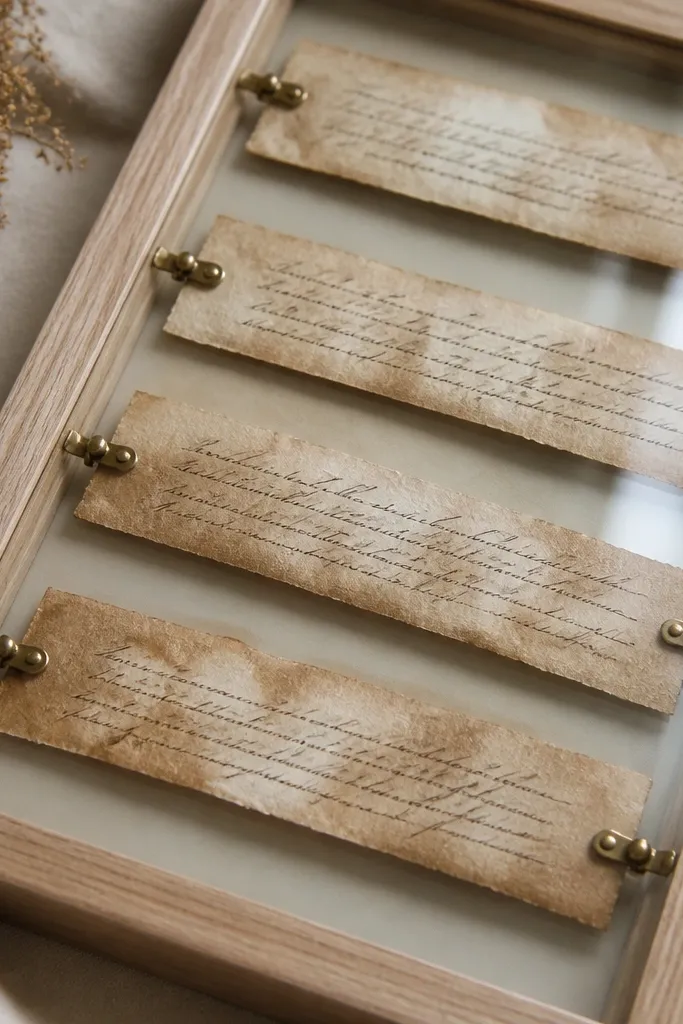
Tea-stained paper gives you that warm, old-book look without needing expensive fonts. The glass keeps everything protected from humidity and dust, which is the difference between pretty and ruined. Brass clips keep the strips adjustable so you can swap one verse without disturbing the rest.
Make paper strips by lightly tea-staining cardstock and letting it dry flat under a book. Seal the strips with a thin matte spray so they don't transfer dye. Mount strips under a glass or acrylic cover and secure with brass clips at each end.
Pro tipUse dark brown ink pens for the cleanest contrast against tea tones.
AvoidAvoid skipping sealing - the tea color smears onto your fingers and sleeves.
19. Watercolor prayer board with laminated strips and twine
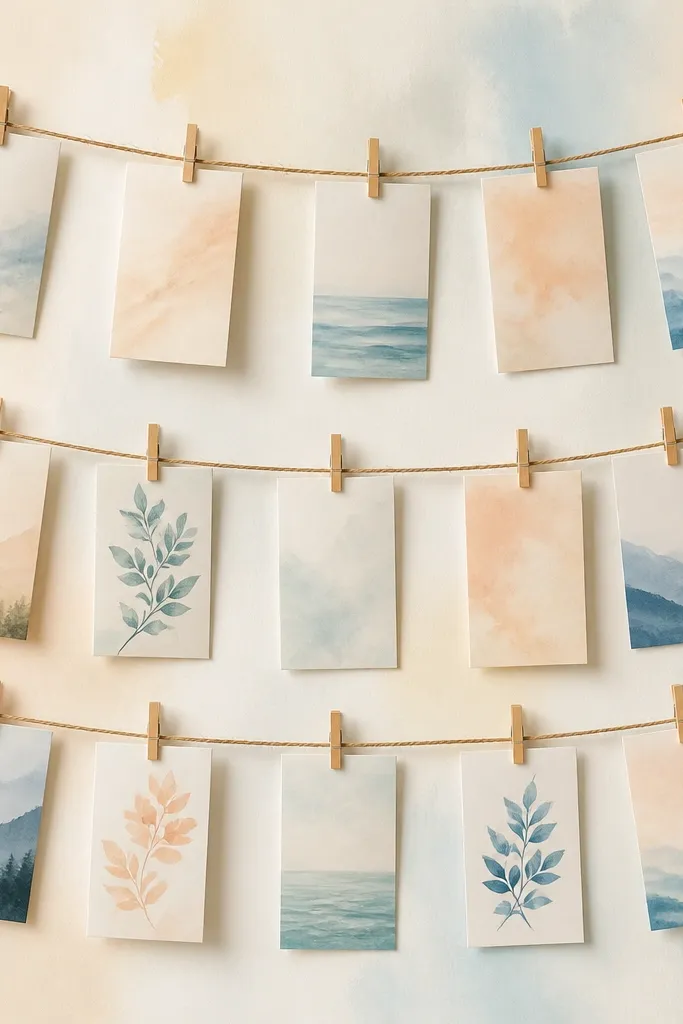
The watercolor background adds softness, but the laminated strips keep maintenance low. Twine arcs look handmade and forgiving if your spacing isn't perfect. I like this when you want a calm feel without building a complicated mounting system.
Paint a watercolor wash on sealed plywood, then let it cure fully. Hang twine lines using small eye hooks and keep the arcs subtle. Print verse strips, laminate them, and clip them across the twine lines.
Pro tipUse a single color palette for the text - black ink and one accent color on headings.
AvoidDon't use thick twine - it crowds the cards and makes the board feel busy.
20. Minimal linen prayer board with removable mini envelopes
Envelopes keep prayers private and tidy, and Velcro makes removal easy. The linen keeps the look warm, and the mini envelopes give structure without bulky decor. This is low maintenance because you're swapping contents, not redoing the board.
Cover a board with linen and add Velcro dots in a grid pattern. Make or buy mini envelopes sized to fit 4x6 folded cards. Stick one Velcro patch to the back of each envelope flap area so the envelope sits flat.
Pro tipUse kraft paper labels with a fine-tip pen so the text stays crisp against linen.
AvoidAvoid paper envelopes without a lining - they absorb moisture and crumple.
21. Painted mason jar prayer board with card tags on twine
Jars add a functional element so your board doesn't feel like decoration only. Use them to hold prayer request slips or a small stack of blank cards. The twine tags are easy to swap, and the jars protect the written slips from getting tossed around.
Mount two small jars on a sealed board with jar brackets or strong mounting hardware. Paint the board in a muted color like sage green, then let cure. Add twine lines across two screw hooks, then attach tag-shaped laminated cards with mini binder clips.
Pro tipLabel jars with category words in simple block letters like "Needs" and "Thanks."
AvoidDon't overload the jars - heavy stacks make the board look cluttered.
22. Wood pallet style prayer board with screw-in card rails
This style looks rustic but stays practical because rails control the card position. Acrylic rails let you slide cards in and out and wipe dust off the front. You get a lot of visual texture from the wood, so you don't need extra decorations.
Sand and seal a pallet-style plank board, then mount two horizontal acrylic rails using small screws. Leave a 1/8 inch gap for card movement. Print cards sized to fit between rails, then slide them under the acrylic lip.
Pro tipSeal the wood with matte varnish, not glossy, so glare doesn't fight the cards.
AvoidAvoid leaving raw wood - it sheds splinters and stains your hands.
23. Magnet-backed prayer board with fabric ribbon borders
The ribbon border makes the board look finished while the magnets keep the content flexible. I like the magnet plaques because they're easy to wipe and you can replace one plaque without redoing everything. The border hides any slight unevenness where the backing meets the frame.
Seal a plywood base and paint it matte white. Glue fabric ribbon around the edges with a thin fabric-safe adhesive, then let dry flat. Make verse plaques from cardstock sealed with laminate, then glue small magnets to the back.
Pro tipUse a rectangle layout: one plaque per category across the top, then rotating weekly prompts below.
AvoidDon't use heavy ribbon - it warps and makes the border ripple.
24. Clear nail polish sealed prayer cards on a cork base
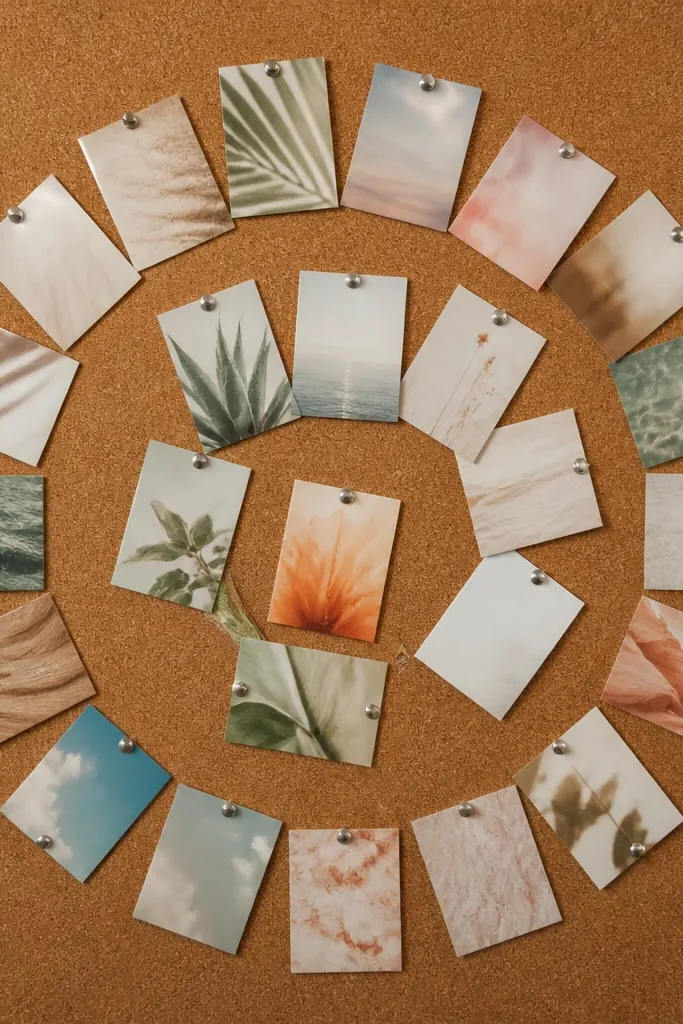
This is a trick I learned after a paper card got smudged during a busy morning. A thin, even coat of clear polish seals the ink so it wipes clean. Cork keeps the structure stable, and the thumbtacks are easy to remove when you rotate cards.
Print verse cards on cardstock and let ink dry completely. Paint a thin layer of clear nail polish over the front and sides, then let cure 24 hours. Pin to cork using thumbtacks and arrange in a spiral or grid for clean flow.
Pro tipUse a foam brush for the polish so you don't get brush streaks across the text.
AvoidAvoid thick layers - they dry tacky and look uneven.
25. Dry-erase prayer board on wood with removable category strips
Dry-erase on wood is low maintenance because you can change your prayers without replacing anything. Category strips keep your writing from spreading all over the surface. I like using two colors of marker so the board reads like a plan, not random notes.
Sand the wood smooth and apply a dry-erase coating kit meant for wood. After curing, apply removable vinyl tape strips as category dividers. Write with dry-erase markers; wipe with a damp cloth, then dry with microfiber.
Pro tipPut your main verse in a framed box area using tape, then keep it there for consistency.
AvoidDon't use cheap paint under dry-erase coating - it stains and ghosts under wiping.


