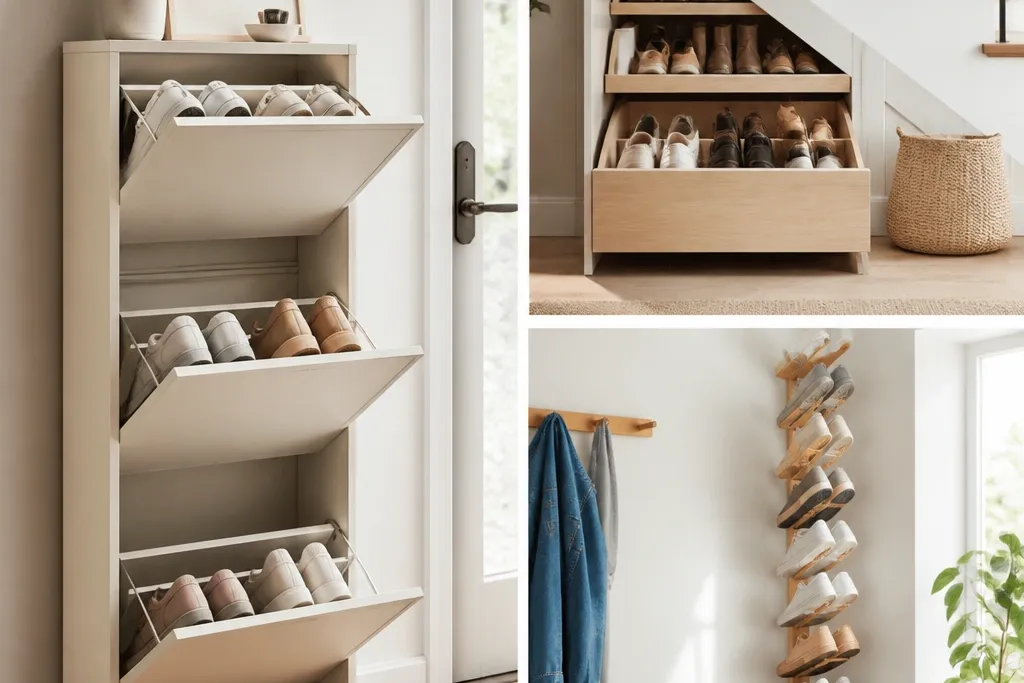
1. Door-Swing Shoe Cubbies on a Rail
This setup uses the door area you already waste. The cubbies are shallow and vertical, so you keep the floor clear while shoes stay visible. I like small, uniform compartments because you can line up pairs by toe direction and it looks intentional. The rail keeps everything straight even if your wall isn't perfectly level.
Use a 1x2 wood rail or a metal slotted rail, mounted to studs if you can. Make cubbies from 1/2-inch plywood or store-bought cube dividers; target 8 inches wide per cubby and 10 inches deep max. Add a 3/4-inch lip on the front edge so heels don't slide out when you grab quickly.
Pro tipPaint the rail and cubbies the same matte color as your trim so the whole thing reads like built-in storage.
AvoidDon't mount cubbies using drywall anchors only; after a few months of weight, they start to tilt.
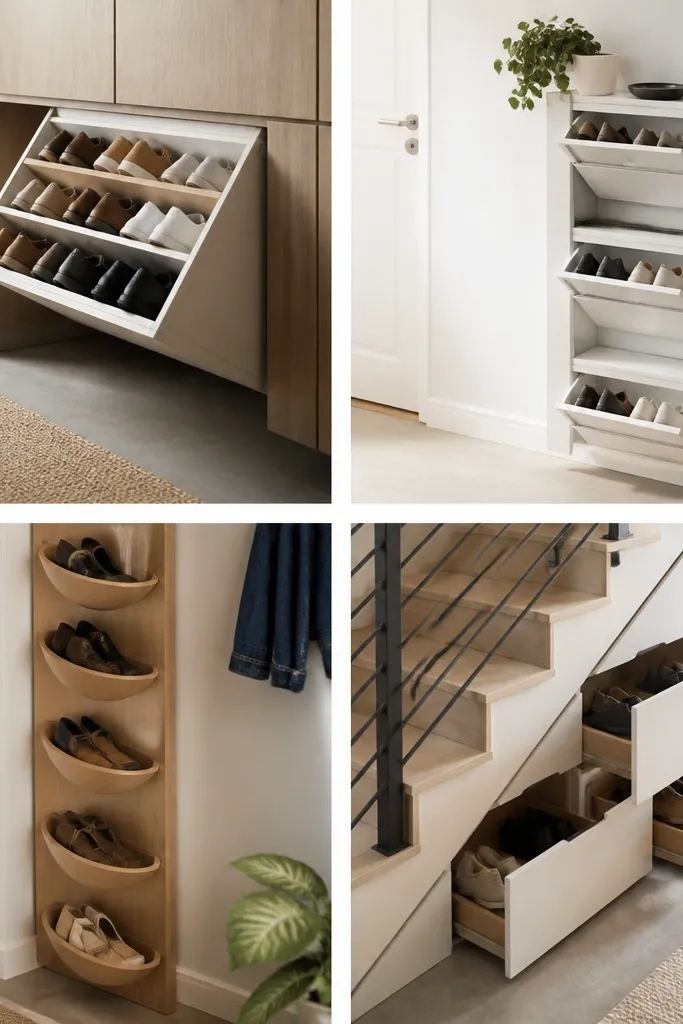
2. Under-Bench Slanted Shelf for Boots
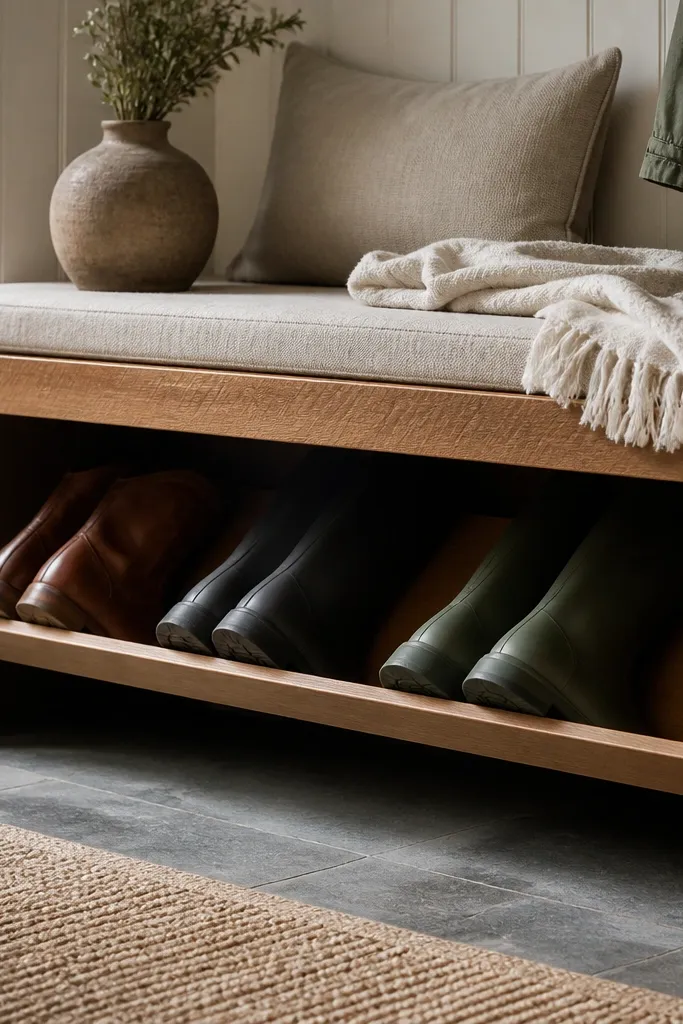
Boots look better when they're supported and angled, not shoved flat. A slanted shelf lets the shaft rest without collapsing, and it keeps the opening clean. I've built this under a bench because it hides the storage and still lets shoes breathe. The angle also prevents the toe tips from poking out into the walkway.
Build a shelf frame from 1x2s and set the shelf at about a 15-degree tilt. Use 3/4-inch plywood for the shelf surface, then add a 1-inch tall front stop strip. Leave 2-3 inches of clearance between the bench underside and the boot tops so you don't scrape when you sit.
Pro tipSeal the plywood with a couple thin coats of matte polyurethane so scuffs wipe off with a damp cloth.
AvoidAvoid a flat shelf here; boots will end up leaning and your bench area turns into a messy pile.
3. Pegboard Shoe Grid with Numbered Hooks
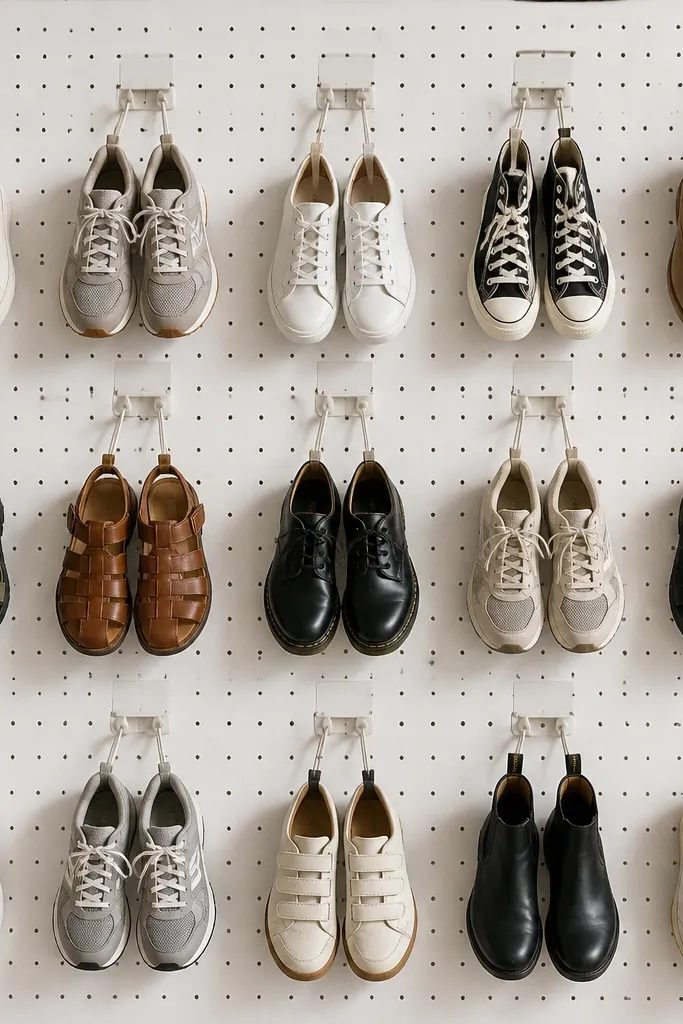
Pegboard is the fastest way I know to make shoe storage look tidy and customizable. You can adjust hook positions as your shoe sizes change, and the pegboard surface makes the wall feel organized. I use hooks for sandals and sneakers because they hang straight and dry. Numbered labels keep the system from turning into a free-for-all.
Use 1/4-inch pegboard and mount it over studs. Install wire hooks sized for shoes (not small picture hooks) and space them about 3.5-4 inches apart vertically. Add labels using a label maker on cardstock or vinyl, then tuck them under a clear tape strip so they survive shoe scuffs.
Pro tipAdd two horizontal wood battens at mid-height to keep heavier shoes from pulling the board.
AvoidDon't use flimsy plastic hooks; they flex and leave shoes hanging crooked.
4. Stacked Wire Drawer Inserts in a Closet
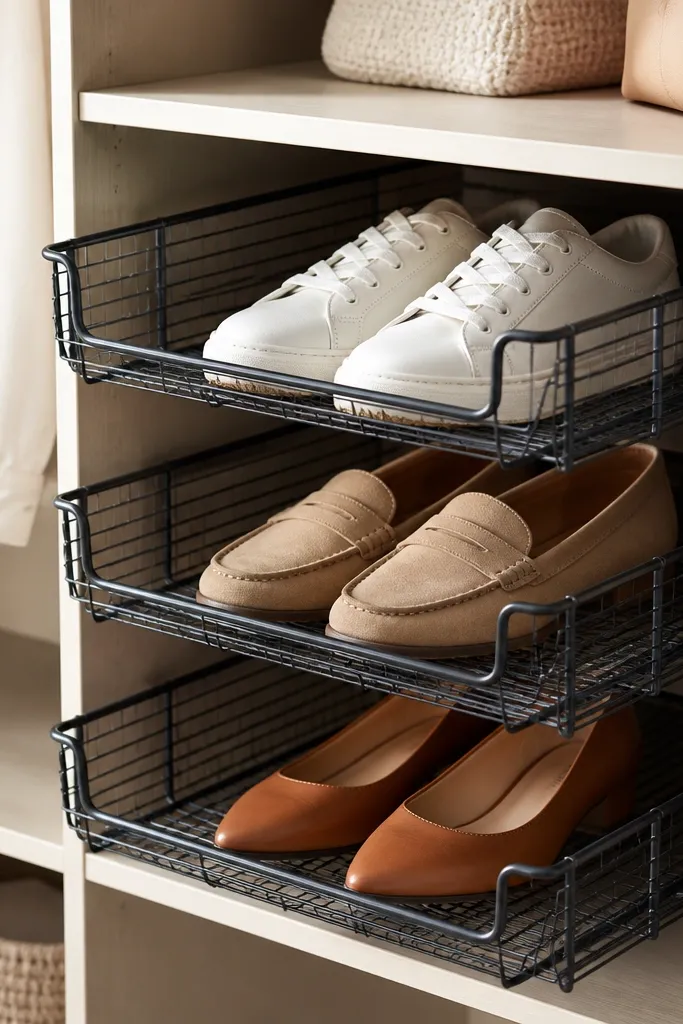
Wire drawer inserts are my go-to when you want shoes to dry without turning your closet into a smell machine. The open sides make it easy to grab a pair and see what's clean vs. Still damp. I like stacking them because it creates clear zones without bulky wood dividers. The look is clean because all inserts match.
Pick inserts that are 10-12 inches deep and fit your shelf width with a 1/2-inch clearance on each side. Stack three levels if you can keep each level under 7 inches tall for flats and sneakers; for boots, use fewer levels and taller inserts. Wipe the wire down first, then add a thin rubber shelf liner to keep shoes from sliding.
Pro tipAdd a small bin on top for shoe trees and cleaning wipes so the rack stays useful, not just storage.
AvoidDon't line the whole thing with thick fabric; it traps moisture and makes the wire feel dusty.
5. Shallow Corner Ladder Shelf for Sneakers
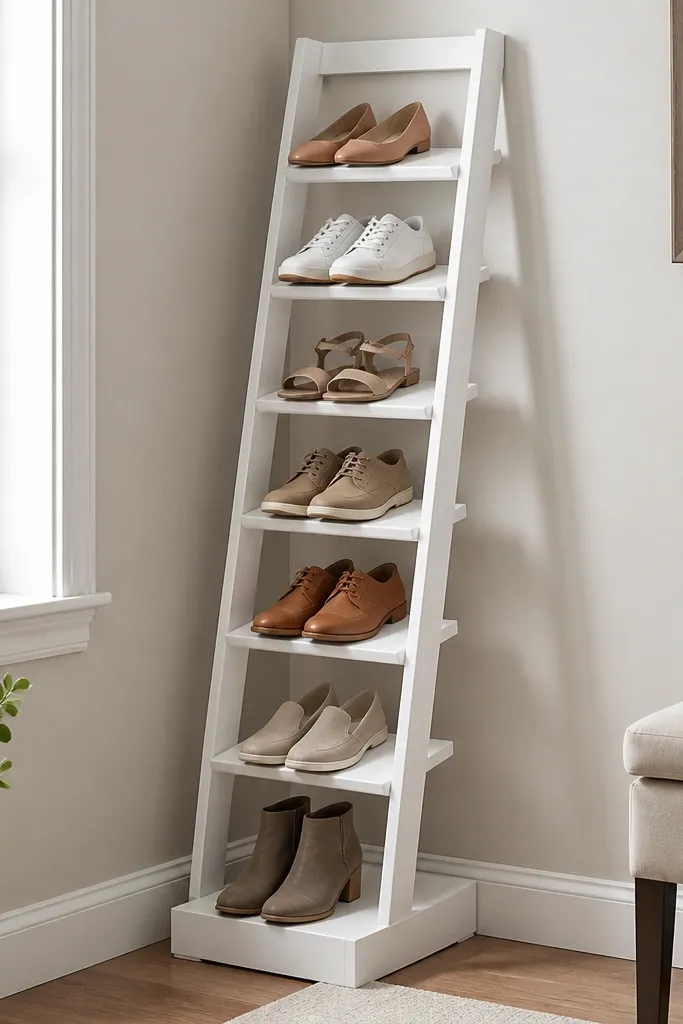
Corners are the one spot small spaces ignore, and it's exactly where a ladder shelf shines. Narrow rungs let you store multiple pairs without needing straight wall width. I keep it for sneakers and flats because their shape stays stable on flat-ish rungs. The ladder look also makes the storage feel light instead of bulky.
Build a ladder frame from 1x3 boards and set rung spacing at about 7 inches apart. Keep shelf depth around 6-7 inches so you don't lose walking room. Finish with matte white paint or a light wood stain with a clear topcoat, then add small rubber pads on the bottom contact points.
Pro tipAnchor the ladder to two studs, even if it feels solid; corners still get bumped.
AvoidDon't set rungs too close together; tight spacing scuffs toes and makes pairs hard to pull.
6. PVC Pipe and End-Cap Shoe Stand
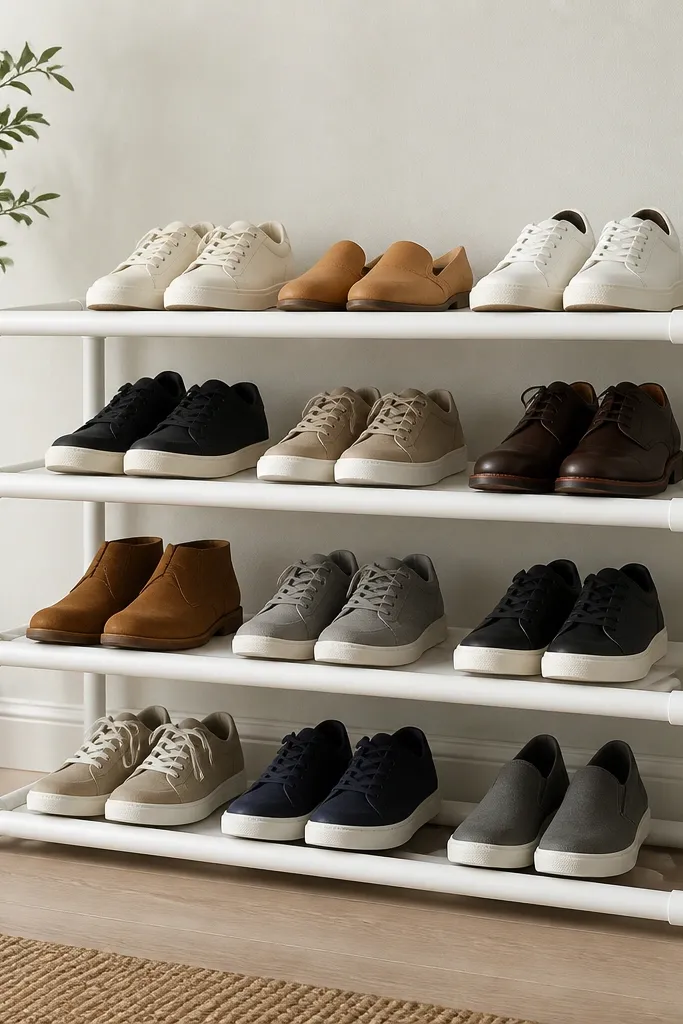
This is the "I need it cheap and fast" rack that still looks neat. PVC is smooth, easy to wipe, and it doesn't mind wet seasons. The pipe grid supports shoes without trapping moisture like solid boards can. I like the look because it reads modern and clean, especially in rental spaces where you can't build permanent wood.
Use 1.5-inch PVC for the frame and 1.25-inch pieces for crossbars if you want a tighter footprint. Glue end caps on the ends and add T-fittings where you need stability. Build a 2x3 grid for about 6 pairs, then expand by adding another row if you have width. Test height with one pair first; aim for 4.5-5 inches of clearance under a shoe sole.
Pro tipWrap the top crossbars with a thin strip of closed-cell foam tape so shoes slide less.
AvoidAvoid leaving raw pipe edges; sanding and smoothing makes it look intentional and prevents scuffs.
7. Fabric Hanging Shoe Organizer with Rigid Inserts
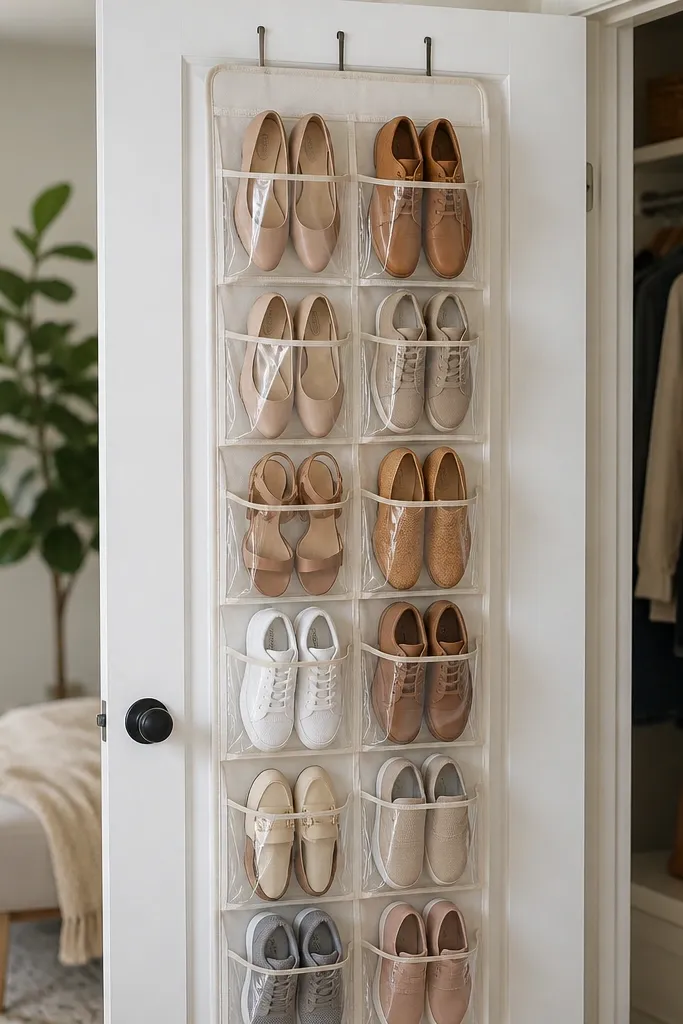
Most hanging organizers sag after a few weeks, and then you're digging through folds. Rigid inserts fix that. I use this for flats, sandals, and house shoes because they don't need heavy support. The door-mount saves floor space and the clear pocket style keeps the system visible.
Choose an organizer with pockets at least 7 inches wide. Cut thin plastic or corrugated plastic sheets to fit inside each pocket so the shoe sits flat. Use Velcro strips at the top edges so the inserts can be removed for cleaning. Hang from a sturdy over-door hook that doesn't flex.
Pro tipAdd a small under-door tray for wet items so you're not stuffing damp shoes into fabric pockets.
AvoidDon't stuff tall boots into fabric pockets; they bend and the whole organizer looks messy.
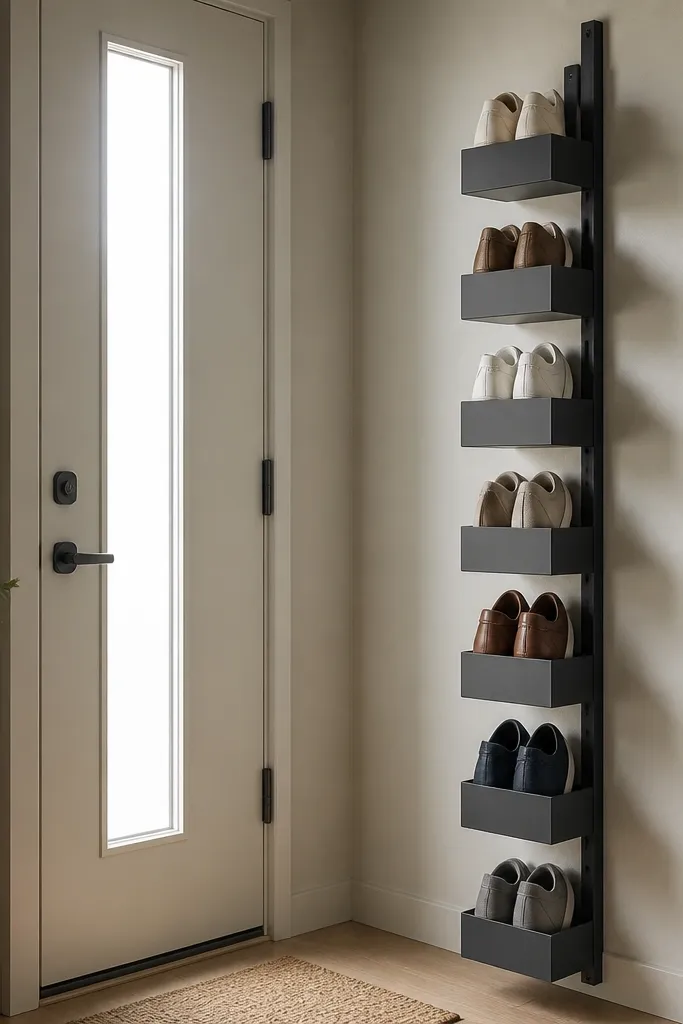
8. Corner Shelf with Floating Toe Stops

Floating shelves look sleek, but shoes slide off if you don't add a stop. Toe stops make the storage behave like a proper rack. I built this for a tight foyer where I wanted shoes visible without looking messy. The angled blocks also hide the gap under the shelf so dust doesn't show as much.
Use 3/4-inch plywood shelves with 6-8 inches of depth. Install toe stops from 1x2 wood cut into 45-degree triangles and screw them to the front edge. Space shelves about 9 inches apart so sneakers fit and you can still grab without bending too low. Paint or stain to match your wall trim.
Pro tipWipe a thin coat of wax on the toe stop edges; it makes wiping scuffs easier.
AvoidDon't mount shelves with only one anchor point; floating shelves sag and the toe stops stop working.
9. Rolling Cart Shoe Tower with Labelled Drawers
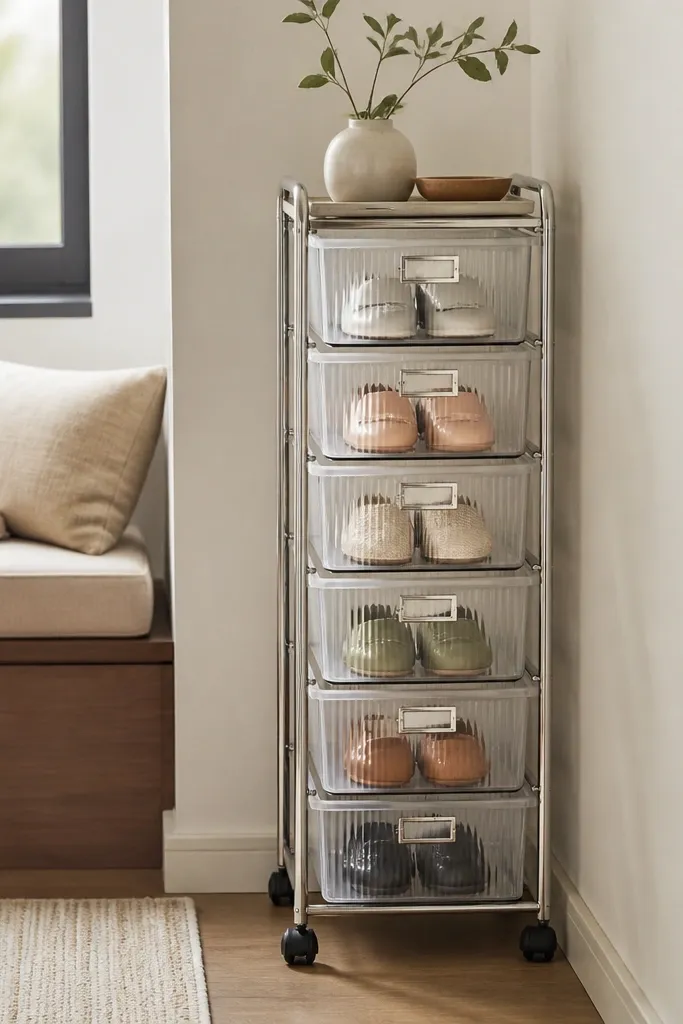
If you have a tiny bedroom corner, a rolling cart gives you vertical storage and mobility. I use it for seasonal rotation because you can roll it out for cleaning and then push it back. Labelled drawers keep the look tidy and stop you from mixing pairs. It's also easy to switch the layout when your shoe collection changes.
Pick a cart with a footprint under 15x15 inches. Use drawer liners in matte black or gray to hide dirt. Keep drawer heights around 5-6 inches for flats and 7-8 inches for low boots by skipping a drawer level if needed. Add drawer labels on the front lip so they're readable when it's pushed in.
Pro tipAdd felt pads to the cart wheels so it doesn't scratch hardwood when you roll it out.
AvoidDon't stack heavy boots in shallow drawers; they bow and the cart becomes hard to slide.
10. Louvered Front Rack for Airflow and Sight Lines
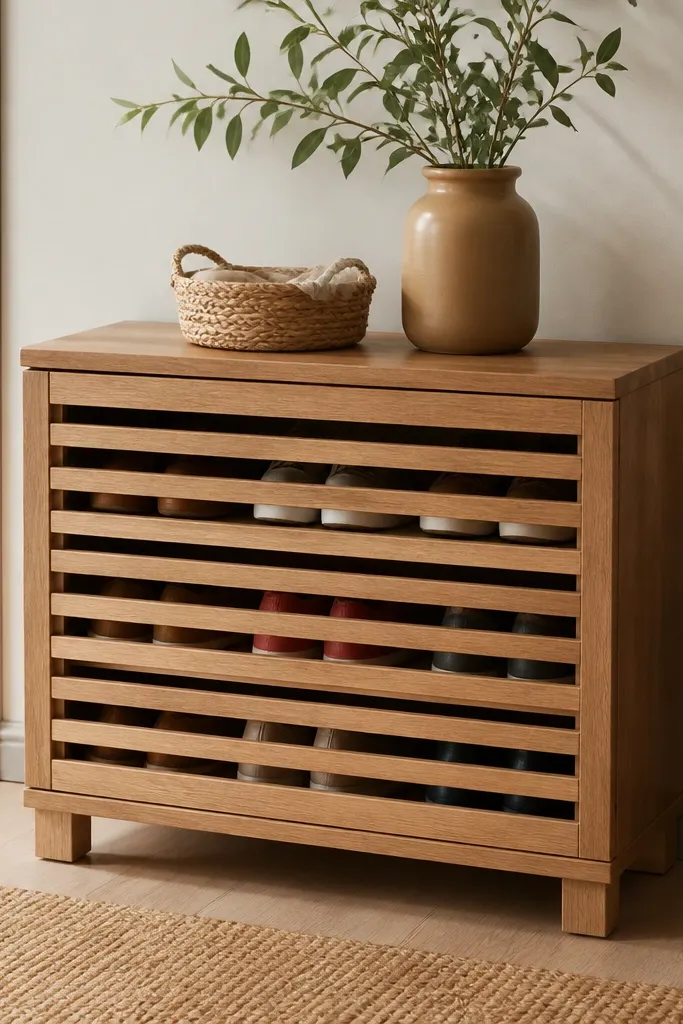
A louvered front keeps airflow moving while still hiding the full mess of loose laces. I like it because it balances function and appearance - you can see what's inside without the clutter look. Shoes dry faster, and the rack stays neater because the louvered face discourages tossing random pairs on top. This one works great for hallways where you want the rack to look like furniture.
Use a simple box frame from 1x2s or 3/4-inch plywood, then install louver slats with a small gap. Keep openings around 1 inch apart so airflow is real but shoes don't fall through. Add a removable tray at the bottom for dust and small cleaning items. Finish with paint over a primer so the slats look uniform.
Pro tipAdd a small hinge and soft-close latch for the front panel if you want easy cleaning.
AvoidDon't use overly wide slats; shoes will lean forward and you'll see the mess anyway.
11. Pegboard + Shelf Combo for Boots and Cleaning Tools
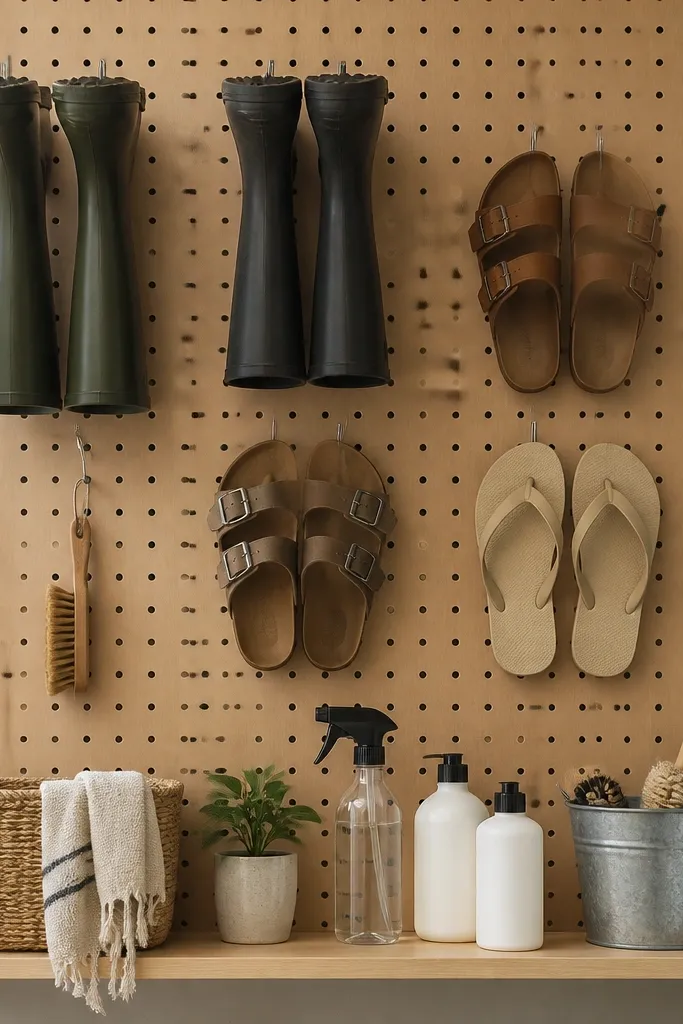
This is the rack that keeps the entryway looking done because it stores the stuff that usually ends up on the floor. Boots hang on hooks so they dry and don't slump. The shelf below holds a brush, wipes, and a small spray bottle so you're not walking past a mess every day. I built this for a household where shoes are constantly in motion.
Mount a 1x4 shelf about 18 inches off the floor, then place pegboard above it anchored to studs. Use heavy-duty hooks sized for boot shafts, and separate boots from sandals by hook height. Keep the shelf top clear by using a shallow bin for supplies. Paint pegboard and shelf to match wall trim for a built-in feel.
Pro tipUse two hook heights for each person's shoes so you don't mix pairs when you're rushing.
AvoidDon't hang everything on one line of hooks; different shoe heights create a tangled look.
12. Stacked Crate Shoe Bench with Removable Liners
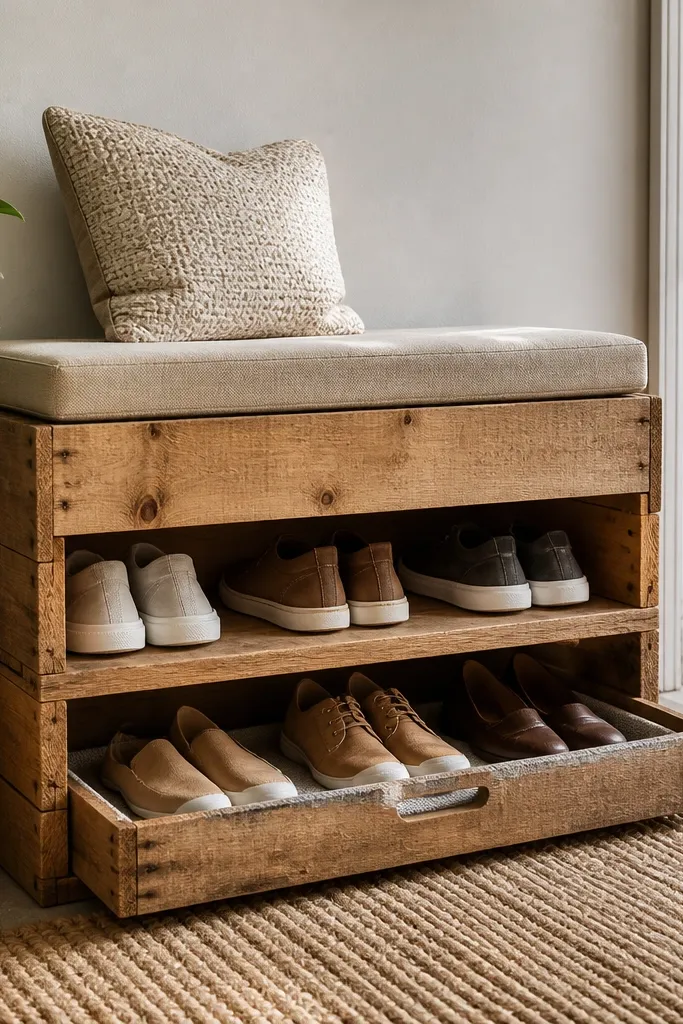
Crates make storage look intentional and they're easy to customize without fancy tools. I like this design because it gives you a seat and shoe storage in one footprint. The removable liners keep it clean, and you can swap liners for seasons. It's also forgiving if your shoes are messy because you can take liners out and wash them.
Use two crates sized so the top crate lip becomes a bench surface. Sand edges, then paint or stain the crates and seal with a clear coat. Add removable liners from washable fabric or a thin plastic sheet with holes for airflow. Leave the top open if you want quick grab access, or add a lid if you need a calmer look.
Pro tipAdd felt feet to the bottom crate so it doesn't scrape and so the bench feels stable.
AvoidAvoid bare wood inside the storage - it stains and scuffs show fast.
13. Hinged Shoe Rack Panel Behind a Curtain

This is for the awkward spot where you don't want to see shoes at all. The hinged panel hides storage behind a curtain, and it still lets you access pairs without kneeling. I built it for a narrow hallway where the shoe pile looked worse than the space was small. The compartments keep pairs aligned so the curtain hides a tidy grid, not a chaotic pile.
Use a hinged plywood panel attached to a frame, and add shallow compartments inside with 1x2 dividers. Keep each compartment around 8-9 inches wide and 10 inches deep. Mount the frame to studs and use a magnetic catch so the panel stays closed. Add a washable curtain and leave a small gap at the bottom so air moves.
Pro tipInstall a small LED puck light inside the compartment so you can find shoes without opening the whole panel for long.
AvoidDon't make compartments too deep; you'll lose the small-space benefit and the panel gets bulky.
14. Three-Tier Shoe Shelf Built Into a Narrow Laundry Wall
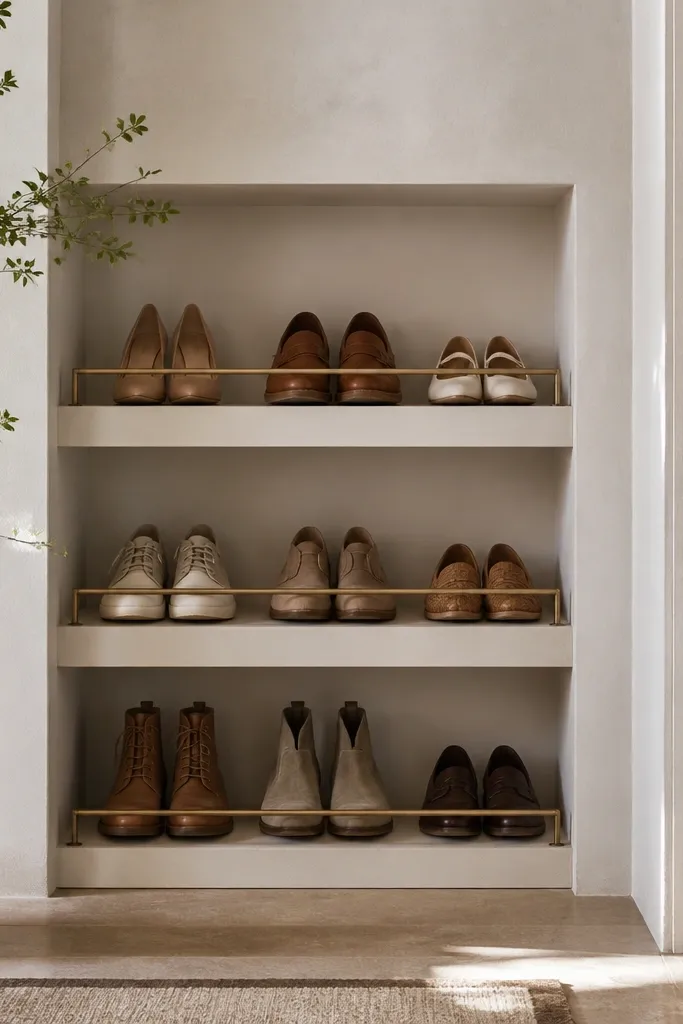
A wall niche is the cleanest look because shoes disappear into the architecture. This works when you have a narrow laundry wall or utility closet and you don't want furniture in the room. I like adding front rails because it stops toes from drifting and it makes the shelf feel like a built-in rack. The gap under each tier helps shoes dry and reduces that basement smell.
Frame the niche with 2x2 or 1x3 studs and keep shelf depth at 9 inches. Use 3/4-inch shelves and add a 1-inch front rail made from 1x2 ripped pieces. Space tiers at 8.5-9 inches for sneakers and 10-11 inches if you store low boots. Finish with paint matched to the wall so the edges blend.
Pro tipUse a removable dust board at the back if you get lint; it makes cleaning faster than vacuuming every shelf.
AvoidDon't close the back panel fully; trapped air makes shoes smell even in a clean home.
15. Magnetic Tool Bar for Shoe Laces and Keys
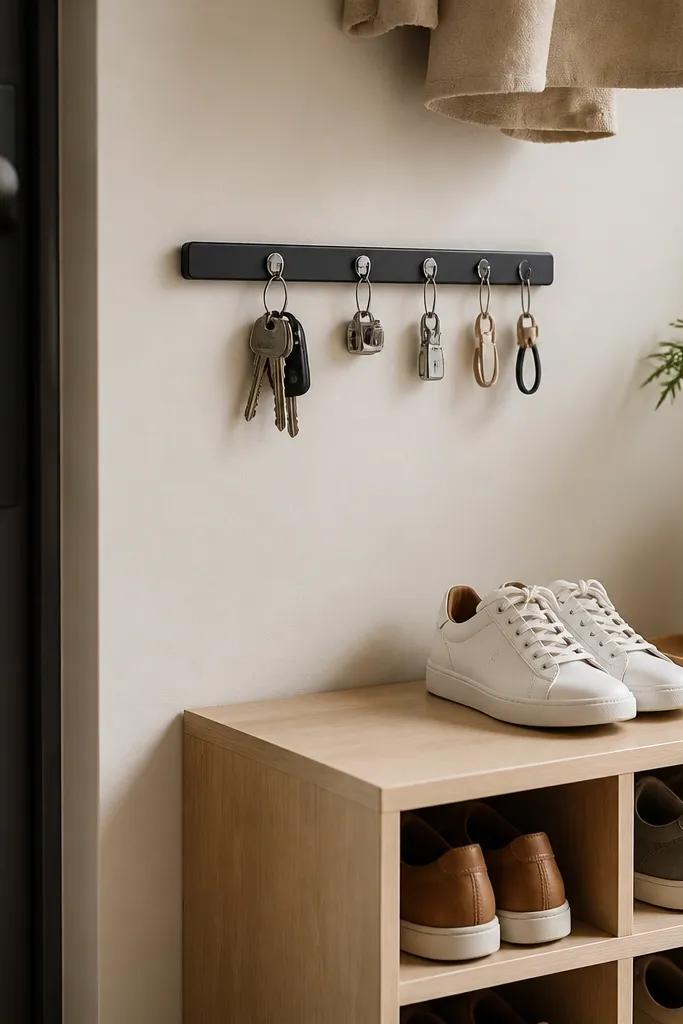
Shoes stay neater when the tiny mess gets stored too. A magnetic bar keeps keys, lace clips, and small essentials off the floor so the entryway looks organized even when you're mid-rush. I pair this with a low rack because it creates a "landing zone" without adding bulky storage. The bar also makes it easy to grab what you need when you're leaving.
Use a magnetic tool bar 12-18 inches long mounted at about chest height. Add small S-hooks or lace clip hooks that fit the bar spacing. Place it next to your main shoe storage - I usually keep shoes on the floor shelf or in cubbies, then use the bar for the small stuff. Keep the bar finish matte so it doesn't show scuffs.
Pro tipUse a small label strip on the bar with two sections: keys and lace clips so the system stays consistent.
AvoidDon't mount the bar too low; shoes and bags bump it and you'll hate using it.


