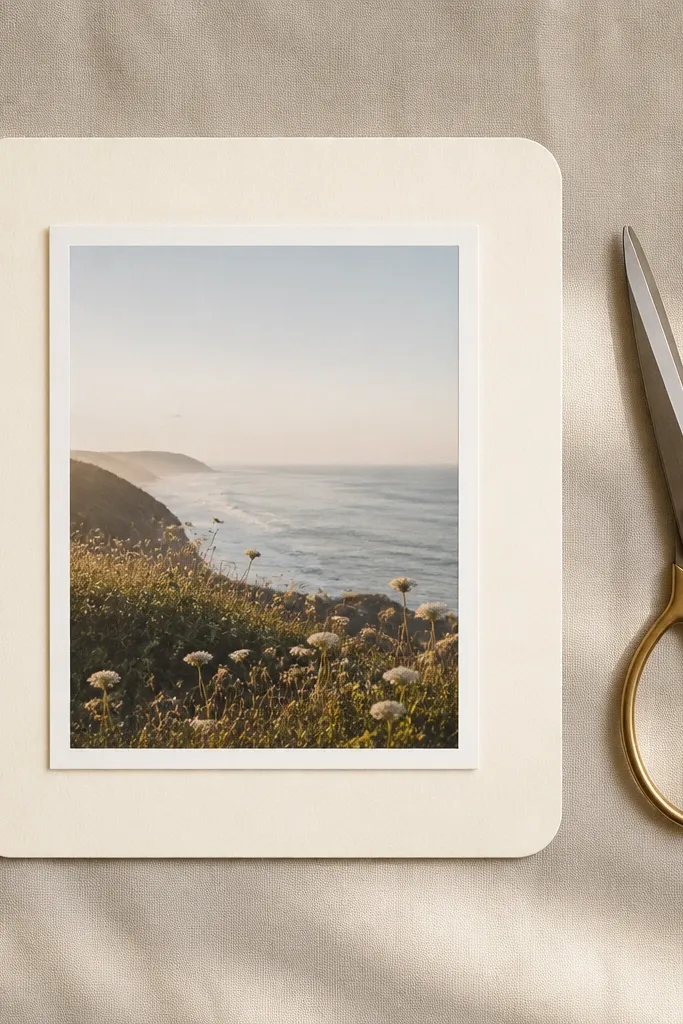
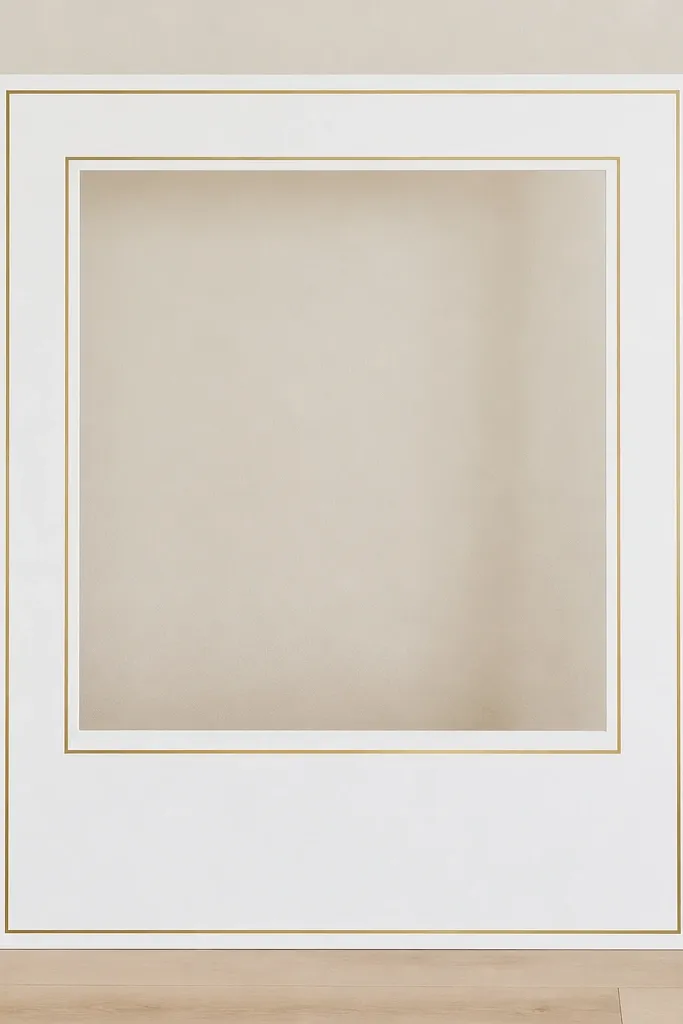
1. Classic Square Matte Window
This one is the "works with everything" layout. A clean square window keeps the focus on the photo, and the matte border gives you room for slight print shifts. I use white foam board because it takes marker lines and tape cleanly, and it photographs bright without glare. The black photo insert edge makes the image look grounded, like a print in a store frame.
Print your 1080x1080 photo, then print the template so the inner window matches your photo's crop. Cut the window with a sharp craft knife and ruler, staying just outside the traced line. Glue the photo to a black cardstock backing, then mount it behind the window.
Pro tipTrace the outer edge lightly first, then cut deeper only after you confirm alignment with your printed photo.
AvoidDon't make the matte border thinner than 1/4 inch or the photo will look like it's floating and misaligned.
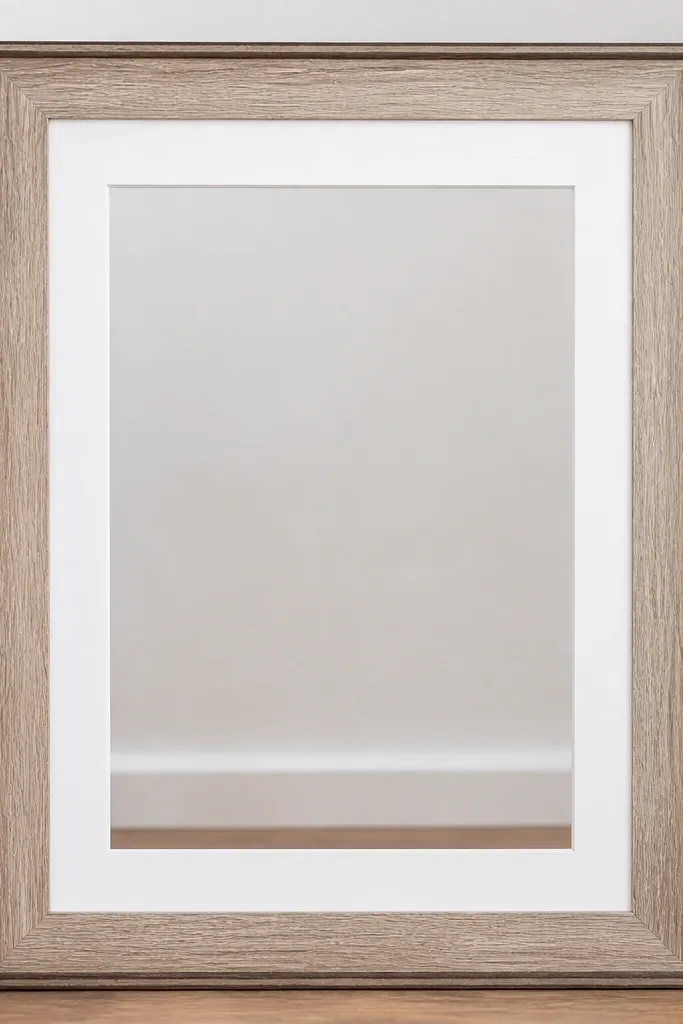
2. Story-Ready Vertical Window
Vertical frames are better for captions and full-body shots because the window doesn't fight your composition. This template uses a tall inner rectangle that matches 1080x1920 so your screenshot fills the frame. The gray outer border makes the white matte feel calmer and reduces the "paper craft" look. It also hides tiny cut imperfections better than pure white.
Use a 1/2 inch matte border around the inner rectangle. Cut the outer frame to about 4 inches wider than the photo on each side so you get a sturdy handle area at the bottom. Mount your printed story screenshot on a slightly darker backing (charcoal or deep gray).
Pro tipBefore gluing, hold the frame up to a window light - if the edges look uneven, trim once now while the foam board is still flat.
AvoidAvoid using glossy photo paper without sealing - the glare makes the matte border look washed out.
3. Polaroid-Style Rounded Corners
Rounded corners soften the whole piece and make it look like a real instant photo mount. I like cream cardstock because it gives warmth even when the photo is cool-toned. The thick matte strip makes your photo feel like it's been placed, not taped. This style is super forgiving if your cut line is slightly off.
Print your template with a rounded-corner inner window. Cut the window using an actual corner radius guide (I use a small circle template) so both top corners match. Layer: photo on white cardstock, then mount it under the frame so you can see the matte strip evenly.
Pro tipUse a foam tape strip (1/8 inch) behind the photo for a tiny lift that reads as depth in Instagram shots.
AvoidDon't use a tiny radius - if the corners are too sharp, it stops reading as Polaroid and looks like a cheap sticker.
4. Thin Black Edge Box
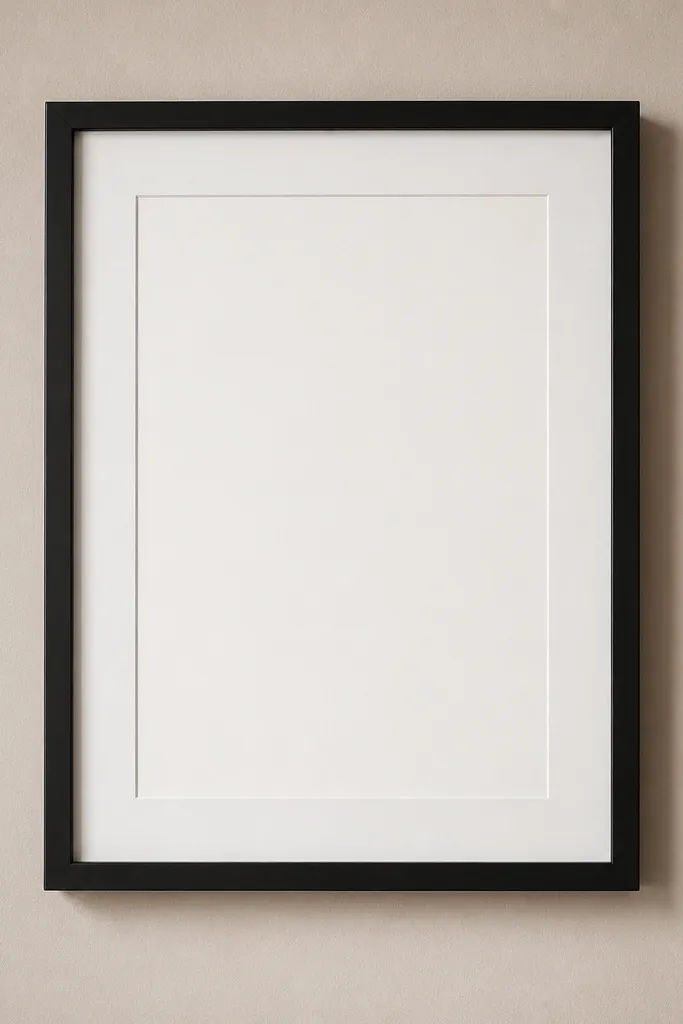
If you want this to look like a store-bought display, go thin and controlled. The slim black edge gives you that "gallery" feeling without adding extra design elements. White matte keeps the photo bright and readable. This frame style looks best with high-contrast photos - portraits, product shots, or typography-heavy images.
Make the inner window border about 3/8 inch black. Use a ruler and cut with one consistent pressure so the foam board edge stays crisp. Mount the photo slightly inset so the black border shows evenly all the way around.
Pro tipWipe the black edge with a dry microfiber cloth before sealing - dust shows up as gray streaks on camera.
AvoidSkip thick glue blobs near the window edge - they create bubbles that show even after you seal.
5. Gold Foil Accent Strip
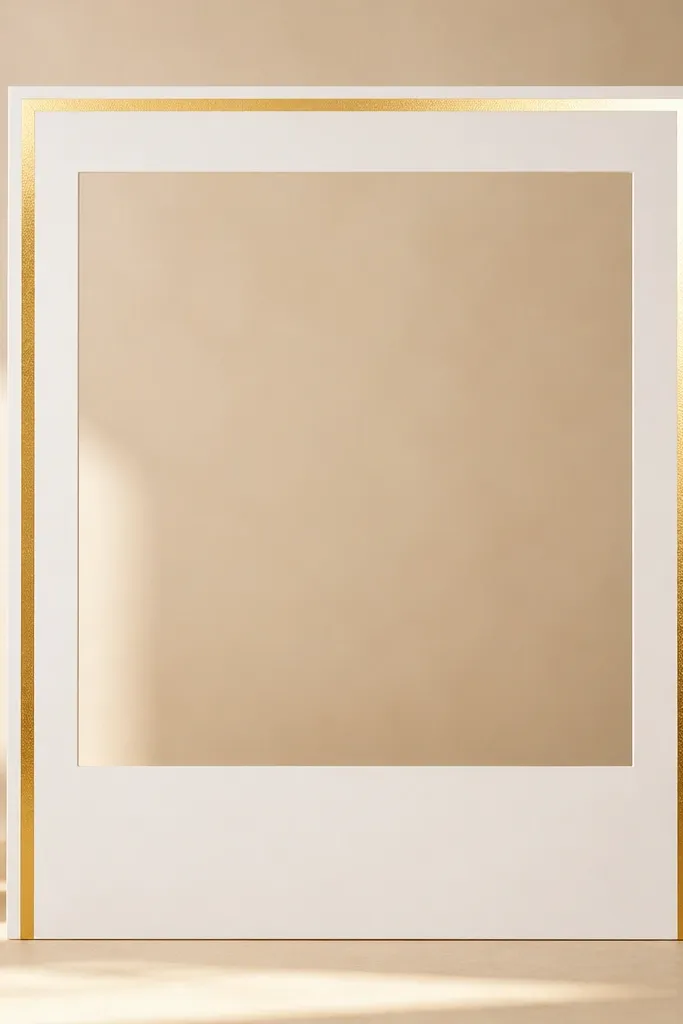
Gold foil strips add a high-end vibe without painting the whole frame. Keep the foil narrow so it looks intentional, not like a craft project. The inner matte stays white, so your photo colors stay true. This is the style I use for engagement posts and birthday photos because it photographs warm even in indoor light.
Apply gold foil tape along the outer edge, not across the window. Leave 1/2 inch matte around the inner photo window. Seal the foil with a matte clear coat so it doesn't catch light too harshly.
Pro tipPress the foil tape with a plastic burnisher or the back of a spoon so it sticks flat along corners.
AvoidDon't wrap foil around the inner window - it tends to peel at the cut line.
6. Pastel Ombre Border
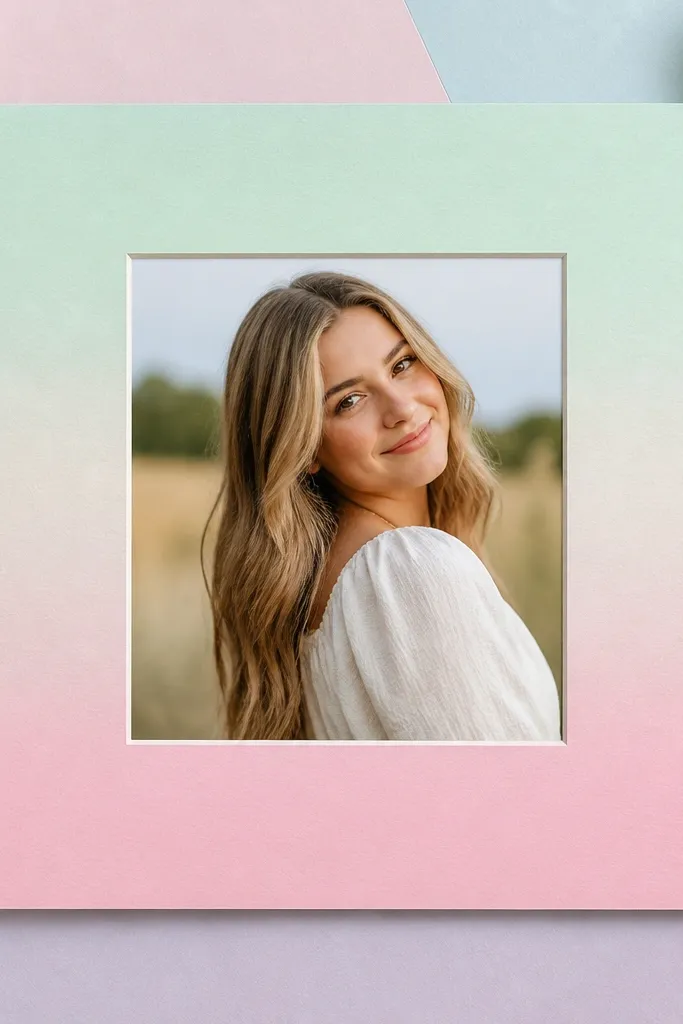
An ombre border makes a simple frame feel designed. I keep the ombre only on the outer band so the photo stays the star. Soft mint-to-pink looks good with skincare, spring outfits, and food shots. It also hides minor scuffing better than a flat color.
Mask the inner window and paint only the outer border area using a sponge brush. Use watered-down acrylic so the gradient blends instead of streaking. Let it dry fully, then cut any tiny overspill with a craft knife before mounting the photo.
Pro tipTest your sponge blend on scrap foam board first - the first layer always looks too harsh until it dries.
AvoidAvoid thick paint near the cut edge - it chips when you trim.
7. Polished Woodgrain Look (No Wood Needed)
You can fake woodgrain using craft acrylic and it reads as real in photos. The outer woodgrain border adds warmth while the inner matte keeps your photo crisp. I like this for travel photos and coffee shop shots because it makes everything feel cozy. It's also a lifesaver if your room has warm lighting - the woodgrain stops the frame from looking too cold.
Paint a base color (light oak beige) on the border band. Drag a small dry brush lightly in curved strokes to create grain lines, then add thin darker lines for depth. Seal with matte clear coat so the pattern doesn't smear when you handle it.
Pro tipUse two passes: one for grain direction, one for tiny speckles. The second pass makes it look less streaky.
AvoidDon't over-darken - if it's too brown, your photo colors look muddy.
8. Clean White + Micro-Pattern Frame
Micro-patterns add texture without taking over. Dots, tiny lines, or small stars on the outer border give you visual interest when the photo itself is simple. I use white-on-off-white so it doesn't clash with any image. This style looks great for minimal feeds and black-and-white photos.
Print the template, then mask the inner window. Use a fine paint marker or diluted acrylic with a stippling sponge to create the pattern only on the outer band. Let it dry, then seal the whole front.
Pro tipKeep the pattern scale small - if your dots are larger than 1/8 inch, it starts looking like a sticker sheet.
AvoidAvoid painting directly over the template print guides - marker lines can bleed through.
9. Fabric Ribbon Frame Tie
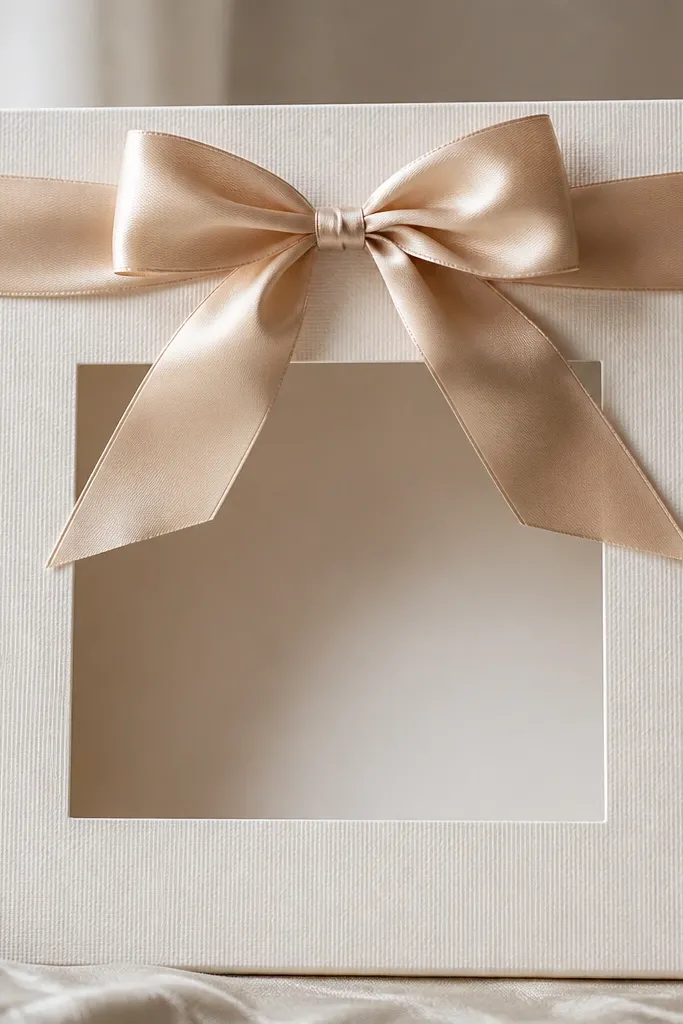
A ribbon tie makes the frame feel like a gift photo card. Satin reads smoother than grosgrain on camera, and it catches light in a nice way without looking shiny. The inner matte stays plain so your photo doesn't get visually crowded. I use this for holidays and birthdays because it's instantly recognizable.
Cut the foam board window first, then attach the ribbon to the back with hot glue or strong tape before you mount the photo. Keep the ribbon width around 1 inch for good scale. Tie the bow after the photo is secured so you can center it perfectly.
Pro tipTrim ribbon ends at a slight angle so they don't fray quickly.
AvoidDon't glue ribbon across the photo edge - it lifts and shows glue strings.
10. Chalkboard-Style Outer Frame

A chalkboard-style edge makes your photo pop because the background is dark and matte. This style works especially well for black-and-white photos and food pics with strong contrast. I use a slate paint look so the frame looks like it belongs in a kitchen or café vibe. The inner matte stays bright so text on the photo stays readable.
Paint only the outer band with matte slate acrylic. Lightly dab a dry brush with lighter gray to mimic chalk wear. Seal with matte clear coat, then mount your photo on white cardstock behind the inner window.
Pro tipIf you plan to write on the frame, seal after writing so it doesn't smear when touched.
AvoidAvoid glossy chalkboard paint - it reflects light and makes the frame look wet.
11. Neon Corner Markers
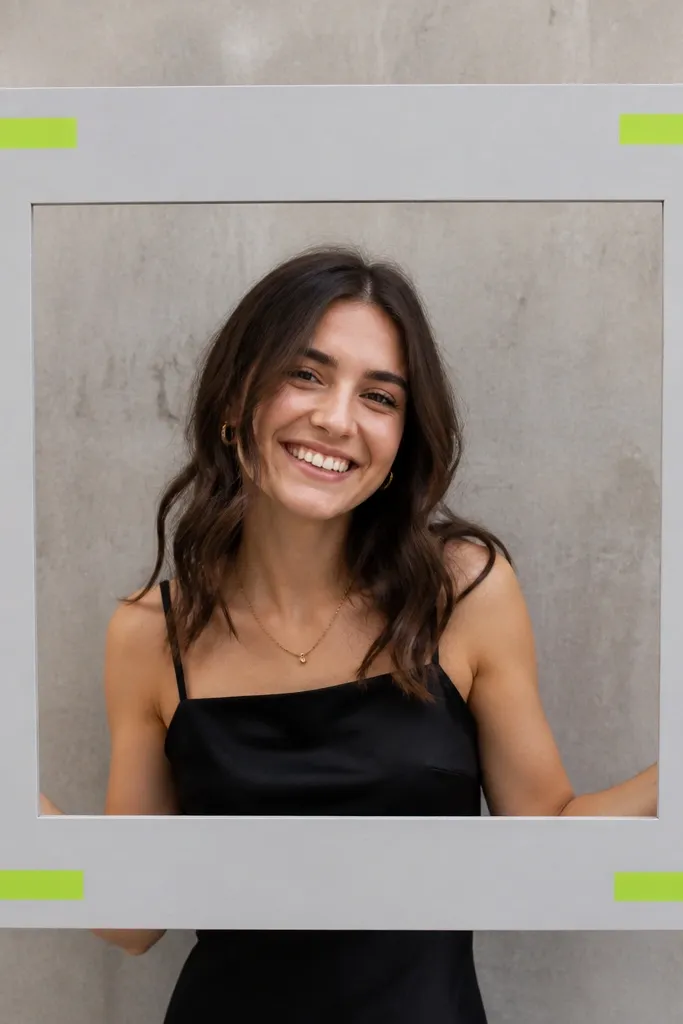
Neon corner markers make the frame look like a camera interface. It's a fun option for fitness, street photos, and night scenes. Keep the neon only at the corners so it doesn't overpower the photo. Gray foam board is the perfect neutral backdrop for neon colors because it doesn't fight the image.
Use a template to mask the inner window and draw L-shapes about 1 inch long. Paint or use neon paint pen for crisp edges. Let it dry, then seal lightly so the neon doesn't fade under handling.
Pro tipUse painter's tape as a straightedge for the corners - freehand neon lines always look wobbly.
AvoidDon't extend the neon lines to the middle of the border or it turns into a messy outline.
12. Checkerboard Border Band
A checkerboard band looks playful and graphic, and it still stays readable in photos. I keep the squares small so it doesn't look like a kids craft. Black-and-white works with nearly any photo color because it's neutral. This frame style is great for travel, fashion, and anything with a bold subject.
Mask the inner window and measure the outer band width. Cut tiny squares from black and white cardstock (about 1/4 inch each) and glue them in a grid. Seal the surface after the grid dries.
Pro tipPress a flat book on top while glue sets so the squares don't lift at the edges.
AvoidAvoid large checker squares - they look pixelated once printed and photographed.
13. Sunburst Outer Rays

Sunburst rays add energy without cluttering the photo. The trick is to keep the rays behind the matte area, not over the image. Warm orange and yellow looks great for brunch, beach, and anniversary photos. It also gives you a strong focal point in the center, which helps when your photo is less busy.
Trace the inner window, then draw rays on the outer band only. Use a ruler for straight lines and vary the ray lengths slightly for a natural look. Paint with acrylic and seal once dry.
Pro tipUse 12 to 16 rays total. Too many rays make it look like a printed background instead of a hand-made frame.
AvoidDon't draw rays into the matte border - if they show through, they distract from the photo.
14. Monogram Cutout Frame

A monogram cutout makes the frame personal without needing extra decorations. I use a single letter because it stays clean and reads fast on camera. The silhouette effect looks crisp when the outer board is painted and the cutout reveals a contrasting layer. This is a great option if you want your frame to match your room decor.
Cut the monogram shape out of the outer layer, then glue a contrasting backing behind it (black backing under a white frame looks sharp). Keep the inner window matte border consistent. Sand the cut edges lightly if foam fibers show.
Pro tipChoose a bold letter font style for the cutout so the bridges don't snap during cutting.
AvoidAvoid thin monogram strokes - they break when you cut the foam board.
15. Linen Texture Frame Wrap
Fabric wrap makes the frame feel expensive even if you only wrap the outer band. Linen texture photographs with soft shadows and hides small edge flaws. Beige linen works with warm skin tones and neutral interiors. I like this style for nursery photos, baby milestones, and cozy home corners.
Wrap only the outer border area, not the inner window. Use fabric glue or spray adhesive, then trim fabric at a slight angle at corners. After it dries, mount the photo behind the window and seal the fabric edge lightly with matte spray.
Pro tipPull the fabric tight and glue at the back corners first so you don't get wrinkles across the front.
AvoidDon't use stretchy fabric - it warps the outer corners when you handle the frame.
16. Matte Clear Coat + Sticker Border
Sticker borders are the fastest way to add personality. The key is to keep the sticker scale consistent and place them only on the outer band so the center stays calm. A matte clear coat makes everything look uniform and stops the stickers from peeling. I use this for travel and event photos because it's easy to match theme colors.
Cut the template window first, then apply stickers to the outer band. Seal with a light matte clear coat spray held 10 to 12 inches away. Let it cure fully before you mount the photo so the coat doesn't wrinkle.
Pro tipGroup stickers in two color tones max so the border looks intentional instead of random.
AvoidAvoid thick glossy stickers - they create glare spots that look cheap on camera.
17. Color Block Frame Corners

Color block corners add a modern punch without turning your frame into a scrapbook. I like using four colors because it looks playful but still balanced when each corner is the same size. The white matte keeps it clean, and the photo stays readable. This style works for product shots, party photos, and any picture with a clear subject.
Mask the inner window and outer band, then paint or apply cardstock color blocks sized about 1 inch square. Keep the corner blocks away from the inner matte so the photo edge stays crisp. Mount the photo with a thin adhesive layer so you don't get bumps.
Pro tipChoose colors pulled from your photo. I literally sample them visually and then match with craft paint jars.
AvoidDon't use neon colors together - coral + teal + neon green makes the frame look chaotic.
18. Leatherette Strap Hanger Frame
A strap hanger makes the frame feel like decor, not a flat print. Faux leatherette reads like real leather under indoor light, and it doesn't fray like fabric ribbon. This style is great for small apartments because you can hang it quickly and move it between rooms. It also gives you a clean silhouette in photos.
Attach a leatherette strap loop to the back using two small strips of strong tape or hot glue points at the top corners. Keep the strap centered so the frame hangs straight. Use a simple matte window and a neutral border so the strap does the talking.
Pro tipTest hang angle before sealing the front. If it leans, move the attachment points by 1/4 inch.
AvoidAvoid thin strap material - it twists and makes the frame hang crooked.
19. Tiny Frame within Frame (Double Border)
A double border makes your photo look more "finished" because it creates a frame-within-a-frame effect. I use this when the photo has lots of detail and needs separation from the outside world. The second border line is thin enough that it doesn't crowd the image. It also hides uneven cut edges because the inner line becomes your visual anchor.
Cut the outer window normally, then draw or cut a second inner border line about 1/4 inch inside the matte area. Mount the photo behind so it sits flat and doesn't press against the border line. Seal the front and keep the border line matte.
Pro tipUse a fine-tip black pen for the inner line so it stays crisp on camera.
AvoidDon't make both borders thick - it looks like a school poster frame.
20. Vintage Newspaper Strip Side Panel
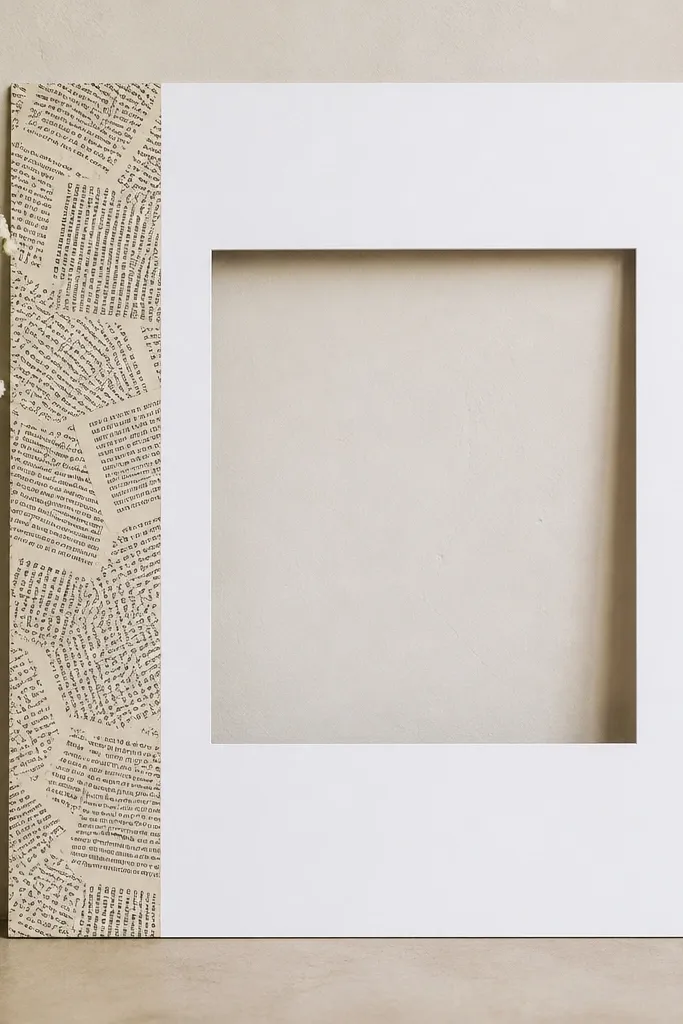
Newspaper strips add texture and story without covering the photo. I keep it to one side so it feels like a design element, not a collage. The aged text pattern looks great with black-and-white portraits and street photography. It also gives you a textured edge that shows up nicely even with flat lighting.
Cut a strip of printed newspaper-style paper about 1.5 inches wide and glue it to the outer border area. Seal the strip with matte clear coat so ink doesn't rub off. Leave the rest of the border clean so the photo stays readable.
Pro tipUse a brayer or the back of a spoon to press the strip flat before sealing.
AvoidDon't skip sealing - newspaper ink transfers onto your hands and then into the photo area.


