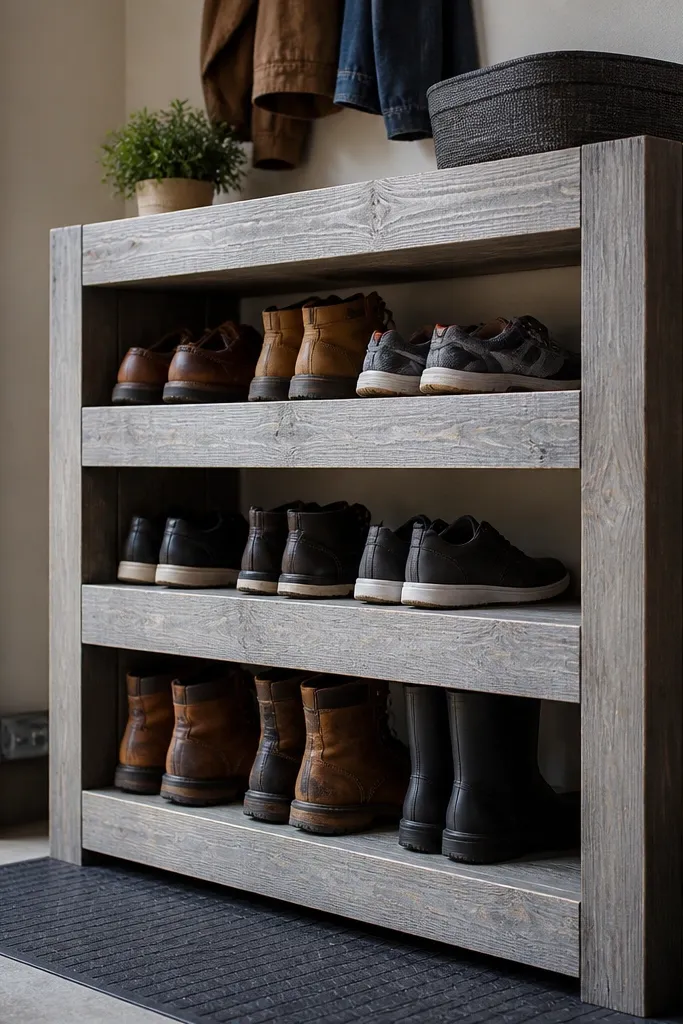
1. Slim Wall-Mounted 3-Shelf Rack with Hidden French Cleat
This version makes shoes disappear visually while keeping grab-and-go access. I used a French cleat behind the scenes so the shelves look floating. The wood tone stays warm and matches coats and hooks, and the matte finish hides fingerprints better than glossy paint.
Cut three shelves from 3/4-inch pine or birch plywood, each about 10-12 inches deep for a hallway. Make the cleat from 3/4-inch stock and mount the cleat level first, then hang the rack after you test it with the full weight of a couple pairs. Keep shelf spacing around 7-8 inches for sneakers; raise spacing to 10-11 inches if you store boots.
Pro tipUse a scrap board as your spacer while you screw the cleat and shelf faces so every shelf lands at the same height.
AvoidDon't mount cleats out of level - even a small tilt makes the whole rack look crooked fast.
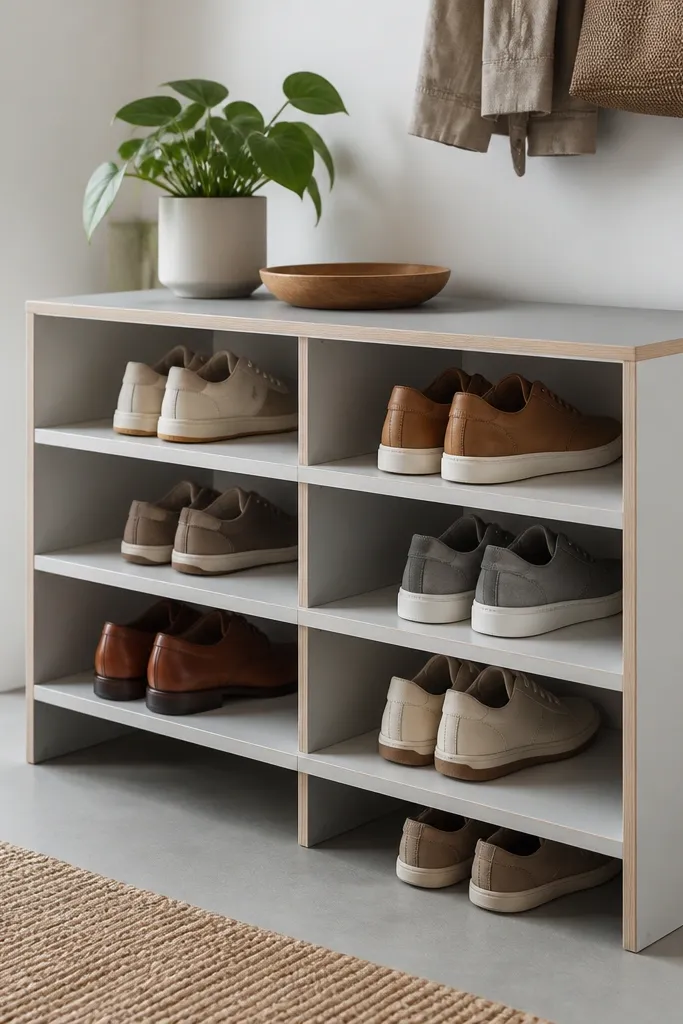
2. Grid-Front Cube Rack with 1x2 Frames
The grid front looks tidy because every compartment has a defined boundary. I built this with 1x2 frames around a plywood back so it feels sturdy without adding bulky sides. The painted finish makes it look like store-bought furniture, even though it's just frames and panels.
Build a rectangle frame first, then install 1x2 dividers to create 10-inch wide cubes. Use 1/2-inch plywood for the back panel and screw it to the frame so the rack doesn't rack side-to-side. For most sneakers, make the cube height 7-8 inches; for flats, keep it closer to 6.5-7 inches.
Pro tipPaint the frames before assembly - you'll get cleaner coverage on the edges and skip hard-to-reach spots.
AvoidAvoid wide gaps between dividers; uneven spacing makes it look handmade in the bad way.
3. Reclaimed-Look Stacked Crates Shoe Rack
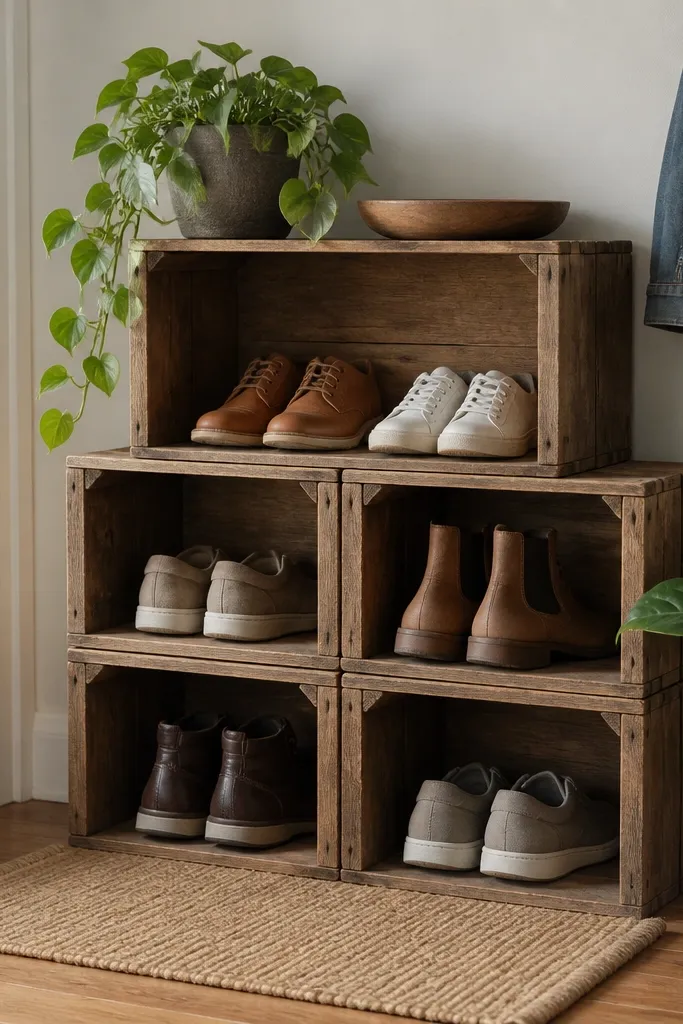
This one is charming because the crate openings already act like shoe slots. I used 8-inch-tall crate boxes and staggered them so each pair sits at a slight angle, which helps people grab without shoving. The lightly distressed finish hides dings from daily use.
Use crates (or build crate-style boxes) that are about 12 inches wide and 14 inches deep. Sand only the sharp edges, then apply a stain like dark walnut and wipe it back immediately for a worn look. Seal with a matte clear coat so the finish stays even where shoes rub.
Pro tipAdd thin rubber feet under the bottom crate so the rack doesn't slide on tile.
AvoidDon't skip sealing the wood - raw crate boards grab dirt and look grimy after a few weeks.
4. Diagonal Slat Shoe Rack for Wet Weather
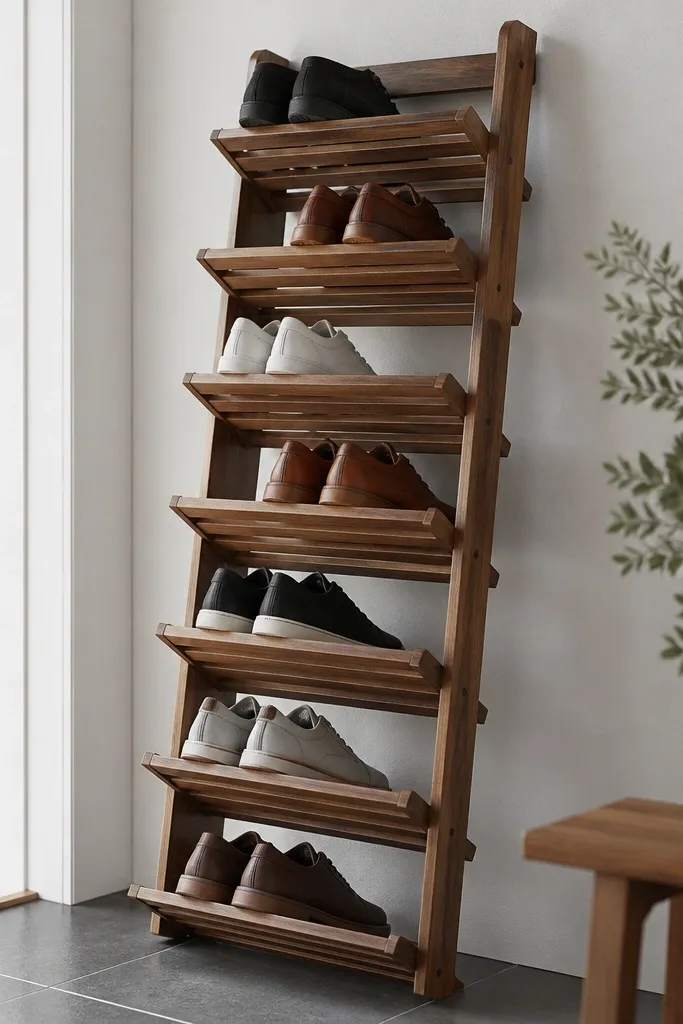
Diagonal slats let air move and let water run off instead of pooling. I built this for a mudroom where boots come in damp - shoes dry faster because they're not sitting flat. The slats also hide scuffs because the grain pattern breaks up marks.
Make the rack about 16 inches deep and tilt the slat support frame to around a 20-30 degree angle. Use 1x3 slats spaced 3/4-inch apart so wet shoes aren't trapped. Add a shallow catch tray under the lowest slat if you deal with puddles.
Pro tipUse a scrap shoe sole as a template to test the slat spacing before you cut all slats.
AvoidAvoid tight slat gaps; they trap moisture and make the rack smell after rainy weeks.
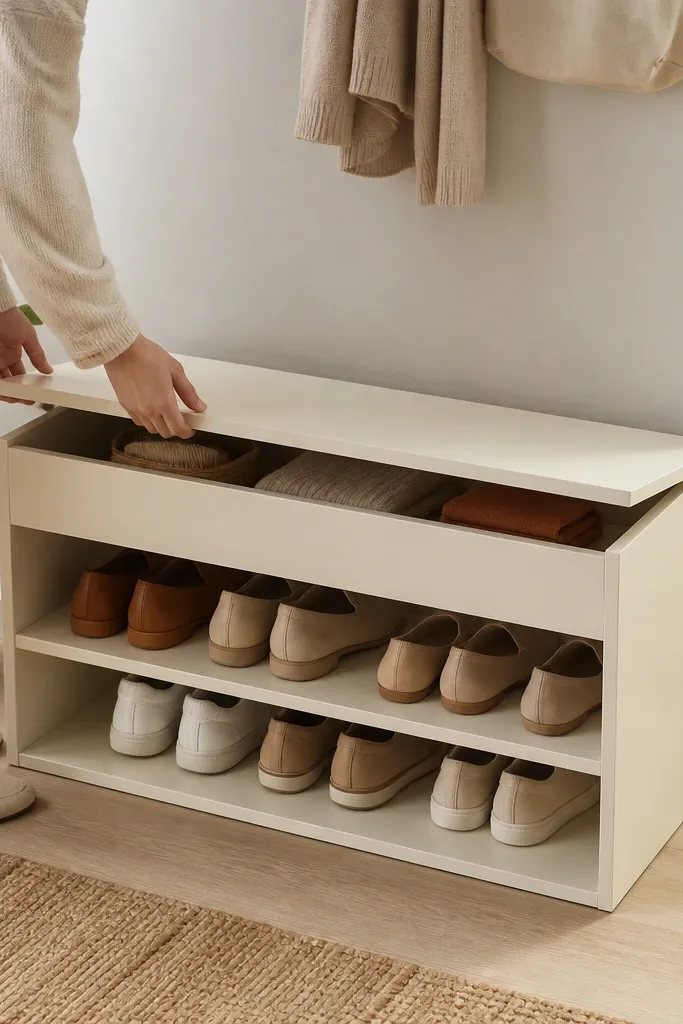
5. Bench-Style Shoe Rack with Lift-Top Lid
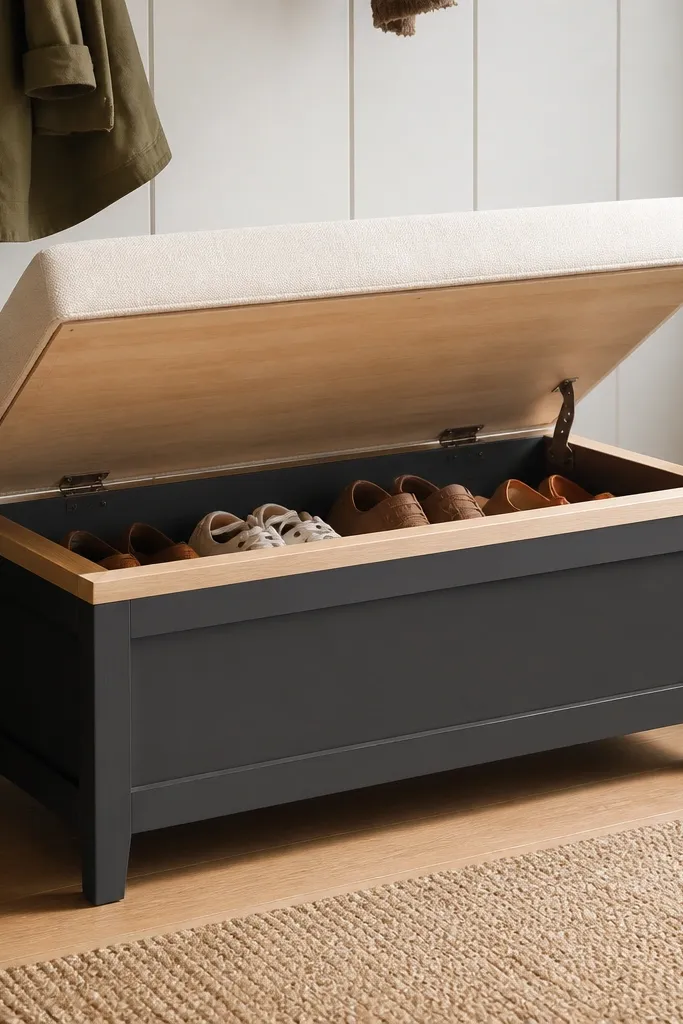
This is the one I built for an entry that needed seating, not just storage. The lift-top keeps shoes out of sight and gives you a clean surface to drop keys. The hinged lid also protects shoes from kids who shove everything under the table.
Use a plywood base with a 1x2 frame, and size the bench so it holds 10-14 pairs depending on shelf height. Build a lid from 3/4-inch plywood with a soft-close hinge or a simple lid prop. Add a bottom shelf or cleats inside so shoes sit upright without tipping.
Pro tipAdd felt bumpers to the lid edges so it closes quietly and doesn't chip paint.
AvoidDon't make the lid too light; a flimsy lid bows and looks cheap even if the storage inside is great.
6. Corner Shoe Rack with Triangular Shelves
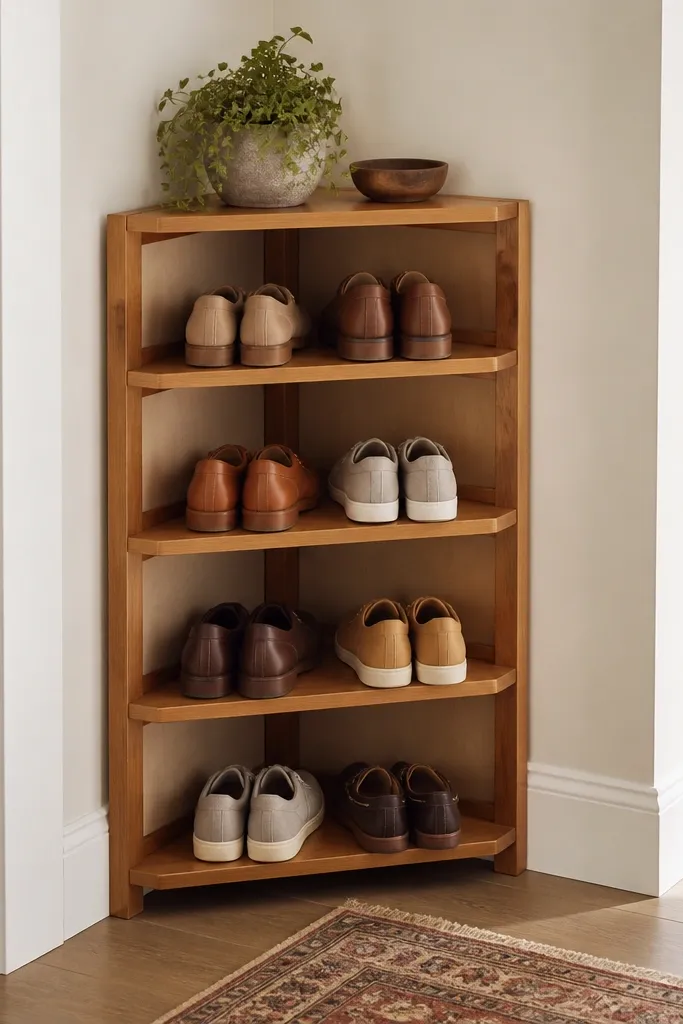
Corners are wasted space unless you build for them. Triangular shelves let you store shoes without blocking the hallway line, and the shape makes the rack look custom instead of shoved in. I like honey stain on this because the warm tone matches baseboards and looks less bulky.
Measure the corner angle and cut side panels so the shelf faces meet cleanly. Build three to four shelves, each around 10-12 inches deep along the wall edges. Use a plywood back panel for rigidity, and screw into studs if possible.
Pro tipDry-fit the first shelf with painter's tape to check the corner alignment before you cut the rest.
AvoidAvoid shelves of different depths - they look off instantly in a corner.
7. Over-the-Door Shoe Rack Frame (No Fabric)
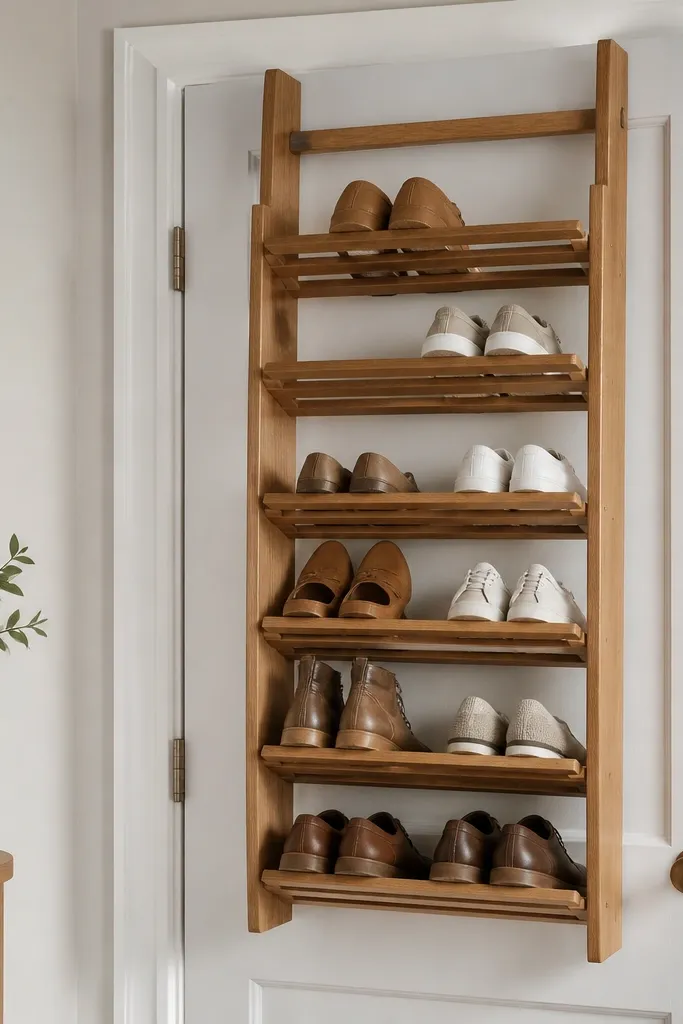
If you hate fabric racks, this solves the sag problem. The frame keeps shelves rigid, so boots and heels don't slump into each other. I built mine with slats so air circulates and you don't trap odors.
Build a U-shaped hanger from 1x3 boards and add a top bar that hooks over the door. Create two or three shelf sections about 6-7 inches high each, using slats spaced 1/2-inch apart. Sand and seal the wood because it rubs against the door constantly.
Pro tipUse rubber door pads where the hanger touches so it doesn't scratch and doesn't shift.
AvoidDon't rely on thin plywood shelves - they bow over time under shoe weight.
8. Mid-Century Style Shoe Rack with Angled Legs
Angled legs make the whole thing look intentional even with basic shelves. I used a walnut stain and a clear matte topcoat so the wood grain stays warm without looking shiny. This is a great option for a living room corner where you don't want a bulky storage unit.
Cut four legs at a consistent angle, then attach a rectangle frame with 1x2 rails. Build three shelves from 1/2-inch plywood with 1x2 trim around the edges. Space shelves around 8 inches for sneakers; leave the top shelf a touch higher for taller shoes.
Pro tipCheck leg angles against a level on the floor - if one leg is off, the rack rocks and looks sloppy.
AvoidAvoid mixing stains on different cuts; edges will look blotchy if you don't stain them all the same day.
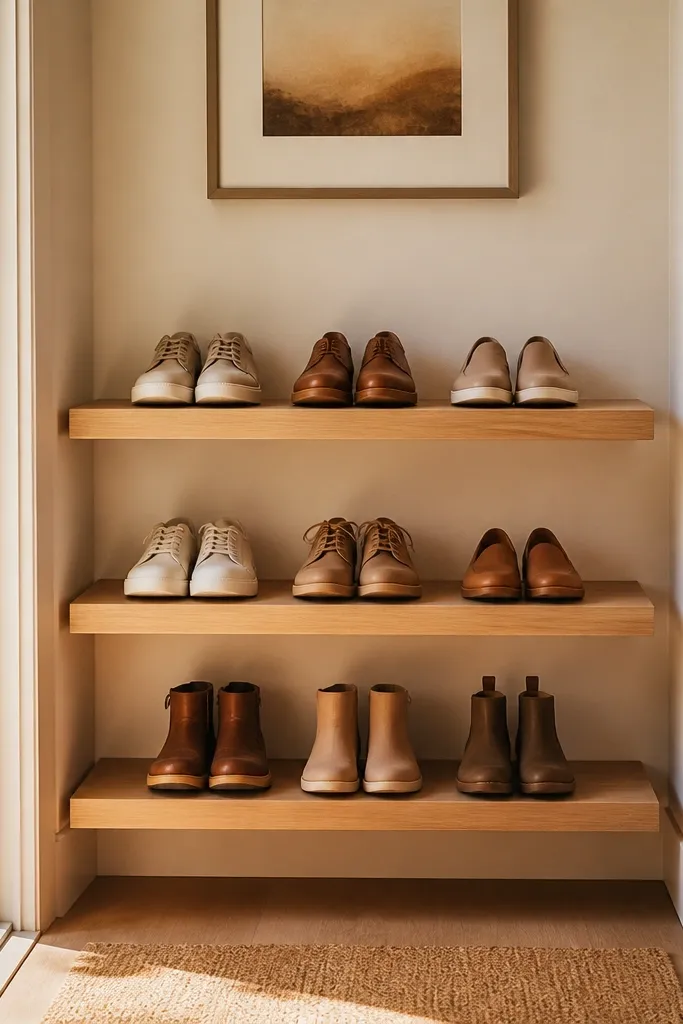
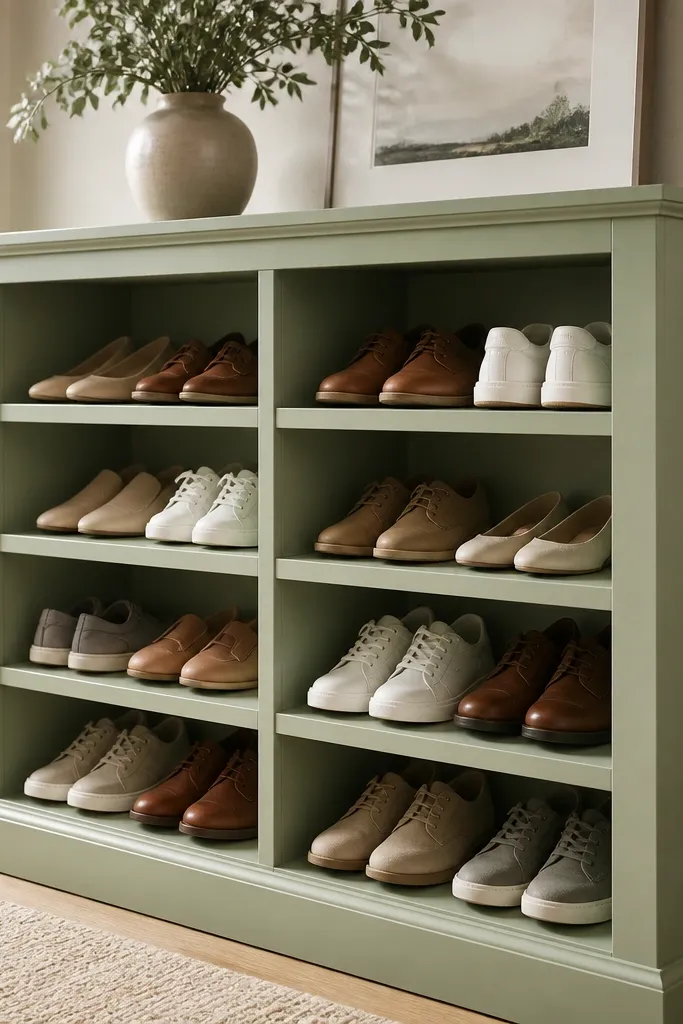
9. Two-Tier Floating Rack with Side Panels
Side panels hide the messy parts and keep the front clean. I like this when you want a small footprint but still need space for daily shoes. The paint finish also makes it look like built-in storage, especially if it matches the wall trim.
Use 3/4-inch plywood for side panels and shelves, and set the depth at 11-12 inches. Mount into studs with a ledger board first so it doesn't sag while you attach the shelves. Keep the shelf heights around 7-8 inches for most shoes.
Pro tipUse a pocket-hole jig for the side panel connections so everything lines up without visible screws on the front.
AvoidDon't mount it with drywall anchors only; shoes add weight and it will pull out.
10. Shoe Rack with Sliding Drawer for Small Items
This is the one I built when I got tired of hunting for socks and shoe polish. The open shelves store pairs, and the drawer holds small stuff like lint brushes, insoles, and boot spray. The drawer also hides clutter that would otherwise make the rack look messy.
Build two shelves on top and a drawer bay at the bottom. Use full-extension drawer slides rated for at least 50 pounds and mount them square to the frame. Size the drawer so it's about 3-4 inches taller than your tallest product bottle.
Pro tipSand the drawer edges and test the drawer travel before final paint so it doesn't scrape.
AvoidAvoid drawer slides mounted crooked - the drawer will bind and you'll hate using it.
11. Shoe Rack from 2x4s with a Weathered Finish
When your shoes live in a garage or laundry room, you need something that can take abuse. 2x4 construction gives you real thickness for screws and makes the rack hard to wobble. The weathered gray finish hides scratches from boots and dragging shoe soles.
Cut 2x4s to build the frame, then add shelf boards on top. For shelf depth, keep it around 12-14 inches so boots fit without falling over. Seal with a penetrating oil or exterior clear coat so it holds up to wet bottoms.
Pro tipPre-drill every screw hole in 2x4s so you don't split the boards.
AvoidAvoid skipping a finish; raw lumber stains unevenly and looks patchy.
12. Cable-Style Shoe Rack with Metal Pipe Rails
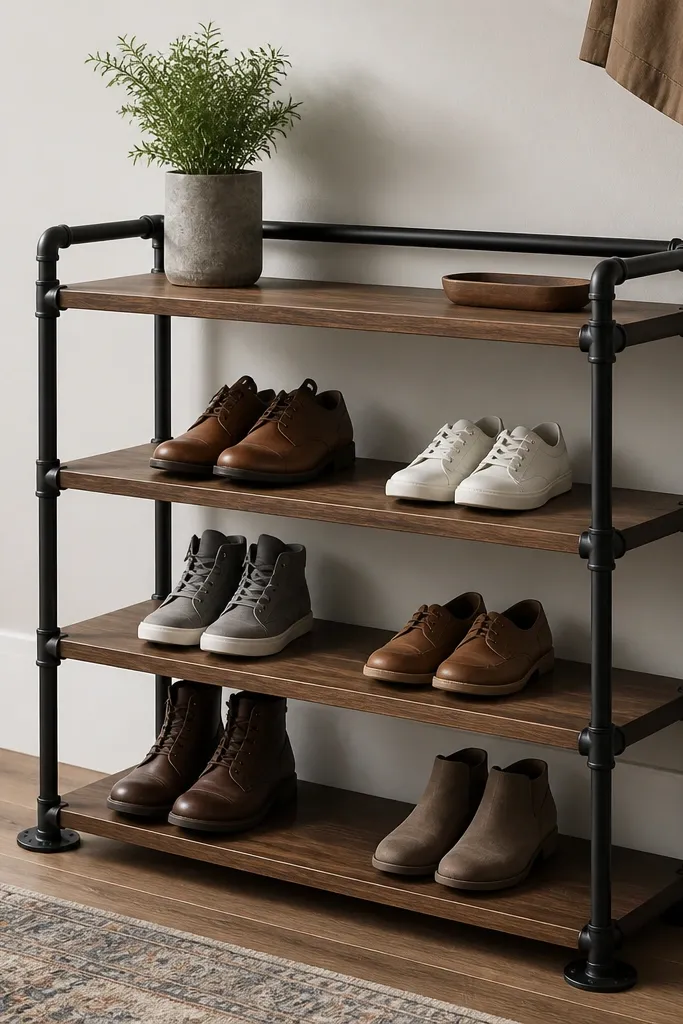
Metal pipe rails add strength without adding bulk, and the open look fits modern spaces. I like this for closets because it feels lighter visually while holding weight. The matte black finish hides fingerprints and looks sharp with oak or walnut shelves.
Use black pipe fittings and pipe nipples to build two side rails, then add wood shelves cut from 3/4-inch boards. Keep shelf depth around 12 inches and space shelves around 8 inches for sneakers. Drill pilot holes in the wood for pipe flange screws so you don't split the board.
Pro tipUse a level to align the pipe flanges before tightening - small misalignment shows on the shelf edges.
AvoidDon't overtighten fittings into soft wood; it crushes the flange and makes the shelves sit uneven.
13. Laminated Plywood Shoe Rack with Edge Banding
Edge banding is the difference between "DIY" and "finished furniture." I built this after seeing how cheap plywood edges looked once shoes and dust touched them. The crisp edge creates a clean shadow line and makes the rack look sharp from across the room.
Use plywood for shelves and sides, then apply edge banding tape with an iron and trim it flush with a sharp utility knife. Finish faces with primer and paint or a clear matte topcoat. Keep shelves around 11-12 inches deep and space them 7-9 inches high.
Pro tipTrim banding with a new blade - dull blades leave little burrs that catch light.
AvoidAvoid painting over unsealed edges; they soak up paint and look darker or blotchy.
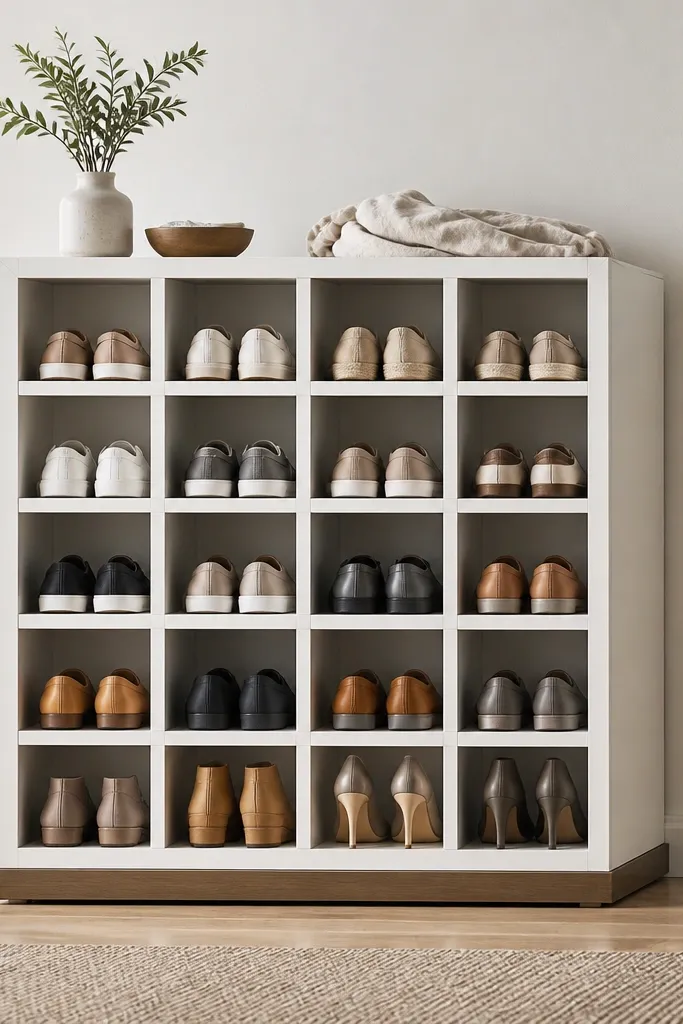
14. Pegboard Shoe Rack with Adjustable Shelf Pins
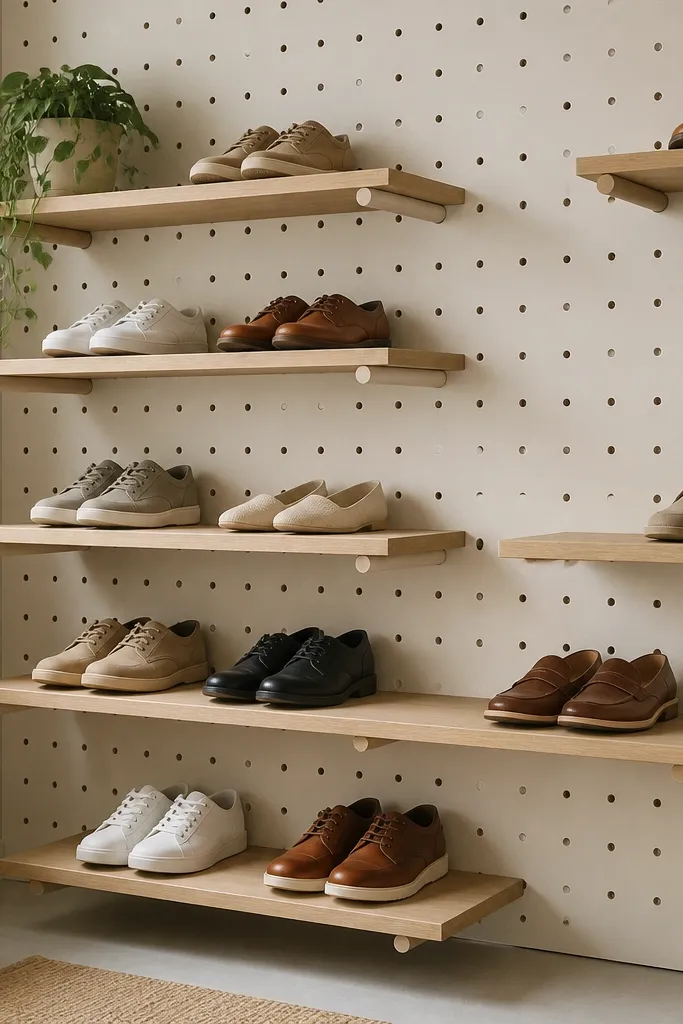
Pegboard lets you change shelf spacing when your shoe collection changes. I built this for a closet that evolves - boots one season, low sneakers the next. The pegboard also makes the rack look like a designed system instead of fixed storage.
Mount pegboard into studs or use strong anchors rated for the weight. Use wood shelves about 10-12 inches deep with a lip that sits on the pegs. Create shelf heights from 6.5 inches up to 10 inches by moving the pegs.
Pro tipMark shelf heights on painter's tape on the wall so you reinstall the same spacing faster later.
AvoidDon't overload pegs; space shelves so each shelf has multiple peg points under it.
15. Small Apartment Shoe Rack with Lift-Off Top Shelf
This one works when you have tiny entry space and you want hidden storage. The lift-off top lets you store seasonal items like shoe inserts or cleaning spray without a separate cabinet. The clean front face keeps it from looking like clutter.
Build a base with two open shelves and a top shelf that sits on cleats. Make the top shelf removable by adding two dowels or finger pulls. Keep shelf depth around 12 inches and height around 7-8 inches for shoes.
Pro tipAdd a small lip on the removable shelf so it's harder to drop while you lift it out.
AvoidAvoid loose-fitting cleats; a wobbly removable shelf makes the rack feel flimsy.
16. Stair-Step Shoe Rack for Narrow Hallways
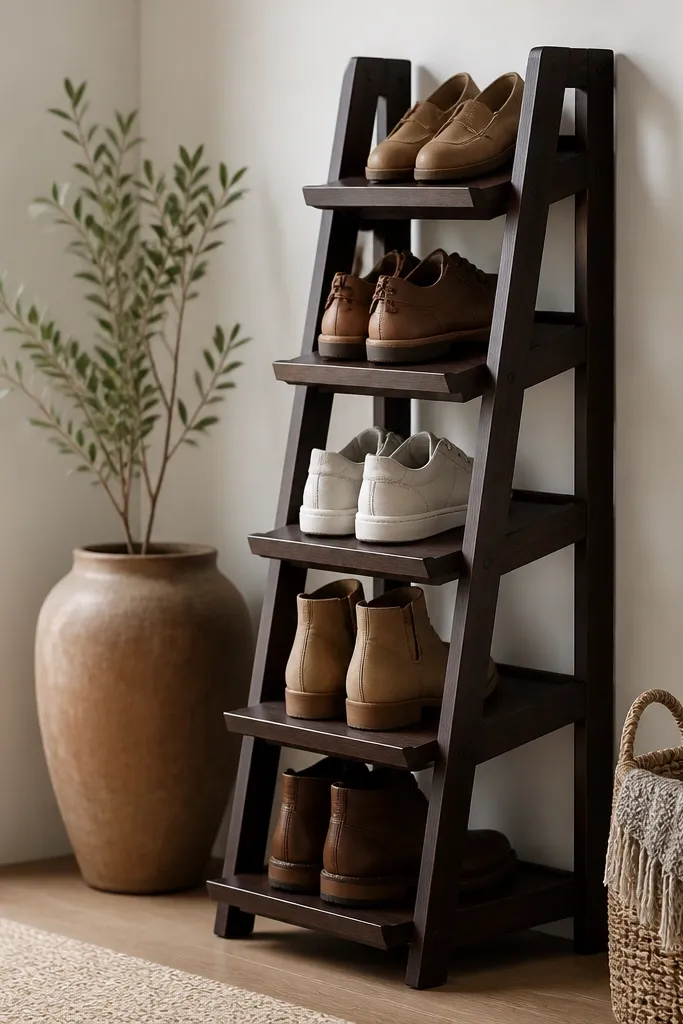
Stair-step shelving makes the rack feel taller without being bulky. I built this for a hallway where door swings limited space, and the staggered layout prevents shoes from blocking each other. The darker stain hides scuffs from daily use.
Build a left and right side frame, then add step shelves using 3/4-inch boards. Keep shelf depth around 10-11 inches so it fits along the wall. Use shelf heights that increase by about 2 inches from bottom to top so shoes don't collide.
Pro tipHold one shoe at the exact angle you store it and test the toe clearance before you cut steps.
AvoidAvoid equal-height steps; it makes the rack look like a ladder and shoes pile up at the front.
17. Corner-to-Hallway Shoe Rack with Removable Front Baskets
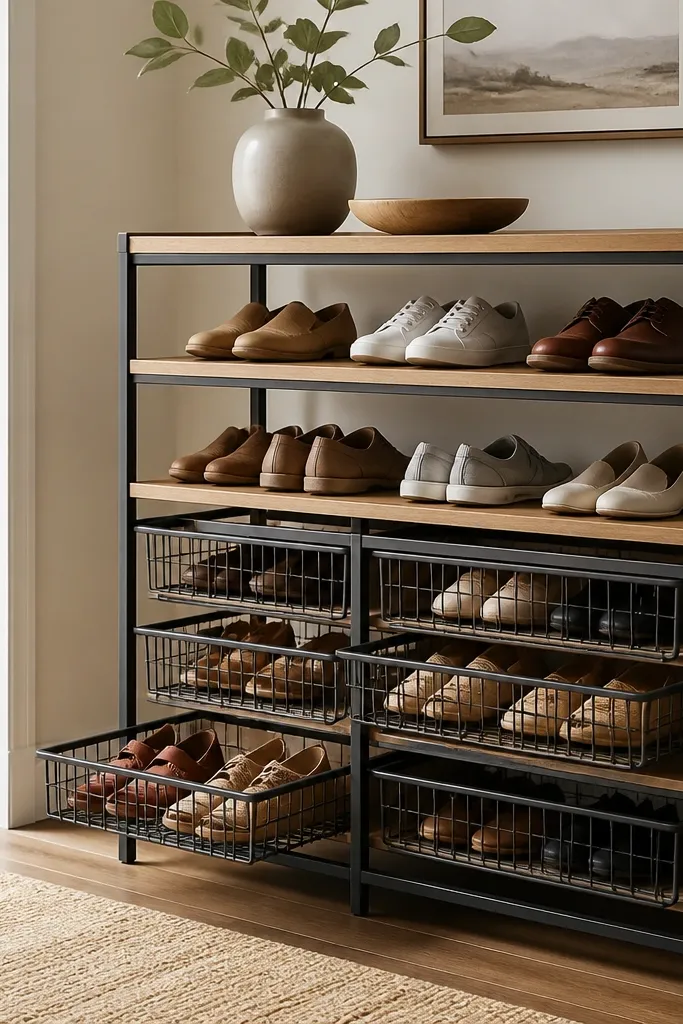
Removable baskets are great for quick-grab items like flats, slippers, and kids' shoes. The wood shelves keep the structure solid, and the baskets keep smaller shoes from falling through gaps. I like this mix because the lower section hides messy pairs that don't line up nicely.
Build a wooden frame with two fixed shelves above. Install rails on the bottom for baskets, and make the basket opening about 2 inches wider than the widest basket you plan to use. Keep upper shelf spacing around 8 inches for everyday shoes.
Pro tipTest slide-out clearance with the door open - baskets stick out and you don't want them hitting trim.
AvoidAvoid baskets that are too tall; they block the bottom shelf and look cramped.
18. Painted MDF Shoe Rack with Chamfered Shelf Edges
Chamfered edges make MDF look more expensive. I used MDF because it's flat and easy to get smooth, then chamfered the top edges so shoes don't catch on sharp corners. The paint finish stays even because MDF doesn't have grain like pine.
Cut MDF shelves and sides, then route or sand a small chamfer on the front edge only. Prime with a bonding primer, then paint with a cabinet-grade finish. Use shelf spacing around 7 inches for sneakers and 9-10 inches for boots.
Pro tipSeal the MDF edges with primer plus a thin coat of clear sealer before painting so it doesn't drink moisture.
AvoidAvoid skipping primer; MDF edges will soak paint and look rough.
19. Vertical Boot Rack with Adjustable Dowels
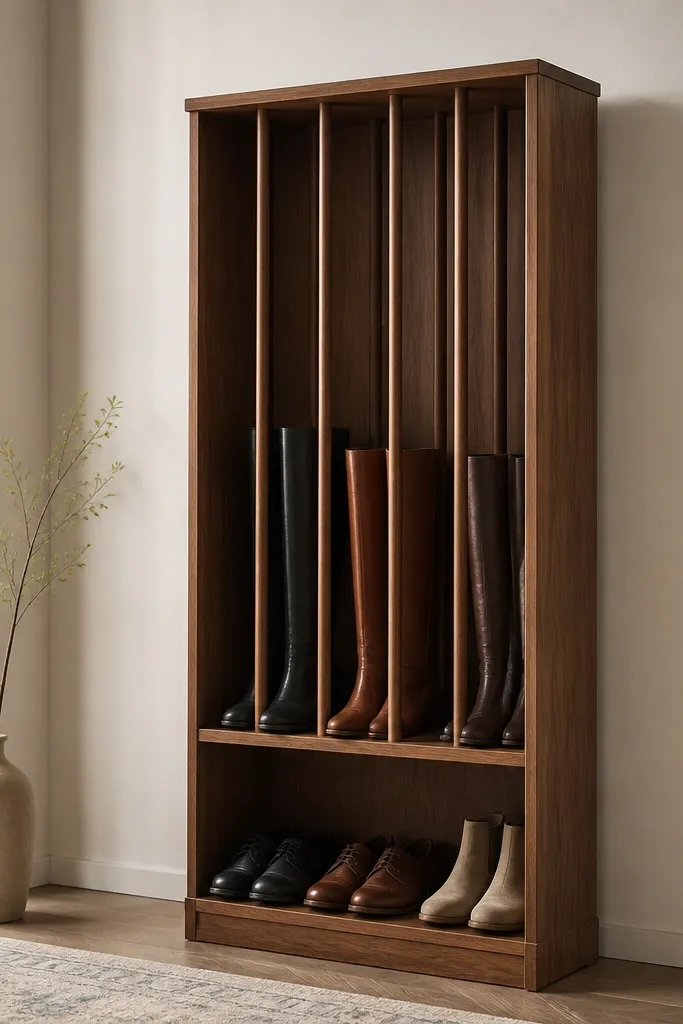
Vertical storage protects boot shape and keeps shafts from collapsing. I built this for tall boots that I don't want stacked - the dowels support the inside and keep the leather from creasing. You also get a clearer view of what's available.
Use a tall frame and install removable dowels with brackets so you can move them based on boot size. Add a lower shelf for regular shoes and slippers. Space dowels about 4-6 inches apart depending on boot width.
Pro tipWrap the dowels with felt where boots touch so the leather doesn't scuff.
AvoidAvoid storing boots flat in shallow shelves; they crease and look tired by week two.
20. Two-Column Stack Rack with Sliding Panels
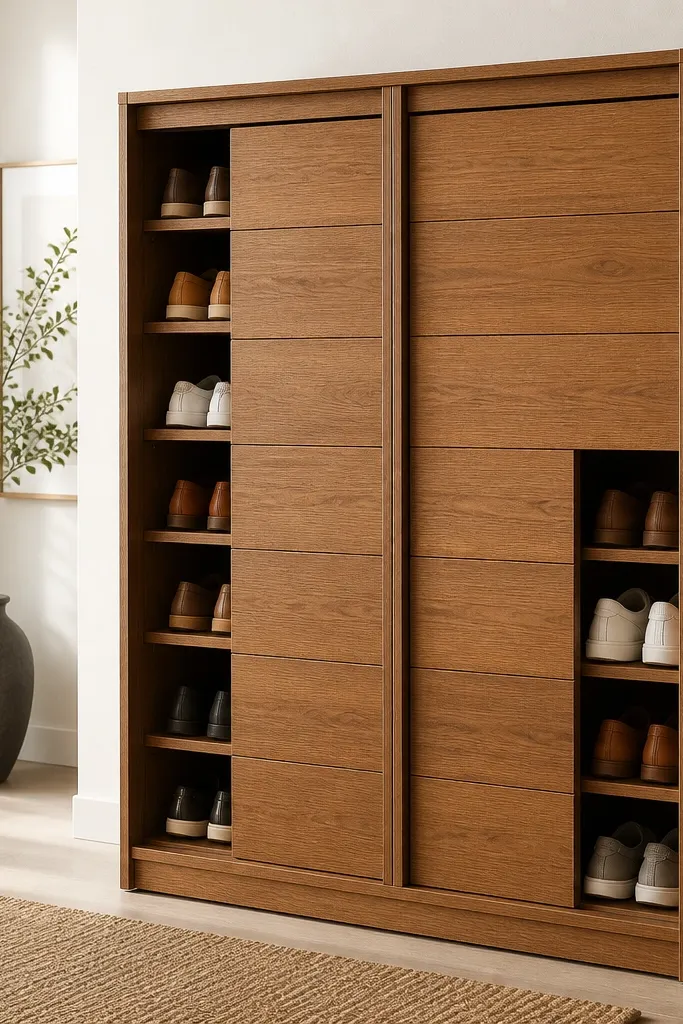
Sliding panels hide the mess without needing doors that swing into your legs. I built this when guests came over and I didn't want to see everyone's shoes piled by the door. The two columns also keep pairs separated so it's easy to find the right one.
Build two vertical stacks with shelves inside, then attach sliding panels on small drawer-style rails. Keep column width around 12 inches each and shelf spacing 7-8 inches for sneakers. Add a small handle notch for easier sliding.
Pro tipTest the panel glide with empty and full shelves so you adjust rail placement early.
AvoidAvoid rails that are too close to the shelf edge; panels bind when the wood expands.


