1. Felt-Wrapped Foam Board with 3 Depth Zones

This one works because it's rigid, fabric-covered, and easy to customize to your exact drawer size. The felt gives jewelry a soft landing so rings don't slide and chains don't clatter. I like gray felt because it hides dust and makes gold and silver pop without looking flashy. The three depth zones also prevent the "everything ends up in the front" mess.
Cut foam board to fit snugly inside the drawer with a 5 mm gap on each side so it slides in and out. Wrap it with felt using spray adhesive, then trim the edges with a sharp utility knife. Mark your zones with a ruler: for example, 3 cm front depth, 5 cm middle, and 8 cm back. Add compartments using foam strips hot-glued in place, then cover the exposed glue lines with felt strips.
Pro tipCut a shallow "chain lane" in the back zone and keep it empty until you hang necklaces there - it stops tangles from spreading.
AvoidDon't skip a snug fit - loose inserts shift and make jewelry slide into the wrong compartments.
2. Cork Board Pinboard for Earrings and Small Pendants
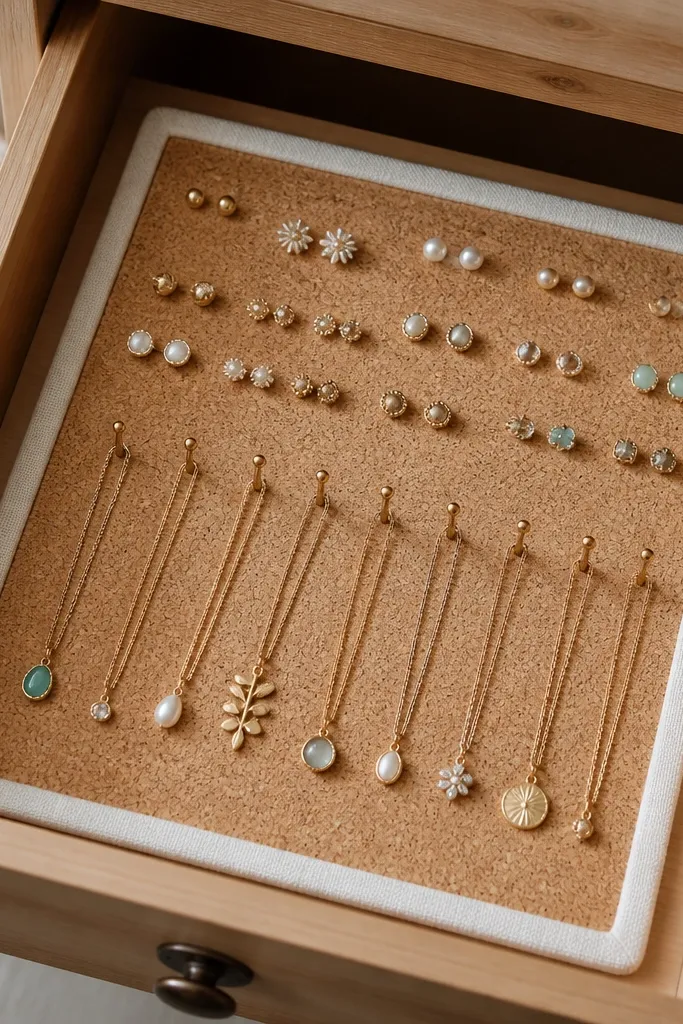
Cork grips jewelry without needing complicated hardware. Pushpins keep earrings separated so pairs don't mix, and small hooks keep pendants from getting lost in the bottom. The cork texture looks warm under jewelry and hides tiny scratches from metal. It also lets you rearrange quickly when your collection changes.
Use a cork sheet cut to drawer dimensions. Cover the sides with fabric tape or thin faux leather so the edges look intentional. Space pushpins about 1.5 cm apart for studs and 3 cm apart for pendants. If you use hooks, screw them into the cork lightly and test pull strength before loading heavier pieces.
Pro tipColor-code by adding a dot of nail polish to the head of pins for different sets - matching looks tidy when the drawer is open.
AvoidAvoid pins too close together - they bend posts and make studs hard to grab.
3. Chain Hammock with Two Dowels and Fabric Strips
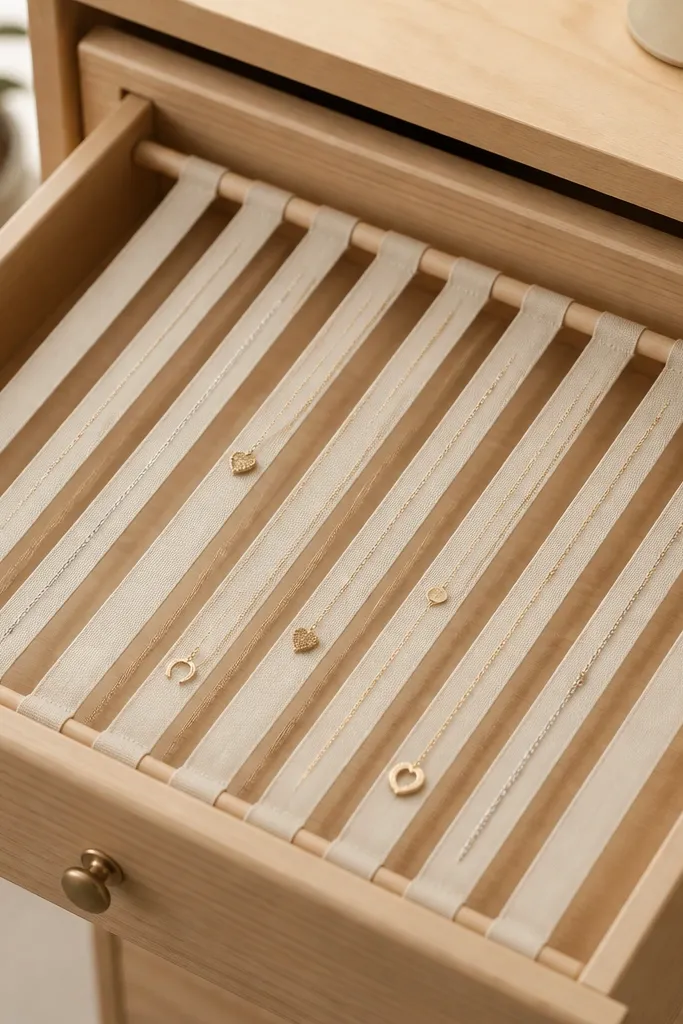
Chains tangle because they braid when they fall into a pile. A hammock keeps each necklace in its own lane so gravity doesn't twist links together. I use soft fabric strips so metal slides without scratching. The result looks airy and intentional, not like a storage box.
Cut two dowels to drawer width minus 2 cm. Glue or screw small blocks on the back and front inside edges to hold the dowels level. Cut fabric strips about 2.5 cm wide and 18-22 cm long depending on drawer depth. Tie or stitch the strips between the dowels with 1 cm gaps so links don't overlap.
Pro tipUse satin ribbon only if your chains are polished - matte chains snag less on twill or cotton tape.
AvoidDon't use stiff plastic strips - they create sharp points where chains catch and twist.
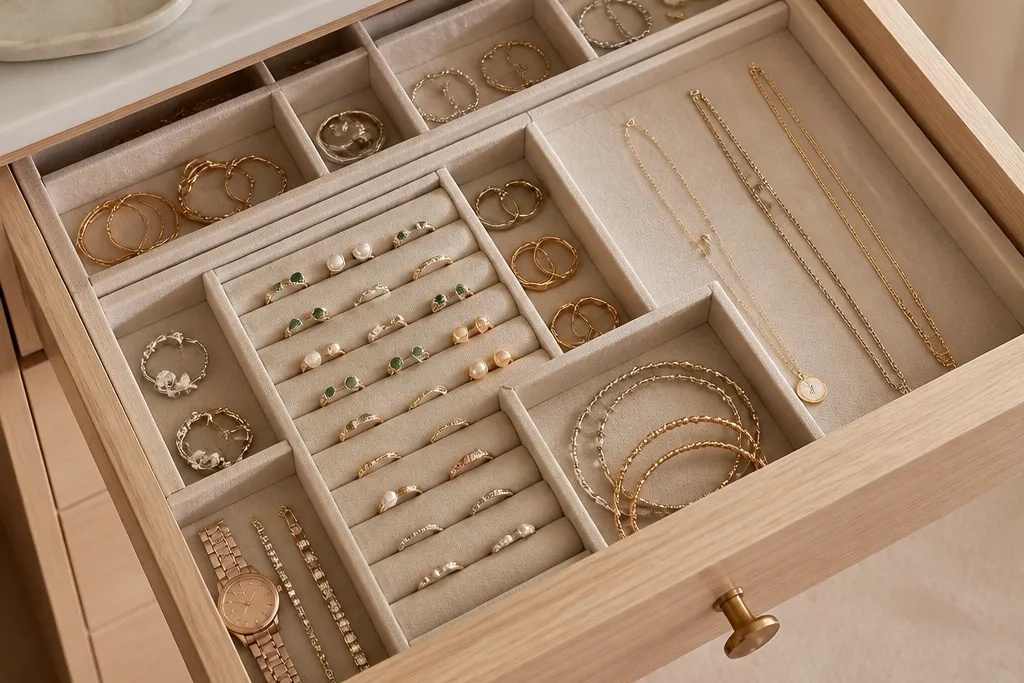
4. Rings-Only Drawer Insert with 12 Slotted Wells
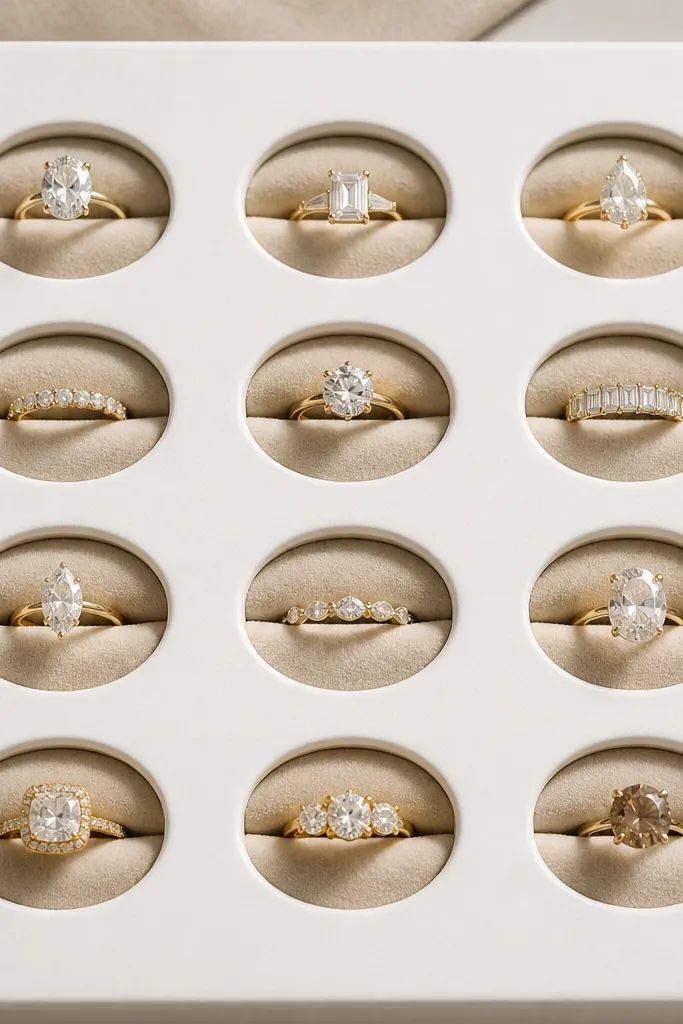
Rings roll because drawers are slightly tilted every time you pull them out. Slotted wells stop that rolling and keep stones from bumping into each other. I like oval wells because they cradle most band shapes without needing a custom fit for every ring. The felt lining also prevents metal-to-metal scratches.
Start with a base panel of thick foam board or thin plywood sealed with matte varnish. Cut 12 oval wells using a craft knife, then line the wells with felt circles trimmed to sit flush. Make wells about 3.2 cm long and 2.0 cm wide, and adjust based on your largest ring. If you want extra grip, dab a tiny dot of fabric glue at the felt edges only.
Pro tipGroup rings by metal color in rows: silver on one side, gold on the other. It's faster to pick an outfit match.
AvoidSkip full-depth cuts - if wells go too deep, rings fall through and get stuck behind the felt.
5. Vintage Tea Tray Style Organizer from a Shallow Frame
A shallow tray keeps everything visible and keeps you from burying jewelry at the back of the drawer. The dividers make a clean "display" look even in a storage space. Dark felt makes silver and pearl pieces look softer and hides smudges. It feels like a mini vanity tray, just inside a drawer.
Use a shallow wooden frame or build one from 1x2 wood strips. Line the bottom with felt, then install thin dividers (about 6 mm wide) to create 4-6 compartments. Mount the tray into the drawer with non-slip cabinet liner underneath so it doesn't slide. Add two small hooks at the back edge for necklaces, keeping hook height consistent so chains hang straight.
Pro tipPaint the frame edges in matte cream and leave dividers natural wood for a warm contrast.
AvoidDon't use glossy paint inside the tray - it shows scratches and makes felt look messy.
6. Drawer Insert with Clear PVC Compartments and Fabric Backing
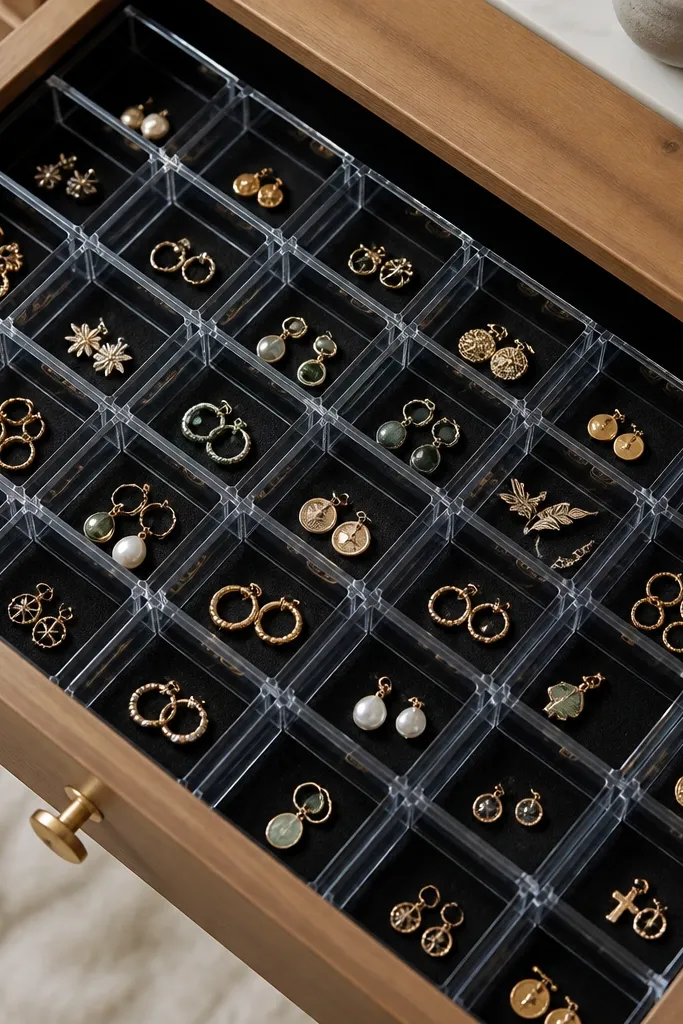
Clear walls let you see what's inside without opening anything, and the fabric backing hides the ugly drawer bottom. This setup is great for tiny items like charm bracelets, hair cuffs, and earring backs that love to escape. The black backing makes gemstones look deeper and keeps the whole drawer from looking cluttered.
Use clear compartment organizers cut to size, or assemble from clear PVC sheet with silicone edges. Back the insert with faux suede stapled or glued to a rigid base. Leave 1 cm spacing between compartments for easy grabbing. Seal any sharp PVC edges with heat-shrink tubing so fingers don't get scraped.
Pro tipPut the heaviest pieces in the bottom row only - clear PVC scratches faster when it rubs metal.
AvoidAvoid stacking compartments too tight - fingers can't pinch the jewelry and everything ends up shoved in.
7. Magnetic Strip Organizer for Metal Bangles and Clips
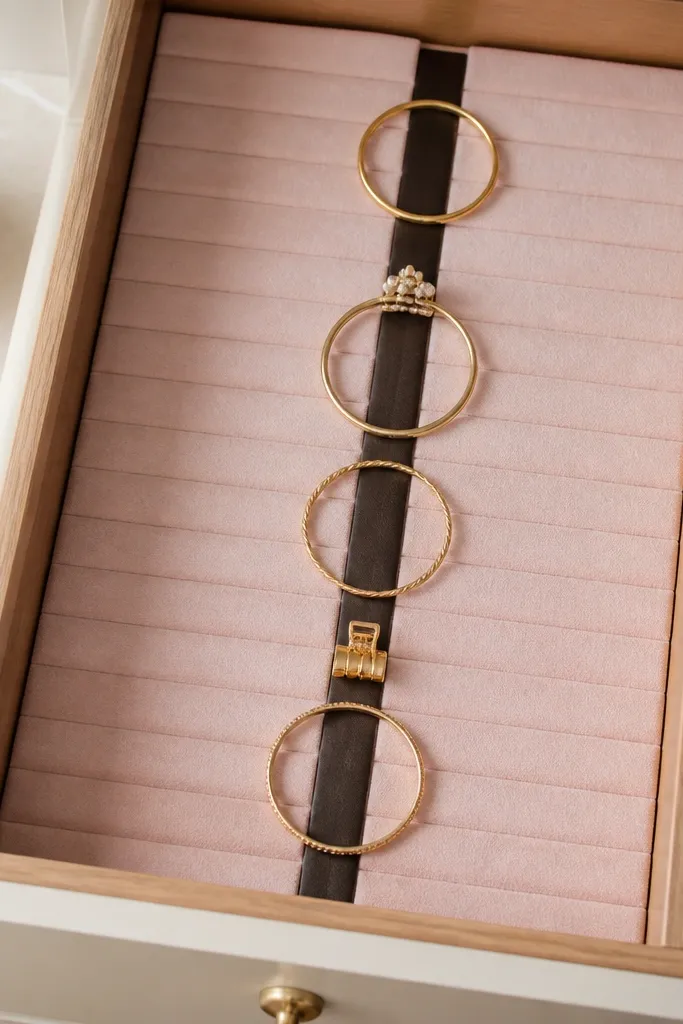
Magnets stop metal pieces from sliding and keep bangles from tangling with each other. I've used this for bangles, hair clips, and small chain bracelets that want to wander. The felt base keeps metal from scratching the drawer. It also looks clean because the pieces line up in a neat column.
Cut a base panel to your drawer size and line it with felt. Add a magnetic strip with strong adhesive, placing it 1.5 cm from the edge so you can still grab pieces. For bangles, space them about 2.5 cm apart so they don't touch. Test the magnet strength with your heaviest bangle before loading the drawer.
Pro tipStick a strip of thin felt over the magnet edge where you grab pieces - it reduces snagging and keeps the look soft.
AvoidDon't mount the magnet flush with unlined wood - bare edges scratch and chip fast.
8. Pegboard Divider Insert with Removable Hanging Hooks
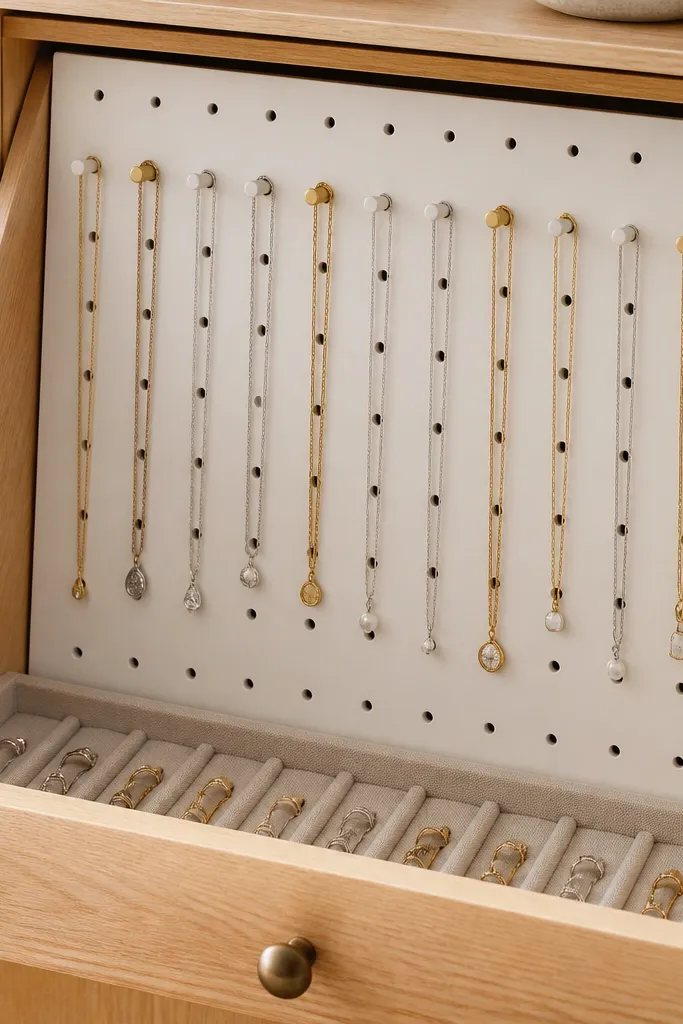
Pegboard lets you change placement without rebuilding the whole organizer. Hooks keep necklaces up and separated, so chains don't drape into each other. I like alternating hook heights because long chains fall naturally and don't pool at the bottom. The pegboard also gives a clean, grid look that looks intentional even when the drawer is open.
Cut pegboard to drawer width and depth, then add a thin frame made from wood strips so it sits level. Paint the pegboard matte the same color as your drawer liner. Install removable hooks so you can swap positions as your jewelry changes. Add a lower tray using a shallow plastic or wood insert lined with felt for rings and studs.
Pro tipUse zip ties to bundle spare earring wires and keep them from snagging on hooks.
AvoidAvoid hooks that are too small for your chain loops - they twist and make pickup slow.
9. Drawer-Safe Jewelry Organizer from an Old Picture Frame
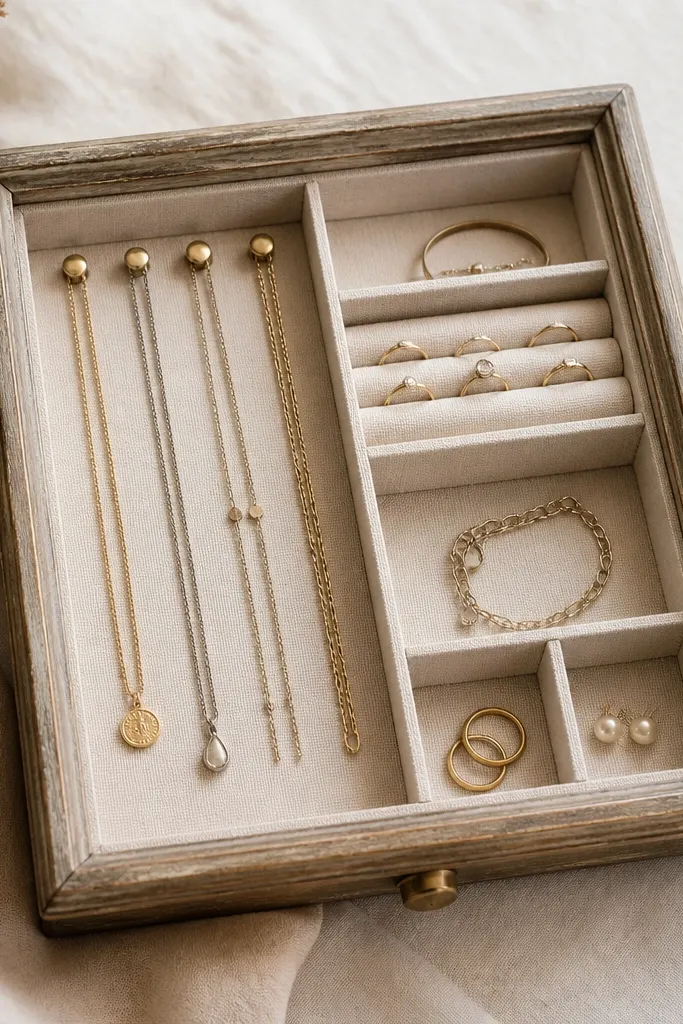
A frame gives you instant structure and makes the organizer look like decor, not a hack job. Compartments keep studs and rings separated, and the brass knobs hold necklaces without crushing them. I like twill lining because it's smooth enough that chains slide but textured enough to hide dust. The distressed frame finish makes the whole piece feel lived-in and warm.
Remove the glass and backing from a small picture frame that fits your drawer. Mount a fabric-lined base inside the frame using hot glue along the edges only. Build compartments with thin wood strips or cardstock walls covered in twill. Screw brass knobs into the back strip for necklace attachment, spacing them about 3 cm apart.
Pro tipSeal the inside wood with matte clear coat so oils from your fingers don't leave shiny spots.
AvoidDon't glue felt directly to rough wood edges - the adhesive shows and the lining peels at the corners.
10. Pegboard + Cotton Pegs for Earring Pair Matching
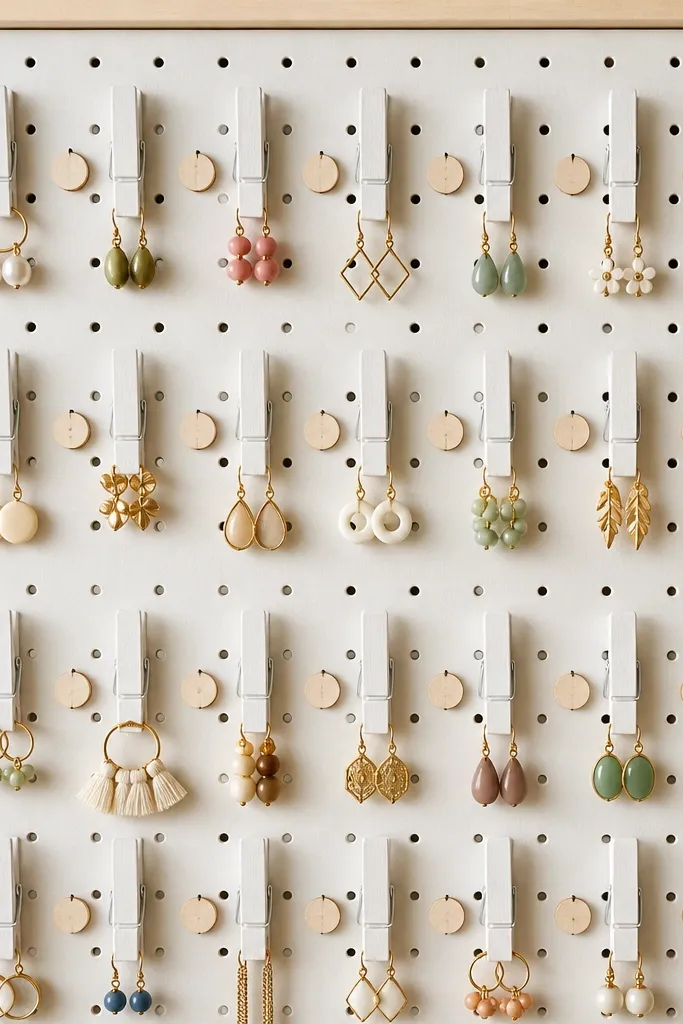
This is the organizer I use when I'm tired of chasing matching pairs. Clothespins grip earring backs and keep them in a visible spot without poking through fabric. The pegboard makes spacing consistent, and the numbered tags help you match quickly. It looks neat because everything lines up in rows.
Cut pegboard to fit the drawer and line the bottom with felt. Paint clothespins matte white and let them dry fully. Attach the pegboard to a base so it stays flat. Clip earrings into the clothespins, then add small numbered tags using cardstock strips glued to the front edge.
Pro tipUse a single tag color for earrings you wear most so your daily picks are obvious.
AvoidAvoid clothespins without a smooth edge - rough wood chips earring posts and leaves dents.
11. Folded Fabric Organizer with Sliding Ribbon Dividers
This one is for people who hate rigid inserts. The fabric outer stays quiet and doesn't clack when you open the drawer, and the ribbon dividers let you resize compartments for different necklace lengths. I like canvas because it holds shape and looks clean, and the ribbon gives a light, airy look. It also makes the drawer feel more like a dressing station than storage.
Sew or glue a fabric box using cotton canvas. Make the base about 2 cm thick with interfacing so it doesn't sag. Thread ribbon dividers through small channels or attach them with fabric ties so they can slide. Keep compartments shallow: aim for 4-6 cm depth so you see everything at once.
Pro tipAdd a stiff strip at the top edge (like fusible interfacing) so the fabric box stays square after repeated pulls.
AvoidAvoid thin flannel fabric - it collapses and jewelry sinks into a pile.
12. Silicone Earring Mat Insert for Studs and Tiny Earrings
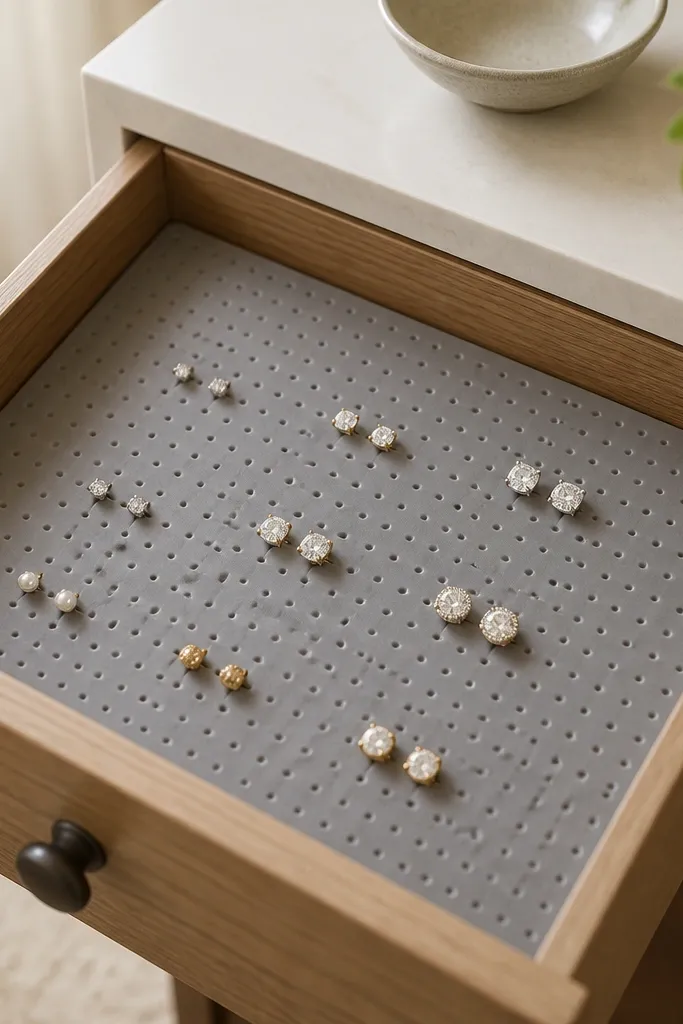
Silicone dimples hold studs so they stand up and don't disappear at the bottom. This is the cleanest option for tiny earrings and for keeping earring backs from getting mixed in. The mat also wipes down easily, which matters when you store makeup-adjacent jewelry like ear cuffs. It looks simple and modern, even in a small drawer.
Buy a silicone jewelry mat or make one by trimming a silicone sheet to drawer size if you have the right thickness. Press it into place and make sure dimples face up. Use two dimples per pair for balance: one for the stud post and one for the matching earring. If you need a backdrop, place the mat on top of a fabric-lined base so it doesn't slide.
Pro tipWipe with a damp microfiber cloth before storing - silicone holds onto residue and it dulls the look.
AvoidDon't store heavy hoops on dimples meant for studs - they tip and bend.
13. Wooden Slat Insert with Adjustable Peg Slots

Wood slats give you structure and a clean look, and the movable pegs let you adjust the organizer as your collection grows. I like this for bracelets because they need space to lie flat without tangling. The holes create consistent spacing so pieces don't slide into each other. The felt lining keeps metal from scratching and softens the wood visually.
Build a base from thin slats spaced about 1.2 cm apart, then drill holes at regular intervals along the slats. Add cream felt on top of the base so jewelry rests on soft fabric. Insert wooden pegs through holes to create lanes - start with 6 lanes across the drawer width. Stain the wood matte light oak and seal with a satin clear coat.
Pro tipKeep peg spacing bigger for charm bracelets - charms snag on tight gaps and twist.
AvoidAvoid glossy sealant - it shows scuffs and fingerprints fast.
14. Acrylic Necklace Rails with Rounded Corner Blocks
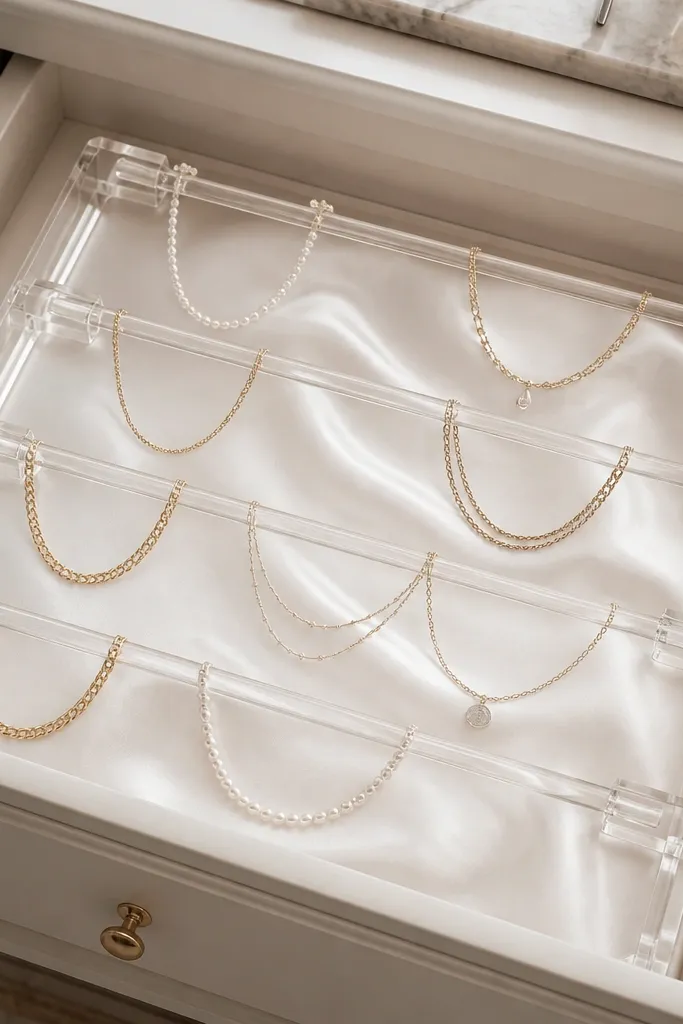
Acrylic rails make necklaces look like they're on display, and the clear structure keeps everything visible. Rounded corner blocks keep the rails from scraping the drawer and reduce the harsh look of straight edges. A satin white backing makes chains stand out and hides minor drawer marks. This is the cleanest option when you want your drawer to look like a mini boutique.
Cut acrylic strips for rails, then sand edges lightly and polish with fine grit so they don't snag chains. Anchor each rail with rounded corner blocks made from acrylic or wood wrapped in fabric. Use satin fabric for the backer and glue it to a base board. Space rails about 3 cm apart for most necklaces, and add extra spacing for thick statement chains.
Pro tipUse anti-scratch film on the acrylic where your chains rest - it keeps the clear look longer.
AvoidDon't leave raw acrylic edges - they grab chain links and cause fraying over time.
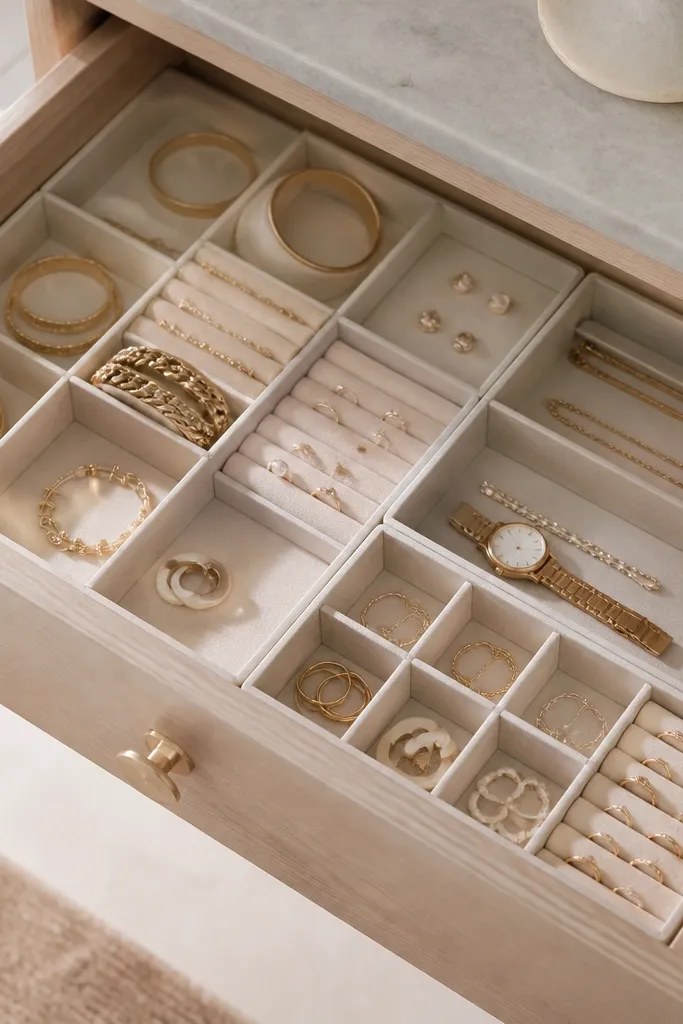
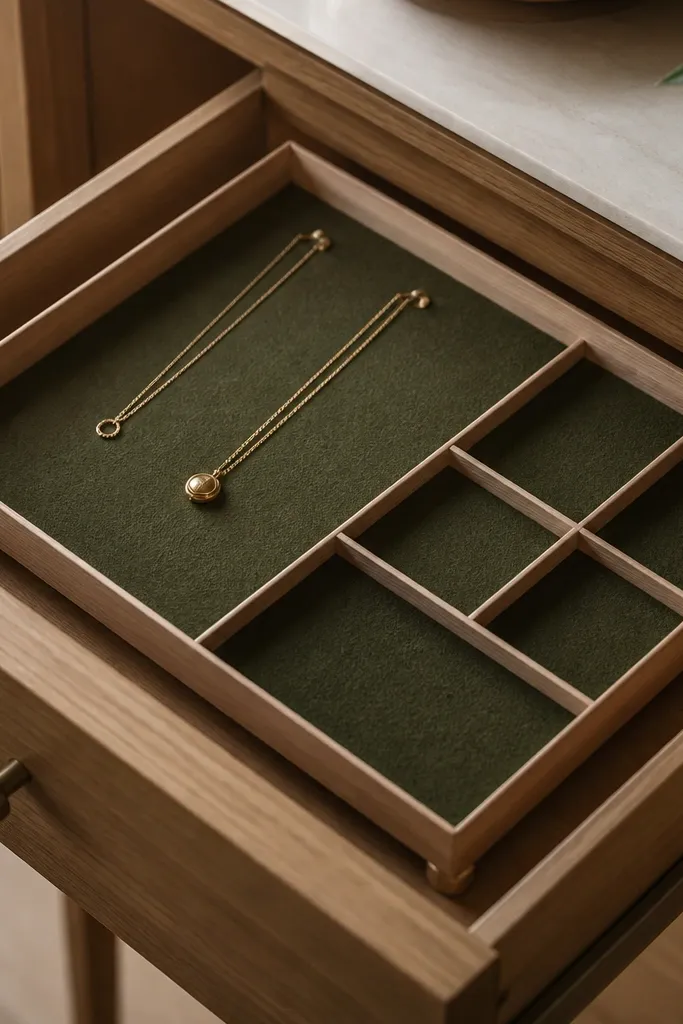
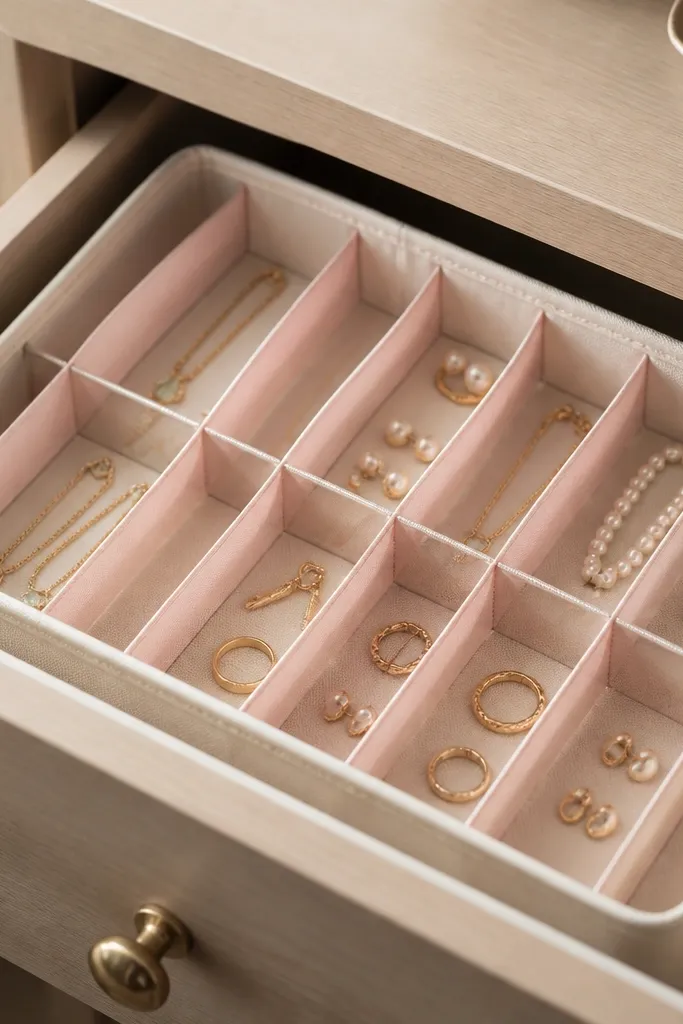
15. Stackable Drawer Inserts with Label Tabs for Sets
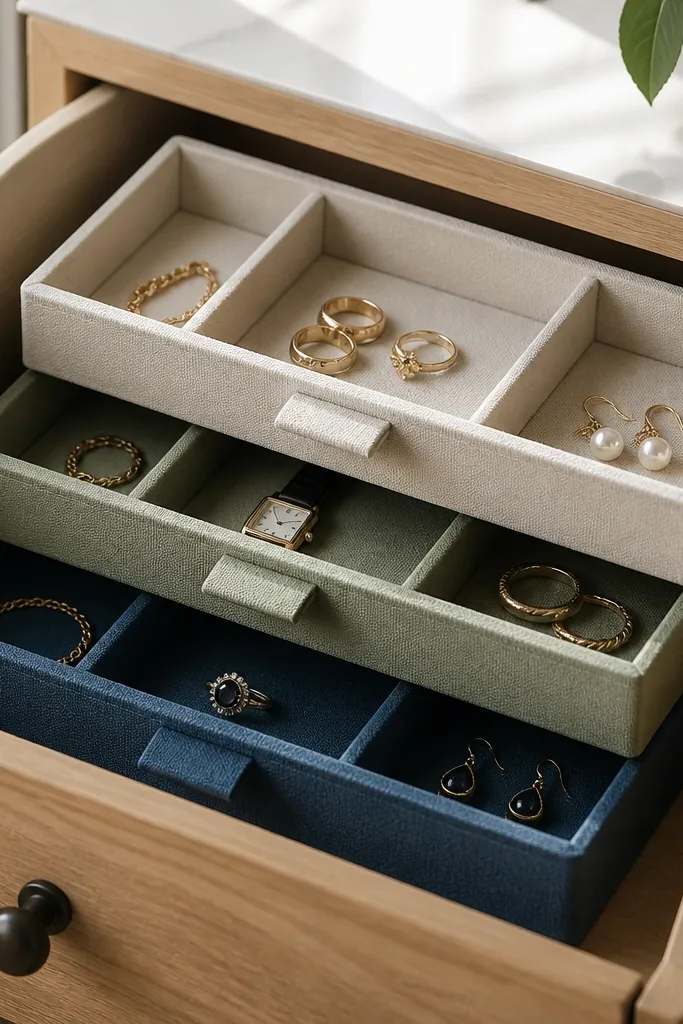
Stackable inserts stop the "mixing" problem when you have sets you wear together. I use fabric-colored inserts so my brain can grab the right one instantly. The label tabs make it feel organized even if the drawer is messy before you open it. This setup is also great for gifting because you can hand over one insert and it's already sorted.
Build or buy three shallow inserts that fit side by side in the drawer depth. Line each insert with a different fabric color: olive for everyday, navy for work, and burgundy for special pieces. Add small compartments inside each insert using foam strips or thin plastic dividers. Attach label tabs using cardstock glued to thin plastic strips so they don't curl.
Pro tipWrite labels in pencil first and test the font spacing on scrap paper - small changes make it look tidy.
AvoidAvoid labels glued directly on fabric - they peel and look uneven after a few drawer pulls.


