1. Linen + brass thumbtack halo board
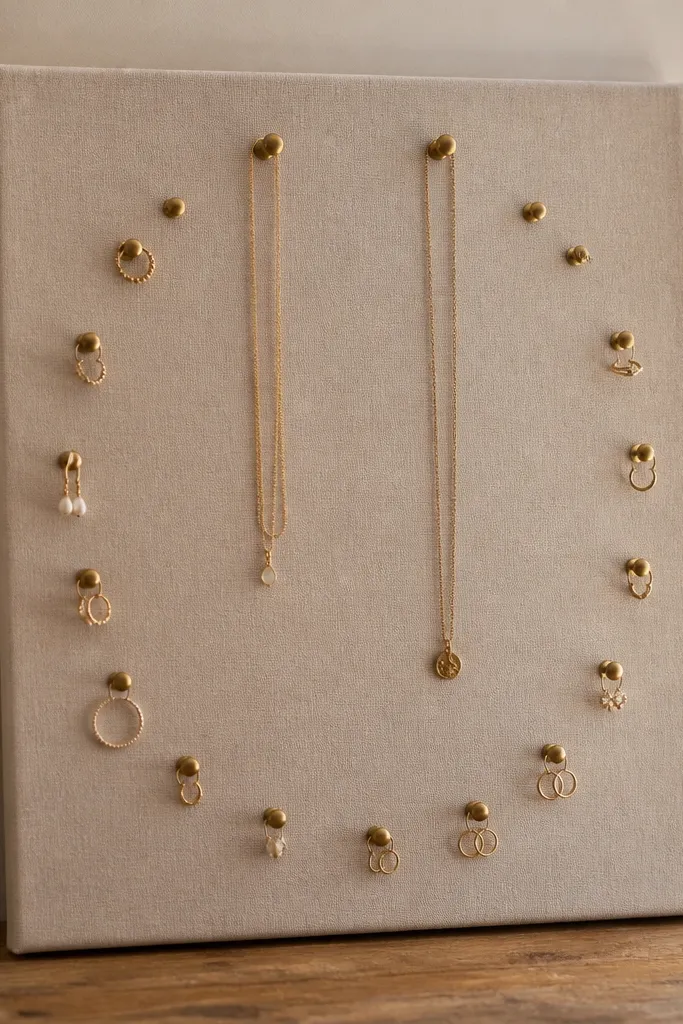
This cozy wall jewelry organizer uses linen to make the whole wall feel soft instead of harsh. The brass thumbtacks add warm shine without needing visible hooks everywhere. I like the curved "halo" layout because it keeps earrings clustered near eye level while necklaces hang slightly lower. Linen also hides glue seams better than glossy fabric.
Wrap a piece of plywood or foam board with linen, pull tight on the back, and staple along the edges. Space thumbtacks about 1.5 inches apart; keep the top row slightly higher than you think so necklaces don't brush the frame. Use brass thumbtacks only - mixing finishes makes it look like a craft bin.
Pro tipBefore attaching jewelry, hang 6-8 of your most-used pieces and adjust tack placement until grabbing feels natural.
AvoidSkip flimsy fabric that sags - a loose wrap makes the tack layout look messy.
2. Cork sheet with painted mini-arches
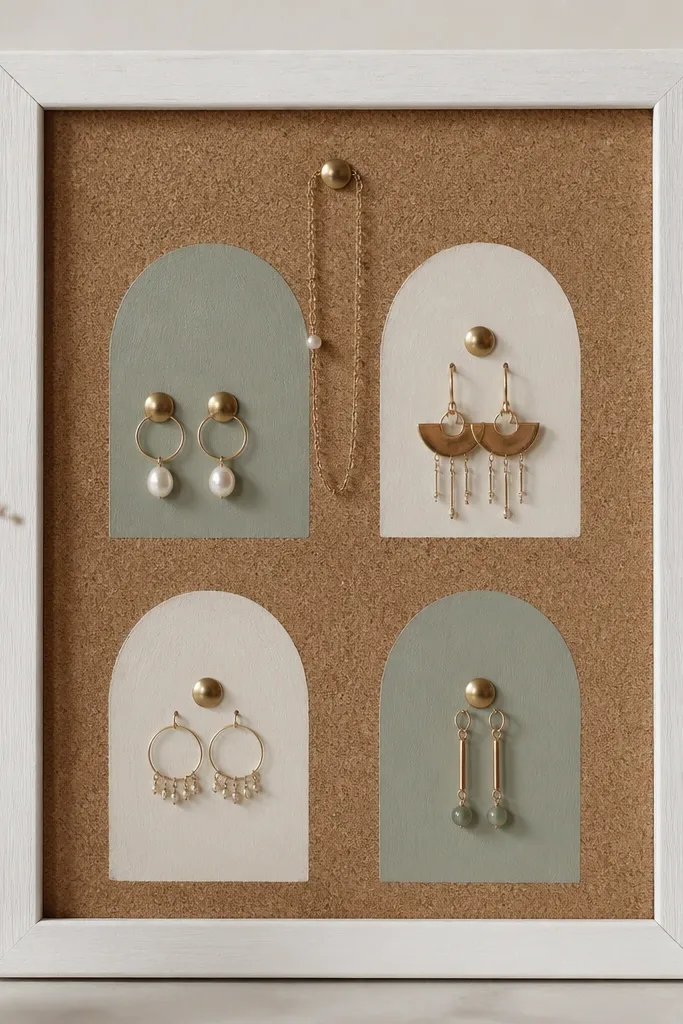
Cork is forgiving and grips earring backs, making it practical for daily use. The painted mini-arches give you cozy structure - it looks like designed wall art, not a storage board. Dusty sage with cream makes gold jewelry look warmer and less yellow. Cork also keeps lightweight chains from sliding.
Cut cork to a frame opening and glue it to a backing board. Paint arch templates with matte acrylic, then seal with a light clear matte spray to keep it from scuffing. Use brass push pins for jewelry points and keep the arches about 3 inches tall so there's room for dangles.
Pro tipLabel each arch lightly on the back or inside the frame corners with tape so you'll remember which zone is for studs vs hooks.
AvoidDon't use glossy paint - it reflects flash and makes the board look cheap in photos.
3. Pegboard with sage spray + knob hooks
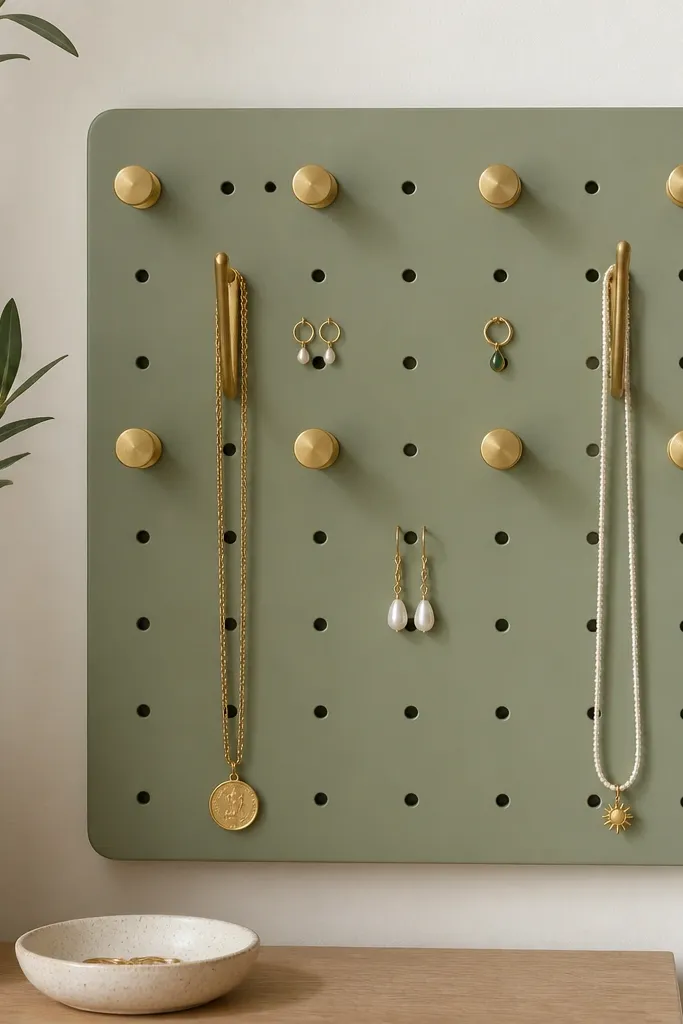
A pegboard is the cleanest way to get a cozy wall jewelry organizer that also handles weight. When you spray it in sage, it stops looking like a garage tool wall and starts reading as soft decor. Knob hooks look friendlier than thin hooks, and they keep chains from twisting. This setup is great if you have more than 20 pieces and hate tangles.
Use a pre-cut pegboard panel, sand lightly, then spray with a primer and two coats of sage paint. Install hooks after the paint cures so you don't chip the finish. Keep hook rows aligned and leave at least two peg holes between necklace attachment points.
Pro tipHang your most-used necklace first, then build outward - the layout locks in once you see where it naturally falls.
AvoidSkip plastic hooks on a painted pegboard - they bend and scratch the finish.
4. Framed window screen with ribbon loops
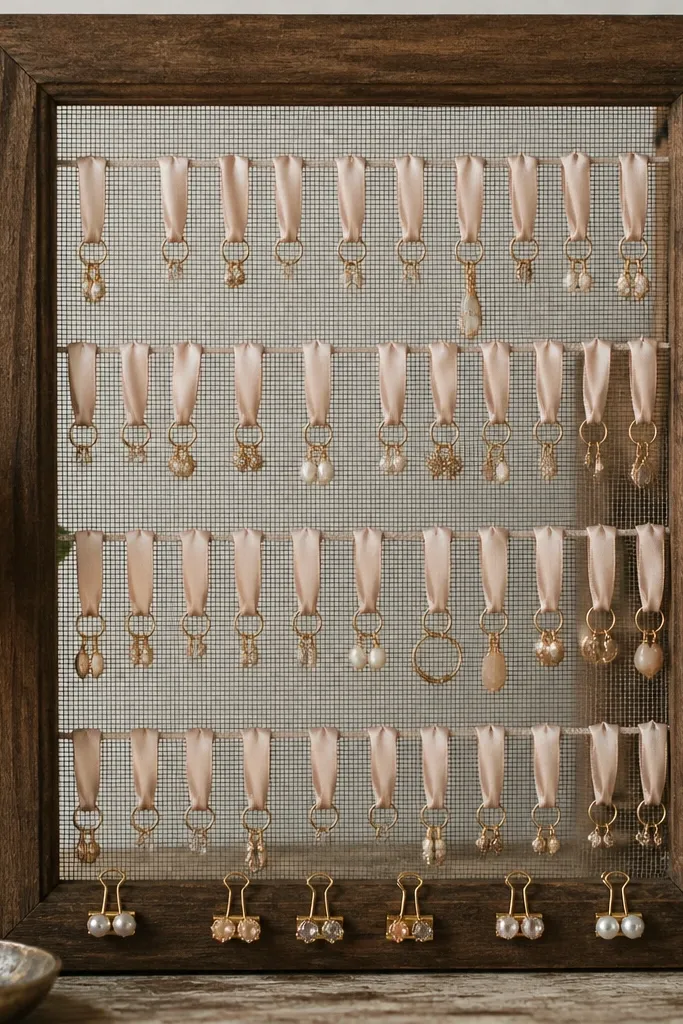
This is the cozy wall jewelry organizer I build when someone wants it to look like decor first. The ribbon loops create gentle grip points, so earrings hang without snagging. Blush satin catches light and makes the wall feel warm even in dim bathrooms. The screen texture also gives a little visual depth without clutter.
Stretch a metal window screen into a frame and secure on the back. Tie ribbon loops around the screen wire using double knots, then clip earrings with small jump rings. Keep ribbon loops spaced about 2 inches apart, and use one thicker ribbon line for necklaces so they don't tangle.
Pro tipUse satin ribbon with a width of 1/2 inch; narrower ribbon cuts visually and wider ribbon looks heavy on the screen.
AvoidDon't tie ribbon too tight - it warps and makes the loops look uneven.
5. Felt wall tiles with color-coded pockets
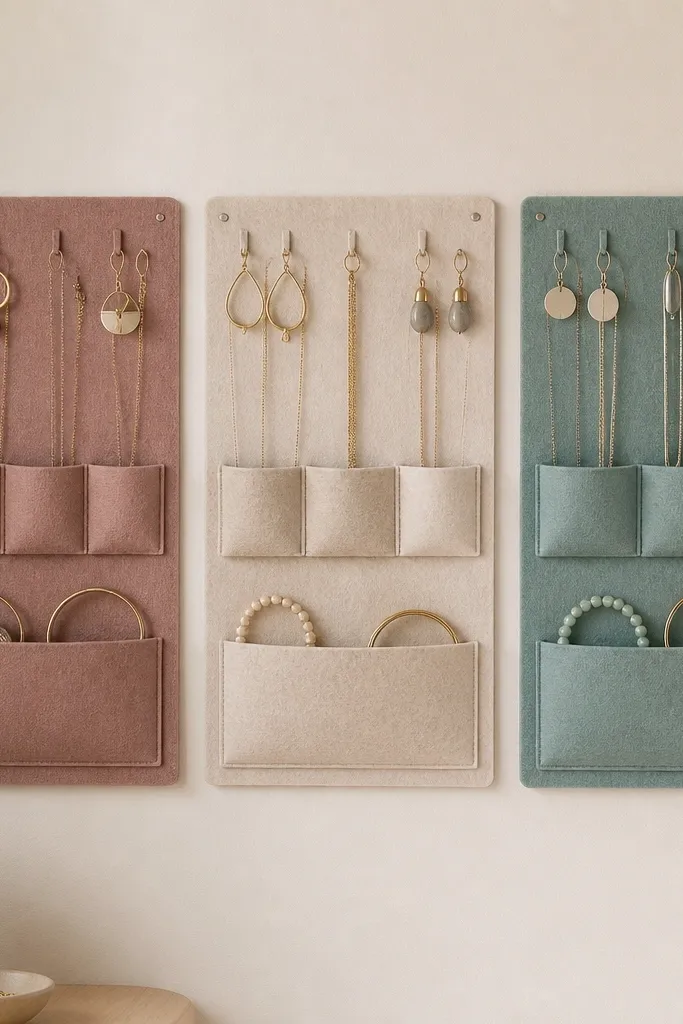
Felt tiles make a cozy wall jewelry organizer because they're soft, quiet, and forgiving when you bump them. Color-coded pockets help you keep jewelry sorted without thinking. Teal and rose make costume jewelry look intentional and less random. Stitching pockets also gives every item a home, which stops the "mixed pile" mess.
Cut felt sheets into equal rectangles (I like 12x16 inches), then stitch pockets using coordinating felt. Mount tiles on a backing board or directly with small screws and washers for clean spacing. Add 6-8 small loops along the top with embroidery thread so earrings hang at consistent height.
Pro tipUse fabric glue only for temporary placement; stitch the pockets so they don't peel after a few weeks.
AvoidSkip thin craft felt - it flops and makes pockets look like they're sagging.
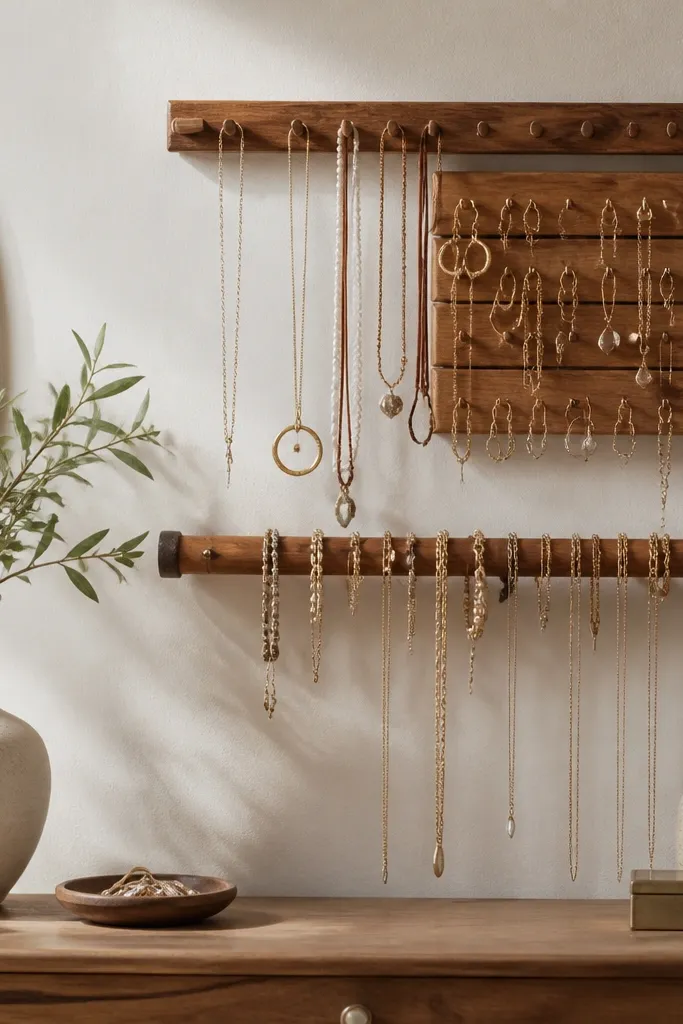
6. Macramé + dowel necklace ladder
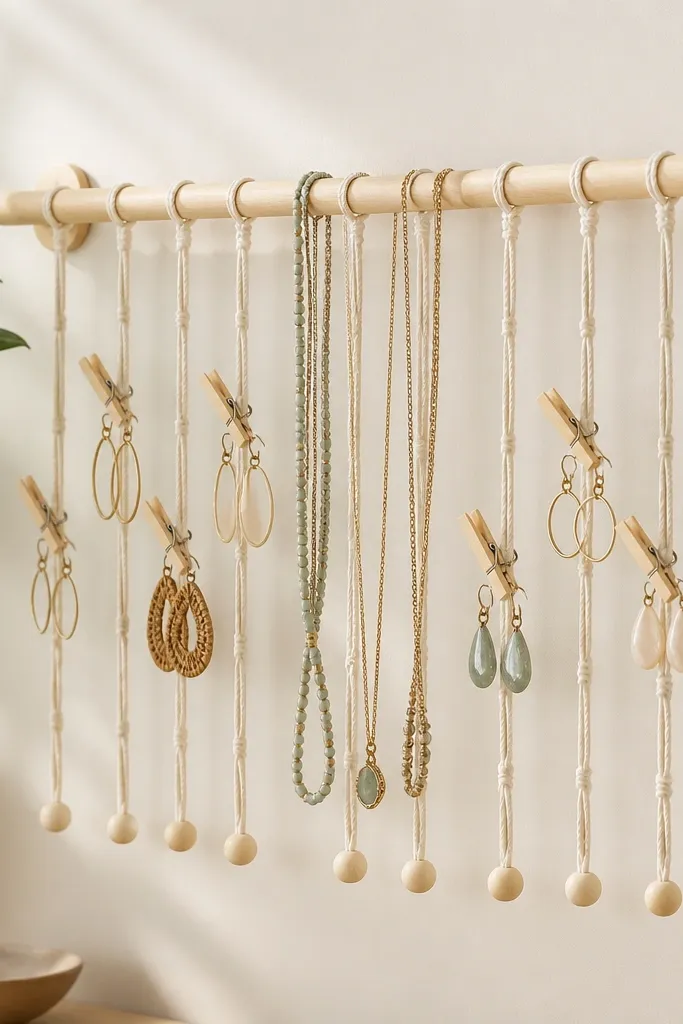
This one looks cozy because it adds texture without bulk. The cords give you flexible attachment points, so you can move pieces around as your rotation changes. Wooden beads make the whole thing warmer, and the vertical lines keep earrings from tangling with chains. It also works great for people who wear a lot of pendants.
Mount a 1-inch diameter dowel with two wall brackets. Knot macramé strands (1/4-inch cotton cord works well) and secure them to a top cord bar or directly to the dowel. Add beads at the bottom for weight and spacing, then clip earrings with small clothespins.
Pro tipKeep the top knot line 2 inches below the dowel so the cords don't rub against your necklaces.
AvoidDon't use slippery polyester cord - it slides knots and loosens the whole ladder.
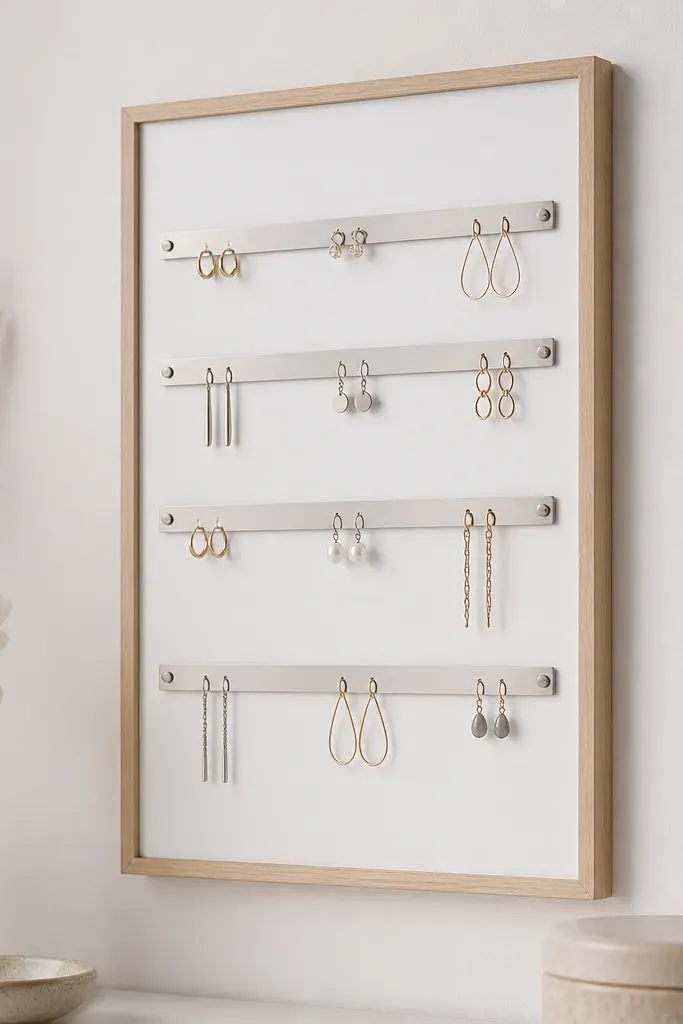
7. Weathered wood plank + wire ring line
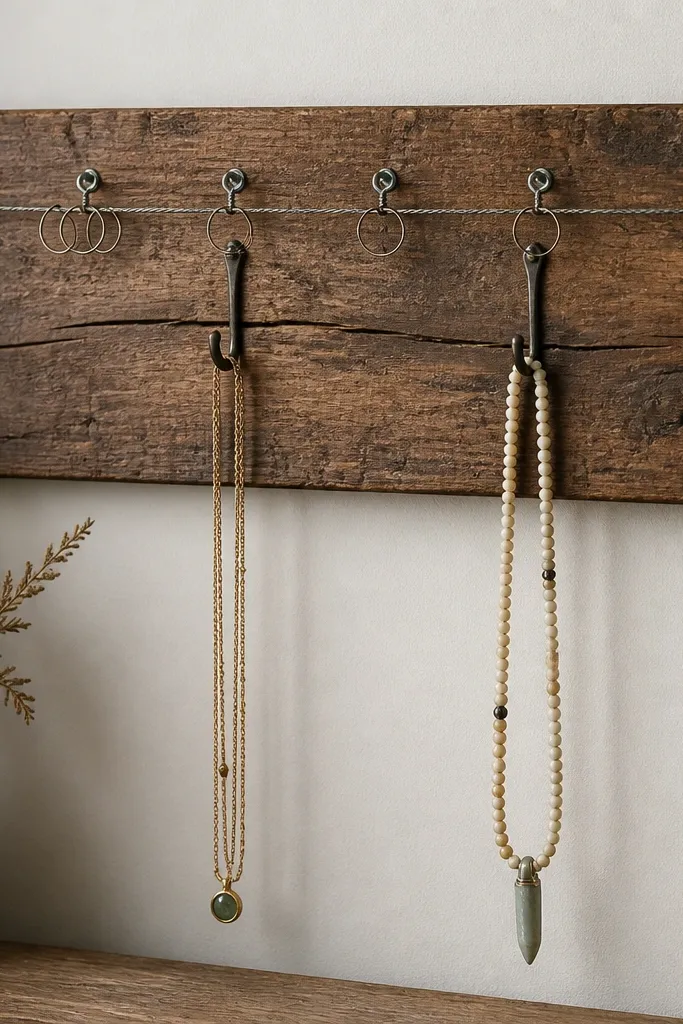
A weathered plank makes this cozy wall jewelry organizer feel like it belongs in a farmhouse bathroom, but it still stays practical. The wire ring line gives you adjustable spots for earrings, so you can re-space without re-drilling. Eye screws keep the wire straight, which makes the whole piece look neat. I like the contrast of warm wood and cool galvanized wire.
Use a plank about 18-24 inches long and 3-4 inches wide. Drill eye screws 1.5 inches apart along the top and run wire through them. Clip rings onto the wire for earrings; mount two larger hooks underneath for necklaces and bracelets.
Pro tipSand the plank edges until they feel smooth with your fingertips; rough edges make it look homemade in a bad way.
AvoidSkip thin wire - it bends and sags, making the ring line look crooked.
8. Board-and-basket shadowbox earring wall
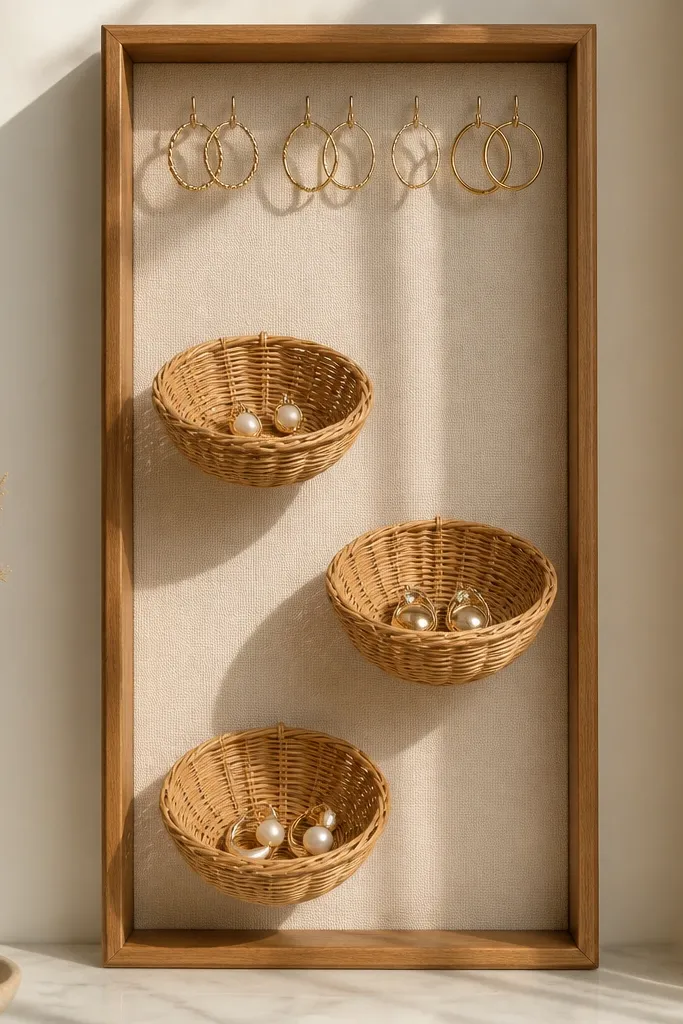
This is cozy wall jewelry organizer territory when you want texture and a little "display" instead of hanging everything. Rattan baskets catch earrings gently and prevent the constant pin-stretching that happens with push pins. The shadowbox frame keeps the whole thing looking finished. It works especially well for stud sets and small hoop earrings.
Use a deep shadowbox frame (around 2-3 inches deep). Staple or glue fabric to the back, then attach mini basket hangers with small screws. Add a top row of hooks using picture frame hardware so you can hang hoops above the baskets.
Pro tipSort earrings by size - small studs go in the bottom basket, and medium hoops go on the middle row hooks.
AvoidDon't cram baskets too close - rings and backs tangle when baskets overlap.
9. Pearl-white tray wall with mini cup hooks
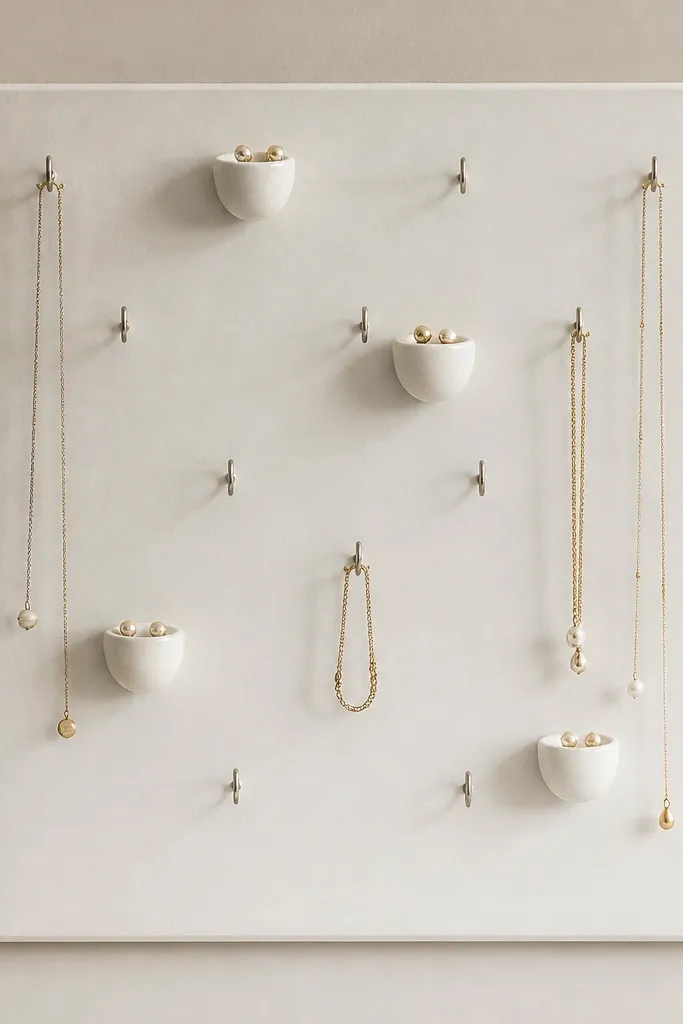
This organizer looks cozy because it blends soft paint with small ceramic pieces. Cup hooks keep chains from sliding off, and the mini cups give you a place for backs and tiny studs. Pearl white also makes rose-gold jewelry look extra warm. It's a good option for people who hate digging for earring backs.
Paint a board with matte wall paint or chalk paint in pearl white. Install cup hooks evenly across the board, then glue or screw mini porcelain cups under selected hooks. Keep cup openings facing up and leave at least 2 inches between cups so jewelry doesn't brush.
Pro tipUse a thin layer of clear matte sealant over the paint if your wall gets bathroom humidity.
AvoidSkip glossy paint - it shows every smudge and makes cheap hardware stand out.
10. Sculpted clay charm wall with earring pegs
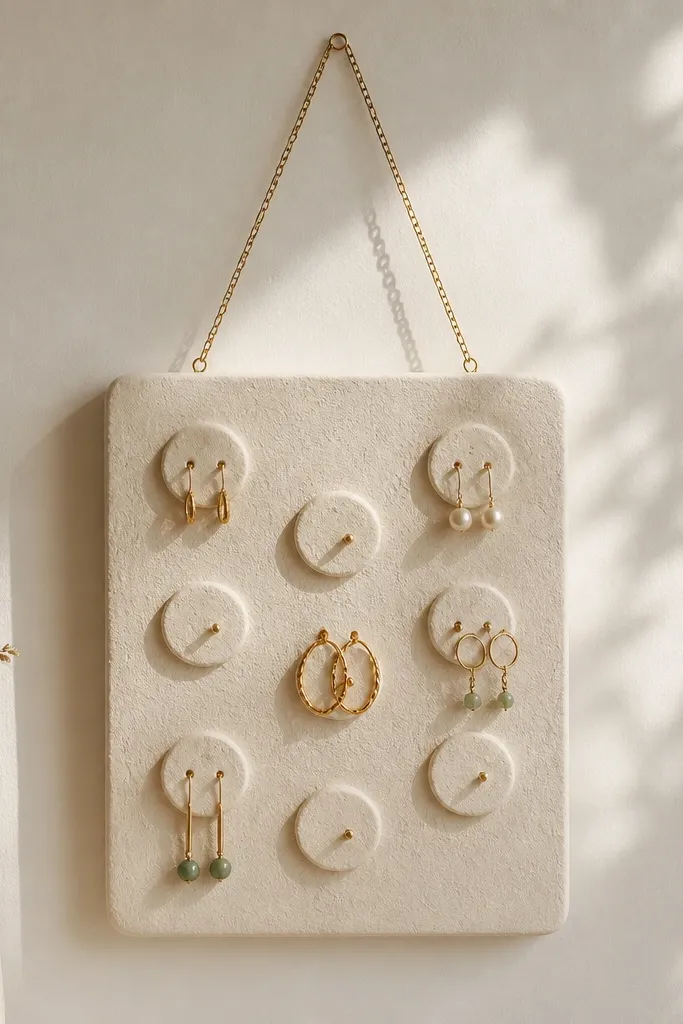
Air-dry clay gives you a cozy wall jewelry organizer with character - it's tactile and looks like handmade art. The raised circles make earring pegs feel intentional and spaced. Ivory clay makes silver and gold both look softer. This is best for a smaller collection since pegs are fixed.
Shape clay onto a plywood base using 1/4-inch thickness for strength. Press metal earring pegs into clay while it's still workable, then let it cure fully. Seal with a matte clear varnish so the clay doesn't chalk over time.
Pro tipPlan your layout on paper first; once clay is cured, moving pegs needs rework.
AvoidDon't skip sealing - unsealed clay scuffs and sheds dust onto jewelry.
11. Ribbon-wrapped dowel + earring cards
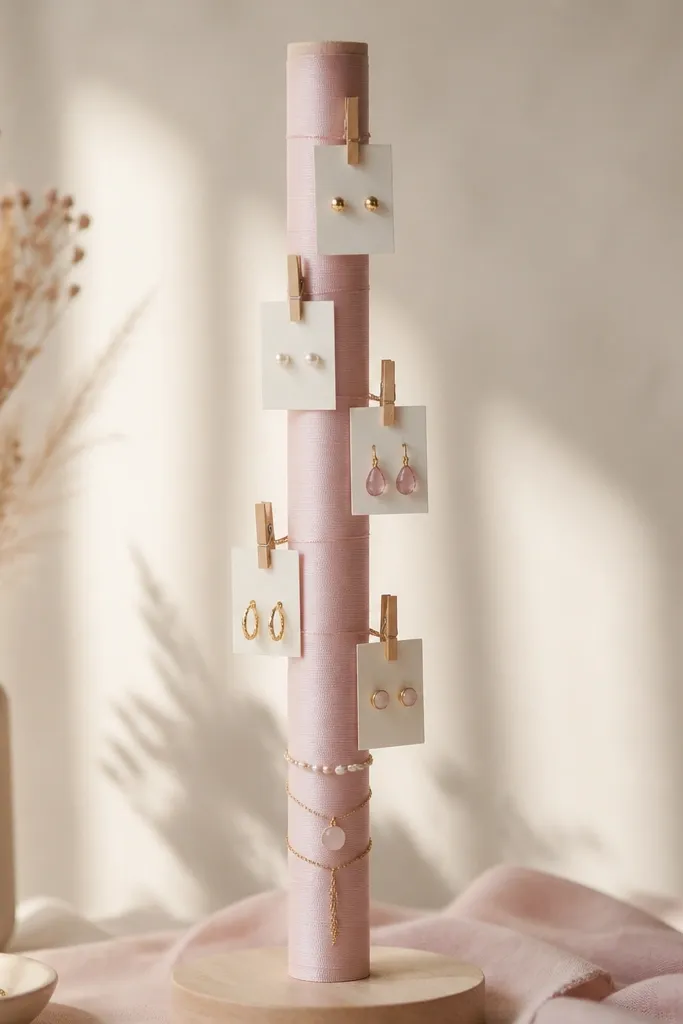
This one looks cozy because the ribbon adds softness and makes the wall feel warm. Earring cards keep pairs together, which is the real time-saver. The dowel also gives you a place to drape longer necklaces so they don't tangle in the same zone as hoops. Pale pink and cream read gentle rather than childish.
Wrap a 1-inch dowel with ribbon, securing with hot glue at the back seams. Attach small clothespins or mini clips along the ribbon line at 2-inch intervals. Hang necklace hooks at the very bottom using a couple of screw hooks so chains don't slip.
Pro tipUse cardstock cards cut to 3x5 inches with a small hole punch for each stud pair.
AvoidSkip bulky knots in the ribbon - they show through and look messy up close.
12. Whiteboard wall organizer with magnetic earring strips
A whiteboard makes a cozy wall jewelry organizer when you keep it minimal and use magnets for the pieces you remove often. Magnetic strips let you rearrange earrings without punching new holes. The light wood frame makes it warmer than a plain office board. It also lets you write which set you wore last - that prevents "I swear I wore these yesterday" confusion.
Mount a small magnetic whiteboard (around 12x24 inches) with two wall anchors. Add magnetic earring bars by taping and then hot-gluing the base to the strip backing. Label zones with erasable marker and keep necklaces on two small hooks at the bottom.
Pro tipUse small felt pads on the back of earring strips so metal doesn't scratch the board.
AvoidDon't use permanent marker for labels - marker stains happen fast on whiteboards.
13. Shiplap-look panel with brass hooks and mini trays
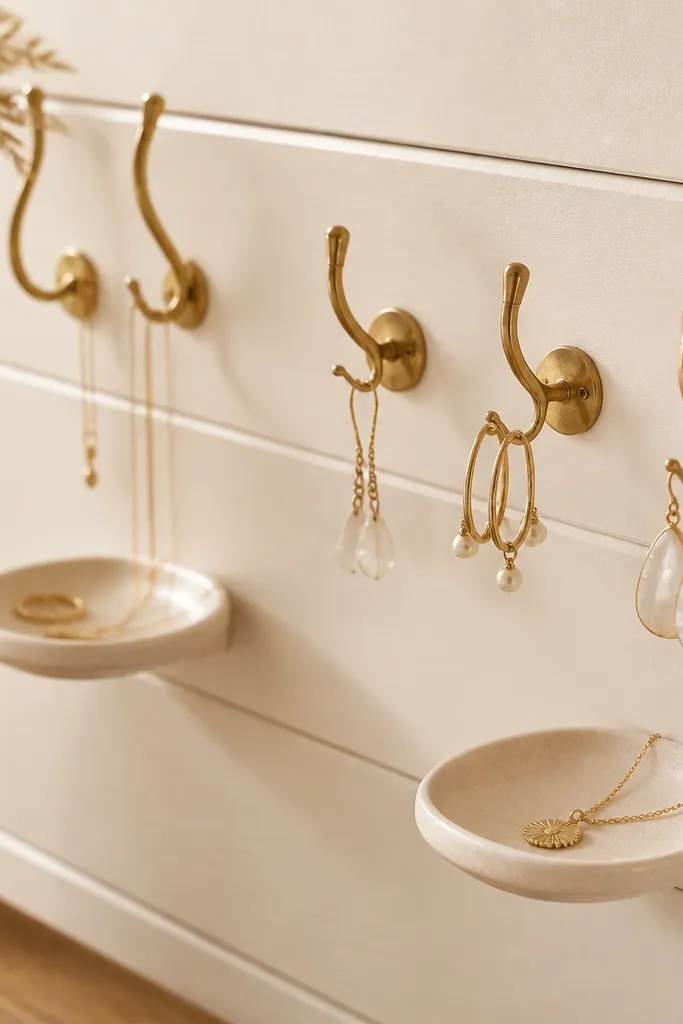
A shiplap-look surface makes this cozy wall jewelry organizer feel built-in. Warm cream is the color I reach for when I want gold to look rich without getting too yellow. Mini trays handle the pieces that don't hang well, like chunky bracelets or a pendant you want to grab quickly. The combination of hooks and trays keeps the wall from looking crowded.
Use thin shiplap boards or a pre-made shiplap panel. Paint with a warm cream matte finish, then install brass hooks with screws. Add two or three mini trays with small brackets or strong adhesive rated for ceramic/wood.
Pro tipUse trays for "daily" pieces and hooks for "rotate" pieces - it keeps the wall tidy.
AvoidSkip oversized trays - if the tray takes up half the panel, everything looks out of scale.
14. Patchwork fabric banner with ring clips
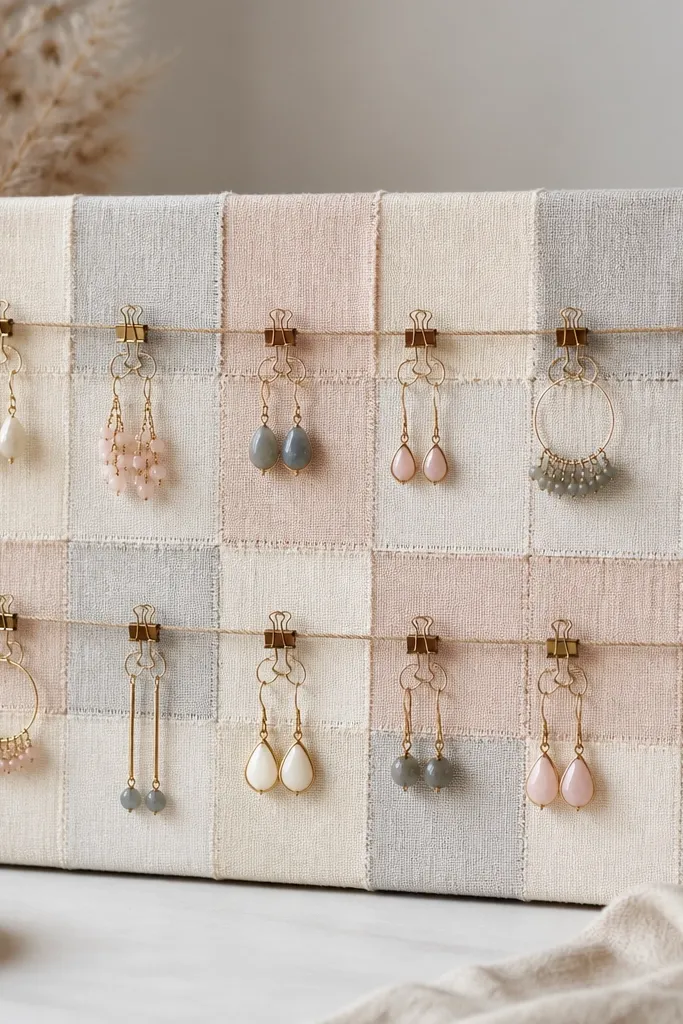
Patchwork makes a cozy wall jewelry organizer because it adds warmth through color variety, not shine. The ring clips let you swap earrings fast, which is exactly what you want during a busy week. I like patchwork with small patterns because it hides tiny stains from makeup or hand oils. This also works for people who hate drilling into walls - you can hang it with picture wire.
Sew or glue fabric squares onto a backing fabric, then stretch over a wooden frame. Add a thin cord across the back or top edge and attach ring clips at 2-inch intervals. Clip earrings directly or use small jump rings for consistent hanging.
Pro tipChoose fabrics with a similar weight so the banner stays flat and doesn't ripple.
AvoidDon't use slippery satin for the whole banner - clips slide and the jewelry shifts.
15. Macaron pastel shadowbox with grid pegs
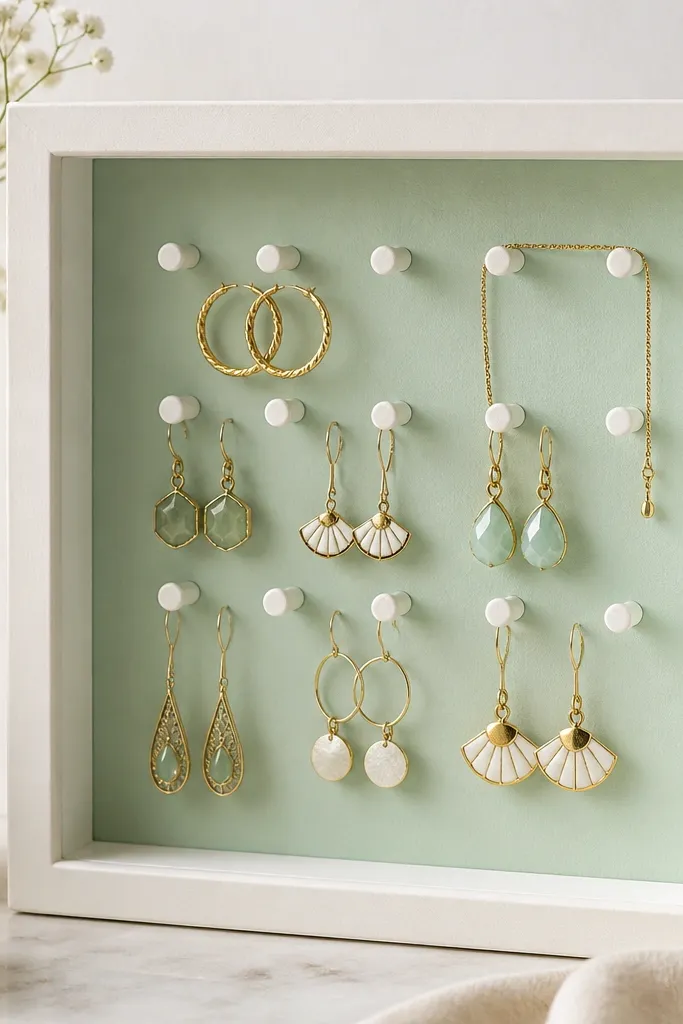
A pastel shadowbox turns jewelry storage into wall art. The mint background makes silver jewelry pop, and white pegs keep the look clean. Grid pegs make it easy to find the right pair because everything aligns. It's also compact, so it fits apartments and small bedrooms.
Use a square shadowbox frame about 14-16 inches wide. Paint or line the back with mint cardstock or fabric, then screw small pegs into a backing board inside the frame. Keep peg spacing about 1.5 inches so dangling earrings don't touch.
Pro tipUse a label maker for tiny peg numbers inside the frame corners - it speeds up sorting.
AvoidSkip overcrowding the grid - if pegs are too close, dangles braid together.
16. Twine + clothespin wall for statement earrings
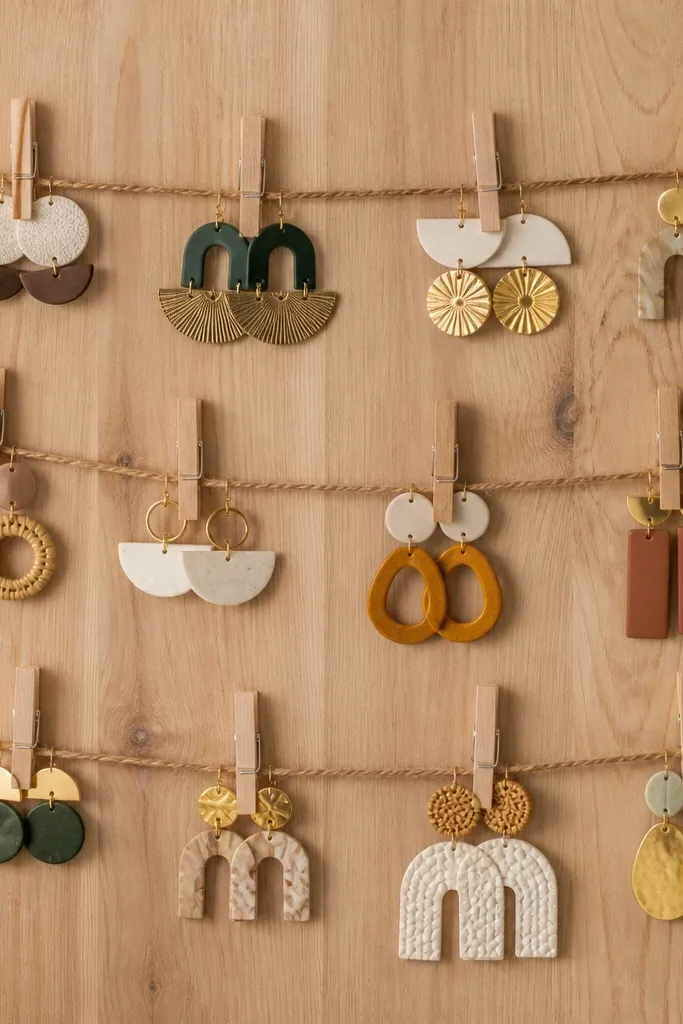
Twine and clothespins make a cozy wall jewelry organizer that looks artsy but still practical. Clothespins grip wide earring tops better than small hooks, especially for chunky pieces. The natural wood tones keep the wall warm, and the horizontal lines create order. This is my go-to when someone has a handful of bold earrings they wear often.
Drill small eye hooks into a wood board and run twine across in three lines. Attach clothespins to the twine at spaced points (about 3 inches apart for statement pieces). Add two small hooks below for necklaces so chains don't hang near earrings.
Pro tipSand the wood board edges and round corners so the organizer feels finished, not rough.
AvoidDon't use shiny plastic clothespins - they look like a craft sale item.
17. Book spine display with rotating ring holders
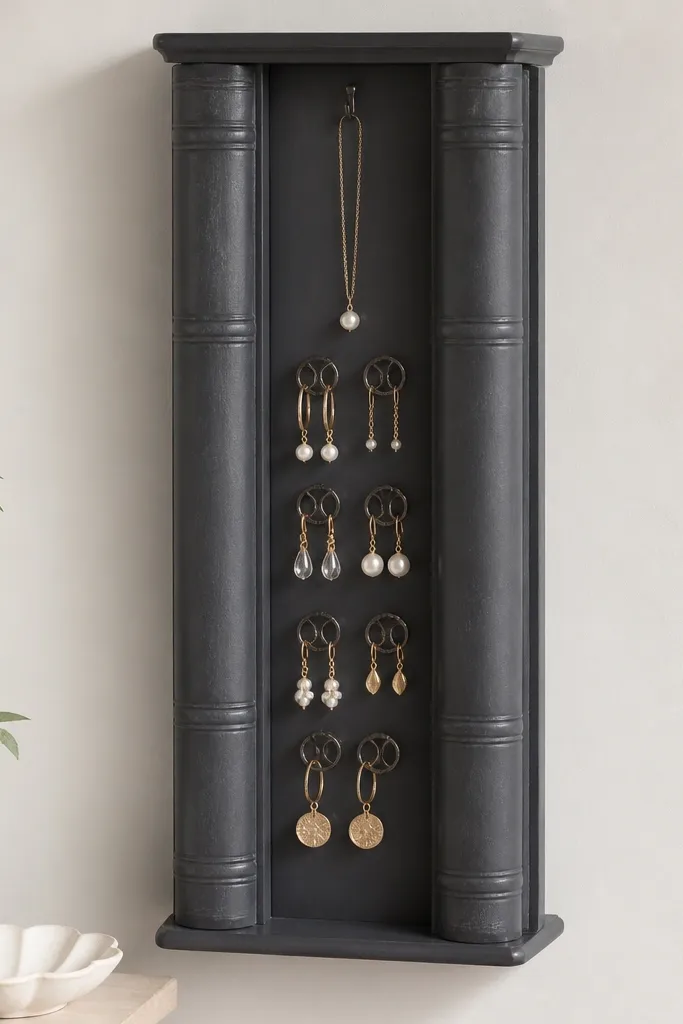
This is cozy wall jewelry organizer energy with a darker, moody vibe. Charcoal makes gold and amber stones look richer, and the faux book spines add personality without clutter. Rotating ring holders let you angle earrings so they sit flat. It's great for people who have multiple rings and want them visible.
Cut a backing board to about 18x30 inches and paint charcoal matte. Mount faux book spine pieces on the left and right using fabric or printed paper. Install rotating ring holders in a central column, leaving 2 inches between holders, then add a top hook for necklaces.
Pro tipAngle the ring holders slightly toward you so earrings don't look flat from across the room.
AvoidSkip high-gloss paint - it shows smudges and makes the whole piece look less cozy.
18. Sunburst cork with copper push pins
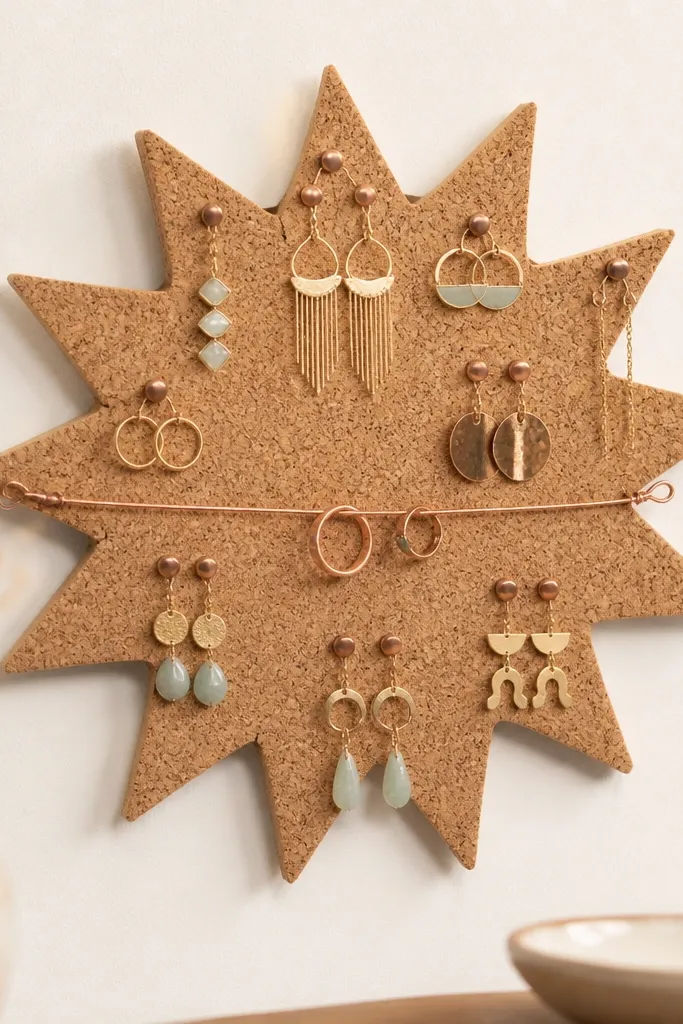
Sunburst shapes make a cozy wall jewelry organizer feel like art, not storage. Cork keeps pins secure, and copper push pins add warm color without looking shiny-for-shiny's-sake. The rays create natural separation between earring clusters. It also makes finding pairs easier because each ray becomes a "zone."
Cut cork into a sunburst template and mount it on a thin backing board. Paint the backing edge in a matching copper tone so the cut looks intentional. Arrange pins in a pattern and clip rings onto a thin copper wire line across the middle.
Pro tipUse shorter earrings on the outer rays and longer dangles closer to the center so nothing overlaps.
AvoidDon't place pins randomly all over - the sunburst loses its ordering effect fast.
19. Ceramic tile wall with brass cup pulls
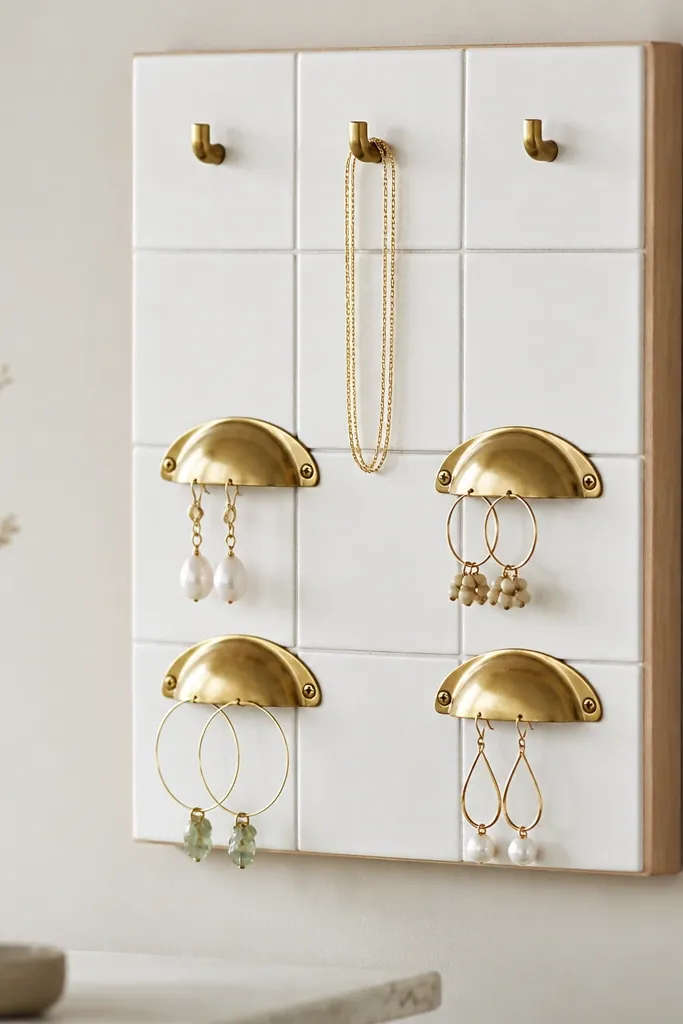
Ceramic tile makes this cozy wall jewelry organizer feel clean and durable, especially in bathrooms. Brass cup pulls give you rounded grip points that keep chains from slipping. White tile also makes it easy to see what's missing from your set. The tile grid keeps everything aligned without you having to measure every hook by eye.
Mount tiles onto a backing board using tile adhesive, then grout lightly or use pre-grouted tiles. Screw hooks into grout lines or use anchors designed for tile. Keep hook spacing consistent and use two top hooks for necklaces.
Pro tipWipe tile with rubbing alcohol before installing hardware so adhesive and screws seat cleanly.
AvoidSkip drilling without the right bit - cracked tile looks bad and can make the whole panel unsafe.
20. Yarn pom wall with ringed studs
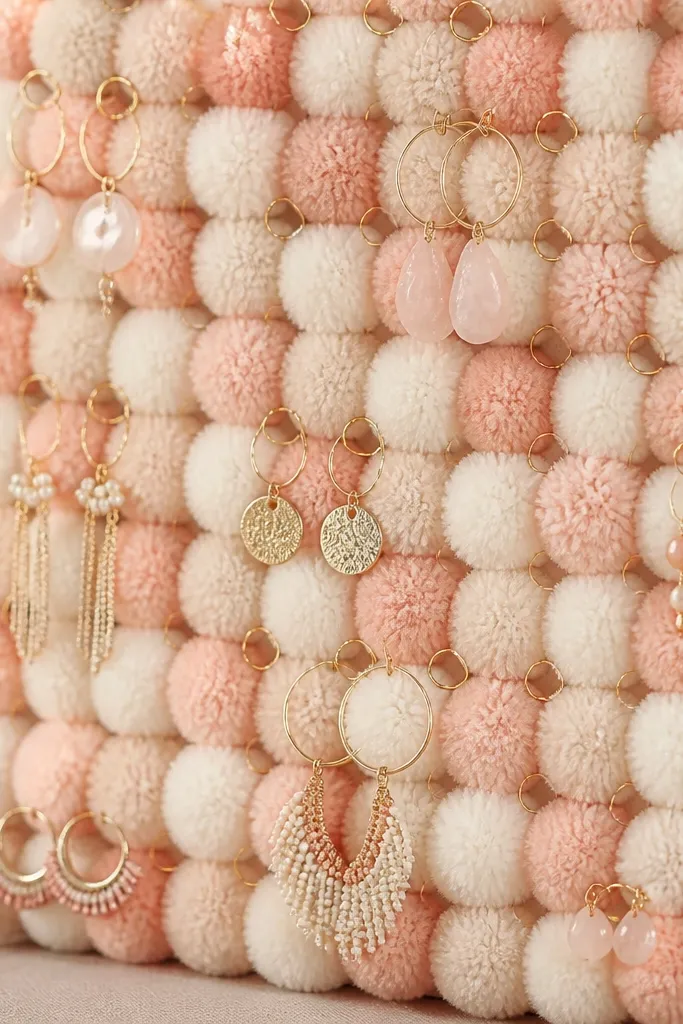
Pom poms make a cozy wall jewelry organizer that feels like a hug. The soft surface prevents scratches on delicate pieces, and the ring holders create stable attachment points. Cream and blush keep the wall gentle and reduce visual noise. This setup is best for lightweight earrings and bracelets you don't mind touching the fabric.
Use a foam board base wrapped in felt, then hot-glue yarn pom clusters in a tight pattern. Insert small ring holders between pom rows and secure with glue so they don't pull out. Attach one or two small hooks at the top for a short necklace chain.
Pro tipKeep pom size consistent - 1-inch pom balls look best for a wall organizer instead of mixed sizes.
AvoidDon't hang heavy necklaces from pom areas - the fabric compresses and the rings loosen.
21. Gold leaf edge frame with velvet hanger bar
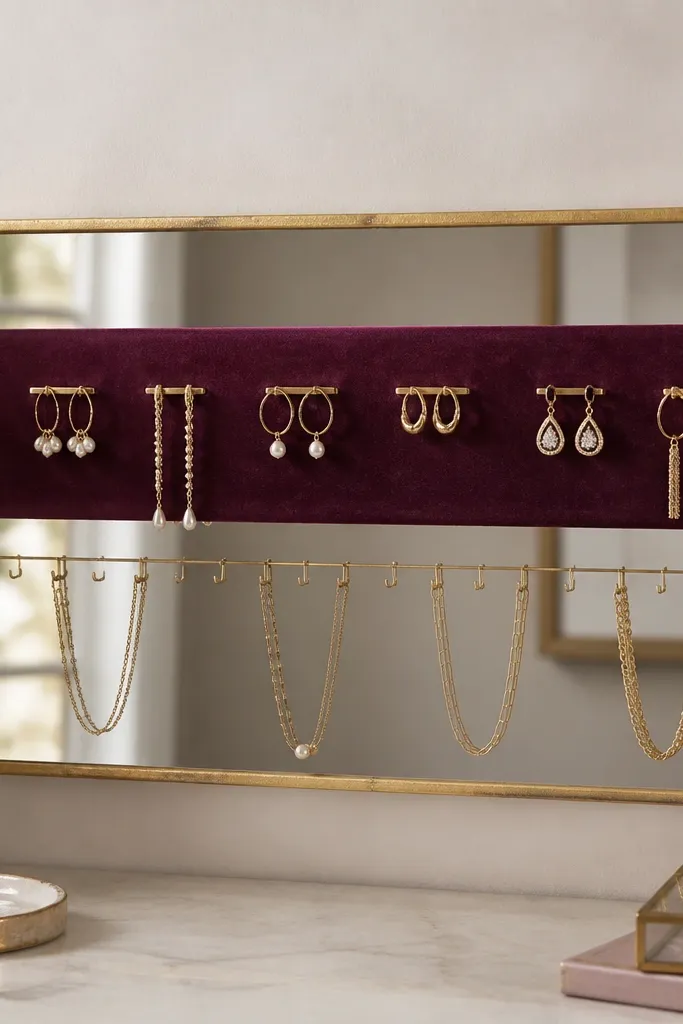
Velvet makes this cozy wall jewelry organizer feel luxe even when it's handmade. Plum velvet absorbs light, so gold earrings look warm and soft instead of glaring. A gold leaf edge ties the hardware together visually, which makes the piece look finished. I used this style for a small dressing area because it turns a handful of favorites into a statement.
Frame a board with a gold leaf edge frame or paint a thin frame in gold leaf style metallic. Glue velvet to the backing and add a hanger bar line across the top using small metal bars or hooks. Install two necklace hooks at the bottom with screws into studs when possible.
Pro tipPress velvet smooth with a fabric roller so the pile looks even when the light hits.
AvoidSkip cheap velvet that sheds - loose fibers catch on earring posts.
22. Rope knot wall with leather strap loops
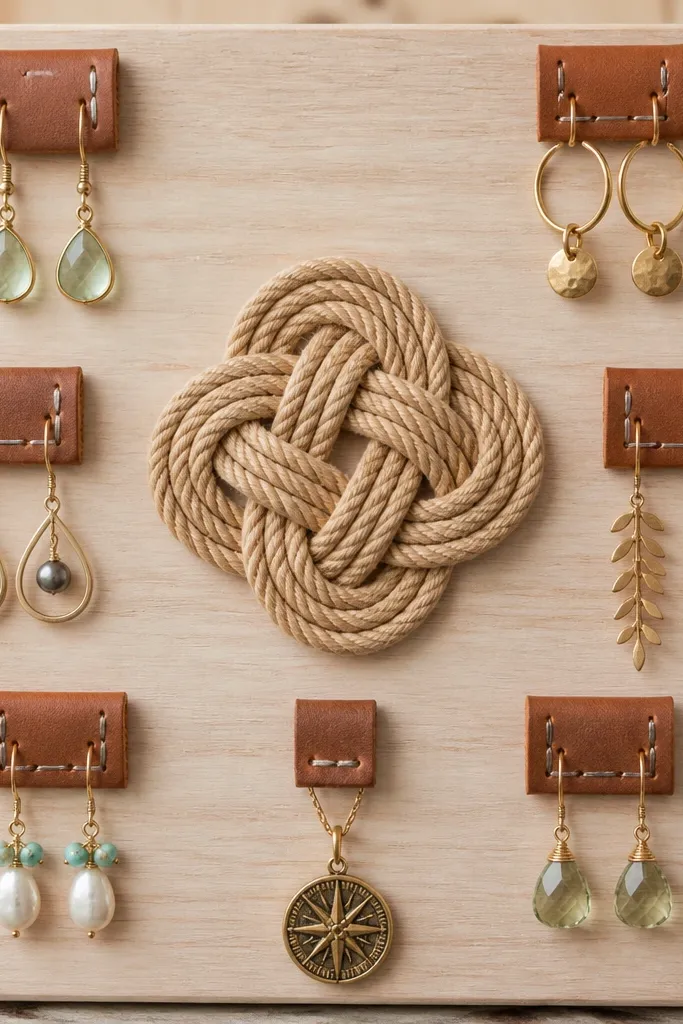
Rope knots add a cozy, nautical-cottage feel, and leather loops keep jewelry from snagging. The leather also wears better than thin faux leather when you open and close the same loops daily. This organizer looks intentional because the rope knot becomes the focal point and the loops radiate out. It's great for studs, small hoops, and pendants.
Tie a rope knot cluster and mount it with wood screws into the board. Cut leather straps into 2x3 inch loops and stitch edges with waxed thread for strength. Space loops about 2 inches around the knot so pieces don't bump.
Pro tipCondition leather with a tiny amount of leather balm so it stays flexible and doesn't crack.
AvoidDon't use floppy straps that curl - curled leather makes earrings hang sideways.
23. Clear acrylic + fabric backing earring gallery
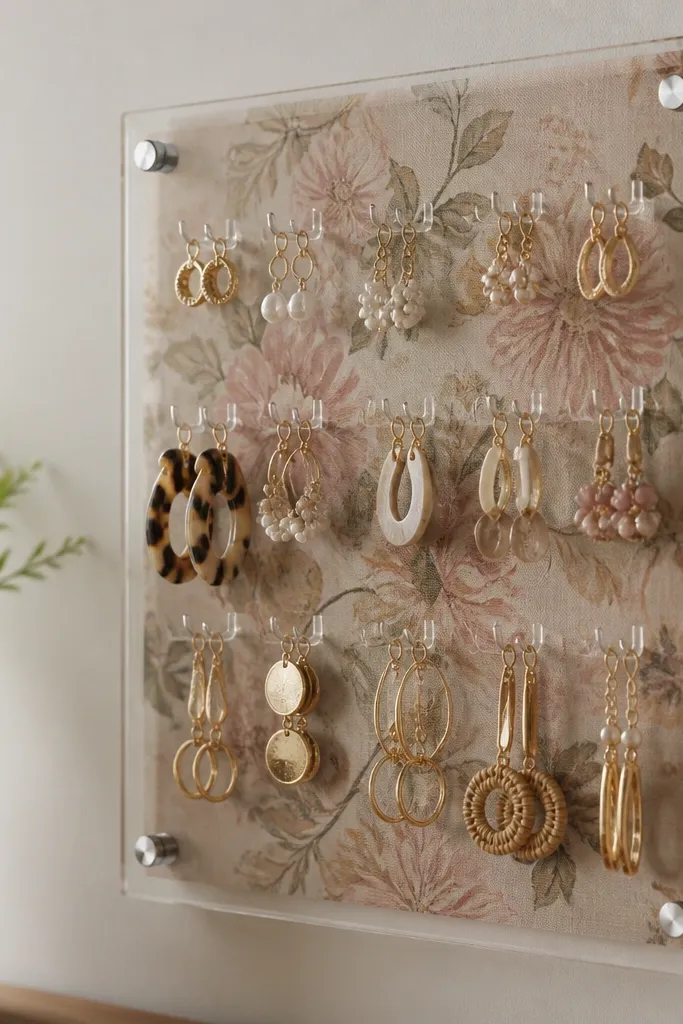
Clear acrylic makes this cozy wall jewelry organizer feel airy, and the fabric backing adds warmth. It's a great choice if you want your jewelry to look like it's floating. The U-shaped pins hold earrings without crushing them. I also like that you can swap the fabric behind it - you get a new look without rebuilding.
Mount clear acrylic on standoffs so it sits 1/2 inch off the wall backing. Attach U-shaped pins with screws into the acrylic edges or use acrylic-safe mounting hardware. Choose a fabric backing like light floral cotton or linen so it stays cozy, not busy.
Pro tipUse a fabric backing that matches your room palette; I pick one main color and one neutral so it doesn't compete with jewelry.
AvoidSkip cheap acrylic that scratches easily - it turns cloudy and ruins the floating effect.
24. Shaped foam board with faux leather ribbon grid
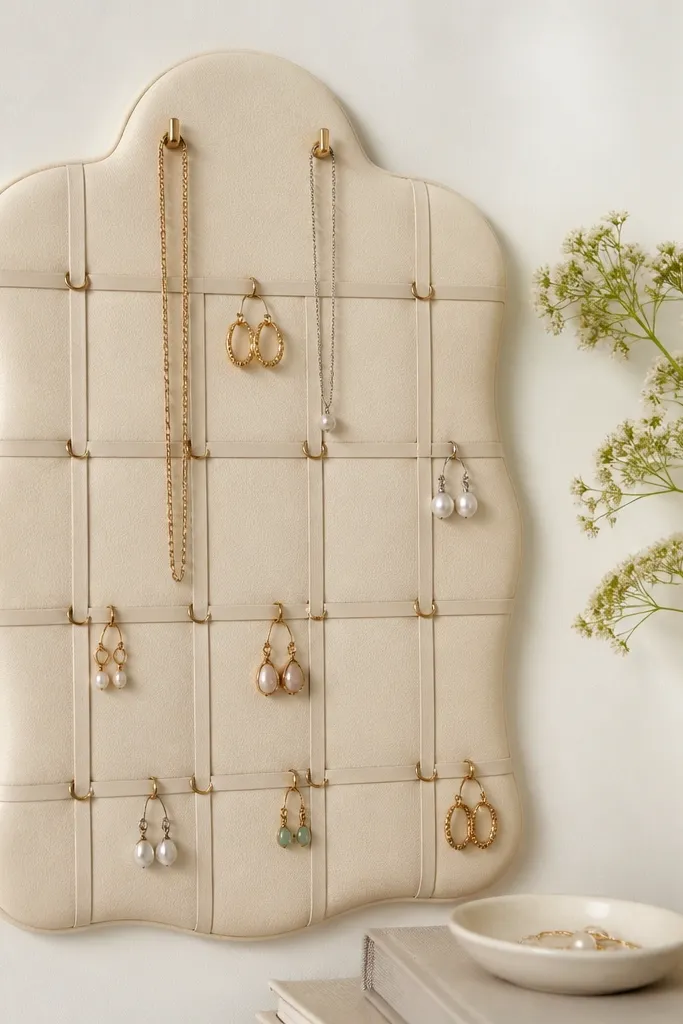
Faux leather ribbon grids look neat and cozy because they mimic high-end accessories display. The sliding rings let you adjust spacing as your collection grows. Cream faux leather keeps the organizer soft and helps gold jewelry look clean. This setup is ideal for people who like their wall storage to look like design, not craft.
Cover a foam board with cream faux leather using contact adhesive. Cut thin faux leather strips (about 1/2 inch wide) and glue them into a grid with equal spacing. Add small metal rings on the intersection points, then mount a couple of screw hooks for necklaces.
Pro tipUse a ruler and masking tape guides while gluing strips; straight lines are what make this look expensive.
AvoidDon't stretch faux leather too tight - it puckers at corners and looks sloppy.
25. Painted ladder slat with mini hooks and velvet cuffs
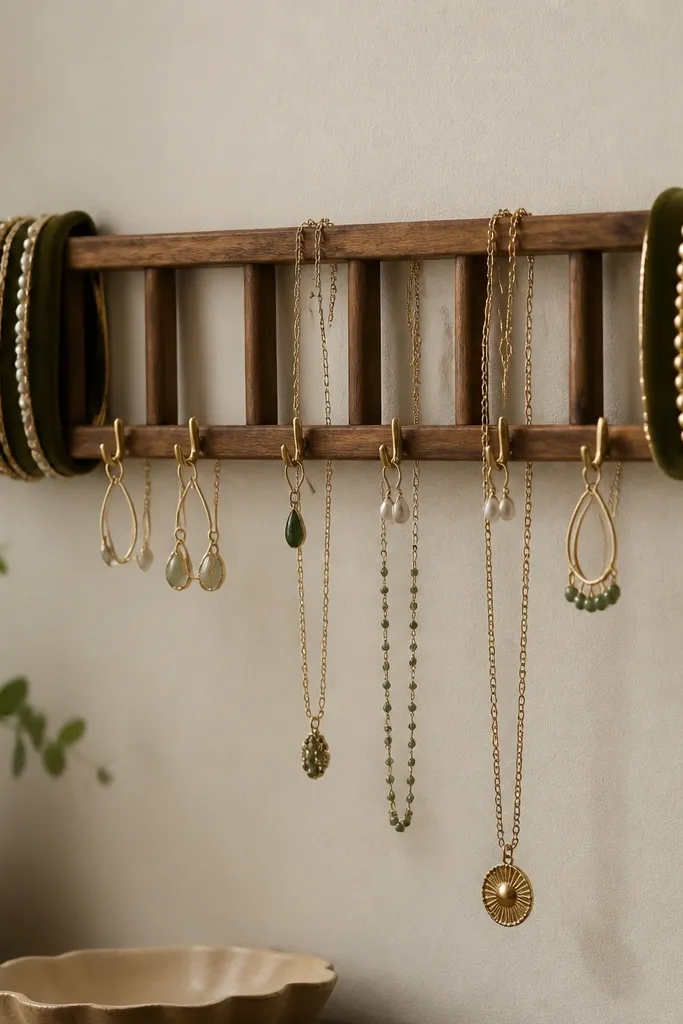
A ladder slat gives you a natural cozy rhythm because the rungs create built-in separation. Mini hooks handle earrings and small chains, while velvet cuffs protect bracelets from scratching. Painted soft white keeps it bright without looking sterile. This is a great organizer for a dresser wall where you want jewelry visible but not tangled.
Use a small wooden ladder-style shelf or build one from two rails and three rungs. Paint matte soft white, then screw mini hooks into the rails. Wrap velvet around the ends as cuffs and secure with hidden stitches or fabric glue.
Pro tipHang your heaviest bracelet on the velvet cuff first to set the height and spacing.
AvoidSkip hooks that are too small for rings - small hooks pinch earring hooks and leave marks.


