1. Floating Pine Cubby Wall with Fabric-Soft Backing
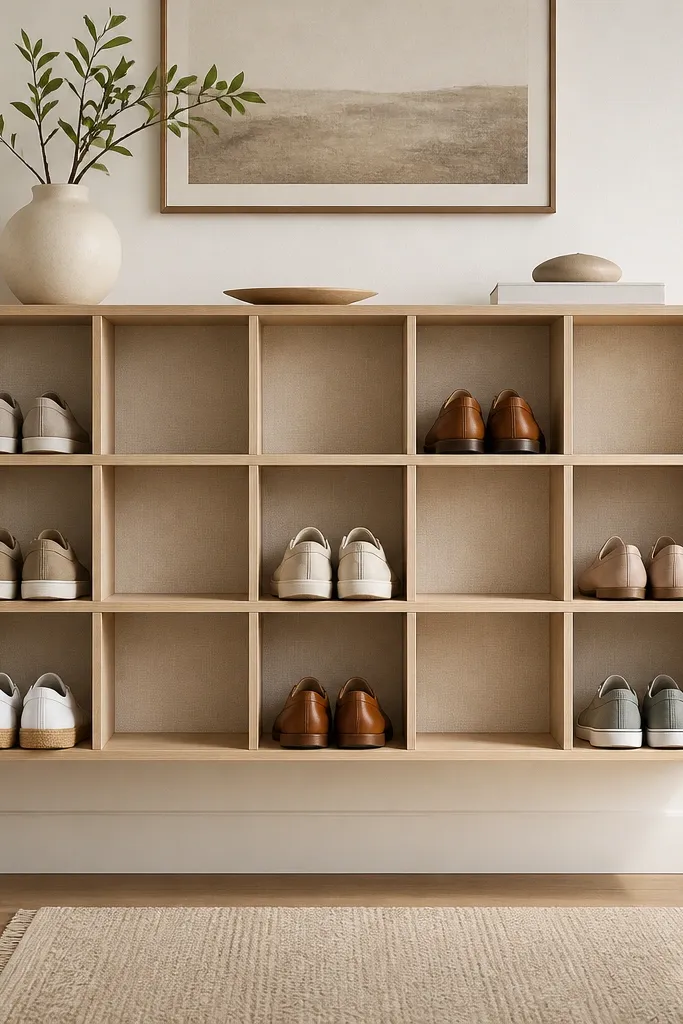
This setup reads like wall decor because the cubbies are flush and the back is covered, not bare plywood. Pine keeps it warm, and the fabric backing adds softness so the bedroom doesn't feel like storage. I like toe-out alignment here because it makes sneakers easy to grab without searching. The fabric also hides dust and scuffs from the shoe uppers.
Build 4-6 cubbies using 1x6 pine for the main sides and 1x2 dividers, with 9-10 inches of internal height for flats and sneakers. Cut the backing from stiff felt or thin upholstery canvas and staple it to the inside backs before mounting. Leave 10-12 inches from the floor if you want easy access while still keeping it visually grounded.
Pro tipLine the bottom with a thin grippy shelf liner so shoes don't creep forward overnight.
AvoidAvoid mismatched cubby depths - uneven spacing makes the whole wall look homemade.
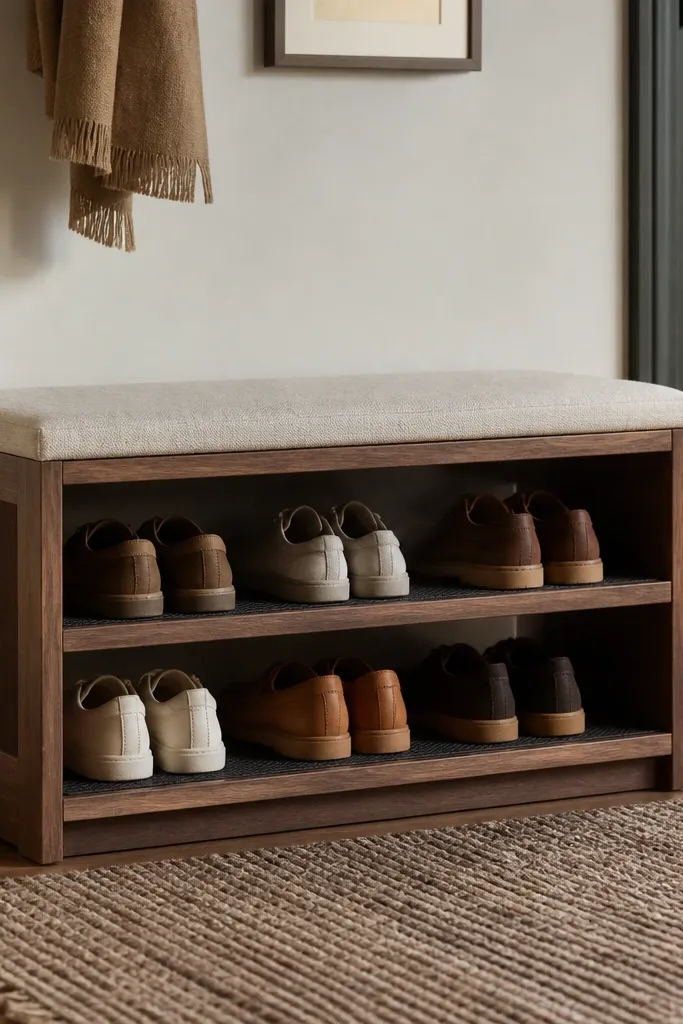
2. Bench-Style Shoe Rack with Linen Slip Covers
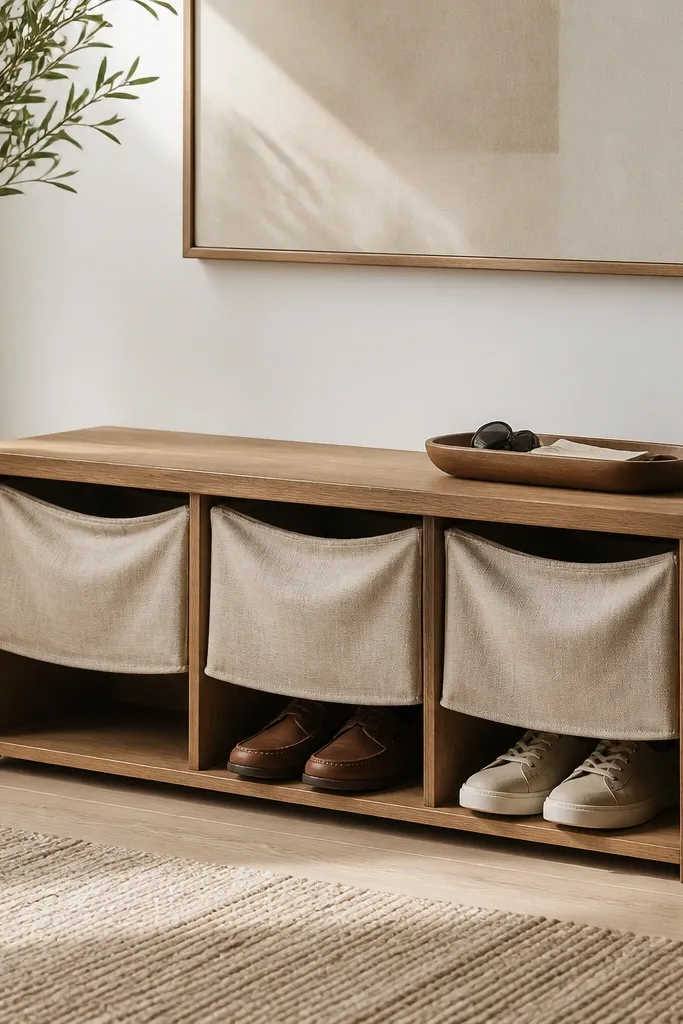
A bench format makes your shoes part of the room flow, not an eyesore by the door. Linen slip covers hide the mess and make the rack feel cozy even when it's holding a few pairs. The top surface gives you a place for a small tray, so the whole spot looks styled. I've found linen also reduces scuff marks on shoes because the fabric buffers contact.
Use a simple bench base with 3 compartments, each about 10-12 inches wide and 7-8 inches deep. Add removable bins (plastic or wood) inside so the fabric cover doesn't get dirty. Choose off-white or oatmeal linen, and keep the slip cover seams straight so it looks tailored.
Pro tipUse Velcro at the back corners of each cover so it stays smooth when you open and close bins.
AvoidSkip thin, stretchy fabric - it sags and looks sloppy after a week.
3. Woven Basket Cabinet with Sliding Wood Doors
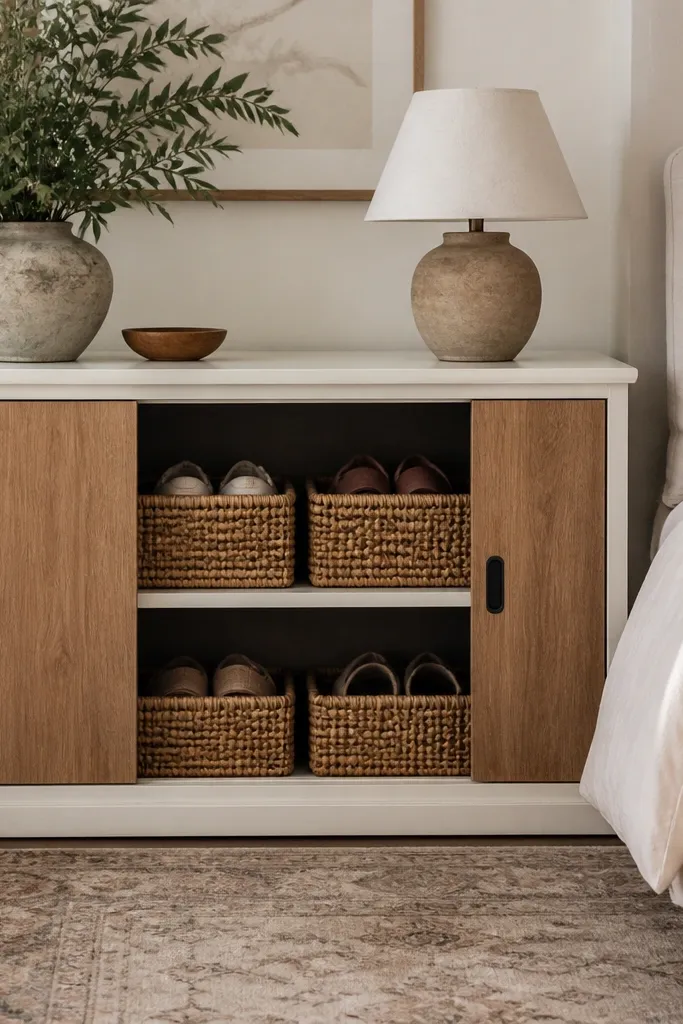
Sliding doors keep visual clutter behind a clean face, which is what your bedroom wants. Woven baskets add texture and hide shoe shapes, so you don't see messy uppers. The sliding motion is smooth for daily use, and the warm white paint keeps it soft, not industrial. This one looks like furniture because the doors align perfectly with the cabinet frame.
Build a cabinet roughly 30 inches wide and 18 inches deep, with two shelves spaced 8-10 inches apart. Use 2-3 woven baskets per shelf, sized to fit sneakers or flats without crushing. Install a simple top-and-bottom track for the sliding doors, and keep the door overlap about 1 inch.
Pro tipAdd a felt strip inside the door edge to quiet the slide and prevent scuffs.
AvoidAvoid flimsy tracks - wobbly doors ruin the "cozy furniture" look fast.
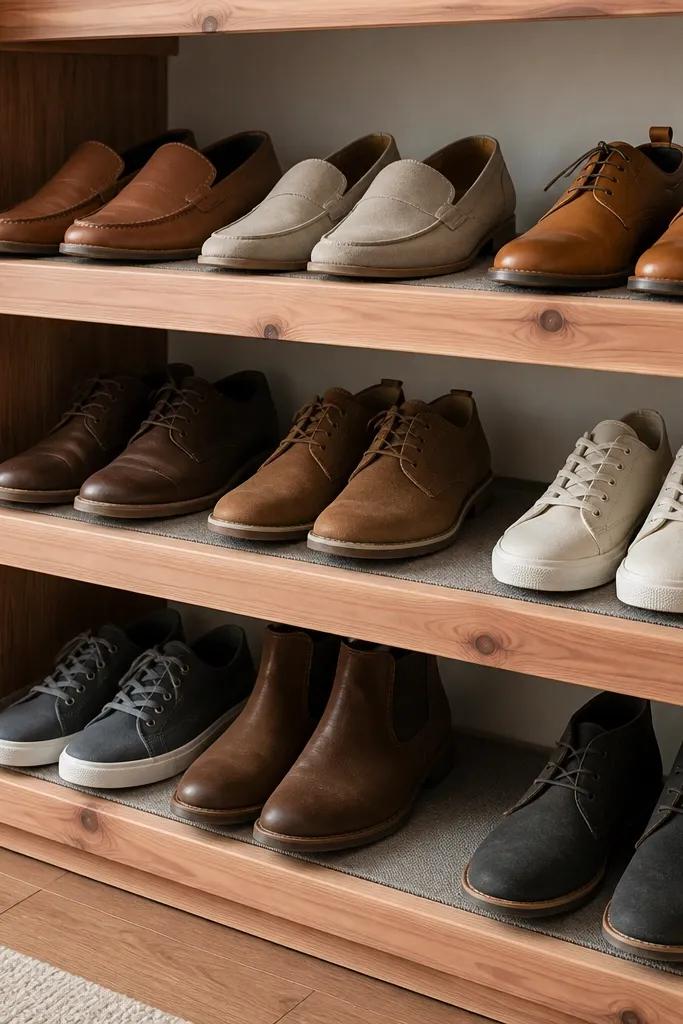
4. Angled Crisscross Rack for Sneakers and Flats
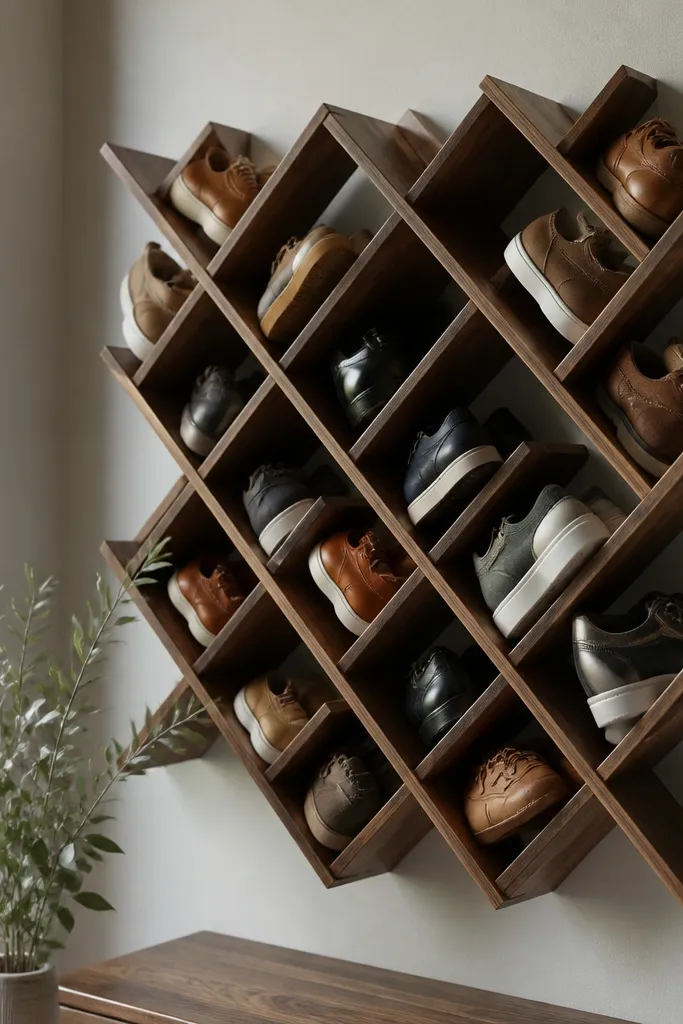
Angled slots make shoes easy to grab because you don't have to lift and shift. The crisscross pattern also uses depth efficiently in tight bedrooms. Walnut stain adds warmth, and the angle keeps shoes from piling and looking chaotic. It's one of the few open designs that stays tidy if you keep shoe pairs aligned.
Cut side rails from 1x3 wood and set the slot angle around 30-35 degrees. For internal spacing, use 5.5-6 inches between rails for flats and 6.5-7 inches for sneakers. Mount with two sturdy wall brackets and add a toe-stop strip at the bottom to prevent sliding.
Pro tipPaint the underside of the rack with the same stain, then seal it - it looks finished even when you peek under shoes.
AvoidSkip wide gaps between slots - it turns into a jumble instead of a grid.
5. Rattan Drawer Inserts in a Closet Shoe Shelf
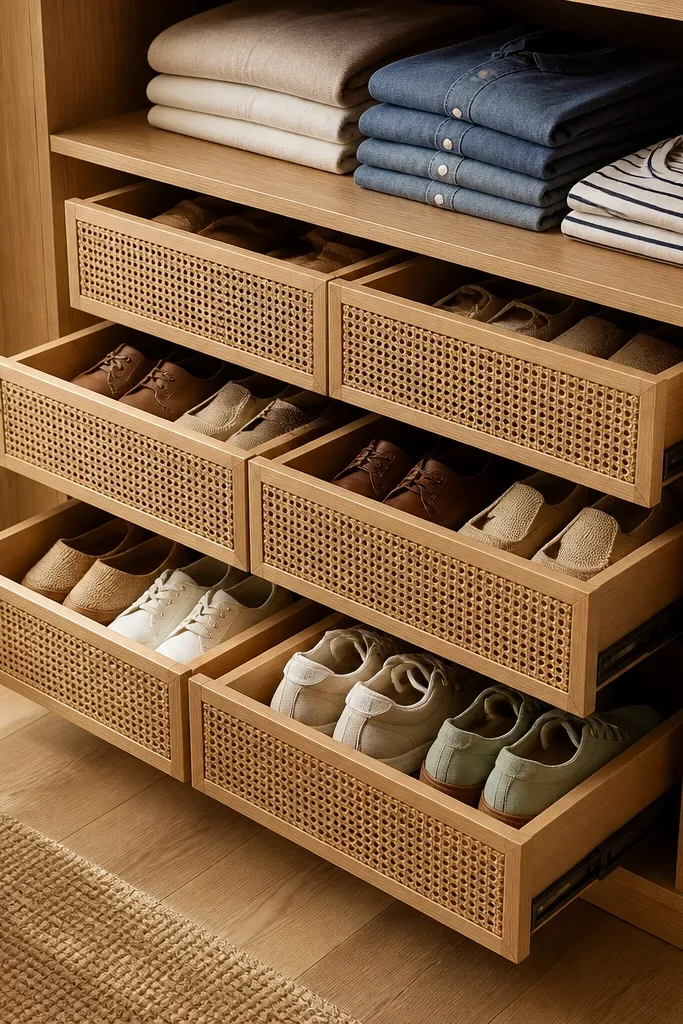
Instead of building a whole rack, this makes your existing shelf look intentional. Rattan fronts soften the closet and hide the shoe mess instantly. Drawer inserts keep daily pairs reachable without turning the bedroom into a shoe display. It also protects shoes from dust better than open shelving.
Measure one shelf bay and build or buy drawer inserts that are 10-14 inches deep depending on your closet depth. Use rails rated for lightweight furniture, and add a simple stop so the drawer doesn't fall out. Choose light rattan or woven fronts and keep the drawer frames the same color as the closet shelves.
Pro tipLabel the drawer bottoms with small fabric tags by shoe type, not names - it speeds up mornings.
AvoidDon't add deep drawers if you wear mostly flats - wasted space makes drawers feel awkward.
6. Turntable Shoe Rack for the Bedside Closet
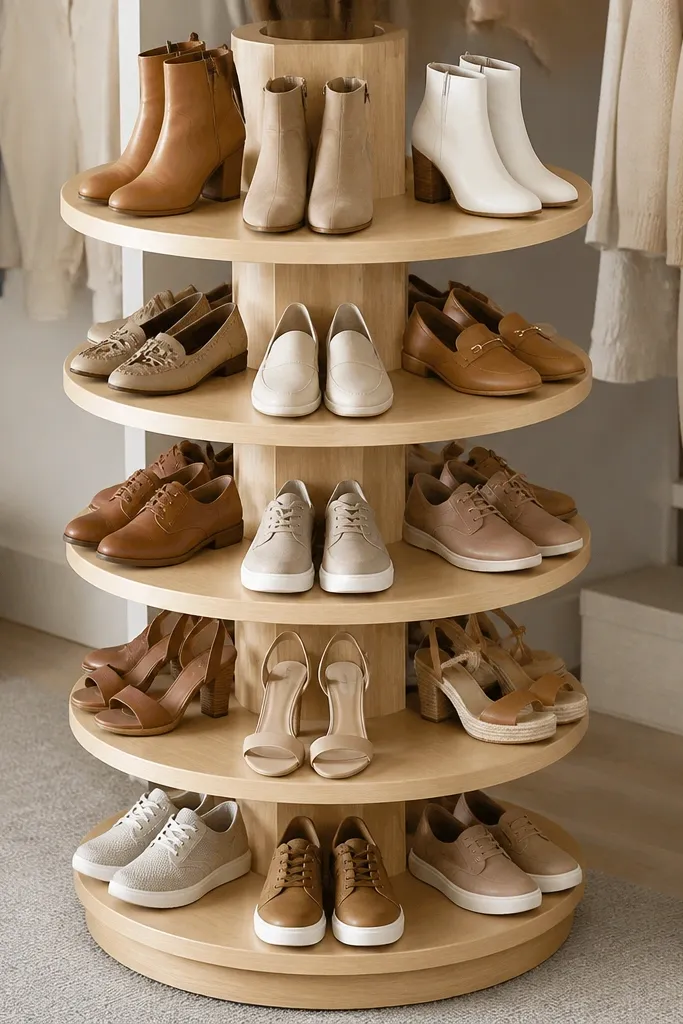
A turntable keeps everything visible in a neat ring, which feels tidy even in a small bedroom. When you rotate it, you don't drag shoes across the floor. The open design also looks clean because the shoes face the same direction. It's a great choice if your closet is narrow and you want one "grab zone."
Use a lazy Susan base sized to your closet width minus 2 inches for clearance. Build or buy 6-8 wedge shelves and keep spacing consistent at about 5-6 inches for flats and 6-7 inches for sneakers. Seal the wood with a matte clear coat so it doesn't look shiny and cheap.
Pro tipStick a thin felt ring on top where shoes sit - it prevents squeaks and scuffs.
AvoidAvoid uneven shelf heights - one shoe will always fall out of position.
7. Pegboard Shoe Wall with Color-Matched Hooks
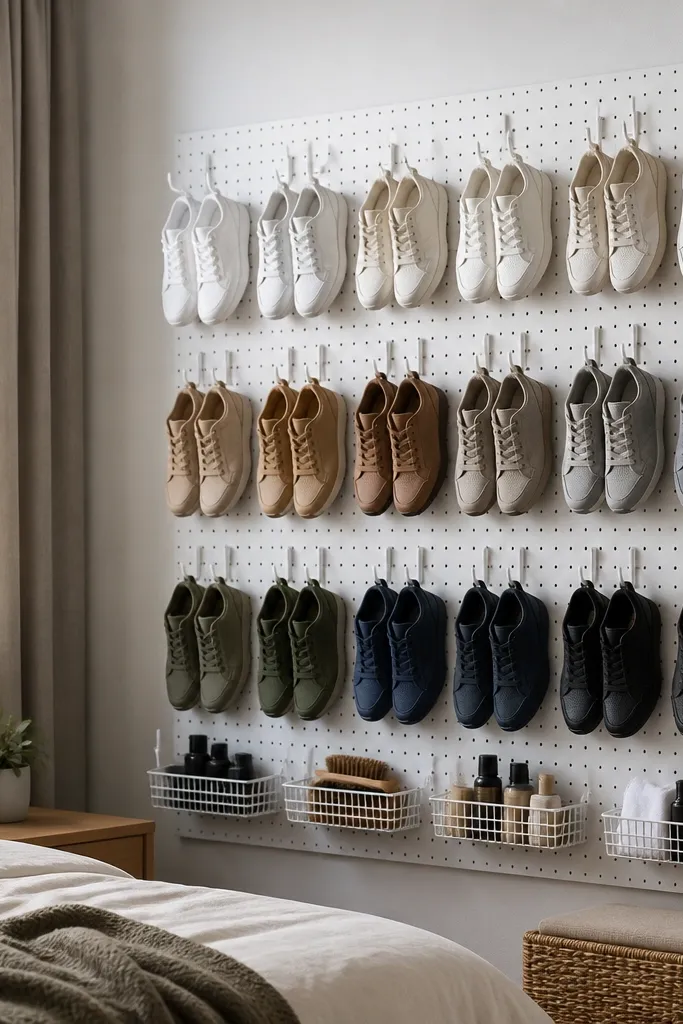
Pegboard is fast, cheap, and looks intentional when you keep the layout grid-like. Hanging shoes by heel or lace loop makes them dry faster and keeps the bedroom from smelling like a pile. Color-matched hooks turn a utilitarian board into something that looks styled. I've used this in guest rooms when I needed guests to keep footwear off the floor.
Mount 1/4-inch hardboard pegboard and paint it the same color as your wall. Use hooks spaced 4-5 inches apart, and group shoes by type with two rows per type. Add a bottom shelf ledge for a small basket of wipes, laces, and a shoe horn.
Pro tipUse clear plastic shoe protectors over the hooks if you have leather uppers - it prevents hook dents.
AvoidSkip random hook spacing - messy spacing makes it look like a craft project.
8. Shallow Shelf Rack with Fabric Drawer Fronts
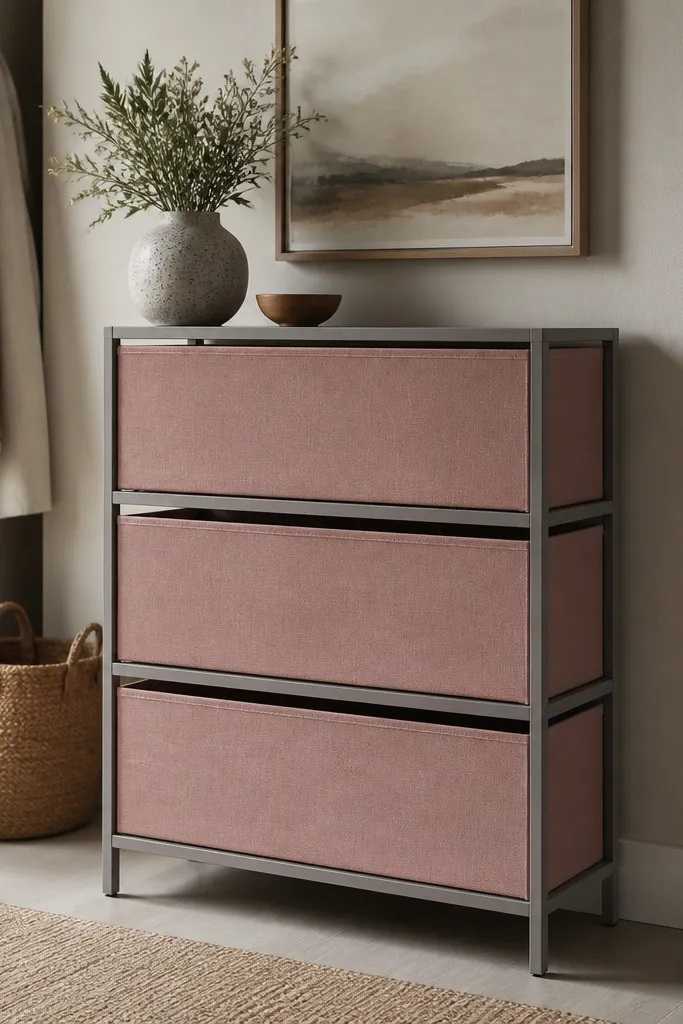
This is the sweet spot between open shelves and full cabinets. You get easy access to grab shoes, but the drawer fronts hide the visual mess. Dusty rose fabric warms up the room and makes the rack feel like part of your decor. The shallow design works in bedrooms where you can't spare deep storage.
Build shelves about 6-7 inches deep so they fit flats and low-top sneakers. Use frames from 1x3 boards and attach fabric drawer fronts with a tight, stapled edge. Keep shelf spacing around 7-8.5 inches so shoes sit flat without bending.
Pro tipAdd a magnetic catch on each drawer front so it closes flush and doesn't flop open.
AvoidAvoid fabric that's too thin - it shows shoe shapes and looks wrinkled.
9. Reclaimed Door Shoe Rack with Matte Finish
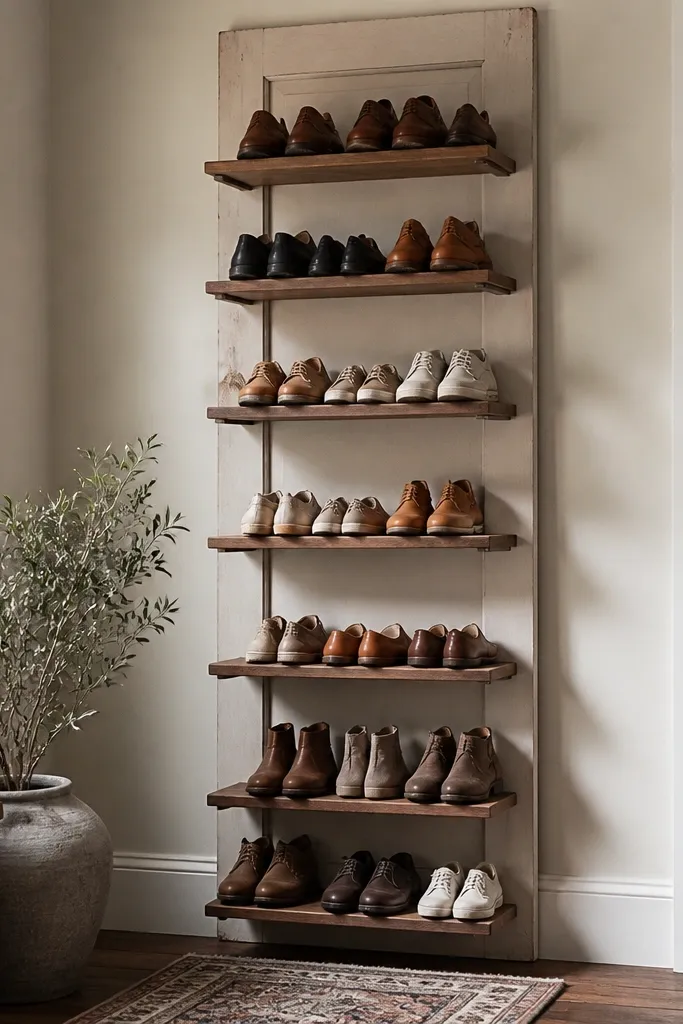
A repurposed door makes a shoe rack feel like furniture because the vertical panel looks like a real piece. The matte finish keeps it from looking rustic in a messy way. With shelves spaced evenly, it reads clean instead of cluttered. This works especially well for boots because you can set a taller shelf height.
Cut the door down if needed so it fits your wall space, then attach 4-6 shelves using 1x4 boards. Space shelves 10-12 inches apart for boots, and 8-9 inches for sneakers. Sand thoroughly and finish with a matte clear coat or chalk paint sealed with a water-based topcoat.
Pro tipAdd felt pads on the back corners so it sits flat on textured walls or baseboards.
AvoidSkip glossy varnish - it reflects light and highlights every scratch.
10. Corner Ladder Shelf with Shoe Bins on Each Step
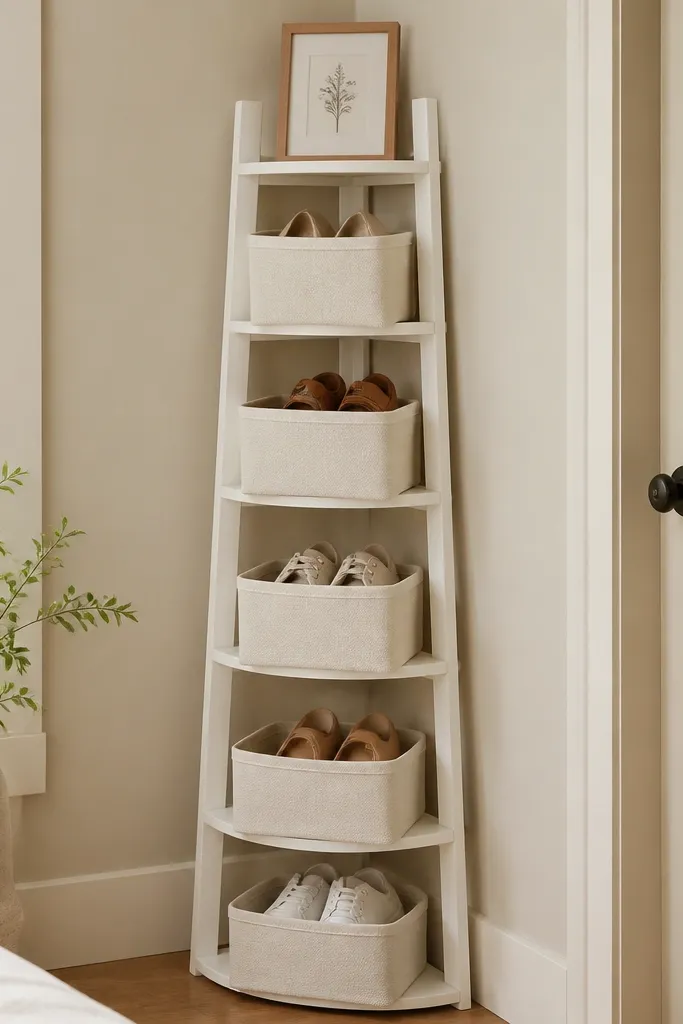
Corner ladder shelves are a practical way to use space that already feels underused. The bins keep the shoes from visually spilling into the room. Warm white paint makes it look soft, and the ladder shape gives you vertical storage without taking up floor area. I've installed these in small apartments where the closet is too tight to organize properly.
Choose a ladder shelf with 5-6 tiers and rungs spaced about 9-10 inches apart. Use fabric bins with stiff sides so they keep their shape and don't sag forward. Secure the shelf to the wall with anti-tip brackets, especially if you have kids.
Pro tipPick bins with the same neutral color and texture so the corner reads cohesive.
AvoidAvoid bins that are too floppy - they collapse and look unplanned.
11. Under-Bed Rolling Drawer Shoe Storage
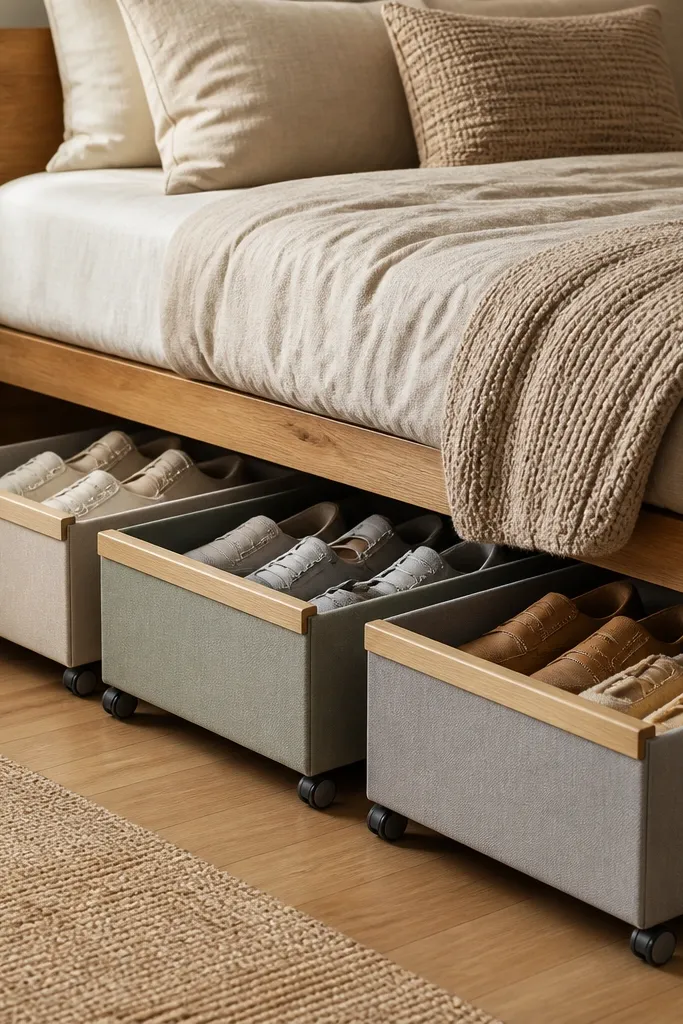
Under-bed storage keeps the bedroom visually calm because shoes disappear completely. Rolling drawers are the difference between "I'll do it later" and actually using the storage. Fabric fronts hide the shoe shapes and make it feel cozy instead of utilitarian. This is the setup I use when I want my room to look guest-ready every day.
Build or buy shallow drawers that fit under your bed frame height, aiming for about 6-7 inches internal height for flats and sneakers. Stack shoes vertically with a divider plank so pairs don't slide. Use casters with a soft tread or install smooth glides so drawers don't catch on carpet.
Pro tipAdd a removable cardboard liner at the bottom so you can swap it when it gets dirty.
AvoidSkip drawers that scrape - the noise makes you avoid using them.
12. Rug-Top Bench Rack with Bottom Liner and Toe Shelf
Putting a shoe rack right next to a seating corner makes it feel like decor because it shares the same "zone." A grippy liner keeps shoes from sliding and scuffing your floors. The toe shelf keeps boots and taller pairs from tipping forward. I like this when you have a bench or chair in the bedroom and shoes tend to land there.
Build a low bench frame 16-18 inches tall, with an open rack compartment 8-10 inches deep. Add a toe shelf using 1x2 wood at the back edge. Line the bottom with rubberized shelf liner or DIY non-slip drawer mat cut to size.
Pro tipSeal the wood with a matte finish so it matches the rug's texture instead of looking glossy.
AvoidAvoid smooth bare wood on the bottom - it makes shoes slide and look messy.
13. Macrame-Edge Shoe Shelf with Boot Loops
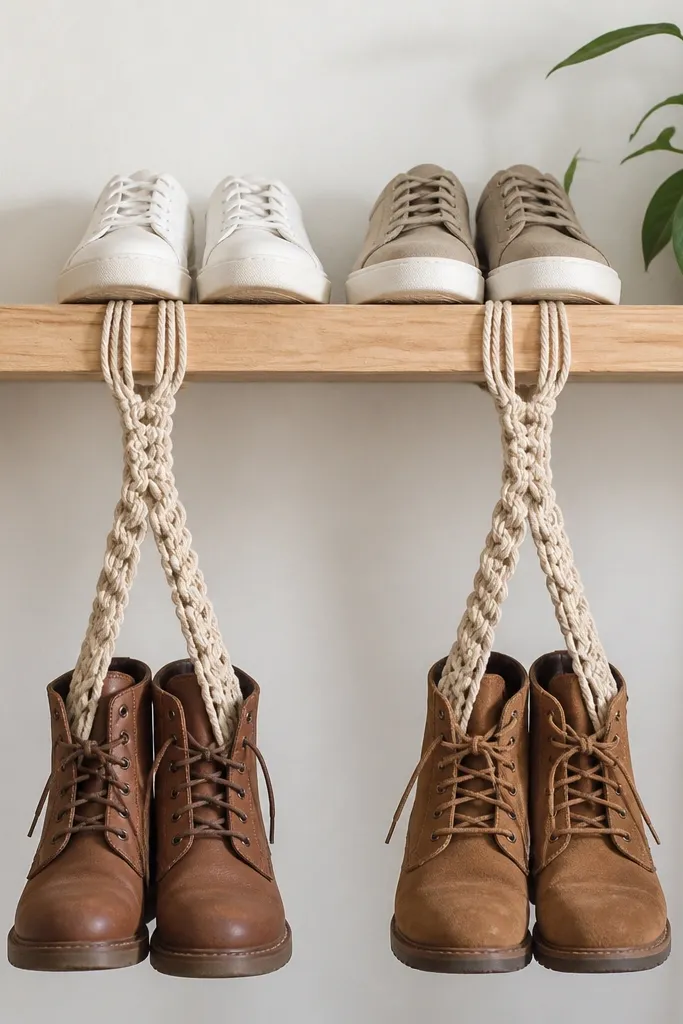
Macrame edges add softness and texture, which makes a shoe shelf feel cozy instead of harsh. Hanging boots by the shaft keeps them from collapsing and stops the bedroom floor from becoming a boot rack. The shelf above gives you a clean place for shoes that you grab daily. Natural beige macrame blends with linen bedding and light wood.
Attach a shelf bracket to studs and mount a 36-40 inch shelf around 18-20 inches off the floor. Add macrame loops using thick cord knots and space loops 6-7 inches apart. Keep shelf depth around 7-8 inches so shoes sit without drooping.
Pro tipWrap the macrame knot points with a tiny dab of clear fabric glue so loops don't loosen over time.
AvoidSkip thin cord - it stretches and your boots start to sag.
14. Matte Black Metal Shelf with Soft Taupe Back Panels
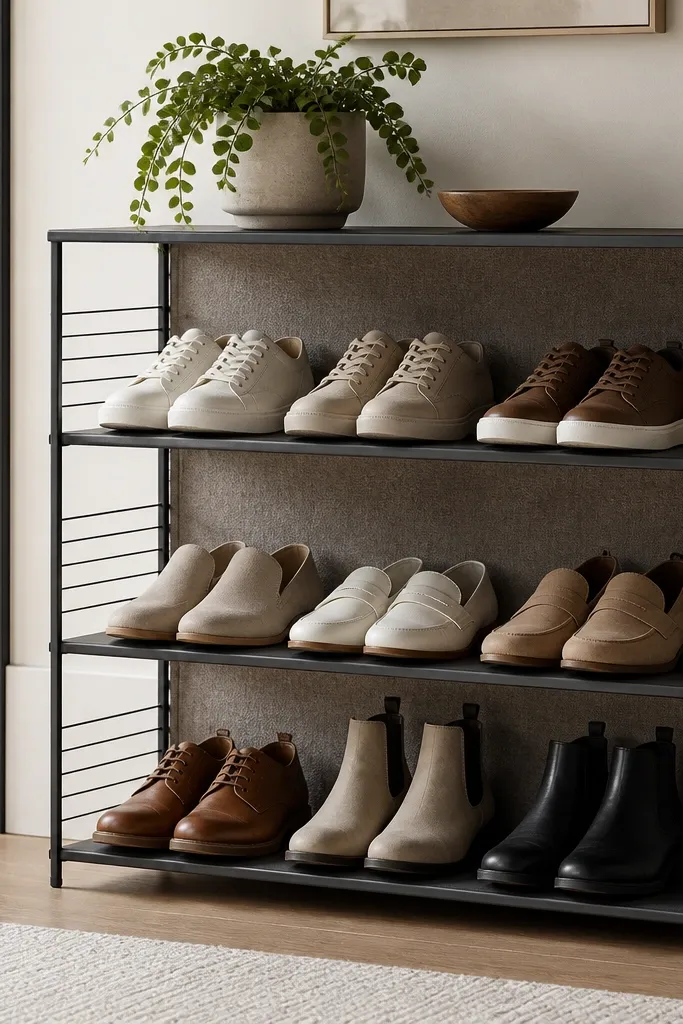
Metal racks can look cold, but covering the back with felt makes it feel like a designed piece. Matte black hardware gives structure, and taupe felt adds warmth. This combo works when your room has black accents like frames or lamps. I've used this in rooms with dark walls because it keeps the storage from blending into shadow.
Choose a metal shelf with 3 tiers and spacing around 9-10 inches for sneakers and flats. Cut felt panels to fit the back and staple or Velcro them in place. Seal any exposed metal edges if you're using it near fabric so it doesn't snag.
Pro tipAdd a thin anti-slip mat under each shoe pair so they don't slide and lean.
AvoidAvoid leaving the back bare - it makes the rack look unfinished and visually busy.
15. Cedar Closet Shoe Row with Removable Liner Boards
Cedar smells good and helps with moisture, so your shoes don't feel "stale" after a few days. Removable liner boards make cleaning easy - you can pull them out and wipe dust. The warm cedar tone looks cozy even without paint. This is one I recommend when you store shoes in a closet but want it to feel like a nicer corner, not a dumping spot.
Build shallow shelves 7-8 inches deep from cedar planks, with shelf spacing around 8-9.5 inches. Add removable liners cut to shelf size so they sit snug without gaps. If you wear boots, swap one shelf to 11 inches high.
Pro tipWipe cedar with a dry microfiber cloth only - wet cleaning can raise grain.
AvoidAvoid stacking shoes directly on raw cedar - scuffs collect and look messy.
16. Peg Rail + Hanging Shoe Pockets for a Tiny Bedroom
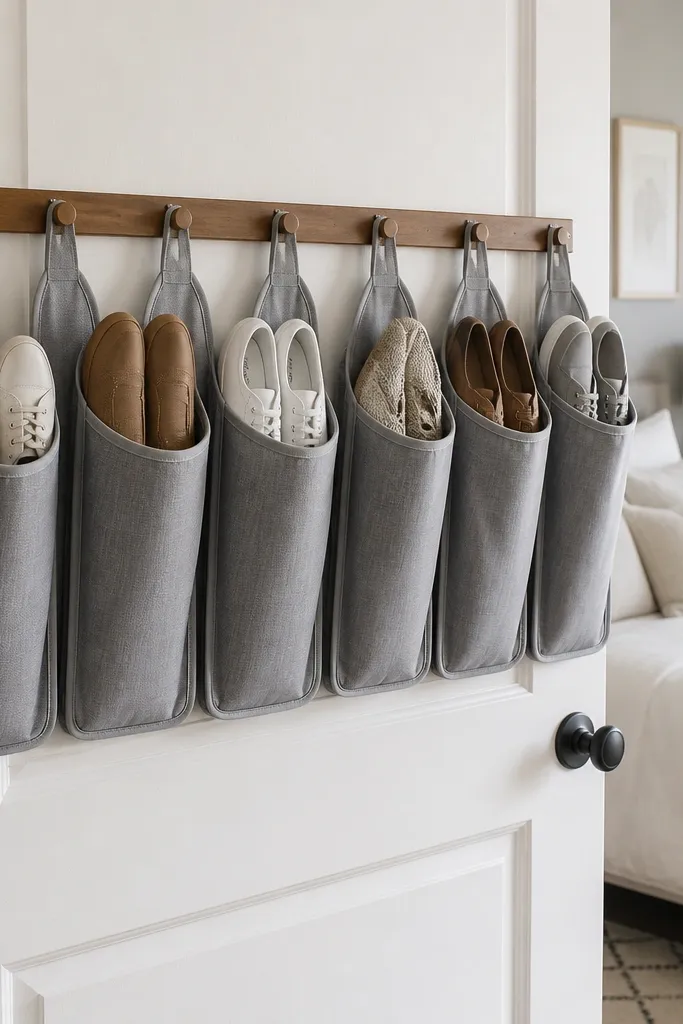
Hanging pockets are the fastest path to cozy bedroom shoe rack ideas when you have almost no floor space. The pockets keep shoes separated, so pairs don't tangle and you don't end up with a pile. Reinforced edges make the pockets keep their shape, and the door location keeps the bedroom tidy. I like this for flats, sandals, and low-top sneakers.
Use a door-hinged or back-of-door setup with a rail length that fits your door width. Choose pockets with stiff backing so they don't collapse when you insert shoes. Keep pocket height around 5.5-6.5 inches for flats and 7 inches for sneakers.
Pro tipAdd a small clip-on label pocket holder so you can mark each pocket with shoe type.
AvoidSkip stretchy pockets - shoes fall through and it looks chaotic.
17. Ladder-Back Wall Shelf with Hidden Shoe Shelf Behind Curtain
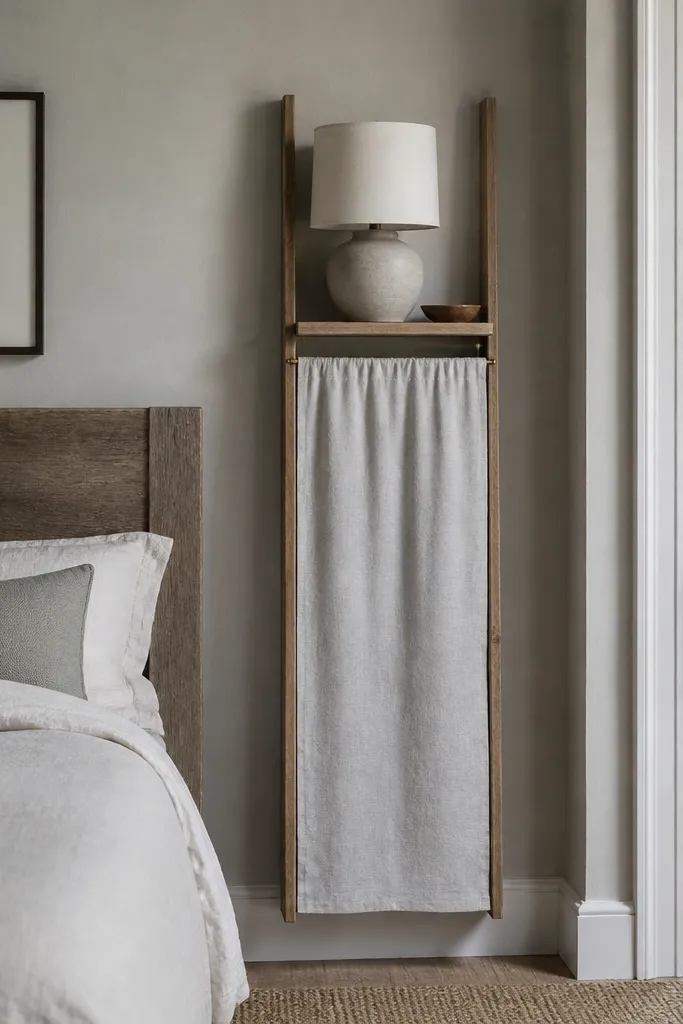
This one gives you the look of open shelving but hides the shoes the second you close the curtain. It's perfect for bedrooms where you want a "pretty wall" but still need functional storage. Linen curtain fabric softens the lines, and the narrow ladder shape doesn't take up much width. I like it because you can style the top ledge while keeping footwear out of sight.
Install a narrow ladder shelf with two vertical rails and 2-3 small ledges. Create a hidden compartment below using a simple box frame, then hang a linen curtain from a tension rod or small track. Make the compartment depth 7 inches for flats and 8-9 inches for sneakers.
Pro tipUse a curtain weight chain at the bottom edge so it hangs straight and looks tailored.
AvoidAvoid thin curtain fabric - it will show shoe silhouettes.
18. Color-Blocked Shoe Rack with Matching Shelf Liners
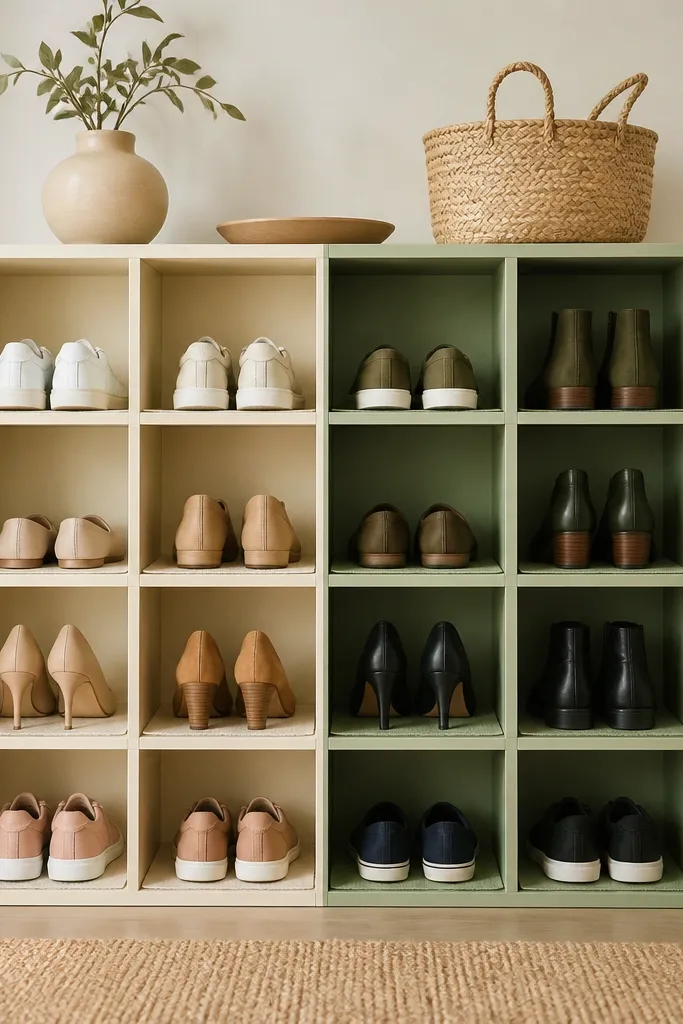
Color-blocking makes open racks feel intentional and cozy. Instead of hiding shoes, you control how they look by giving each compartment a consistent liner color. When you match liners to your bedding palette, the rack blends into the room. This is a great option if you don't mind seeing shoes as long as they look organized.
Use a 3x3 cube rack and sand it well before painting. Paint alternating cubes with two colors and keep the paint finish matte. Add liners cut from felt or canvas so each cube has a soft base; match liner colors to the paint blocks. Leave 8-10 inches of height per cube for sneakers and flats.
Pro tipUse painter's tape to keep edges sharp and clean - the crisp lines are what makes it look store-bought.
AvoidSkip glossy paint - it highlights dents and uneven brush strokes.
19. Rolling Shoe Cart with Cloth Cover and Side Handles
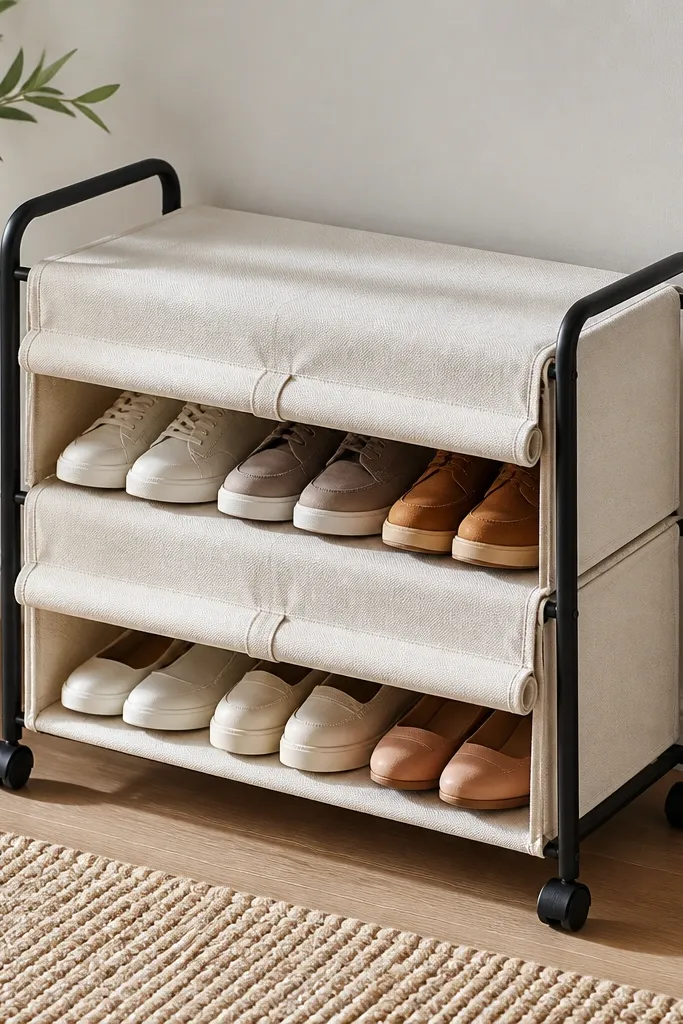
A rolling cart makes it easy to manage shoes without hauling them across the room. Cloth covers keep the cart looking cozy and reduce the visual clutter of open metal. Side handles make it easy to move during cleaning, which matters because shoe carts get dusty. The covers also soften the look in a bedroom where you don't want a "utility" vibe.
Pick a cart with two tiers and wheel locks. Cut or sew fabric covers with elastic at the top so they stay tight and don't sag. Keep the cart width under 18 inches so it doesn't dominate the room, and use shelf liners inside to stop sliding.
Pro tipVacuum the wheels and underside every two weeks - it keeps movement smooth and quiet.
AvoidAvoid carts without wheel locks - it shifts when you pull shoes.
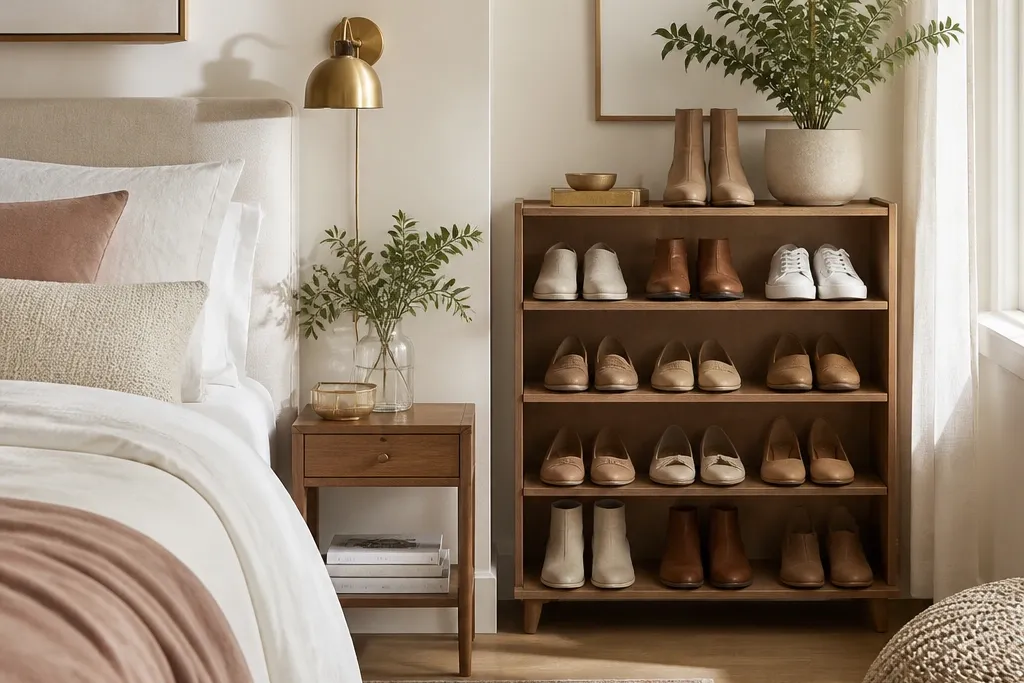
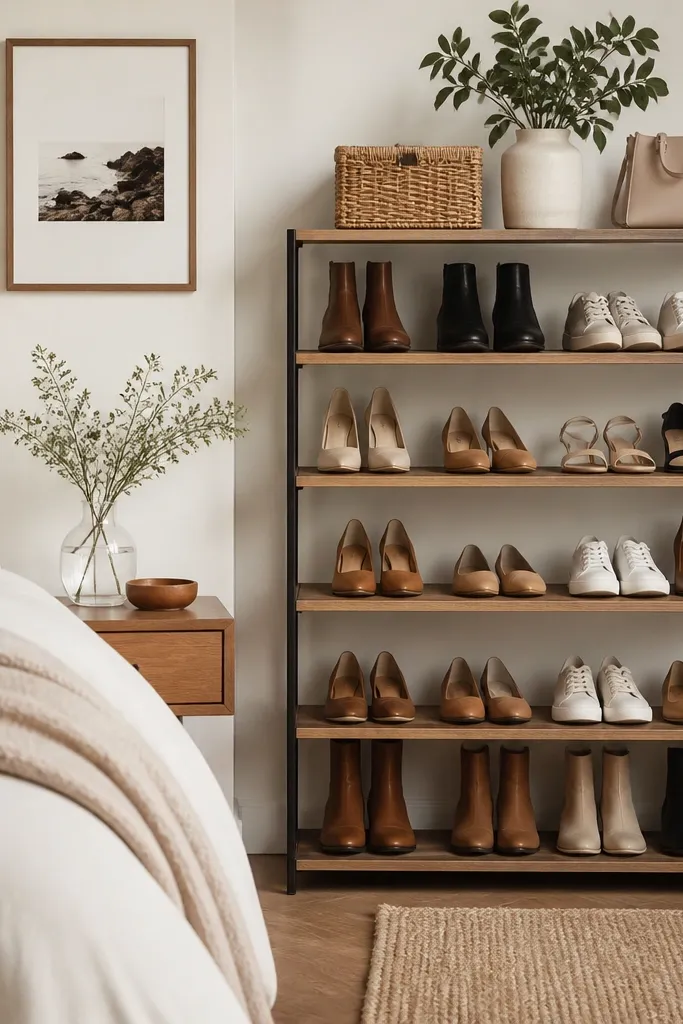
20. Bookcase-Style Shoe Rack with Back-Slatted Privacy
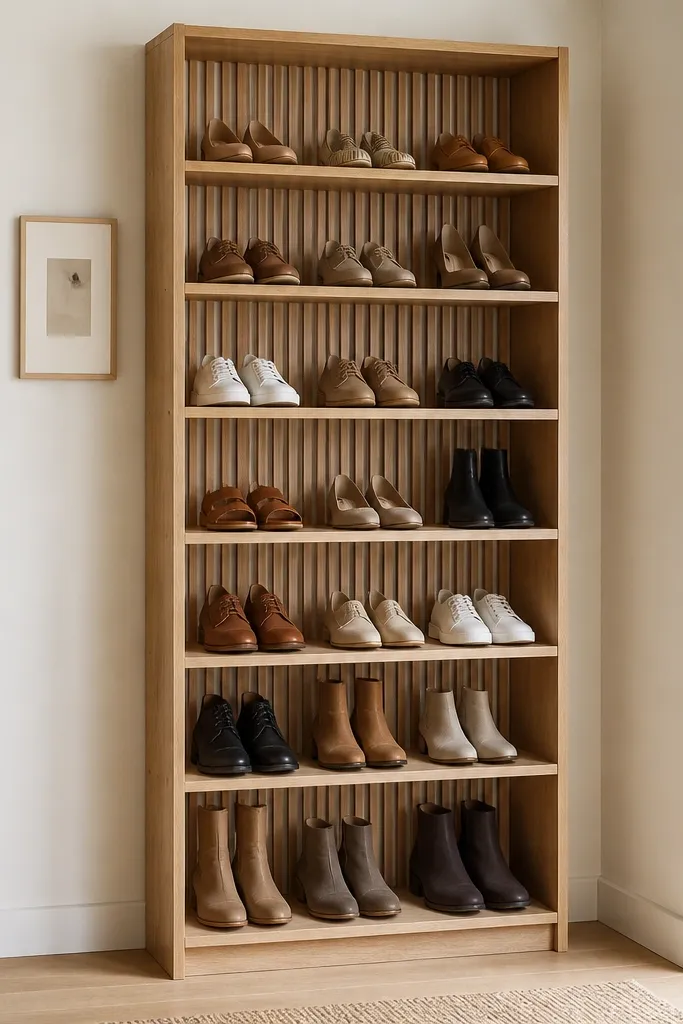
A bookcase-style rack gives you height and organization without looking like a shoe tower. The slatted back adds privacy without fully closing the front, so it still feels airy. Light oak keeps it warm, and consistent shelf spacing makes it look tidy when you open the rack. I like this when you have many pairs but want the bedroom to stay visually calm.
Build a narrow bookcase around 28-32 inches wide and 60 inches tall. Create cubbies with 8-9 inches height for sneakers and 10-12 for boots. Add a slatted back from thin strips spaced 1 inch apart so you get airflow but still hide the worst clutter.
Pro tipAdd a small lip on each shelf front so shoes don't slide forward and spill out.
AvoidAvoid shelves that are too deep - deep shelves make shoes look lost.


