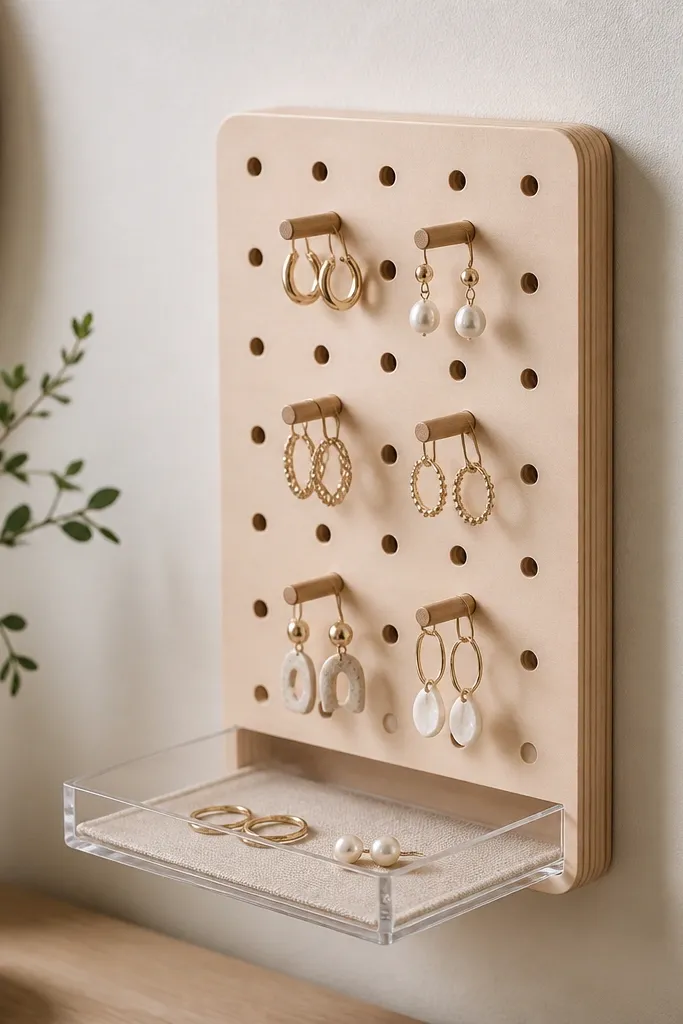
1. Linen-wrapped wall rack with clip-on earring bars
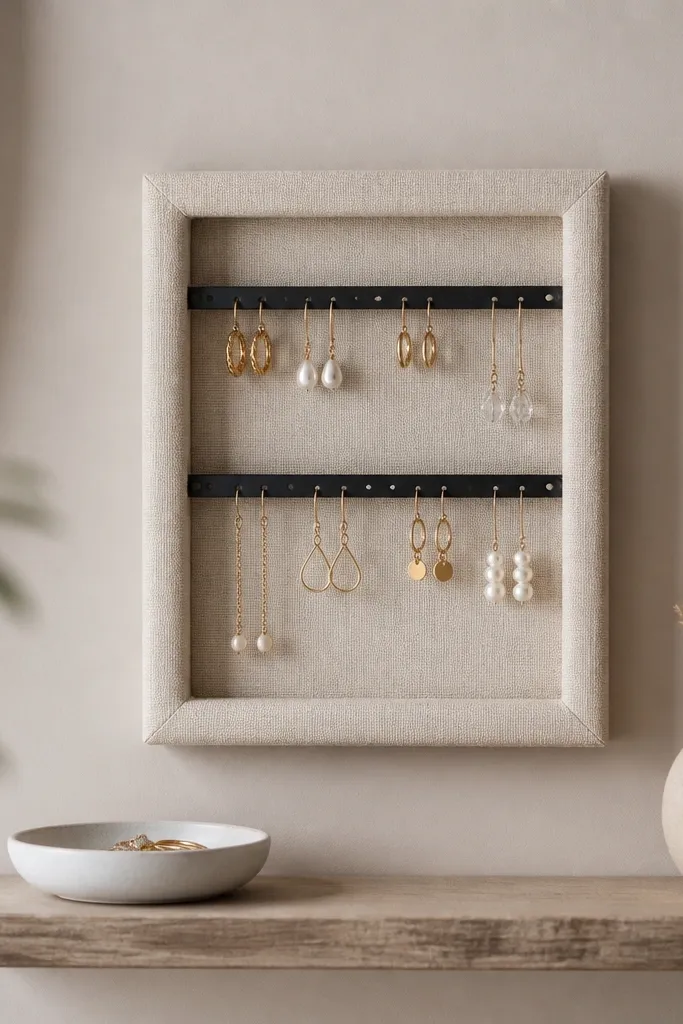
This one looks "soft" even though it's functional. Linen hides the cluttered back side, while the black bar clips keep earrings separated at the same height so pairs don't twist together. I used warm neutrals (beige linen, matte black clips) because they make gold and silver both look cleaner. The frame also gives you a defined border, so the whole organizer reads like decor, not storage.
Build a shallow box frame from 1x2 pine ripped to about 3/4 inch depth, then wrap it tight with linen and staple the back. Add two rows of small earring bars using screw hooks or adhesive-backed bar clips rated for the weight. Keep the top bar about 2.5 inches from the top edge so earrings hang without hitting the shelf.
Pro tipUse bar clips with a spring opening so you can swap earrings without fighting the clasp.
AvoidDon't staple linen loosely - slack fabric makes the whole piece look homemade and messy.
2. Cork board vertical earring grid with matching pushpin caps
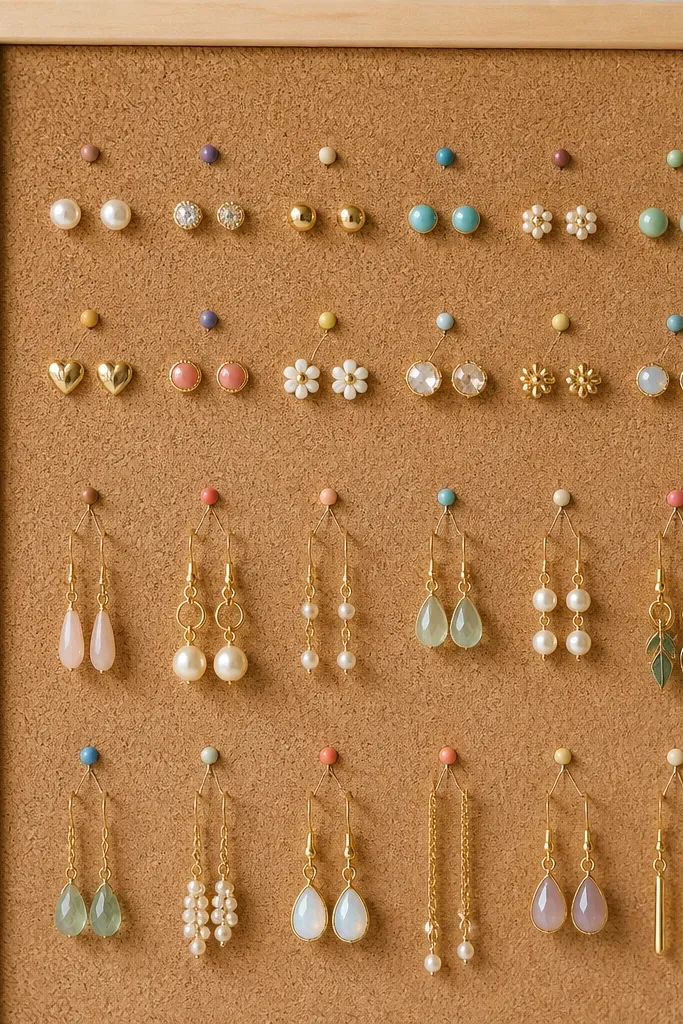
Cork is the quickest way to get a custom-sized organizer. The pins give you instant separation, and the grid makes it feel intentional. I like cork with a thin stained edge because it looks finished in small spaces. Colored pin caps also act like a color code, so you can grab matching sets faster.
Cut cork board to 8x14 inches (fits most closet doors). Stain the edge with a dark walnut stain and let it dry fully. Use a simple ruler to mark a 1-inch grid, then push pins straight down so they align. Add a thin backing board so it mounts flat.
Pro tipPaint the pin caps with metallic craft paint (gold or gunmetal) for a cohesive look.
AvoidSkip random pin spacing - uneven rows make earrings look scattered even when they're technically "organized."
3. Acrylic necklace tray with foam pads and clear dividers
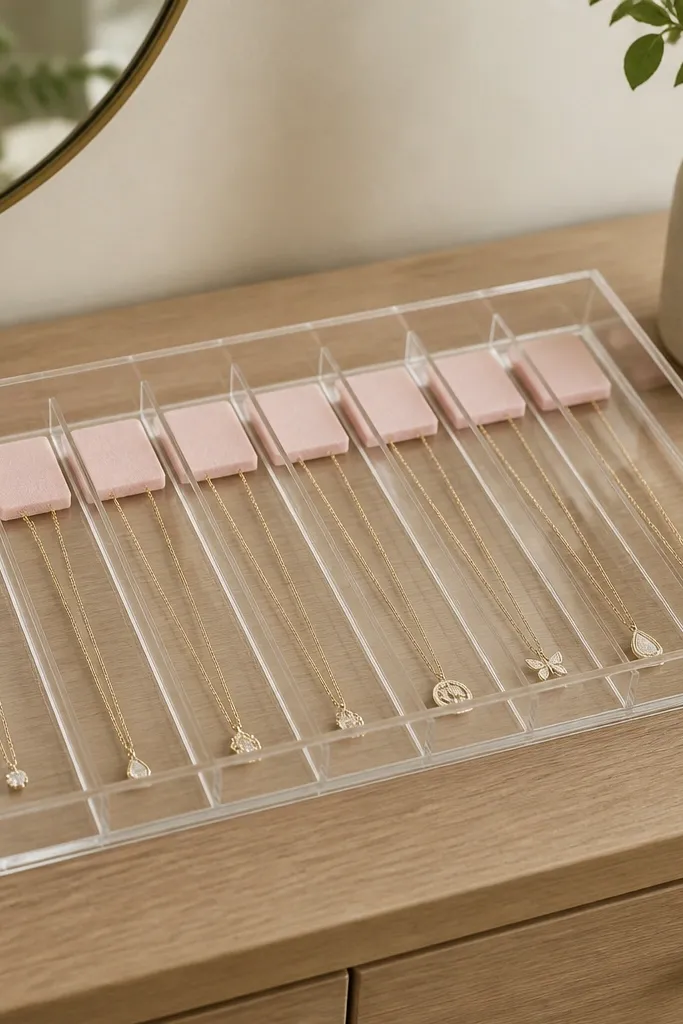
If you hate tangles, this setup is the answer. Clear acrylic keeps the view clean, and foam pads stop chain links from sliding and knotting. I built it for people who wear multiple short necklaces and want them visible without dangling. The dividers create "lanes," so every chain has its own space.
Use a shallow clear acrylic organizer tray, then glue or screw small acrylic divider strips to form lanes (I used 10 lanes for a 10-inch width). Cut foam squares about 1 inch wide and press them into each lane corner. Keep the dividers about 3/4 inch tall so necklaces can sit without jumping out.
Pro tipLightly buff the foam with a lint roller so it doesn't shed fibers onto delicate chains.
AvoidDon't use bare plastic bottoms - chains slide and twist when the tray gets moved.
4. Pegboard drawer insert for bangles and stackable rings
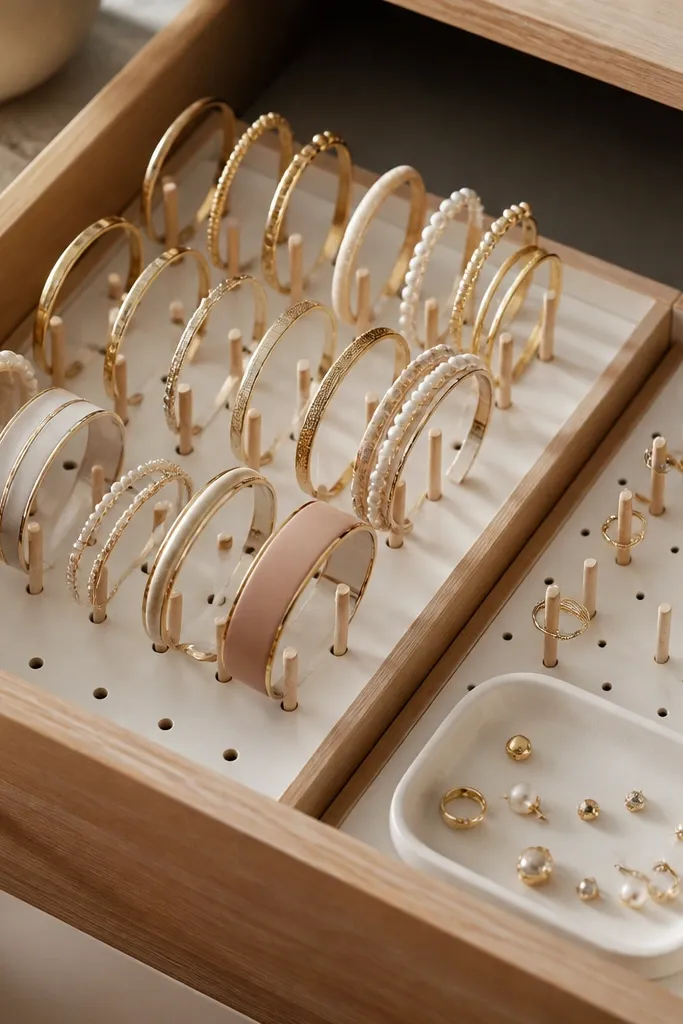
This makes your jewelry drawer look curated instead of chaotic. Pegboard grips bangles so they stand up, and ring pegs keep stacks from turning into a tangled mess. I love white pegboard because it's a neutral background that makes stones pop. The drawer stays closed, so jewelry stays protected from dust.
Measure your drawer interior and cut pegboard 1/4 inch smaller on all sides for a snug fit. Paint the pegboard with matte white spray paint, then seal with a clear matte coat. Add wooden pegs or store-bought peg hardware, and group rings on one side with larger pegs for statement pieces.
Pro tipKeep peg spacing consistent: 1.5 inches between bangles looks tidy and prevents rubbing.
AvoidDon't cram too many pegs - tight spacing forces bangles to touch and tangle at the edges.
5. Repurposed picture frame with mesh and tiny clasp hooks
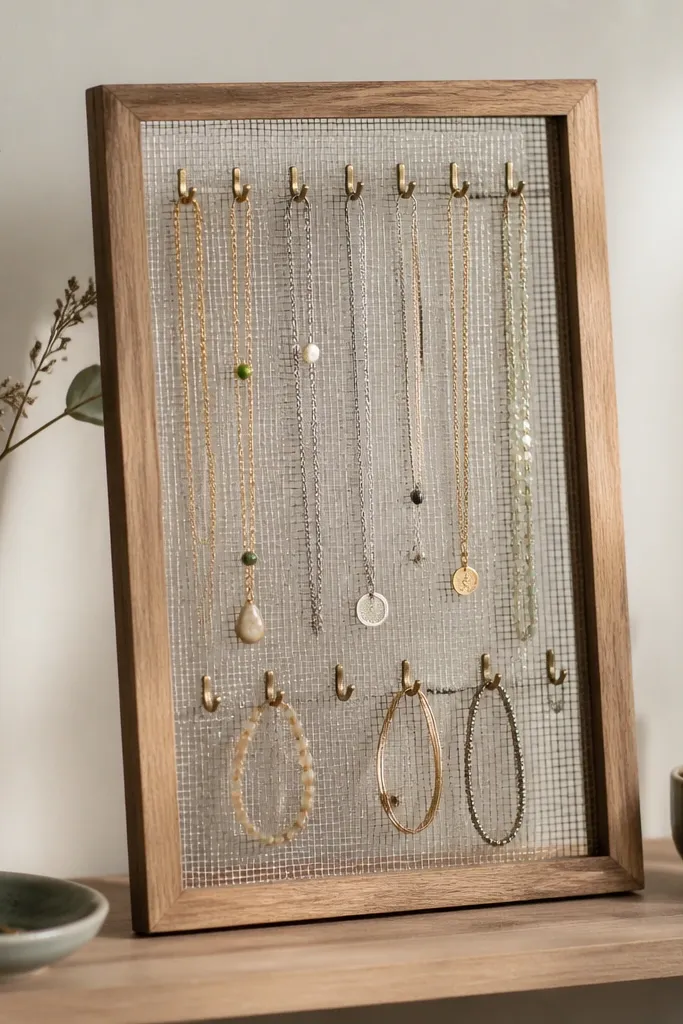
This is one of my favorite compact jewelry organizer ideas because it looks like wall art. The mesh gives you grip for hooks without the heavy feel of a full pegboard. I used a fine metal mesh so necklaces drape over it without snagging. The frame border hides the hardware, so it reads clean and intentional.
Remove the glass from a small thrifted frame and replace it with fine mesh (like wire craft mesh). Stretch and staple the mesh to the back, then screw tiny S-hooks into the frame lip or into the wood supports. Arrange necklaces by length: short chains on top, longer pieces lower.
Pro tipUse black hooks and a dark frame finish so silver and gold jewelry both look sharp.
AvoidSkip thick, bendy mesh - it warps and makes hooks sit at crooked angles.
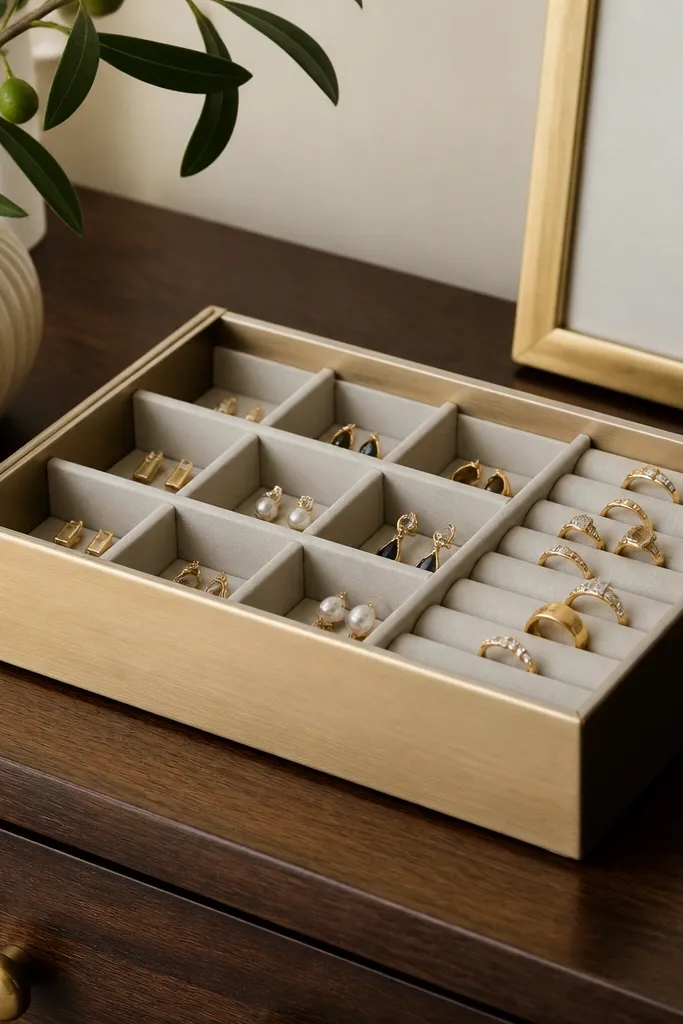
6. Stacked shadowbox with removable mini trays
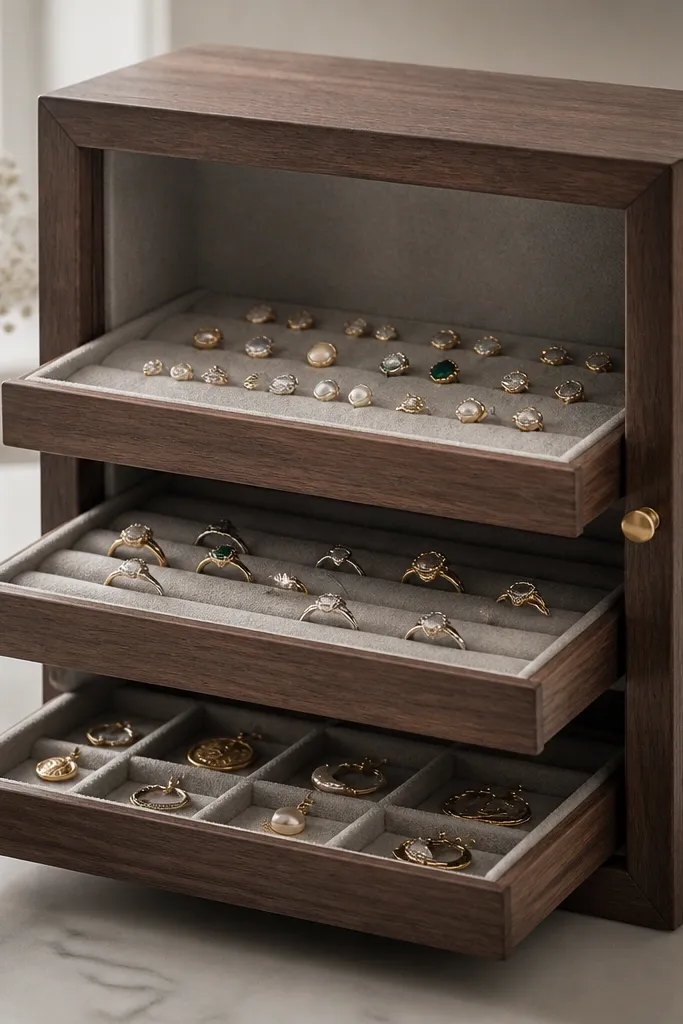
Shadowboxes make jewelry feel curated, and the removable trays keep you from digging. I designed mine for people who wear lots of studs and rings and want them sorted without separate containers on the dresser. Gray felt is my favorite backing because it doesn't reflect harsh light. Each tray has a different texture, so you can tell categories by touch.
Use a 6x8 or 8x10 shadowbox frame, then add three internal ledges using thin wood strips. Make mini trays from acrylic or thin wood and line them with felt. Leave a small lip on each tray so you can pull it out with your fingertips.
Pro tipLabel the underside of trays with a tiny strip of masking tape so you don't see text on display.
7. Wooden spool organizer for earrings with rotating top
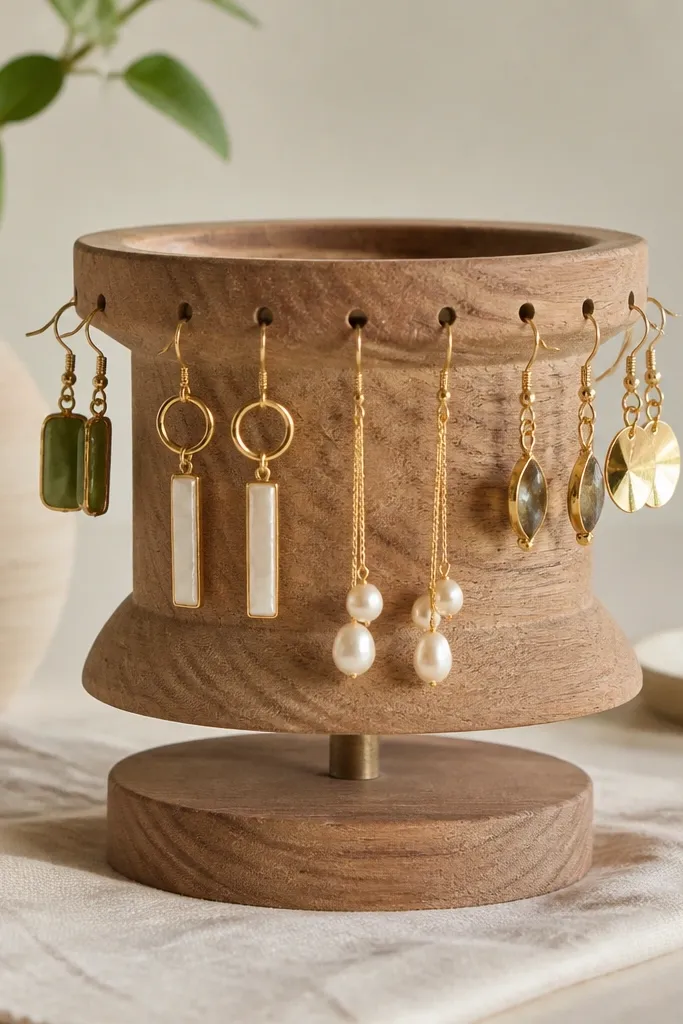
This design solves the "I can't see what I own" problem. A rotating top lets you browse without moving hooks by hand. The spool shape also makes it compact - it takes up the footprint of a mug. I used a dark stain and left the wood grain visible so it looks warm next to candles or a makeup compact.
Take a wooden thread spool or turn one from a scrap dowel and base. Drill evenly spaced holes about 1/4 inch deep around the top perimeter. Insert earring posts or small eye screws, then mount a simple turntable base using a lazy susan bearing (small size).
Pro tipDrill slightly angled holes so earrings hang straight instead of flopping sideways.
AvoidDon't drill holes too shallow - lightweight hooks will pop out when you rotate.
8. Clear-lid pill organizer with 'category rows' for studs
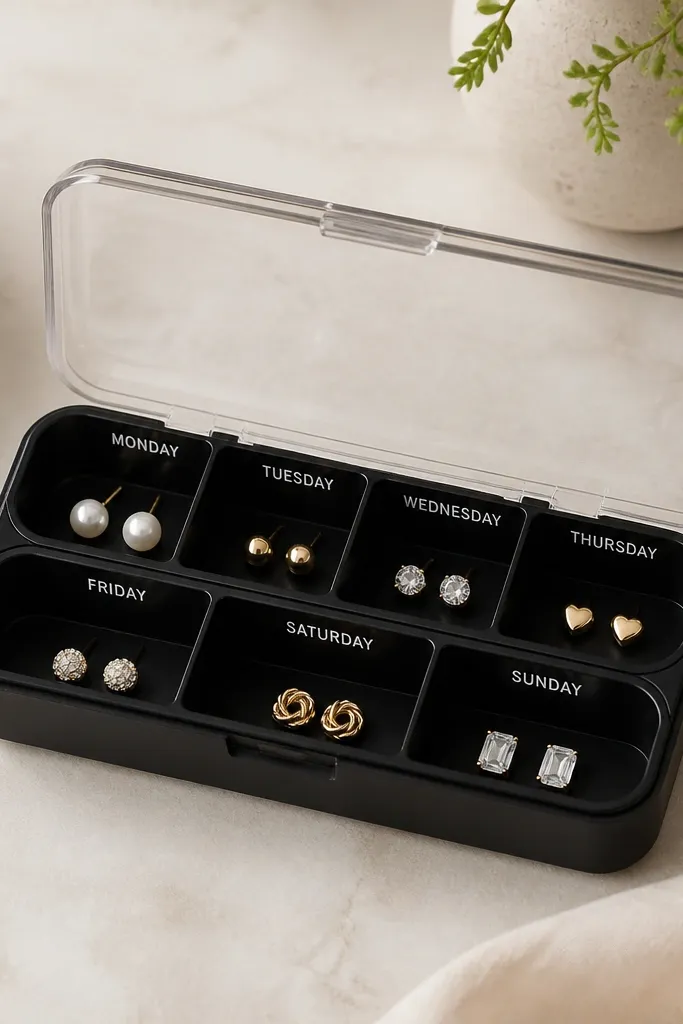
This sounds too simple, but it works because studs are the easiest jewelry to compartmentalize. The clear lid lets you see stones without opening anything. I keep it on my nightstand for everyday earrings because it's fast. The matte black base looks less "medical" than the original plastic.
Use a small 7-compartment organizer or a 14-compartment mini version. Clean it, then spray paint the base matte black and seal with a light clear coat. Keep each stud pair in a tiny folded paper square so they don't clink and chip.
Pro tipStore studs by metal color: one row for gold-tone, another for silver-tone.
9. Magnetic spice rack with removable labels for pendants
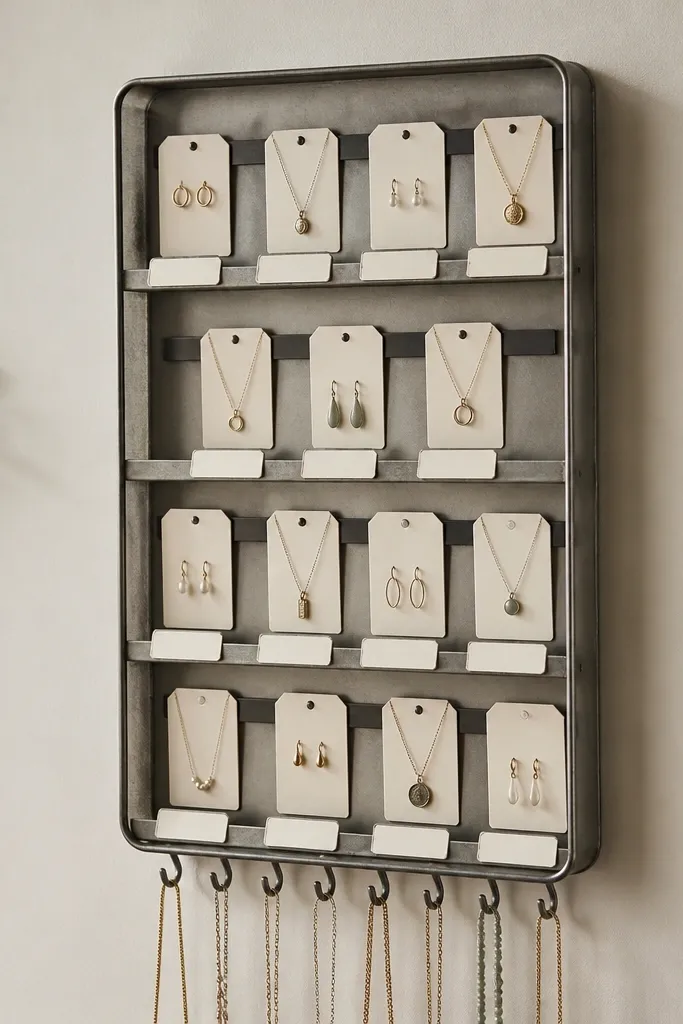
Metal racks are great for small-space jewelry because they let you reuse everything you already have. Magnetic strips hold pendant cards flat, so chains don't tangle. I like this for people who wear pendants daily and want them visible like spices. The labels keep you from grabbing the wrong necklace when you're rushing.
Mount a narrow spice rack (about 10-12 inches wide) with two screws and add a bottom row of small hooks for chains. Create pendant cards from cardstock and punch a small hole for chain loops. Attach magnetic strips to the rack shelves and place cards on top.
Pro tipUse a label maker with a tiny font and put the label on the bottom corner of each shelf so it looks neat.
10. Felt roll-up with elastic bands for bracelets and bangles
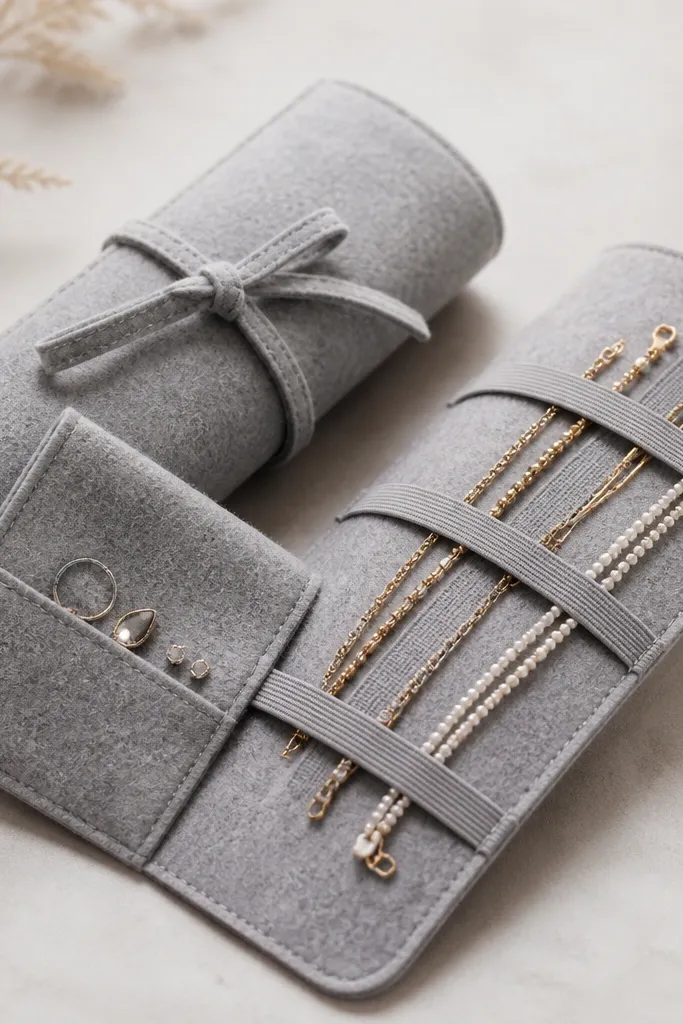
Roll-ups are the most compact way to store bulky pieces without tangles. Felt grips jewelry so bangles don't slide. I make mine with elastic bands spaced so thicker bangles have room. It also travels well - I've used the same roll-up in hotel bathrooms and it always looks tidy in my bag.
Cut felt into a rectangle about 18x24 inches, then stitch or glue a second layer for thickness. Add elastic bands in rows: 6 bands for bangles, 4 for thinner bracelets. Roll tightly and secure with a fabric tie or button.
Pro tipAdd a small coin-size pocket for tiny earrings so you don't lose backs.
AvoidSkip slippery felt - if it's too silky, bangles slide and scratch.
11. Drawer organizer box with angled earring slots and velvet base
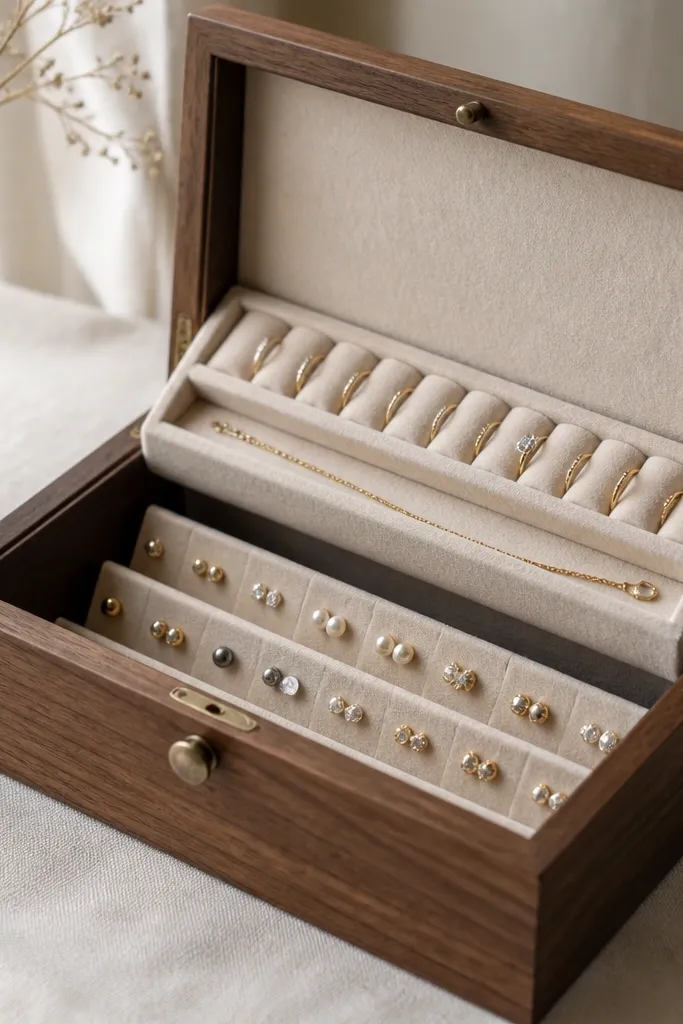
Velvet makes jewelry look expensive and keeps metal from sliding. Angled slots stop studs from falling over and reduce the "where's the pair?" panic. I like wooden boxes because the weight makes the whole organizer feel stable. This is a great option when you want jewelry hidden but still easy to grab.
Build a simple box from 1/2 inch plywood and line the bottom with black or deep navy velvet. Cut thin foam or felt wedges into angled channels for studs (about 20-30 degrees). Add one long channel for a short necklace and separate ring wells with small round inserts.
Pro tipUse a fabric glue that stays flexible so the velvet doesn't peel when you pull the organizer out.
12. Wall-mounted acrylic 'U' hooks with clear string ties for chains
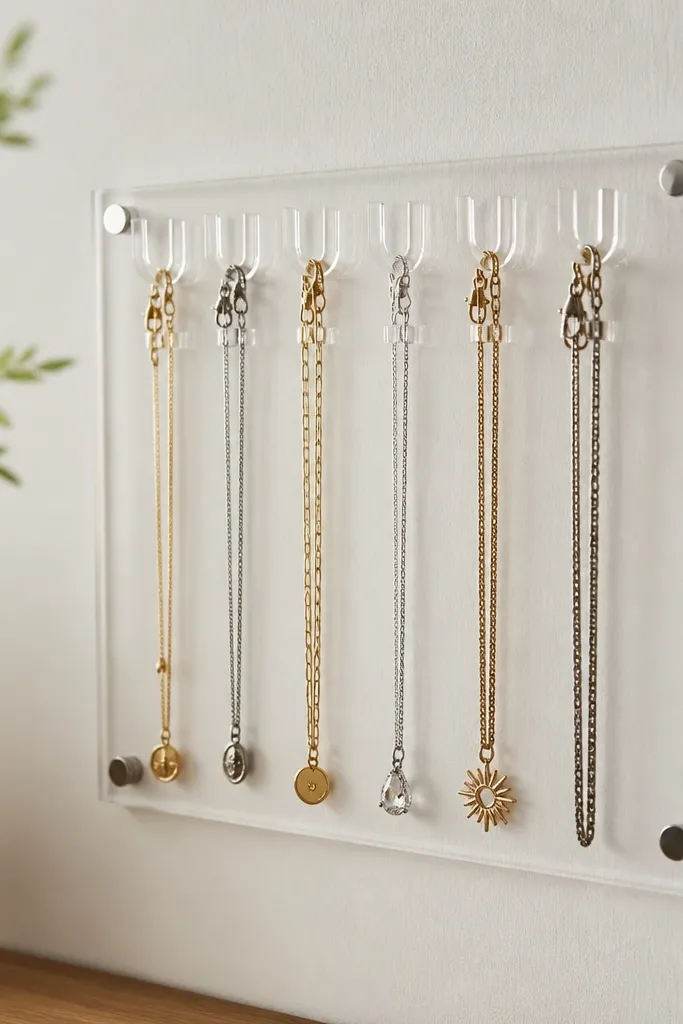
If you want a clean, modern look, clear U hooks do it. The hooks hold chains without bending them, and the string ties keep the clasp from swinging into another chain. I used clear acrylic so the background stays bright and your jewelry becomes the only color. It's compact because all pieces hang in a single vertical strip.
Buy or cut a clear acrylic strip panel and mount it with two screws. Heat-bend or attach U hooks spaced 1.5-2 inches apart. Use thin clear nylon string to tie each chain at the clasp - leave just enough slack so the chain drapes naturally.
Pro tipGroup necklaces by weight: lightweight chains in the top half, heavier pieces lower.
13. Repurposed utensil organizer with tiny paint-dipped dividers
This is a quick makeover for a thing you already have. Utensil organizers have natural grid spacing, so earrings and rings stop migrating into each other. I add paint-dipped dividers so each section has a visual boundary. The result looks like a custom organizer instead of a thrift flip.
Clean and dry the organizer, then use thin plywood strips cut to fit between existing ribs. Dip only the top edge of each divider in a single coordinating color (like terracotta or sage) so the rest stays wood. Line bottom with felt to prevent scratches.
Pro tipUse painter's tape to keep divider edges sharp and straight.
14. Cedar mini drawer with brass knob pull and ring tray insert
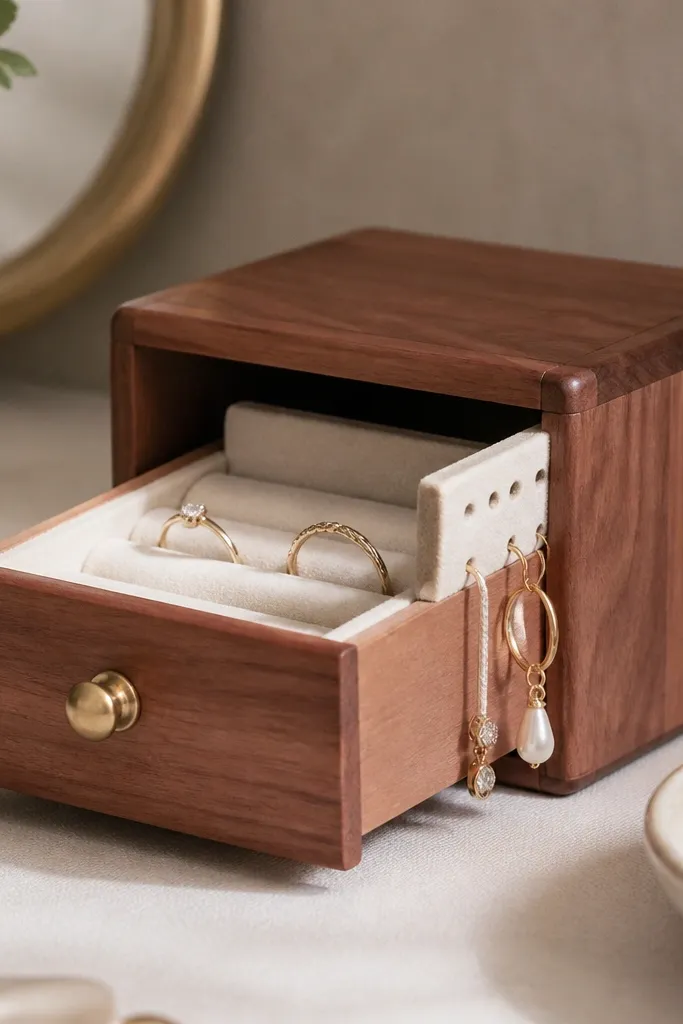
Wood smell is real, and cedar makes your jewelry drawer feel fresh. The mini drawer is compact but holds enough for a week of pieces. I like adding a ring tray insert because rings are the hardest to keep neat in small containers. The brass knob adds warmth and matches gold jewelry.
Find a small drawer box or build one from 1/4 inch cedar plywood. Line the bottom with cream felt, then insert a removable ring tray made from thin wood with shallow wells. Add a small side panel inside the drawer lip with micro hooks for studs.
Pro tipKeep cedar away from pearls and opals - store those in a separate soft pouch.
15. Pegboard end-cap with sliding acrylic tray for travel earrings
This is for people who pack jewelry in the same pattern every trip. The pegboard keeps earrings separated, and the sliding tray holds the pieces you bring most often. Acrylic keeps it visible, so you don't have to open and search. It's also compact because the vertical space does the work.
Mount a small pegboard panel (about 6x10 inches) and add pegs in two heights. Build a sliding acrylic tray with two small runners (thin metal strips) so it moves smoothly. Keep the tray width just under the pegboard so it doesn't snag.
Pro tipMark your top travel picks with a tiny dot of paint on the earring cards.
16. Rattan tray with removable foam 'stud blocks'
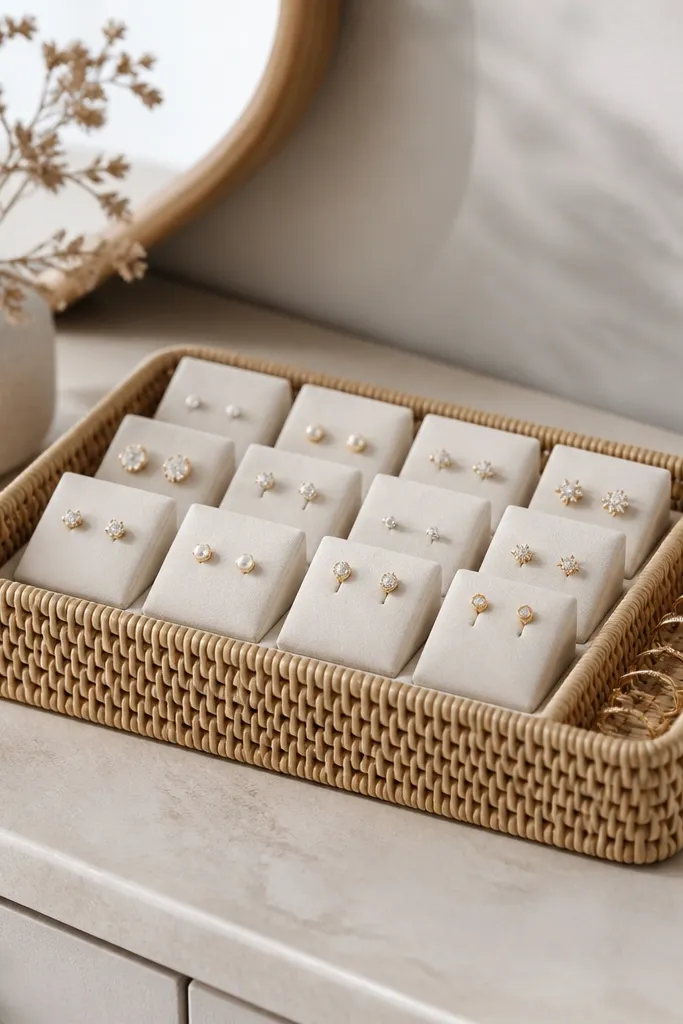
Rattan looks warm and natural, and it makes jewelry feel like part of your decor. The foam blocks keep studs upright and prevent the backs from getting lost in the bottom of a tray. I use neutral foam so it doesn't distract from stones. This setup also makes it easy to rotate studs without dumping everything out.
Use a shallow rattan tray with straight sides. Cut foam blocks to fit the tray corners and wrap them in thin linen or felt to keep them tidy. Add a small side insert for rings made from a tiny cut of wood or acrylic.
Pro tipKeep foam blocks removable so you can quickly vacuum lint around them.
17. Mini jewelry ladder made from dowels and leather ties
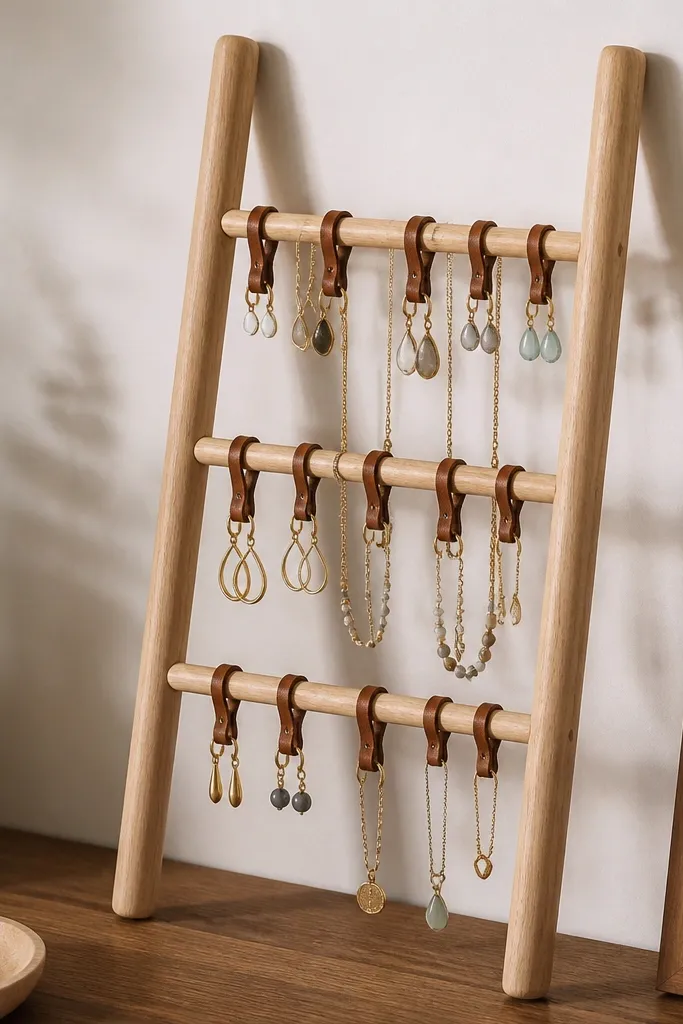
A ladder format is compact because it stacks pieces vertically without needing compartments. Leather ties are soft on delicate finishes and keep chains from sliding. I like using dark brown leather because it looks good with both gold and silver. It's also easy to adjust - you can move ties up or down as your collection grows.
Cut two vertical side dowels about 14 inches tall. Attach three rungs using wood dowel joinery or screws, spacing them 3 inches apart. Punch small holes in leather strips and tie them to rungs, then hook earrings to the leather loops.
Pro tipKeep tie lengths consistent so the jewelry hangs at the same visual height.
18. Resin 'ring bar' coaster with tiny posts for stacking rings

A ring bar is a clean answer for ring storage because rings look best when they're displayed upright. Resin gives you a smooth surface and a glossy highlight that makes stones sparkle. Tiny posts stop rings from tipping and tangling. I made mine with subtle gold flecks so it works with everyday jewelry without looking flashy.
Use a silicone mold for a bar coaster or cast in a shallow tray. Embed small nail studs or short metal posts in two rows, spaced about 1 inch apart. After curing, sand the top lightly and wipe clean before placing rings.
Pro tipSeal finished resin with a UV-resistant top coat if it sits near sunlight.
19. Door-hung organizer using a small shower caddy and magnetic strips
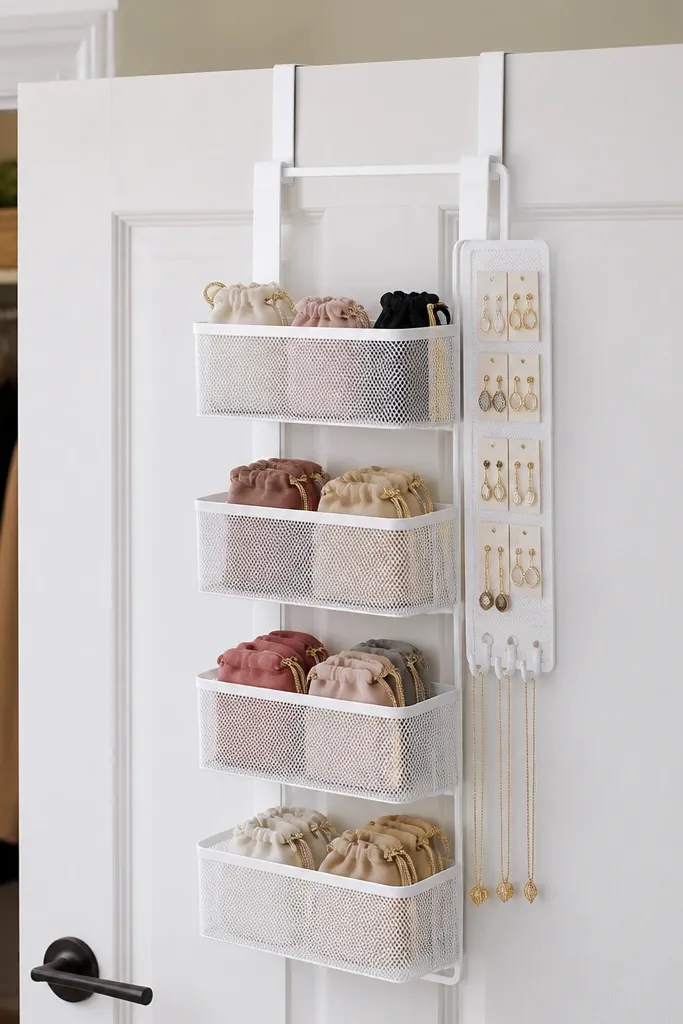
This is a compact jewelry organizer idea that works because it uses the vertical dead space of a door. The bins hold pouches, and magnetic strips keep metal pieces from spilling. I've used this in a small apartment where dresser space is basically nonexistent. The caddy also keeps everything together, so you don't lose items during laundry days.
Choose a small shower caddy with 3-4 shallow bins. Add magnetic strips to the side panel and attach earring cards made from thin cardstock with a small magnet. Keep necklaces in a single pouch so they don't tangle in bins.
Pro tipUse small mesh pouches so you can see what's inside without opening every time.
20. Upcycled tin with felt top and fold-out earring display
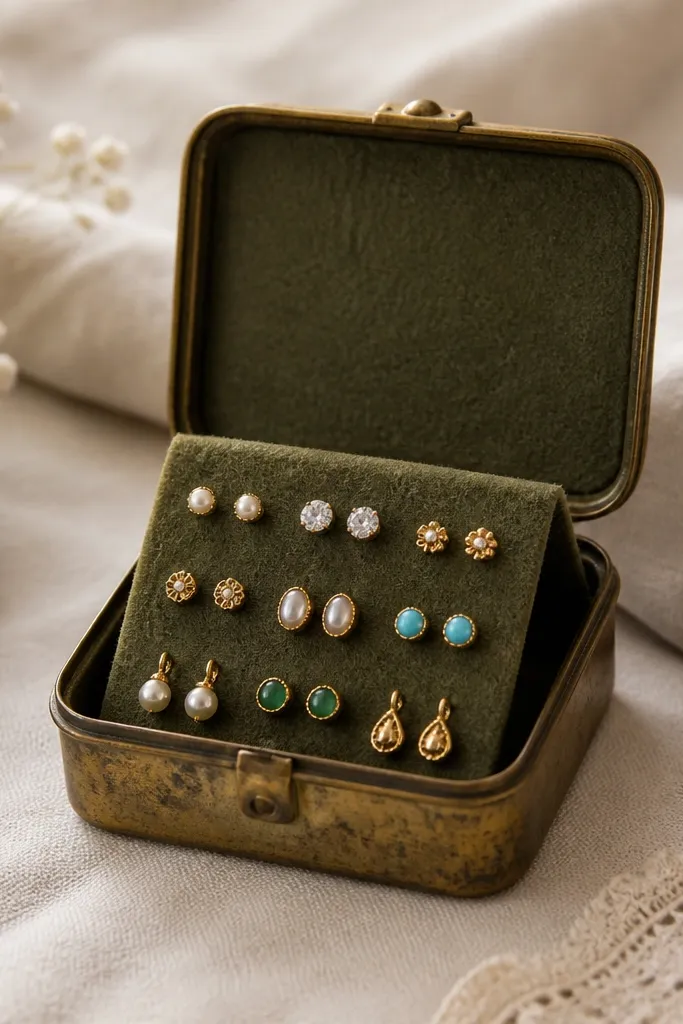
Tins are compact and they look charming, especially when you line the inside with felt. The fold-out stand makes earrings visible without taking up wall space. I like this for holiday jewelry or "special pieces" because the tin protects them from dust and light. The felt also reduces scratching from metal-on-metal contact.
Use a shallow tin and line the lid interior with felt using fabric glue. Inside, attach a fold-out panel made from thin plywood or sturdy cardboard covered in felt. Create rows of small hook nails or felt-covered pegs for studs and drops.
Pro tipAdd a small strip of clear tape on the hinge to stop lid wobble.


