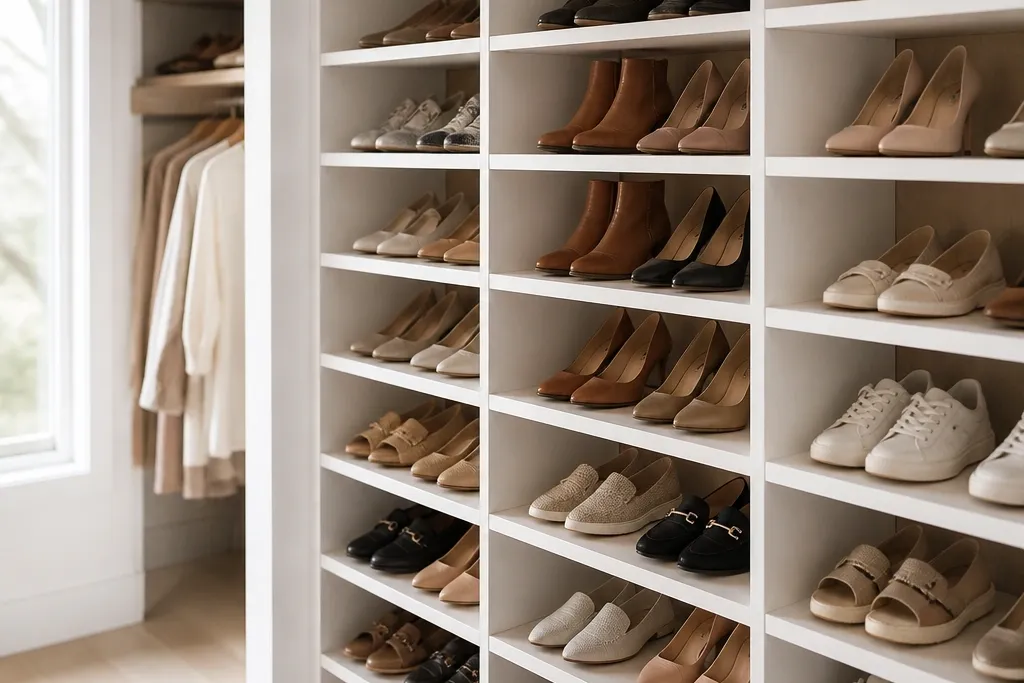
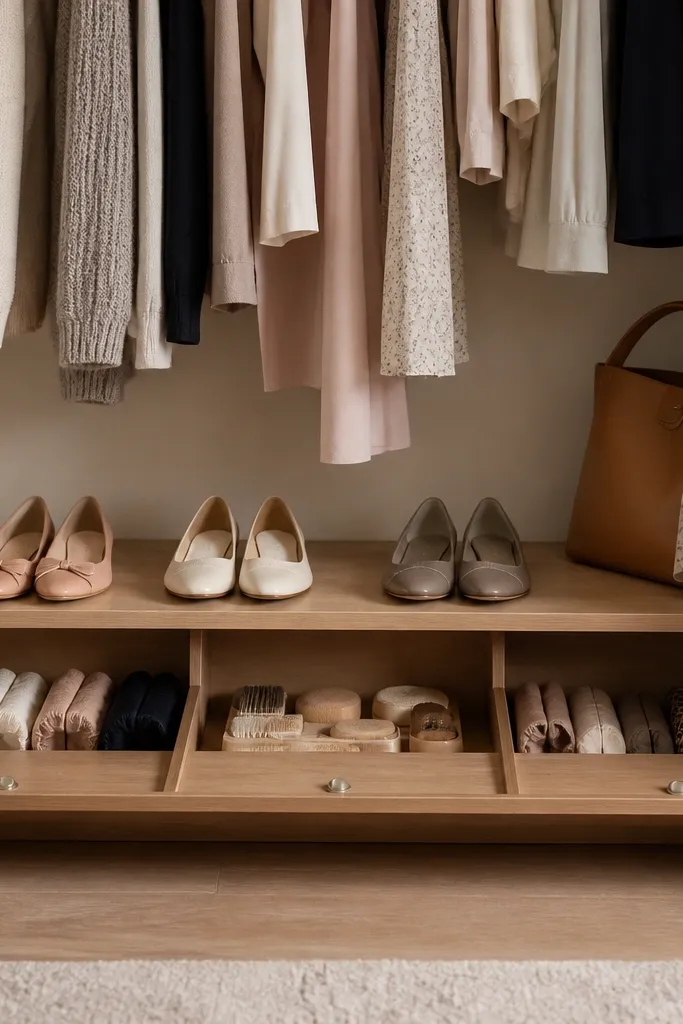
1. Slanted 2x4 shoe shelves with a 1-inch front lip
This setup keeps shoes from rolling into each other because the shelf has a lip and a slight angle. I've built this with 2x4s because the wood is thick enough to look substantial and it takes stain well without looking patchy. The angle makes sneakers easier to grab - you see the toe shape instead of digging through a pile. A grippy liner keeps leather and rubber from sliding when you pull a pair out.
Cut two side supports for each tier to set an angle of about 15-20 degrees. Use 1-inch wood strips for the front lip so the shoe toe can't slide forward. Space tiers 7-8 inches apart for low shoes, and leave 10-11 inches for boots. Finish with matte stain or paint, then seal with a clear coat that won't feel sticky.
Pro tipIf your closet is narrow, reduce shelf length by 2-3 inches and add one extra tier instead of making the shelves too wide.
AvoidSkipping the 1-inch lip makes the shelf look fine at first and then turns into a toe pile.
2. Stacked wire baskets on a closet rail
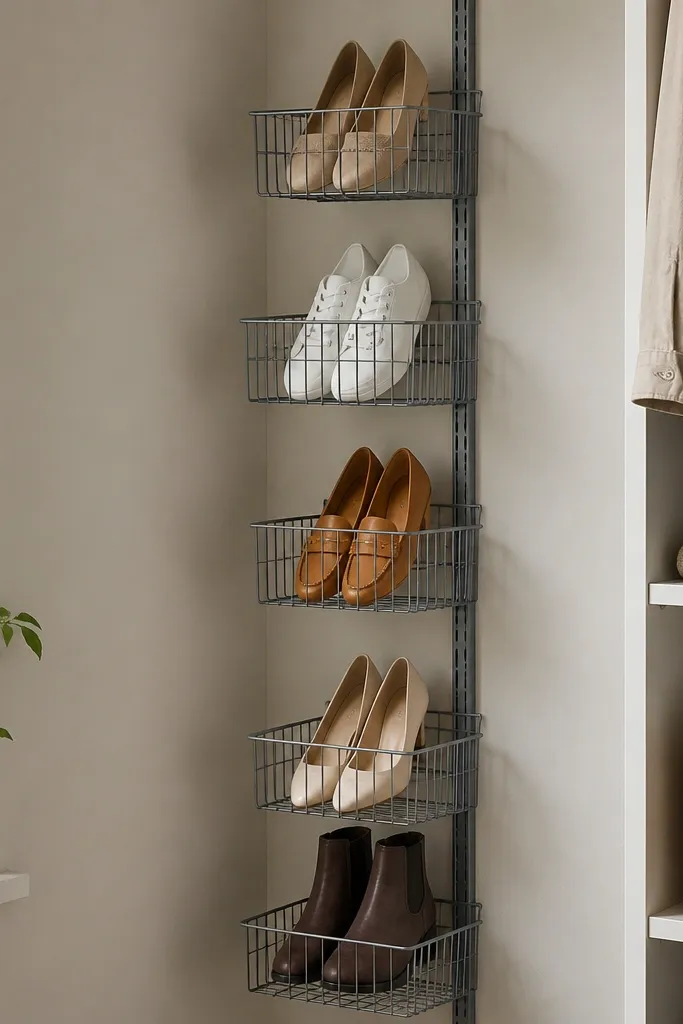
Wire baskets are honest storage - you can see everything instantly, and air moves around shoes. I like this when your closet has a little humidity or you rotate shoes often. The baskets look light, so the closet doesn't feel boxed in. Add a liner or non-slip mat so heels and sandals don't slide.
Mount a heavy-duty closet rail or two vertical uprights with screws into studs. Hang baskets with spacing of about 10-12 inches for sneakers and 12-14 inches for boots. Use black non-slip shelf liner cut to basket size. If your baskets are open on the sides, keep shoes toe-forward so they don't tip.
Pro tipLabel the basket heights with painter's tape strips while you load it, then peel them off after you're happy with the layout.
AvoidUsing baskets that are too shallow for the shoe height makes boots lean and collapse.
3. Under-hanging shelf with flip-down doors for shoe cover storage
This is a lifesaver for people who have shoe covers, insoles, and polish kits that clutter the closet floor. The flip-down doors hide the small mess while still letting you grab items fast. You get a clean front line, and the shelf under the rod keeps things within reach. It also helps keep dust off anything you don't use daily.
Build a shallow shelf about 8-10 inches deep so it doesn't bump your hanging clothes. Use thin plywood or MDF painted matte and seal the edges. Install small flip-down cabinet hinges so the doors don't sag. Store low shoes behind the doors and keep accessories in the front compartment.
Pro tipUse magnetic catches on the doors - a cheap latch that loosens makes the closet look sloppy.
AvoidLeaving the shelf too deep traps items behind the doors and you end up leaving stuff on the floor.
4. Boot rack with vertical slats and a removable drip tray

Vertical slats hold boot shafts without crushing them, and the removable tray handles the wet-salt mess that usually runs onto the floor. I use this in winter closets because boots always come in damp. The slats also make the boots easy to identify without yanking one out and knocking others over. A dark tray liner hides stains.
Space slats 3.5-4 inches apart for most boot shafts. Make the rack depth about 12-14 inches so boots don't press against the back wall. For the tray, use a shallow storage tote or a baking sheet tray size that fits under the slats. Line with waterproof rubber or a vinyl-backed mat.
Pro tipPut a small hook on the side for boot trees so you can insert them right away and keep the shape.
AvoidStoring boots directly on the closet floor - you'll get stuck scraping salt and the bottom gets scuffed.
5. Cube shelves with fabric bins and matching labels
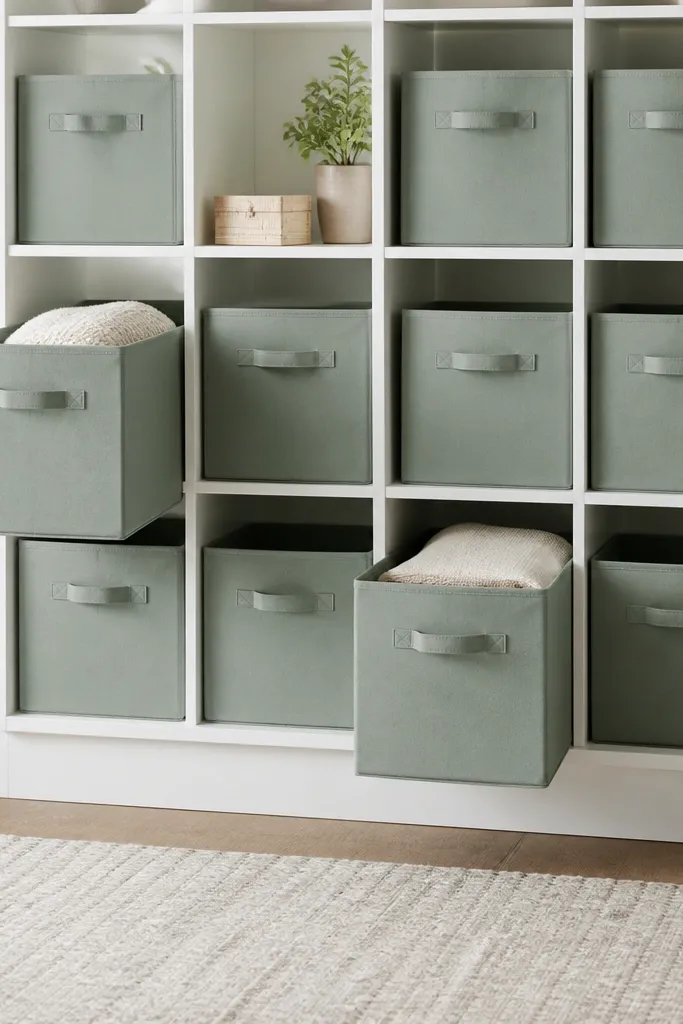
Cube shelves look tidy because the grid forces consistent spacing. Fabric bins keep shoes from showing scuffs and reduce the visual chaos of different materials. I like using bins in a soft neutral because it calms the closet, especially if you have a mix of sneakers and heels. Labels make it faster to put things back without thinking.
Choose bins that fit the cube openings with about a 1-inch gap so they slide in and out smoothly. Use 2-3 height cubes per shoe type: one row for flats, one for sneakers, one for boots in pairs of smaller boots or tall gaps. Label with a consistent system - I use small black label strips or printed tape. Keep bin material thick enough to stand up when you pull it.
Pro tipUse binder clips as temporary "bottle labels" for the first week while you refine what you own.
AvoidUsing flimsy bags that collapse - the closet looks messy and shoes end up on the shelf edges.
6. Clear acrylic shoe drawers for one-rotation weeks
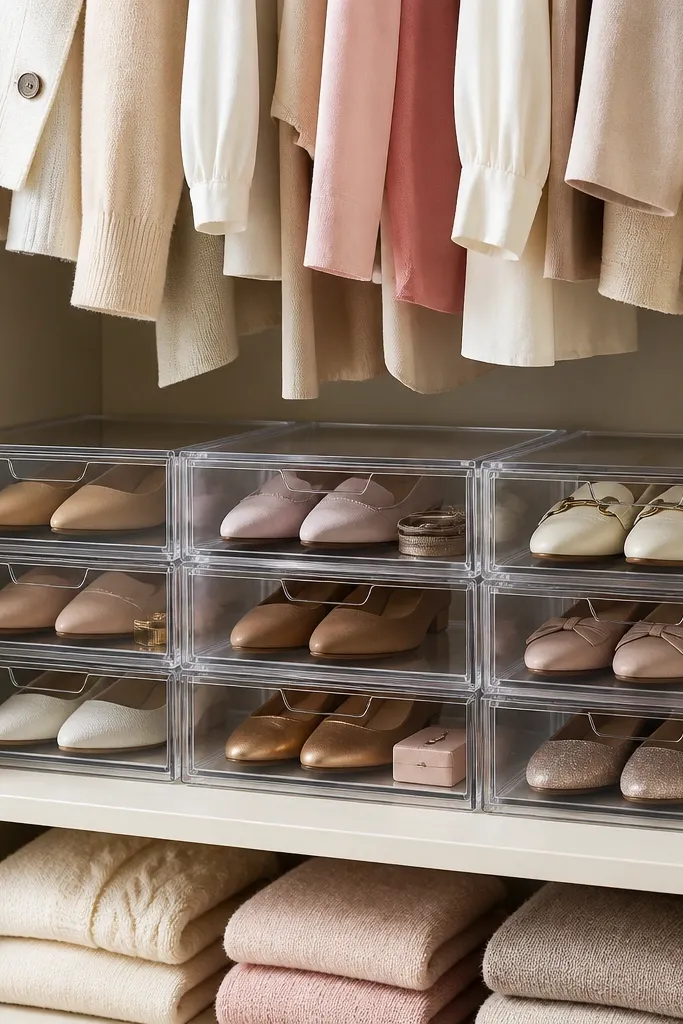
Clear drawers let you pick your shoes without opening five bins. I use this when I rotate through seasonal shoes and don't want to dig. The acrylic makes the closet look clean and modern, and the drawer format keeps shoes from being kicked around. You also see dirt early, so you wipe bottoms before they spread.
Use shallow drawers about 6-8 inches tall for flats and sneakers, and set aside a separate space for boots. Place a thin non-slip pad in each drawer to prevent sliding. If you're building a DIY version, use acrylic panels or store-bought drawer units and mount them on a fixed shelf. Keep the drawer fronts aligned so the closet looks straight.
Pro tipPut a small silica gel packet in each drawer for a week of odor control, then replace it.
AvoidStacking heavy boots in clear drawers - they crack or warp and the closet looks broken.
7. Pegboard shoe wall with angled hooks
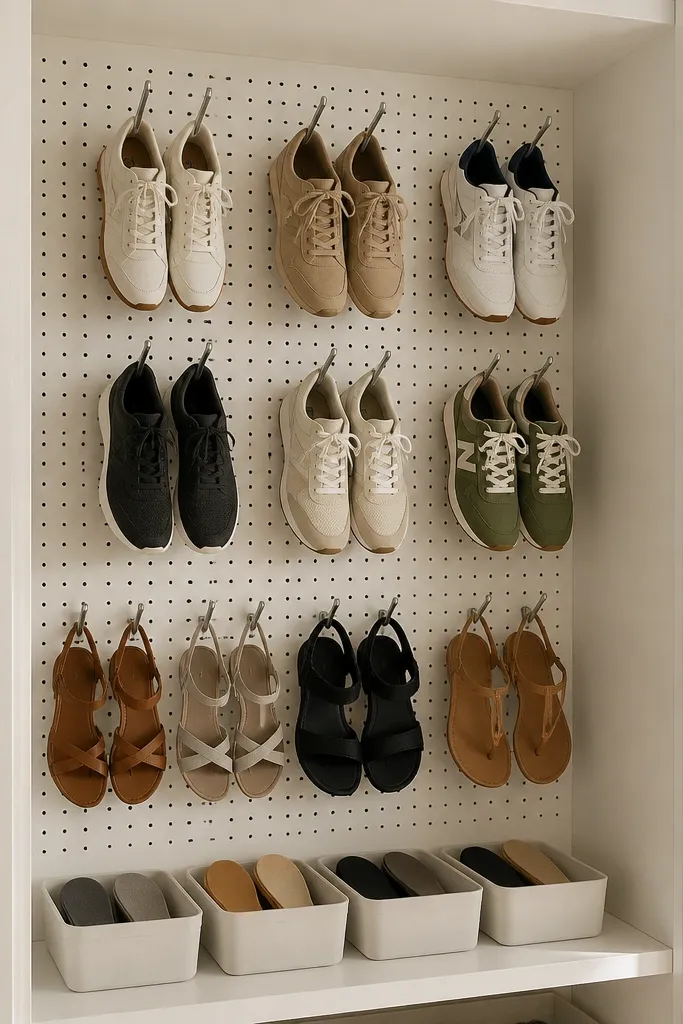
Pegboard is the fastest way to get organized because you can change spacing as your shoe collection changes. Angled hooks keep shoes from sliding down and show you the pair clearly. This looks great when you want a clean, artsy closet instead of a "utility" storage corner. The air flow helps shoes dry between wears.
Mount pegboard to studs and add a lip shelf at the bottom for bins. Use angled hooks sized for the shoe heel width so they hold without bending. Hang sneakers by heel, sandals by strap, and keep tall boots for a different rack. Leave 2-3 inches between hanging pairs so they don't rub.
Pro tipPaint the pegboard and hooks matte black for a uniform look that hides scuffs.
AvoidOvercrowding hooks - shoes touch and you get scuff marks fast.
8. DIY ladder shelf with shoe stops
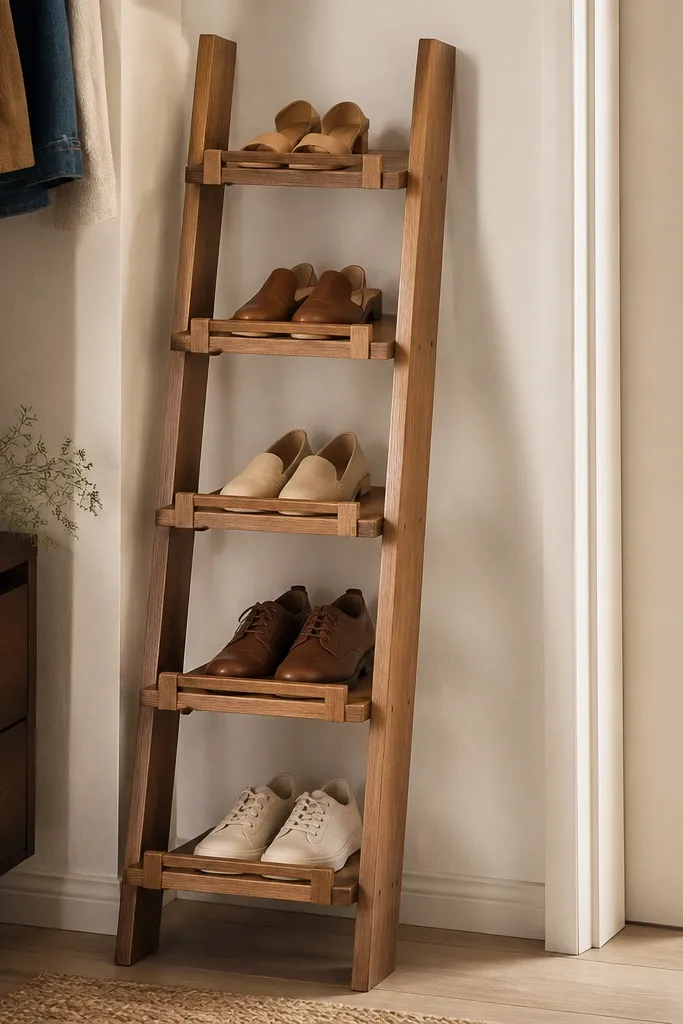
A ladder shelf gives you vertical storage without building a full cabinet. I like it for narrow closets because you can tuck it close to the wall and still reach each shelf. Shoe stops keep pairs from sliding forward when you pull them out. It also looks intentional because the ladder shape reads as design, not random shelves.
Build two side rails and rungs spaced 8-10 inches apart for low shoes. Add a front stop block about 3/4 inch tall on each rung. Seal with a satin clear coat so the wood wipes clean. Keep the ladder depth around 10-12 inches so shoes don't overhang.
Pro tipAttach anti-tip brackets to the wall - ladder shelves shift if you bump them.
AvoidSkipping the front stop - the first pull-out knocks shoes into the next rung.
9. Rotating carousel shelf for heels and sandals

A rotating carousel makes "which pair did I wear last?" disappear because everything faces you. I've used this for heels and sandals where you want visibility and quick selection. It also keeps shoes from stacking awkwardly and scuffing. The closet looks neat because pairs are contained.
Install the carousel on a level base and choose compartments sized for your heel height. For DIY, build a round platform with dividers that are 2 inches wider than the widest shoe. Add non-slip pads in each compartment. Keep the carousel height around 24-36 inches so you can reach without kneeling.
Pro tipGroup by type - sandals on one half, heels on the other - so you don't mix straps and lose track.
AvoidChoosing compartments too tight - heels scrape and the closet ends up with bent straps.
10. Bamboo tension rod shelf for lightweight shoes
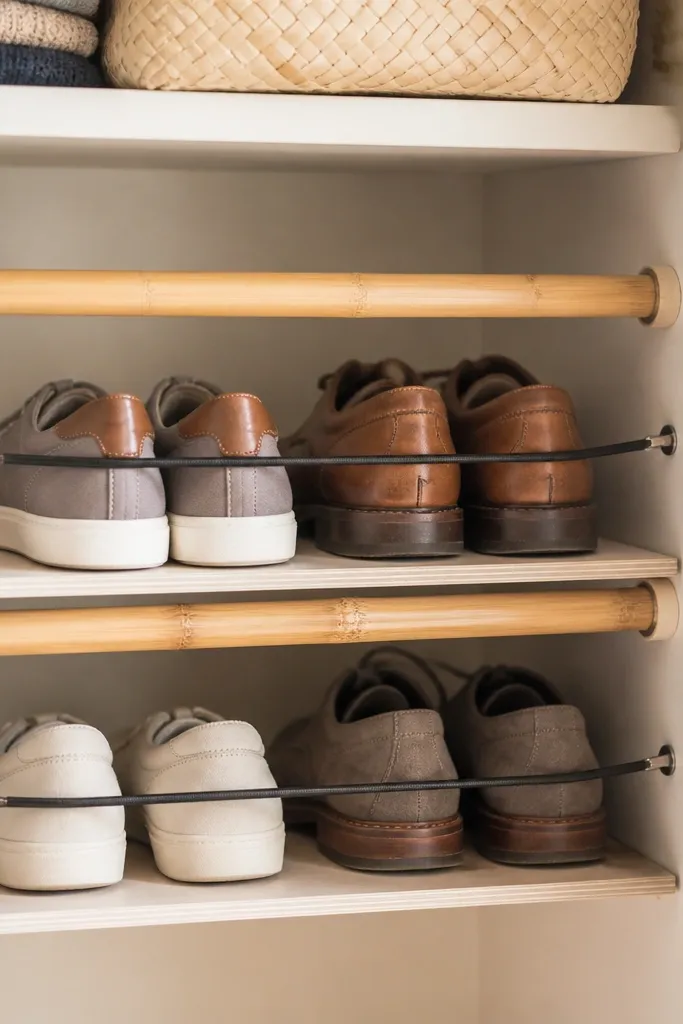
This is a renter-friendly system when you can't mount boards into studs. Tension rods let you create a quick shelf line, and bamboo looks warm instead of plastic. It's best for lightweight shoes like flats, slip-ons, and sneakers without heavy boots. A bungee or grippy mat keeps pairs from sliding.
Use a shelf board about 12-16 inches long and 1/2 inch thick. Set tension rods with enough spacing to support the board edges. Put a non-slip mat under shoes and add bungee cords across the front if the closet bumps. Keep each shelf section to one or two pairs maximum so it stays stable.
Pro tipWrap rod ends with felt tape where they touch the closet frame to prevent scratches.
AvoidStoring heavy boots on tension rods - the shelf sags and shoes end up on the floor.
11. PVC pipe cubbies with end caps for rain boots
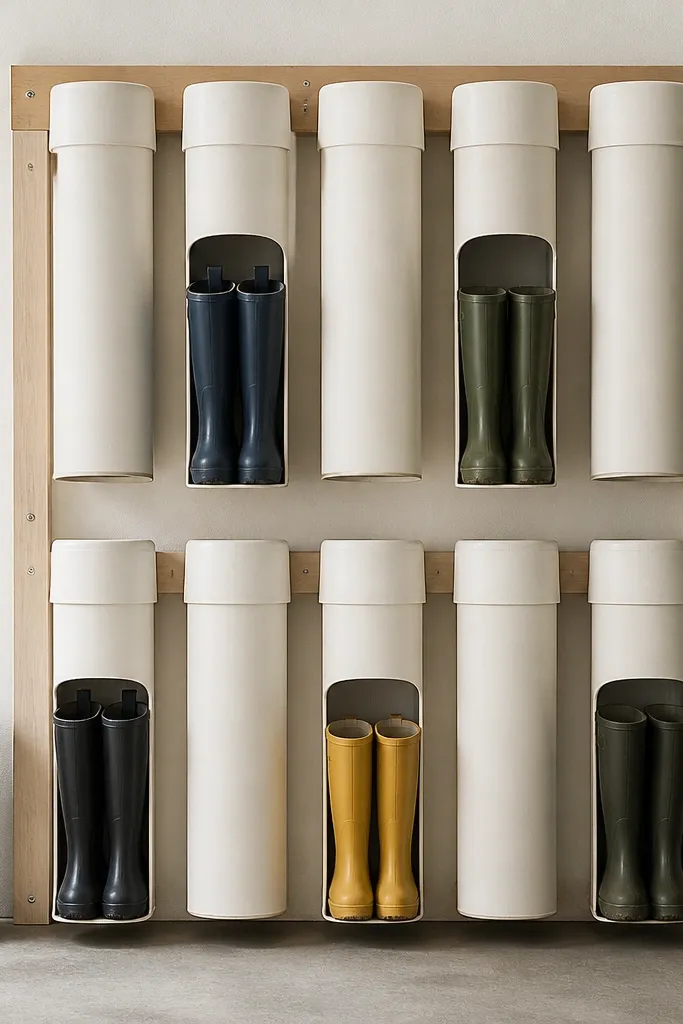
PVC cubbies handle wet gear without soaking up water like wood can. I used this for rain boots and water shoes because the material wipes clean in seconds. The end caps keep the pipes from looking unfinished and protect the pipe edges from scuffs. It creates a uniform, graphic look in a closet corner.
Cut PVC sections to match the height of the boot sole plus 3-4 inches. Mount them into holes drilled in a plywood backing board, using tight tolerances so the pipes don't wobble. Add rubber feet under the board if it sits on the floor. Seal the board edges and paint it matte white or soft gray.
Pro tipKeep a small spray bottle of vinegar water nearby for quick wipe-down after storms.
AvoidLeaving PVC raw or unpainted - it looks unfinished and scuffs show immediately.
12. Pegboard shelf + clear shoe pockets for travel pairs
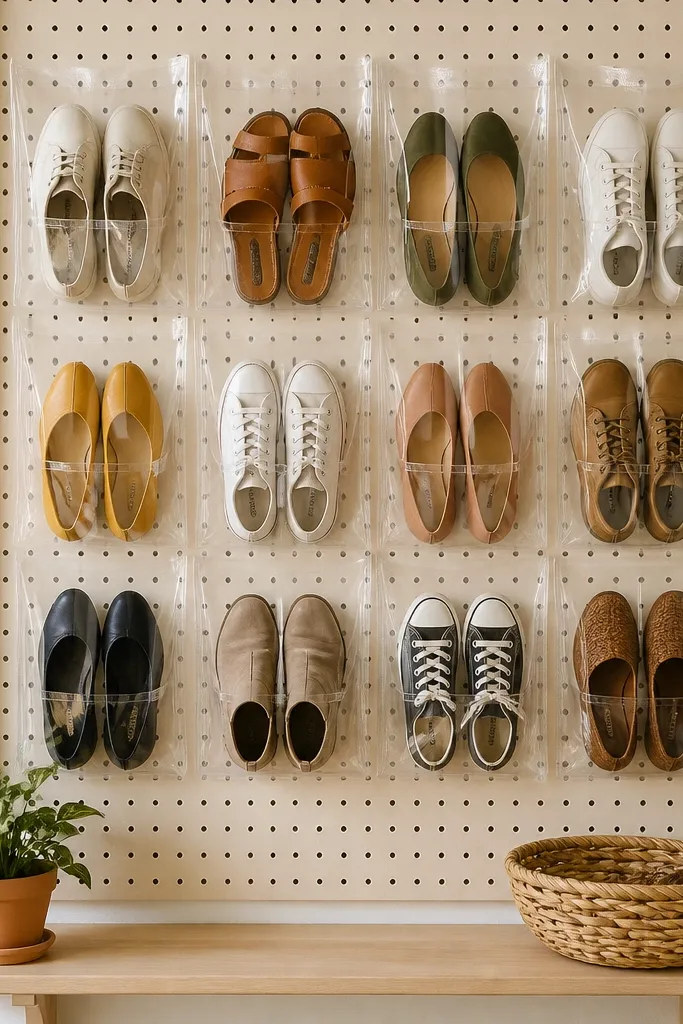
Clear pockets are great when you travel and need a home for "weekend shoes" that you don't wear every day. They prevent shoe dust from spreading and keep pairs together. Pegboard lets you reconfigure pocket rows as your collection changes. The closet looks clean because the pocket fronts show a neat grid.
Mount the pegboard to studs, then hang clear pockets designed for shoes. Keep pocket rows 10-12 inches apart so high tops fit without crushing. Use a small bottom shelf for shoe brushes and wipes. If the pockets bend, add a thin board behind the pegboard to create a firmer mounting surface.
Pro tipLabel pockets with dates like "Trip pack" or "Gym week" so you don't mix categories later.
AvoidUsing pockets meant for kids - the seams tear and shoes slip out.
13. Drawer-style shoe storage with sliding bins
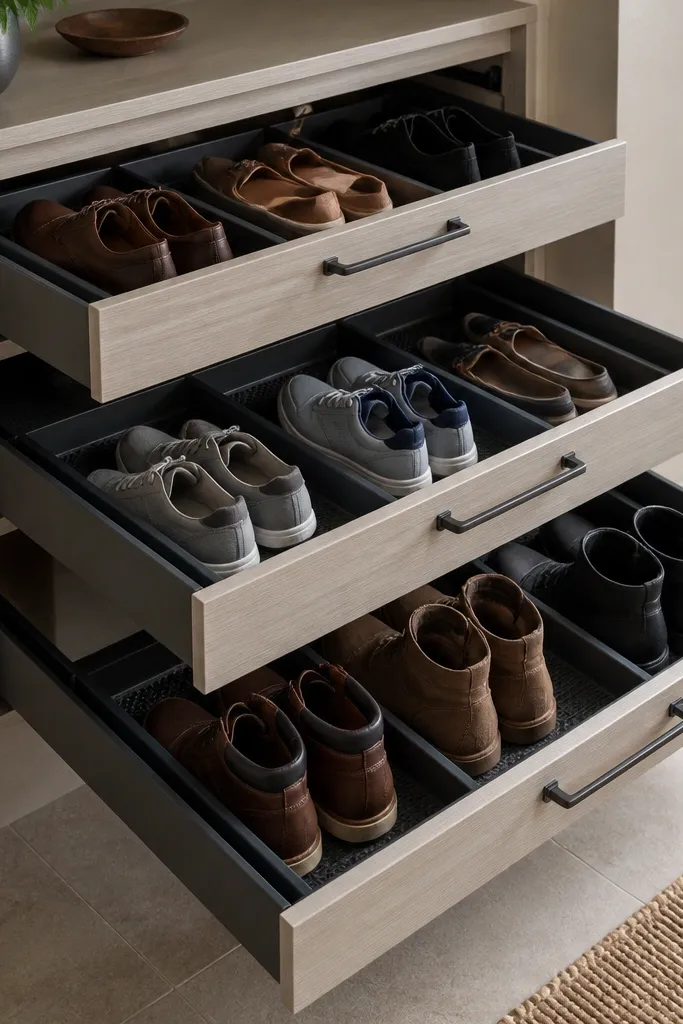
Sliding bins inside drawers keep shoes out of sight and out of the dust line. I love this for people with a busy household because it keeps the closet looking tidy even when you're rushing. The bins also let you pull one drawer and take it to the door for quick grabbing. It's also easy to clean because you can lift the bin and wipe the drawer floor.
Build a base cabinet or use a ready-made dresser drawer system. Make each drawer height 8-10 inches for flats and sneakers, 12 inches for boots. Use bins with handles so you can pull them out smoothly. Install slides rated for the bin weight and keep the drawer front aligned for a clean look.
Pro tipPut a thin felt strip on the drawer bottom corners where bins land - it reduces scuffs.
AvoidOverstuffing drawers - shoes crush together and you lose the "easy storage" effect.
14. Woven baskets on floating shelves with toe-forward spacing
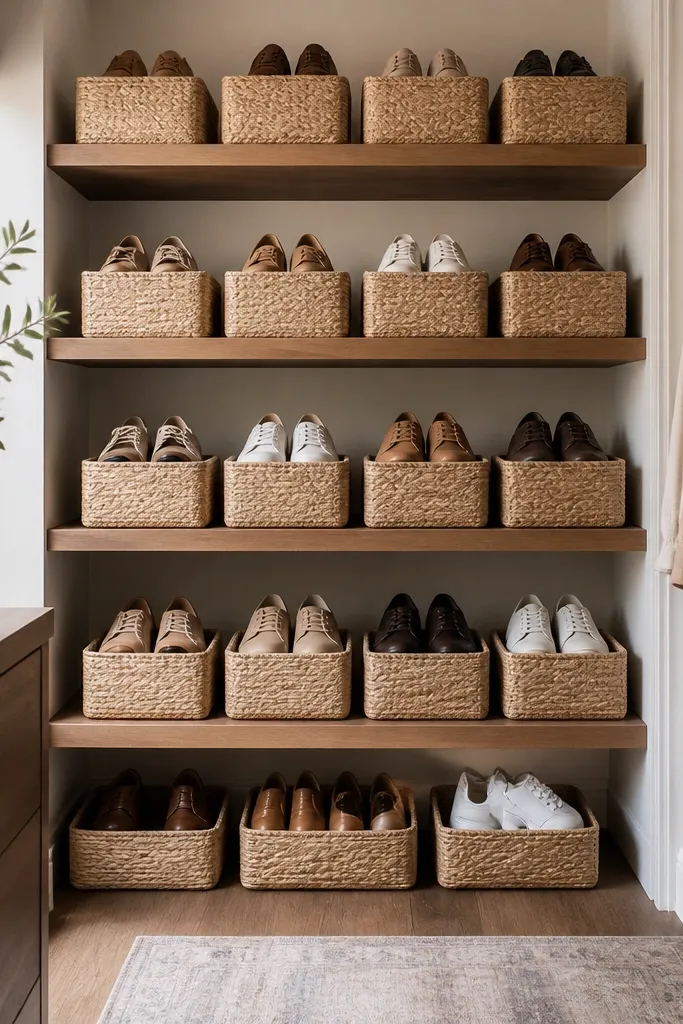
Floating shelves give a clean, modern line, and woven baskets hide shoe clutter without making the closet feel heavy. Toe-forward spacing keeps pairs from turning into a tangled mess. The baskets also soften the look if your closet is all painted walls and metal rods. This setup works well for sneakers, flats, and sandals you want to grab quickly.
Use shelves at least 10 inches deep so baskets sit securely. Place baskets so their front edge aligns, then arrange shoes with the toe toward the same direction. Use shelf brackets strong enough to handle the basket weight, and add non-slip pads under baskets. Finish shelves with warm stain or paint that matches your closet trim.
Pro tipBuy baskets in one size and one weave - mixing weaves makes the closet look chaotic fast.
AvoidBaskets that slide on the shelf - you'll end up with scuffed shelf edges.
15. Shoe cubby bench with hinged lid for seasonal pairs
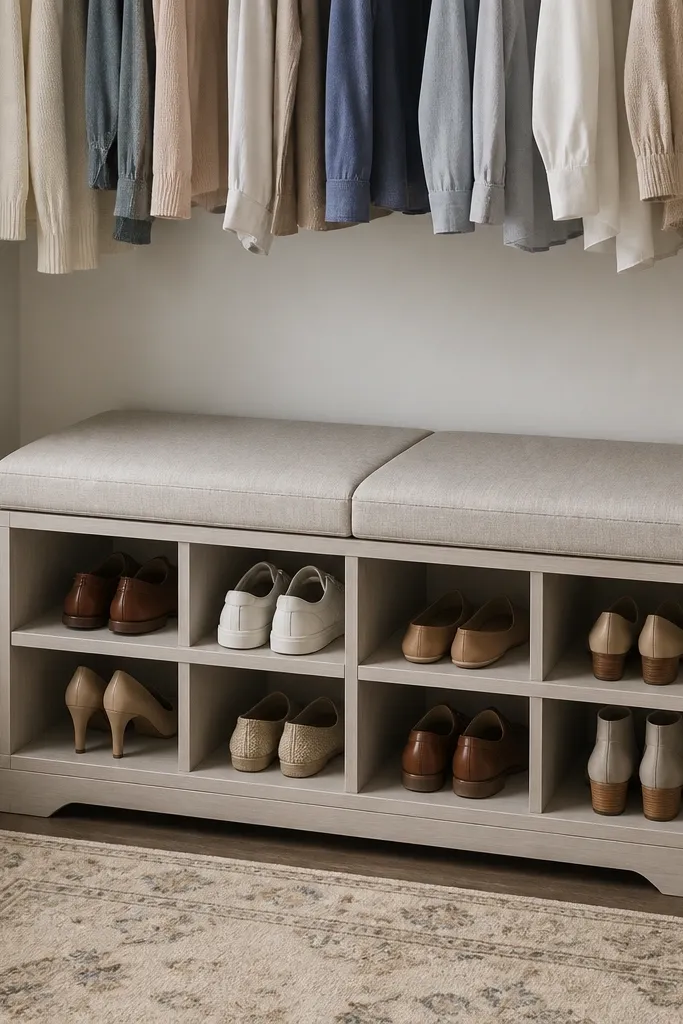
A cubby bench is the best "one piece" solution when your closet sits near a door. The hinged lid hides shoes you don't use daily, and the bench top gives you a place to sit while you put on boots. I built one with a wipeable fabric top because closets get touched. It also helps keep the floor clear.
Build cubbies with dividers set 8-9 inches apart for sneakers and 10-12 for boots. Use a hinge that holds the lid steady, and add a soft-close damper if you want it quiet. Line the inside with paint or contact paper that wipes clean. Keep the bench depth around 18 inches so shoes don't overhang.
Pro tipPut your "season switch" pairs in the back cubbies so you don't constantly shuffle everything.
AvoidA lid without a stay mechanism - it slams shut and knocks shoes around.
16. Magnetic shoe labels on a metal shelf
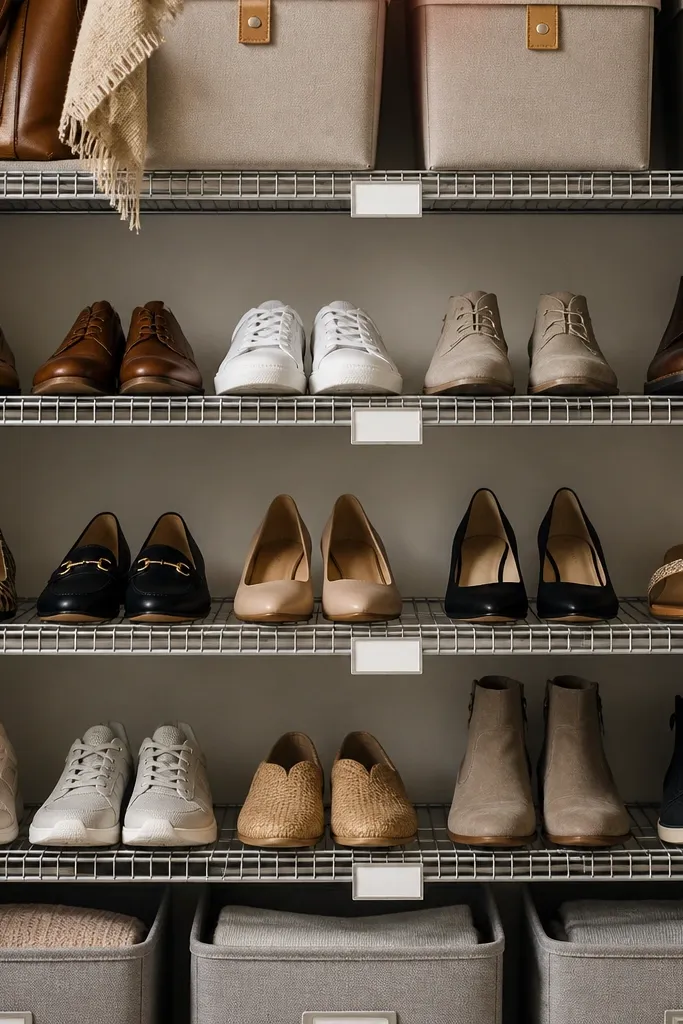
The storage itself is simple, but the labeling system changes how fast you put things back. I've used magnetic label cards on metal shelves because they stay put even when you wipe the shelf. This works especially well with wire shelves and rolling bins. The closet looks organized because the label lines make the layout obvious.
Use a metal shelf or wire rack and attach a thin metal strip on the shelf front if needed. Create labels for each section like "Work flats" or "Rain shoes." Place bins or shoes behind each label so the visual grid stays consistent. Keep labels at eye level so you don't bend and rummage.
Pro tipUse dry-erase labels for two weeks while you decide your final shoe categories, then replace with permanent cards.
AvoidHandwritten labels on sticky tape - they peel and the shelf looks rushed.
17. Angled acrylic dividers inside a shallow shoe shelf
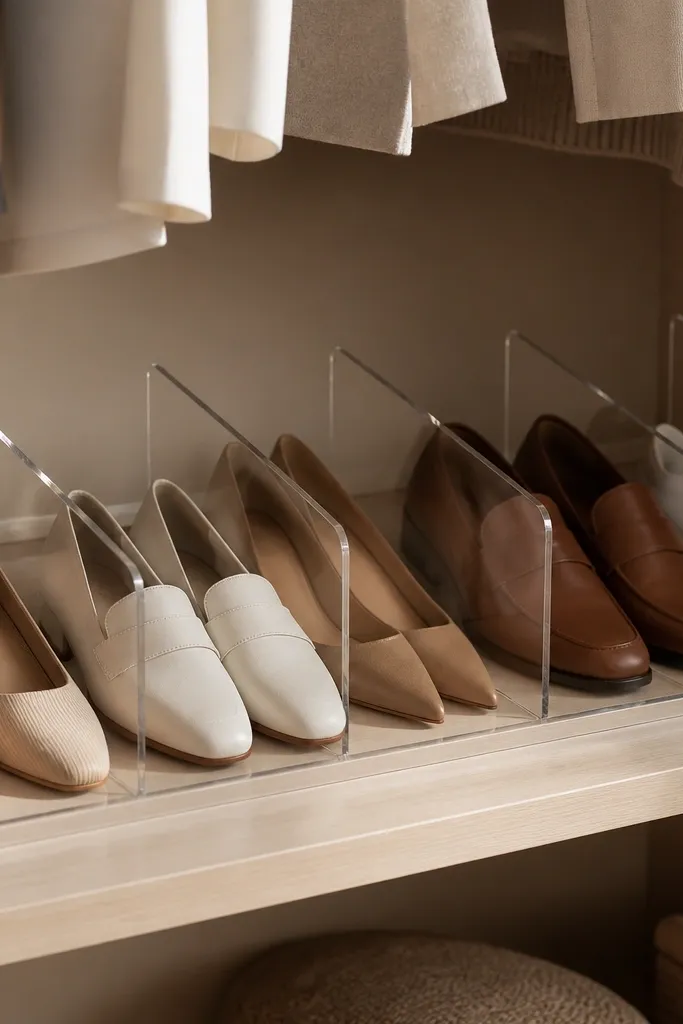
Clear dividers keep shoes separated without adding bulky furniture. I like this when you already have shelves and want to upgrade them quickly. The angled compartments stop toe boxes from bumping and turning into a pile. It looks clean because the dividers are transparent and the shelf line stays simple.
Add dividers in two rows per shelf: one for toes, one for heels so each pair has a defined slot. Aim for divider heights around 2.5-3.5 inches depending on shoe height. Use adhesive-backed felt on the divider bases so they don't slide. Keep shelf depth at least 10 inches so shoes fit without curling around the divider.
Pro tipTest with one pair first and adjust the divider angle so sneakers sit flat, not tilted.
AvoidDividers that are too short - shoes slip under them and the whole system collapses.
18. No-drill closet door shoe organizer with hard backing
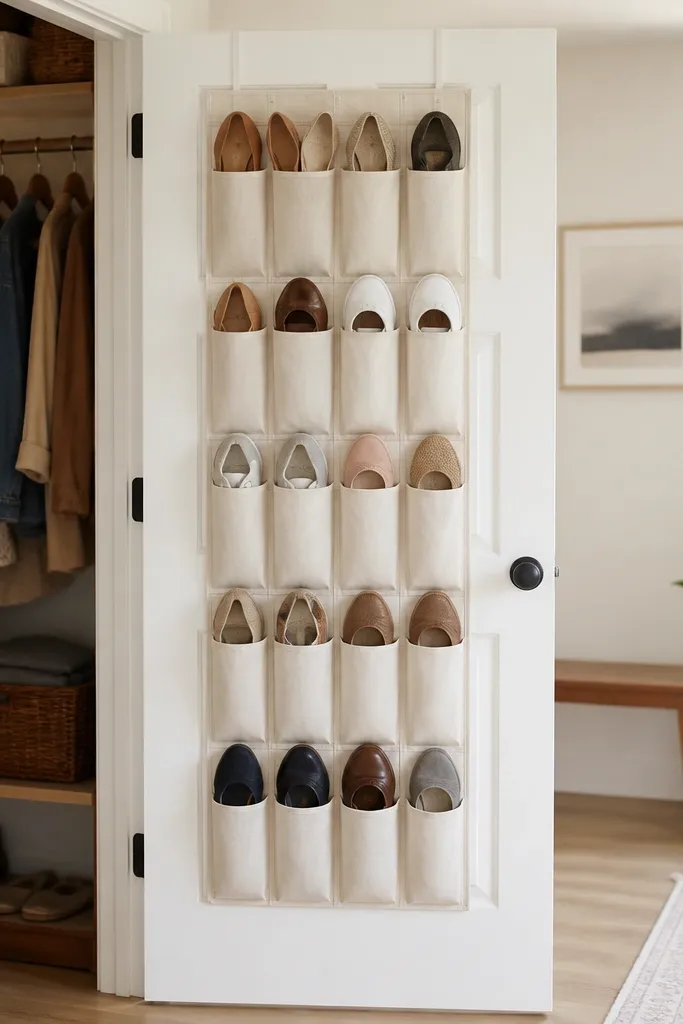
Over-the-door organizers are great for quick, low-height storage like flats and sandals. The hard backing matters because soft organizers sag and shoes end up at the bottom. I use this in small apartments where wall space is limited. It keeps shoes visible and stops the floor from becoming a catch-all.
Choose an organizer with rigid backing and pockets that are at least 7-8 inches tall for flats. Install on the inside door with no drill if you have a thick door - use the included hooks and ensure it sits flush. Space shoes so each pocket holds one pair maximum to prevent stretching. Wipe the door and organizer backing regularly because dust collects.
Pro tipPut rubber shelf liner on the door where the organizer touches so it doesn't slip when you open the door.
AvoidSoft fabric organizers - they sag and your shoes start sliding out.
19. Corner shoe rack with angled shelves and a vertical panel
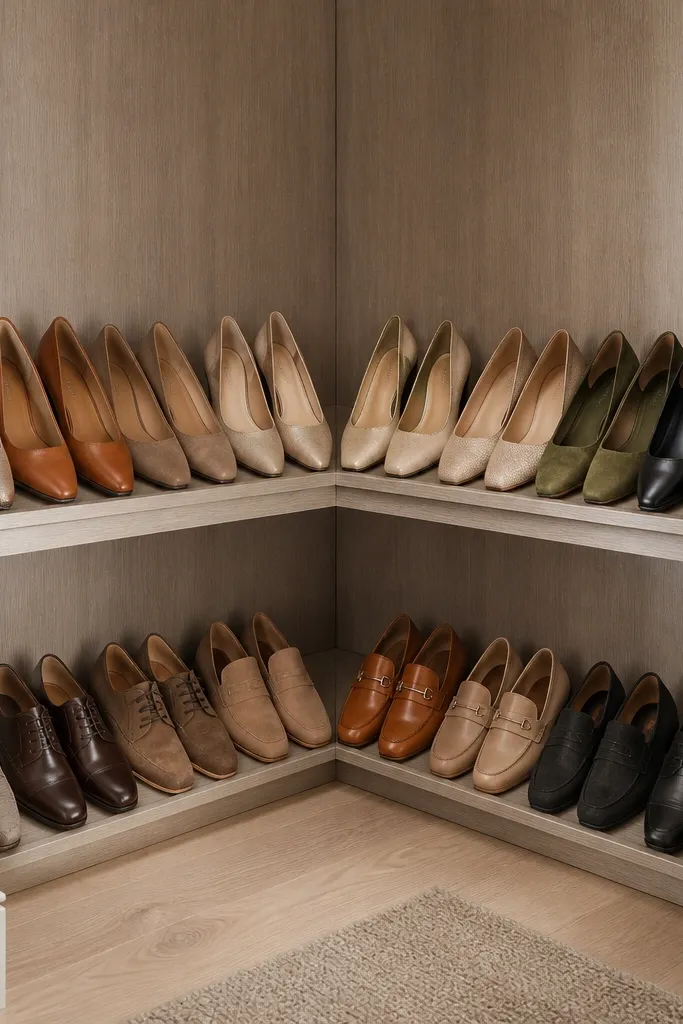
Corners waste space unless you build for the geometry. Angled shelves let you use the corner depth efficiently while keeping shoes easy to grab from the front. I've built this style with a back panel so shoes don't fall into the corner gap. The look is tidy because the back panel creates a clean background.
Build two angled platforms that meet in the corner with a triangular support piece. Use 12-14 inches depth on each side and 7-9 inches spacing between tiers. Add a back panel at least 18 inches tall to hide the wall gap and stop shoes from slipping behind. Finish with paint that matches your closet trim.
Pro tipStore wide toe-box shoes on the outer edge of the corner shelves so they don't scrape the divider.
AvoidLeaving the corner open behind shelves - shoes slide into the gap and you lose pairs.
20. Two-tier cabinet using baby gates as dividers
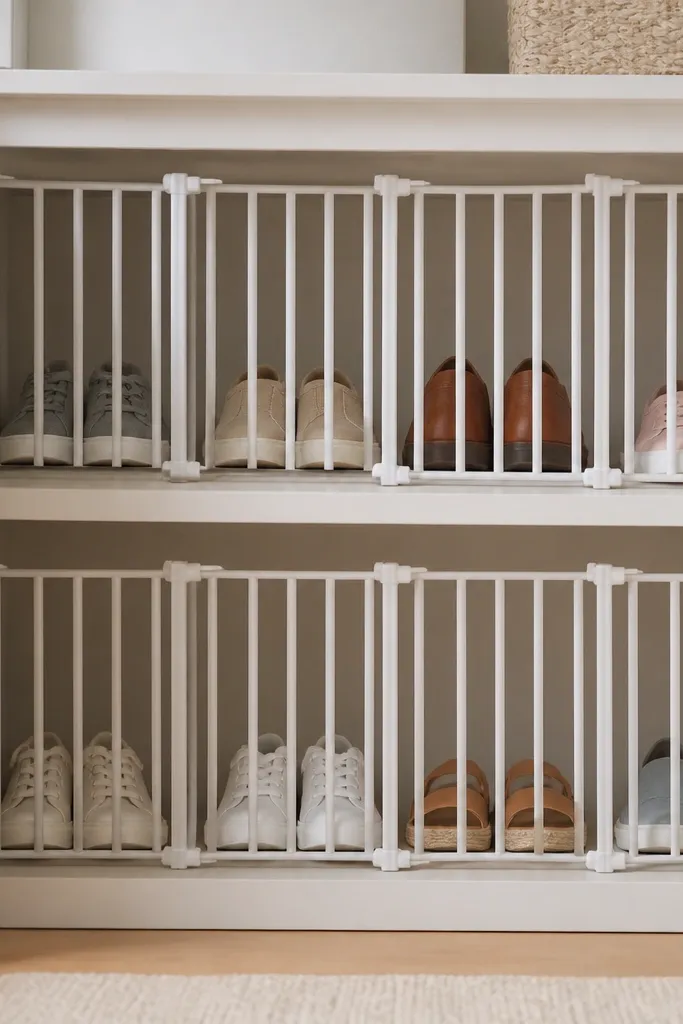
This is a DIY hack I used when I needed cheap dividers that still look structured. Baby gates create straight, consistent separation, which makes shoes stay upright instead of leaning into each other. The white gate color blends well with light closets. It's also easy to cut and adjust for different shoe widths.
Mount a base shelf and add dividers across the shelf width using baby gate panels. Cut and attach so you have 2-3 inch gaps per shoe width. For low shoes, set dividers to create compartments about 6-7 inches wide. Use a grippy liner so the gate panels don't shift.
Pro tipSpray paint the gates matte black before installing if your closet is darker.
AvoidUsing gates without liner - they slide and the compartments break.
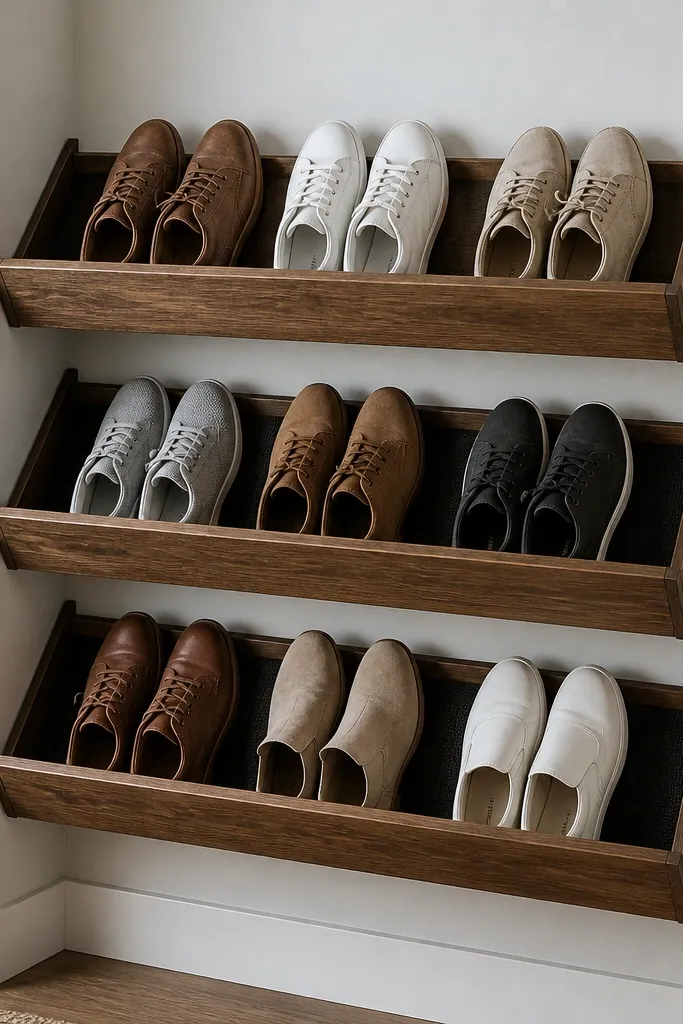
21. Wooden shoe rack with removable pull-out trays
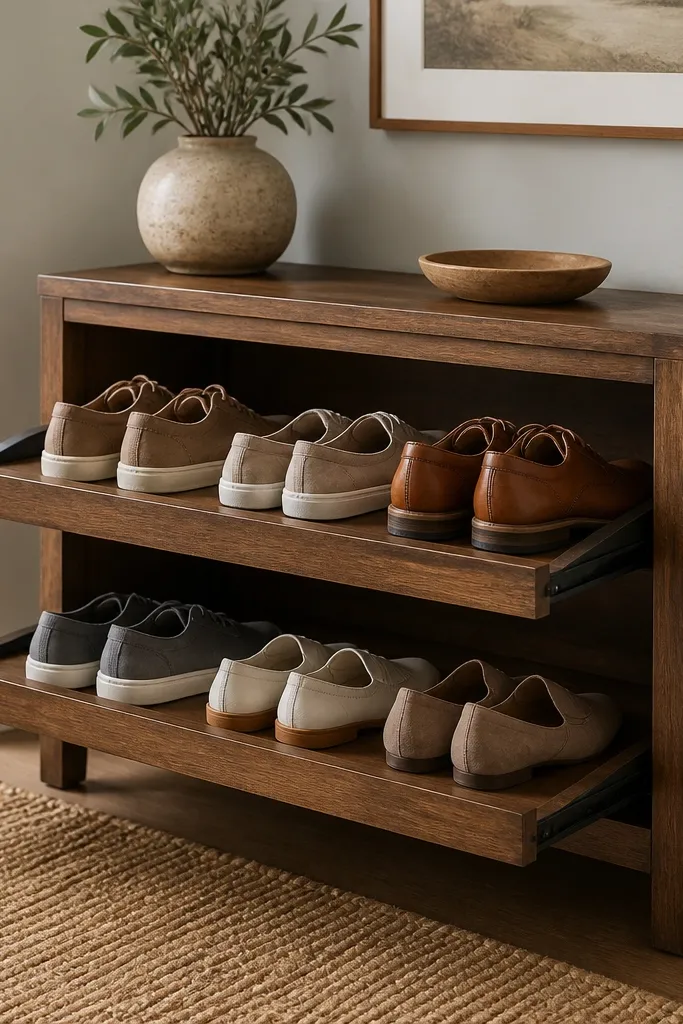
Pull-out trays make the closet feel like a boutique storage unit. You pull one tray out, grab your pair, and shove it back without disturbing the others. I've used this for sneakers because they're easy to store but annoying to dig through. The wooden frame keeps it warm and sturdy.
Build a rack frame with two levels, leaving 10-12 inches between tiers. Make trays about 2 inches less than the inside width so they slide smoothly. Use drawer slides rated for at least 25-30 pounds if you plan to load heavier shoes. Sand and seal everything so the rack wipes clean.
Pro tipAdd a small handle cutout on each tray front so you pull it by the handle, not by the shoe edges.
AvoidTrays that don't fully slide out - you'll still end up reaching and knocking shoes.
22. Hanging shoe shelf made from flat straps and wooden pegs
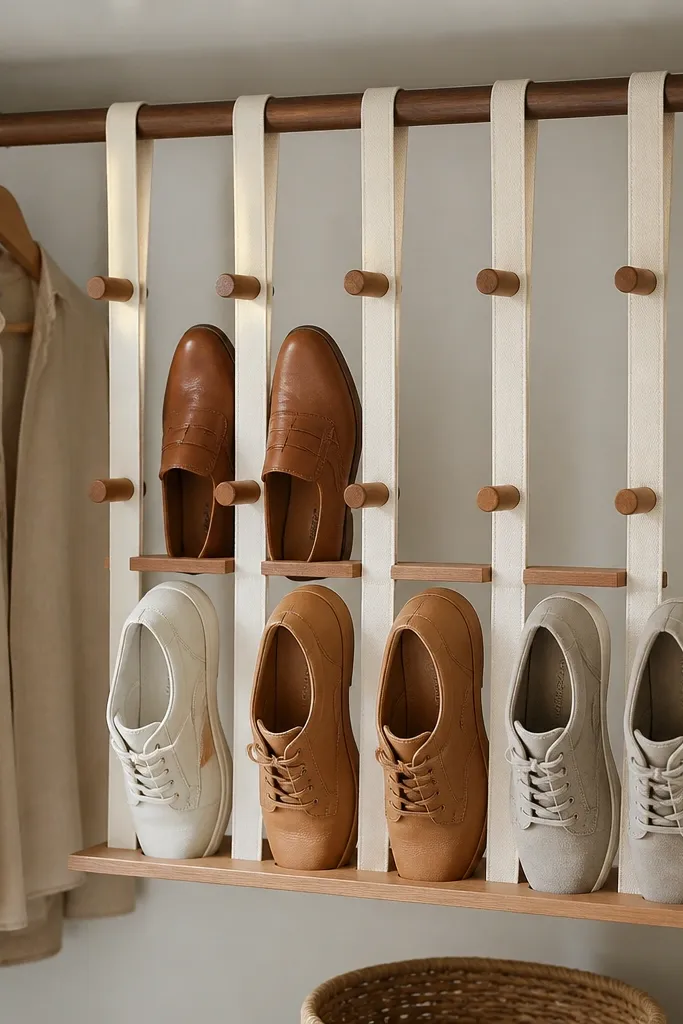
This is a light, airy storage option for slip-ons and sandals. The hanging design gives you a little clearance under the shoes, which helps air move and keeps the closet from feeling crowded. The wooden pegs keep shoe edges from sliding off the plank. It looks soft and personal, not like a garage rack.
Use a sturdy rod and flat straps spaced about 12-14 inches apart. Attach wooden pegs across a narrow plank shelf so the pegs act like stops. Keep the shelf depth around 10 inches. Install at a height where you can reach without bending - I set it around 45-50 inches for most people.
Pro tipLine the plank with thin cork or grippy rubber to stop heel slip.
AvoidHanging it too low - you'll bump it and drag shoes across the floor.
23. Stacked leather shoe forms in a bottom shoe drawer
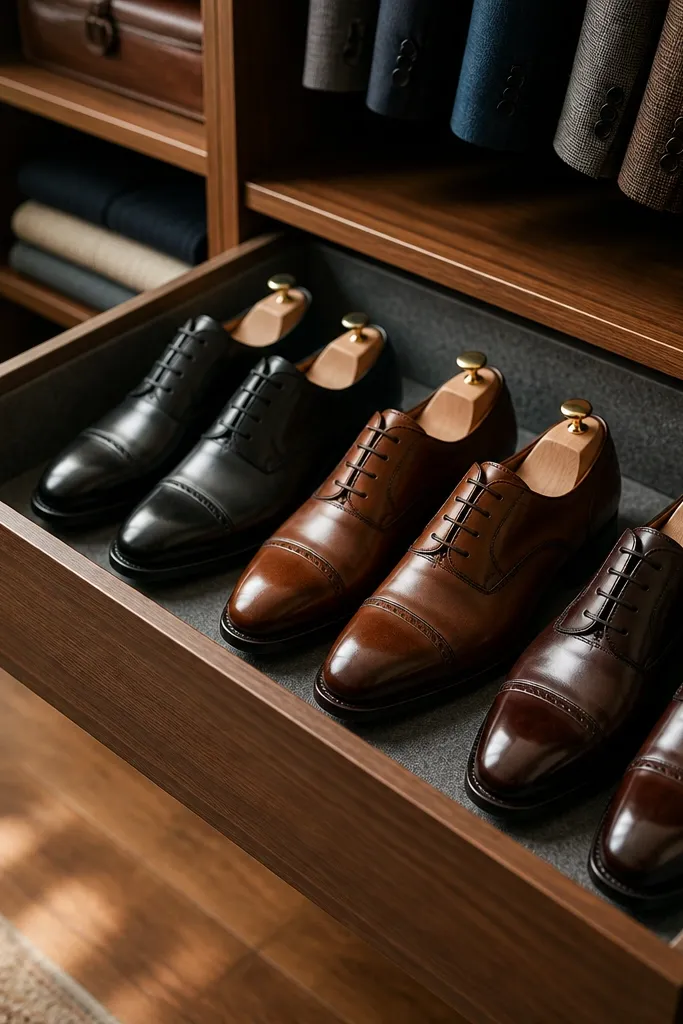
Dress shoes hold their shape better when you store them supported, not squished. Shoe forms keep the toe box from collapsing, which means the closet looks cleaner because shoes don't look wrinkled or bent. Felt lining reduces scuffs and makes the drawer quieter when you slide it open. This setup is great if you have leather loafers, oxfords, or boots you don't want to flatten.
Use a felt-lined drawer or build a drawer box with a removable felt insert. Fit shoe forms for each pair so they sit snug, then store one pair per slot to avoid rubbing. Keep drawer height around 10-12 inches so forms fit without forcing. Add a small compartment for polish cloth and brush at one end.
Pro tipRotate pairs and store them with insoles removed so the drawer doesn't hold odors.
AvoidThrowing dress shoes in a pile - you get creases and the drawer turns into a scuff zone.
24. Wall-mounted slat panel with adjustable shelf pegs
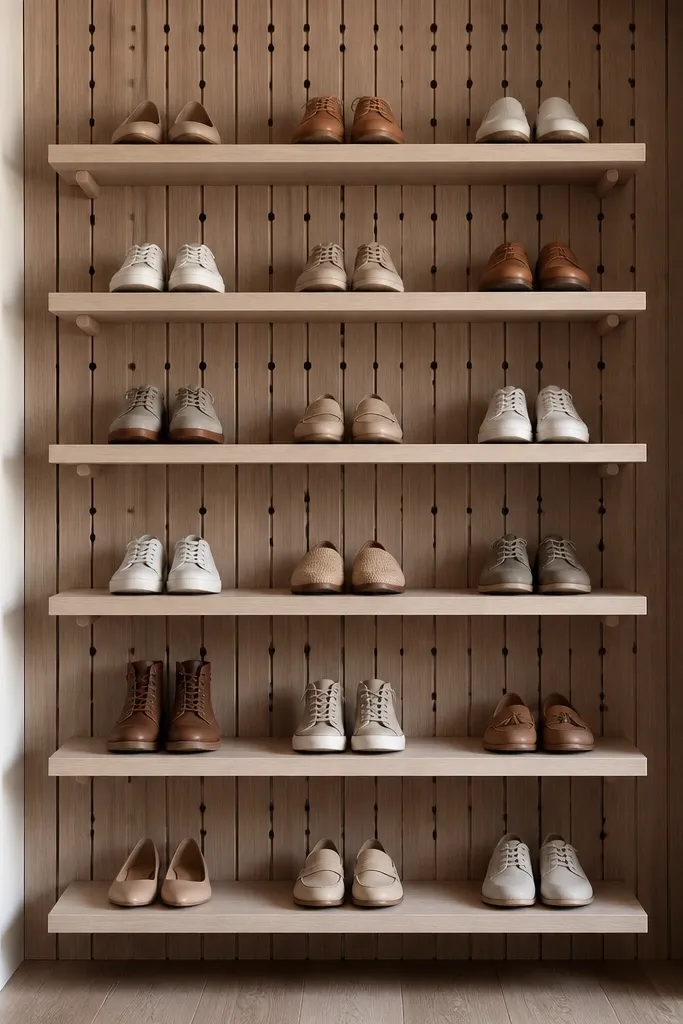
Adjustable slat panels let you reconfigure shoe spacing as your collection changes. I like this when you have a mix of sizes and the closet layout keeps evolving. The shelves look built-in because everything lines up on the slat grid. It also makes the storage feel intentional instead of temporary.
Install the slat panel into studs, then add shelf boards on adjustable pegs. Set shelf spacing at 8 inches for sneakers and 10-11 inches for taller shoes. Use a shelf liner with grip so shoes don't slide when you pull one out. Finish the boards to match your closet trim so it doesn't look like a separate system.
Pro tipMark the peg holes with tape for your most common shoe heights - you'll set it faster later.
AvoidUsing shelves without liner - shoes creep forward and the closet looks untidy.
25. Stacked acrylic risers for tiny sneaker collections
Acrylic risers are a clean way to add height without building more shelves. This works best when you have a small number of pairs and want them visible and easy to grab. The clear material keeps the closet from feeling cramped. I've used this on narrow closet shelves where stacking directly on top looks messy fast.
Place risers on a sturdy shelf and keep each riser footprint stable. Use one riser level for flats and low sneakers, and keep boots on a separate tier. Add a thin non-slip pad between risers and the shelf. Keep spacing consistent - I aim for about 2-3 inches of vertical separation so you can grab without snagging.
Pro tipGroup by color on one shelf and by type on another so your brain finds pairs quickly.
AvoidRisers placed too close to the shelf edge - shoes fall off and the setup gets abandoned.


