
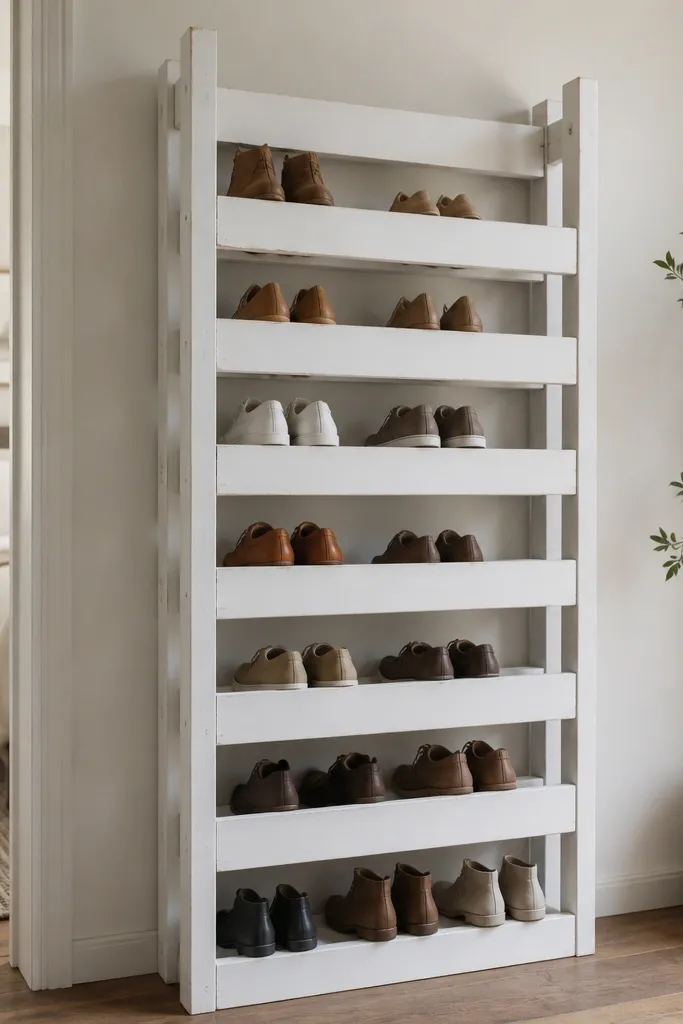
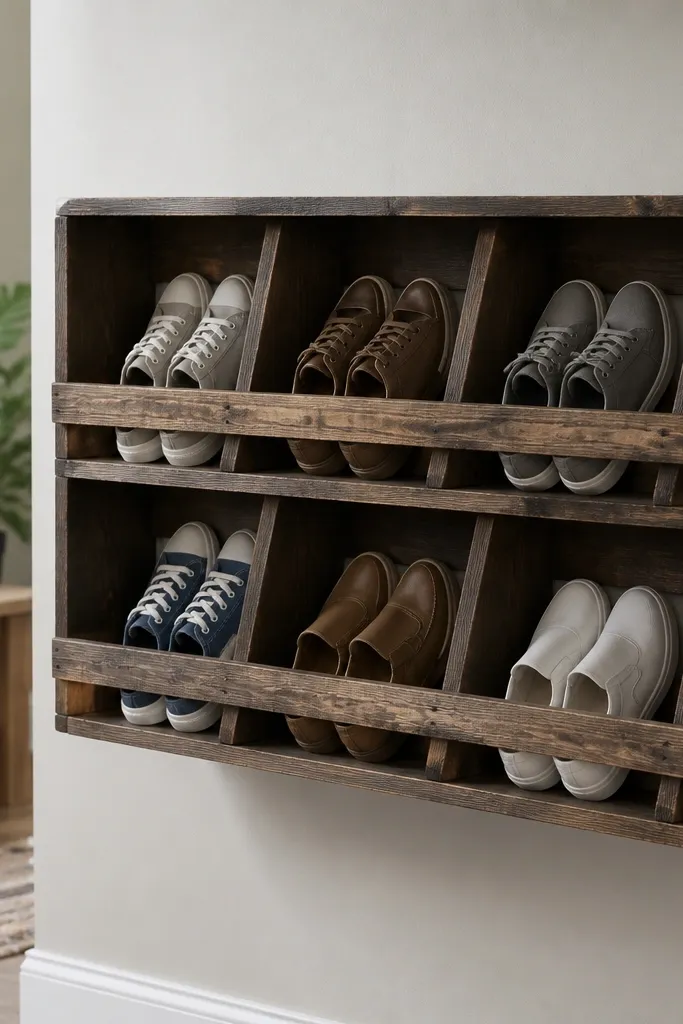
1. Pine slat wall rack with 10-inch openings
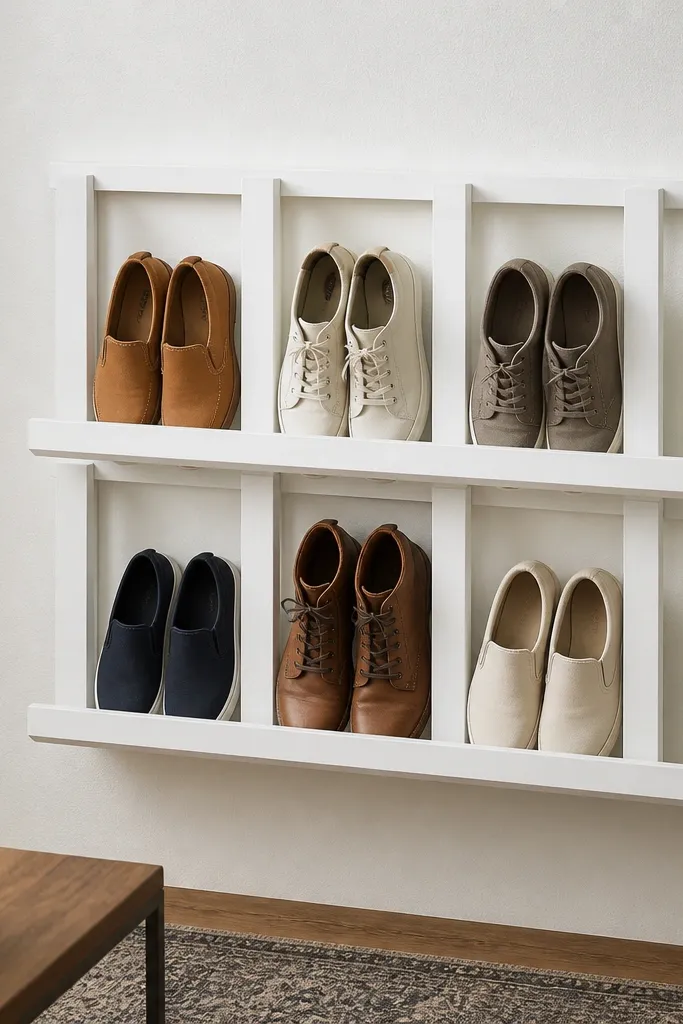
This design uses pine 1x2 slats so you get airflow and a clean look without drilling a million holes. The open rectangles make it easy to grab shoes without digging. White matte paint makes the wood dents and knots less noticeable, and the slat spacing keeps sneakers from getting scuffed by tight wood edges.
Cut two side rails from 1x3 pine or plywood strips, then mount them to studs with 2.5-inch wood screws. Build three to four "shelves" out of 1x2 slats, spacing the vertical slats so the opening is about 10 inches wide and 6 inches tall per shoe height. Add a 1-inch front lip using a thin strip so heels don't slide off.
Pro tipSand the slats with 120 grit, then wipe with a damp cloth before painting so the matte finish doesn't look patchy.
AvoidSkipping stud-finding makes the rack feel shaky even when the wood is thick.
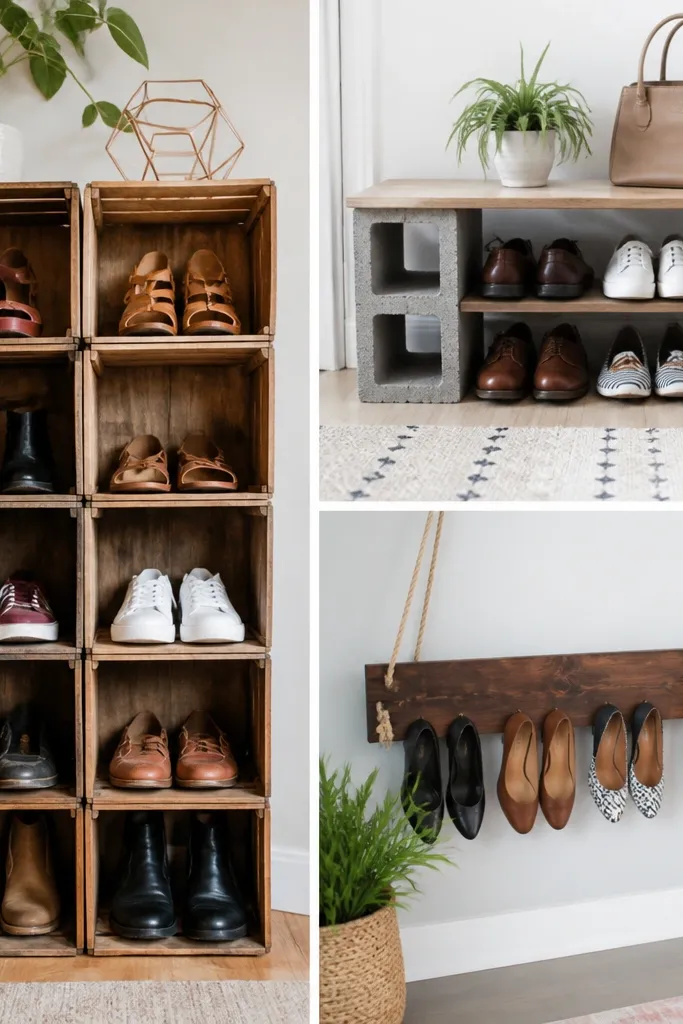
2. DIY crate shoe rack with stacked 2x4 frames
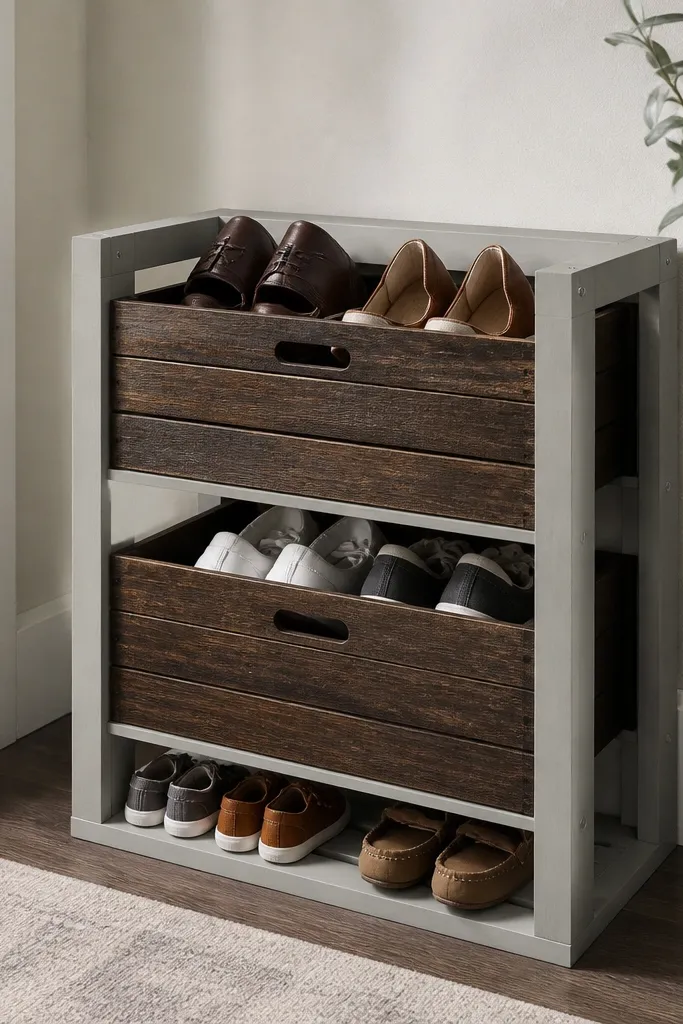
Crates are cheap and they already have holes for airflow. Framing them with 2x4 lumber turns a wobbly crate into a rigid rack you can move or keep on a closet floor. The look is farmhouse-clean when you stain the crate and paint the frame in a muted color like gray-green.
Use two crates sized around 16x12 inches, then build a frame that's just slightly wider than the crate footprint, leaving a 1-inch border on each side. Screw crate corners to the frame with 1.25-inch screws through the crate wood, then add a bottom plank shelf for flats. Finish with one coat of wood stain and two coats of matte clear if the crates are raw.
Pro tipLine the bottom with a thin rubber shelf liner so shoes don't slide and the wood stays cleaner.
AvoidUsing clear gloss over stained pallet-like wood makes knots look cheap and shiny.
3. Industrial pipe and reclaimed wood sneaker rack
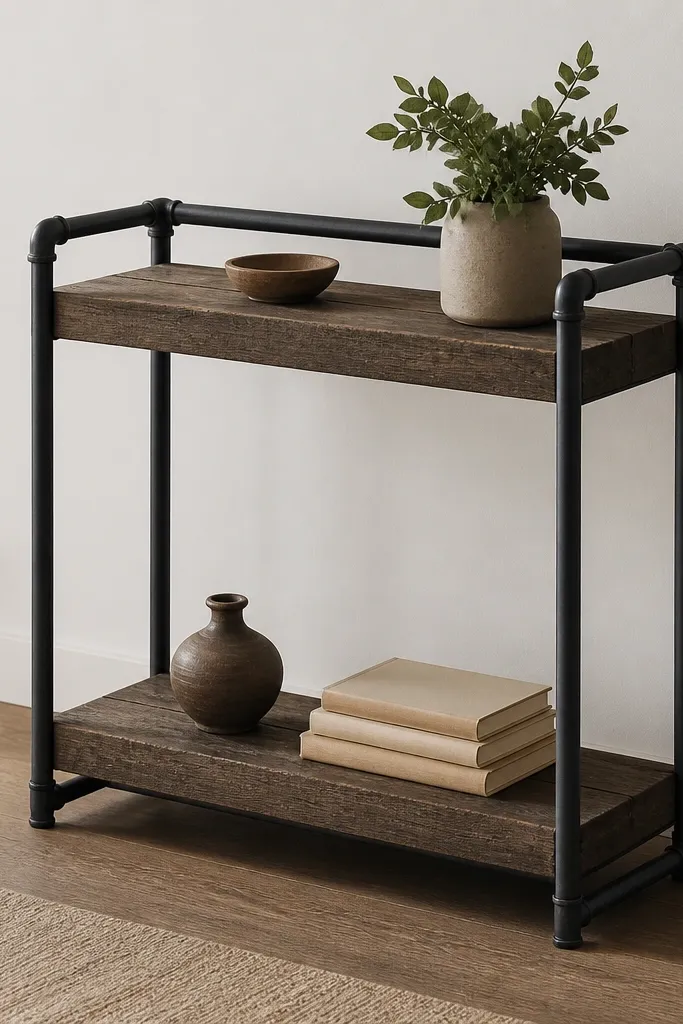
Metal pipe hardware is one of the cheapest ways to get a strong frame fast. Reclaimed wood planks hide small imperfections, and the open structure looks intentional instead of bulky. Because the shelves are solid planks, sneakers don't sag between supports.
Build a two-tier rack with 1-inch black pipe verticals. Use 1x12 reclaimed boards cut to about 30 inches long, and add flanges at the top and bottom for stability. Space the shelves 12 inches apart for sneakers; for boots, increase to 14 inches. Secure planks with wood screws into the board end grain and add pipe caps at the corners.
Pro tipDrill pilot holes and lightly sand the reclaimed planks so the screws bite without splitting.
AvoidTightening everything before checking level - a slightly crooked shelf makes the whole rack look off.
4. Hanging over-the-door shoe rack with binder rings

This one is great for flats, sandals, and lightweight shoes that don't need rigid support. Clear sleeves let you see what's inside, and binder rings make it adjustable if you add or remove compartments. The materials are cheap and you can make it look neat by using matching straps and a tidy row of rings.
Buy clear document sleeves and a heavy-duty over-the-door hook with a bar. Punch holes at the top of each sleeve, then connect them with binder rings to a horizontal strap or metal chain. Space sleeves so each compartment is about 7 to 8 inches wide, then attach a small fabric stop at the bottom to keep shoes from slipping through.
Pro tipUse a fabric or ribbon strap to tie the bottom row so sleeves don't sway every time you grab a pair.
AvoidOverstuffing clear sleeves - when they bulge, the organizer looks messy fast.
5. Ladder-style shelf using two wood dowels and four steps
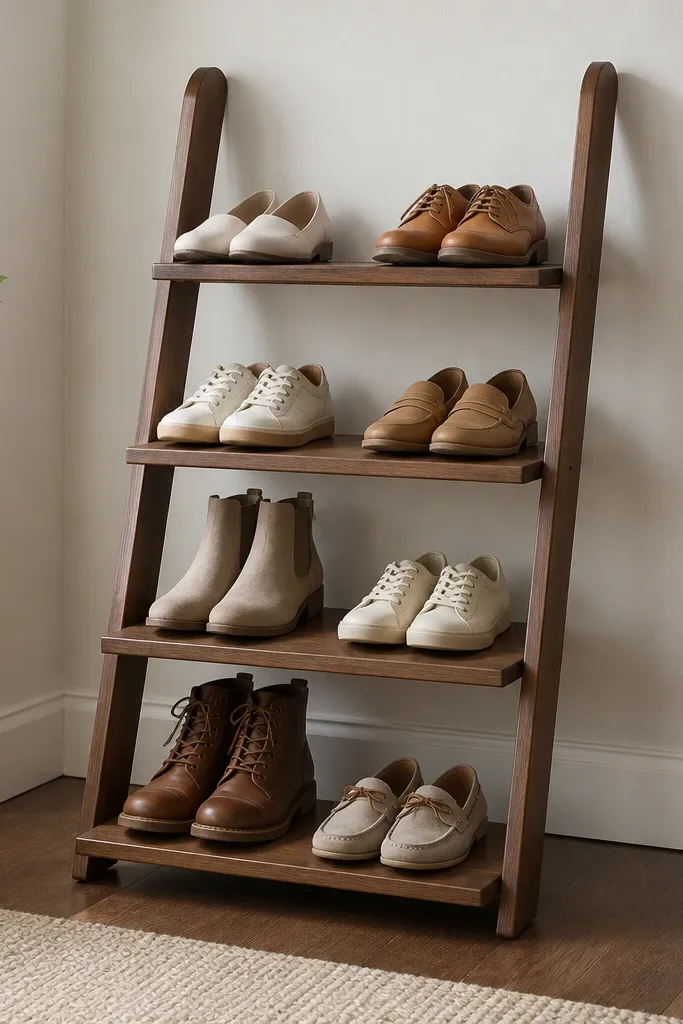
A ladder rack looks good because it has a natural rhythm and visible spacing. It's also easy to build because you're basically making a frame and attaching steps. The open steps mean airflow, and the angled silhouette makes entryways look styled instead of cluttered.
Cut two side rails from 2x2 or 2x3 lumber at the same angle, then screw in four steps using 1x3 boards. Space steps 10 to 11 inches apart for sneakers and 9 inches for flats. Add rubber feet to the bottom rails and a back brace strip if you want it to feel extra stable.
Pro tipStain first, then seal with matte poly so the wood grain looks even across all the cut faces.
AvoidUsing thin steps without a front lip - heels slide off and the rack stops looking neat.
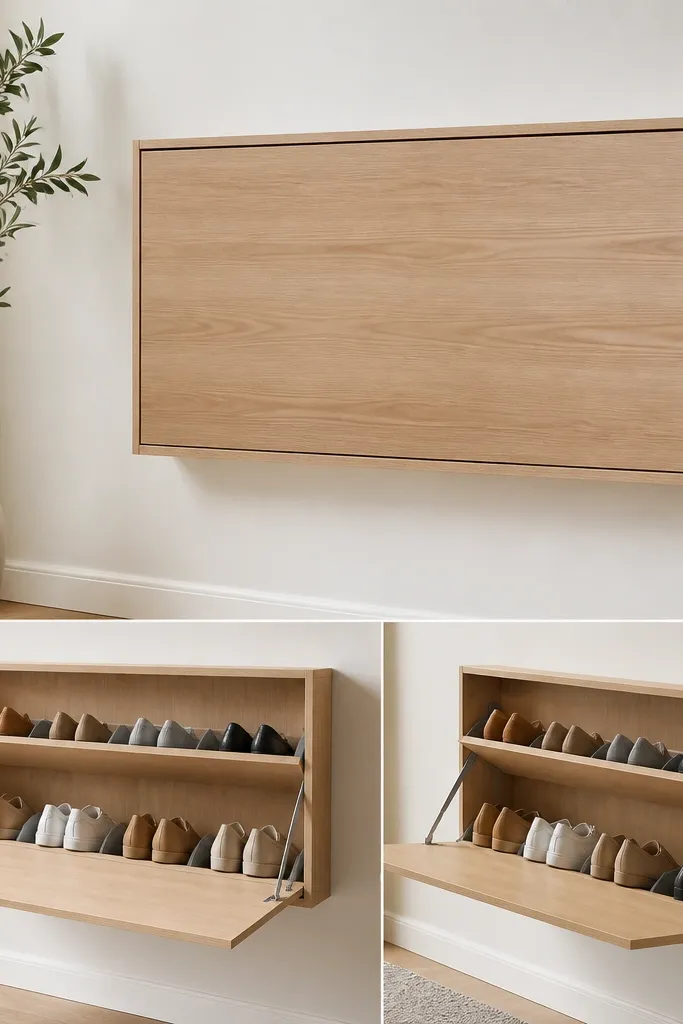
6. Plywood shoe bench with hidden lift-out lid

This one solves the mess problem by hiding shoes while still giving you a clean place to sit. A lift-out lid keeps shoes from being visible, and the bench top makes the space look intentional. Plywood is cheap, and you can make it look store-bought with paint and a simple handle.
Build a box from 3/4-inch plywood sized around 30 inches wide by 14 inches deep. Add a hinged top with a piano hinge and a small gas strut or prop stick. Inside, add a slanted false bottom or a single shelf 9 inches up to separate boots from smaller shoes. Vent the back panel with a few 1-inch holes.
Pro tipLine the interior with thin felt or a scrap of vinyl so shoes wipe clean.
AvoidSkipping ventilation - closed storage without holes makes the bench smell.
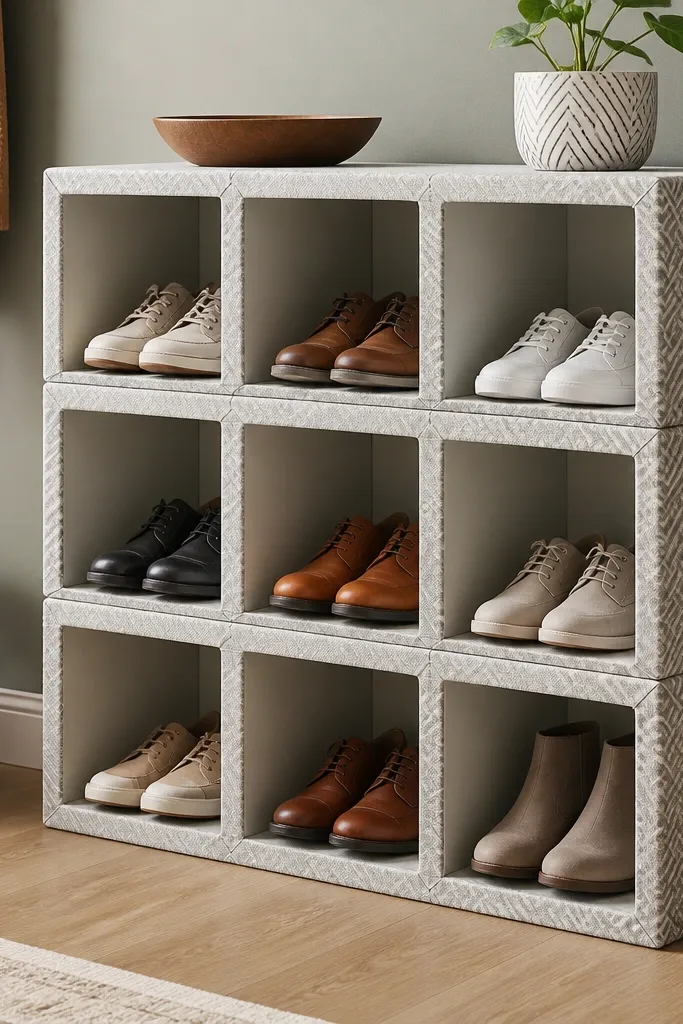
7. PVC pipe rack with fabric shoe dividers
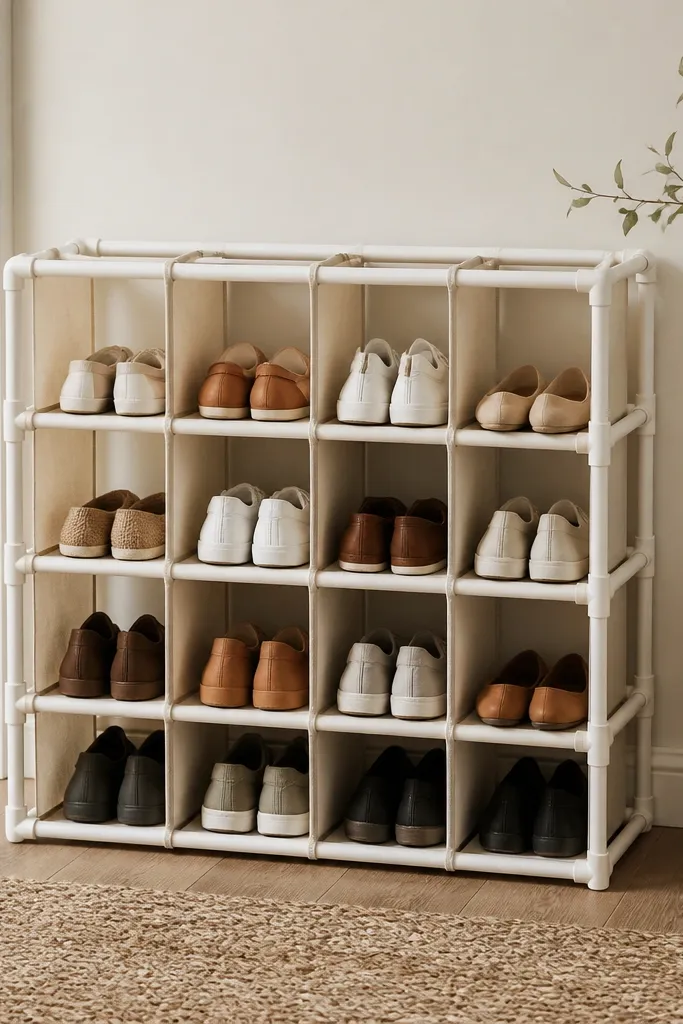
PVC is cheap and it's fast to assemble, and the frame doesn't warp like some cheap wood. The fabric dividers stop shoes from rubbing each other and add a softer look. With the open grid, air moves around shoes, which helps if you're storing everyday sneakers.
Use 1.5-inch PVC elbows and tees to build a grid frame. Make cubbies about 9 inches wide and 7 inches tall for flats and sneakers. Cover the front with fabric dividers cut from canvas, stitched into 10-inch-wide strips, and tie them to the frame using zip ties.
Pro tipDry-fit everything first, then glue with PVC cement in small sections so the frame stays square.
AvoidLeaving sharp pipe ends exposed - cap everything or it looks unfinished.
8. Reclaimed pallet wood rack with three tiers and toe guards
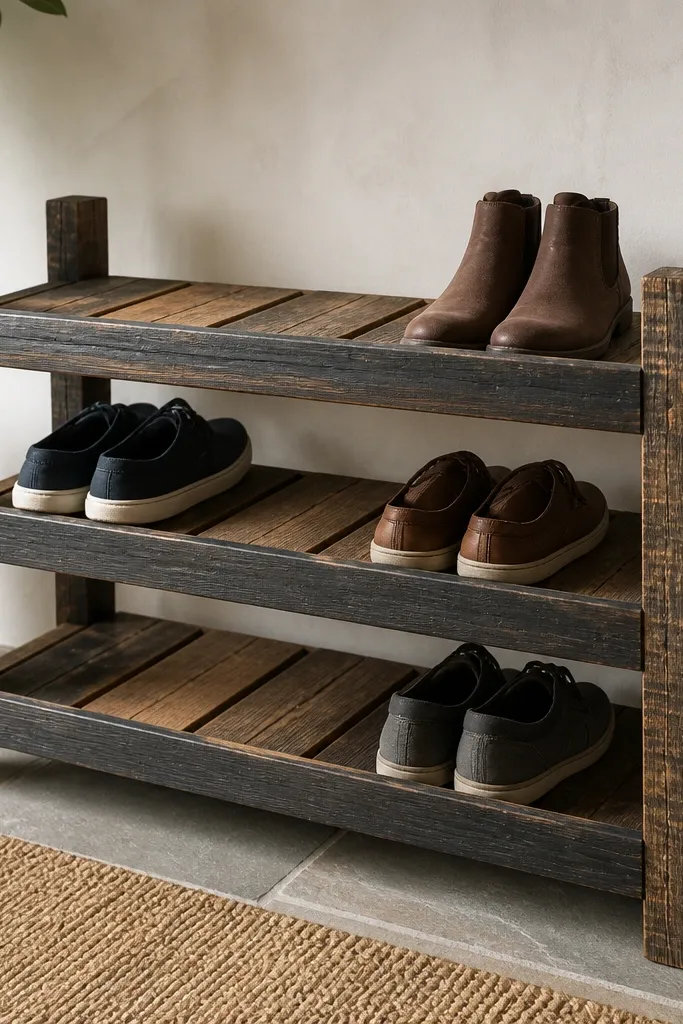
Pallet wood already has the slat spacing for airflow, and the uneven texture hides cheapness. Adding toe guards makes a big difference: shoes don't slide forward and it looks more "designed." The charcoal stain makes the grain stand out and keeps the rack from looking like bare scrap.
Strip and sand pallet boards enough to remove splinters, then cut three shelf frames from the thicker pallet pieces. Attach slats across the shelves with 1.25-inch screws, keeping about 2 inches between slats. Add a 1-inch toe guard strip on the front edge of each tier. Mount it to a wall with two brackets or keep it freestanding with a base frame.
Pro tipSeal with two coats of matte sealer so the stained wood doesn't rub off on socks.
AvoidUsing pallet boards with deep cracks - they break under shoe weight.
9. Bed frame slat shoe rack for tall boots
Bed frame slats are already sized for strength, so they don't flex like thin shelf boards. This build is great for tall boots because you can set tier heights to your boot shaft. The open slat structure lets air reach the inside of boots without trapping moisture.
Use two vertical rails from old bed frame side pieces, then attach horizontal slats spaced 14 to 16 inches apart. For boots, make two tiers deep enough to hold the shaft, about 12 inches deep. Paint with a primer made for wood, then finish with white semi-gloss so it wipes clean.
Pro tipAdd a back stop strip so boot heels don't lean and fall forward.
AvoidMaking tiers all the same height when your boots vary - it turns into a pile.
10. Fabric pocket shoe rack on a tension rod
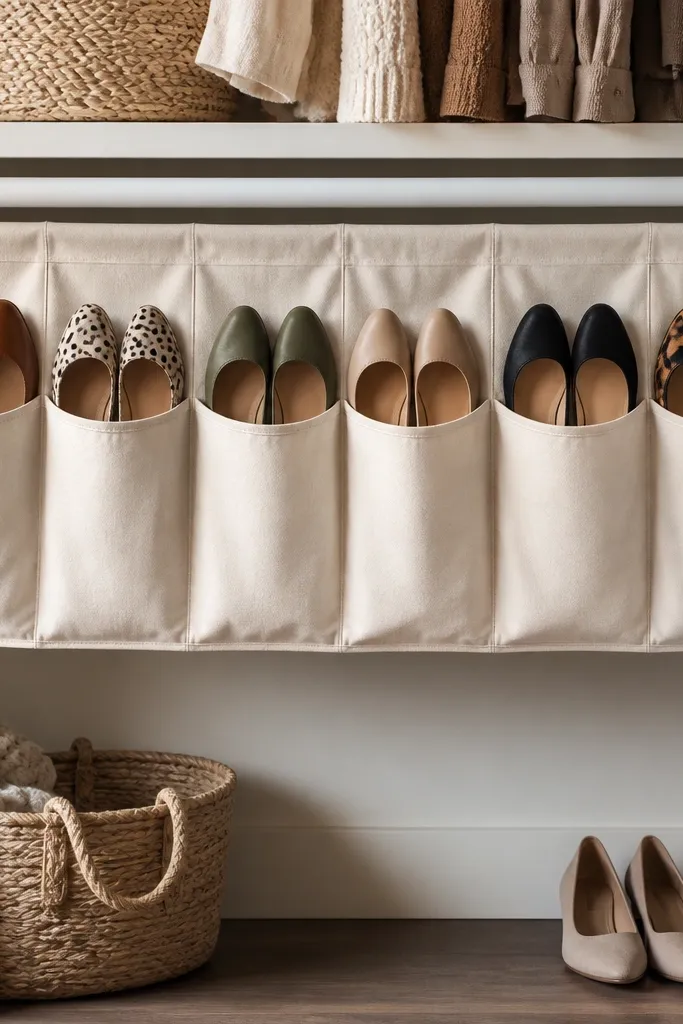
If you want cheap affordable diy shoe rack ideas that don't require power tools, this is it. Tension rods hold firm in closets, and pocket dividers keep shoes from sliding into each other. You get a clean, uniform look that's easy to adjust for different seasons.
Sew or assemble pockets from canvas or denim, each pocket about 9 inches wide and 8 inches tall. Attach the top edge to the rod with curtain clips or a stitched channel. Add a simple lining or a thin non-slip backing so the fabric doesn't sag. Make two rows if you store more than 8 pairs.
Pro tipUse double stitching at the pocket seams and reinforce the top edge where clips attach.
AvoidUsing thin fabric that stretches - it turns into floppy pockets.
11. Milk crate shoe rack with plywood base and wall straps
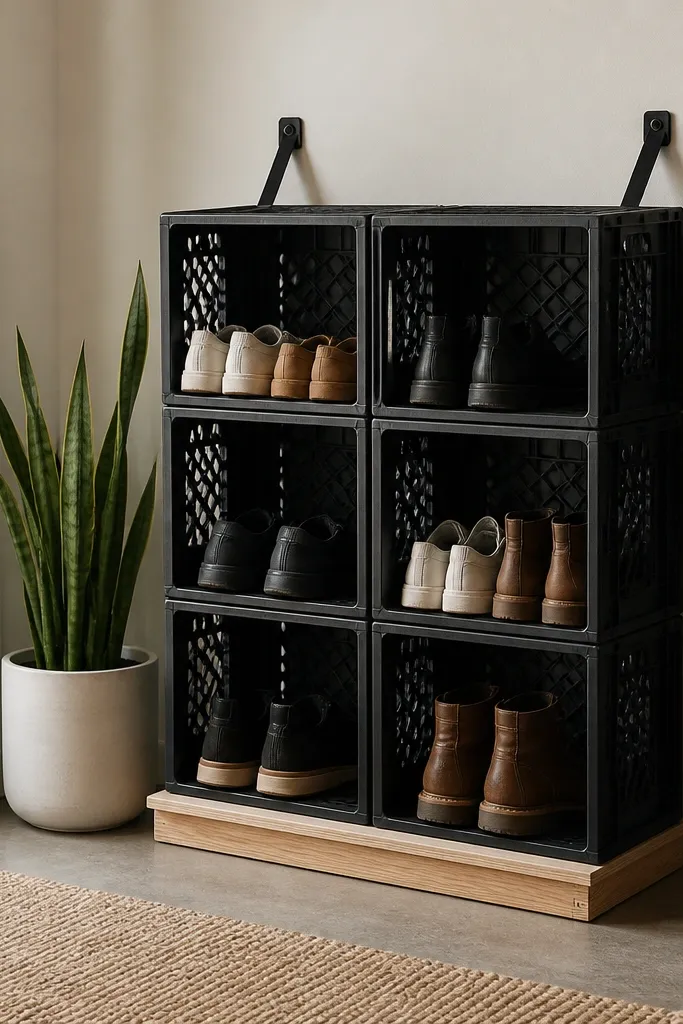
Milk crates are cheap, and the open sides keep shoes from staying damp. A plywood base makes the whole thing stable, and wall straps stop wobble. This is one of the best options for kids' shoes because it's easy to separate pairs by crate.
Stack two or three crates, then cut a plywood base that's 2 inches wider than the crate footprint. Screw the crates to the base through the crate corners with long screws and washers. Paint the crates with plastic primer and matte black paint. Strap the top crate to the wall studs with two nylon straps.
Pro tipAdd a small chalk label on each crate front for quick sorting.
AvoidSkipping straps - stacked crates can tip when someone yanks a shoe.
12. Corner shoe rack from two bookcases with one shelf removed
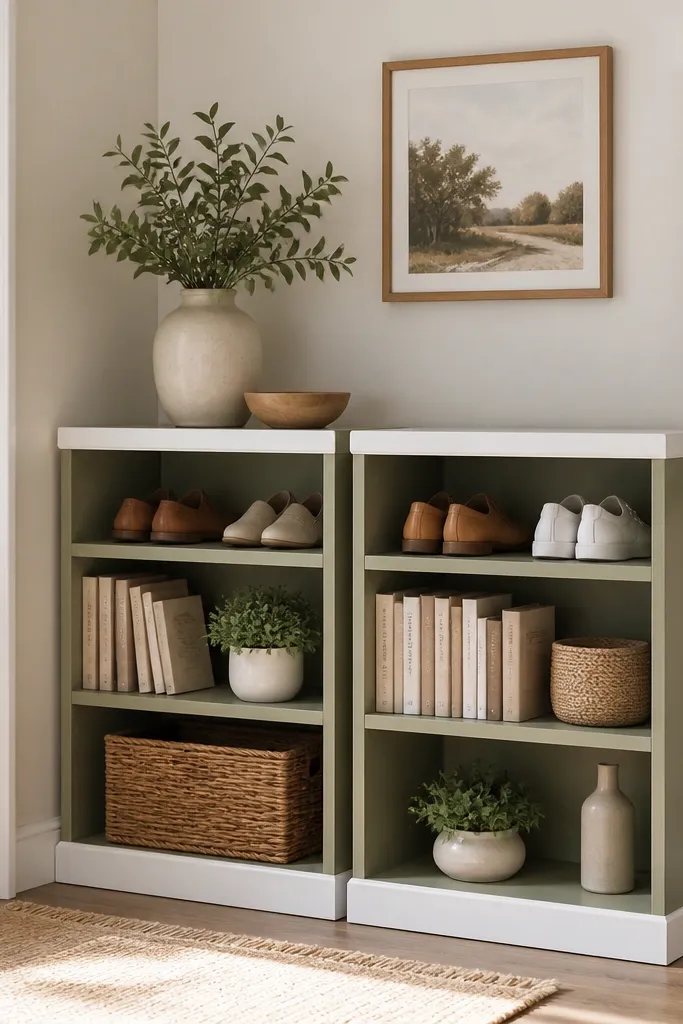
This is a visual trick that makes a cheap rack look intentional: matching units in a corner create symmetry. Removing one shelf opens up taller compartments for sneakers and some boots. The cabinet sides block dust and give a cleaner look than open cubbies.
Pick two narrow bookcases that are about 24 inches tall and 12 inches deep. Remove one shelf level from each so you get three compartments per unit. Paint or spray them with an enamel finish for wipeable surfaces. Use shelf pins or add a fixed board to keep the remaining shelves level.
Pro tipStagger the units by 2 inches so the corner doesn't look like a dead zone.
AvoidLeaving raw particleboard shelves unpainted - they look cheap and stain unevenly.
13. Rolling shoe rack cart with two wire shelves

A rolling cart keeps shoes off the floor clutter while still letting you access everything quickly. Wire shelves are naturally airy, so they don't trap odor the way solid boards do. The casters make it easy to pull the rack out and clean behind it.
Use two matching wire shelving units or repurpose a small wire rack set. Build a simple frame from 1x2 wood, then bolt the shelves to the frame with corner brackets. Add four locking casters rated for at least 50 pounds each. Paint the frame and add a handle strip for a sturdier look.
Pro tipPut the rack on a low pile mat so wheels roll smoothly on hard floors.
AvoidUsing non-locking casters - the rack scoots every time you grab a pair.
14. Stacked drawer shoe rack with repurposed file drawers

File drawers give you hidden storage without building a full cabinet. The metal slides feel sturdy, and the drawer fronts keep shoes from looking messy. You can sort by drawer: flats, sneakers, and sandals, and you can add liners so shoes don't scrape.
Use three to four metal file drawers, then mount them on a plywood backing panel. Cut the backing to the width of the drawers and screw through the drawer rails into the panel. Add a simple base strip to keep everything level. Paint the backing or leave it industrial and add ventilation holes on the back panel.
Pro tipAttach felt pads to the drawer bottoms so shoes don't rattle.
AvoidStacking drawers without a base - they wobble and the pulls look crooked.
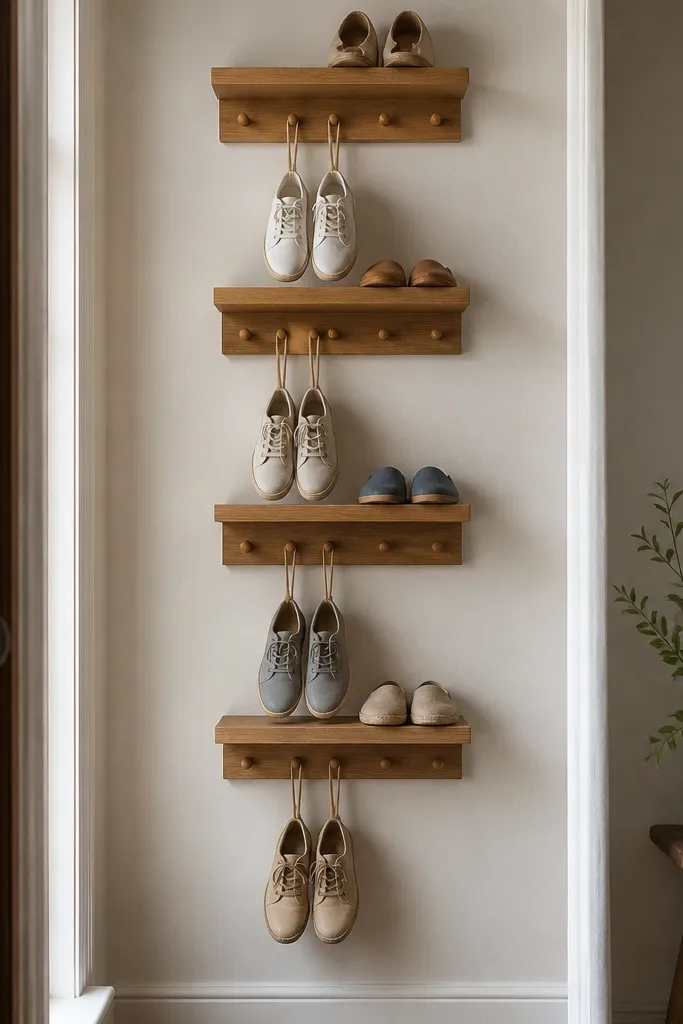
15. Wood dowel shoe rack with hanging pairs

This works best for shoes that have loops, straps, or laces you can wrap. Dowels are cheap and smooth, and they keep shoes from getting crushed at the toe. The wall-mounted setup makes entryways feel cleaner because the floor stays open.
Mount two horizontal dowels 18 inches apart on a board, then add vertical pegs spaced 6 inches apart. For slip-ons, add a low shelf below using a 1x6 board. Finish with clear matte varnish so the dowels look warm and uniform.
Pro tipWrap a strip of cloth tape around dowels where shoes rub so paint doesn't wear off.
AvoidUsing rough dowels - they snag laces and scuff shoes.
16. Shallow shelf rack using 1x4 boards and pegboard sides
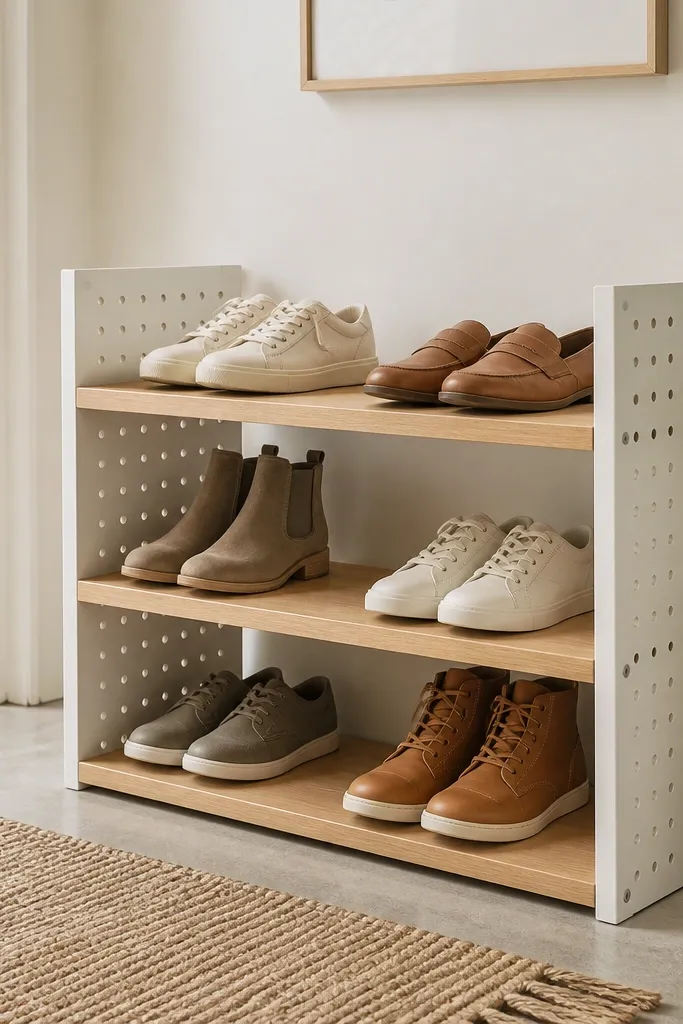
Pegboard sides make this look neat because the holes add texture and the whole rack can handle small adjustments. Shallow shelves are perfect for flats and sandals, where you don't need deep storage. The mix of white pegboard and light oak stain looks clean and modern.
Build a frame from 1x3 strips, then attach painted pegboard panels on the sides. Install 1x4 shelves using shelf brackets screwed into the pegboard holes. Space shelves 7 to 8 inches apart for flats; leave the bottom shelf lower for sandals. Finish the shelves with a light stain and matte topcoat.
Pro tipUse furniture feet under the bottom shelf so it doesn't scrape and chip the paint.
AvoidOverloading pegboard shelves - stay under about 20 pounds per shelf.
17. Desk organizer shoe rack using plastic bins and a wood rail

This is a great closet hack when you want cheap affordable diy shoe rack ideas that look organized immediately. Clear bins show what's inside, and the wood rail makes it feel like a real piece of furniture rather than loose storage. It's especially good for kids' shoes because they come in smaller sizes.
Attach a 1x2 wood rail to a wall or inside a closet using screws into studs. Use plastic bins sized around 10x7 inches, then screw or zip-tie them to the rail with a small spacer. Add a second rail above for taller bins. Paint the rail a soft gray or warm white so the plastic doesn't look harsh.
Pro tipAdd a small ventilation gap between bins using a 1/4-inch spacer strip.
AvoidStacking bins flush to each other - shoes don't dry and bins fog up.
18. Simple stackable shoe box rack from foam insulation panels
This is one of the cheapest builds if you just need a temporary organizer. Foam insulation panels are easy to cut, and wrapping them keeps the look clean. Modular cubes let you resize the rack as your shoe collection changes.
Cut foam panels into cube blocks, then wrap each block with vinyl or heavy fabric. Glue with contact adhesive and use a staple gun on the back edges if needed. Assemble cubes into rows by aligning edges and adding a fabric strap around the sides. Use 9-inch cubes for flats and 10-inch cubes for sneakers.
Pro tipSeal the wrapped surface with a matte vinyl spray so it wipes clean.
AvoidUsing thin foam alone - it dents under shoe weight.
19. Wall-mounted pallet shelf with angled shoe holders
Angling the shoe supports keeps pairs from tipping and makes grab-and-go easier. It also reduces scuffs because shoes rest on wood instead of sliding around in a flat compartment. Pallet wood gives a textured, lived-in look that still looks tidy when you stain it dark.
Cut a pallet board into a main shelf, then add angled blocks using small triangular wood scraps. Space compartments 10 inches wide for sneakers and add a front rail strip about 1 inch tall. Mount the shelf to studs with two heavy brackets. Stain with a dark walnut and seal with matte clear.
Pro tipSand only the contact surfaces with 150 grit so the angled holders are smooth where shoes slide.
AvoidMounting without a level check - angled holders look crooked even if the wood is straight.
20. Cinder block shoe rack with scrap wood shelves
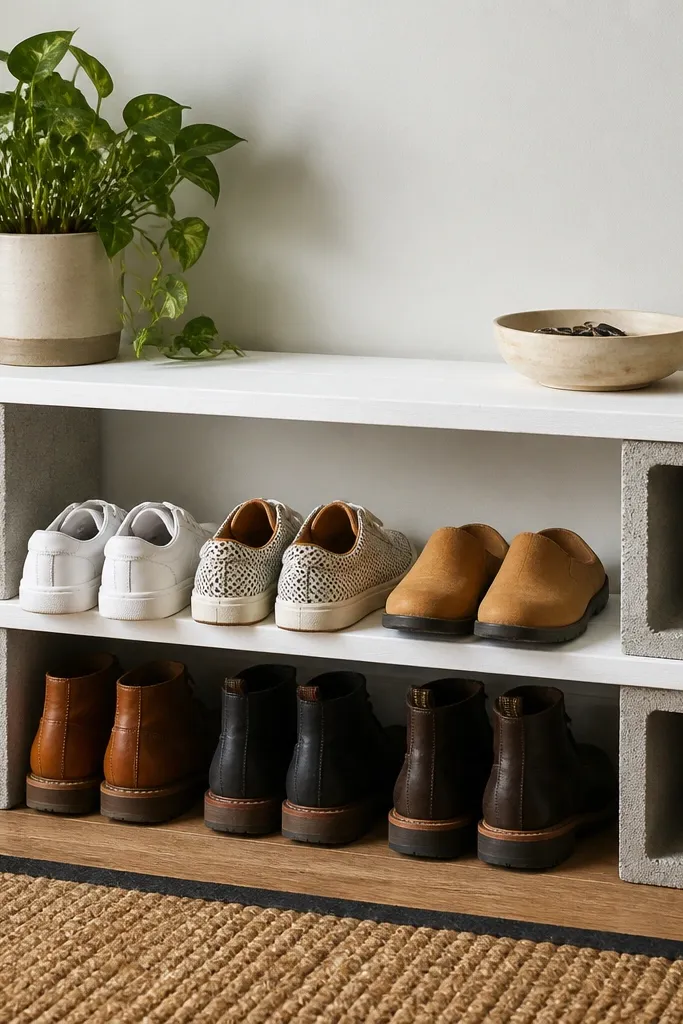
Cinder blocks are cheap and heavy, so the rack doesn't wobble. Using scrap wood planks makes it adjustable - you can change shelf depth without rebuilding the base. The open cinder block holes also add airflow around the shoes.
Place two cinder blocks side by side, then set wood planks across them. Use 2x4 scrap boards cut to 24 to 30 inches long, depending on your space. Add a thin strip on the front edge of each plank as a toe guard. Paint only the front shelf faces if you want a cleaner look.
Pro tipAdd non-slip rubber pads between wood and block so planks don't shift.
AvoidLeaving planks bare after cutting - splinters make the whole rack feel rough.
21. Built-from-scrap picture ledge shoe rack with peg hooks
Picture ledges are cheap and already have a clean profile, which makes the rack look polished even if you use scrap wood. Hooks let you hang shoes that have laces or loops, so you keep the floor open. This is a smart choice for small entryways where you need vertical storage.
Mount two to three picture ledges at staggered heights, leaving about 10 inches between levels. Add peg hooks under each ledge using a small board backing so the hooks screw into solid wood. For slip-ons, keep the top ledge shallower and add a lip strip to stop sliding.
Pro tipPaint the ledges the same color as your wall trim so they blend and look intentional.
AvoidOverloading hooks - if hooks bend, shoes end up on the floor.
22. Fold-down shoe rack using hinges and a frame
A fold-down rack is great for tiny entryways because it disappears when you're not using it. The hinged shelf gives you a flat surface that can hold shoes temporarily while keeping the wall clean. It also helps with dust since closed storage hides shoes from view.
Build a shallow frame from 1x2 lumber, then attach a hinged front panel with two cabinet hinges. Add two internal dividers spaced 9 inches apart for flats and sandals. When closed, you see a flat door; when open, the dividers face outward. Add small ventilation holes along the top edge.
Pro tipUse a soft-close hinge if you can - it prevents the door from slamming and looking homemade.
AvoidMaking the shelf too shallow - shoes fall out as soon as you open it.
23. DIY shoe rack with hanging shoe pockets and dowel bottom bar
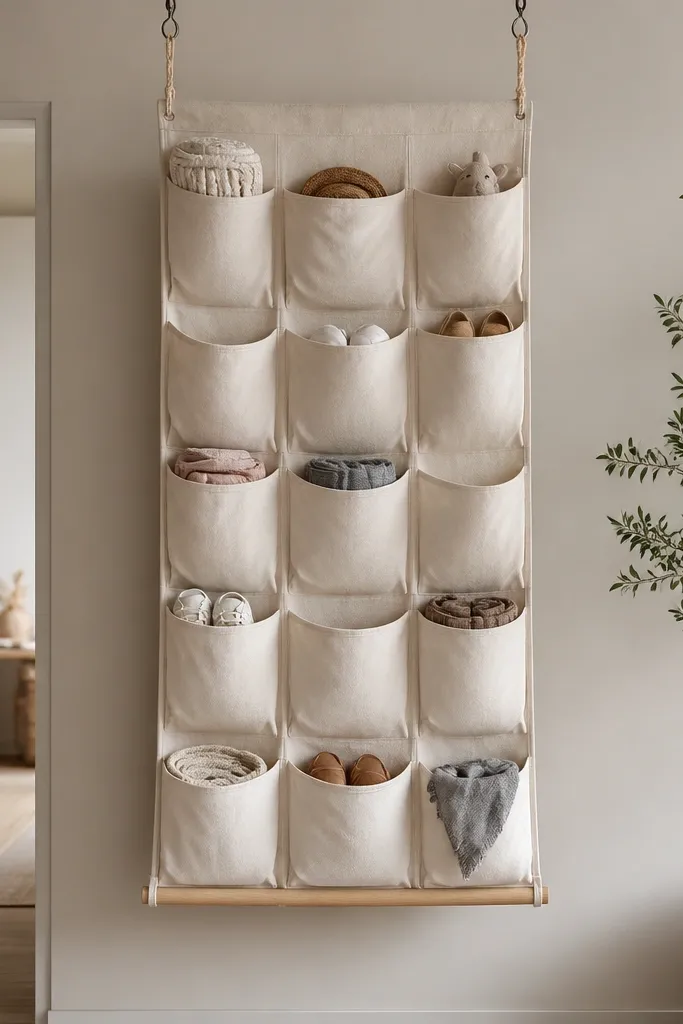
The dowel bottom bar keeps pockets open so shoes slide in cleanly and sit flat. It looks tidy because the fabric doesn't sag. This setup works well for closets and laundry rooms where you want to manage drying shoes without building wood shelves.
Sew or buy fabric pockets, then insert a 1-inch dowel into a bottom channel. Hang the organizer from two ceiling hooks using adjustable cord so you can set it at waist height or higher. Use 10- to 12-inch spacing between pocket rows for sneakers and 7- to 8-inch for flats. Add a small non-slip backing to stop the fabric from sliding.
Pro tipWash and dry the fabric before sewing so pockets don't shrink after installation.
AvoidHanging too low - shoes drag on the floor and the pockets stretch.


