
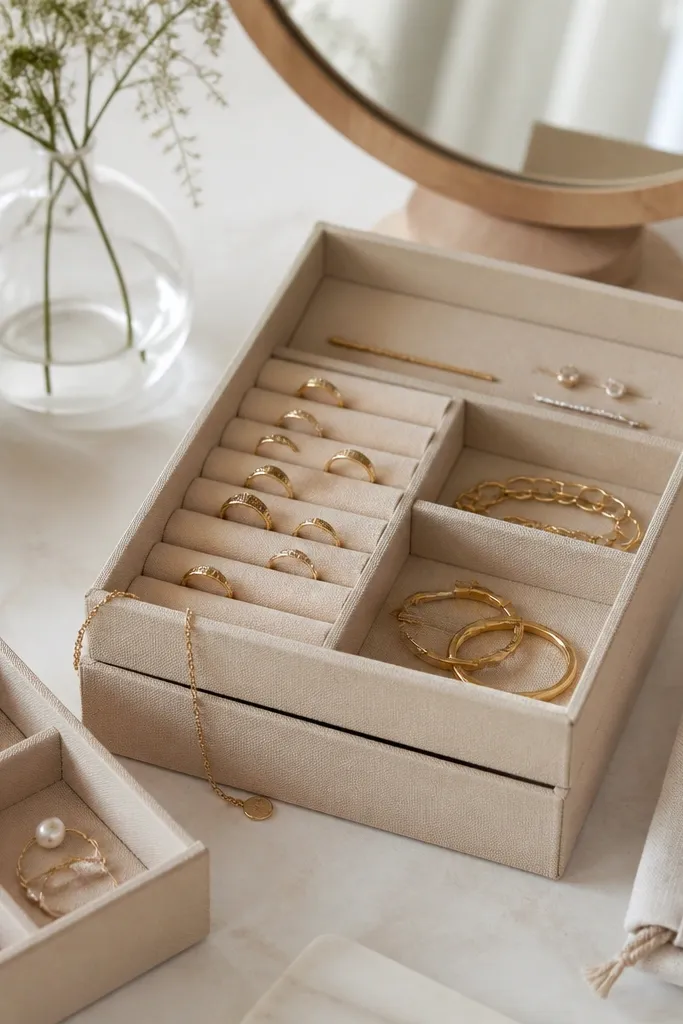
1. Painted shoebox with removable felt earring lanes
This one works because felt lanes hold earring shapes without letting them flop. I used matte paint so the box doesn't look glossy and cheap, and the felt stays grippy for posts. The clear acetate at the back makes it easy to see what's inside without opening the lid every time. The right-side ring dividers keep metal from scraping together.
Start with a shoebox that's roughly 12 x 8 x 4 inches. Cut two felt strips the height of the box minus 1 inch, then glue them into lanes with hot glue along the back edge only - so the strip can lift out later. For rings, use a thin cardboard strip cut into 8-10 shallow slots, then cover with felt. Seal the painted box with a clear matte spray before you glue inserts.
Pro tipLabel the underside of the lid with a tiny color dot system: studs in blue dots, hoops in green dots, rings in red dots.
AvoidDon't glue felt all the way around - if you fully seal it, it warps and the lanes look uneven.
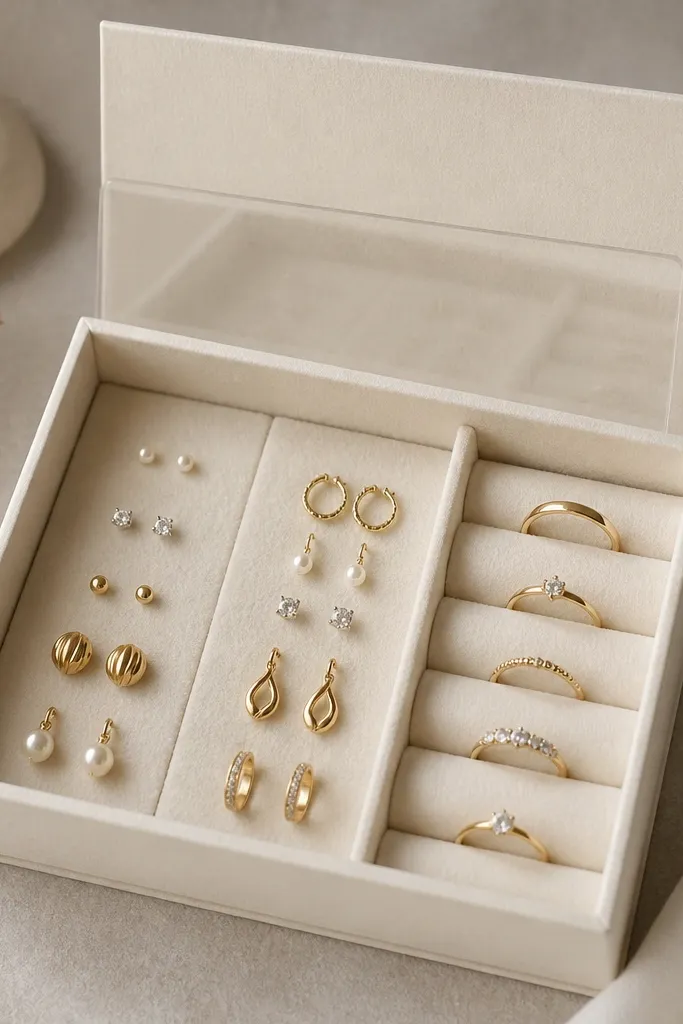
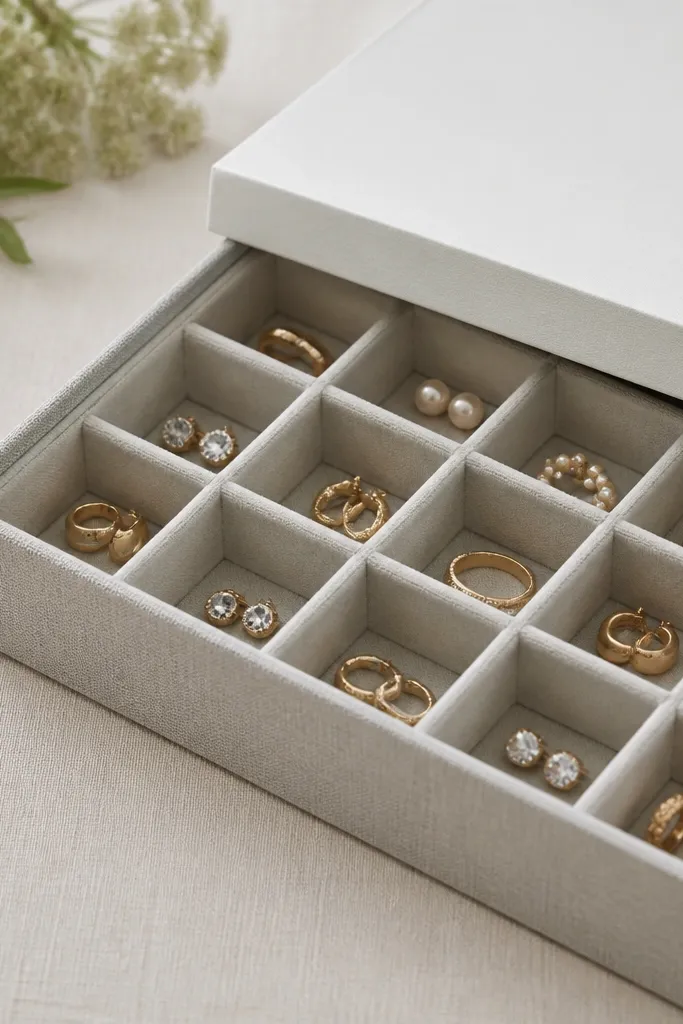
2. Clear-lid organizer box from a repurposed plastic drawer
Plastic drawers are already the right shape for a jewelry organizer box because they're rigid and don't sag. The clear lid keeps visibility high, and the dividers stop pieces from rolling into each other. I like foam for studs because it holds posts at a gentle angle. The kraft label keeps it looking like a designed organizer instead of a storage hack.
Use a shallow drawer insert from an old craft organizer set. Cut thin foam sheets to fit the bottom, then carve shallow wells for studs using a pencil eraser tip. Make dividers from corrugated cardboard covered in fabric tape. Add a clear lid by reusing the drawer's cover or attaching an acrylic sheet with hinges from a hardware kit.
Pro tipRoughen the acrylic with fine sandpaper before attaching tape so it won't peel after a week.
AvoidAvoid glossy label tape on plastic - it reflects light and makes the box harder to read at a glance.
3. Mason jar lid + shadowbox frame jewelry storage
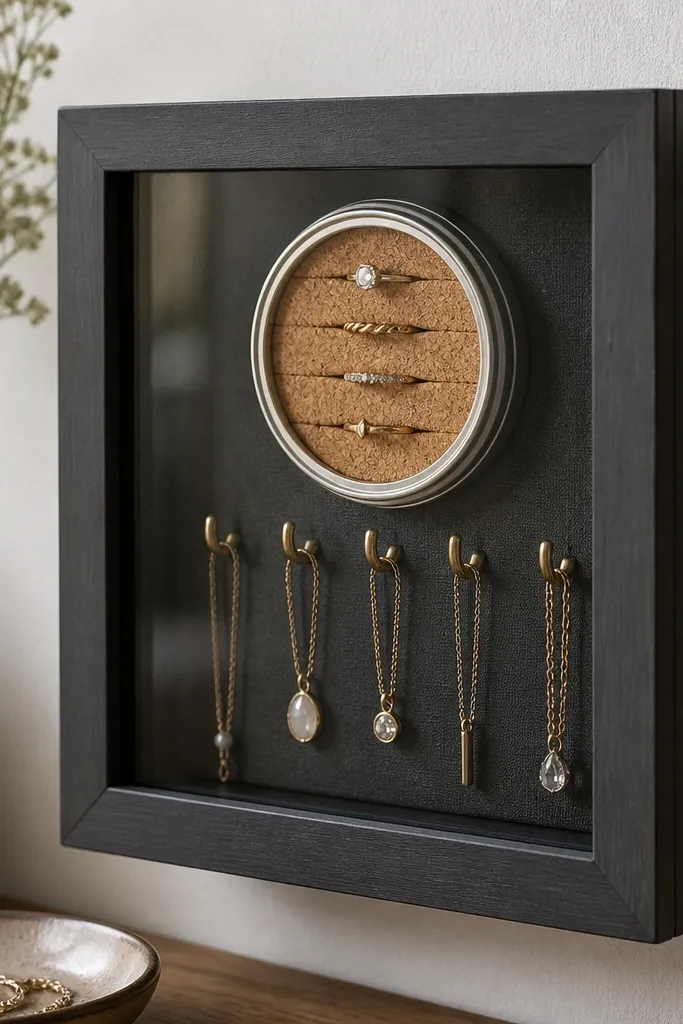
This build turns jewelry storage into something you can hang on a wall. The mason jar lid gives you a sturdy circular anchor for hooks, and cork behind it grips rings and keeps them from sliding. A shadowbox frame looks finished and protects the back from dust. I used charcoal paint because it makes gold chains look warmer.
Start with a small shadowbox frame about 10 x 12 inches. Mount a mason jar lid centered inside using screws and a washer. Glue a cork sheet behind the lid and cut 12-15 shallow ring slits. Add two or three small cup hooks on the jar lid rim for chains and longer earrings.
Pro tipUse two lengths of chain hooks - one for heavier chains and one for lighter pendants - so nothing pulls down.
AvoidDon't use super-thin cork. It tears when you cut slits and makes the box look messy.
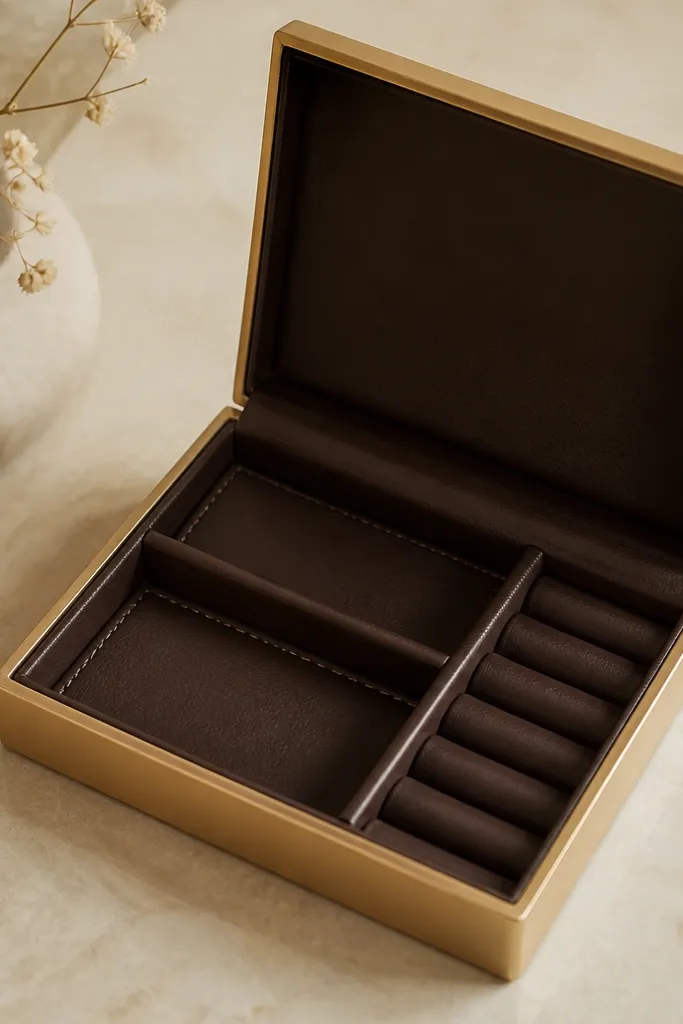
4. Fabric-wrapped jewelry box with snap-in ring roll
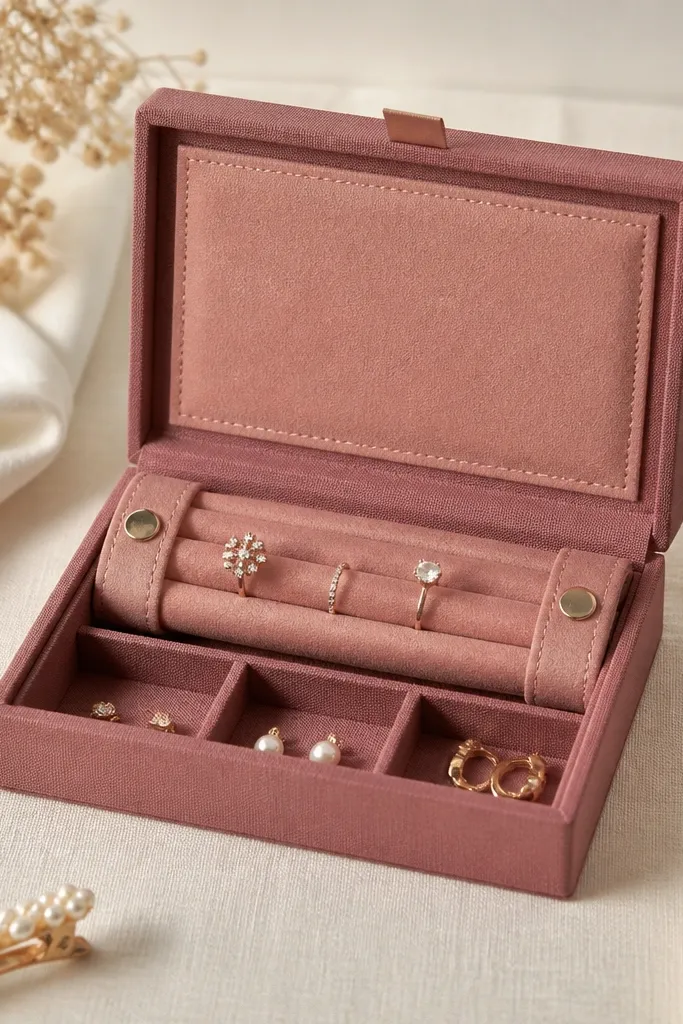
Fabric wrapping hides cheap materials fast, and it makes the organizer box feel like a gift. The ring roll gives you a soft landing for rings while keeping them easy to grab. Snap-in inserts are key: you can remove the roll to clean it or swap layouts. This setup looks tidy even when you store bulky statement rings.
Use a plain wooden or cardboard box about 9 x 7 x 3.5 inches. Wrap the outside with cotton fabric using spray adhesive, then cover edges with matching bias tape. Make the ring roll from two layers of felt with a stitched pocket strip for rings. Add snaps along the roll base so it locks into two small tabs inside the box.
Pro tipStitch the pocket strip with a straight stitch and reinforce at the ends - ring rolls fail where the thread stops.
AvoidAvoid fabric that frays easily on the edges. It will snag and look worn quickly.
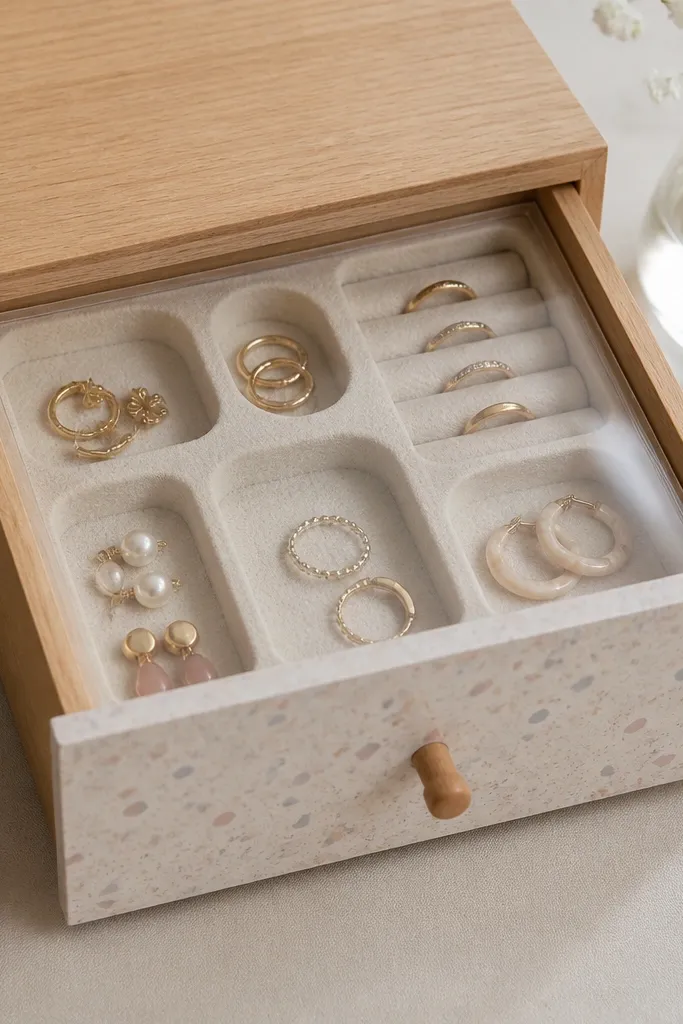
5. Wine box turned into a drawer-style jewelry organizer
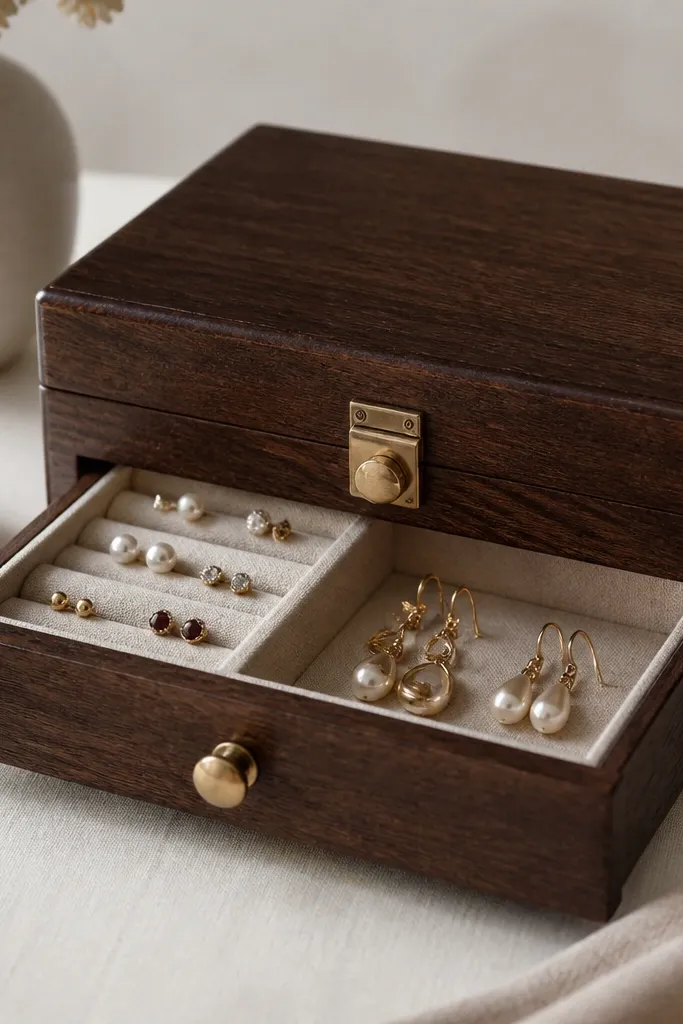
Wine boxes already have the right vibe and the right sturdiness. The pull-out tray keeps jewelry off the base so you don't have to dig through a lid every time. I built this for someone with lots of small pieces and it cut their morning search time down immediately. Brass hardware makes it look intentional without spending on a fancy store-bought organizer.
Use a single-bottle wine box with a removable insert if possible. Sand, then stain with dark walnut and seal with matte polyurethane. Build a tray from 1/2-inch wood or thick cardboard covered in felt. Add a grid of shallow wells for studs using a drill bit on a foam sheet, then glue the foam into the tray.
Pro tipMount the tray on two small drawer slides, even cheap ones. It keeps the tray aligned and stops scraping.
AvoidDon't skip sealing - stained cardboard or raw wood edges fuzz up fast.
6. Cord organizer box using pegboard inserts
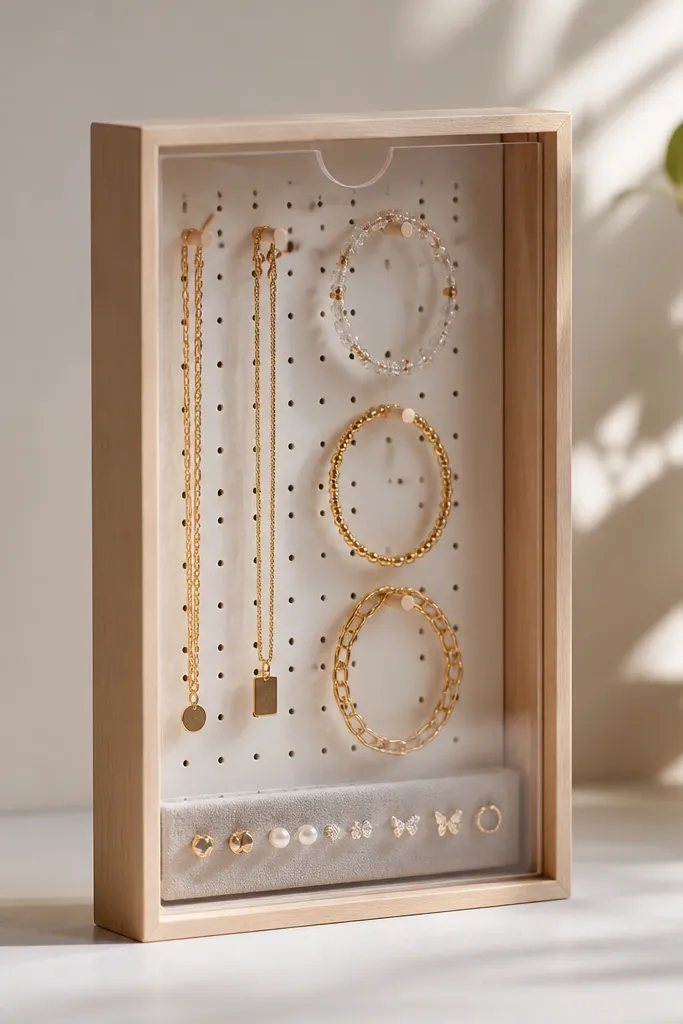
Pegboard inserts are my favorite when you have long pieces. They stop tangling because each item hangs in a separate spot. The clear plastic flap lets you see what's hanging without opening the box. I like this for travel because it packs flat and stays organized.
Use a slim wooden box about 10 x 6 x 3 inches. Cut pegboard panel to fit the back wall, then paint it the same color as the box. Screw in small peg hooks and add a foam strip across the bottom for studs. Seal everything with a clear coat so pegboard doesn't absorb oils and fingerprints.
Pro tipUse foam tape around peg edges where jewelry contacts - it prevents tiny scratches on metal.
AvoidAvoid tiny peg hooks that bend. They tilt and your jewelry slides off.
7. Repurposed jewelry tray lid insert into a cardboard box

If you already have a cheap plastic tray insert, you can make it look expensive by building the right box around it. The faux leather covering hides cardboard edges and makes the organizer feel sturdy. The elastic strap keeps the lid from popping open in a drawer. This is the fastest build on the list that still looks clean.
Start with a cardboard box the same footprint as your tray insert. Cut the cardboard top so the tray lid sits flush, then glue it in place with hot glue. Cover the box with faux leather or vinyl using contact cement for a smooth finish. Add an elastic strap closure with two small snaps or fabric tabs.
Pro tipTrim vinyl with a fresh blade and use a ruler. Uneven edges show up instantly under drawer light.
AvoidAvoid hot-gluing vinyl. It can warp and leave bumps you'll feel every time you open it.
8. Cork board box with vertical earring slots and ring grooves
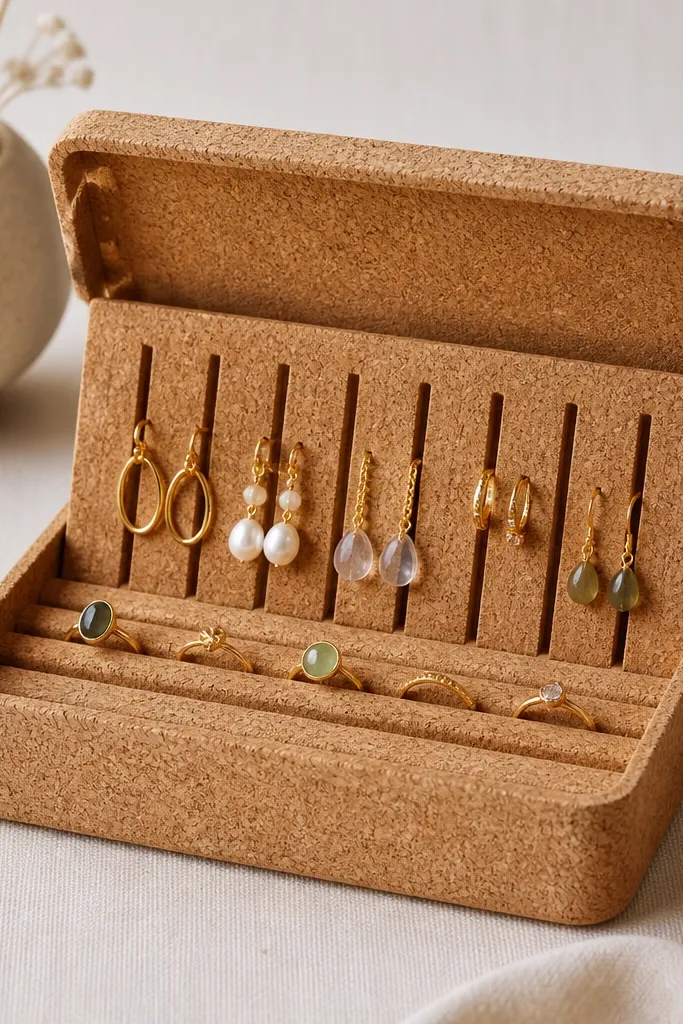
Cork is forgiving and it grips metal without scratching like harder surfaces. Vertical slots keep earrings separated, and the ring grooves prevent sliding. This build looks natural and warm, which matters because jewelry storage is usually ugly by default. The hinged lid keeps dust off while still letting you open quickly.
Make a box frame from thin wood strips or thick cardboard, then glue cork sheets to all inside faces. Cut vertical earring slots using a craft knife, spacing them 1 inch apart. For ring grooves, carve shallow arcs with a rounded tool and seal the cork with a thin coat of matte sealer. Add a hinge from a small hardware kit and a simple magnetic catch.
Pro tipCarve slots slightly deeper than the earring post length so they don't fall out when the box tilts.
AvoidAvoid carving too wide. Loose cork slots make earrings fall and look sloppy.
9. Brass-rim box with leatherette compartments
Leatherette compartments look expensive because the texture hides small imperfections in the box base. The brass-rim finish creates a clean boundary line that makes the organizer look designed. I used padded felt under the leatherette for rings so they don't rattle. This build works well for people who store fewer pieces but want each one protected.
Build a low box from wood or layered cardboard, then paint the rim with metallic gold craft paint. Cut leatherette panels for each compartment, then glue them over felt padding. Stitch along edges with faux leather thread or thick upholstery thread for a crisp look. Add a sliding inner tray for earrings so you can lift it out.
Pro tipUse painter's tape as a guide line for stitching so your seams stay straight.
AvoidAvoid leaving raw foam edges under leatherette - they create lumps that show through.
10. Ice cube tray insert in a fabric-lined box
Ice cube trays are cheap, rigid, and the perfect height for small jewelry. They also make a grid that looks orderly, which is what you want for a budget jewelry organizer box. Fabric lining keeps metal from scratching and makes the tray feel softer. I like this for studs and small bangles because the compartments are consistent.
Find an ice cube tray with compartments about 1 inch wide. Cover the bottom and tray walls with felt or thin foam covered in fabric. Cut the box base to fit the tray snugly, then secure with non-slip shelf liner tape. Wrap the lid with fabric and add a simple closure with a magnetic strip.
Pro tipLightly sand the tray edges so fabric sits flat and doesn't peel.
AvoidAvoid skipping liner between metal and plastic. It scratches quickly.
11. Upcycled picture frame with hinged jewelry panel
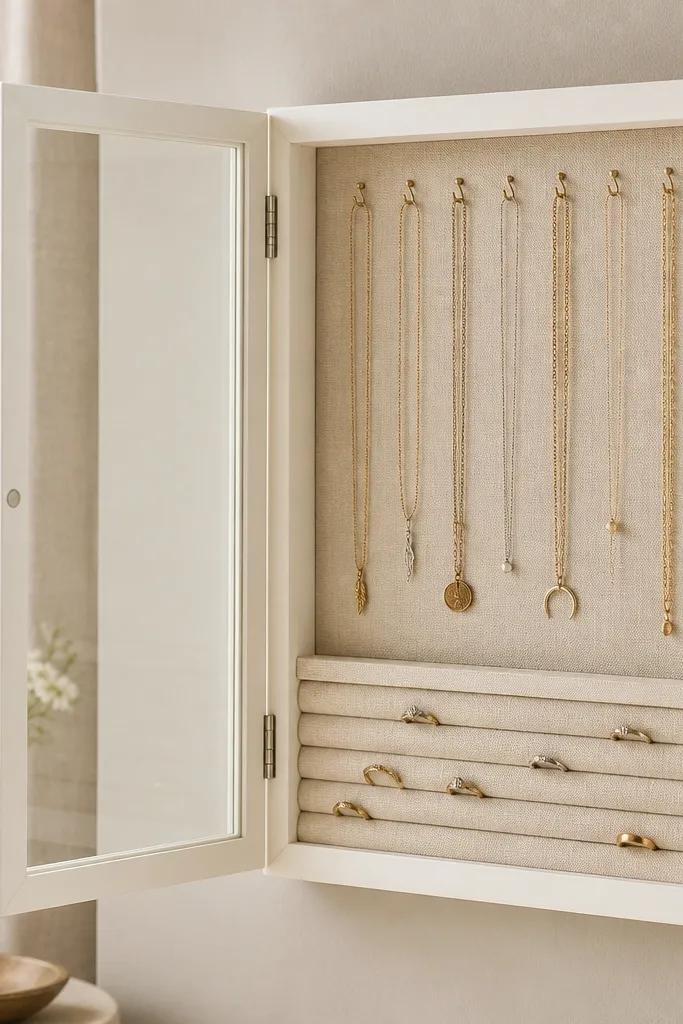
A picture frame is already square and looks good on a wall or dresser. The hinged panel keeps jewelry visible but protected, and you don't have to lift a full lid. Felt behind hooks keeps chains from rubbing against wood. This is a strong option if you hate digging through drawers.
Use a frame with depth at least 1 inch. Attach hooks to a backing board, then cover the board with felt. Add a ring-slot pattern by cutting shallow slits and inserting felt tabs. Seal the frame paint and attach a clear acrylic protector with small standoffs.
Pro tipHang the frame so the bottom is at eye level. You'll actually use it instead of ignoring it.
AvoidAvoid hooks that are too tall. They make bracelets swing and tangle.
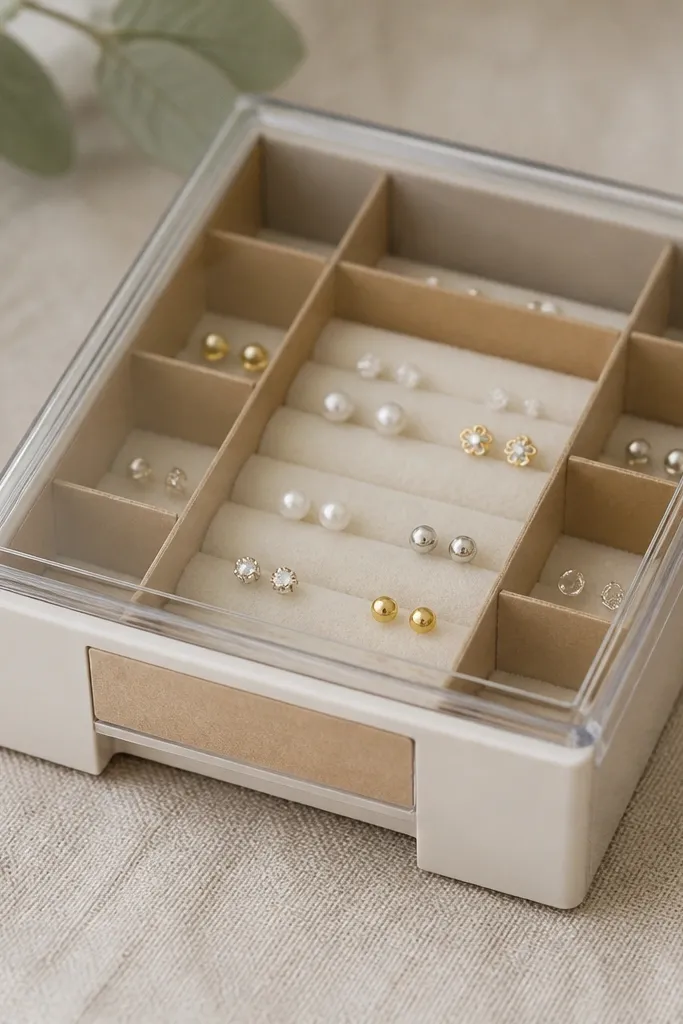
12. Mini drawer organizer from a foam block and contact paper
This is a clean, satisfying build because the foam wells look neat and hold shape. Contact paper on the outside is a budget-friendly finish that looks uniform. The clear sheet on top keeps dust away and lets you see the layout. I use this when I need a compact organizer that fits in a jewelry tray.
Make a small drawer box from wood strips or a thick cardboard drawer. Glue dense foam to the bottom and carve wells using a craft knife and rounded tool. Cover the foam with a thin felt layer to protect finishes, then add a clear acrylic or plastic sheet with a few standoffs. Use contact paper for the outside and seal the edges with clear tape.
Pro tipCarve a test well first. Foam tears if you go too deep too fast.
AvoidAvoid cheap foam that crumbles. It looks messy and the jewelry won't sit stable.
13. Decoupaged map paper box with compartment dividers
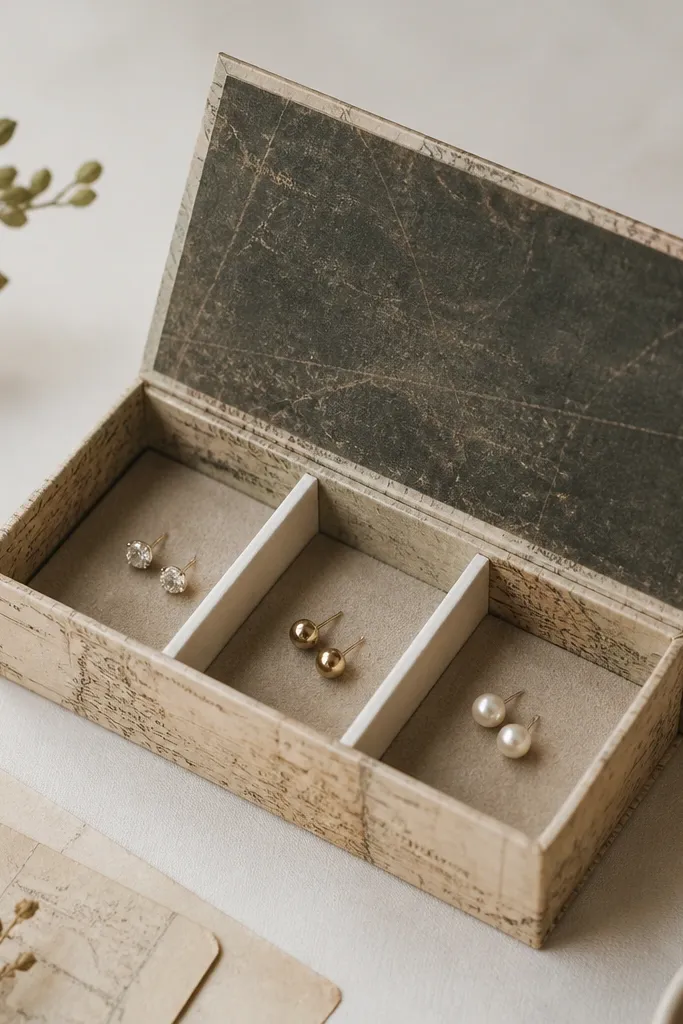
Decoupage makes a budget jewelry organizer box look personal without spending on new materials. The muted map print works with gold and silver jewelry because it doesn't fight the metal shine. Dividers matter here - the paper alone doesn't stop tangling. With felt on the base, studs don't scrape and rings don't rattle.
Use a plain wooden or cardboard box. Cut dividers from 1/4-inch cardboard and cover them in fabric or paper so they don't absorb oils. Decoupage the outside with matte Mod Podge and let it cure fully. Add felt squares to the bottom and a shallow tray for earrings made from thick paper sealed with clear coat.
Pro tipUse matte Mod Podge, not glossy. Gloss shows every brush stroke.
AvoidAvoid heavy layers on corners. It creates thick ridges that peel.
14. Shaker-style shadowbox jewelry organizer with acrylic front
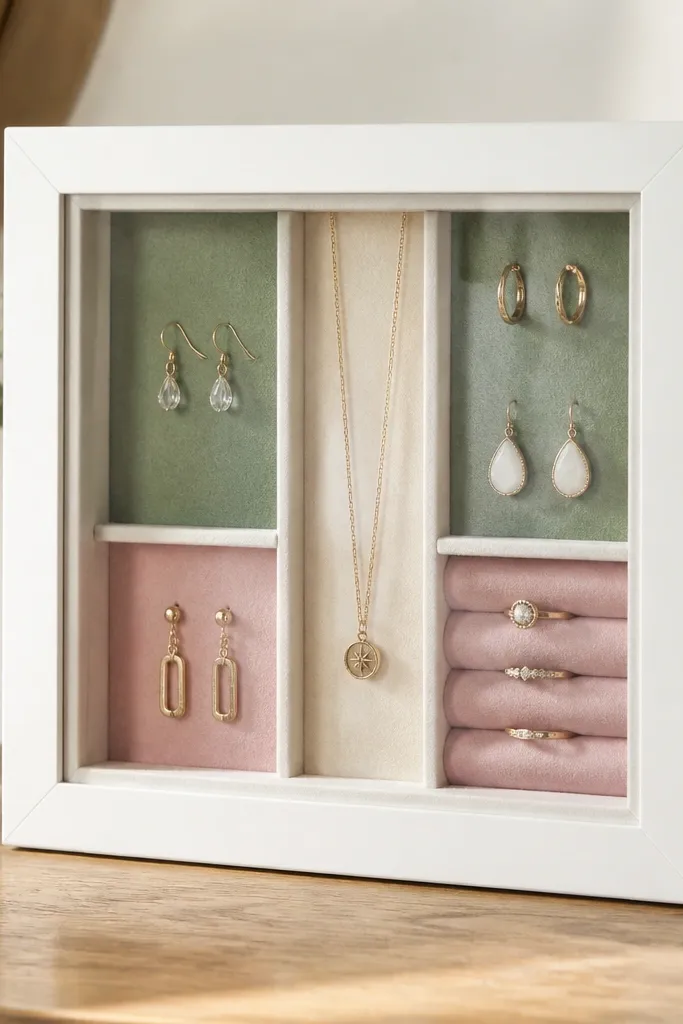
A shaker-style frame looks clean because the front is structured and the compartments are visible. Acrylic gives you a clear view, but the felt keeps pieces from sliding. Colored felt behind each compartment makes it easy to spot matching sets. This build looks good even if your jewelry collection changes later.
Build a frame with 1/2-inch thick wood strips or use a store-bought shadowbox. Cut felt panels for each compartment and glue them to the inner base. Use magnets on the front panel so it closes tight without a bulky latch. Seal all raw wood and paint the frame with satin white.
Pro tipChoose felt colors that match your wardrobe palette. I used dusty blue and warm beige so it doesn't look childish.
AvoidAvoid foggy acrylic. It makes the compartments look dirty and old.
15. Rolled-up belt organizer box with ring pockets
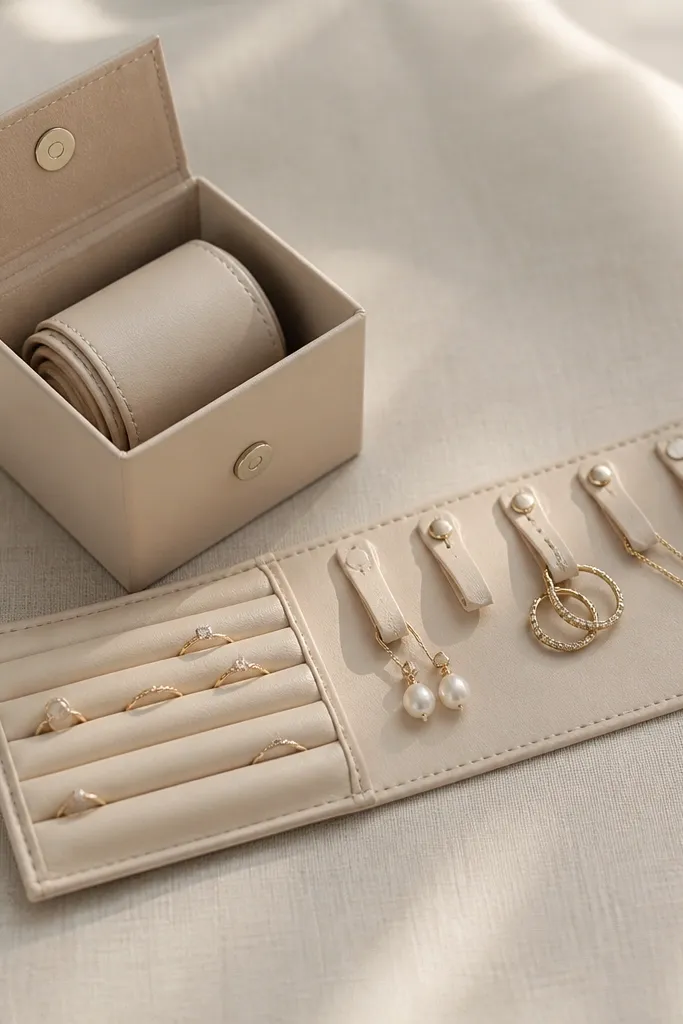
If your rings are the main problem, a rolled belt-style organizer is the most satisfying fix. The faux leather pockets keep shapes and stop rings from scratching each other. Earring loops on the side prevent tangles. The box format keeps it from becoming a loose mat on your dresser.
Use a slim box about 10 x 7 x 2.5 inches. Cut a long strip of faux leather and stitch rows of small pockets for rings. Add two rows of elastic loops for earrings, spaced 1.25 inches apart. Roll it tightly around a small dowel inside the box, then secure with a magnetic snap lid.
Pro tipTest the ring pocket depth with one ring before stitching the whole row.
AvoidAvoid pockets that are too shallow. Rings slide out and you'll stop using the organizer.
16. Chalkboard paint top with magnetic earring board insert
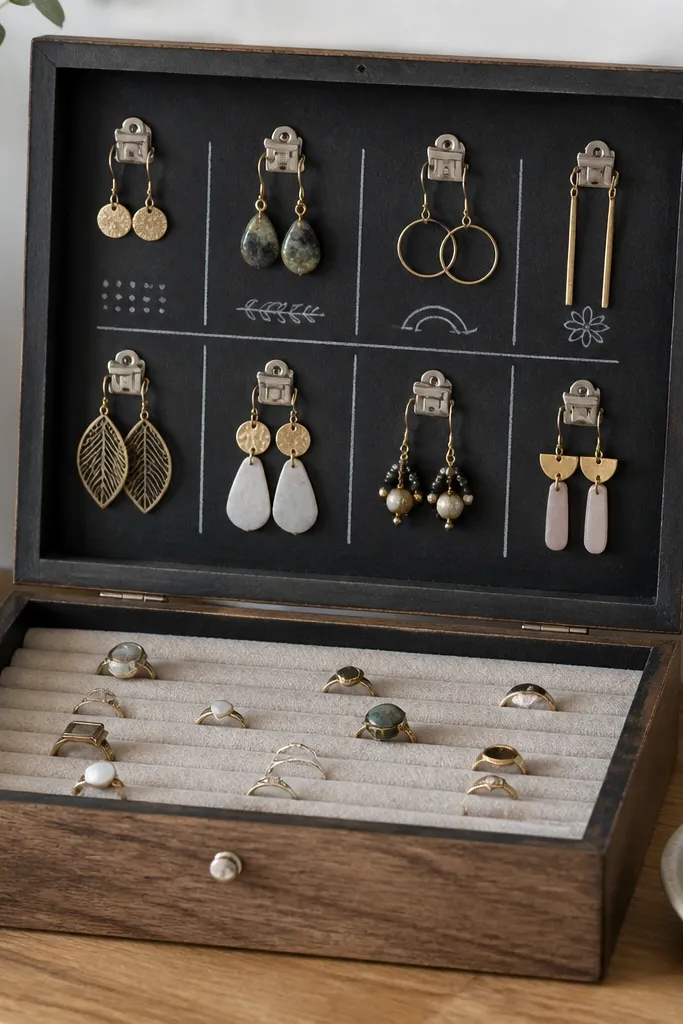
This build is about speed. You label with chalk and you see where each piece goes because the magnetic board organizes by shape. The chalkboard lid also hides scuffs from daily use. I added a felt ring pad so rings don't rattle on metal. The result is a box that looks like a desk accessory, not a craft project.
Paint the lid with chalkboard paint and cure it with a thicker chalk rub. Inside, attach a thin magnetic sheet to a backing board. Use small binder clips or mini magnetic hooks attached to the clips for earrings. Add a felt pad on the base for rings and small studs.
Pro tipUse a fine-tip chalk marker for long-term labels. It wipes clean but stays readable.
AvoidAvoid magnets that are too weak - earrings fall forward and it looks careless.
17. Toothpick and bead pegboard box for earrings and bracelets
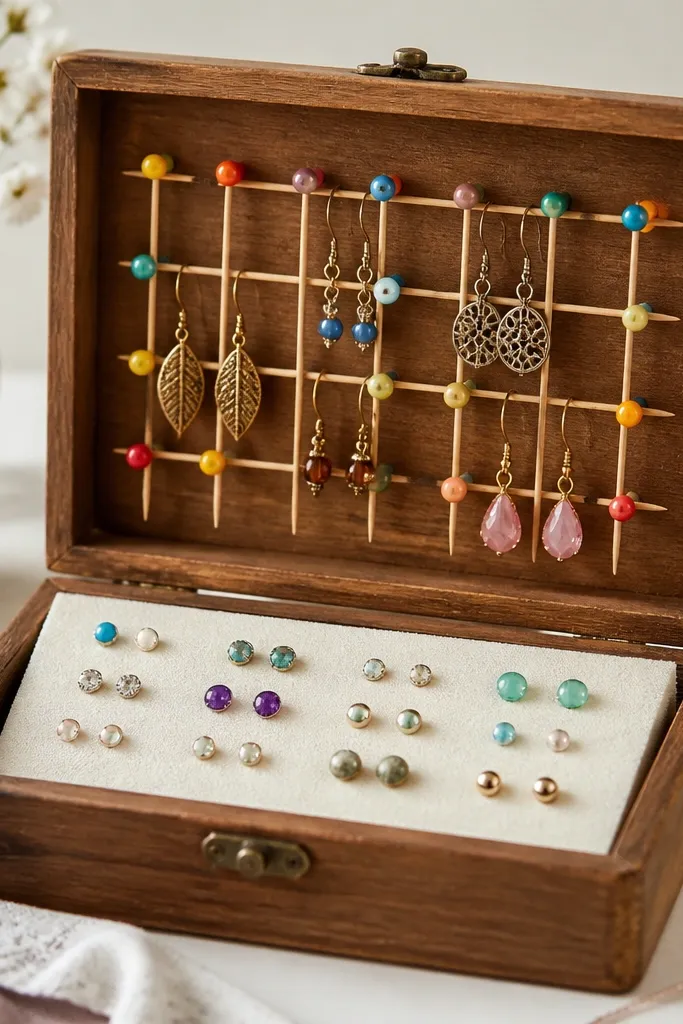
This is the DIY version of a jewelry boutique wall, shrunk into a box. The toothpick pegs are cheap, and the bead caps stop metal from slipping off. It also looks playful without being messy because the pegs are evenly spaced. I like it for bracelets and longer earrings that need vertical separation.
Make a box frame from scrap wood and sand it smooth. Drill tiny holes in a backing board, then insert toothpicks and glue them. Cap each toothpick with a small bead and seal with clear glue. Add hooks made from thin wire inside the pegs for hanging, and line the bottom with foam covered in felt for studs.
Pro tipSpace pegs 1 inch apart if you hang dangles. It stops overlap when you grab quickly.
AvoidAvoid toothpicks without sealing. They soak up moisture and split.
18. Leather-bound book-style organizer with hidden compartments
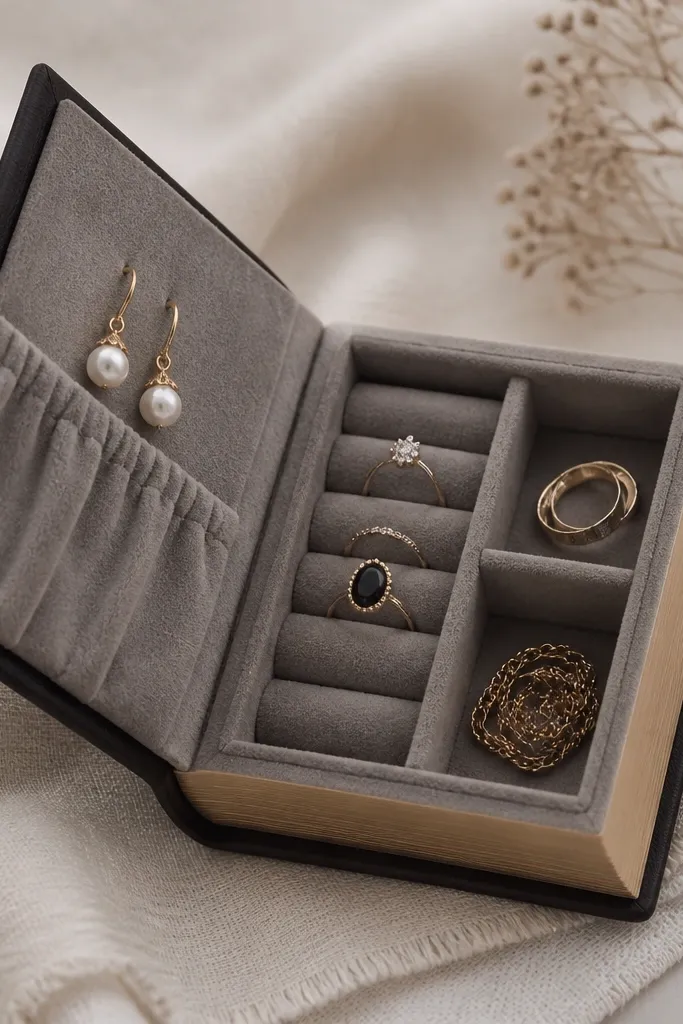
Book-style organizers are my pick for people who want jewelry storage that looks like decor. The felt interior keeps pieces from scraping, and hidden compartments make it feel special. It's also great for travel because you can pack it without thinking about fragile lids. I made this for a weekend trip and it stayed organized in my suitcase.
Use a thick binder cover or a foam-core book box form. Wrap the outside in leatherette and glue the spine for a tight finish. Inside, create two hidden pockets from felt-covered cardboard and a larger open area for earrings. Add a closure band using a wide elastic strip and two snaps.
Pro tipUse fabric tape to reinforce the inside corners. That's where book boxes split after repeated opening.
AvoidAvoid thin felt. It bunches and makes the compartments look uneven.
19. Pegboard lid with removable ring tray and earring hooks
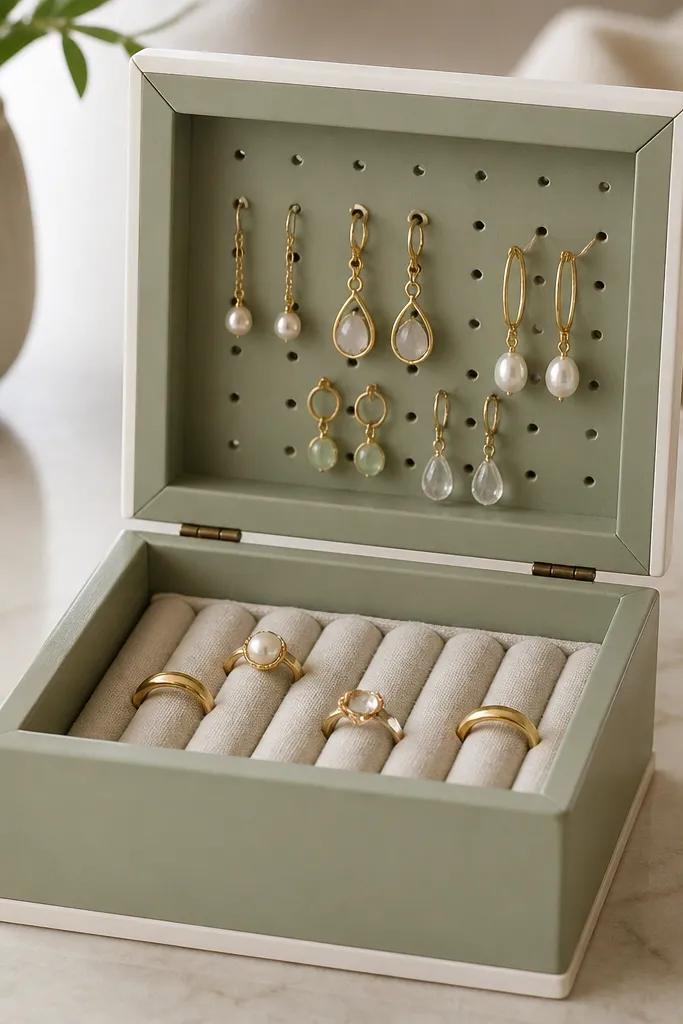
This is a practical layout: you open the box and all earrings are instantly visible on the lid. The ring tray stays removable so you can grab rings without disturbing earrings. Pegboard keeps everything aligned and prevents the messy pile look. The sage paint makes silver jewelry pop without looking loud.
Build a box base and make a pegboard panel sized to the lid. Paint the outside, then seal. Attach small hooks to the pegboard and add a thin felt sheet behind the hooks to prevent metal-to-wood contact. For rings, make a shallow tray from wood strips and cover with suede-like fabric or felt.
Pro tipUse two hook sizes - small for studs and medium for hoops. It keeps weight balanced and stops sagging.
AvoidAvoid mounting hooks too close. Rings bump and scratch when you open quickly.
20. Cupcake tin insert in a fabric-covered jewelry box
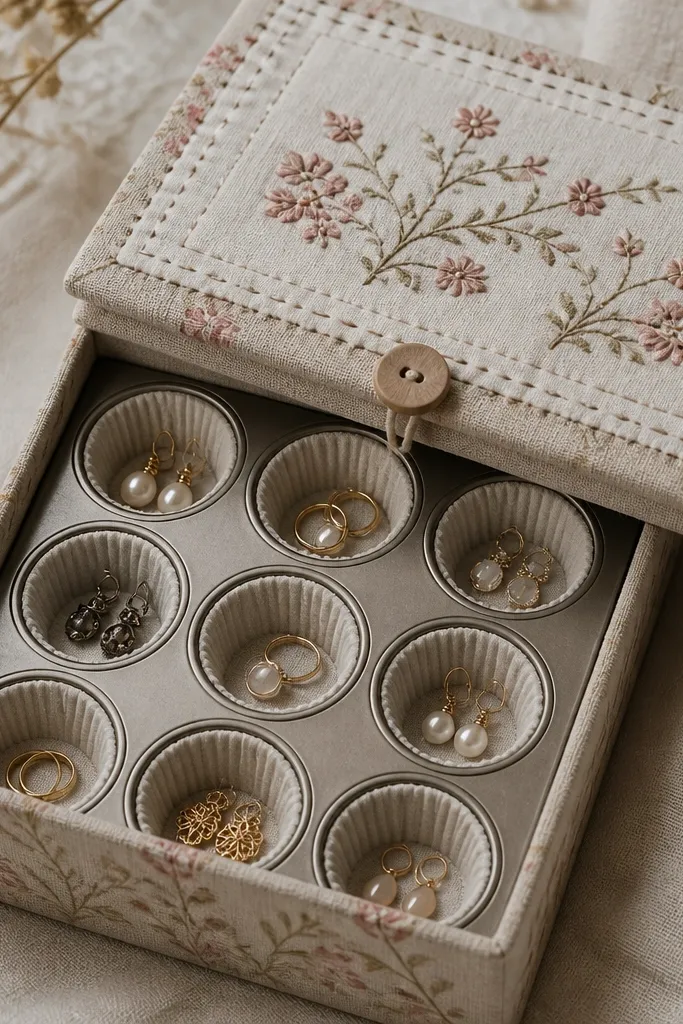
Cupcake tins are perfect for a budget jewelry organizer box because each cup is already shaped. You get a neat grid without measuring dividers. Fabric-covered box sides keep the tin from sliding and make it look soft and clean. This works well for small studs and charm earrings.
Buy a mini muffin tin style insert or repurpose one from craft storage. Fit it into a small box base and glue non-slip shelf liner underneath. Cover tin edges with felt strips so metal doesn't scrape. Make the lid from the same fabric as the outside and add a button with elastic cord closure.
Pro tipMark the cups with tiny dots of paint on the bottom so you remember the layout after you clean it.
AvoidAvoid skipping non-slip liner. The tin slides and cups end up misaligned.


