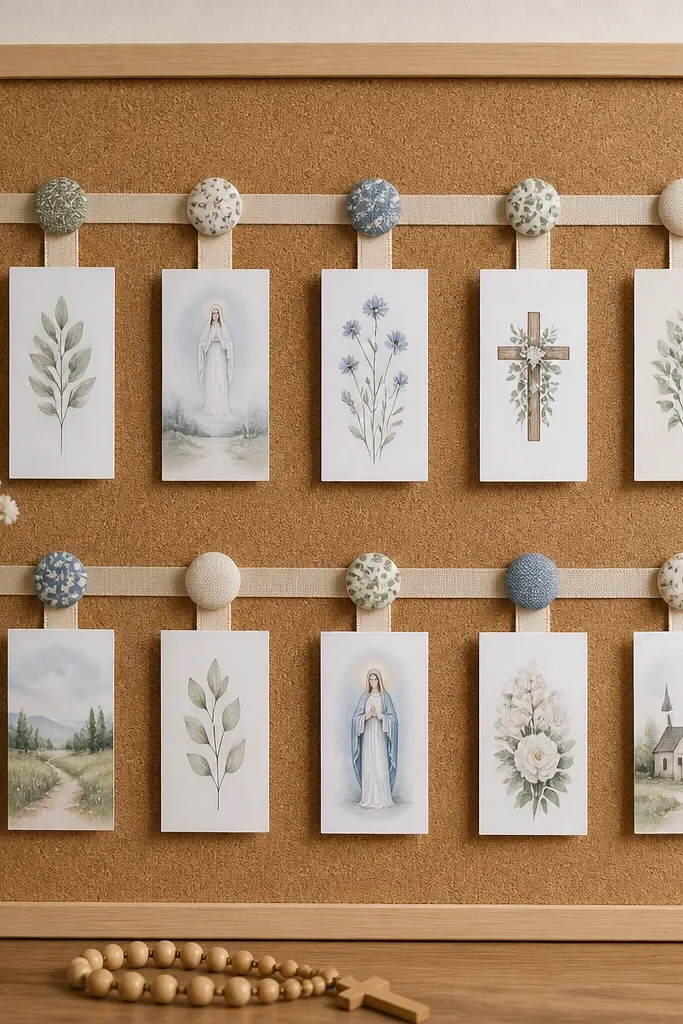
1. Cork Tile Prayer Board in a Dollar-Store Frame
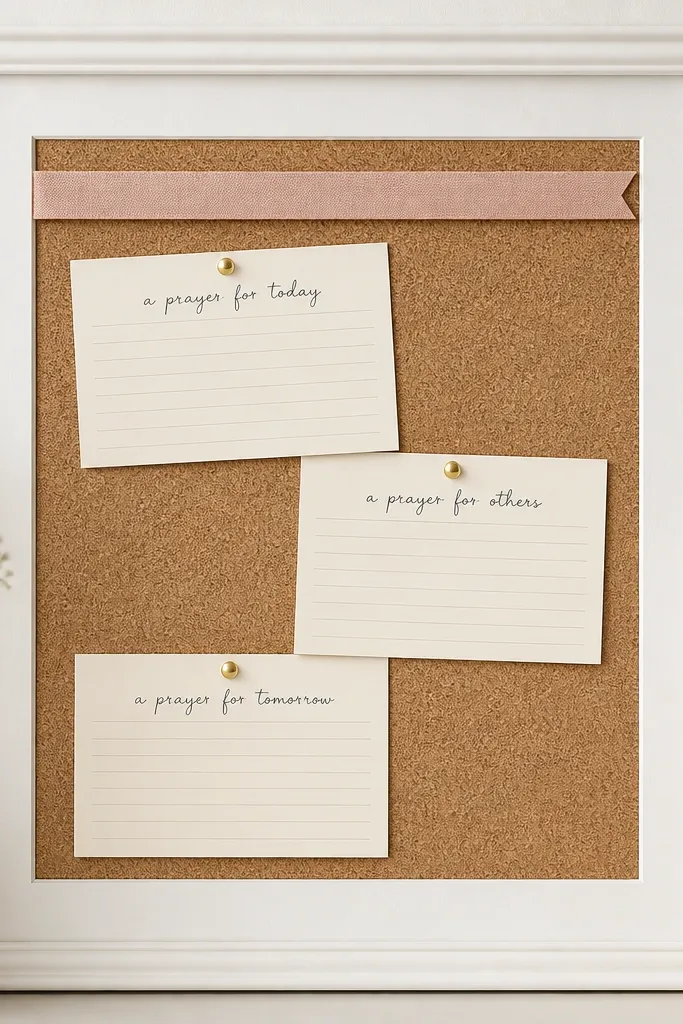
Use a cork tile because it grips pins cleanly and looks warm without painting. The white frame makes the board feel finished even when the cork is plain. Keep your prayer cards in one paper color (cream or ivory) so the whole board reads cohesive. Gold pins add a soft shine that doesn't look "crafty."
Buy a cork sheet or 12x12 cork tile(s) and trim to fit the frame opening. Mount cork with hot glue on the back edge, then add a small ribbon header (about 10 inches long) on top using double-sided tape so it stays flat. Handwrite headings in black gel pen with a steady size and leave 1/4 inch margins on each card.
Pro tipPrint prayer card templates on cream cardstock, then cut cards with a paper trimmer for consistent edges.
AvoidAvoid mixing bright neon paper and dark pins - it reads messy fast.
2. Fabric-Stretched Foam Board with Pom-Pom Trim
Fabric stretched tight makes the board look like home decor, not a craft project. Pom-pom trim adds a gentle texture that photographs well and hides uneven edges. Use a neutral fabric (cotton, linen blend, or canvas) so your cards stand out. Pinned cards still work, but the background stays calm.
Cut foam board to your desired size, then wrap fabric around the edges and tape or hot-glue on the back. Add pom-pom trim along the outer border using hot glue, pressing for 20 seconds per spot. For cards, use 3x5 inch index cards pinned near the center so the board doesn't look crowded.
Pro tipSpray the fabric with a light starch mist before stretching so it stays crisp and smooth.
AvoidDon't stretch stretchy knit fabric - it puckers and makes the whole thing look cheap.
3. Chalkboard Label Board with Mini Clip Lines
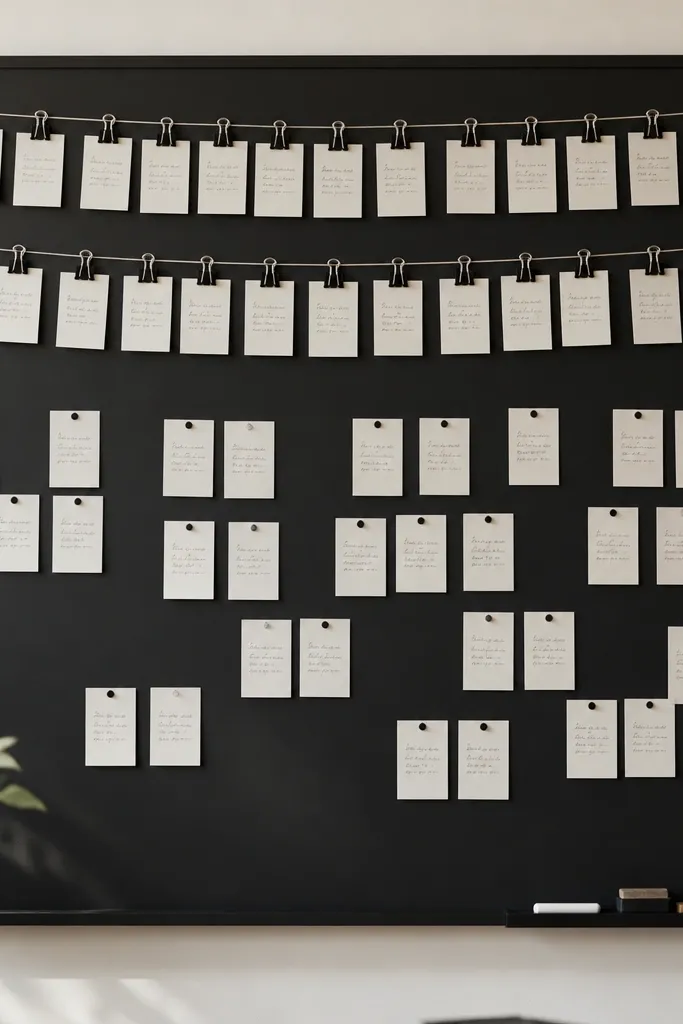
Chalkboard paint gives you erasable prompts, so you can change what you're praying for without rewriting everything. Binder clips create a neat "line" effect that keeps cards aligned. White label cards against black look high-contrast and easy to read from a distance. The clip system also prevents cards from falling when you move the board.
Paint foam board or a scrap plywood panel with chalkboard paint and let cure 48 hours. Add two rows of small binder clips (or mini clothespins) mounted with screws and washers so they don't loosen. Use 2x3 inch label cards for quick notes and write with chalk markers.
Pro tipUse a strip of washi tape as a guide under each clip row so your cards line up every time.
AvoidSkip glossy chalk markers - they reflect light and look streaky in photos.
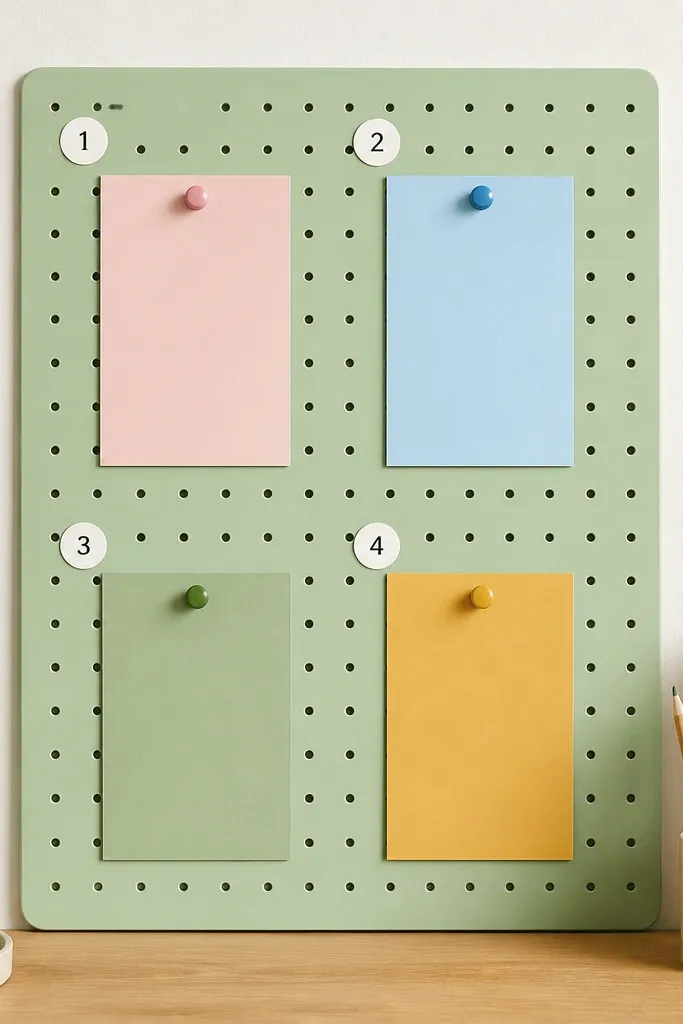
4. Pegboard Prayer Board with Painted Hooks
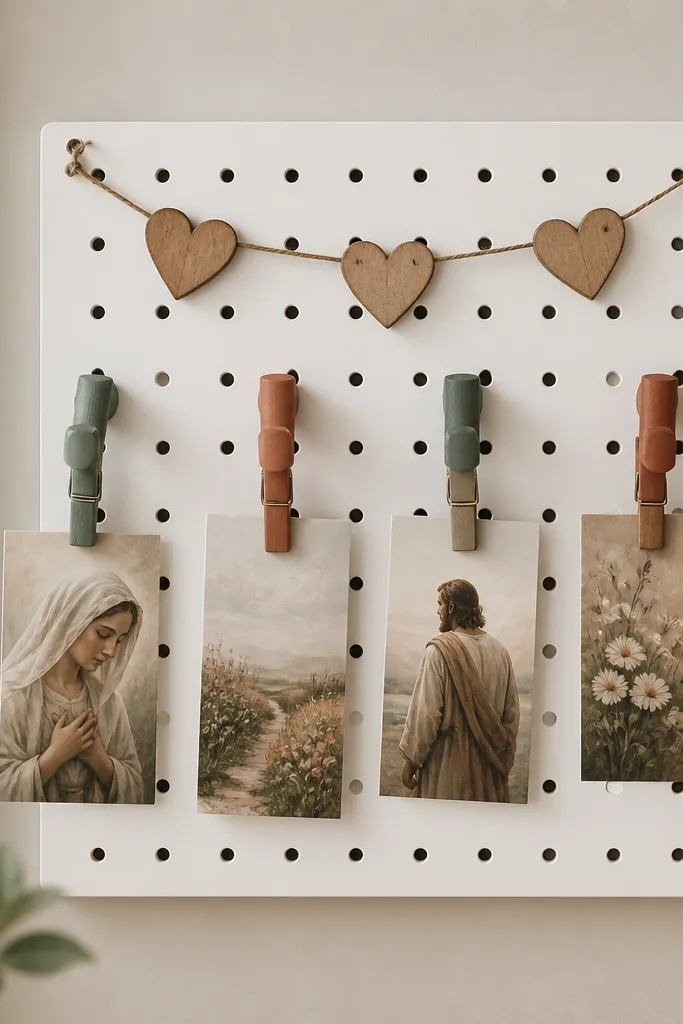
Pegboard is cheap, sturdy, and it gives you built-in spacing. Hooks let you hang cards without pins, so nothing bends. Painting the hooks keeps the board looking intentional instead of "hardware store." The card arrangement stays airy, which looks better than cramming.
Cut pegboard to size or buy a small kit. Sand lightly, then spray paint the pegboard and hooks in two separate coats. Mount using wall anchors if you're hanging it, or set it on a shelf with a small backing board. For cards, use A6 or 4x6 cardstock and clothespins painted the same color as hooks.
Pro tipLabel the hooks with tiny metal tags so you can sort prayers by person or category.
AvoidDon't leave pegboard raw brown - the whole board looks unfinished.
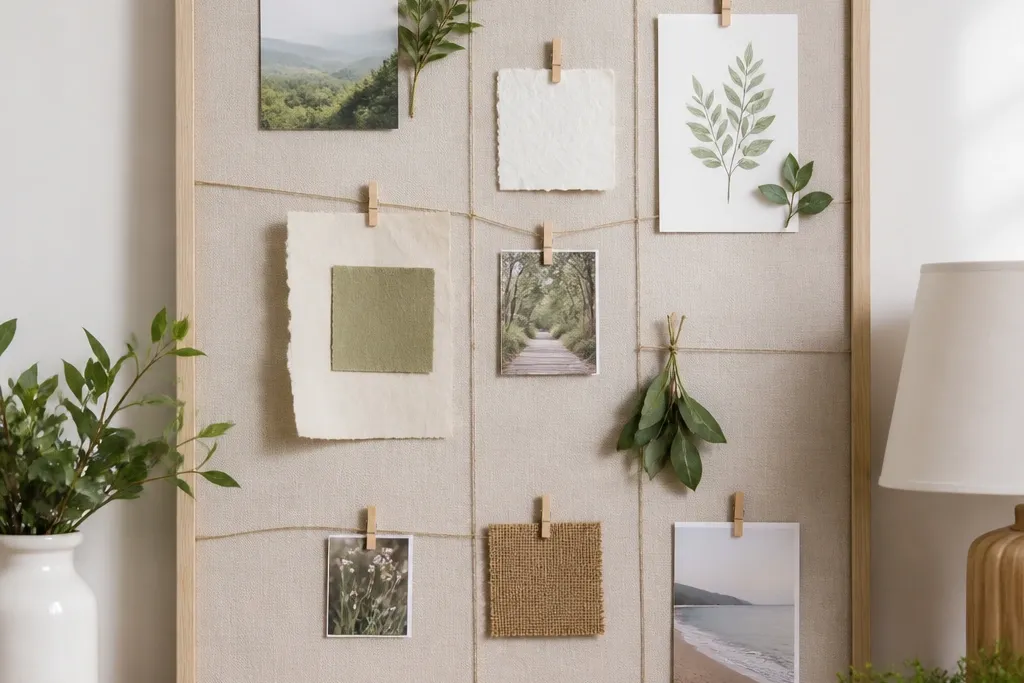
5. Reclaimed Wood Slat Board with Twine Grid

Wood slats give you structure without needing a full frame. Twine grid creates a visual pattern that makes the board look designed even with simple notes. Clothespins make it easy to swap requests without poking holes. This style looks especially good in a hallway or near a reading chair.
Use two longer slats and two shorter ones to form a rectangle. Stretch twine vertically and horizontally using small eye hooks at the corners and midpoints. Tie twine tight, then hot-glue knots on the back. Fold prayer notes into thirds so they hang flat on the clothespins.
Pro tipUse painter's tape to mark your twine spacing (like 2.5 inches) before tying so the grid stays straight.
AvoidAvoid stretchy twine - it sags after a week.
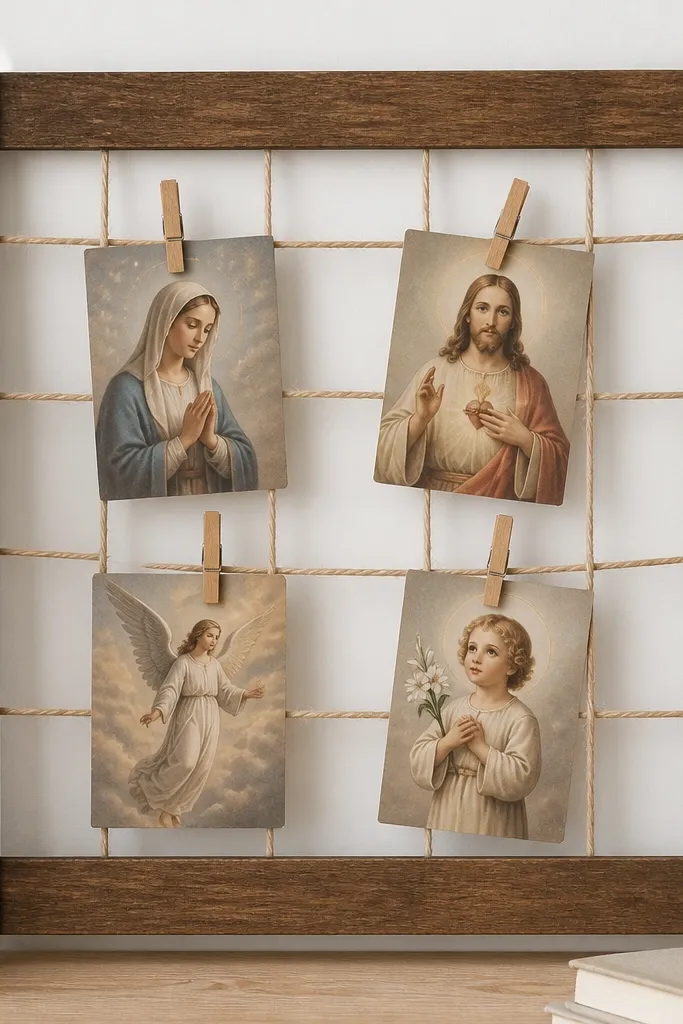
6. Binder Clip Photo Sleeve Prayer Board
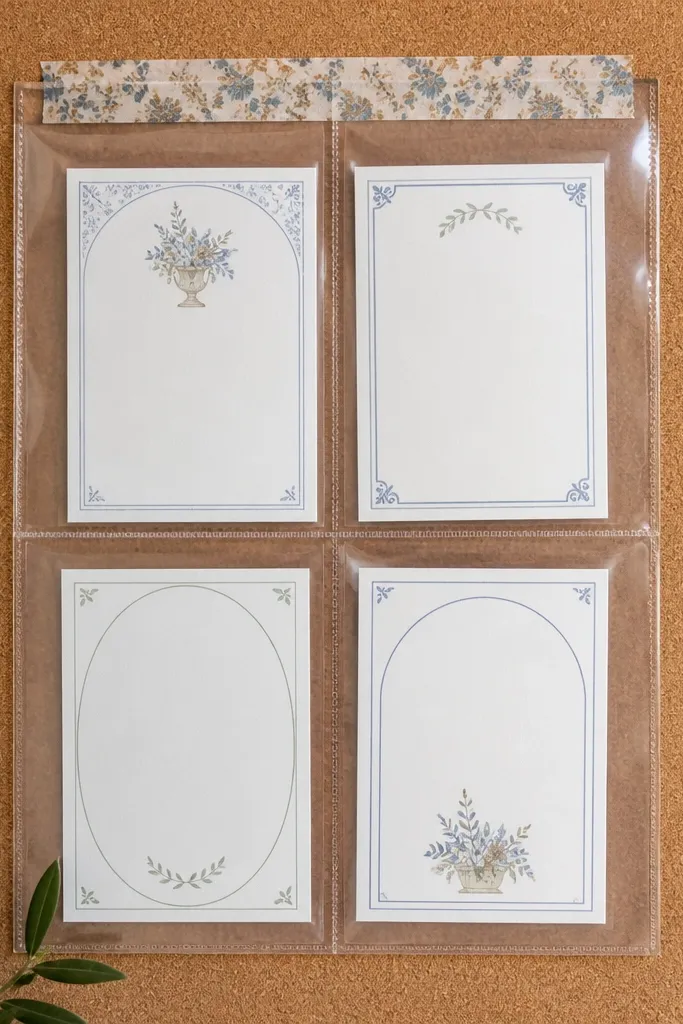
Clear sleeves keep paper flat and protect it from pet noses and kitchen splashes. Binder clips are the secret to swapping quickly without tearing. Hiding the clips under washi tape makes the hardware disappear visually. This build is clean, and it looks good with printed prompts.
Start with cork or a fabric-stretched board. Attach binder clips along the top edge and run a clear sheet or photo sleeves across. Use 8.5x11 sheet protectors cut into panels, then insert printed prayers. Place a patterned washi strip (thin width) over the clip arms where they meet the board.
Pro tipPrint your prompts in two font sizes only: one for category labels and one for the names or dates.
AvoidDon't use crinkly cheap plastic sleeves - they warp and look uneven.
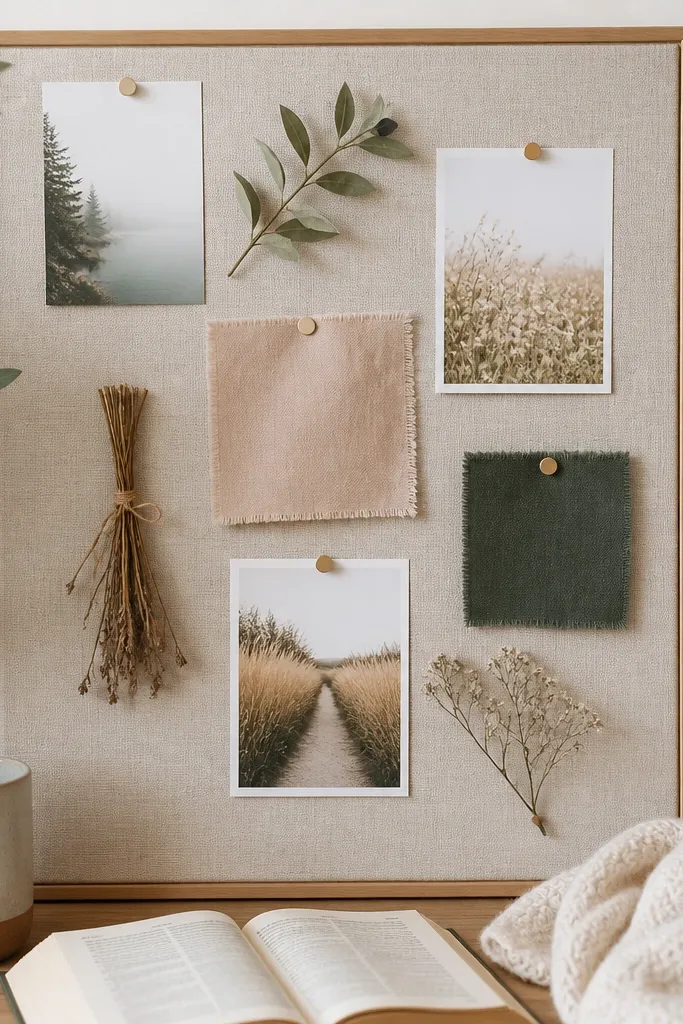
7. Magnet Sheet Board with Layered Paper Prayers
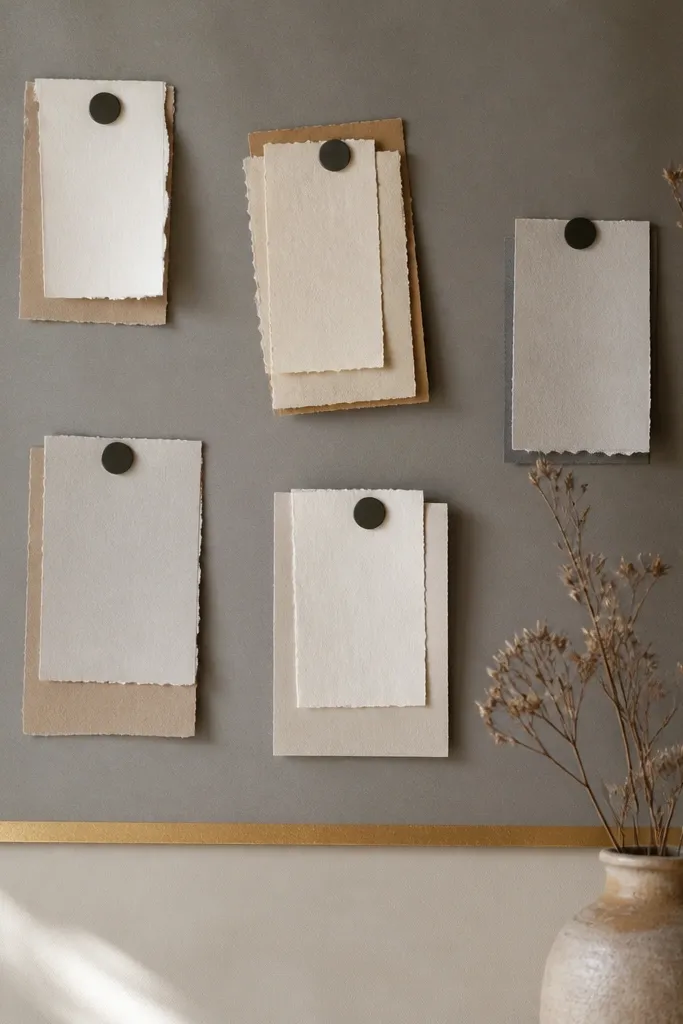
Magnetic boards are great if you hate pin holes. Layered paper adds dimension without expensive materials - you stack two cutouts with a paper adhesive layer. The gray base makes colored paper look brighter and more deliberate. This style also keeps cards tidy because magnets hold them flush.
Use a magnetic sheet (from craft stores) cut to size, then mount with adhesive strips or screws with a backing board. Cut prayer shapes from cardstock (circles or rectangles) and layer with foam dots for slight lift. Attach tiny disc magnets behind each layered piece.
Pro tipUse a consistent magnet size, like 1/2-inch discs, so the layers sit evenly.
AvoidSkip glossy cardstock - fingerprints show and make it look messy.
8. Wooden Spoon Prayer Board with Mini Tags
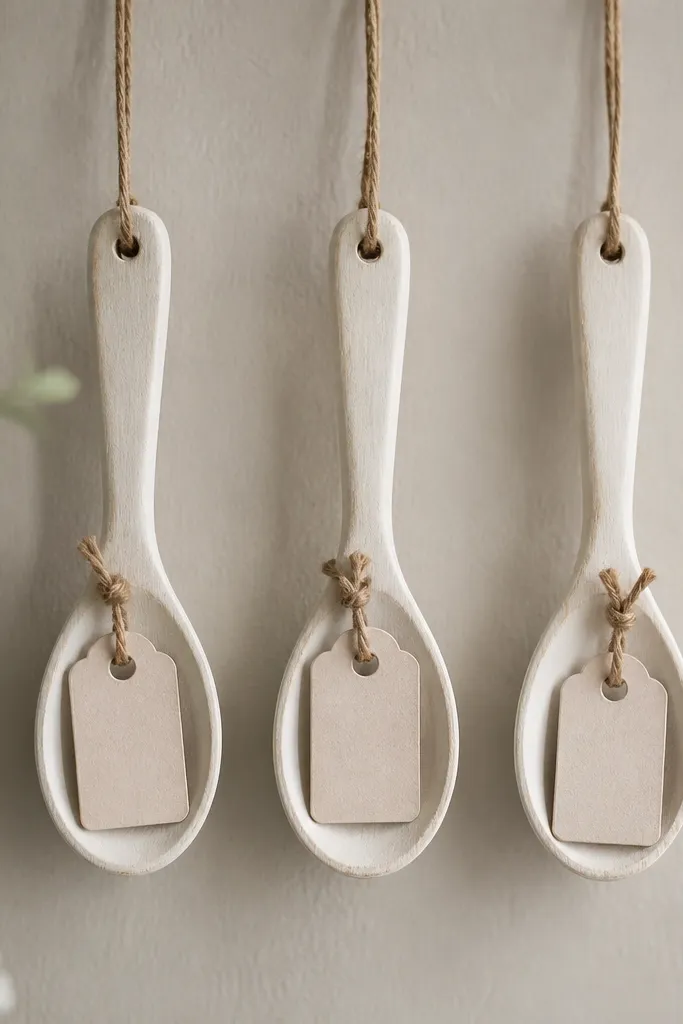
This one looks whimsical but still tidy. The spoons create small "shelves" so tags don't flop. Off-white paint keeps it soft, and the twine knots give you a handmade feel without clutter. It's perfect for a focused set of 6-10 prayers you swap weekly.
Mount a scrap wood crossbar or small board behind the spoons. Drill tiny holes at the top for twine, or use small hooks. Paint spoons with matte chalk paint, let dry, then tie mini tags (2x2 inch cardstock) to each spoon with thin twine. Add a small label strip at the top for the category.
Pro tipWrite tags on both sides so you can flip them when you complete a request.
AvoidAvoid too many spoons - it turns into a decoration instead of a prayer tool.
9. Seashell-Free Coastal Prayer Board with Painted Canvas Strips
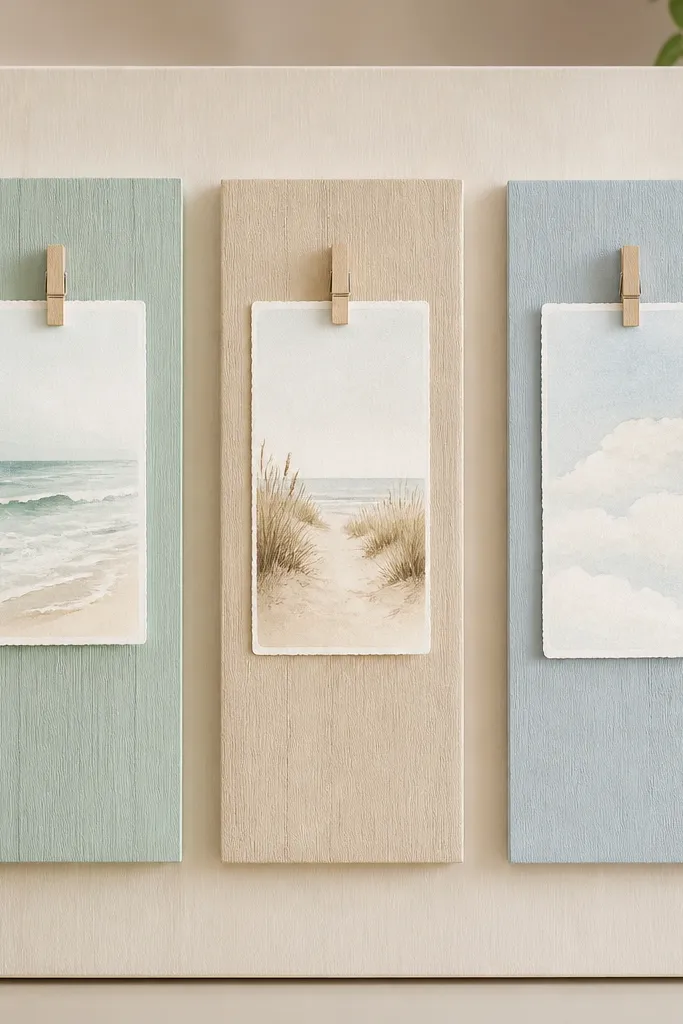
You don't need seashells to get a calm coastal look. Narrow canvas strips create color blocks that frame your prayers. Soft blues and sand tones keep the board soothing, and the clip placement keeps cards aligned. This is the kind of board people ask about because it looks like a mini art piece.
Stretch or glue canvas strips (about 2.5 inches wide) onto a cork or fabric base. Paint them with acrylic in three tones, then seal with a matte medium. Use small binder clips or mini clothespins to hold 4x6 cards on each strip. Keep card text in black or dark navy for contrast.
Pro tipAdd a thin line of white paint along strip edges for a crisp, finished border.
AvoidDon't use bright turquoise and hot pink together - it stops feeling peaceful.
10. Ice Cream Stick Frame Prayer Board with Twine Clips
Craft sticks are cheap, but the look is all in the finish. Stain or paint them the same color and seal with matte clear coat so the frame looks uniform. Twine clips make the center usable without pin holes. This build is great for kids too because cards clip on and off quickly.
Glue craft sticks into a square frame on a foam board base. String twine across with tiny brads at corners and midpoints. Use 3x4 inch cardstock prayers and clip them with mini clothespins. Seal the whole board lightly with a matte spray to keep dust down.
Pro tipMeasure your stick frame thickness so your twine grid stays centered - use one spacer stick as a guide.
AvoidAvoid leaving stick ends rough - sand the edges before gluing.
11. Gold Foil Prayer Board with Scrapbook Paper Border
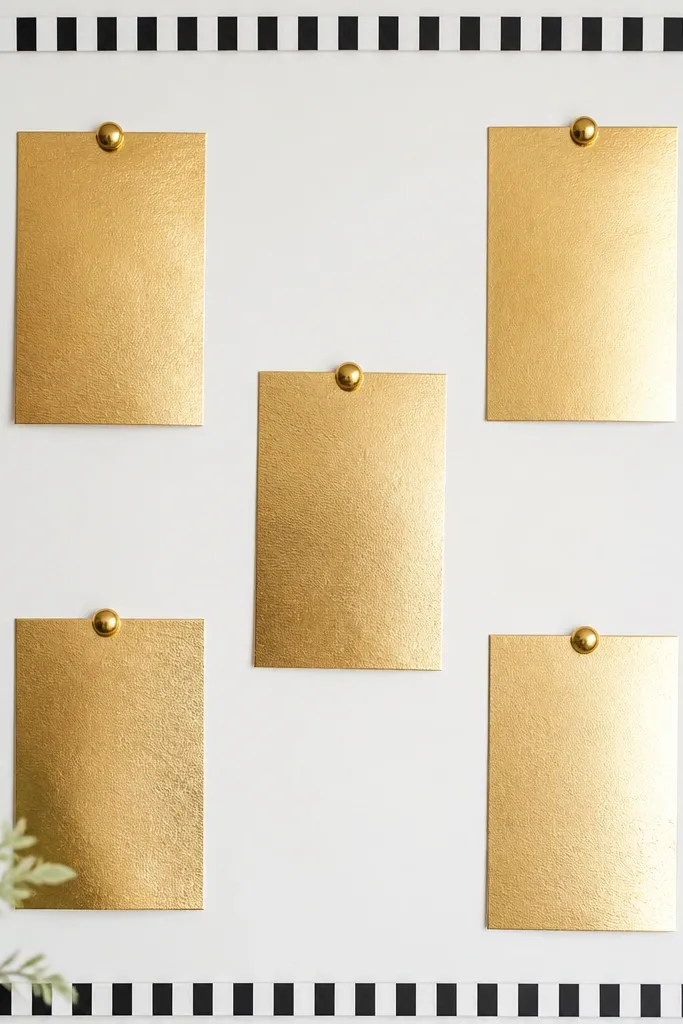
Scrapbook paper border instantly makes a cheap base look styled. Gold-foil details catch light without needing fancy materials. The key is keeping the border thin and clean, so the center still feels open. This board works great for a desk or entry table.
Use a small cork sheet on a backing board. Add a 1/2-inch border strip of patterned scrapbook paper around the edges. Pin gold foil card stock pieces (cut 4x6) with gold push pins. Keep handwriting on the cards in black to match the border.
Pro tipUse a corner punch on the cards so the edges look intentional and consistent.
AvoidDon't mix more than two patterns - it reads busy.
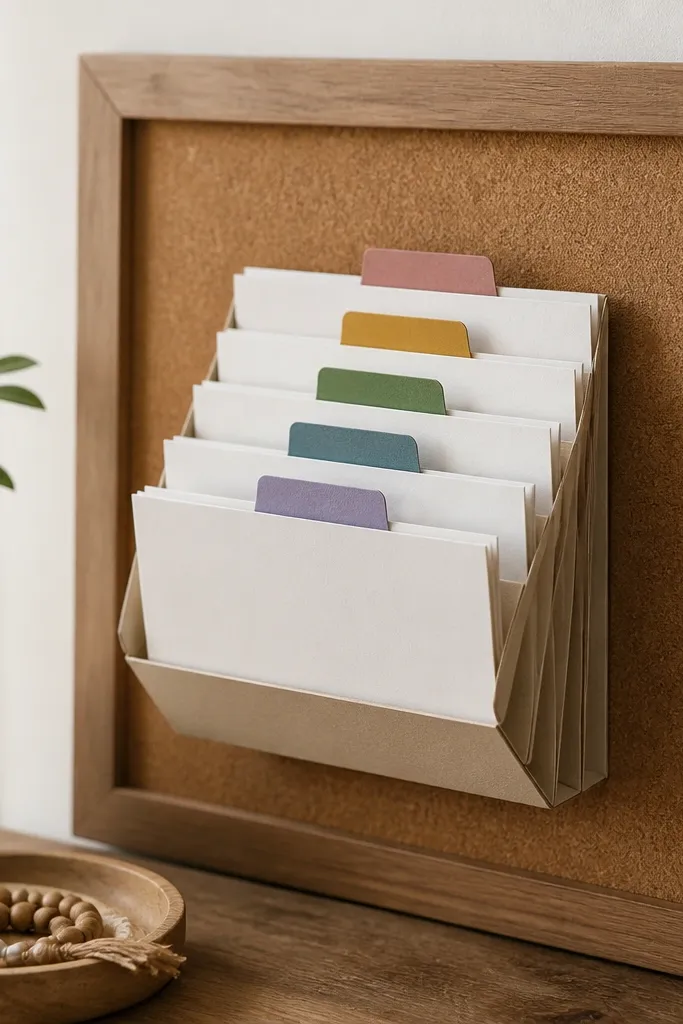
12. Accordion File Prayer Board on a Felt Panel
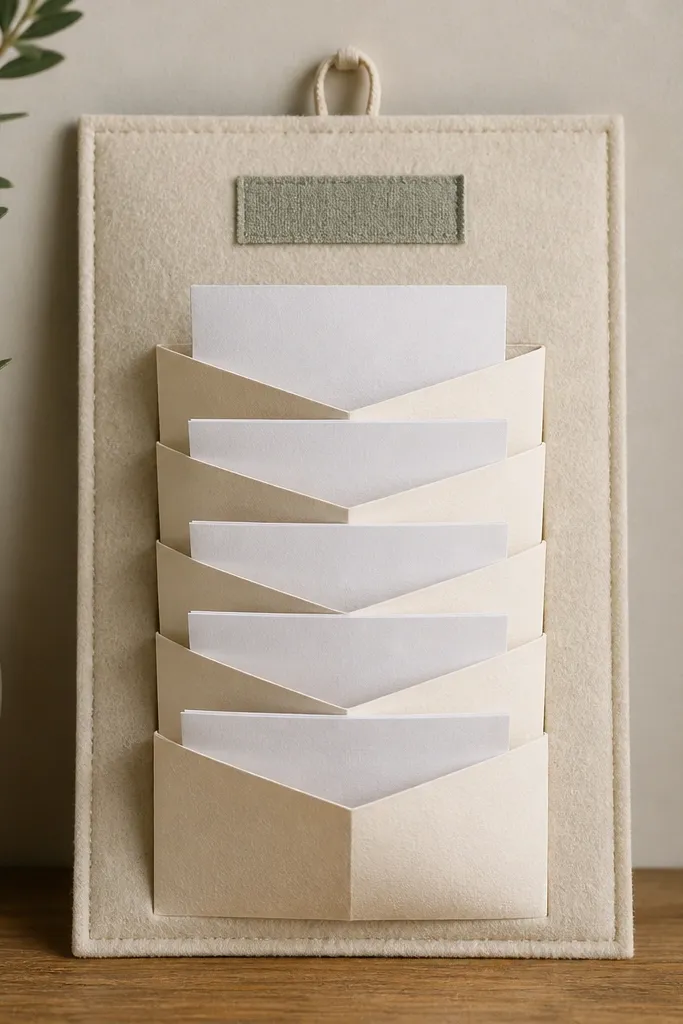
If you want prayers to stay private and tidy, an accordion pocket system is the move. Felt hides the edges and grips the insert pieces so they don't slide out. It looks soft and calming, like a little organizer. You can pull out one slip at a time without disturbing the rest.
Stretch felt over foam board and glue it on the back. Build an accordion pocket from cardstock strips folded and glued into a fan, then attach it to the felt with hot glue at the top spine only. Make slip inserts from small folded paper (about 2x4 inches) and write in pencil or gel pen. Add a fabric label using iron-on transfer or sewn-on text.
Pro tipUse index tabs on the accordion folds so you can find the right person fast.
AvoidSkip bulky pockets - thick inserts make the panel look lumpy.
13. Roll-Up Ribbon Prayer Board with Button Sections
This board is for people who don't want pins at all. Ribbon loops keep paper protected and make swaps quick. Fabric buttons add a handmade anchor point that looks cute and hides attachment points. It also works well when you store the board on a shelf because it's mostly flat and light.
Attach ribbon strips horizontally across a cork or felt base using double-sided tape and a few stitches if you sew. Sew or glue small fabric buttons at the ends to anchor the loops. Fold prayer cards to fit under the ribbon and slide them into the loop pockets. Keep cards the same size so everything lines up.
Pro tipUse grosgrain ribbon for a crisp shape that doesn't curl.
AvoidAvoid thin satin ribbon - it frays and looks messy quickly.
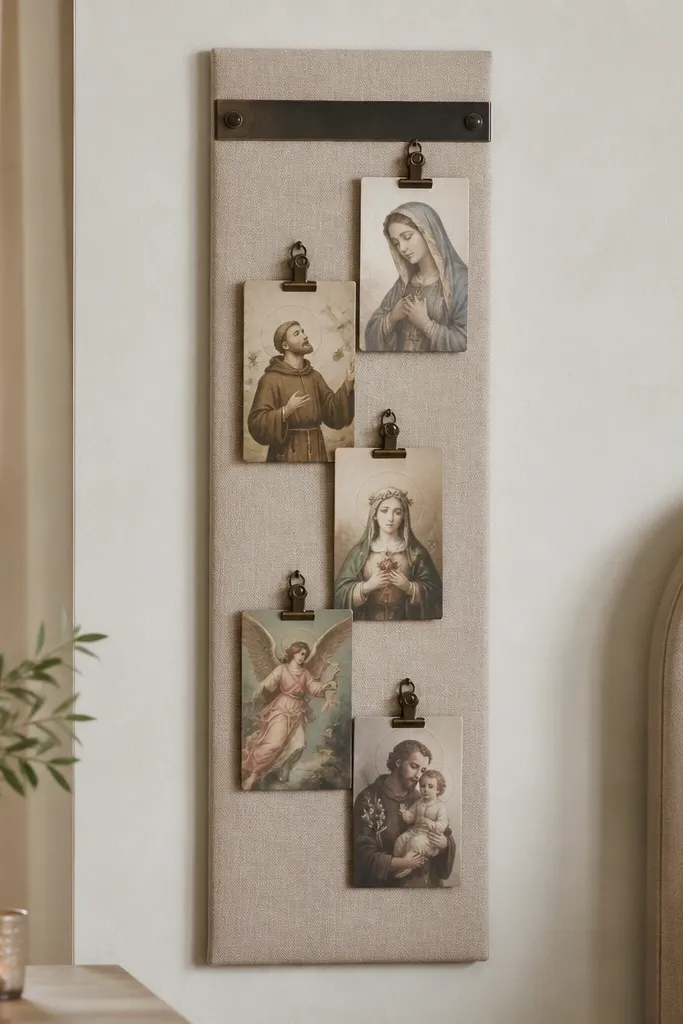
14. Laminated Prayer Cards on a Pegboard Rail

Laminated cards survive spills and get handled a lot, especially in kitchens. A rail keeps everything at eye level, and clip placement keeps cards from swinging. Using a "Today" label keeps the board focused instead of endless. The look is practical and clean.
Create a rail using a thin wood strip (about 1 inch tall) attached to the top of a cork base. Add small pegboard clips or mini binder clips along the rail. Laminate your printed prayer cards or use clear contact paper panels. Insert cards behind clips so the bottom edges stay aligned.
Pro tipPunch a small hole in each laminated card corner and use a single brad so the card never twists.
AvoidDon't laminate over messy handwriting - it shows smudges through the plastic.
15. Paper Rolodex Prayer Board in a Cheap Frame
Rolodex-style slots make the board feel organized and calm. You can see what's coming up without hunting through piles. Colored tabs help you sort prayers by person or theme without needing extra labels. It also looks neat because each card sits at the same depth.
Mount cork inside a frame. Build a rolodex holder from folded cardstock or foam core, then glue it onto the cork so the slots stay upright. Cut 3x5 cards and add small tabs (like 1/2 inch wide) at the top. Use a single accent color for tabs so the board doesn't become rainbow chaos.
Pro tipUse a bone folder to sharpen the slot folds - it keeps cards sliding smoothly.
AvoidSkip loose slot walls - sloppy folds make cards scrape and bend.
16. Washed-Out Denim Prayer Board with Leather-Trim Corners
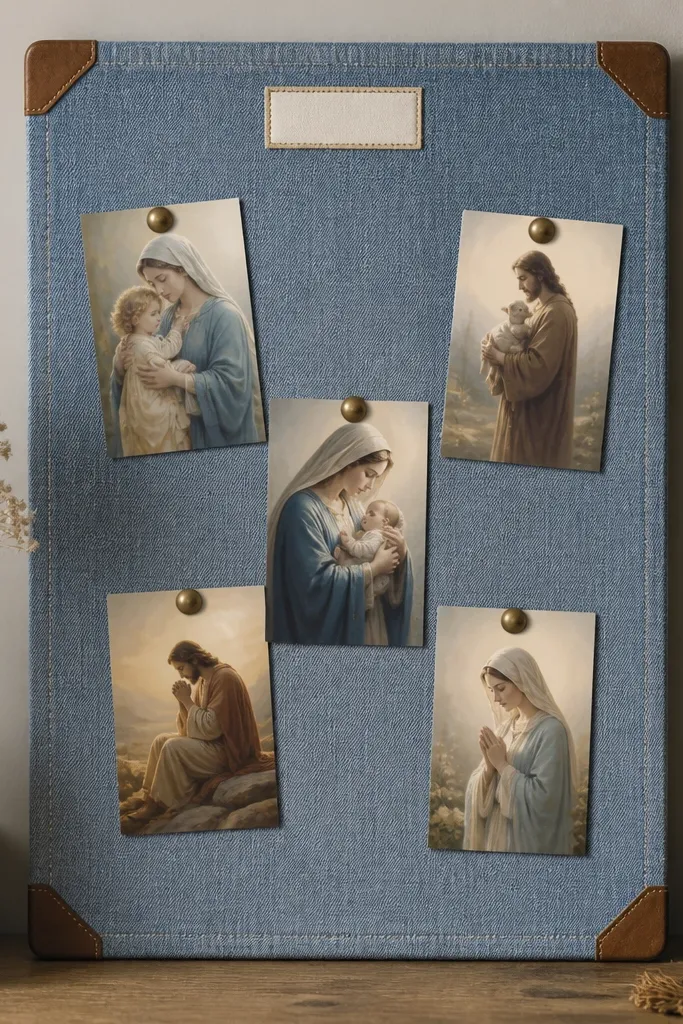
Denim has a natural texture that hides minor base imperfections. Leather-trim corners make it look more "finished" than plain cloth without spending much. Antique bronze pins match denim's warm tone and don't glare like bright gold. This board feels sturdy and lived-in.
Stretch denim over foam board, glue on the back, and trim extra fabric. Add faux-leather corner squares (about 2x2 inches) with hot glue to cover raw edges. Pin cards using 4x6 cardstock in off-white. Stitch a simple label using embroidery floss or use fabric glue for a straight line label.
Pro tipWash the denim first so it drapes flat and doesn't shrink later.
AvoidDon't use thin denim that stretches - it sags and wrinkles.
17. Painted Pegboard Prayer Board with Numbered Sections
Numbered sections turn prayer into a simple routine. Mint paint makes the pegboard feel fresh, and white circles keep the layout clean. Matching card colors to each section makes scanning faster when you're tired. This is a great solution for families where multiple people add requests.
Paint pegboard mint and let cure fully. Add small white circle stickers or painted circles with acrylic for numbers. Place push pins in the corners of each card so cards align within their section. Use four consistent card colors like cream, blush, sage, and navy.
Pro tipWrite section prompts directly on small label cards so the numbers mean something.
AvoidDon't scatter pins randomly - keep each card pinned in the same two spots.
18. Magnetic Curtain Strip Prayer Board
This one is surprisingly practical if your space is narrow. The vertical layout makes it easy to add new notes without blocking older ones. Magnetic clips let you swap one card at a time without bending paper. Fabric background softens the look and keeps it from feeling like a classroom board.
Mount a fabric panel (cotton or linen) to a backing board. Add a magnetic strip along the top edge and attach small metal clips to hold cards. Use 4x6 cards and punch a tiny hole at the top center so the clip grips cleanly. Keep clip spacing even, about 2 inches apart.
Pro tipUse a ruler and painter's tape to mark clip positions before pressing magnets on.
AvoidAvoid heavy cardstock without a hole - it won't hang straight.


