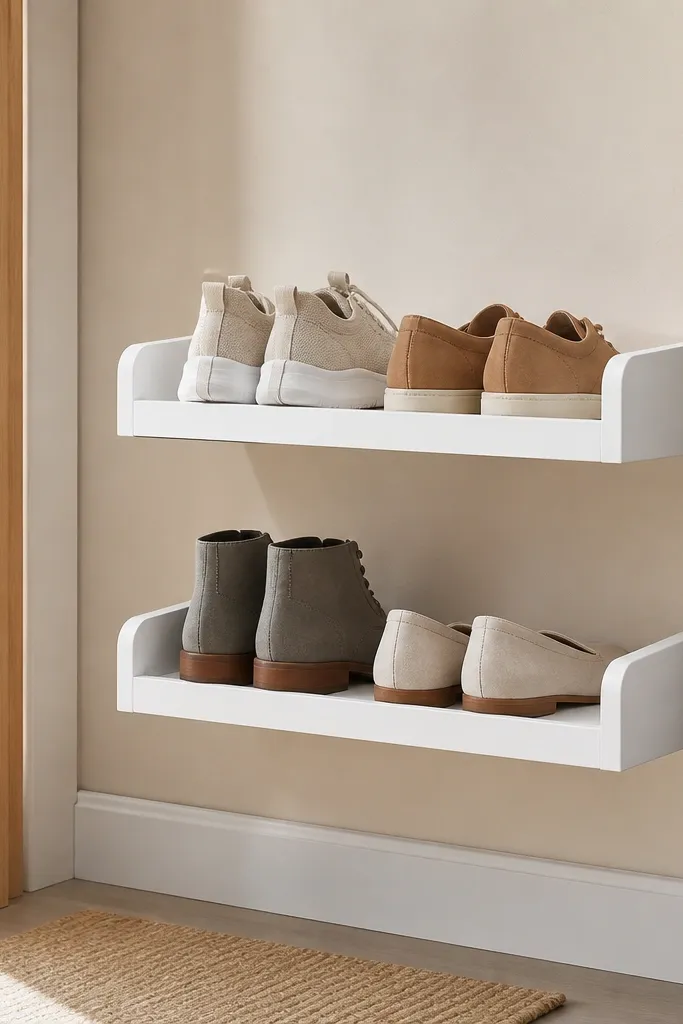
1. Slim wall rail with 3 floating shelves for sneakers
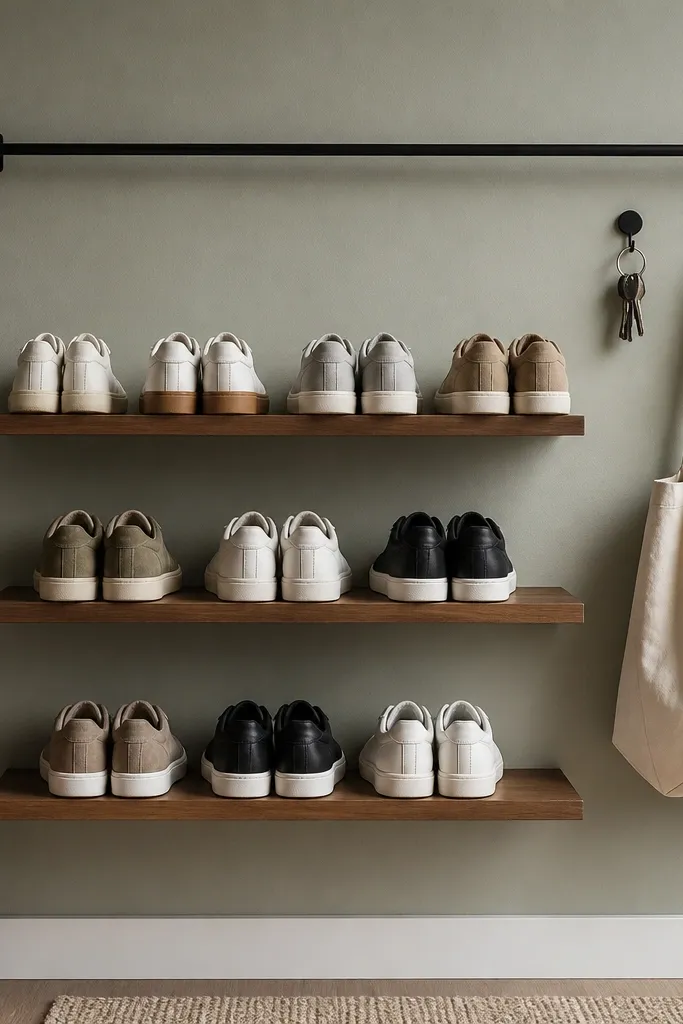
I built this for a friend's apartment entryway that was only 28 inches wide. The floating shelves keep shoes off the floor, and the rail gives you a place for daily grab items so shoes don't end up beside the rack. I used white oak-look plywood stained on top and sealed with satin poly, so it wipes clean after muddy boots. The open front keeps airflow going, so damp shoes don't trap odors.
Use 3 shelves made from 3/4-inch plywood, cut to about 8 inches deep and 24 inches long. Mount the first shelf 10 inches above the floor, then space each shelf 9 to 10 inches apart for sneakers. Add a metal rail (about 24 inches long) above the top shelf with two screws into studs or heavy anchors.
Pro tipLine the shelf lip with a 1-inch strip of cork or thin felt so the shoe soles stop squeaking and scuffing the wood.
AvoidSkip thick, deep shelves - anything over 10 inches sticks out and looks like storage clutter.
2. Over-the-door shoe organizer turned into a tidy rack wall
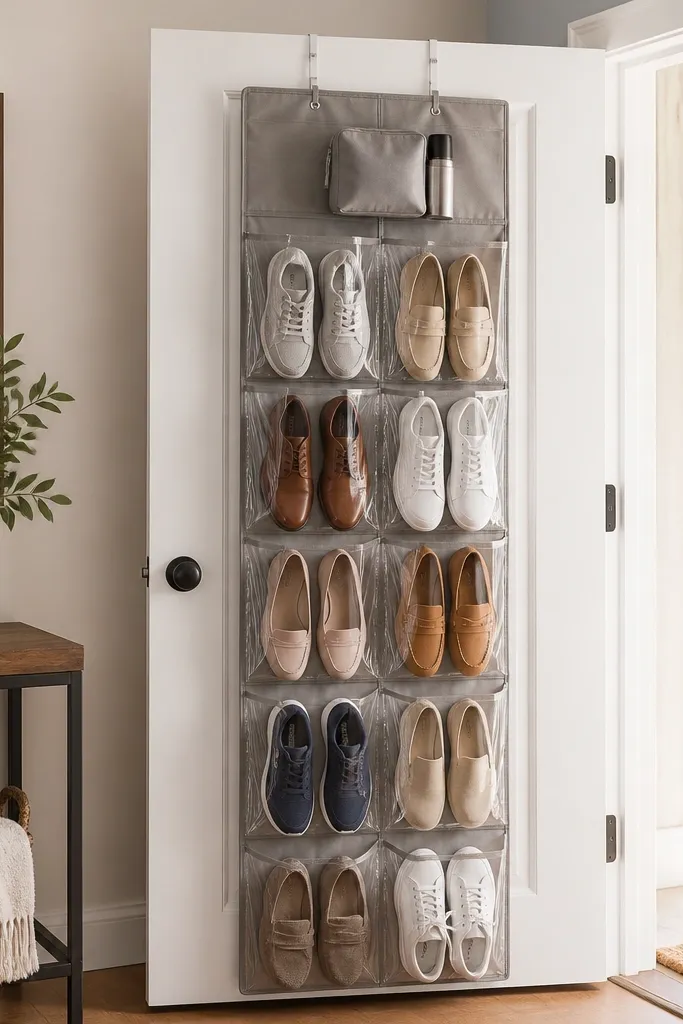
This is the fastest fix when you need budget affordable entryway shoe rack ideas in one evening. The pockets keep pairs separated, and the clear sections let you spot sizes without dumping everything out. I like using it on the back of the entry door because it doesn't fight for floor space. It also looks cleaner when you hang it centered and keep the bottom row just above the floor.
Choose an organizer with at least 12 pockets and reinforced seams. Hang it so the bottom pocket edge sits 1 to 2 inches above the floor - measure from the door's bottom edge. Add a small command hook on the door trim for a shoehorn and a spray pouch so the whole entry stays functional.
Pro tipUse a fabric label maker or painter's tape tags on the top row pockets so each person knows where their shoes go.
AvoidDon't stuff tall boots in narrow pockets - they collapse the organizer and make it look messy.
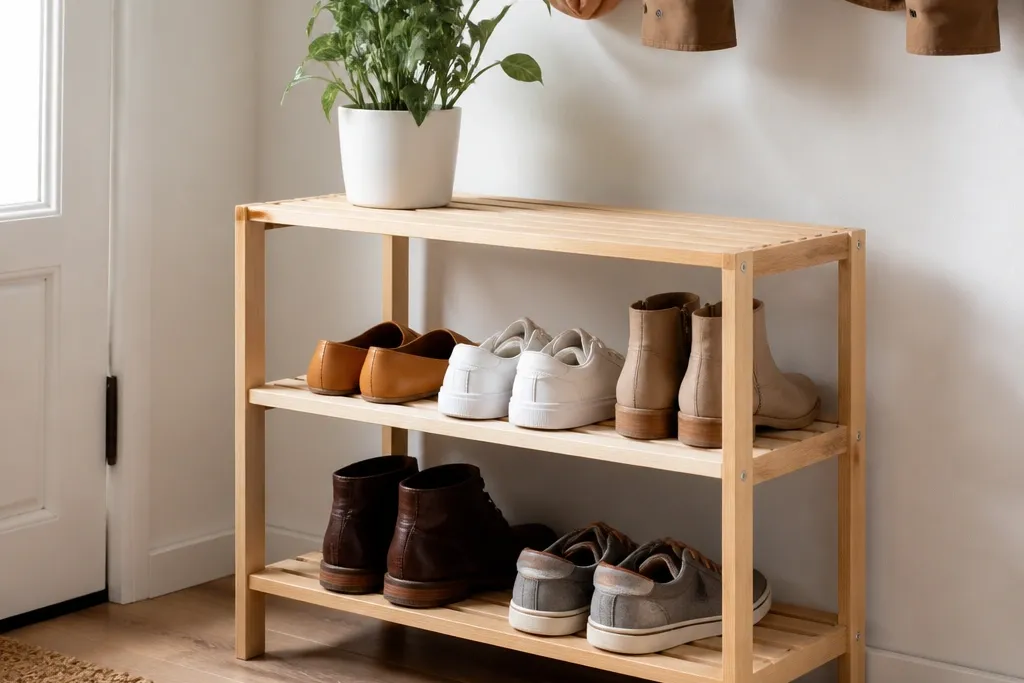
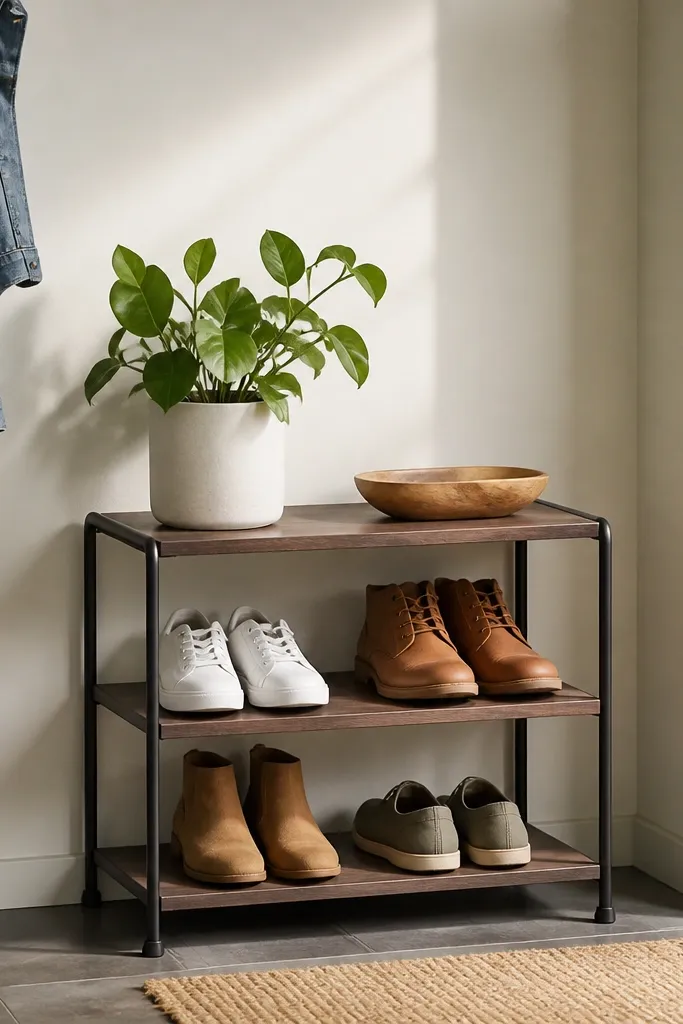
3. 2x4 frame with wire baskets for airflow and wipe-down
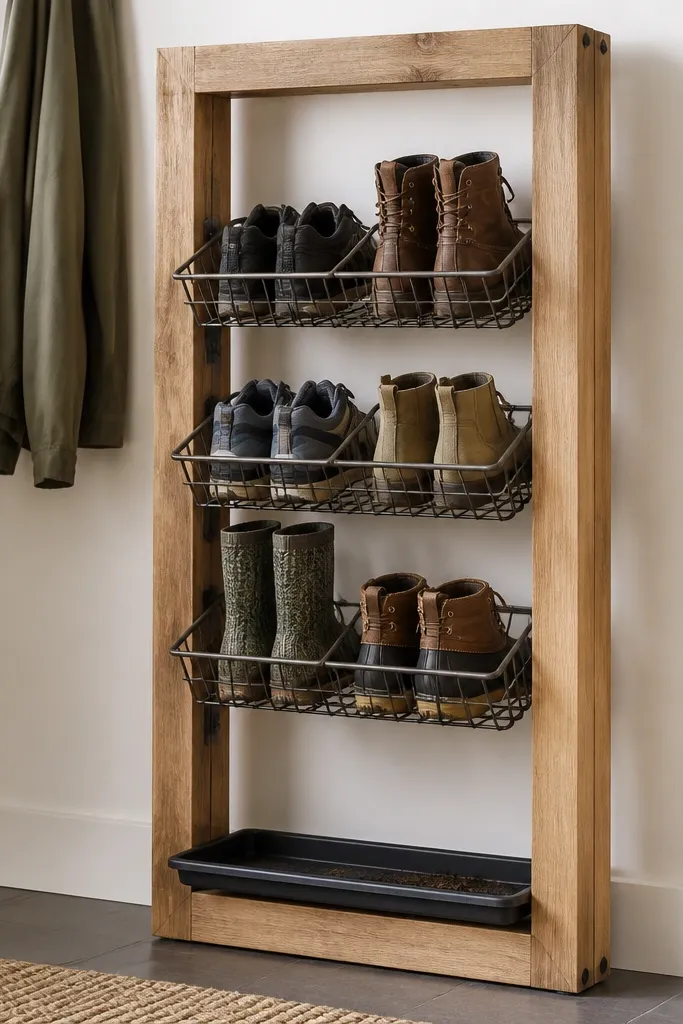
Wire baskets are my go-to when shoes are damp. They let air move through and you can see what's inside without opening doors. The wood frame keeps it from looking like a metal shopping cart, and the bottom tray catches drips. This one looks intentional because the frame matches the rest of the entry wood tones.
Build a simple frame using 2x4s cut to about 36 inches tall, 28 inches wide, and 10 inches deep. Secure corners with 3-inch wood screws and add a back cross brace for stiffness. Use wire baskets that are roughly 10 inches deep to match the frame, then add a plywood bottom tray sealed with polyurethane.
Pro tipSpray the wire with a matte clear coat if it's scuffed or shiny - it blends better with wood.
AvoidSkip baskets with big gaps where heel straps fall through - you'll end up digging for strays.
4. Boot tray + pegboard shelf system for tall pairs
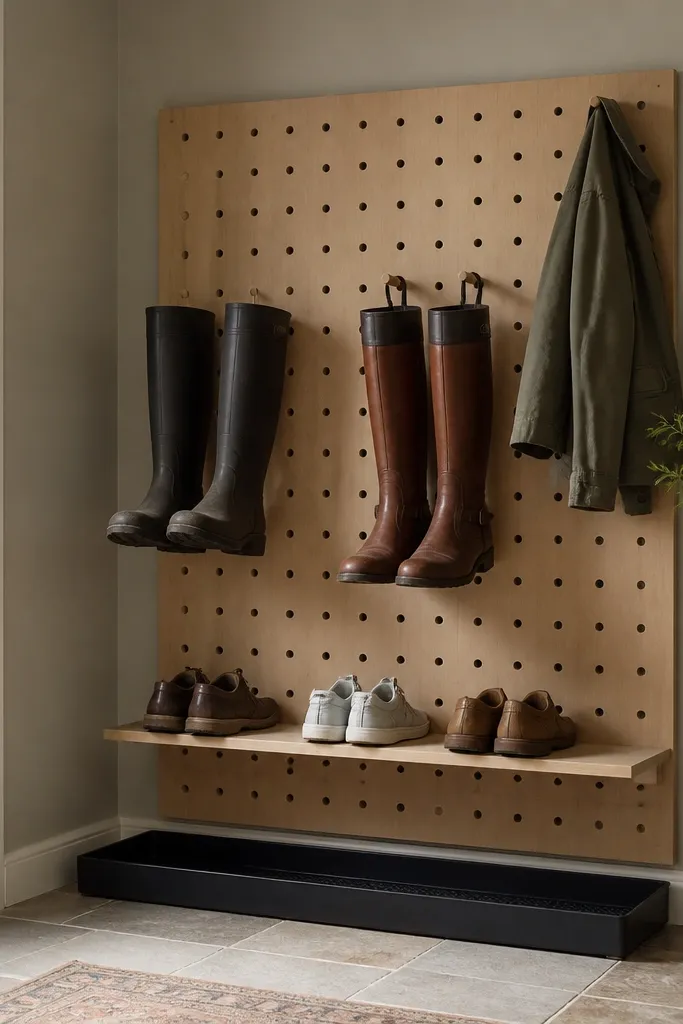
If you have boots that never fit regular cubbies, pegboard solves the problem. You can hang shafts so they dry standing up, and the tray catches water and dirt. The shelf above gives you a place for flats and slippers. It stays neat because each boot has a hook location.
Mount a 1/4-inch pegboard sheet on the wall, then install a shallow metal or sealed wood tray under it. Space hooks so boot shafts hang without touching the tray edge. Add a single shelf made from 1/2-inch plywood with a clear coat, around 8 inches deep, above the hanging area.
Pro tipPaint the pegboard the same color as your wall, then use black hooks for contrast so it still looks designed.
AvoidDon't hang boots too low - wet soles will hit the tray and smear.
5. Plywood cubby unit with 12-inch boot row
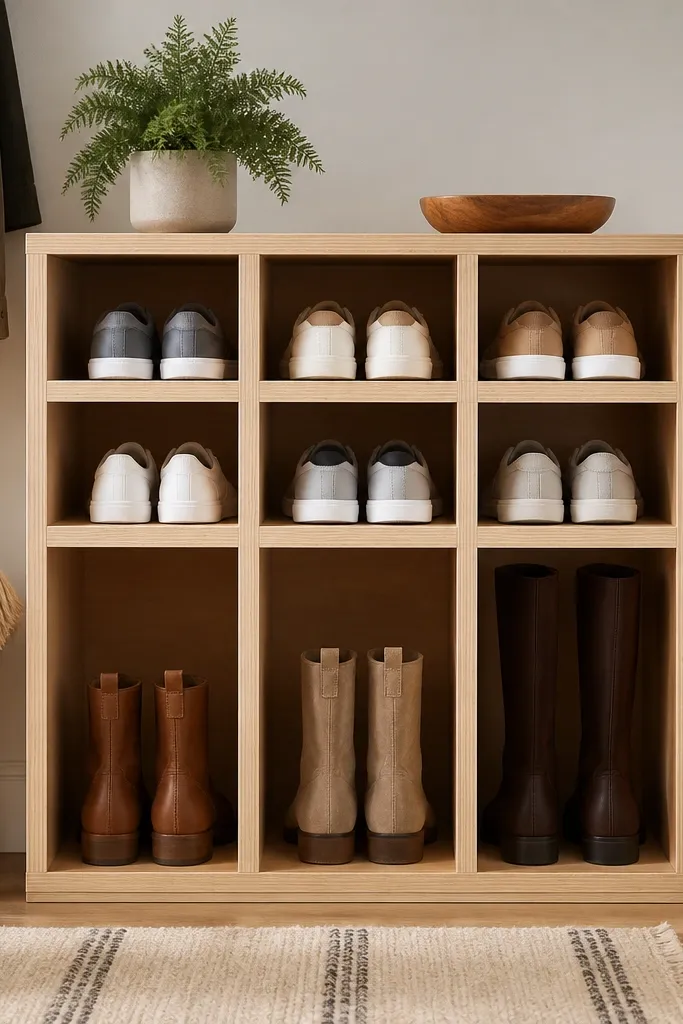
Open cubbies make entryways feel organized because shoes have assigned squares. I built one with a dedicated 12-inch-tall row for boots, and everything else sits above it without squishing. The face frame makes it look like furniture, not a DIY box. With open fronts, you still get airflow, which matters in rainy months.
Use 3/4-inch plywood for the sides and 1/2-inch for internal dividers. Make the boot row at least 12 inches tall, then set sneaker rows at 9 inches. Leave the front fully open and add a 1-inch toe-kick base so it doesn't scrape the floor.
Pro tipAdd a removable backing strip or small standoff so you can slide a thin odor absorber tray behind the unit.
AvoidSkip tight cubby heights under 9 inches for sneakers - they'll force you to shove, and the look gets sloppy.
6. IKEA-style kallax hack with bins labeled by person
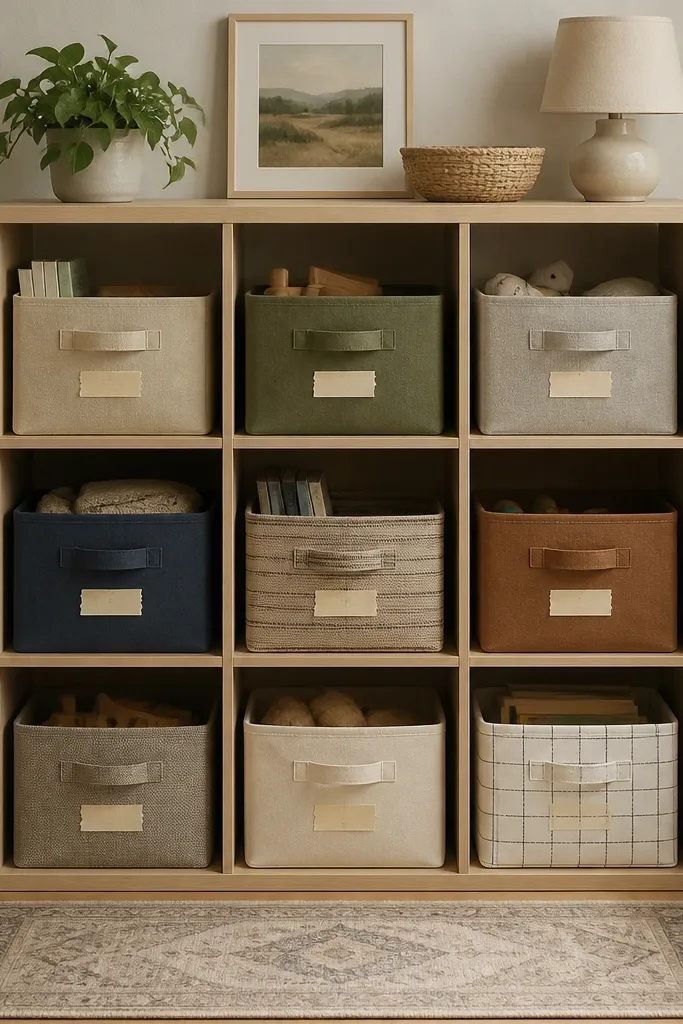
This is one of the most budget-friendly ways to get a clean, uniform shoe station. Bins hide the mess of loose laces and random pairs, and the identical cubes make it look tidy even when you have different shoe types. I like adding labels because it stops the "whose shoes are those?" problem. The open shelf still lets shoes breathe better than closed cabinets.
Use a cube unit with 13-inch-ish square openings so standard baskets fit. Choose slim fabric bins that are about 12 inches wide and 8 to 10 inches deep. Place the unit against the wall and keep the bottom row at least 2 inches above the floor with feet or shims if needed.
Pro tipUse a two-color label system: blue for adults, green for kids, so guests don't mix up pairs.
AvoidDon't use tall, floppy bins that sag - they make the whole unit look uneven.
7. Corner ladder shelf with angled shoe slots
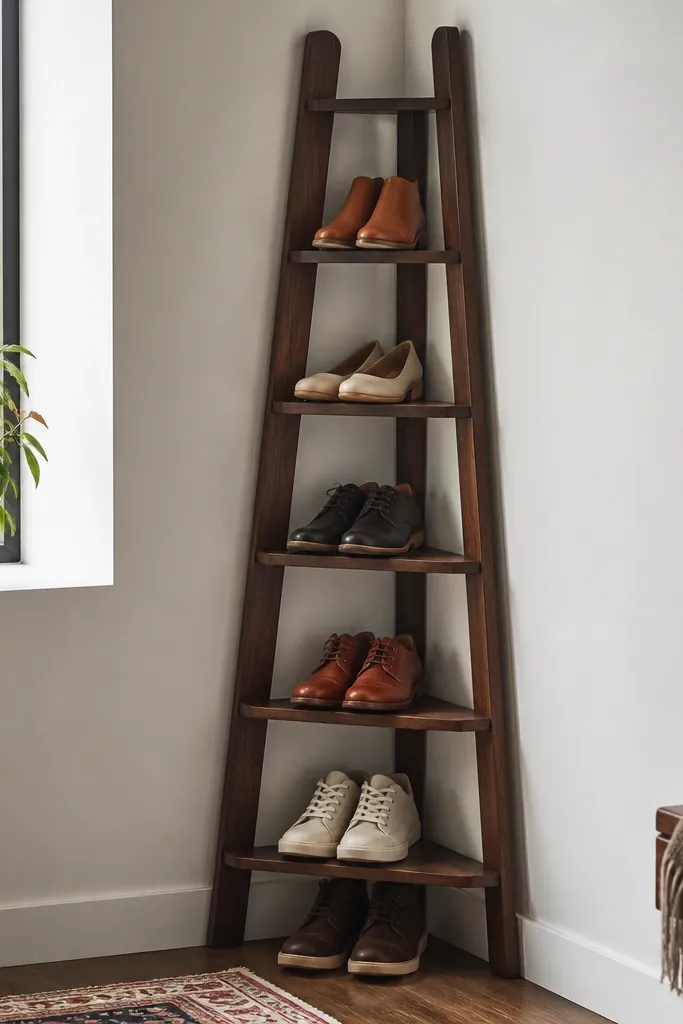
Corners are where shoe clutter goes to hide, and ladder shelves use that wasted space well. Angling the steps helps sneakers slide into place instead of stacking flat. I built mine with narrow treads so it doesn't visually swallow the entry. The dark stain makes it look like a real piece of furniture.
Build or buy a ladder-style shelf with 3 to 5 treads. Keep tread depth around 7 inches and set each tread with a slight downward angle toward the front. Mount it using corner studs or sturdy anchors, and keep the unit height so the top row is reachable without a step stool.
Pro tipPut a thin rubber shelf liner under the treads so the shoe soles don't creep.
AvoidAvoid super wide treads - in a corner they look bulky and block the walkway.
8. Galvanized pipe frame with reclaimed wood planks
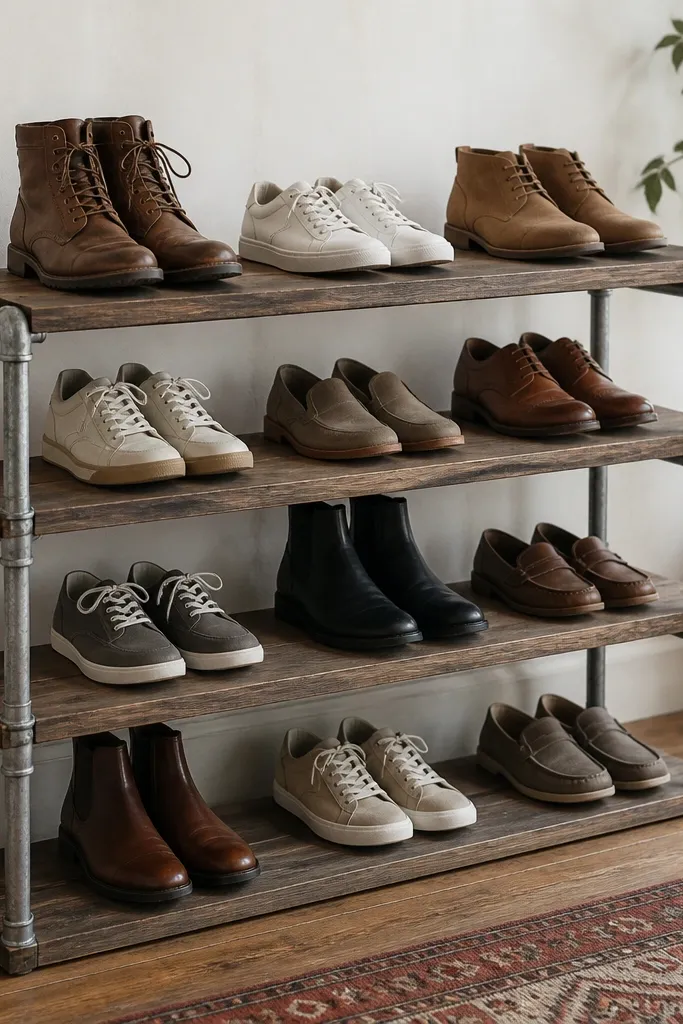
This one looks industrial without being cold. The pipe frame adds straight lines, and the reclaimed planks give warm color that hides scuffs. I used open spacing between planks so each pair gets airflow. It's also easy to wipe down because the wood is sealed.
Cut planks to about 9 inches deep and 30 inches long (or adjust to your entry). Build a rectangular pipe frame with 1/2-inch pipe and flanges at the base for stability. Seal the planks with a clear coat, then mount them at 9 to 10 inch spacing for sneakers.
Pro tipAdd a 1-inch gap between planks so heels don't rub the next pair.
AvoidSkip unsealed reclaimed wood - shoe grime will stain it fast.
9. Bench with flip-top shoe cubbies and hidden storage
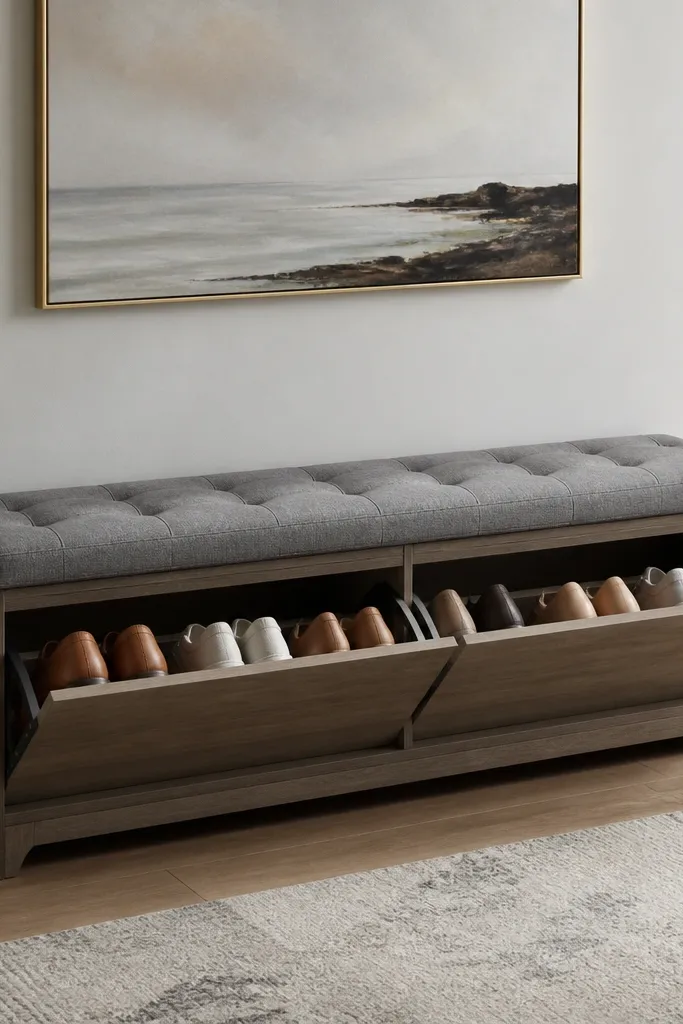
If your entryway is also a sit-and-tie spot, a bench with flip-top cubbies is the best kind of disguised storage. Closed tops keep the look clean when you have company. The key is using vents inside so shoes dry. I like bench storage because it handles both shoes and the stuff people leave near the door.
Build a bench frame from 2x4s, then add a plywood base under the flip doors. Create compartments sized for sneakers at 9 inches tall and boots at 12 inches tall if you need it. Add small drilled holes or a slatted interior backing for airflow, then upholster the top with a removable cover.
Pro tipUse soft-close hinges if you can - slam doors wear out fast in a busy entry.
AvoidDon't fully seal the interior with solid panels - you'll trap moisture.
10. Wall-mounted shoe rack using slats and dowels
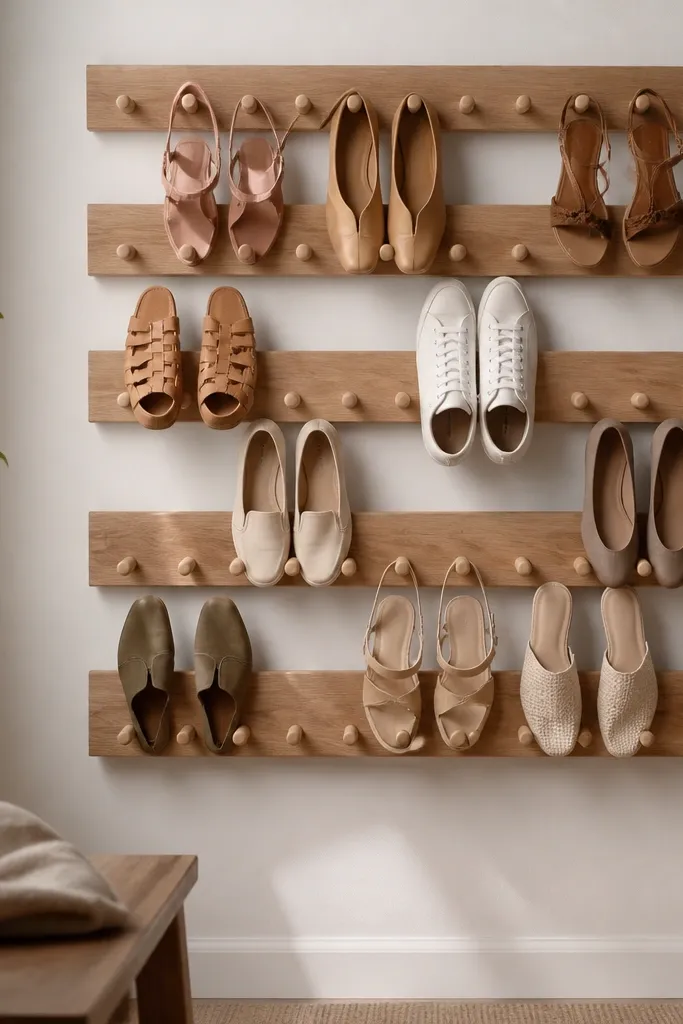
This is a great option for sandals, slip-ons, and lightweight sneakers. The slats give you strong visual lines, and the dowels keep shoes from sliding off the wall. I've used this in a hallway where a bulky rack would block the doorway. It looks lighter than a full cubby unit.
Use 1x2 slats mounted to a ledger strip, spaced about 10 inches apart. Add dowels beneath each slat, about 1 inch diameter, sticking out 2 to 3 inches to catch the heel. Finish with stain and satin poly so it wipes clean.
Pro tipAdd a thin rubber strip behind the dowels so shoes don't rattle.
AvoidSkip smooth dowels without finish - shoes slip and the rack looks chaotic.
11. Rolling cart shoe rack with two tiers and a top tray
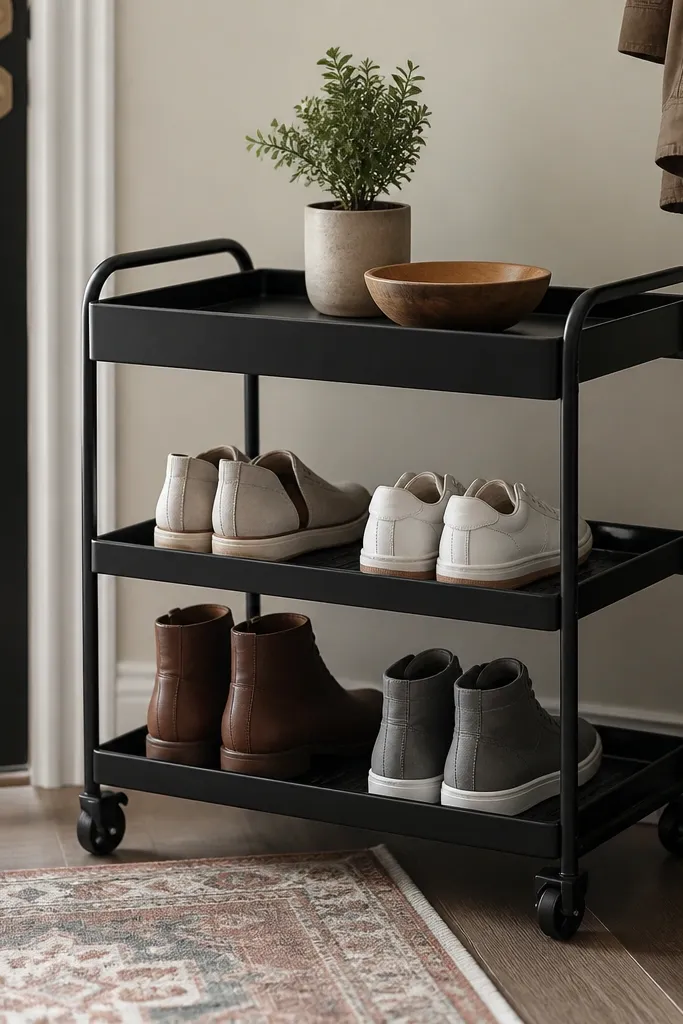
A rolling cart is the best "I'm renting" solution. It's budget affordable, it moves when you clean, and it keeps shoes contained in one spot. Two tiers gives you enough space for daily pairs without looking piled. The top tray is where I put a mail organizer and a small hand sanitizer basket.
Pick a cart with at least 2 tiers and wheels that lock. Choose a size around 24 inches tall and 14 inches wide so it doesn't block the walkway. Put the cart on a rubber mat so it doesn't slide on tile.
Pro tipUse fabric shoe bags or small bins on the bottom tier for heels and dress shoes so they don't scuff each other.
AvoidSkip tiny carts with no top tray - you end up recreating the pile on the floor.
12. Corner over-stair niche rack using tension rods
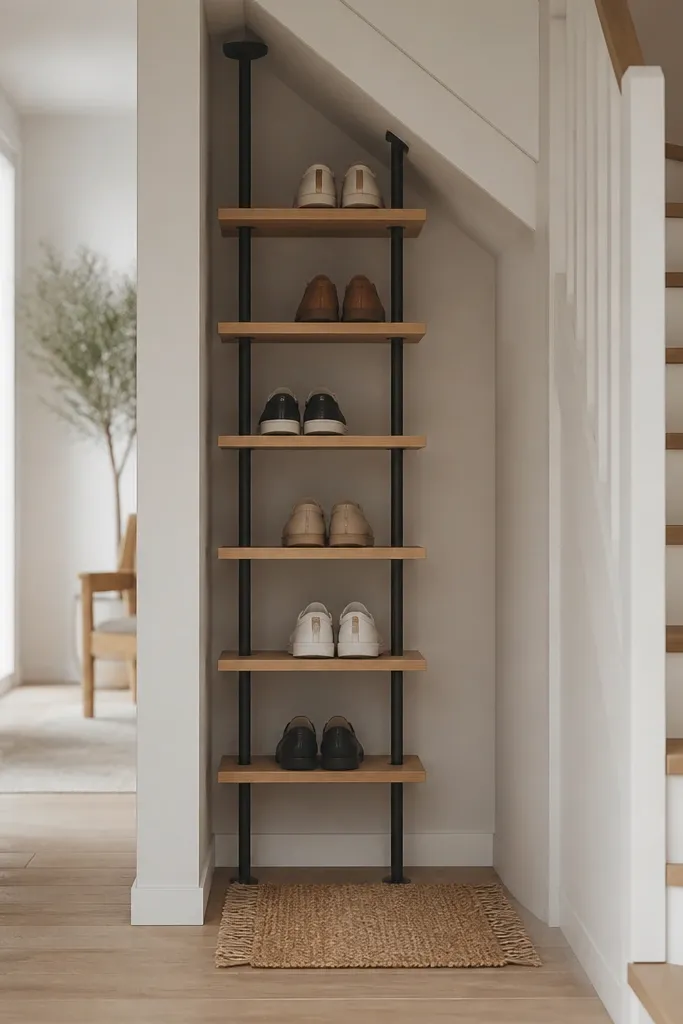
Under-stair spaces are awkward, so tension rods help you create structure without drilling into every surface. I used this setup in a home where the walls were weird angles and studs were hard to hit. The rods hold shoes upright, and the small boards catch the soles. It stays clean because the rack is contained inside the niche.
Install two tension rods across the niche width, then add 8-inch deep shelf boards at two heights. Use 9-inch spacing for sneakers and 12 inches if you have taller shoes. Seal the boards with poly, and add a removable tray at the bottom for dirt.
Pro tipMeasure rod tension carefully so it doesn't bow and drop shoes.
AvoidAvoid tension rods without rubber ends - they slip and scratch the niche.
13. Clear acrylic shoe risers on a slim base shelf
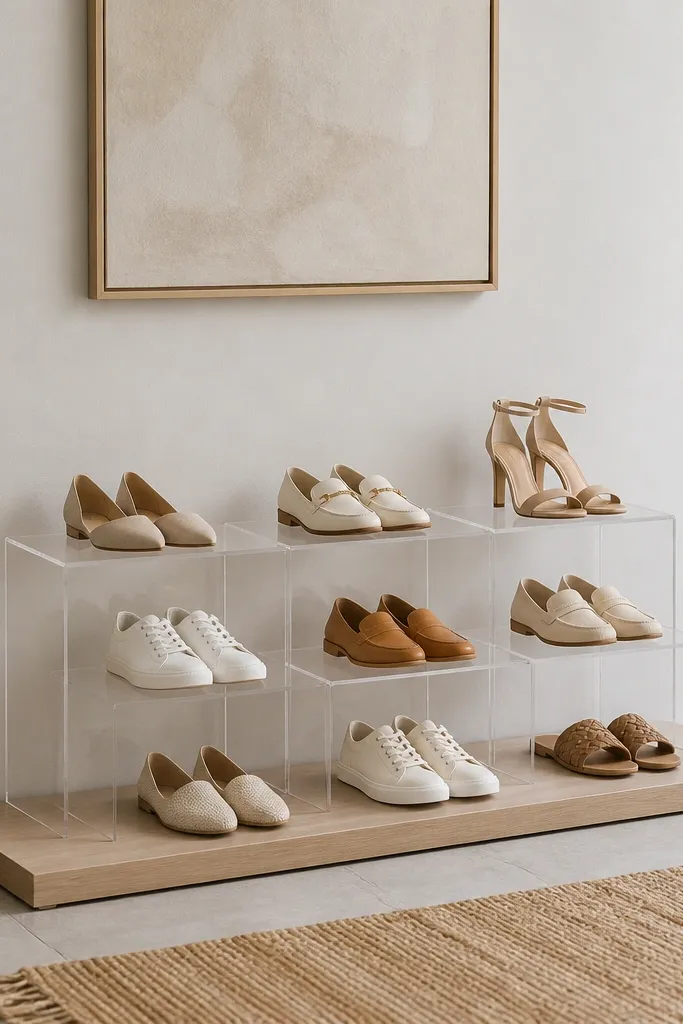
If you want the most "clean and airy" look, risers do it. Clear acrylic makes the entry feel less crowded because you see through it. I used this in a small foyer where the floor already had a runner rug, and the transparent supports kept everything from looking heavy. It also keeps pairs separated so you can grab one without shifting the rest.
Mount a base shelf about 10 inches deep. Place acrylic risers so each holds a single shoe, then stagger left and right pairs to reduce overlap. Keep the shelf finish matte so scuffs don't glare under sunlight.
Pro tipWipe acrylic with a microfiber cloth only - paper towels scratch it.
AvoidSkip glossy bases - they reflect shoe scuffs and look dirty fast.
14. Wood slat shoe wall with removable trays
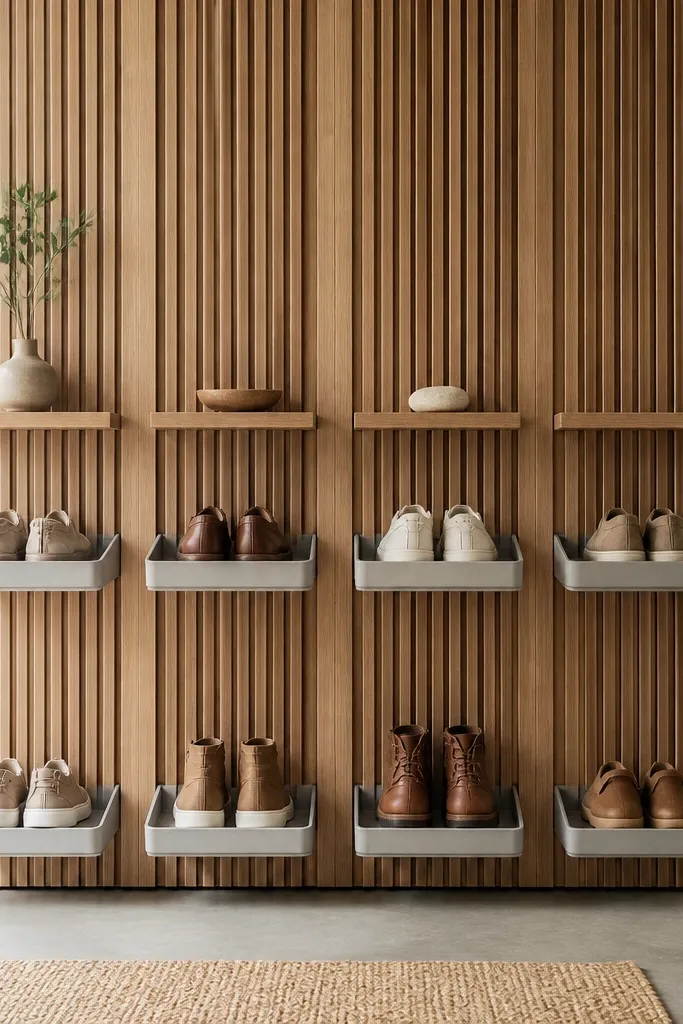
This is the "everything has a home" system. Removable trays make it easy to wash grime off without scrubbing the whole wall. The slats break up the visual weight, so the entry looks designed instead of stuffed. I like it for families because each person can have two trays and swap them when shoes are wet.
Use vertical slats spaced about 2 inches apart, mounted to a backing board. Build trays from 1/2-inch plywood with a sealed finish, sized to about 8 inches deep. Mount trays on simple cleats so they lift out - don't glue them.
Pro tipAdd a thin lip on the tray front so shoes don't slide forward when you open the door.
AvoidDon't make trays too shallow - slip-ons fall off and look chaotic.
15. Shallow drawer unit built from stacked crates
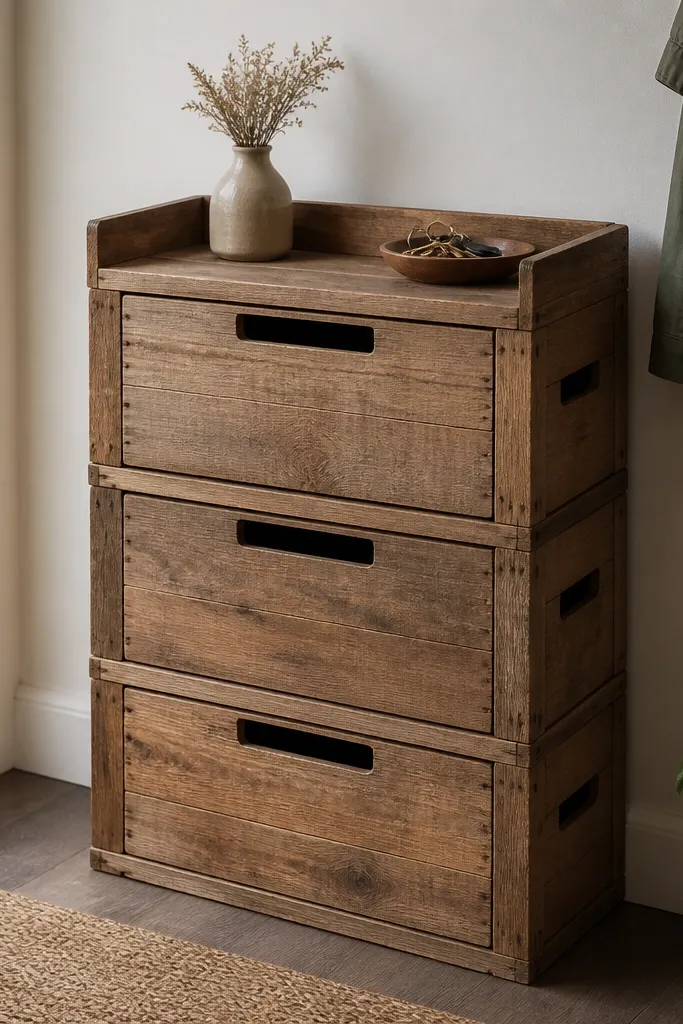
Crates give you spacing and texture, and turning them into shallow drawers keeps shoes contained. I did this for a rental where I couldn't permanently mount anything. The drawers hide the mess, but the crates are open enough for air movement. It looks warm because the wood grain matches entry floors.
Use small wooden crates with similar dimensions, stack them, and attach drawer-style fronts using 1x2 rails. Make each compartment shallow enough for sneakers only, about 9 inches tall. Add a sealed top surface for keys and a small catch tray for change.
Pro tipSand crate edges and seal with matte clear coat - raw wood catches dirt.
AvoidSkip mismatched crate sizes - the unit looks crooked and cheap.
16. Pegboard with shoe hooks and a bottom wipe mat
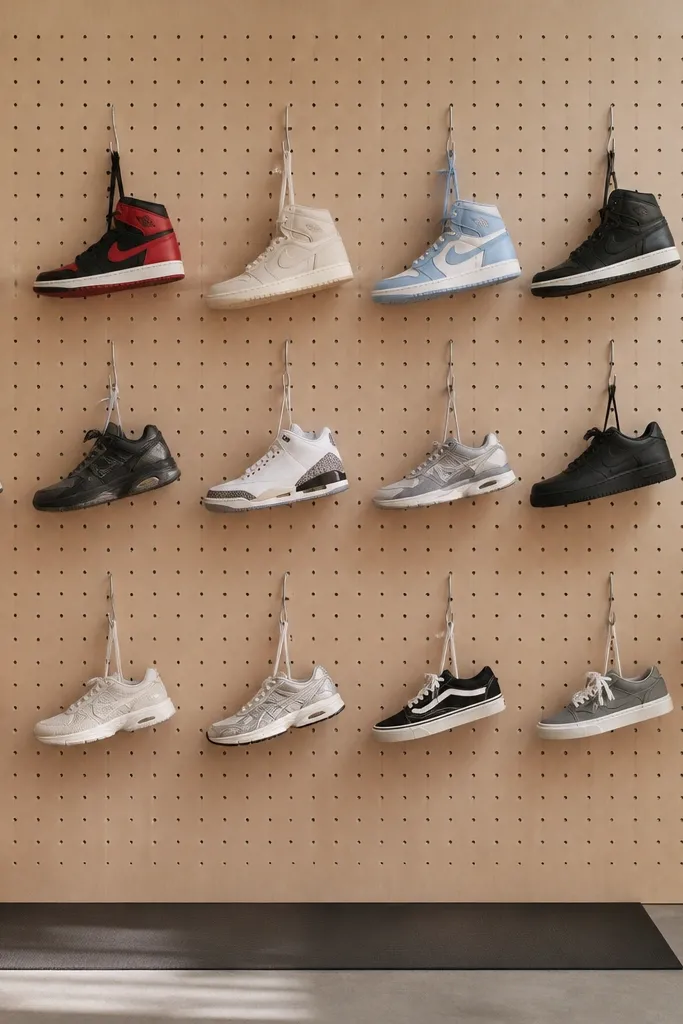
This is a shoe-rack idea that looks tidy because everything is hanging in a grid. I used it for kids' shoes and it cut down on floor piles immediately. The wipe mat is the secret - muddy soles don't smear onto the wall or floor. Hanging also dries shoes faster than stacking them in a closed cubby.
Mount pegboard with anchors, then install S-hooks spaced about 5 inches apart. Hang shoes by laces so the toe points down and the sole clears the mat. Add a bottom wipe mat using a vinyl sheet trimmed to size and held with a simple frame or double-sided tape.
Pro tipGroup hooks by size - one section for kids, one for adults, so you don't hunt.
AvoidDon't hang heavy boots on pegboard hooks - it warps and pulls out.
17. Built-in style shelf using L-brackets and shelf boards
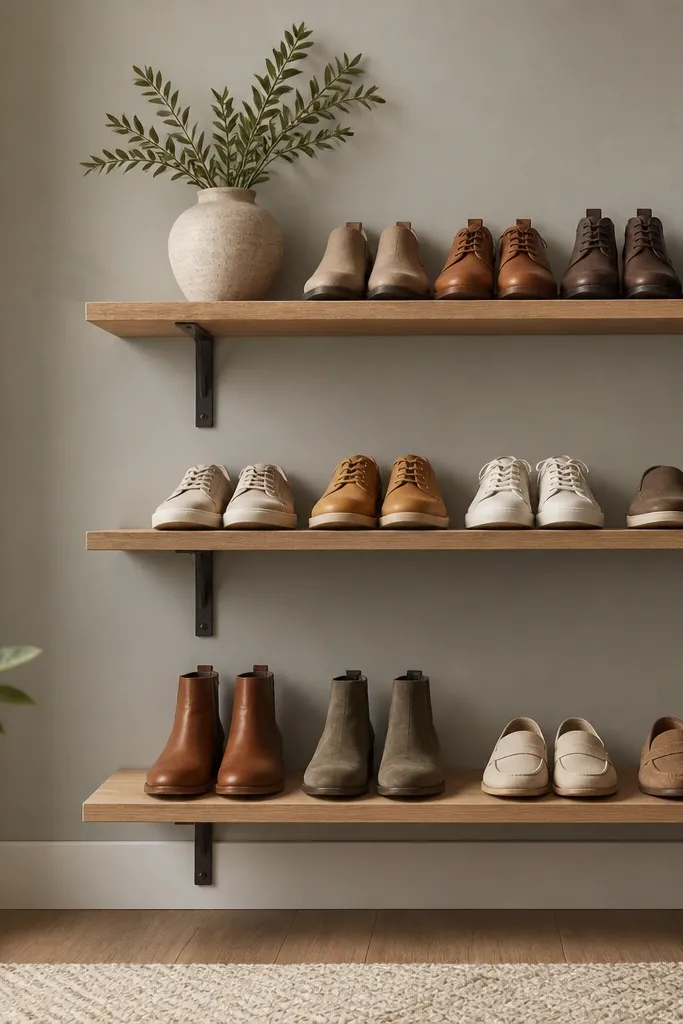
This gives you the built-in look without carpentry. L-brackets are strong, and shelf boards create clean lines that match the wall. I like this for renters because you can remove it later, and it's easy to adjust shelf height. The open shelves also help shoes dry.
Use 2x6 or 1x6 boards cut to your width, and mount them with L-brackets every 12 to 16 inches. Set the bottom shelf 6 inches above the floor if you're using sneakers, and keep 9 to 10 inches between shelves. Stain or paint the boards to match trim so it looks intentional.
Pro tipAdd a thin rubber strip under each shelf board for friction so shoes don't slide.
AvoidSkip thin brackets - flex makes shelves look flimsy.
18. Fabric hanging shoe rack with labeled slots and a drip tray
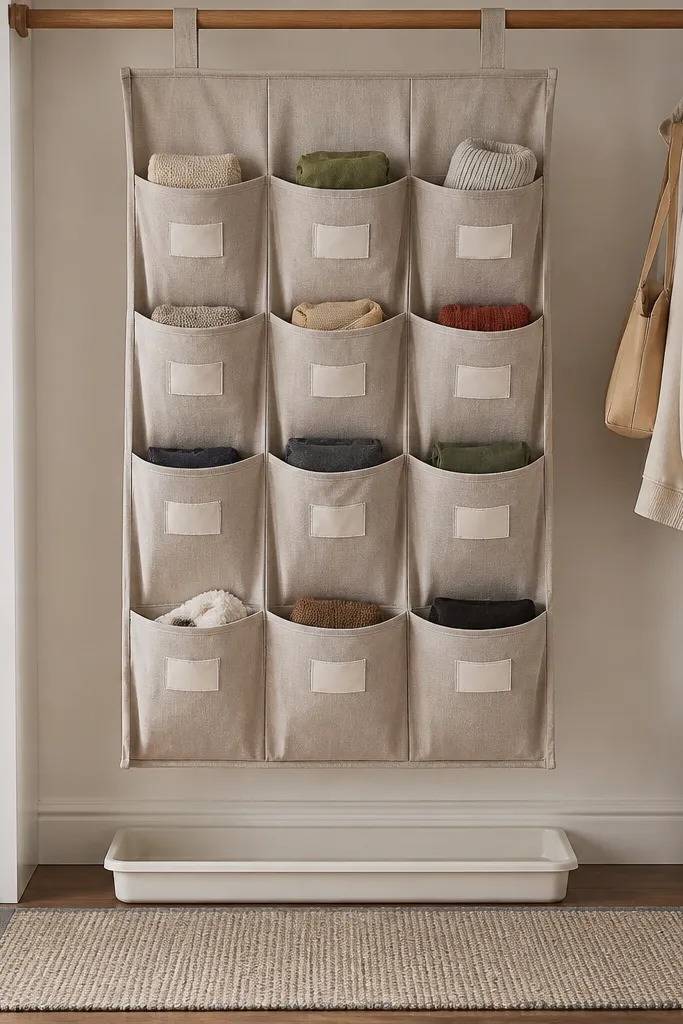
Fabric hanging organizers are cheap, but they look nice when you add the right base. The drip tray keeps the entry floor clean during rainy weeks. I've used this in a mudroom corner where wet shoes always happen. Labeling the slots turns it into a system, not a storage bag.
Hang the organizer on two sturdy hooks or a tension rod depending on your door/wall setup. Place a shallow plastic tray underneath that's wider than the organizer bottom. Label slots with tape - one color per person - and keep sneakers in the center rows.
Pro tipChoose a tray with raised sides so runoff stays contained.
AvoidAvoid hanging organizers without a tray - wet spots spread and the whole corner looks dirty.
19. Two-tier ladder cabinet made from bathroom wall shelves
Bathroom wall shelves work surprisingly well for shoes because they're already made to handle moisture. The smooth finish wipes easily, and the small footprint keeps the entry clean. I used this when my front door had a tiny recess and I needed something slim. The ladder arrangement gives airflow between tiers.
Buy two narrow wall shelves with a depth around 6 to 8 inches. Mount them at staggered heights, leaving about 10 inches between tiers for sneakers. Add a third small lip shelf only if you have enough wall depth; otherwise two tiers is cleaner.
Pro tipUse clear silicone bumpers on the shelf edges where shoes touch to stop scuffs.
AvoidSkip shelves with deep back lips - shoes catch and the rack looks untidy.
20. Staggered cinder block shoe storage with sealed surfaces
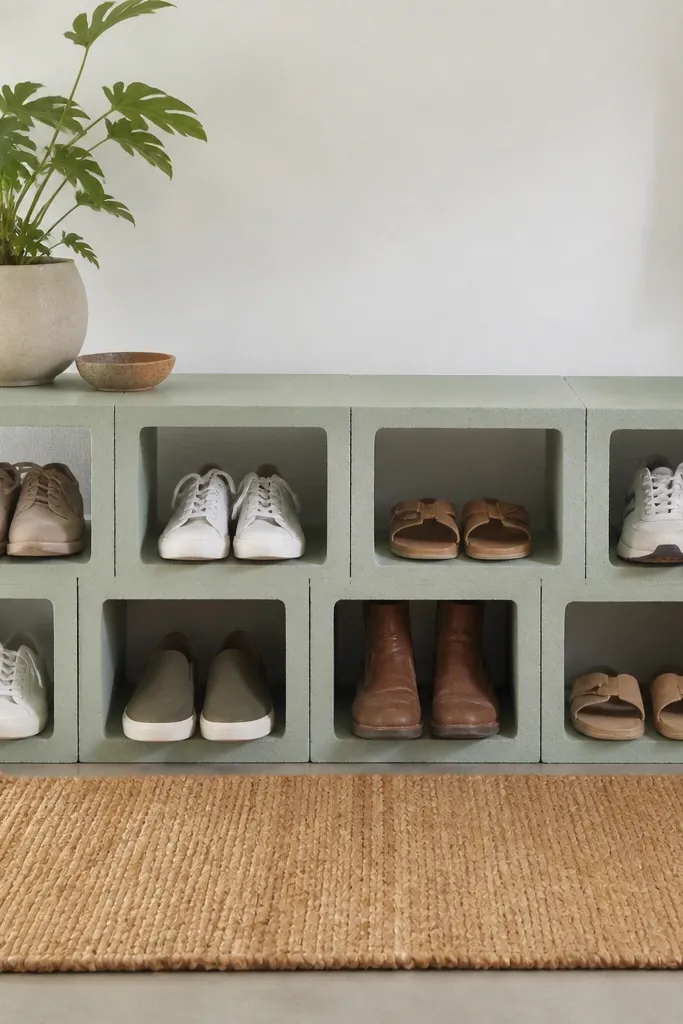
Cinder blocks are cheap and they already give you built-in spacing. When you seal them, they wipe down like a painted surface and look clean instead of industrial rubble. The staggered pattern prevents shoes from lining up too tightly, so you can grab them without knocking others over. I used this in a garage-entry situation where dirt is part of life.
Stack blocks so the holes line up for sneaker-to-sole fit, then paint with masonry primer and a durable matte paint. Seal with a clear concrete sealer if you want extra wipe power. Keep the top row low enough that shoes slide in without you forcing them.
Pro tipPut felt pads under the blocks - they scratch floors and make the setup look rough.
AvoidDon't leave raw concrete - it stains and looks grimy after one week.
21. Bookcase narrow shoe rack with doors removed for airflow
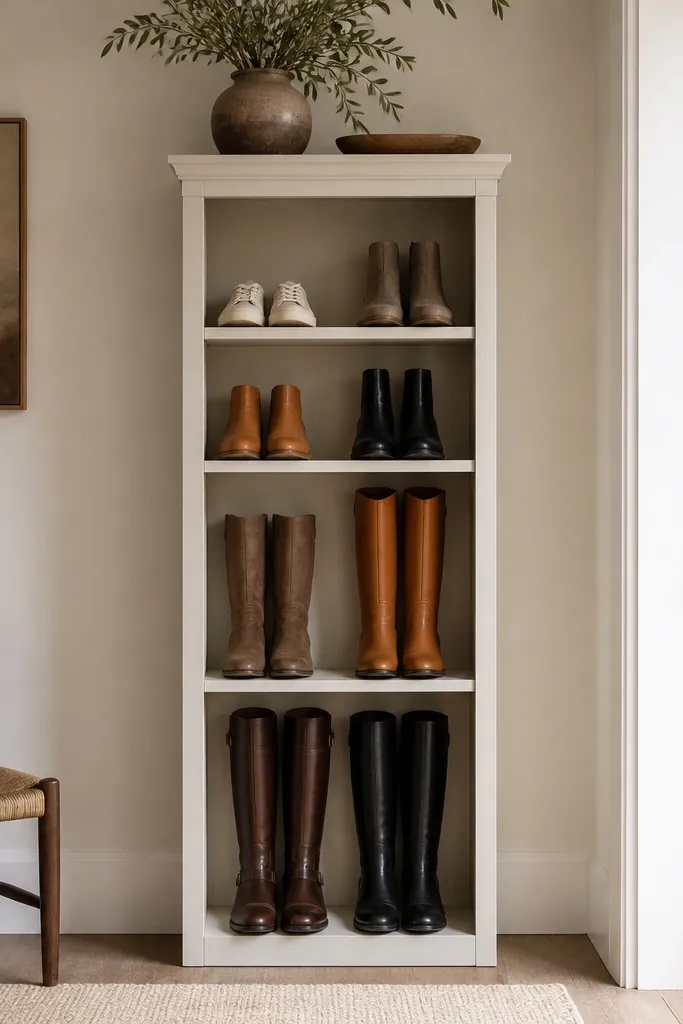
If you already have a thin bookcase, removing doors turns it into a shoe station that still looks like furniture. I did this with an old display cabinet where the doors were foggy and trapped odors. Keeping the shelves open helps shoes dry, and the vertical frame keeps pairs from spilling into a pile. It looks tidy because the spacing is consistent across the unit.
Use a slim bookcase at least 10 inches deep. Remove doors and add shelf liners only if needed for grip; otherwise leave wood sealed. Arrange sneakers on 9-inch sections and boots on taller gaps.
Pro tipAdd a small fan or prop a door open 10 minutes after you come in - it cuts odor buildup.
AvoidAvoid fully enclosed shelves with no ventilation - the smell comes fast.
22. Color-matched shoe rack using painted PVC and shelves
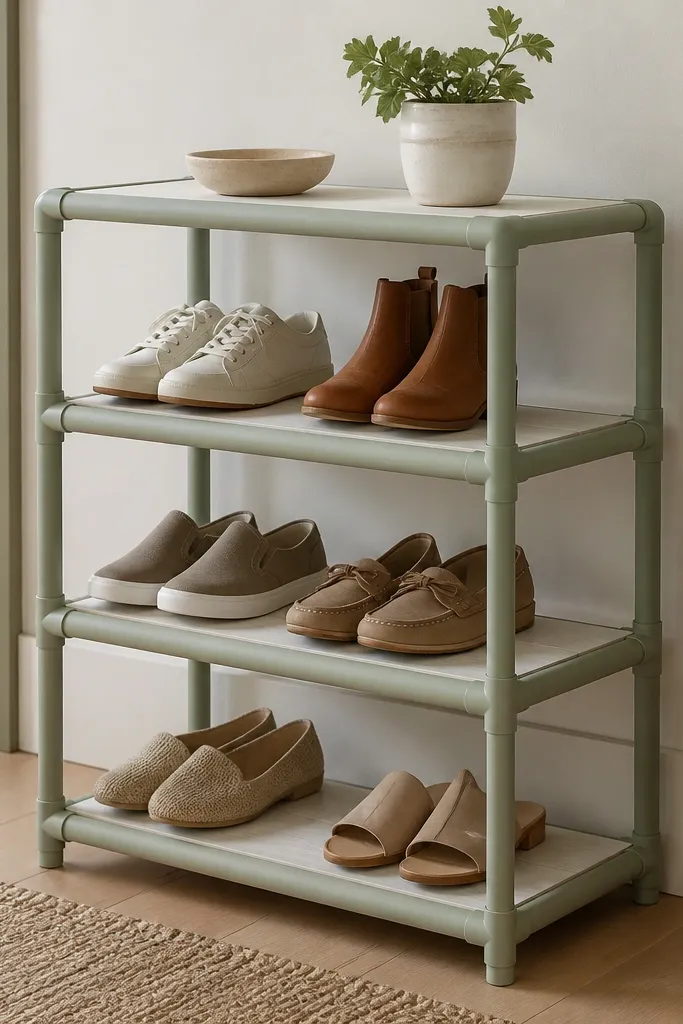
PVC is lightweight and cheap, and it looks clean when you paint it the same color as your trim. I built this for a studio entry because it had to be light enough to move and sturdy enough for daily use. The shelves are open, so shoes dry quickly. The best part is how easy it is to adjust - you can change shelf heights by swapping fittings.
Use PVC elbows and tees to build two side frames, then connect with straight pipe sections. Add shelves made from 1/2-inch plywood sealed with paint or poly. Keep shelf spacing around 9 to 10 inches for sneakers, and add a bottom tray for dirt.
Pro tipRough up PVC with fine sandpaper before painting so the finish doesn't peel.
AvoidSkip gloss paint - scuffs show and the rack looks cheap.
23. Wall-mounted basket rack with dowel supports
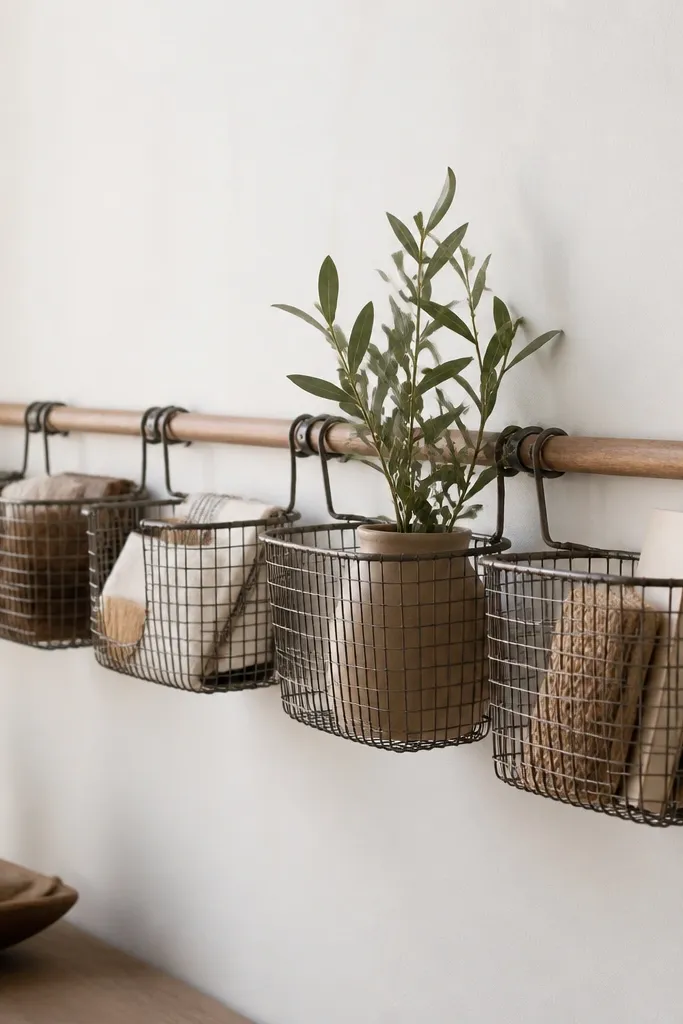
Wire baskets on a wall give you compact storage and quick visibility. The dowel rail keeps baskets level and makes the whole line look straight. I used this for a small entry where the floor is narrow and rugs bunch. The baskets are open, so shoes don't trap moisture.
Mount a horizontal ledger board to the studs, then attach short dowel supports or shelf cleats at equal spacing. Use baskets around 9 inches wide and 6 to 8 inches deep. Leave a small gap between baskets so pairs don't press together.
Pro tipAdd a small removable bin inside one basket for shoe polish and lint brushes.
AvoidDon't mount baskets too low - you'll kick them and scuff the wall.
24. Repurposed window shutter shoe rack with 4 tiers
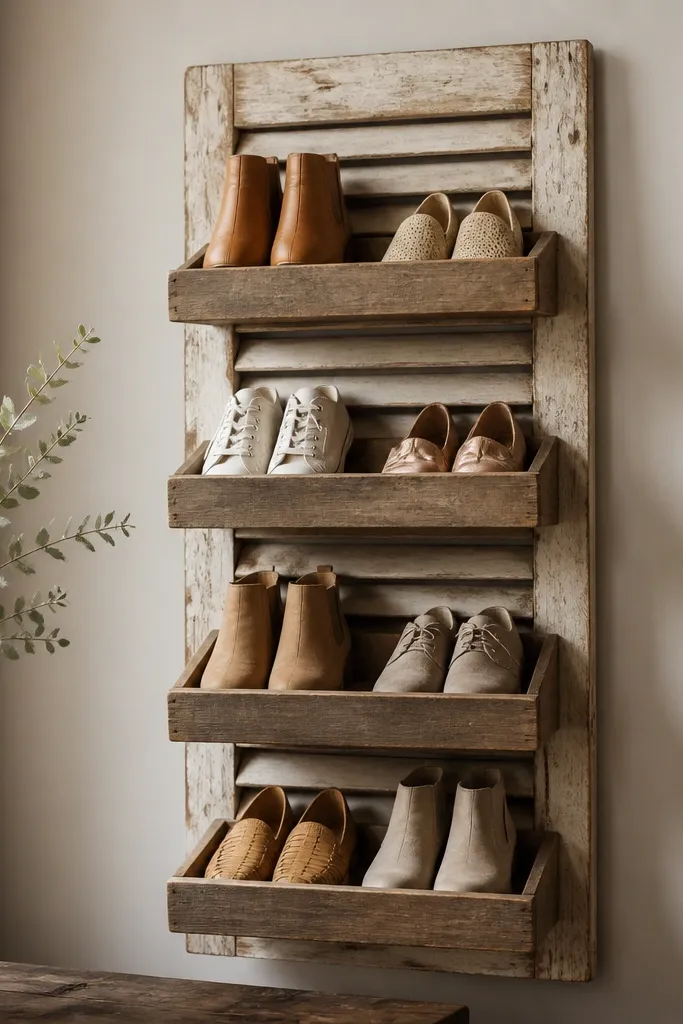
A window shutter gives you instant texture and makes the rack look like decor. I used one with a distressed white finish so it didn't look heavy. The shutter slats hold the structure, while the tiers create shoe spacing. It works well for flats, slip-ons, and casual sneakers because of the open feel.
Attach four horizontal boards to the shutter at 9 to 10 inch intervals. Use 1x4 boards for tiers, about 7 to 9 inches deep. Seal the tiers so shoe grime wipes off, and mount securely if leaning - I prefer wall-mounting with two anchors.
Pro tipAdd small adhesive rubber feet on the tier edges to prevent sliding.
AvoidSkip thin tiers - they sag and the rack looks uneven after a few weeks.


