1. Cork Tile Prayer Board With a Clear "Today" Sleeve
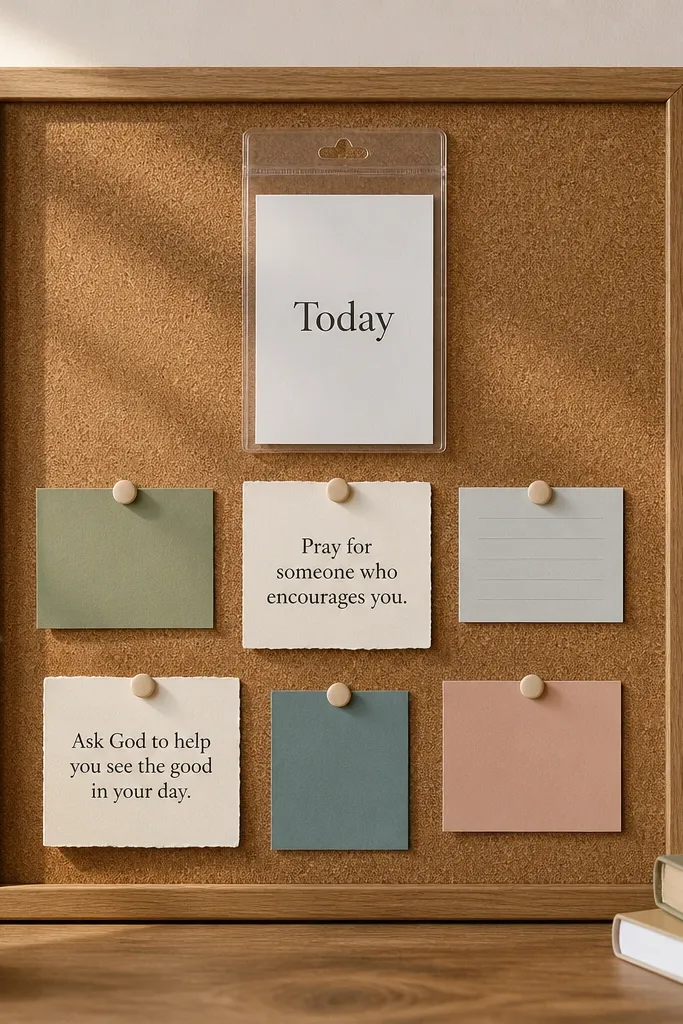
This setup keeps your board calm because the "Today" piece is protected and always in the same place. Cork gives you texture under the pins, so the board doesn't look flat or cheap. I like cream and sage paper because it softens the cork's warm tone and makes the cards readable without glare. The clear sleeve also prevents ink transfer from pens when you update the card.
Use cork tiles that fit a 16x20 frame opening, or cover a board with cork sheet. Cut a sheet protector to a rectangle sized about 5.5 inches wide and 3.5 inches tall for the "Today" sleeve. Pin everything with straight push pins in a single metal color (brass or black) so the hardware looks intentional.
Pro tipWrite your "Today" card with a fine-tip black pen, then laminate just that card in a pocket sleeve so it never smears.
AvoidAvoid using thin transparent tape over paper edges - it turns cloudy and makes the center look messy.
2. Linen Board With Velcro Strips and Rotating Scripture Cards
Velcro is the reason this looks tidy. You can swap scripture cards without tearing paper corners, and the card edges stay aligned. Linen has a soft matte texture that hides fingerprints better than shiny fabric. When you pick a consistent card size (like 4x6), the whole board looks designed instead of random.
Buy linen fabric by the yard and stretch it over a 1/2-inch foam board or thin plywood, then staple the back. Add 1-inch-wide Velcro strips: place one strip at the top for the main verse card and two smaller strips for rotating cards. Use clear 4x6 photo sleeves cut to 4x6, then slide the cards in.
Pro tipPrint scripture cards with extra margin - I leave a 0.5-inch border so text never touches the sleeve seam.
AvoidAvoid mixing card sizes; different widths make the board look like a bulletin board instead of a prayer board.
3. Shadow Box Prayer Board With Layered Photo Sleeves
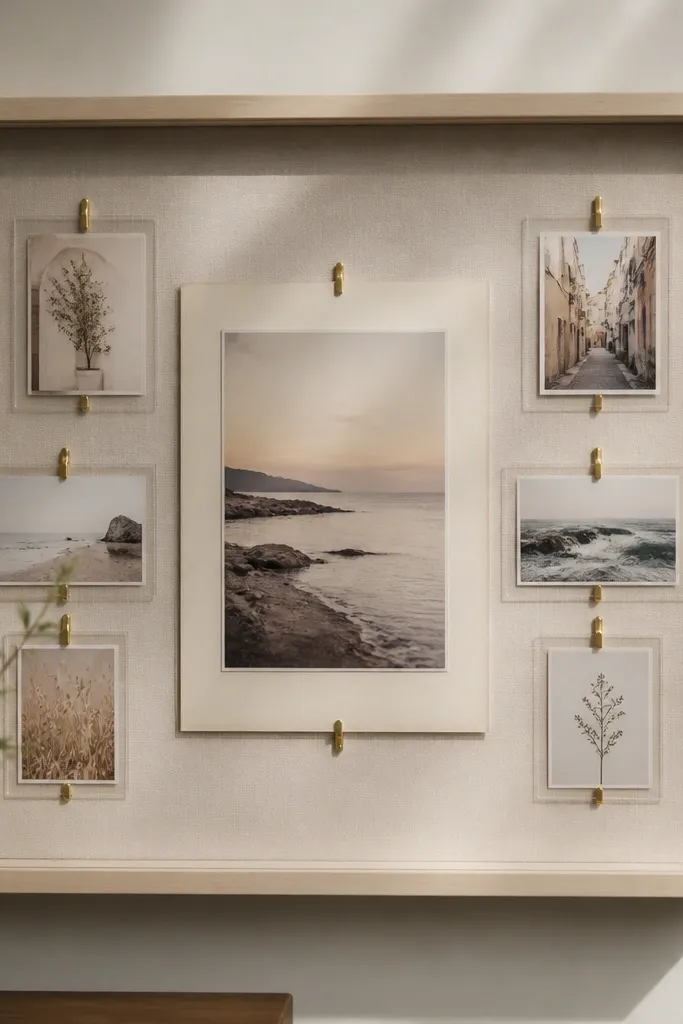
Shadow boxes look "finished" because you get depth without clutter. The clear sleeves protect photos and cards, and the layered arrangement makes the board feel curated without being overdone. I like using a single backing color (cream or light gray) so your cards pop. Gold clips add a gentle shine that feels warm in daylight.
Use a 2-3 inch deep shadow box frame. Cut a backing board in cream cardstock or matte foam board. Attach small binder clips or mini clothespins to hold sleeve corners, or use adhesive photo tabs on the back. Keep the central card at about 5x7 and the side cards at 3x4.
Pro tipHang it with two screws level with the top rail; shadow boxes skew visually if they're even slightly off-center.
AvoidAvoid using glossy paper for the backing; it reflects light and makes the cards look washed out.
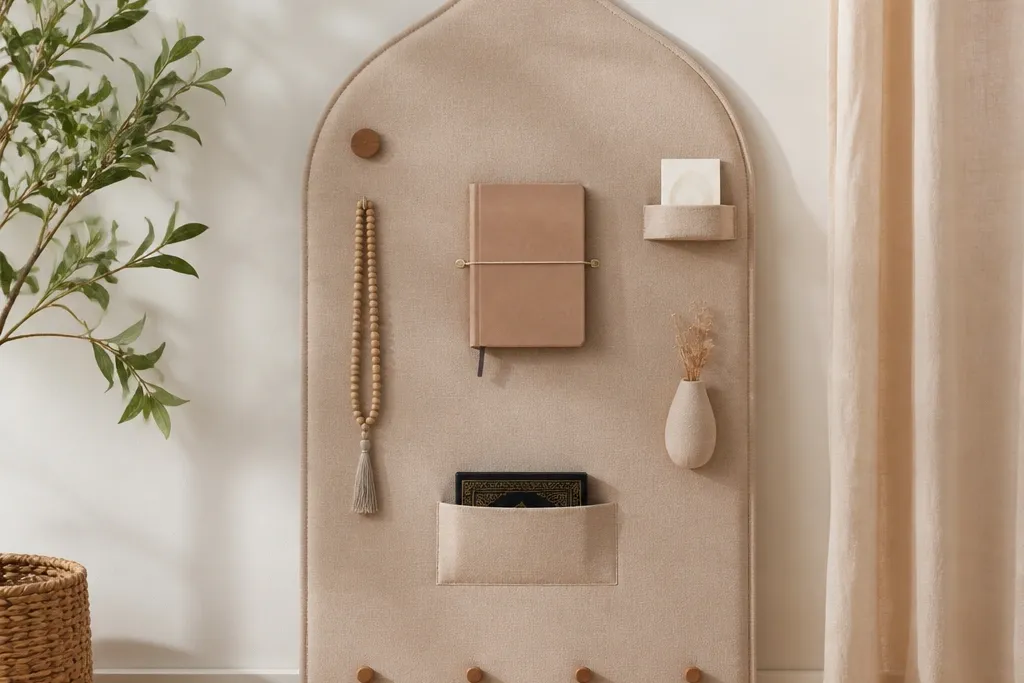
4. Pegboard Prayer Board With Mini Baskets for Names
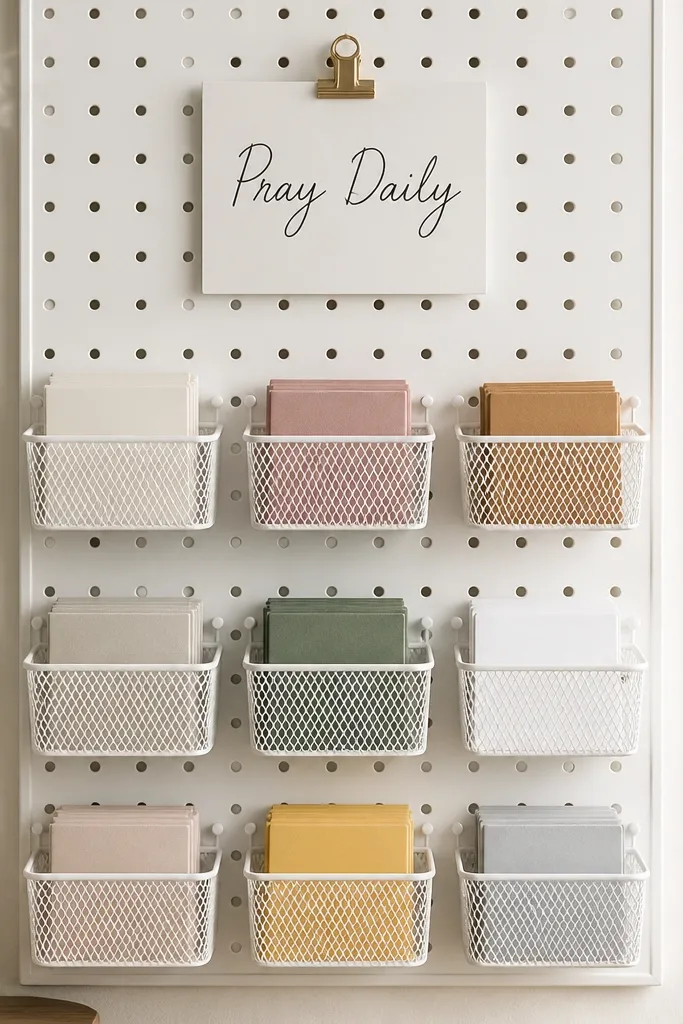
Pegboard is the cleanest way to store names without piles. The baskets keep folded cards contained, and the peg system lets you rearrange without re-sticking anything. White pegboard makes the whole thing look crisp, and mesh baskets let you see what's inside. It's also easy to add labels later when your list grows.
Use a 24x36 pegboard. Hang 3-5 small mesh baskets (about 3-4 inches wide) in a grid. Cut name cards to 3x5 and fold once so they sit neatly. Add one clear label strip under the top sign for a rotating focus theme.
Pro tipUse label stickers with a matte finish, not glossy - glossy labels show dust and fingerprints.
AvoidAvoid overcrowding with too many baskets at once; leave one empty peg row so you can expand.
5. Framed Window Screen Prayer Board With Clothespins
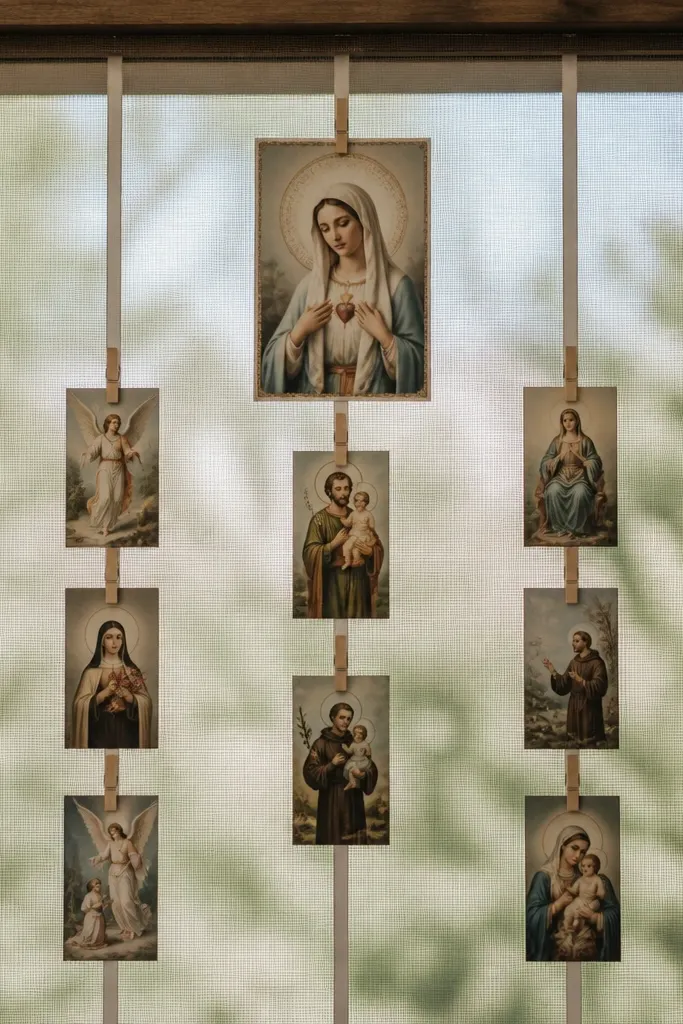
A window screen gives you a breathable, airy look. Clothespins hold cards firmly without tearing, and ribbon lines keep everything aligned. The spacing looks intentional because the screen grid naturally guides placement. I've used this for family prayer boards when I needed something that could handle lots of updates.
Stretch or mount a window screen into a simple frame, keeping tension tight. Attach two or three ribbon lines vertically using small hooks or staples on the back. Clip cards with 2-inch wooden clothespins, and use a single ribbon color like black or natural linen. Keep card widths under 4 inches so they don't sag.
Pro tipUse a ruler to mark clothespin spacing - mine is 3 inches apart for a clean rhythm.
AvoidAvoid flimsy plastic clothespins; they bend and make the cards look uneven.
6. Sealed Wood Slat Prayer Board With Mini Hinged Clips
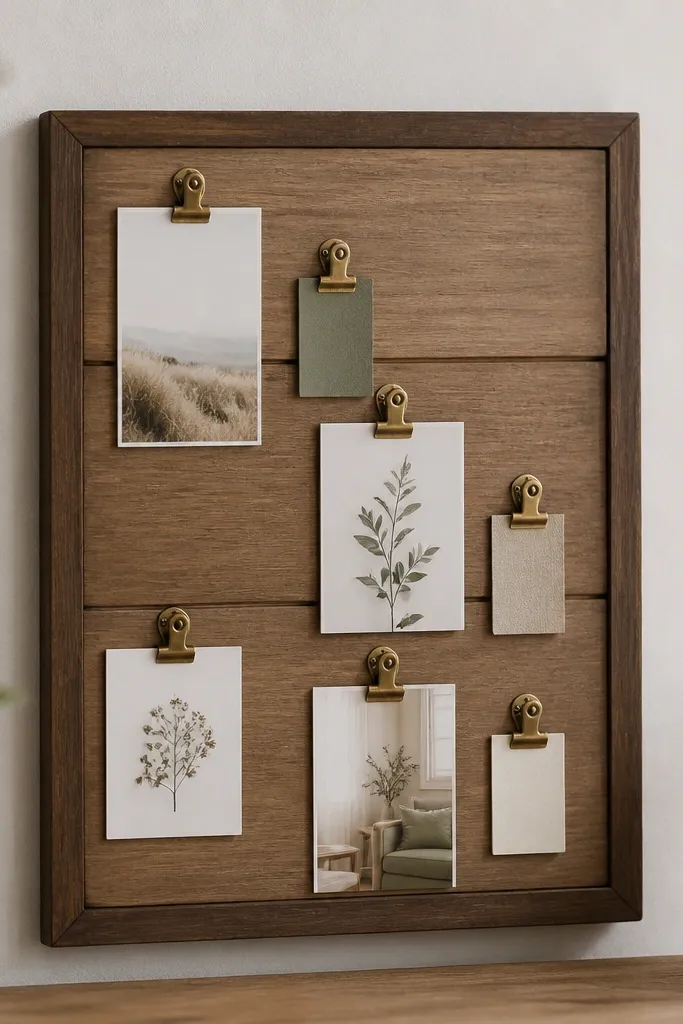
Wood slats look warm and grounded, and the hinged clips keep cards straight. Sealing matters because it stops ink from soaking in and makes wiping easy. I like dark walnut stain with cream cards - it reads like a calm gallery wall. This is a great option if you want your board to match your furniture finishes.
Use 1x2 wood slats spaced 3-4 inches apart on a backing board. Seal with matte polyurethane so it doesn't glare. Install mini hinged clips along each slat, leaving a 1-inch margin from the edges. Use laminated prayer tags sized 2.5x3.5 for quick swaps.
Pro tipPre-drill clip holes so the wood doesn't split and the clip line stays straight.
AvoidAvoid high-gloss sealant; it throws reflections and makes the board harder to read.
7. Magnetic Sheet Prayer Board With "Checklist" Prayers
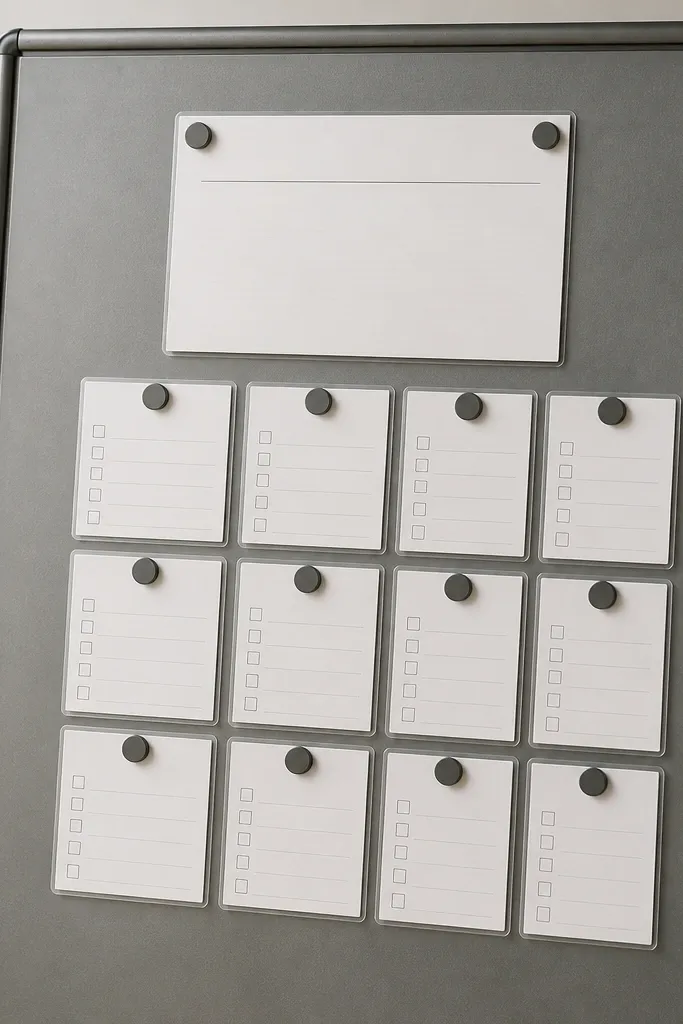
Magnets are fast and clean for daily check-ins. Laminated cards slide into place, and the edges stay crisp. The checklist format helps you pray with intention - you can mark what you've completed without writing on the board. A matte finish reduces glare so the cards stay readable.
Buy a thin magnetic sheet or use a framed magnetic board. Cut laminated cards to 3x5 and print checkboxes in a consistent grid. Use small neodymium magnets or magnetic tape dots behind each card. Mount the board at eye level - around 58-62 inches from the floor.
Pro tipPrint checkboxes large enough to see from 3 feet away - I use 16-point font for labels.
AvoidAvoid cheap glossy magnets that chip; they leave ugly spots on the laminated cards.
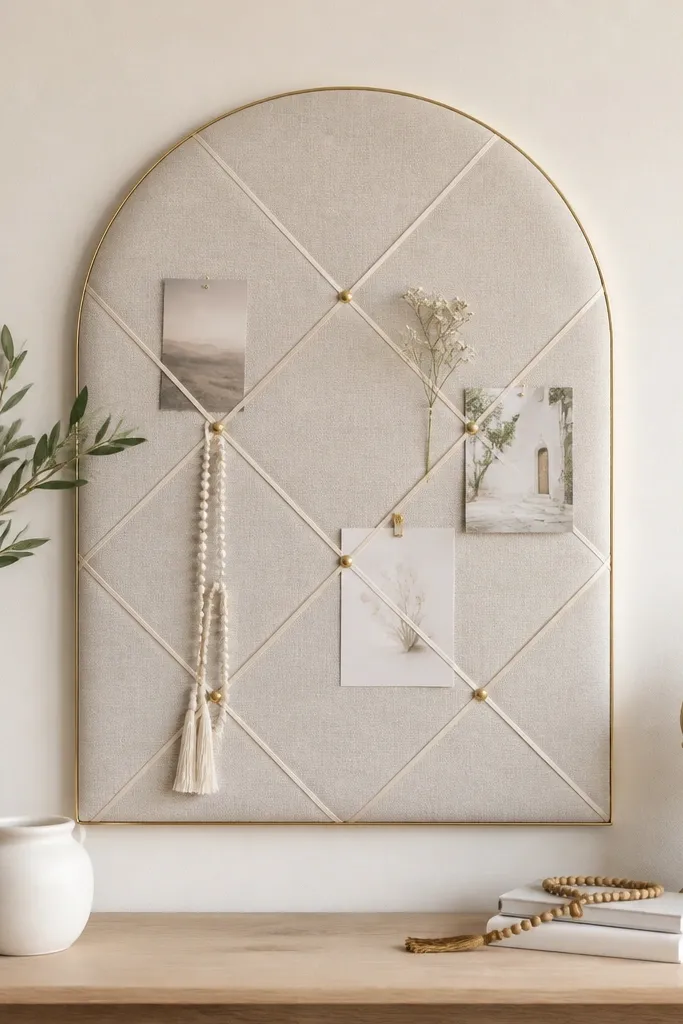
8. Fabric Ribbon Grid Prayer Board With Tie-On Cards
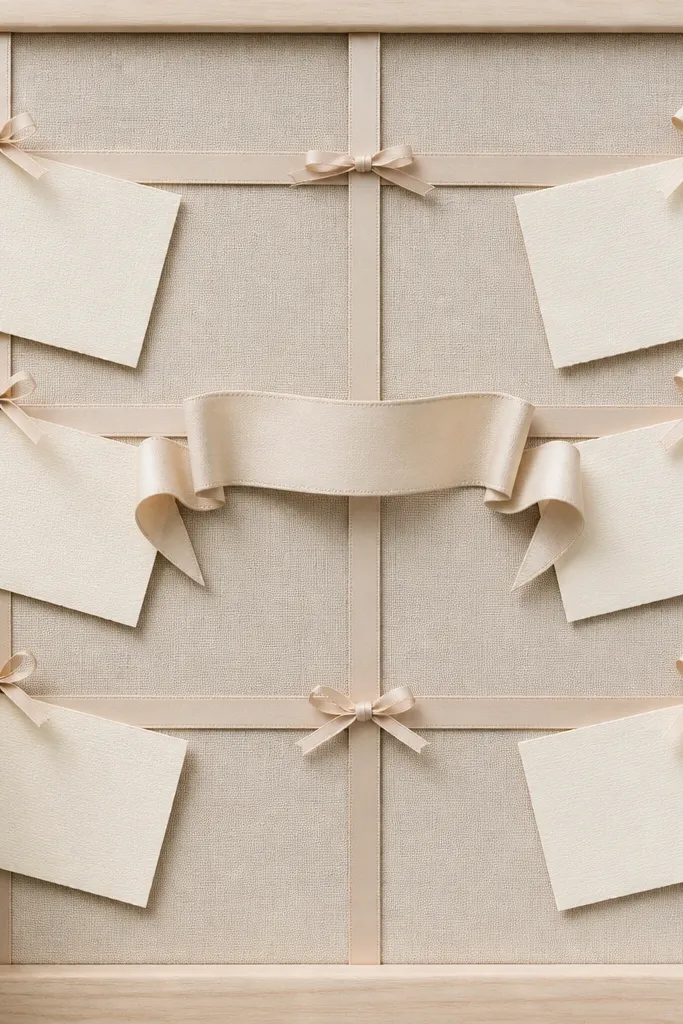
This gives you a gentle, handmade look without needing lots of hardware. Tie-on corners keep cards from sliding, and the ribbon grid makes spacing consistent. Fabric boards are also forgiving - you can pull cards off easily to update them. I like this design for bedrooms because it looks calm, not like office supplies.
Stretch cotton or linen fabric over a backing board. Add a grid of ribbon strips using hot glue on the back - make the squares about 5x5 inches. Tie corners using thin satin ribbon or cotton twine. Keep the central banner card bigger (around 6x8) and the smaller cards 3x4.
Pro tipSteam your fabric before stretching so wrinkles don't show through the ribbon grid.
AvoidAvoid knotting too tight; it warps the card corners and makes the bows look bulky.
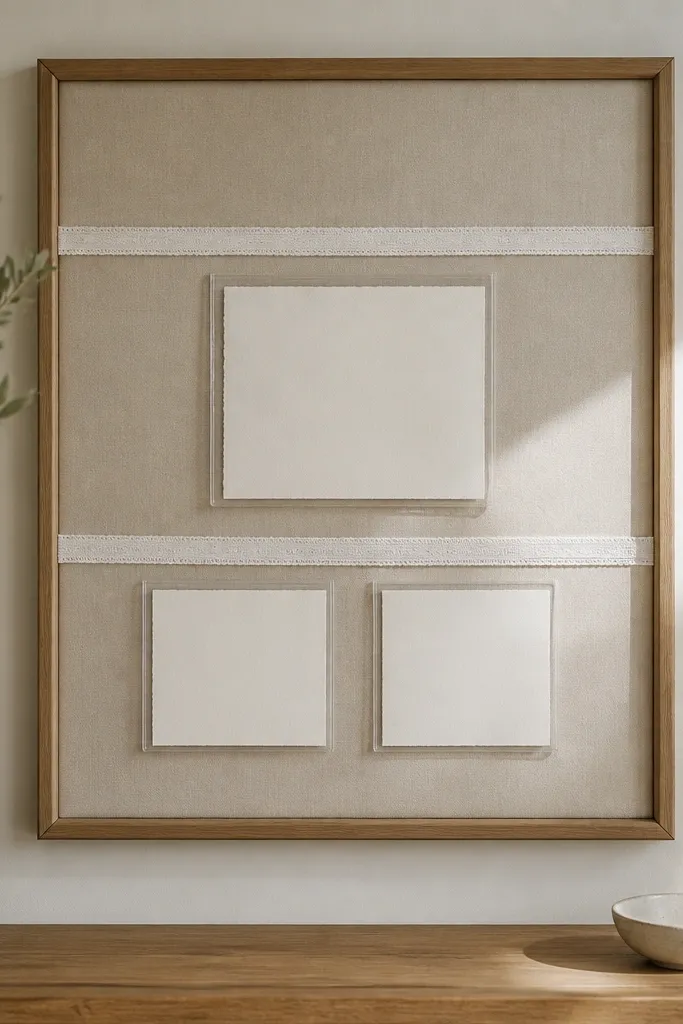
9. Acrylic Frame Prayer Board With Pocket Inserts
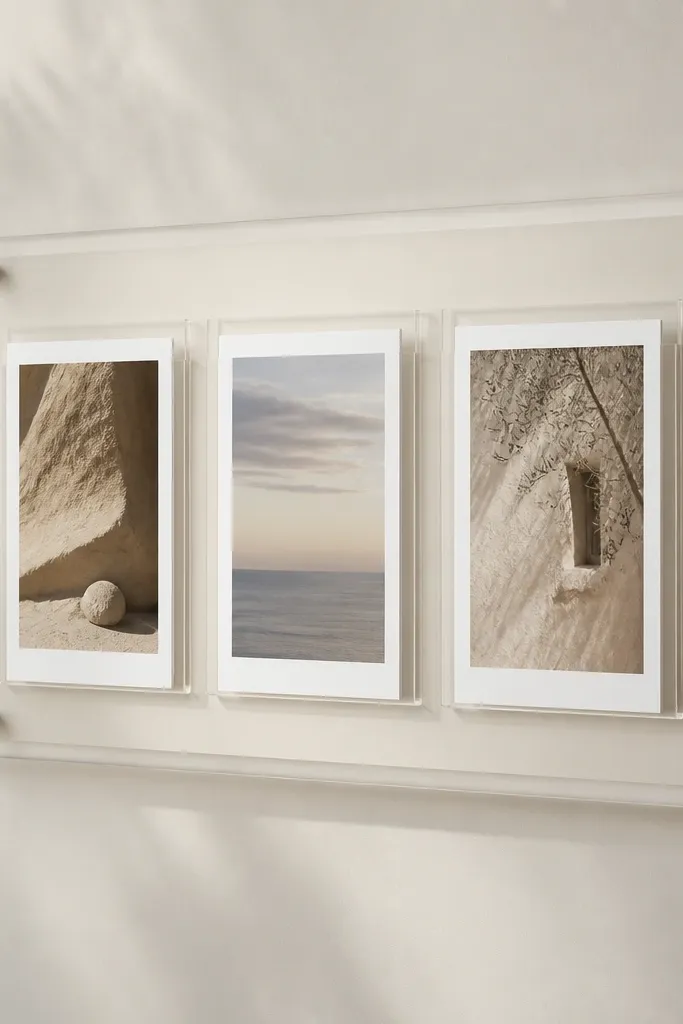
Acrylic pockets look sleek, but the trick is backing color and pocket protection. Off-white foam board makes the cards readable without glare. The pockets keep paper from bending, and the clear frame makes the whole board feel modern. I use this when I want the prayer board to match a minimalist room.
Get a clear acrylic frame with removable pocket inserts or assemble with clear pocket sleeves mounted on a board. Use off-white foam board behind the pockets. Keep pockets aligned in columns: one for daily cards, one for scripture, and one for specific requests. Insert cards in uniform sizes like 4x6 and 3x5.
Pro tipWipe acrylic with microfiber and glass cleaner - fingerprints make it look messy even when everything else is perfect.
AvoidAvoid using colorful backing paper behind clear pockets; it makes the text look muddy.
10. Cork + Chalk Label Prayer Board for Quick Updates
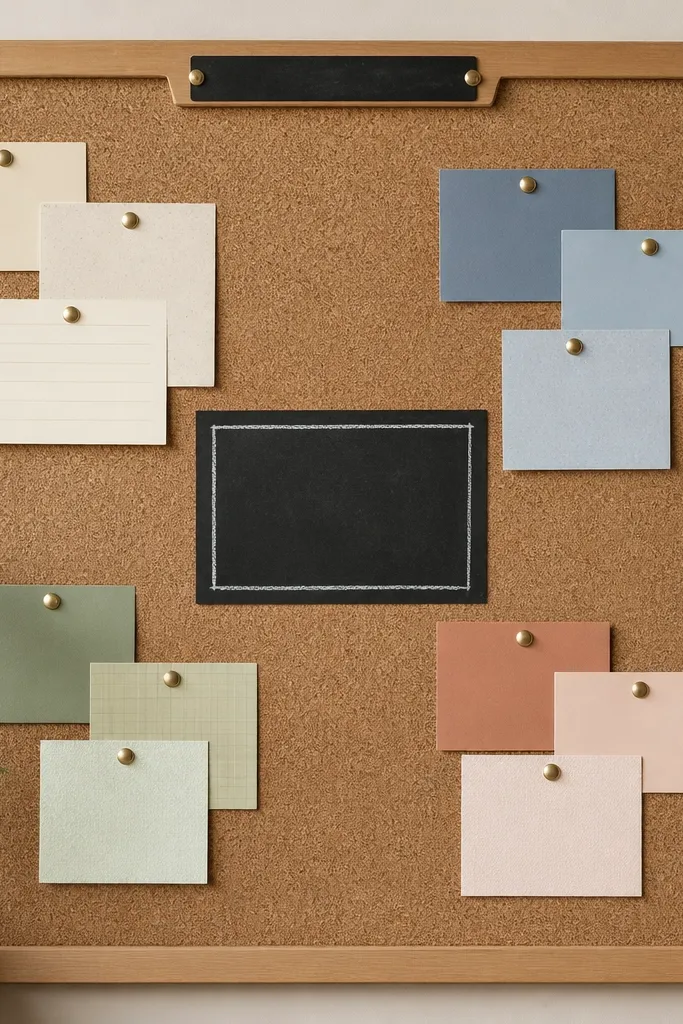
This is the board I reach for when I'm updating often. Chalk labels give you a fast way to change the theme without rewriting every card. Cork keeps pins secure, and color-grouping cards makes it easier to find what you need. When the board is built with zones, you don't feel overwhelmed by lots of requests.
Mount cork on a frame and add a small chalkboard label area (about 10 inches wide) at the top. Group cards by category with colored paper borders: blue for health, green for family, tan for finances. Use push pins with the same finish and write on cards with a black gel pen for contrast.
Pro tipUse a single font style across all cards - I print simple sans-serif and handwrite only the date line.
AvoidAvoid using chalk on paper directly; it smudges and looks uneven after a few days.
11. Picture-Led Prayer Board With Matte Photo Corners
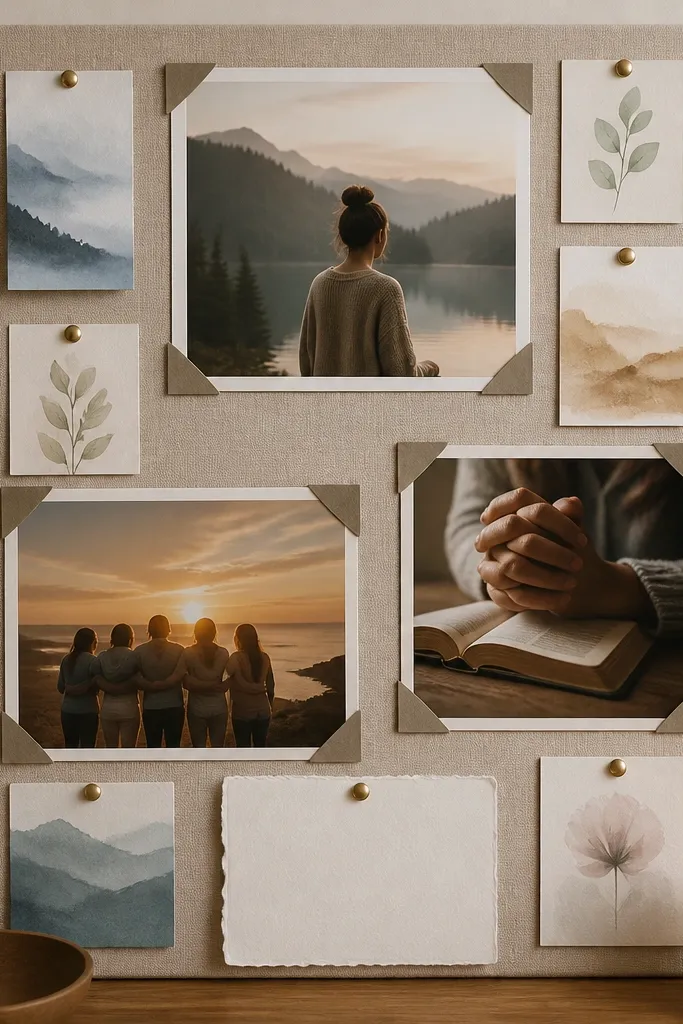
Pictures anchor the board emotionally and practically. Matte photo corners look neat and keep paper edges from lifting. This design works when your prayers connect to people and places - you want the board to feel personal, not just informational. Matte finishes reduce glare, so photos look steady in different lighting.
Use a foam board base covered with matte fabric or matte paper. Place three large photo corners sized for 4x6 photos, then arrange smaller cards around them. Pin cards with matching pins and keep all card corners aligned. Add a bottom strip for a rotating focus card sized about 5x7.
Pro tipUse double-sided tape behind photo corners so the edges stay flat, especially if the board sits near a door where air moves.
AvoidAvoid glossy photo paper; it reflects overhead lights and makes the board harder to read.
12. Three-Section Prayer Board With a Rotating Wheel Card
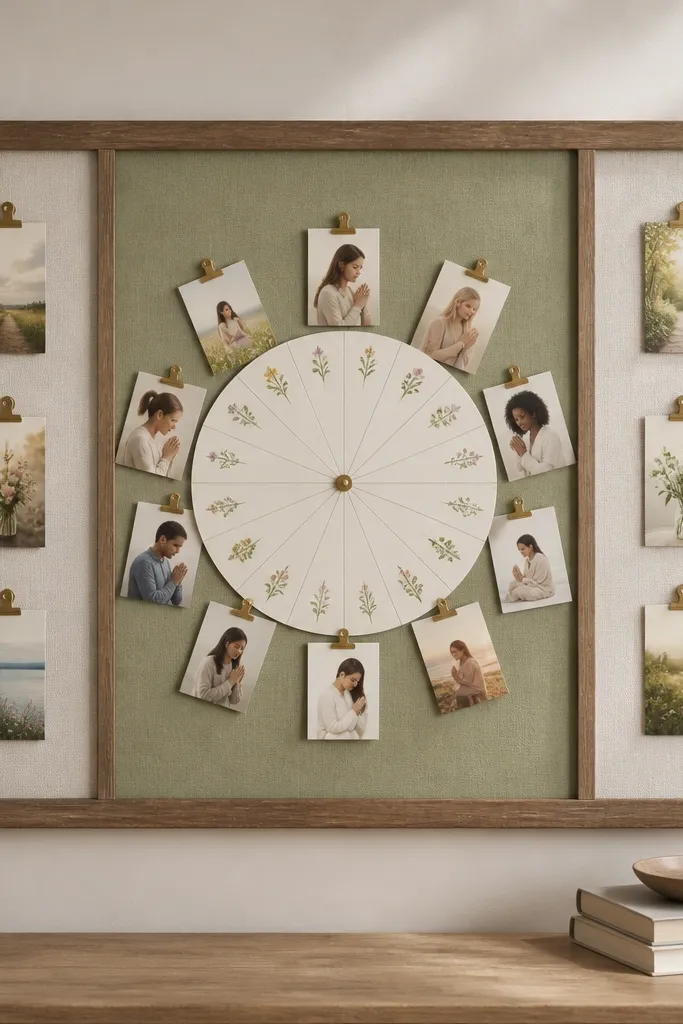
A rotating wheel is a simple way to make your board feel alive without adding clutter. It gives you a clear "where am I now?" visual, which helps when you're consistent with prayer but forget to update. The three-section layout keeps categories separate so the board doesn't blur together. I like using a wheel for seasons or weekly themes.
Create three sections on a board using painter's tape lines on the front, then paint or cover with colored cardstock. Build a paper wheel from a 6-inch circle and attach a brad in the center. Add small clips around the wheel for cards sized 3x4. Keep one section for daily, one for weekly, one for longer-term requests.
Pro tipUse a brad that spins smoothly - if it catches, you'll stop using it.
AvoidAvoid tiny wheel text; if you can't read it from standing height, you won't bother updating it.
13. Bible Verse Tape Borders on a Plain Cork Board
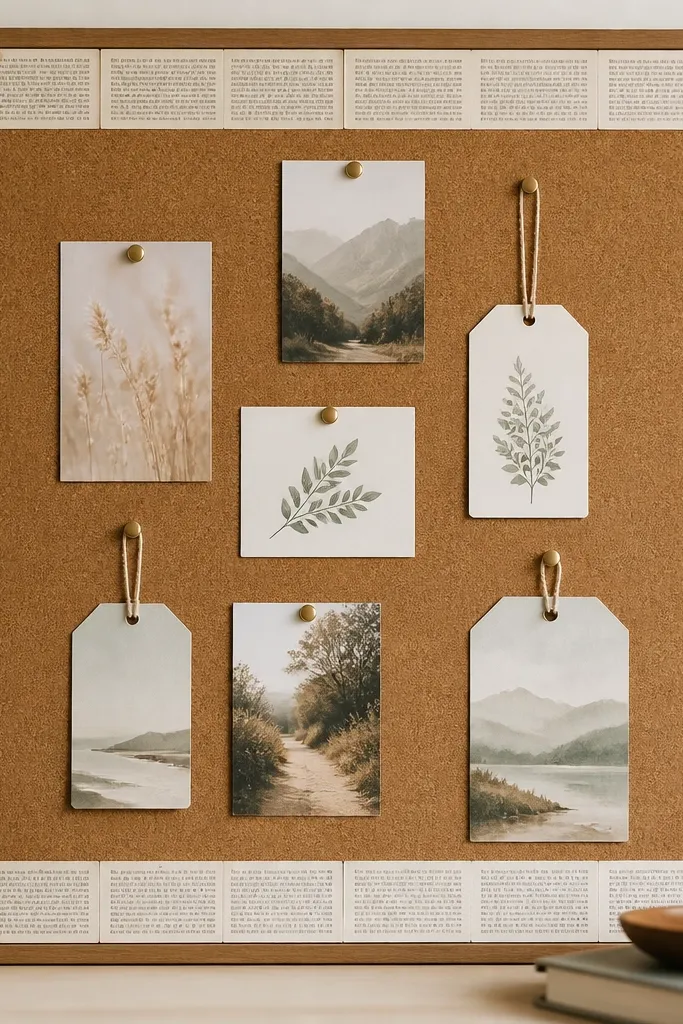
This is a clean trick: you add interest where the eye already lands - the edges. Printed washi tape borders frame the board so it looks intentional even when the center changes weekly. Cork stays functional, and the border keeps the whole thing from looking like a pile of notes. I've used this when I wanted a prayer board that matches neutral decor.
Cover a cork board in a simple frame or directly tape the edges with scripture washi tape. Pin cards in the center only, leaving a 2-inch margin around the taped border. Use laminated tags sized 2.5x4 for longer requests so they don't curl. Keep pin colors consistent and avoid mixing too many paper tones.
Pro tipPress the tape down with a plastic card so it sticks flat and doesn't lift at the corners.
AvoidAvoid thick borders that crowd the cork; too much tape makes the board look heavy.
14. Mini Clipboard Prayer Board for Carried Focus
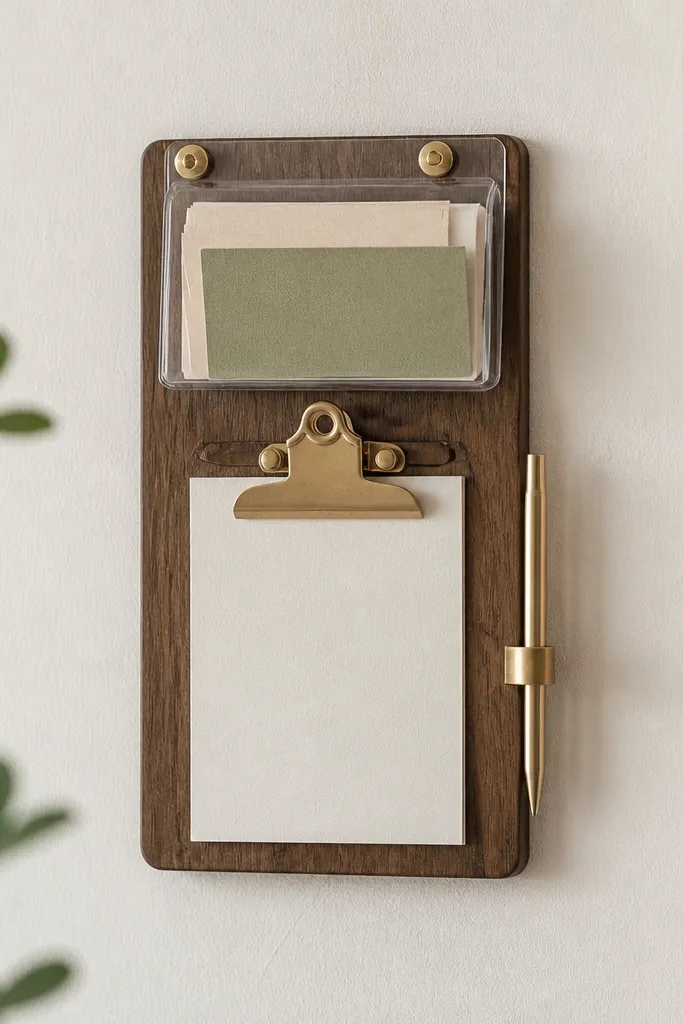
This is the prayer board idea I use when I want fewer moving parts. A clipboard keeps everything in one place, and the clear cover protects cards from spills and fingerprints. It's also easy for kids or guests because nothing has to be pinned. The board looks tidy because the clipboard already has a frame.
Use a small clipboard (8.5x11 size works) and mount it on the wall with two screws. Add clear adhesive document covers inside the board so cards slide under. Use 4x6 cards trimmed to fit, with a "Today" card on top and a "Names" card beneath. Attach a small pen clip so you always have a writing tool.
Pro tipUse a dry-erase marker on laminated cards if you update daily; it cleans off without smudging.
AvoidAvoid leaving paper loose under the clip; it slides and looks sloppy in a week.
15. Desk-Top Prayer Board With a Standing Photo Easel
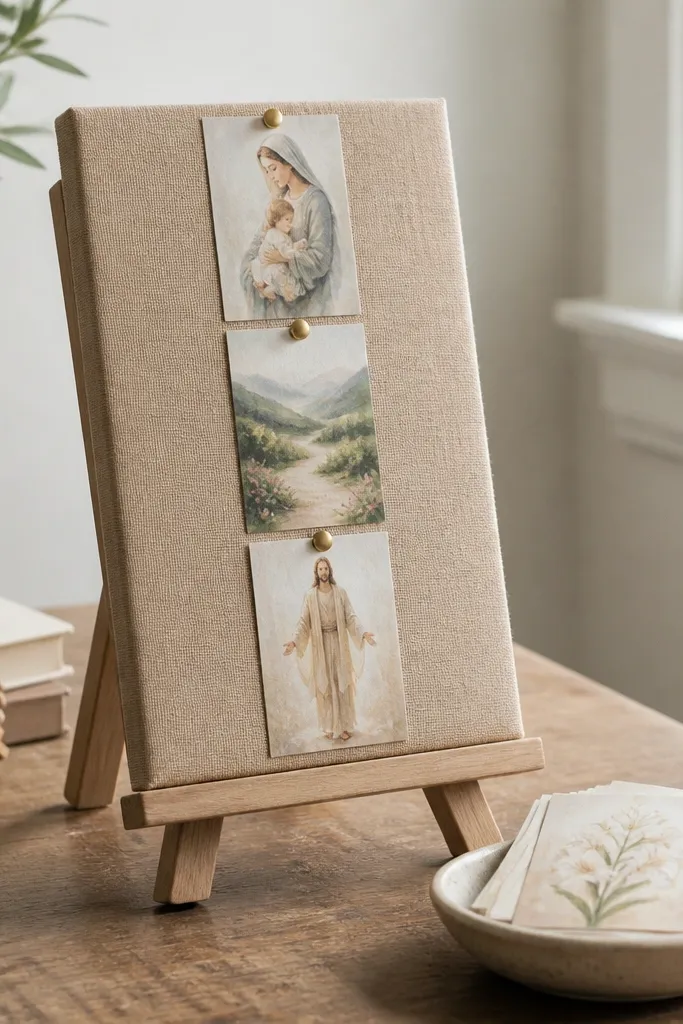
If your prayer time happens at a desk, a standing board beats a wall mount. It keeps your focus in the same spot and reduces the "where did I put that card" problem. Easel-style boards also let you rotate layouts when your season changes. I like this for study spaces because it feels personal, not public.
Use a small easel (about 10-12 inches wide). Attach cork or linen to a 9x12 board panel and pin cards directly. Keep three card positions: top for scripture, middle for names, bottom for today's focus. Add a small tray for extra cards so you don't dig through drawers.
Pro tipPaint the easel legs the same color as your frame hardware so it looks intentional.
AvoidAvoid using thin cork that bends; it makes pins loosen and the board looks tired.


