1. Tall-boot grid rack with 12-inch bays
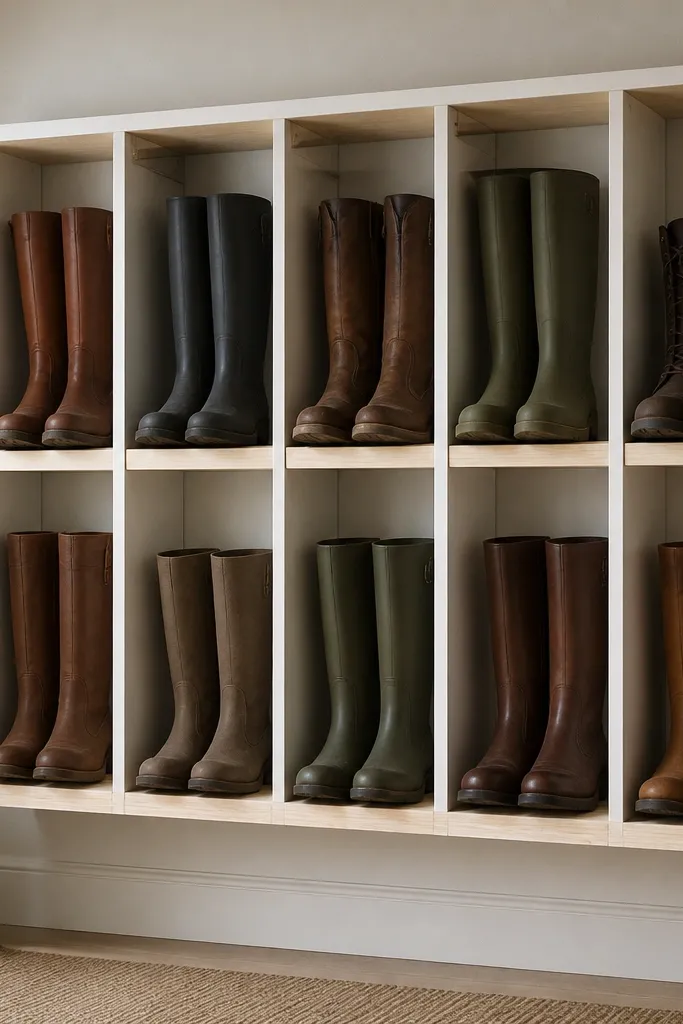
This design works because boots stay upright without leaning. The grid creates clear lanes, so you can line up pairs by height and color. I like pine stained light oak on the frame with a matte white backing because it hides scuffs and keeps the whole thing bright.
Build a rectangular frame with 1x2 pine rails and add vertical dividers every 12 inches. Use slats made from 1x3 cut into 10-12 inch lengths so there's airflow under the boots. Mount into studs with a French cleat or at least two heavy-duty brackets.
Pro tipAdd a thin felt strip at the front edge of each bay so boot shafts don't scratch the wood.
AvoidSkipping airflow by using solid backing makes the rack look clean but leaves a damp smell.
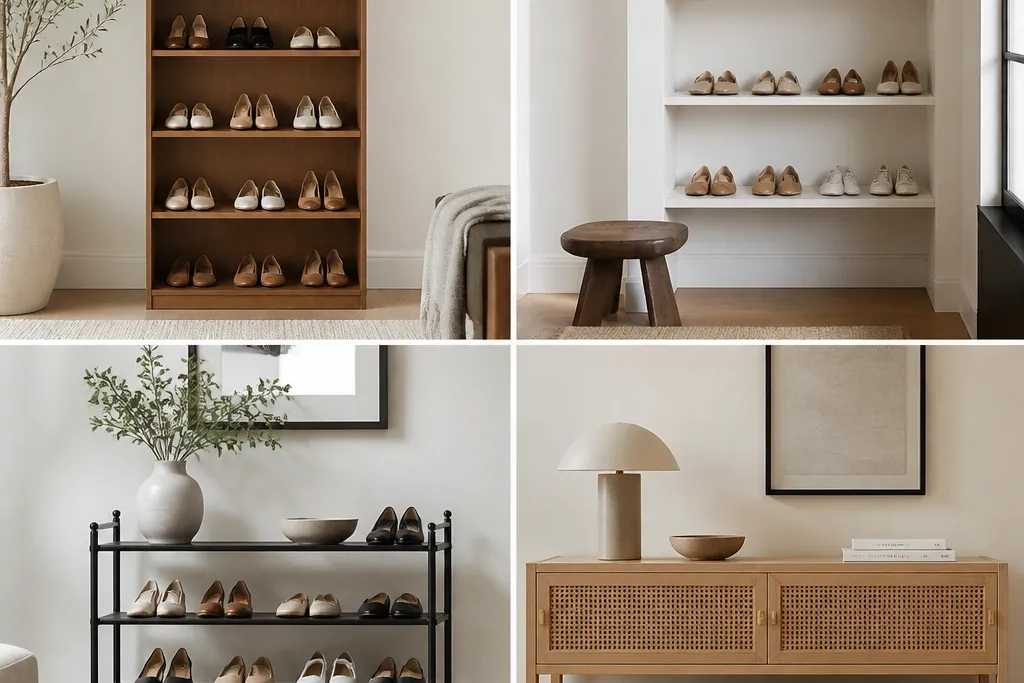
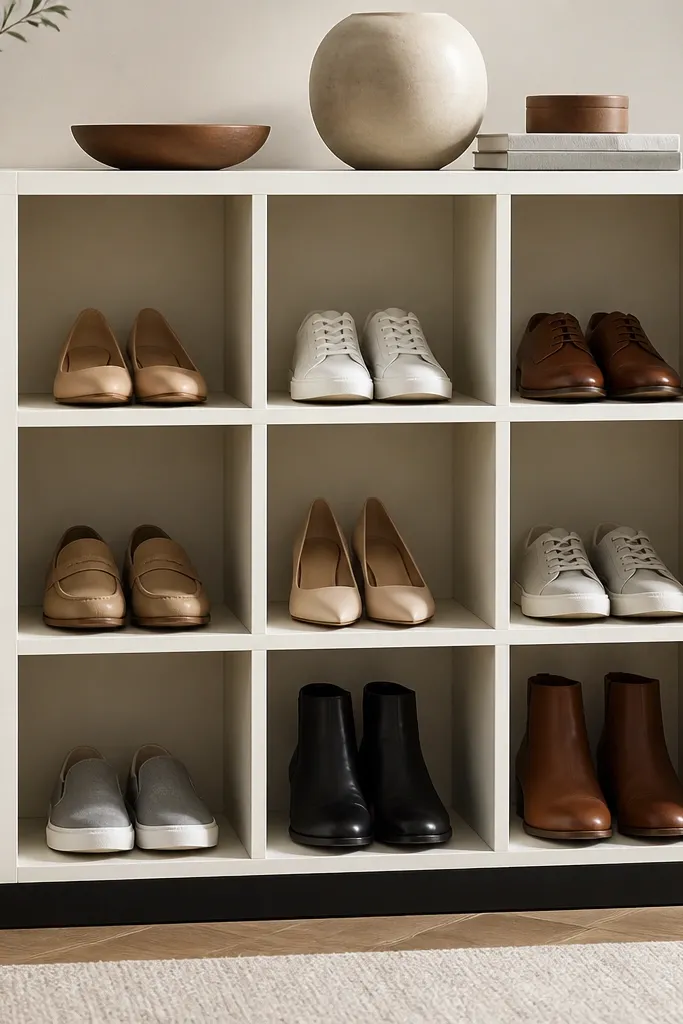
2. Floating walnut-look shoe shelves with hidden cleats
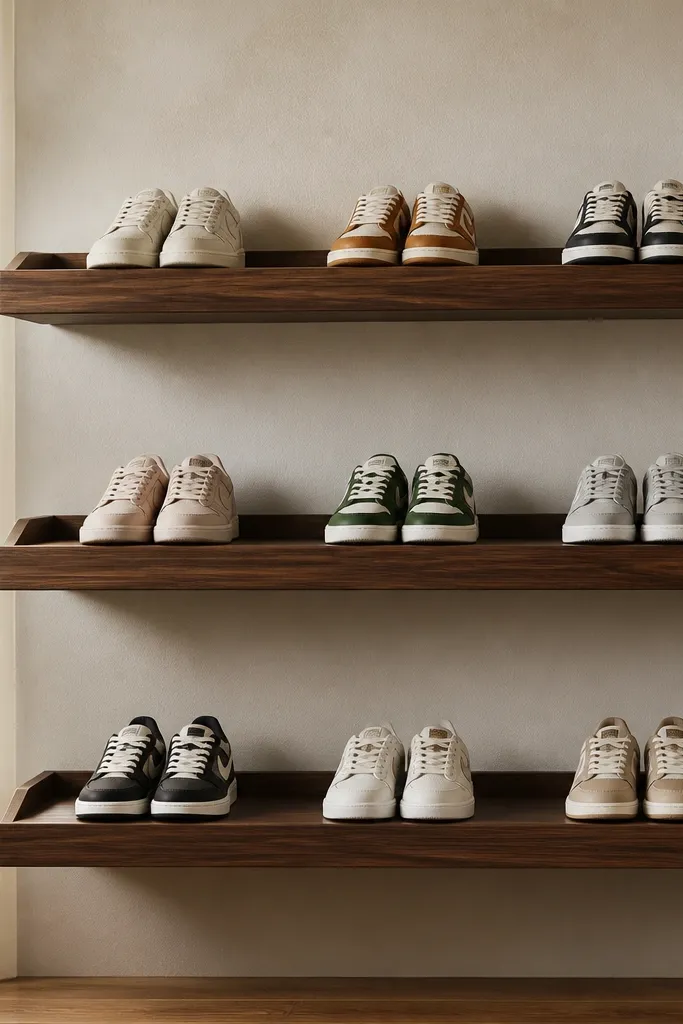
Floating shelves read expensive because the support disappears. The shallow lip keeps shoes from sliding forward, and the spacing looks crisp when every shelf holds the same number of pairs. I finish with a walnut-toned stain and matte clear coat so the shelves don't glare.
Use 3/4-inch plywood shelves cut about 10-12 inches deep. Install hidden cleats inside the shelf ends, spaced so each shelf can hold about 25-30 pounds. Leave 1-1.5 inches of vertical gap between shelves for sneaker airflow.
Pro tipSand edges to a soft radius (like 1/8-inch round-over) so the shelf looks smooth under hand and doesn't chip.
AvoidUsing thin particleboard without cleats makes the shelf sag and look flimsy fast.
3. Shoe cubbies with linen bin inserts
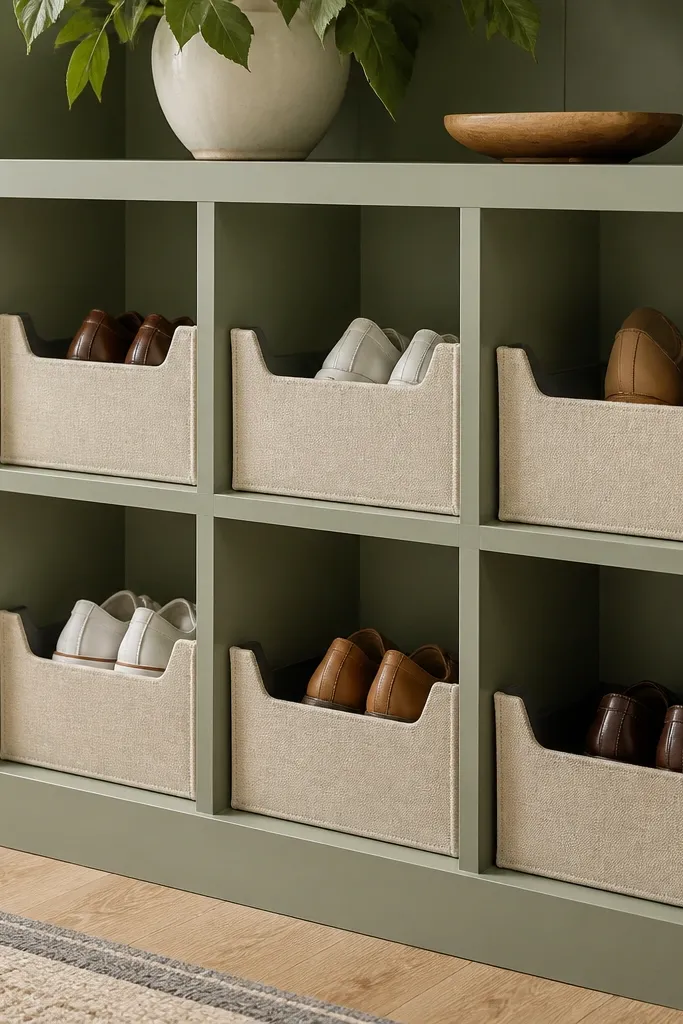
Bins turn a shoe rack into a calmer visual space. You get texture from the linen and still keep airflow because the bin sides don't seal the shoe in. The sage paint makes dark sneakers look less heavy, and the open top of each bin keeps smell from trapping.
Build cubbies with 3/4-inch plywood and divide into 10-12 inch wide sections. Line each compartment with a removable fabric bin that fits snugly but has a 1-2 inch gap at the back. Use a matte paint like cabinet paint in soft sage and seal the interior with clear matte poly.
Pro tipUse bins with rigid bottoms so the front stays straight even when you yank shoes out quickly.
AvoidChoosing bins with a closed, plastic bottom traps moisture and makes the linen smell.
4. Reclaimed pallet rack with diagonal shoe supports
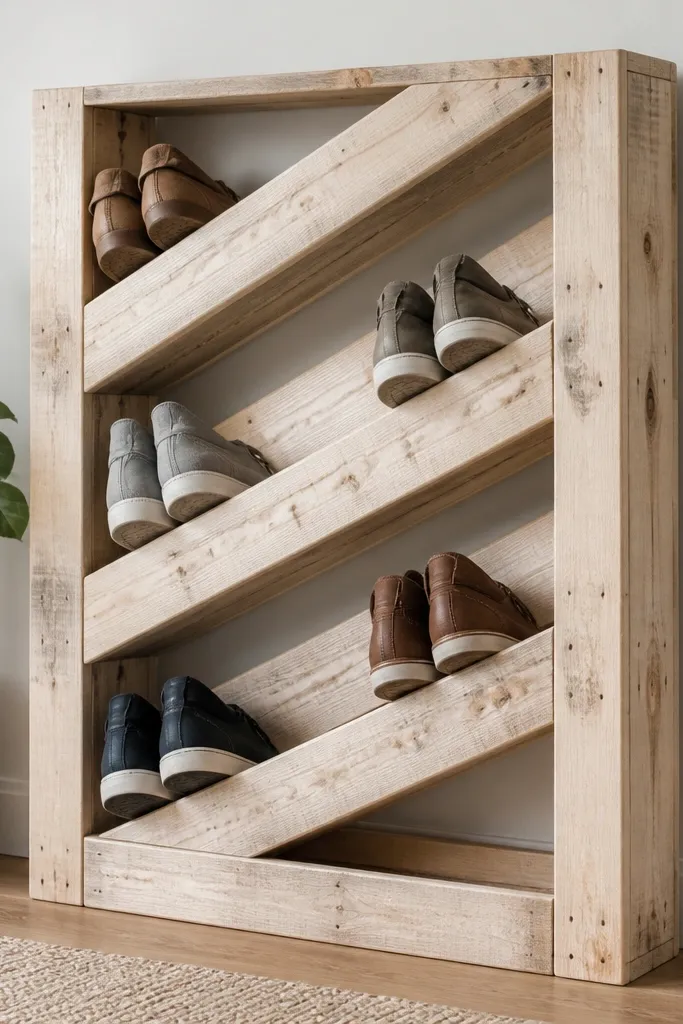
Diagonal supports make shoes sit at a slight tilt, which drains moisture better than flat stacks. The look is casual but still organized because each pair has a dedicated diagonal slot. I use a pale limed finish so the pallet doesn't look too dark in an entryway.
Strip the pallet to good slats, replace any cracked boards, and cut the frame to about 24 inches wide. Add diagonal supports from 1x2 pieces, spacing them so sneakers land in 8-inch wide sections. Seal with a water-based clear matte to stop splinters and protect against wet shoes.
Pro tipDrill small drainage holes along the lowest slat so water doesn't sit in the wood.
AvoidLeaving rough pallet splinters around the edges makes the rack look unfinished.
5. Metal pipe + wood plank corner rack
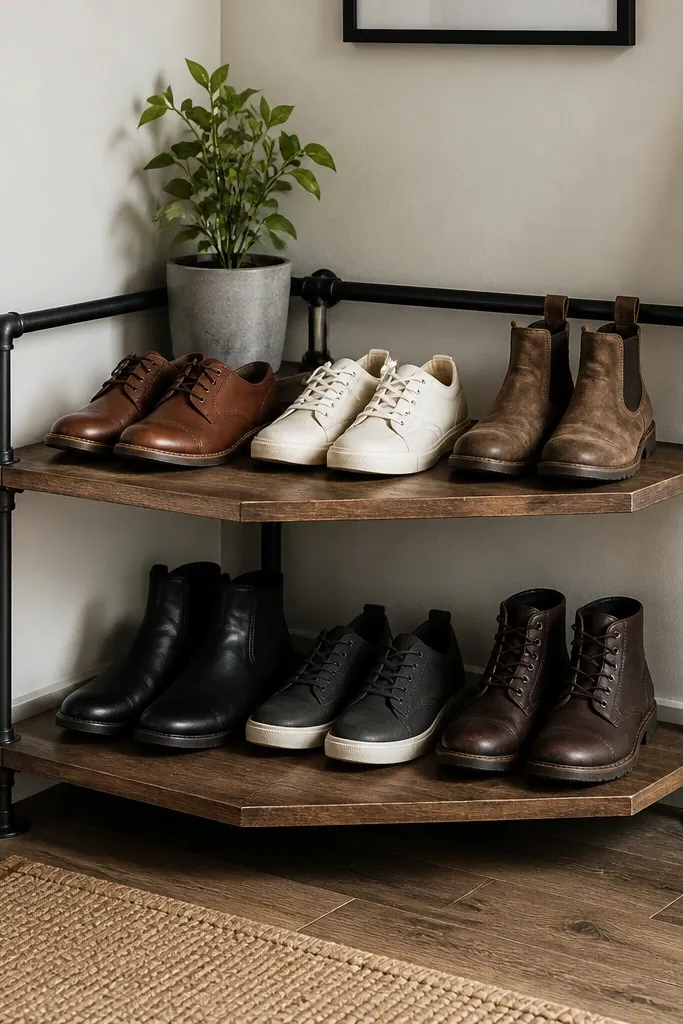
This combo looks sharp because the pipe grid creates straight lines and the wood warms the metal. The corner placement uses space people ignore, and the open sides help shoes dry. I use black spray-painted pipe fittings and a light oak plank top so the contrast stays modern.
Cut wood planks to about 12 inches deep and 30-36 inches long for a corner run. Assemble pipe legs and shelf brackets using 1-inch schedule 40 pipe, with shelf supports every 16 inches. Anchor the top run to the wall so it doesn't wobble when you grab a pair.
Pro tipAdd rubber feet under the lowest pipe to protect floors and stop sliding.
AvoidSkipping wall anchoring turns a "cool industrial" rack into a wobble machine.
6. Pegboard shoe rack with spray-painted hooks
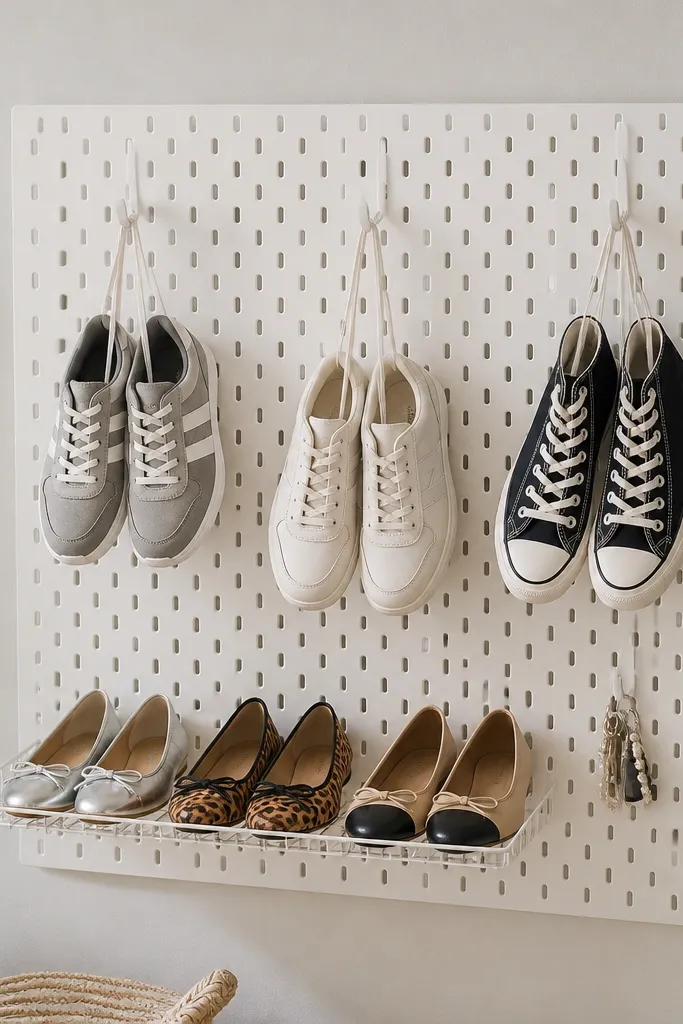
Pegboard is fast and looks tidy because everything lines up on a grid. Hooks keep pairs visible, and hanging by laces prevents odor buildup from trapped soles. I paint the pegboard a crisp off-white and use two hook colors: matte black for contrast and brass for warmth.
Mount 1/4-inch pegboard into studs or use heavy anchors if you can hit at least two studs. Add a wire shelf at about 18 inches from the floor for flats. Use S-hooks and adjust spacing so shoes don't bump each other when you pull one out.
Pro tipLabel the hook rows with tiny removable dots so you always put pairs back in the same place.
AvoidOverloading hooks without checking weight rating makes the board bow.
7. Modular cube rack with color-coded fronts
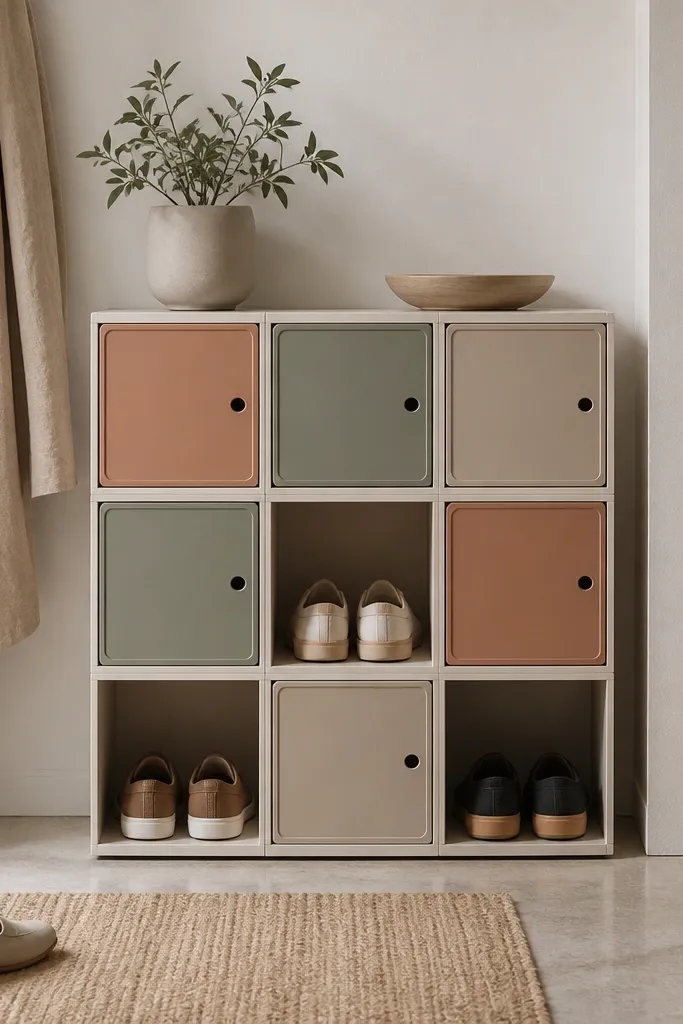
Color-coded fronts make it easy to keep pairs sorted, and sorting is what keeps a rack looking good. The cubes hide the messy parts of everyday shoe life while still letting you see what's inside. I like muted clay and sage because they don't stain like bright pigments.
Build a cube frame from 2x2 or 1x2 lumber and size cubes to 10x10 inches for sneakers. Add removable fronts using thin plywood panels on small magnets so you can pull them out to swap pairs. Seal the panels with matte clear so the colors don't scuff.
Pro tipUse the same color for each family member and put the "wet shoes" color in one spot near the door.
AvoidUsing glossy paint on removable fronts shows every finger smudge.
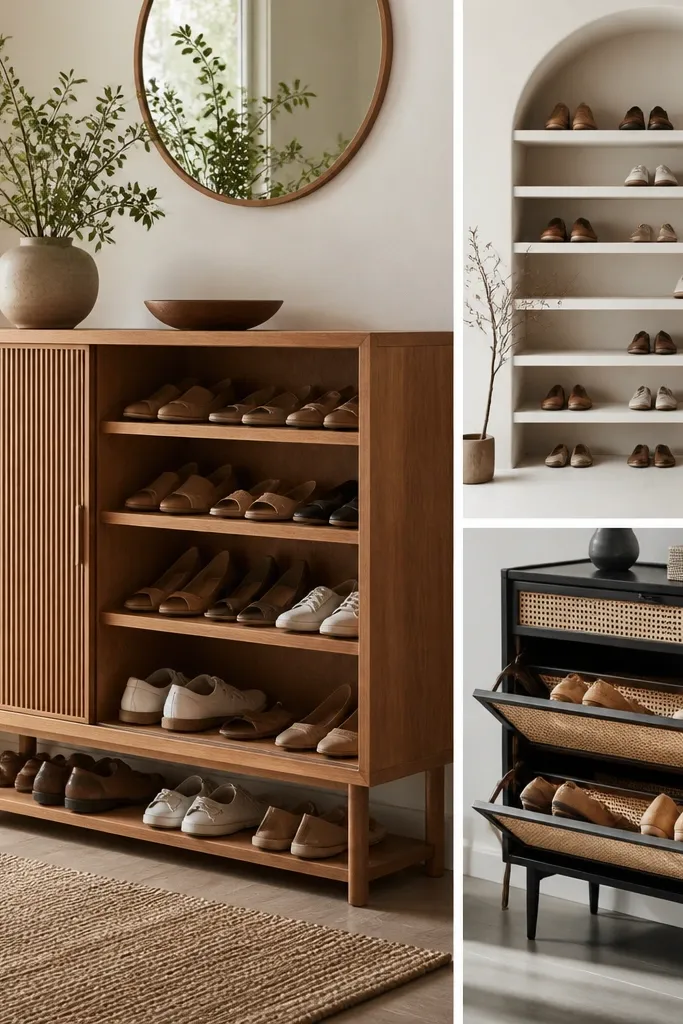
8. Rolling shoe cart with rattan panels
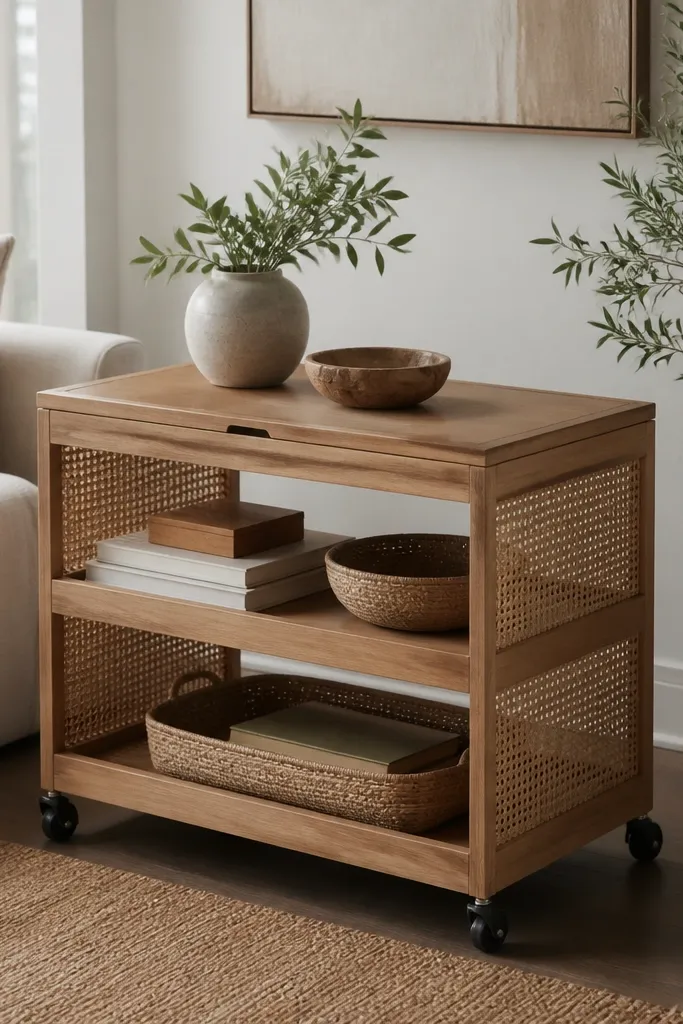
A rolling cart looks like furniture, not storage. Rattan sides hide shoe chaos while letting air move through. I finish the frame in warm white paint with a matte top so it blends into hallways and doesn't scream "utility."
Use a plywood frame with three shelves cut to 14-16 inches deep and 26-30 inches wide. Add rattan panels to the sides as open weave inserts, stapled and edged with thin trim. Install locking casters so it stays still when you open the door.
Pro tipAdd a removable tray on top for shoe care items - laces, brush, and a small spray bottle.
AvoidPutting the shelves too close together creates toe crush marks and makes the cart feel cramped.
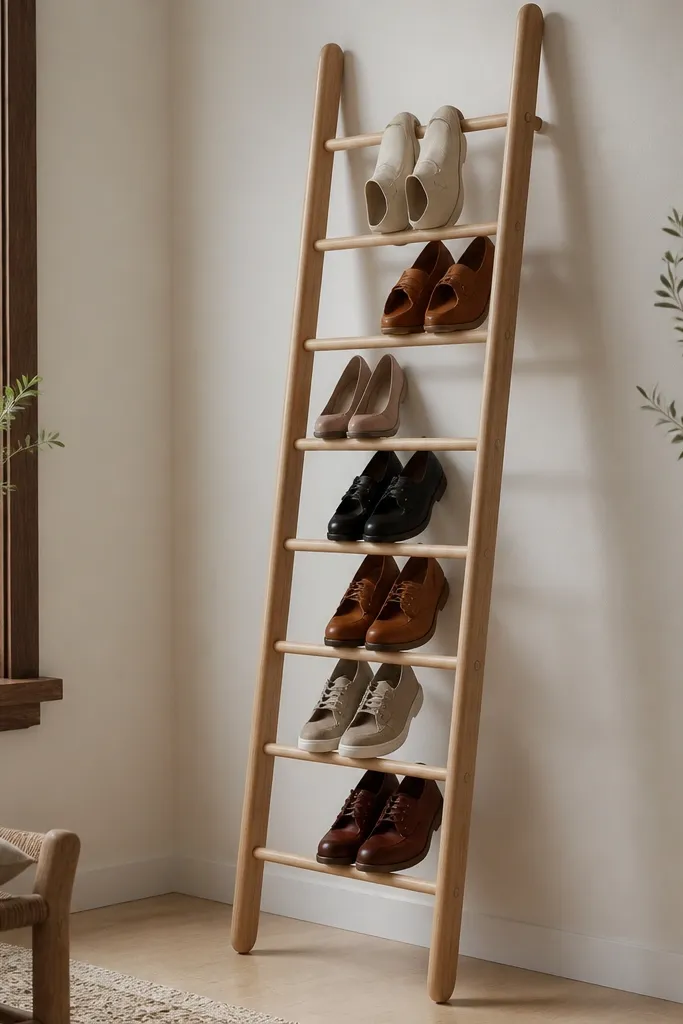
9. Slim ladder rack for flats and everyday sneakers
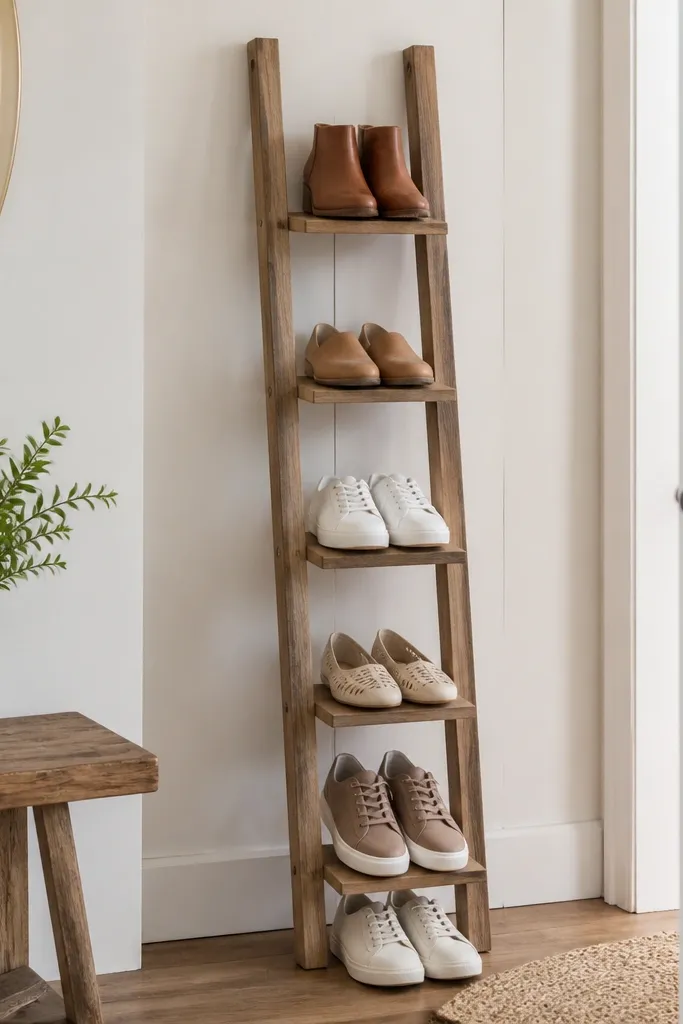
A ladder rack is visually light, even when it holds a lot. The open steps let air pass and it looks neat because each pair sits on a defined rung. I like building it from light birch or unfinished pine and staining it just one shade darker than the floor.
Make two side rails from 1x3 boards and cut rungs from 1x2. Space rungs 7 inches apart for sneakers and 5 inches apart for flats by swapping rung heights. Keep the rack depth under 10 inches so it doesn't crowd walkways.
Pro tipAdd a thin rubber strip on each rung so soles don't slide.
AvoidUsing rungs that are too short makes shoes hang off and look sloppy.
10. Built-in look using trim strips and a slatted back
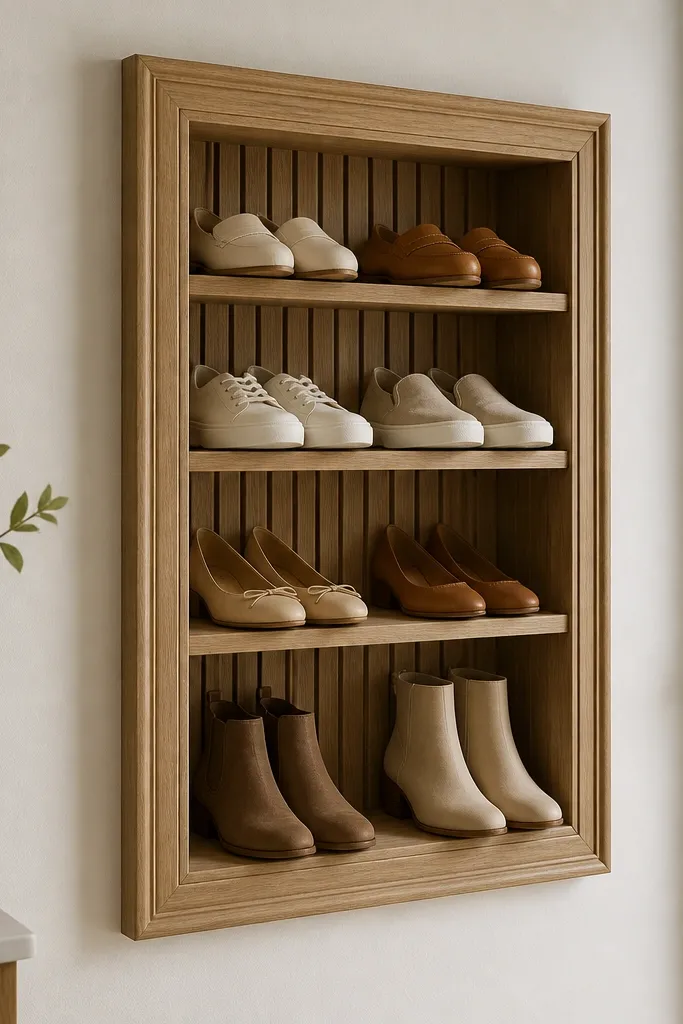
The trim makes it look built-in, and the slatted back keeps airflow behind the shoes. I've done this in narrow hall closets where solid backs trap smell. The clean lines from trim strips make the rack read intentional even if the build is simple.
Build a simple rectangle frame from 1x3 trim and attach 1/2-inch slats for the back panel. Add 3-4 shelves using 3/4-inch plywood with 1-inch gaps between slats. Paint everything the same color as your wall for a seamless look.
Pro tipUse painter's tape to mark shelf levels so the gaps stay even across the whole unit.
AvoidSkipping a slatted back turns "looks tidy" into "smells musty" over time.
11. Staggered entryway rack with front lip and open sides
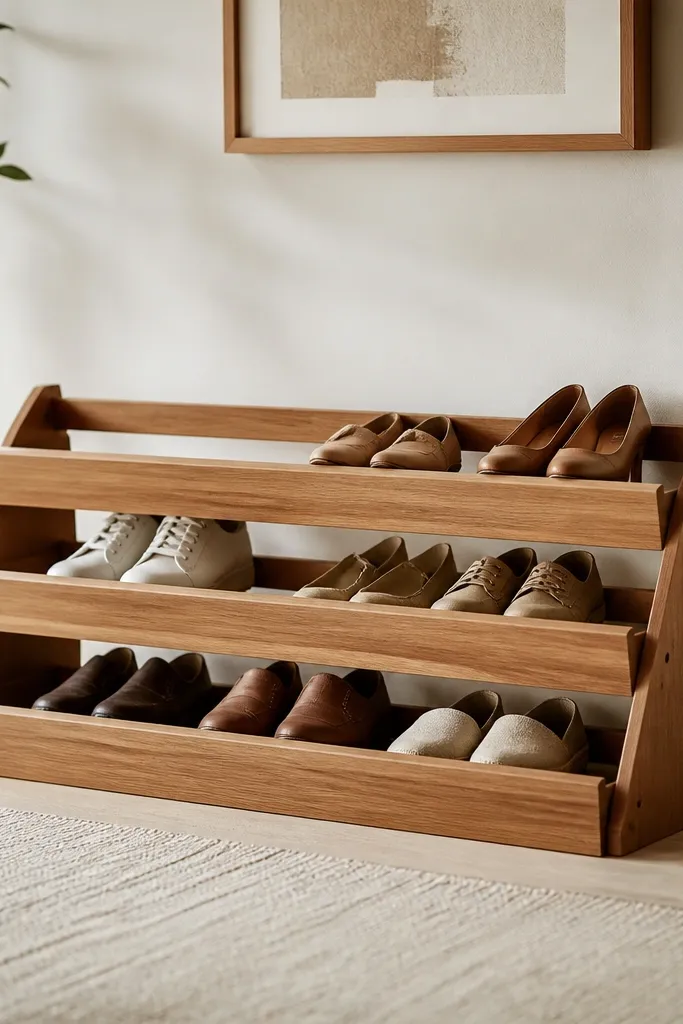
Staggered tiers prevent piles from forming because each pair lands in its own depth zone. The front lip keeps shoes from sliding forward when you step past. I make the back open so air moves - especially right after rainy days.
Use a 36-inch long base with three levels built from 3/4-inch plywood. Stagger shelf heights so sneakers sit at about 7 inches on the bottom, 10 inches mid, and 13 inches top. Add a 3/4-inch front lip board on each level.
Pro tipSand the lip edge smooth and round it slightly so you don't catch socks on it.
AvoidMaking shelves all the same height forces tall shoes into awkward angles.
12. Shoe rack with vertical acrylic dividers
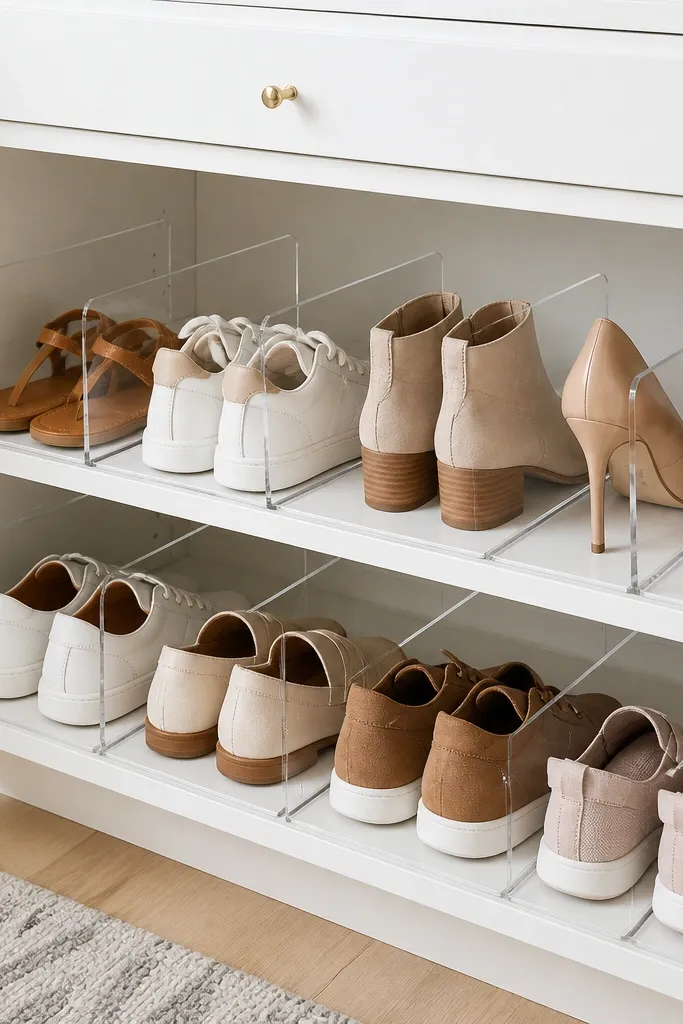
Clear dividers keep the layout strict while still letting you see what's stored. It looks modern and it's easier to find the right pair because nothing is hidden behind solid doors. I use frosted acrylic on the sides to soften glare and reduce the "display case" look.
Build a basic cabinet without doors, about 14 inches deep. Install vertical divider strips with spacers so each lane is 8-9 inches wide. Secure dividers with countersunk screws and clear adhesive pads to reduce cracking.
Pro tipUse a matte white back panel so the clear dividers don't look washed out.
AvoidUsing too-thin acrylic without proper spacing causes wobble and visible flex.
13. Curved wood shoe rack with semicircle openings
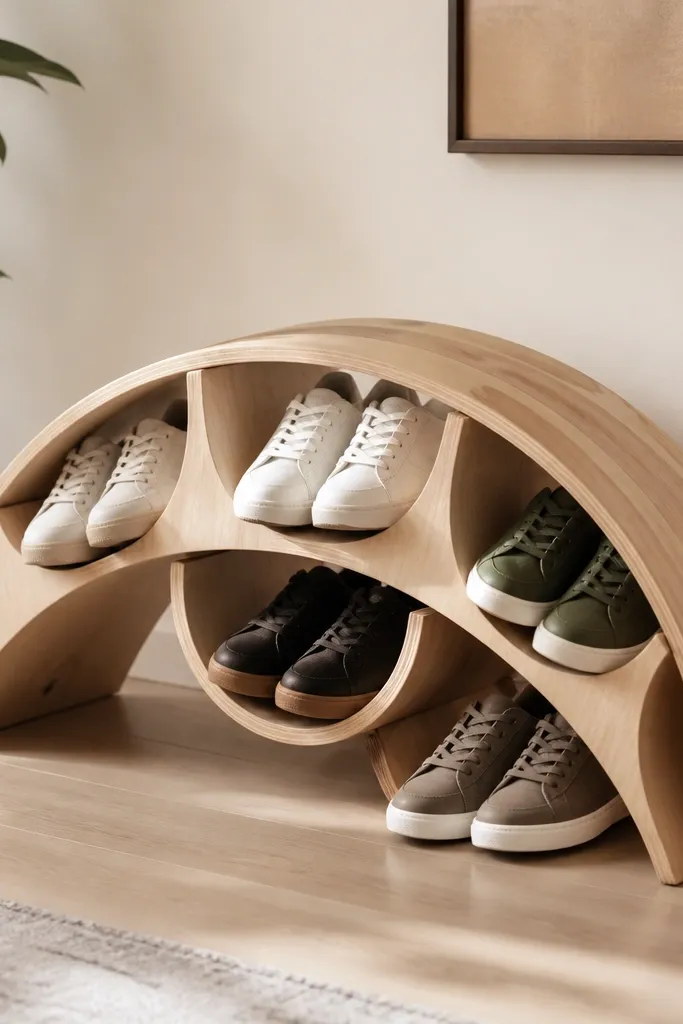
Curved openings soften the whole entryway. The semicircle bays hold shoes without pinching the toes, and the arc makes it feel like a design object. I build the base from 3/4-inch plywood bent using kerf cuts and then sand smooth.
Cut semicircle bays using a template so each opening matches. Make about 10-inch wide bays for sneakers and adjust the height so the sole sits flat. Seal with matte clear and add a thin base strip for stability.
Pro tipKeep the curve gentle (about a 48-inch radius) so it still feels stable and doesn't look like a prototype.
AvoidOver-bending plywood makes the surface look rippled.
14. Recessed door-mount shoe rack with flip-down shelves
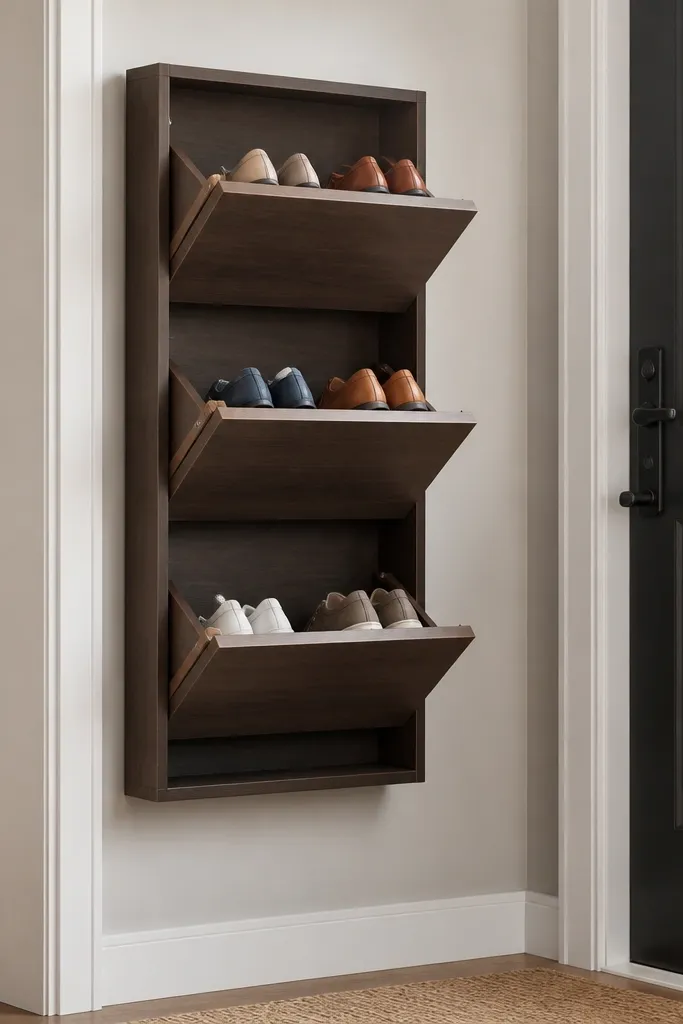
This is the best option when you have almost no wall space. Flip-down shelves give you a place for shoes without permanently taking up space. I use a matte finish and hinges rated for the shelf weight so it stays smooth after months.
Mount two hinge points into studs and attach a 1x4 shelf panel to fold down. Use three shelves spaced for flats, sneakers, and boots. Add a stop block so the shelf lands level and doesn't scrape the wall.
Pro tipUse felt pads on the shelf underside so shoes don't skid and the shelf doesn't rattle.
AvoidSkipping a stop block makes the shelf bounce and wear the hinge area.
15. Two-tone shoebox style rack with black base
Two-tone looks clean because your eye reads the structure first and the shoes second. The black base hides scuffs from vacuuming and keeps the rack grounded. I use off-white cabinet paint for the cubbies and matte black for the lowest strip.
Build cubbies about 11 inches wide and 6-7 inches tall for flats and low sneakers. Add a black base frame made from 1x3 boards about 3 inches tall. Leave the back open or drill small holes for airflow.
Pro tipMake the cubby fronts slightly larger than the opening so the edges hide the plywood layers.
AvoidPainting everything the same color makes DIY edges look messy.
16. Wire basket shoe rack with wooden base tray
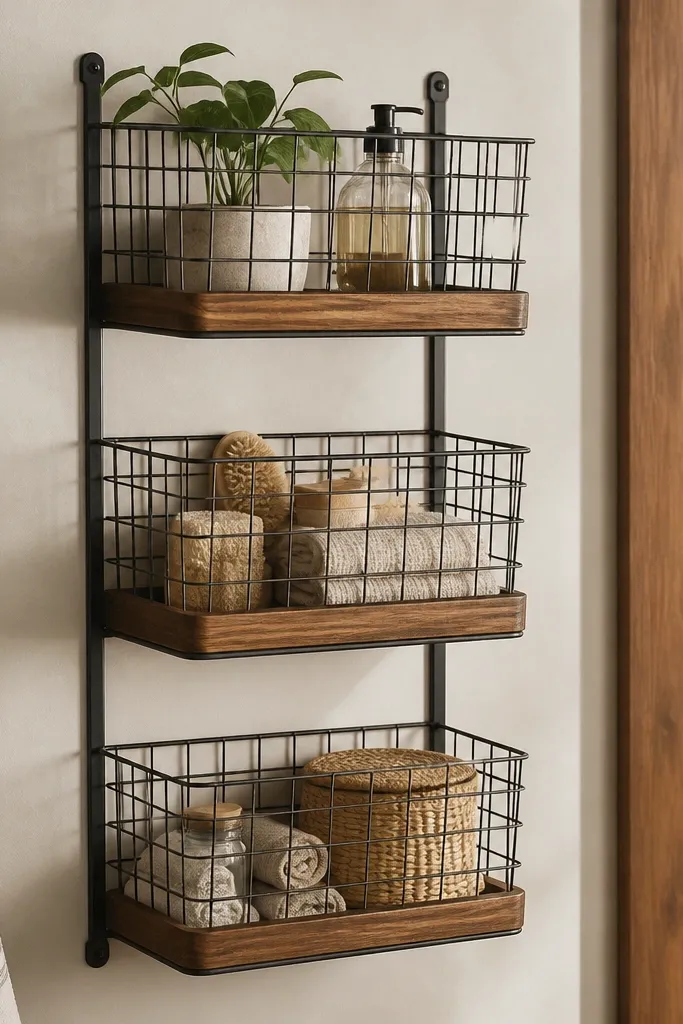
Wire baskets dry fast and look airy, which is perfect near an entry door. The wooden base tray catches drips so the wall doesn't get grimy. I like using black wire and a light wood tray because it keeps the contrast modern.
Mount a support rail into studs. Attach wire baskets so the gaps between baskets are about 8-9 inches for sneakers and 10-12 inches for boots. Add a base tray from 3/4-inch plywood with a 1-inch lip.
Pro tipUse a removable tray insert you can wash after rainy season.
AvoidMounting wire baskets with only drywall anchors leads to sagging and twisting.
17. Shoe rack with fabric shoe bags on a curtain rod
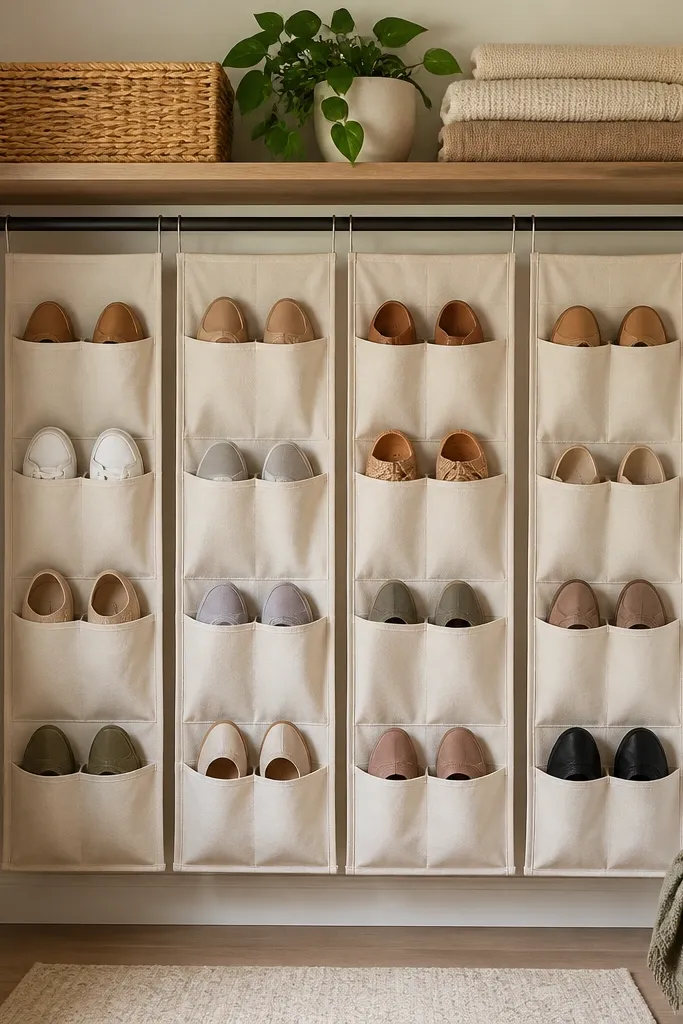
Fabric pockets are a lifesaver for flats, sandals, and smaller shoes because they don't need rigid structure. The curtain rod keeps everything aligned and easy to remove for washing. I use a neutral canvas fabric organizer and mount it inside a closet so it looks built-in.
Install a curtain rod under a shelf at about 16-18 inches above the floor. Use organizer pockets sized to 8x10 inches for most shoes. Fold the organizer corners behind the rod hooks so the edges stay straight.
Pro tipAdd a small strip of Velcro on the back of each pocket for extra stability when you pull shoes out.
AvoidUsing flimsy organizers with stretchy seams makes shoes slump and look uneven.
18. Outdoor-style slat rack with weathered gray finish
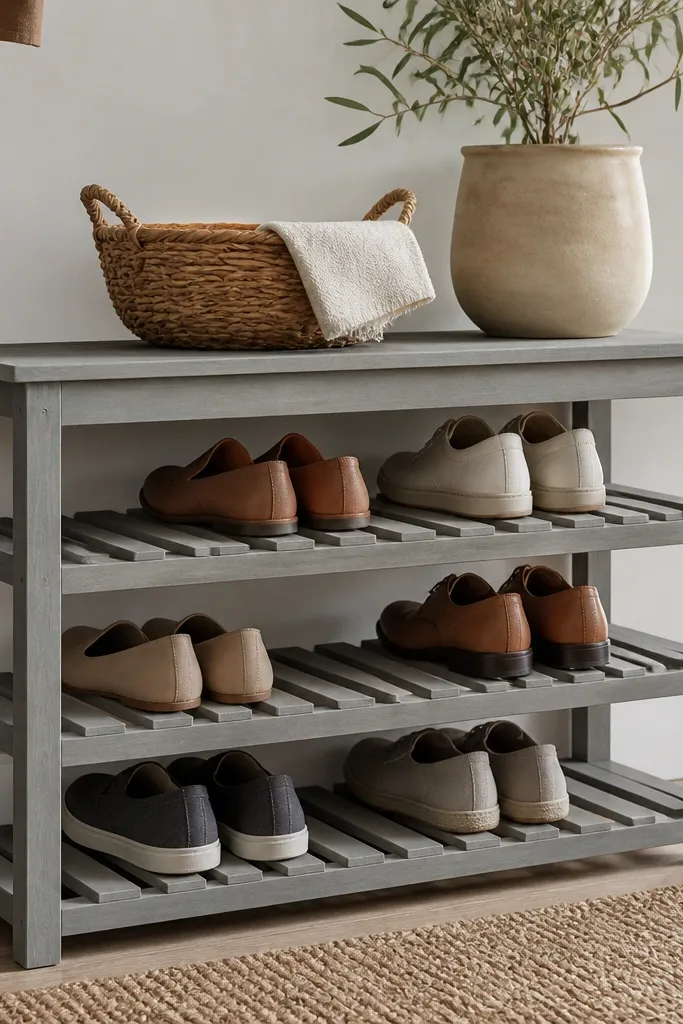
Slats let shoes dry even if you place them damp. Weathered gray looks good with both modern and farmhouse entryways, and it hides minor scratches. I build this when I know the rack will get wet - near back doors or mudrooms.
Use cedar or treated pine for the slats and frame. Paint with exterior-grade paint, then seal with matte clear. Space slats about 1/2 inch apart so air flows and soles don't rest on a flat, wet surface.
Pro tipWipe down after snowy weeks and recoat only the top edges with clear matte to keep it uniform.
AvoidSealing with glossy coat makes the weathered look turn shiny and cheap.
19. Ladder shelf rack with rungs made from dowels
Dowel rungs look more designed than flat boards because they create tiny shadows under shoes. The round shape also prevents sharp edges that snag socks. I pair the dowels with a matte white frame for a clean, airy look.
Drill holes into two vertical side boards and insert dowels at consistent heights. Use 3/4-inch dowels cut to the shelf width, and glue them only at one end so you can adjust slightly. Add a small stop block at the front to keep shoes from sliding off.
Pro tipUse a Forstner bit for clean hole edges so the dowels sit flush.
AvoidCutting dowels too long makes the sides bow and the rack looks crooked.
20. MDF drawer-front shoe rack with pull-out trays
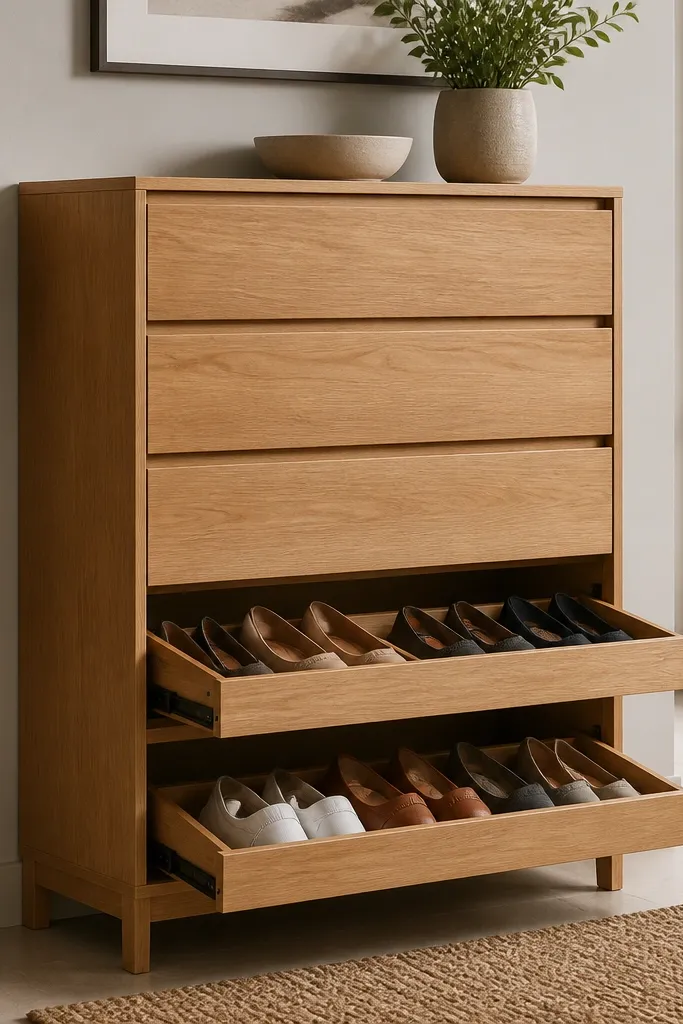
Drawer fronts hide the mess and keep the rack looking crisp. Pull-out trays make daily use faster because you don't have to reach into deep cubbies. I build this style for people who hate seeing shoes in the open.
Build a cabinet box from 3/4-inch MDF or plywood. Install full-extension slides on the pull-out trays sized to 14-16 inches deep. Use drawer fronts with a simple shaker panel and paint with cabinet enamel.
Pro tipDrill a line of 1/2-inch holes in each tray bottom so shoes dry without taking the whole tray out.
AvoidUsing solid tray bottoms without holes traps odor and makes the drawers smell.
21. Shoe rack with built-in mirror and top shelf
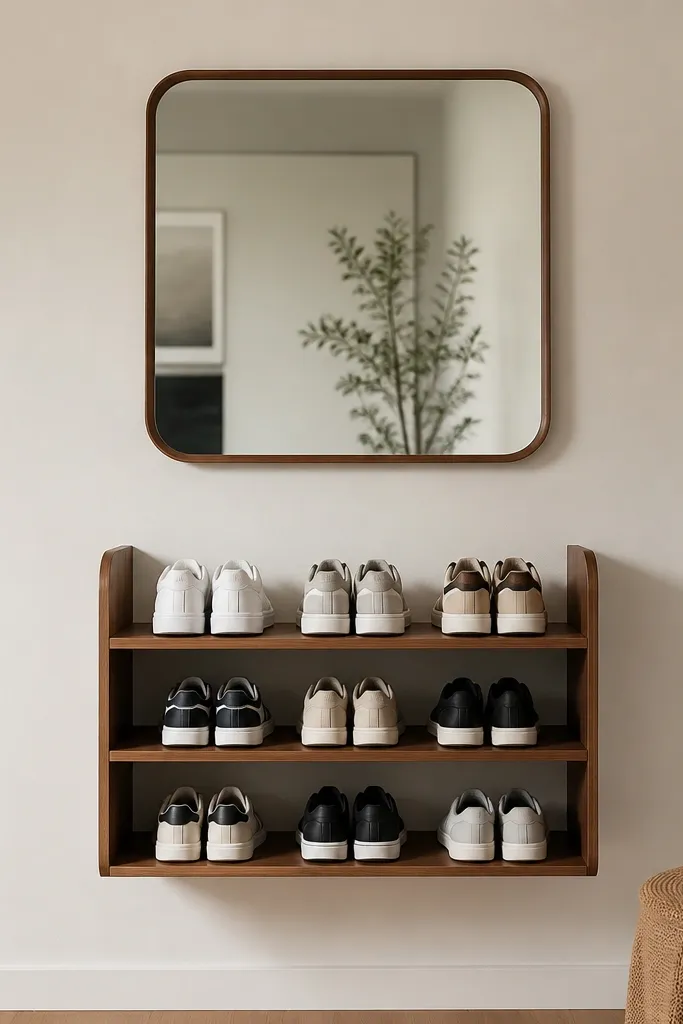
A mirror makes the entryway feel bigger, and it turns shoe storage into a functional spot for quick checks. The top shelf is perfect for keys and a small tray for sunglasses. I keep the rack simple - open shelves and matte black hardware - so the mirror stays the focal point.
Frame a mirror with 1x2 trim and mount it above a three-shelf rack. Set shelf heights around 7-8 inches for sneakers and leave the bottom shelf open for airflow. Use wall anchors into studs and add a 1x2 safety rail under the mirror frame.
Pro tipAdd a thin felt strip on the shelf lip to stop shoe heel marks.
AvoidMounting a mirror without a level reference line makes the whole unit look off.
22. Small-space shoe rack with rotating carousel
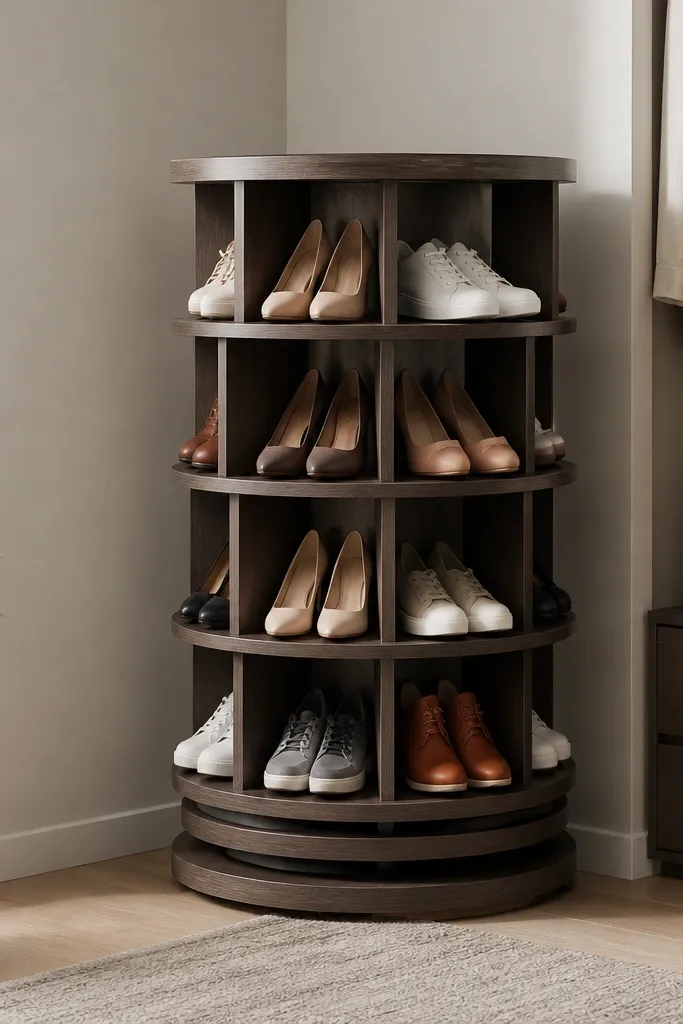
A carousel saves space because you store vertically but access easily. It looks tidy because you only see one section at a time as you rotate. I use a simple round base with a central spindle and evenly spaced shelves for sneakers.
Build a round base from 3/4-inch plywood and mount a lazy susan bearing kit in the center. Add 6-8 wedge compartments using thin plywood dividers. Finish with matte paint and add a rubber stop so it doesn't spin past your preferred position.
Pro tipKeep compartment width around 9 inches so sneakers fit without squishing the toes.
AvoidMaking compartments too narrow forces shoes to angle and ruins the clean look.
23. Backpack-and-shoe rack using pegboard + baskets
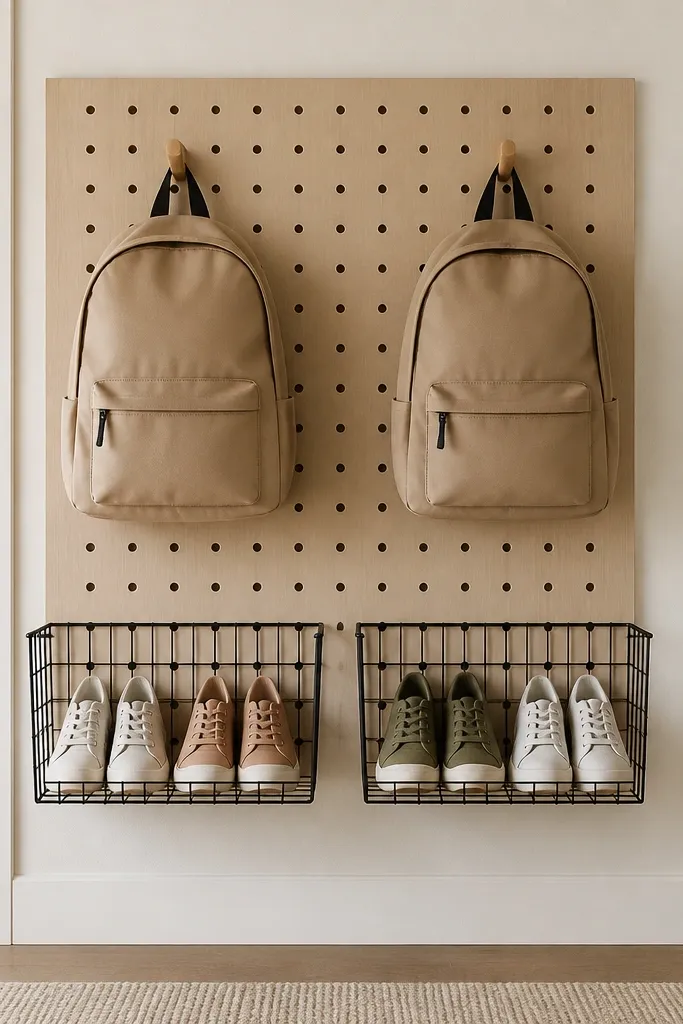
When shoes and bags share the same system, the entryway stays orderly. Wire baskets dry well and look consistent on the pegboard grid. I keep the design symmetrical with baskets centered and hooks aligned so it reads intentional.
Mount pegboard into studs and add a pair of wire baskets sized to 10-12 inches wide. Place baskets at about 14-16 inches above the floor to avoid dirt. Add hooks above for backpacks and small items like hats.
Pro tipUse the same basket color (all black or all chrome) so the hardware doesn't look mismatched.
AvoidMixing too many hardware styles makes the pegboard look cluttered even when it's organized.
24. Cedar slat bench rack with flip-up top
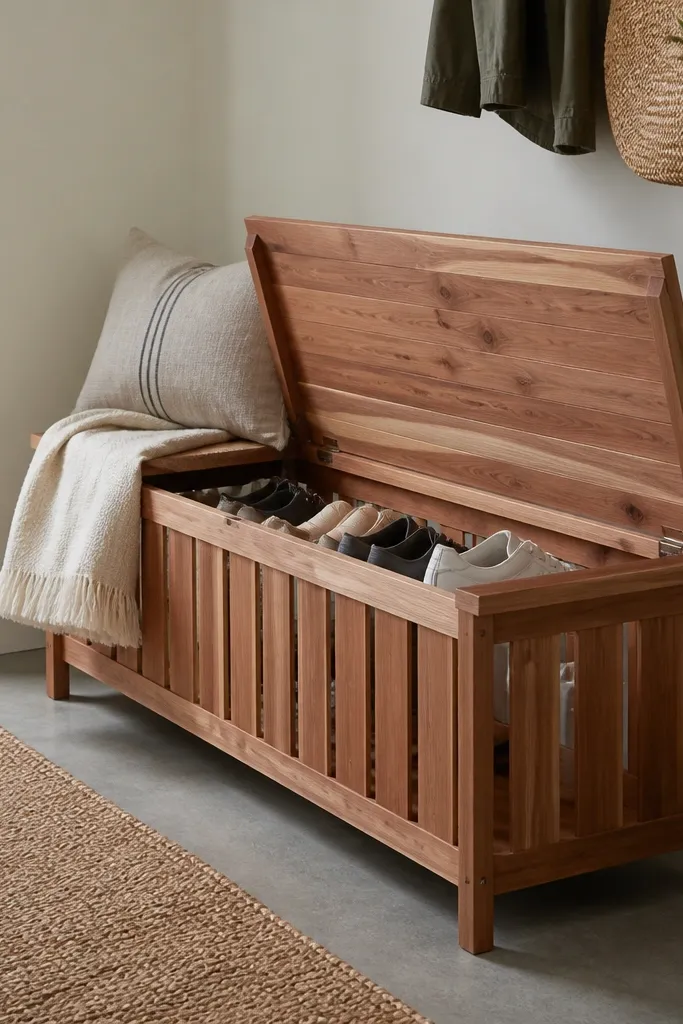
A bench rack solves two problems: storage and a place to sit while you put on shoes. Cedar smells nice and handles moisture better than many woods when sealed. The slatted sides keep airflow, so shoes dry even if you place them quickly after coming in.
Build a bench frame from 1x3 cedar and add slatted sides with 1/2-inch spacing. Make the flip-up top from a hinged panel with a simple latch. Add an internal shelf grid so sneakers sit flat and boots have a tall back section.
Pro tipUse a soft-close hinge or a simple stay hinge so the lid doesn't slam.
AvoidUsing a solid bottom with no ventilation makes cedar smell like damp wood.
25. Monochrome shoe rack with black steel shelves
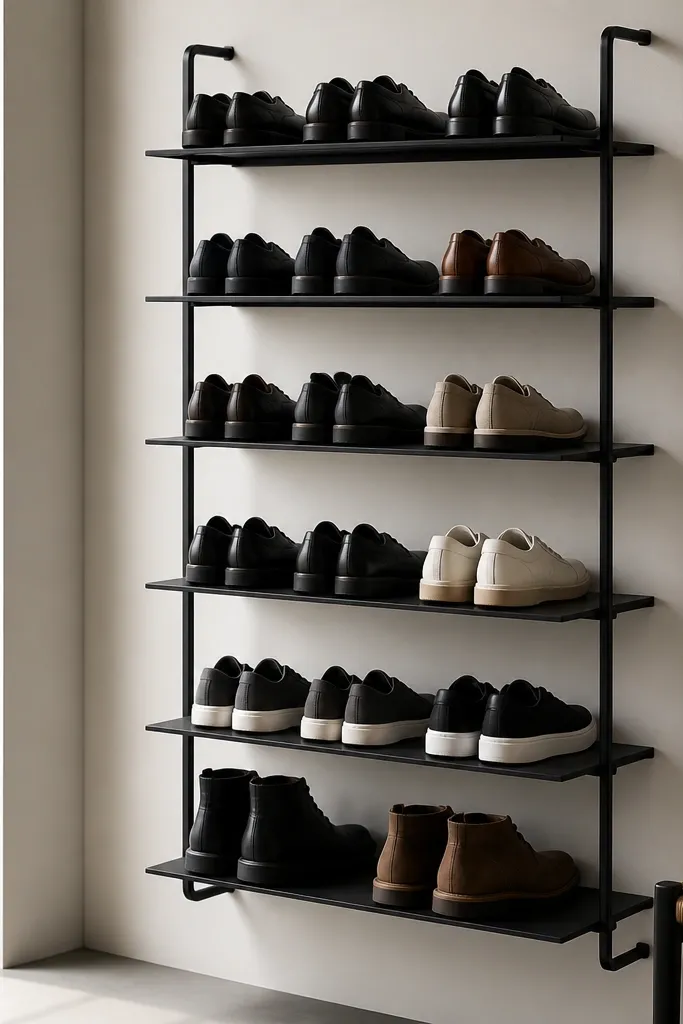
Monochrome looks clean because the shelf edges are consistent and the eye doesn't chase color. Matte black steel hides scratches from buckles and daily use. This is the style I pick for entries that get hit with rain and mud.
Use matte black steel shelving brackets with 3/4-inch wood planks or steel deck shelves. Space shelves 8 inches apart for sneakers and 12 inches for boots. Mount into studs and use at least three attachment points across the frame for stability.
Pro tipAdd a thin anti-slip strip under each shelf so shoes don't slide and scuff.
AvoidUsing glossy black hardware shows every fingerprint and looks messy by day three.
26. Rope-hung shoe rack with wooden pegs
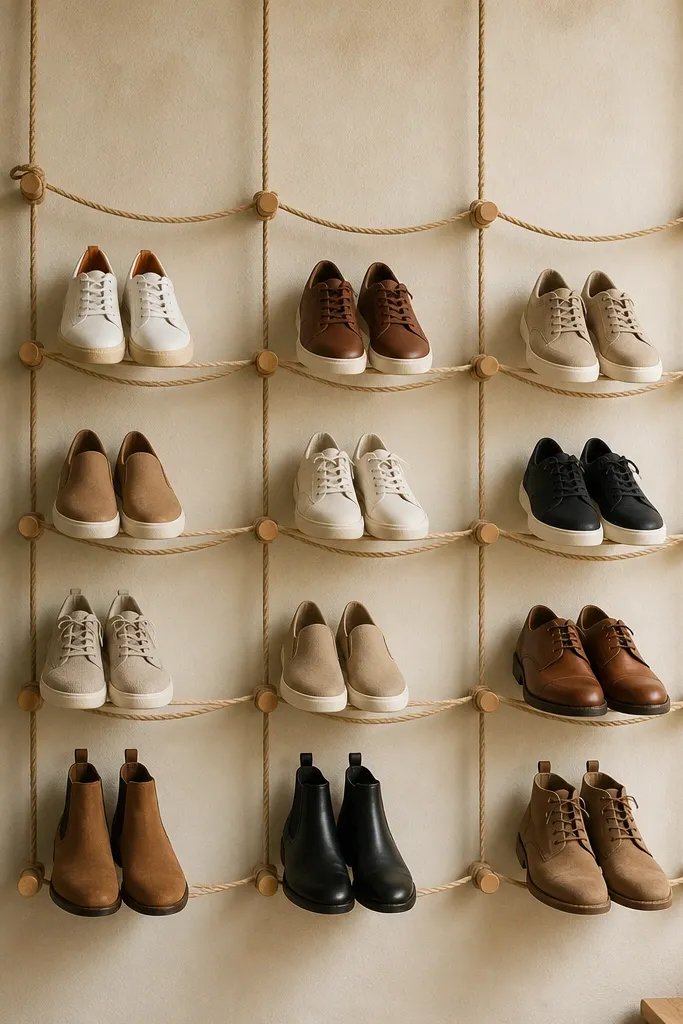
Rope-hung storage looks light and casual, which works in beachy or boho entries. Wooden pegs keep shoes separated and visible, and the rope spacing creates natural airflow. I use natural jute rope stained slightly and pegs in a light honey tone.
Mount two vertical anchors and run horizontal rope lines with adjustable knots. Attach wooden pegs using small eye hooks so you can move pegs to fit different shoe heights. Keep the system low enough for easy access but high enough that the soles aren't dragging on the floor.
Pro tipUse a rope guide on the wall so the rope lines stay parallel and the layout doesn't drift.
AvoidTying knots too loose makes pegs slide and the spacing looks random.
27. White shaker cabinet style with vented doors
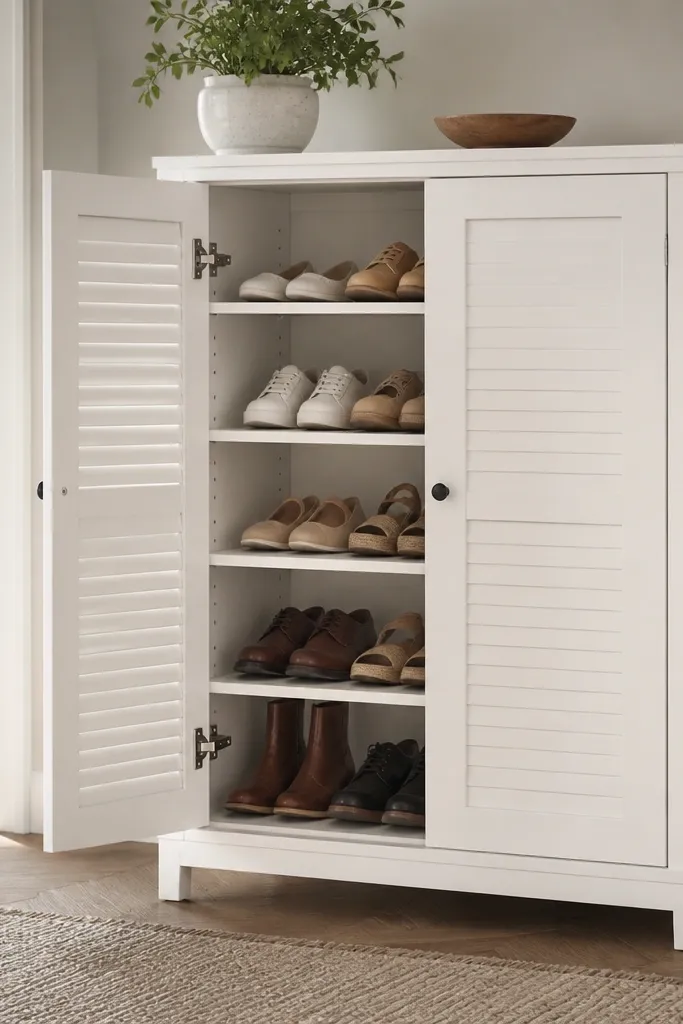
Shaker-style doors make shoe storage look like real furniture, not a utilitarian rack. Vented doors keep airflow while hiding shoes from view. I like a crisp white cabinet paint and brushed nickel hinges so it matches typical interior hardware.
Build a cabinet box with adjustable shelves using a simple dowel-pin system or shelf standards. Use vented door inserts like louvered panels or perforated inserts for airflow. Install soft-close hinges and keep the bottom shelf about 6 inches higher than the floor to avoid damp.
Pro tipAdd a small magnetic vent grille near the bottom so you can open it for odor control after wet days.
AvoidUsing solid doors with no vent turns the cabinet into a smell trap.
28. Floating shoe ledge with built-in LED strip
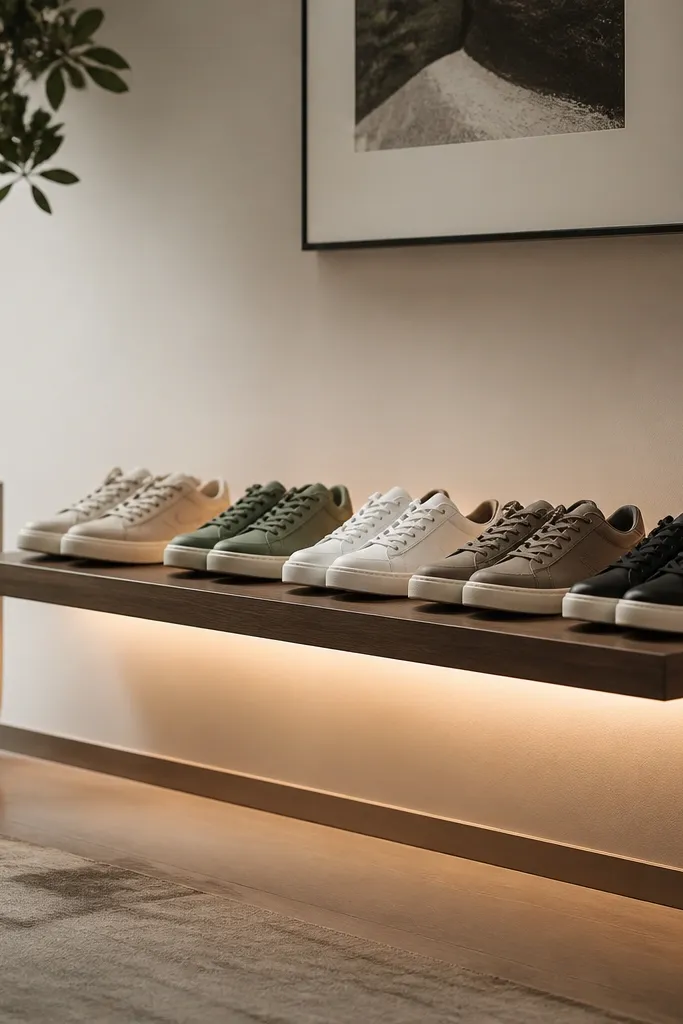
Lighting makes everything look intentional. When you add a warm LED strip under a floating ledge, the shoes look like a styled display instead of storage. I use warm 2700K LEDs and matte finishes so the light doesn't glare.
Install a floating shelf at around 16-18 inches from the floor. Route a low-voltage LED strip under the shelf edge and hide the driver inside a small access panel. Use a front lip about 3/4-inch so shoes don't slide and catch on the light strip.
Pro tipUse a dimmer - full brightness shows scuffs; dimmed light looks clean and flattering.
AvoidUsing cool 6500K LEDs makes shoes look gray and cheap.
29. Segmented bamboo shelf rack with fan-like layout
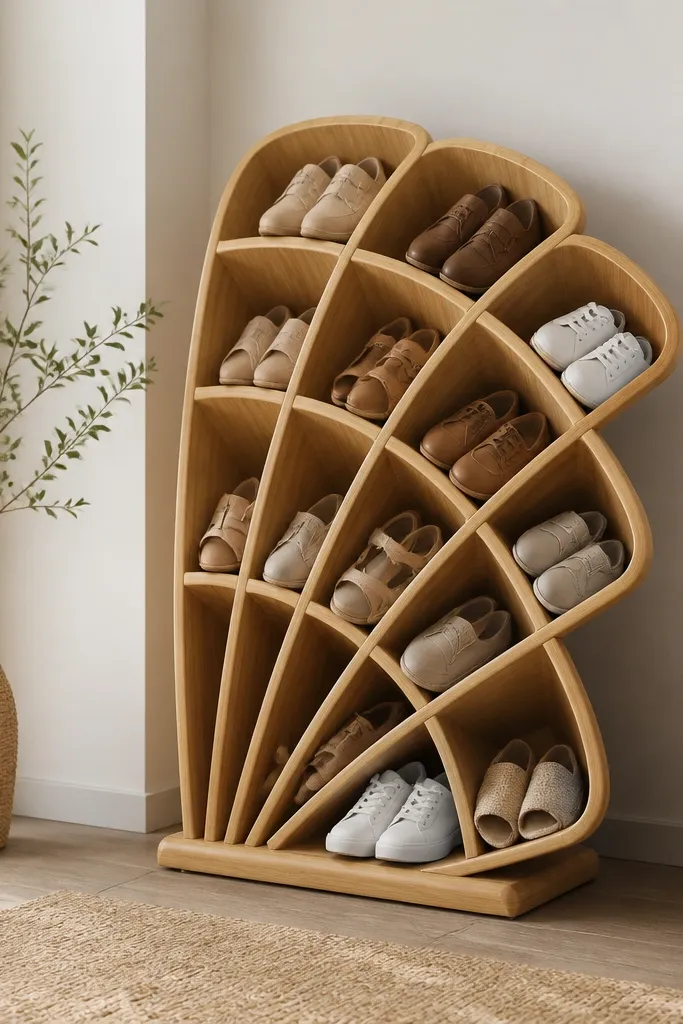
Bamboo looks warm and the segmented shelves create a "fan" pattern that feels designed. Shoes dry because segments create small gaps and the rack avoids flat stacking. I seal bamboo with matte clear so it doesn't turn sticky or overly shiny.
Use bamboo slats or bamboo boards cut into curved segments. Build a backing frame from plywood and attach segments with small brackets, spacing them so each holds one pair snugly. Keep the bottom segment higher if you get wet entryways.
Pro tipStagger the segments so no two shoes touch - it keeps scuffs off and the look stays crisp.
AvoidPacking shoes too tightly into segments makes the rack look crowded and messy.
30. Corner banquette shoe rack with removable bins
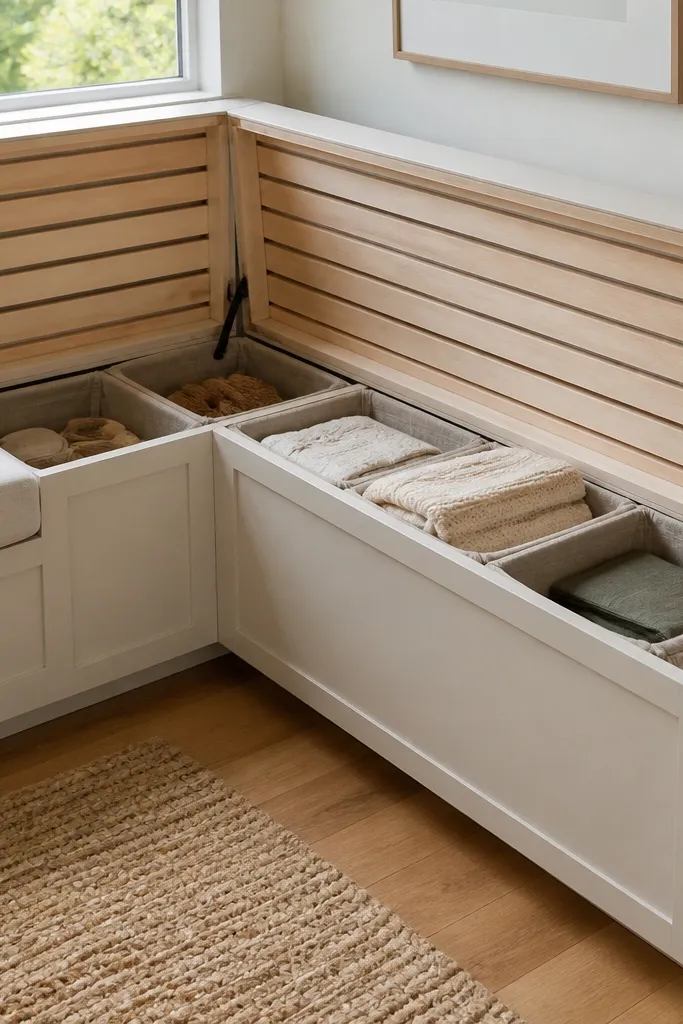
A banquette makes shoe storage feel like seating, which people actually use. Removable bins keep everyday pairs together and make cleaning easy. I use slatted supports inside so air moves through the cavity and damp shoes don't sit in a closed box.
Build a bench base with a hinged top panel and internal slats at about 1/2-inch gaps. Place fabric bins with rigid bottoms inside, sized to 12-inch widths. Add a small vent gap between the back wall and the bench interior.
Pro tipAdd a short handle to each bin so you can pull it out one-handed.
AvoidSealing the inside completely with solid panels makes the bench area smell after rainy weeks.


