1. Sage + Moonstone Swirl with Black Cord
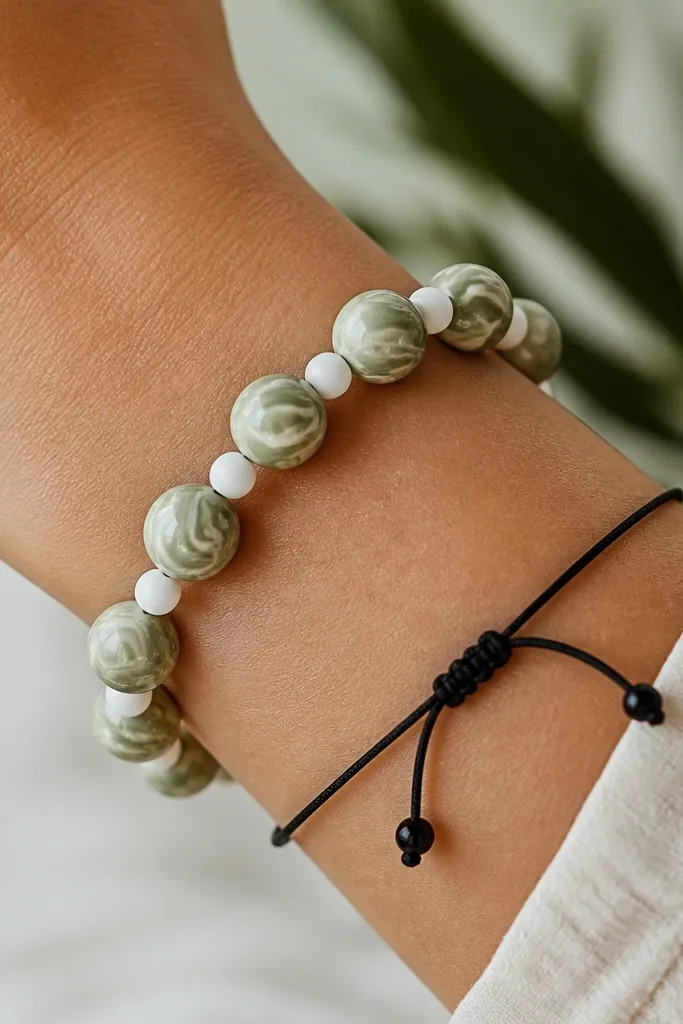
This one looks calm and put-together because the palette is tight: sage with milky white. The marbled swirl beads act like a focal without needing a big charm. Black cord adds contrast so the light beads don't fade into your skin. Seed beads fill micro-gaps so the bracelet doesn't show big empty stretches between clay beads.
Use 10mm sage swirl clay beads as your focal at every third position, with 6mm matte sage beads between. Add 2-3 seed beads (size 11) between clay beads, then finish with black cotton cord or nylon cord tied into a sliding knot. Keep the spacing consistent by laying beads out in a line on a paper towel before stringing.
Pro tipTie your sliding knot, then pull the cord tight enough that the bracelet sits flat - not twisted - before you trim the ends.
AvoidAvoid using only large clay beads with no seed bead fill or it will look hollow and uneven.
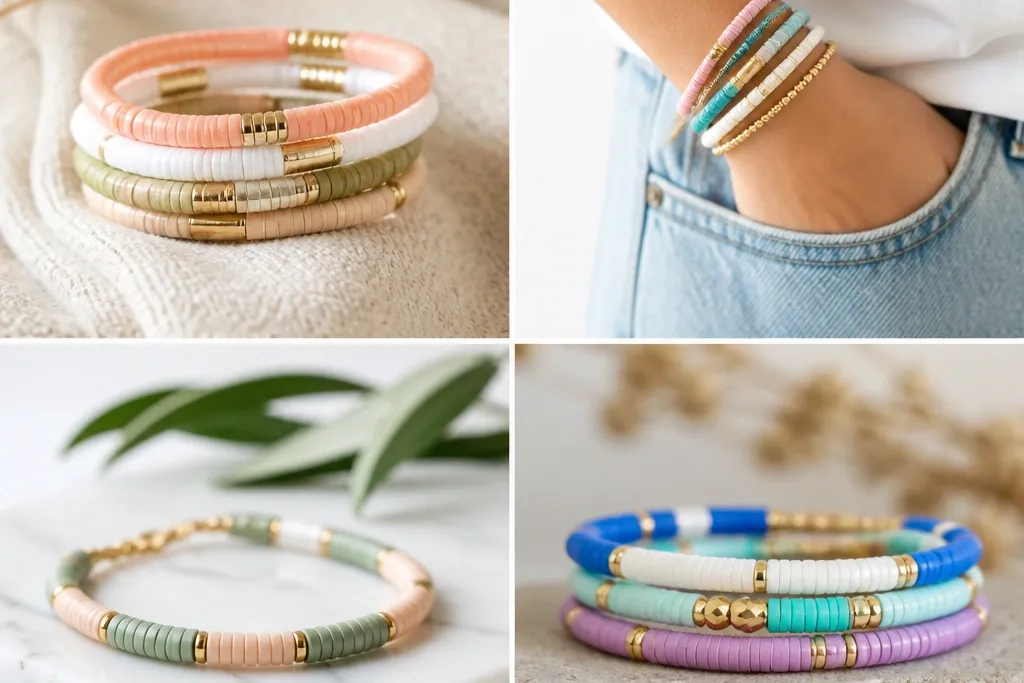
2. Terracotta Gradient with Micro Gold Spacers
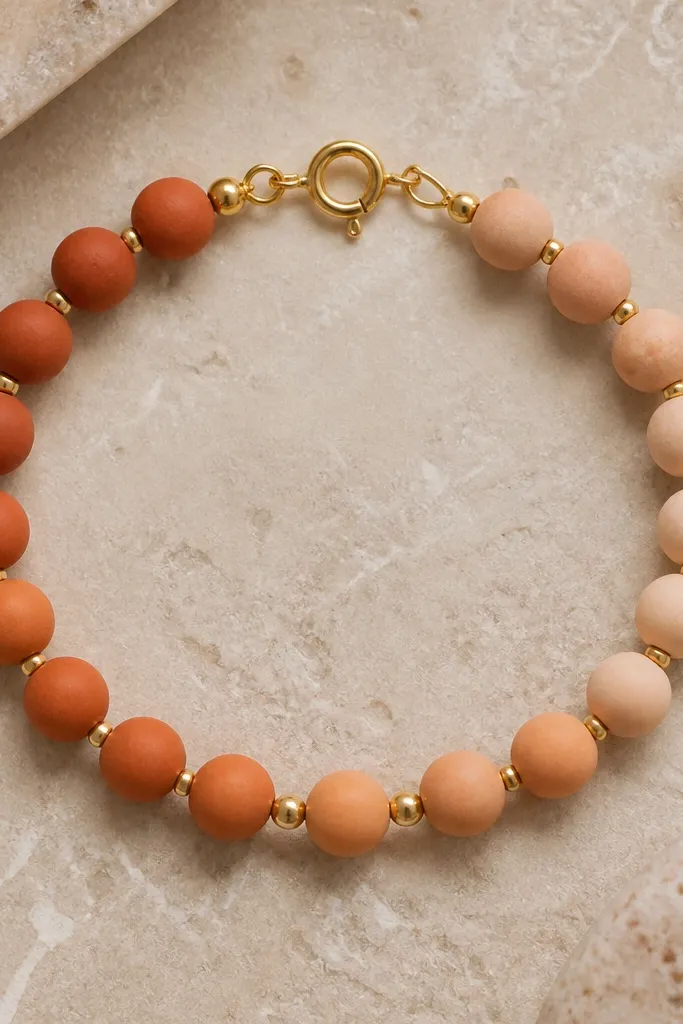
Gradients read intentional even when you're using simple materials. Terracotta beads naturally move from darker to lighter, and the micro gold spacers keep the rhythm. The gold doesn't need to be flashy; it just gives a thin line of brightness between clay tones. This is the bracelet I wear when my outfit is plain and I want color without a loud pattern.
Pick 8-10 clay beads total: 2 darker (10mm), 4 medium (8mm), and 3 lighter (6-7mm). String with 0.5mm elastic thread or jewelry wire, then add one micro gold spacer after each clay bead except the last. Use a small lobster clasp or a fold-over clasp for clean ends.
Pro tipLay the gradient out from darkest to palest on a desk before you start stringing so you don't accidentally reverse it.
AvoidDon't mix random terracotta shades (like red + pink + brown) - stick to one gradient family.
3. Speckled Clay Confetti with Clear Seed Beads
Speckled clay beads already look like they have tiny "confetti," so you don't need charms. The clear seed beads add sparkle when you move your wrist, and they also help you control spacing. This design feels airy on small wrists because it's not packed with chunky beads. It also looks good with both casual and dressy outfits.
Use 12-14 speckled clay beads in 6mm size, alternating with single rows of clear seed beads (size 11). Add a silver spacer bead every fourth clay bead to break up the pattern. If you're using stretch cord, finish with a crimp bead and a bead-tip cover so it looks smooth.
Pro tipIf your clay beads have a matte finish, keep seed beads clear instead of metallic so the bracelet doesn't look too shiny.
AvoidSkip metallic seed beads with already-sparkly speckles or the surface gets visually "noisy."
4. Matte Black Clay with Cream Bow Tie Focal
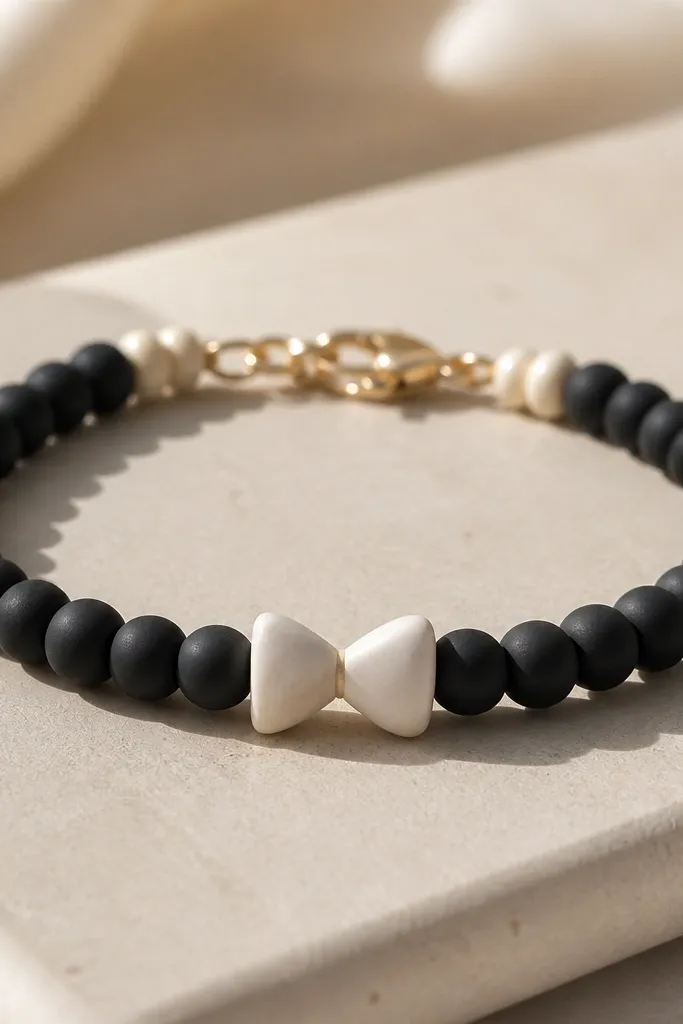
This is graphic and wearable because the matte black beads hide fingerprints and look smooth. The cream bow-tie bead gives you a clear theme without needing multiple charms. I like this when I want something that looks like it came from a boutique shelf. The cream accents near the clasp make the ends look finished.
Use 10-11 matte black clay beads in 7mm, then center one cream bow-tie clay bead (about 12-14mm wide). Add two cream micro-spacers near the clasp side only. String with elastic thread and finish with a small round clasp or stretch knot wrapped with a thread tail.
Pro tipPolish matte clay gently with a soft dry cloth after assembly to keep it looking even.
AvoidAvoid glossy black beads if you don't want a fingerprint magnet.
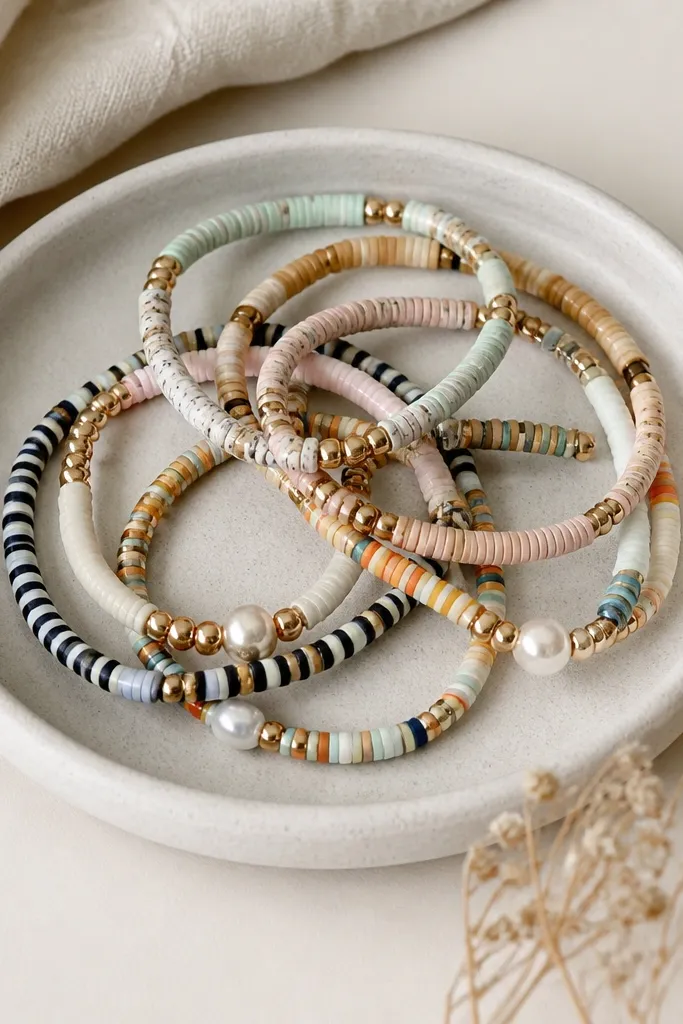
5. Pastel Bead Mix with One Brass Accent Charm
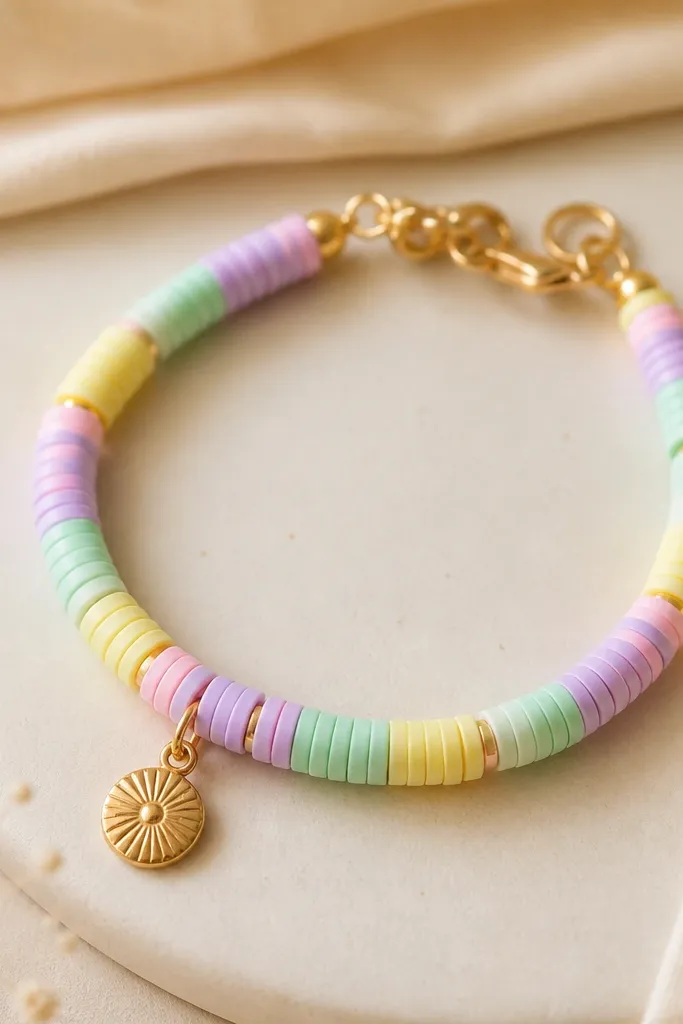
Pastels can look childish if you mix too many patterns. Here, you keep it adult by using one type of bead finish across colors - matte or semi-matte. The single brass charm adds a warm accent and makes the bracelet move in a satisfying way. This setup is easy in a small space because you're not doing complex spacing - just consistent bead sizes.
Choose 3-4 pastel colors and keep to 6mm clay beads for most pieces. Add one 8-10mm bead in the middle and attach a tiny brass charm (like a flat tag) on a short jump ring near the clasp. Use a clasp so the charm doesn't twist the bracelet.
Pro tipIf your pastel beads vary in thickness, sort by thickness first so your bracelet sits evenly.
AvoidDon't add three different metal types (gold + silver + copper) or the bracelet looks mismatched.
6. Navy + White Rope Bead Pattern
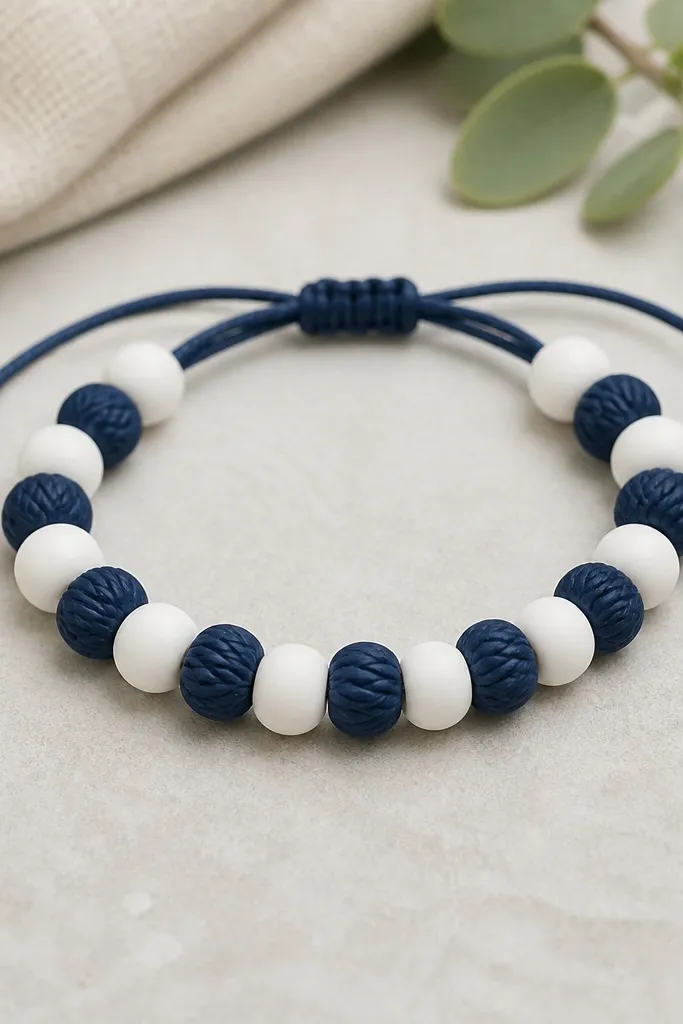
Rope-texture beads create a tactile pattern even when the color palette is simple. Navy and white stays crisp, and the texture makes it feel handmade in a good way. This is a great choice if you're working with a small set of clay bead sizes because alternating textures does the styling for you. It also looks great with denim and plain tees.
Use 5-6 rope-texture navy beads (about 8mm) and 6-7 smooth white beads (6mm). Space them with one tiny seed bead after each rope bead so the texture doesn't bunch. Finish with navy cord and a simple macramé-style knot or a small cord end cap.
Pro tipWrap your cord ends with a tiny dab of jewelry glue before trimming so they don't fray.
AvoidAvoid skipping the seed bead spacer or the rope texture beads will press together.
7. Sunburst Citrine with Tiny Star Spacers
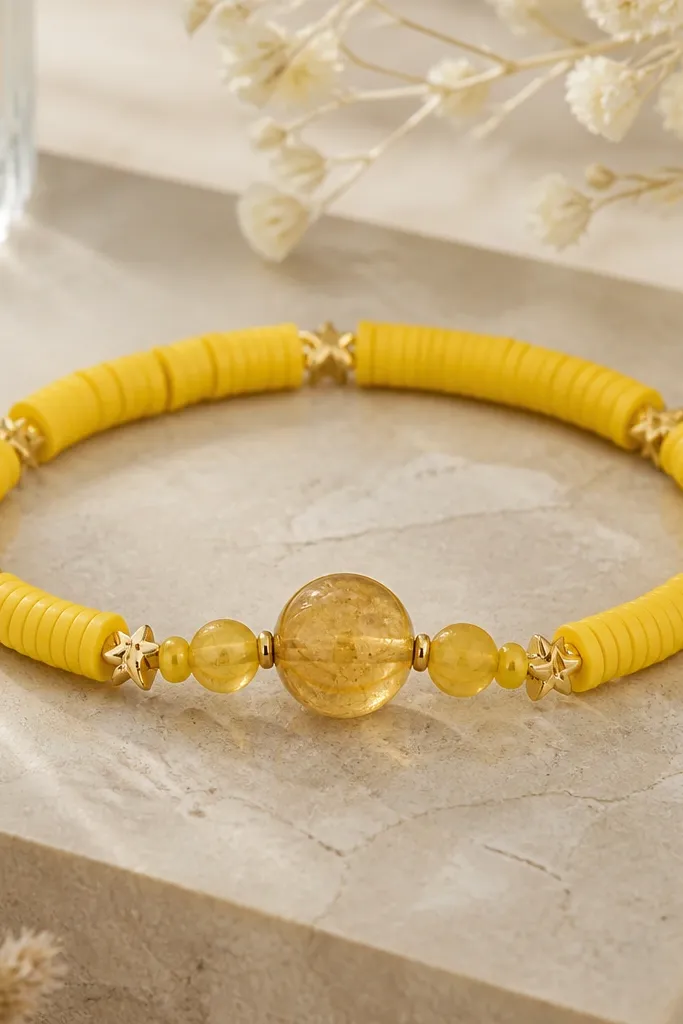
This design is for days you want cheer without going neon chaotic. The larger citrine bead catches light like a little sun, and the star spacers keep the theme consistent. The key is keeping the yellow beads mostly in one tone family - think lemon to honey. Star spacers read cute when you use only a few, not all the way around.
Pick one 12mm citrine focal bead, then surround it with six 7mm yellow beads. Add 3-4 tiny gold star spacers spaced evenly, and keep the rest plain. String on wire with crimp beads because it holds shape better than elastic with heavier clay beads.
Pro tipDo a quick dry run on the table and hold it up to window light - you'll see if the focal bead lands where your wrist naturally sits.
AvoidAvoid using five different bright yellows - two shades is enough for a sunburst effect.
8. Rose Quartz Look with Blush Seed Bead Halo
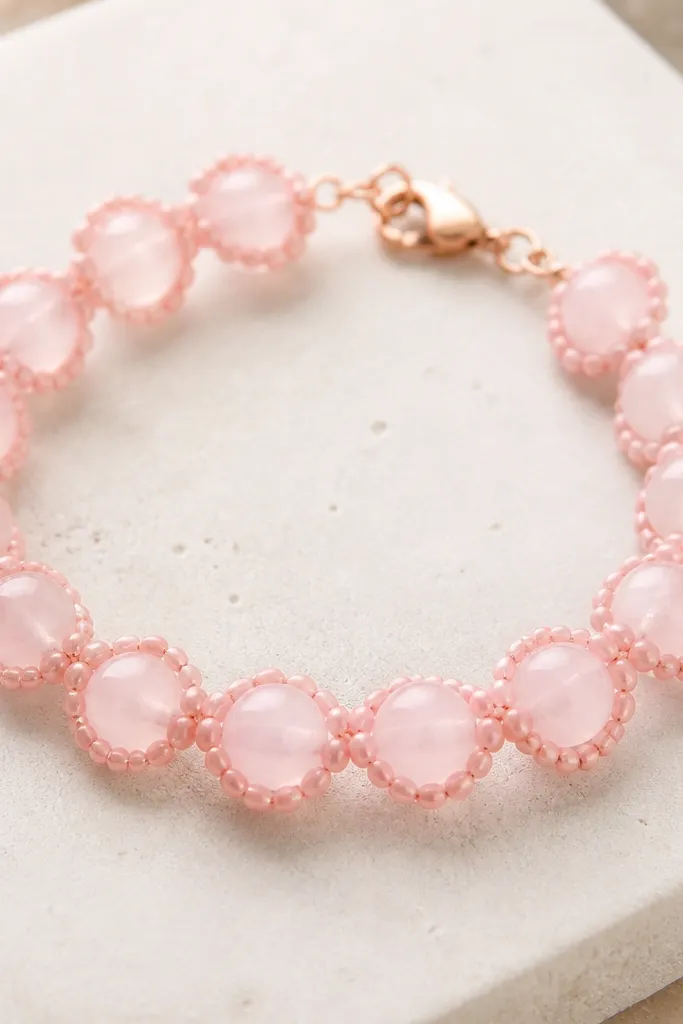
The halo effect makes each clay bead look larger without adding size. Blush seed beads create a soft rim that frames the bead, so the bracelet looks intentional even at a glance. It's a gentle, romantic look that still works in small-space crafting because the pattern repeats. This one also hides small irregularities in clay bead shape.
Use translucent pink clay beads in 8mm, then thread 6-8 blush seed beads around each bead as you string (you'll do it bead-by-bead). Alternate with 6mm solid blush beads to keep it from looking too "glassy." Finish with a rose-gold clasp and small jump rings.
Pro tipUse a needle or thin beading tool so you can thread through seed bead clusters without fraying the line.
AvoidAvoid skipping the seed bead halo on every single clay bead - the bracelet loses the framing effect.
9. Cream + Espresso Beads with Chunky Knot Ends
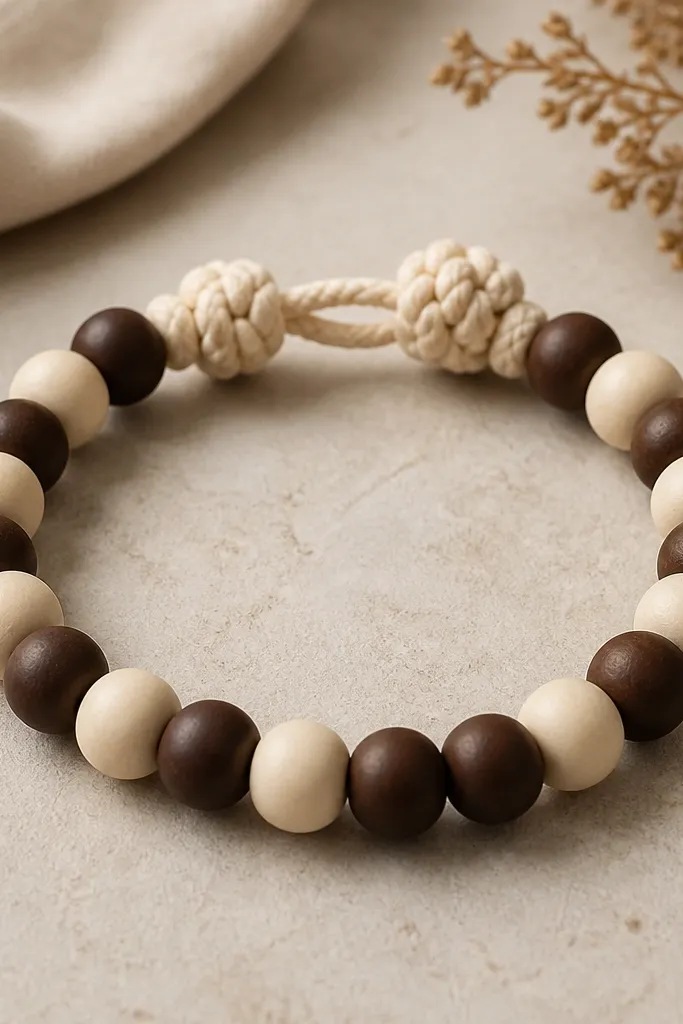
This design looks cozy because the colors feel like coffee and cream. The chunky knots at the ends look deliberate and hide cord end issues. I like it for small spaces because you don't need crimping tools. It also lets you adjust fit easily if your wrist changes with cooler weather or swelling.
Use 10mm cream clay beads and 8mm espresso clay beads alternating, total around 9-10 beads. String with thick cotton cord (about 2mm) so the knots look substantial. After you tie the knot, trim and seal the ends with clear jewelry glue.
Pro tipBefore tying the final knot, slide the beads around on the cord and make sure the bracelet sits flat, not twisted.
AvoidAvoid thin, slippery cord with big clay beads or the beads will slide and bunch.
10. Monochrome Clay Stripes with Flat Spacer Beads
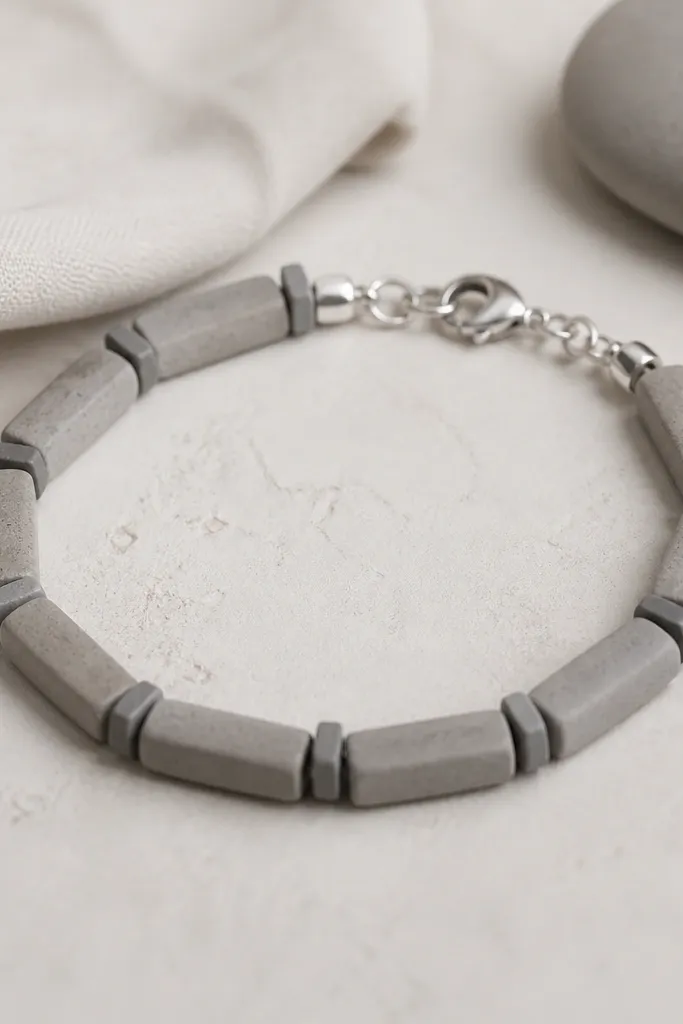
Stripe patterns look clean when you use one color family and two bead shapes. Rectangular clay beads create a linear rhythm, while flat spacers keep the surface from feeling too dense. This reads modern instead of craftsy, and it's great for anyone who thinks clay beads are "too cute" for grown-up style. It also pairs well with watches because the lines don't compete.
Use 6-7 rectangular clay beads (about 10x5mm) and intermix with 6-8 round or oval flat spacers. String on wire for stability, then add a silver clasp. Keep the rectangular beads aligned by rotating each one so the flat face sits the same direction.
Pro tipLay the bracelet flat on your desk and nudge each rectangular bead until all the long edges point the same way before crimping.
AvoidAvoid mixing multiple gray shades with different undertones (cool gray + warm taupe) unless that's your plan.
11. Teal + White Wave Beads with Silver Jump Ring Connectors
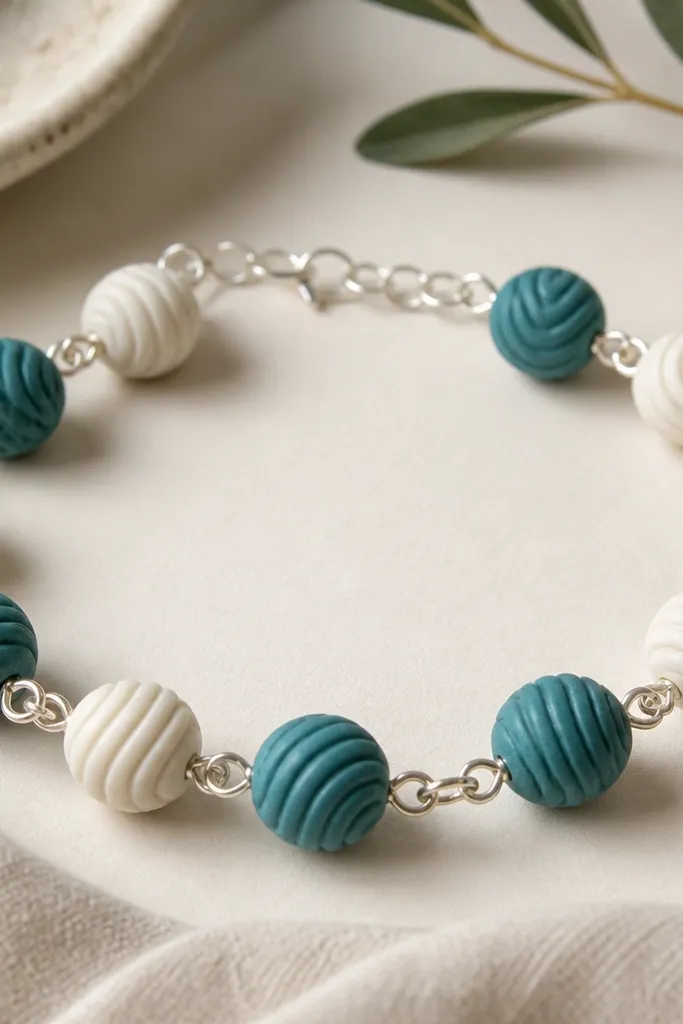
Wave-texture beads make movement without needing extra charms. The silver jump rings act like tiny connectors that break the bracelet into sections - it's a visual trick that makes the bracelet look more expensive. Teal and white stay crisp, and the wave texture keeps it from looking flat. This is also a good bracelet for small wrists because the segmented look makes it feel lighter.
Use 10mm wave teal beads and 6mm white smooth beads alternating. Add a silver jump ring after every 2 clay beads, then continue the pattern. Use wire + crimp beads so the jump rings don't pull the bracelet out of shape.
Pro tipIf your jump rings are tight, open them with two pliers so you don't kink the wire.
12. Lavender Matte with Pearl-Like White Buttons
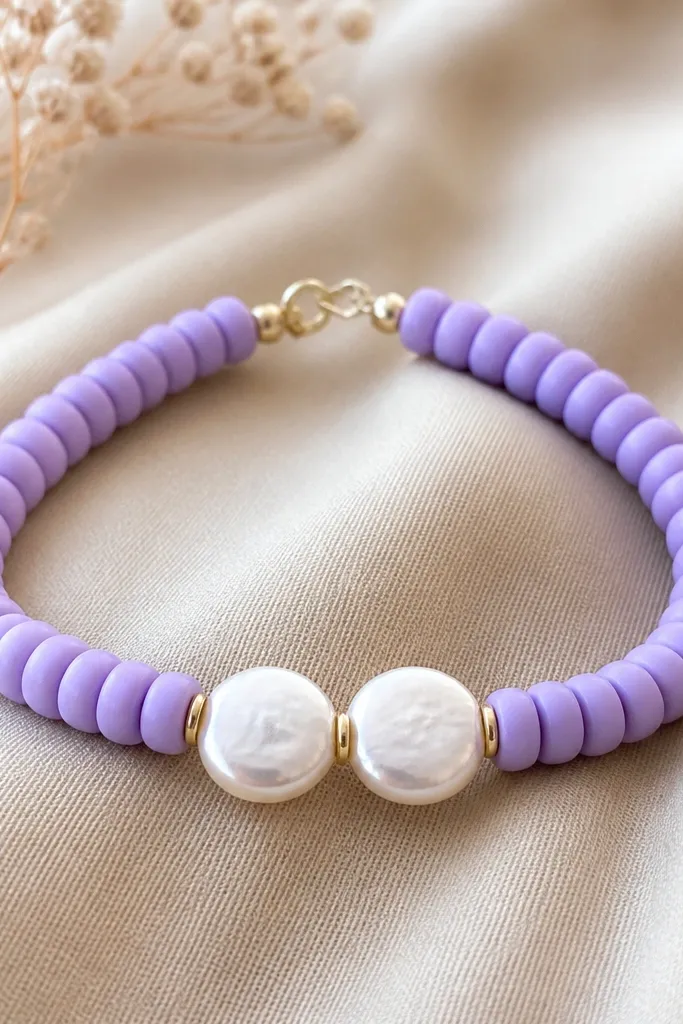
Button-shaped beads add structure and make the bracelet look like it has a design center. Lavender matte beads keep the vibe soft, and the pearl-like white buttons brighten the middle so it doesn't look one-note. I've worn this with a cream sweater and it made the whole outfit look styled. It's also great when you want clay beads but prefer a gentler look.
Pick 8 matte lavender clay beads in 7mm, then add two white button beads in 10-12mm as your centerpieces. Place one button bead at the halfway point and the other just one bead away so the symmetry feels intentional. String with elastic thread and finish with a small clasp or tight knot.
Pro tipKeep the two button beads facing the same direction so their "button" ridges align.
13. Rainbow Dust with Two-tone Clay Speckles
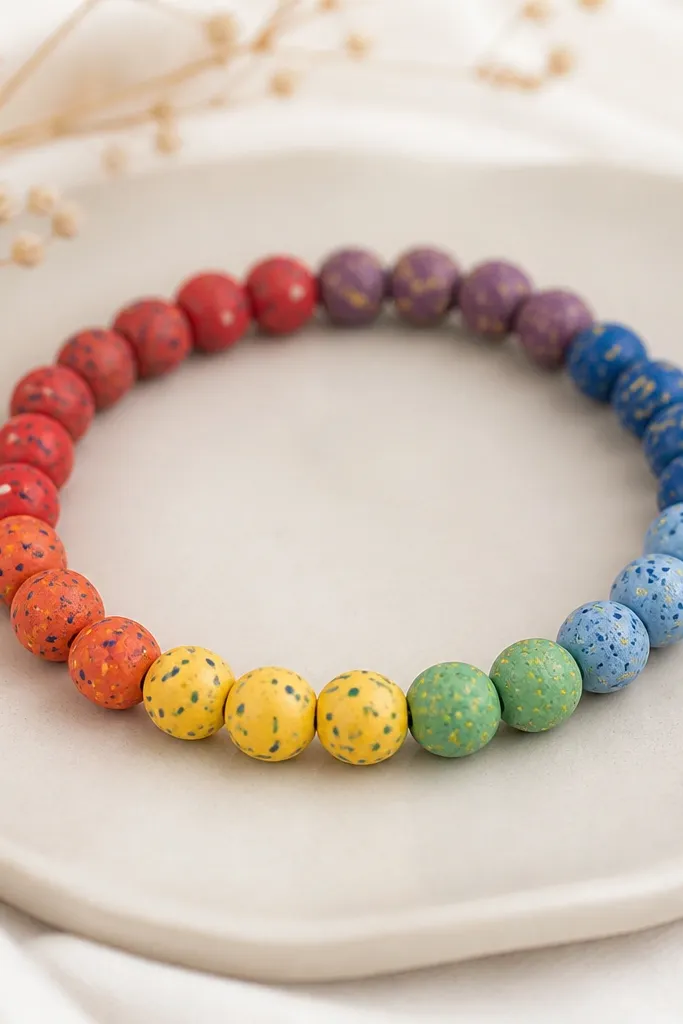
Rainbow dust works when you control the finish. Use clay beads that share the same speckle style so the bracelet looks like a set, not random beads. The two-tone speckles tie the colors together so it feels cohesive. It's fun but not messy, and it's a great way to use up a small bag of mixed clay beads without losing the plot.
Lay out 14 beads in order: red, orange, yellow, green, teal, blue, violet - two beads per color. Keep bead sizes mostly 6mm so the rhythm stays even. Add one neutral spacer bead (tiny clear or white) between every pair of colors. Finish with a clasp so the rainbow doesn't rotate awkwardly.
Pro tipSort your mixed beads by color under daylight - indoor lighting makes reds and oranges blur.
14. Chocolate Brown with Copper Wire Wrapped Accent Beads
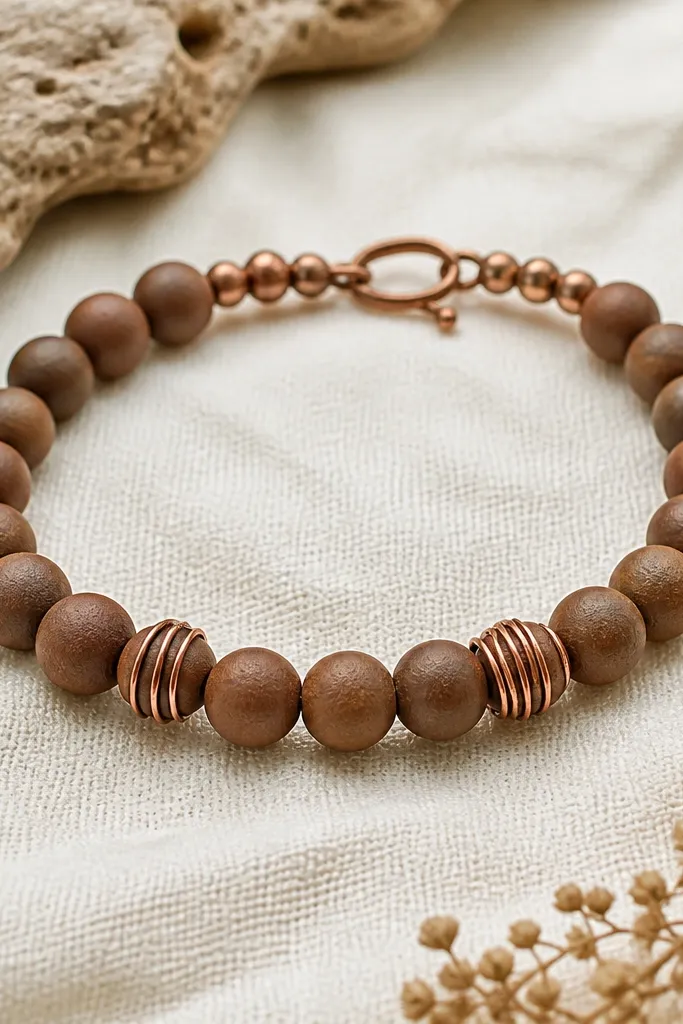
Wire-wrapped accents make clay beads look intentional and handcrafted. The copper loops catch light in small flashes, and they add a warm metallic note that brown clay loves. This bracelet is easy to assemble in a small space because you're only wrapping two accent spots - the rest is straight stringing. It looks great with gold rings too.
Use 10-12 chocolate brown clay beads in 7mm. Choose two lighter caramel beads (8-10mm) as accent points and wrap each with 26-gauge copper wire into a simple loop. String the rest with copper spacer beads every third clay bead. Finish with a lobster clasp.
Pro tipWrap the wire tightly but stop before it dents the clay - light pressure holds the loop without cracking.
15. Black-White Checker with Tiny Round Spacers
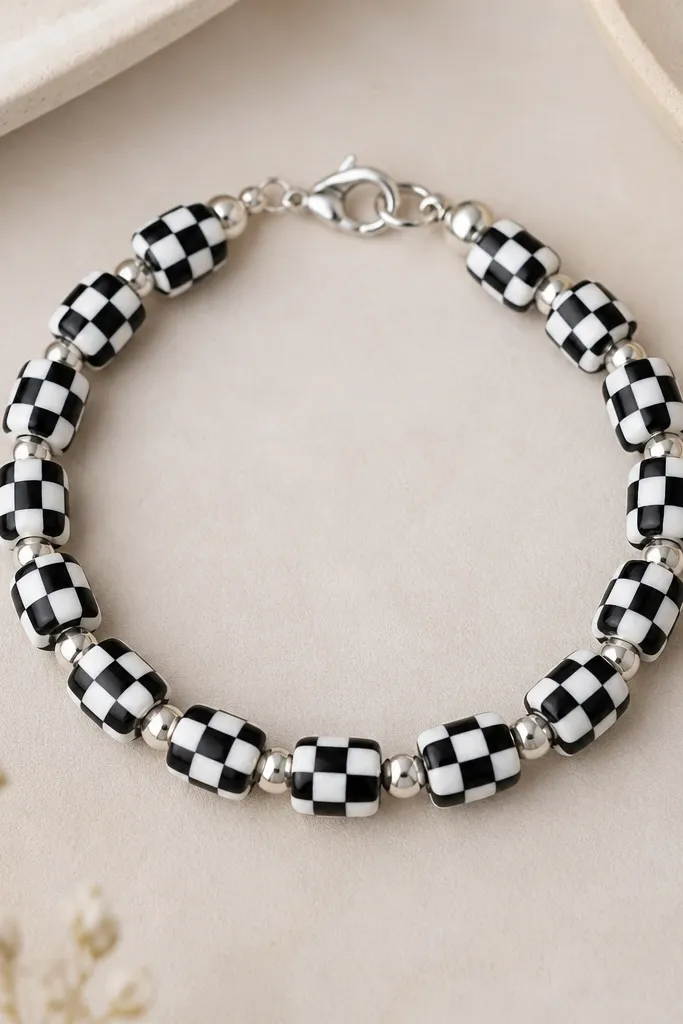
Checker patterns look sharp because your brain reads the repetition quickly. Black and white is the easiest palette for a clean look, and tiny round spacers prevent it from looking like a string of big beads. I like this design for work outfits because it pops without being loud. It also photographs well since the beads create strong light-dark contrast.
Use 6mm black and white clay beads alternating for a total of 16-18 beads, depending on your wrist. Add a tiny silver spacer (2-3mm) between every bead so the pattern stays crisp. Use wire + crimp beads to keep the spacing tight.
Pro tipKeep the bracelet flat while you crimp so the checker alignment doesn't tilt.
16. Sea Glass Green with Clear Tube Bead Intervals
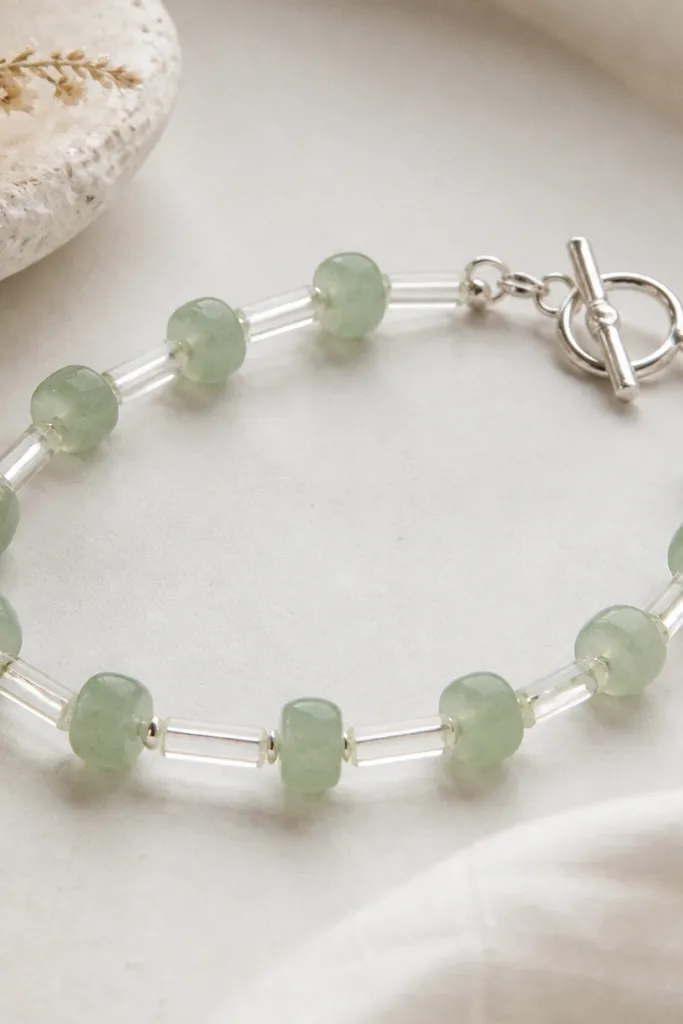
Clear tube beads break up the clay and create a glassy, ocean-like rhythm. Sea glass green clay beads look realistic because they're translucent or semi-translucent, and the clear tubes add depth. This is one of those bracelets that looks better the more you move because the tubes catch light at different angles. It also feels light on the wrist.
Use 10-12 sea-glass green clay beads in 8mm, alternating with clear tube beads about 4-6mm long. Keep the tube beads consistent so the rhythm stays even. Finish with a toggle clasp so you get easy on/off without fiddly knots.
Pro tipIf your tubes have sharp edges, run them over a nail file for a few seconds to prevent string abrasion.
17. Gold-Dipped Edge Effect Using Small Metallic Clay Beads
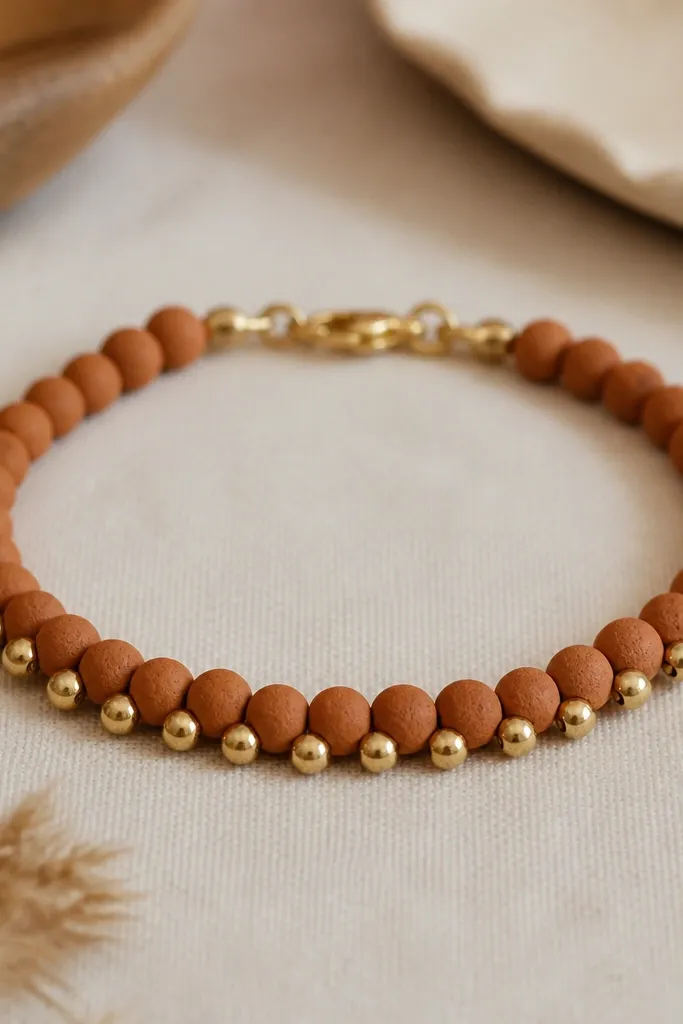
This gives the look of a gold-dipped edge without painting anything. Tiny metallic gold clay beads act like highlights that travel around the bracelet. The terracotta base keeps it grounded and warm. I like this when I'm wearing neutrals because it adds shine that doesn't feel flashy.
Use 9-11 terracotta clay beads in 7-8mm. Add one tiny metallic gold bead (3-4mm) after every other terracotta bead, keeping them slightly offset so it looks like an edge highlight. String with elastic thread and finish with a small clasp. If you want extra security, add two crimp beads under the clasp jump ring area.
Pro tipKeep metallic beads to about 25% of total pieces so the shine stays a highlight, not a full sparkle.
18. Dusty Pink with Tiny Heart Shaped Clay Focal
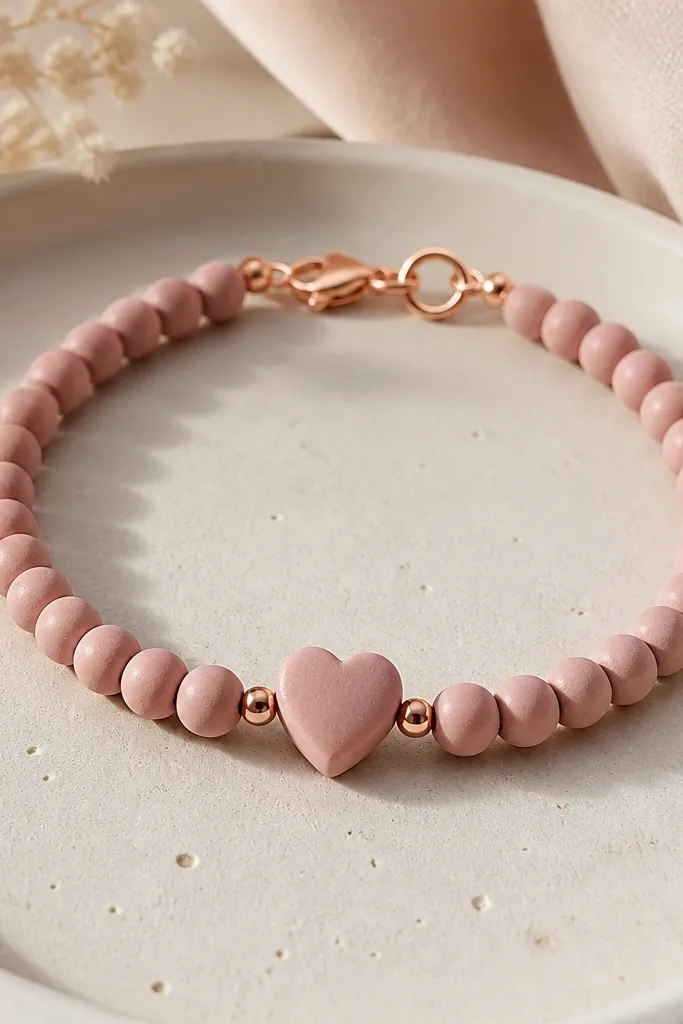
A small heart bead reads sweet without taking over the whole bracelet. Dusty pink is forgiving and looks good in daylight, even with simple stringing. The heart shape gives you a clear focal point that makes the bracelet look designed. This is a good pick if you're making a gift and want it to look thoughtful fast.
Use 11 dusty pink round clay beads in 7mm and add one heart-shaped clay bead in the center (about 12-14mm wide). Add two tiny white seed beads on each side of the heart so it frames the focal. Finish with a rose-gold clasp or a small toggle clasp.
Pro tipAngle the heart so its point faces outward when worn - it makes the symbol read correctly in photos.
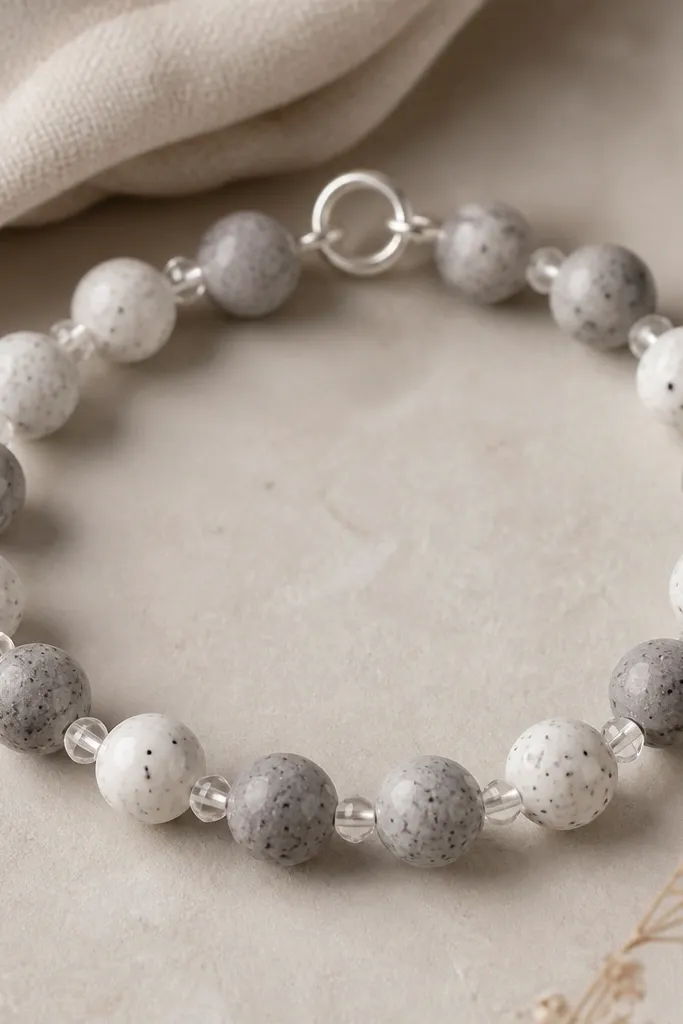
19. Matte White + Gray Marble with Silver Crimp Covers
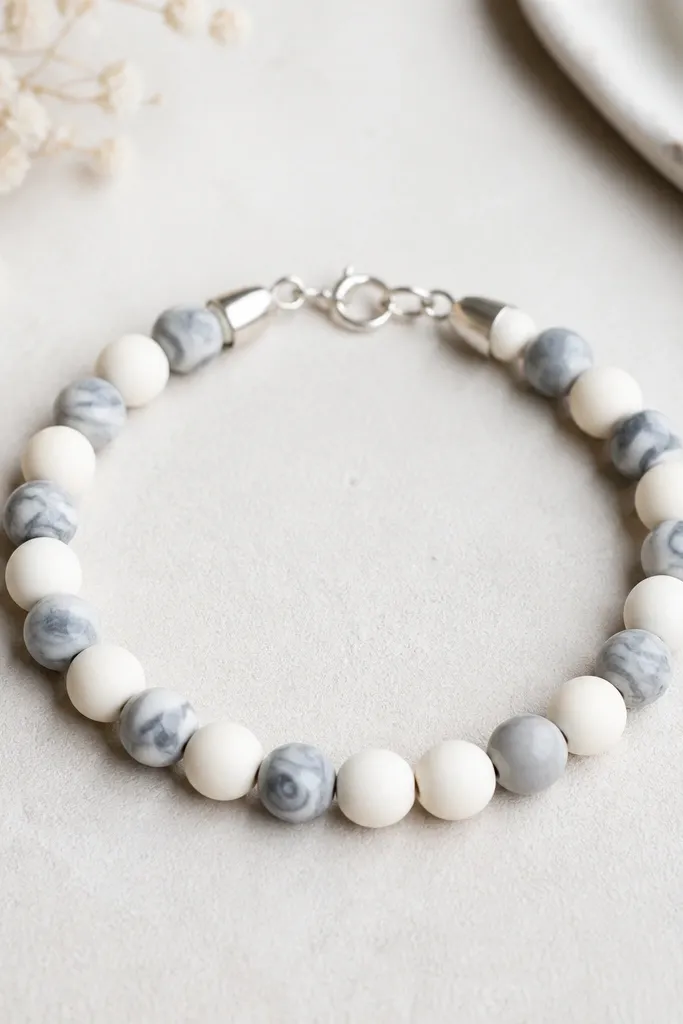
Marble beads look expensive when you keep the rest quiet. Matte white beads calm everything down, and the gray marble gives subtle pattern. Crimp covers make a huge difference in how "finished" it looks. I've had people ask where I bought this kind of bracelet, and the answer was just good finishing.
Use 8-9 matte white beads (6-7mm) and 6-7 gray marble beads (8mm). String with 49-strand beading wire or elastic thread and add crimp beads if you use wire. Cover each crimp with a silver bead tip cover so there's no visible metal nub. Add a small jump ring and clasp.
Pro tipIf your marble beads vary in size, match them by diameter so the bracelet doesn't warp between beads.
20. Monarch Orange with Black Resin-Style Spacer Beads
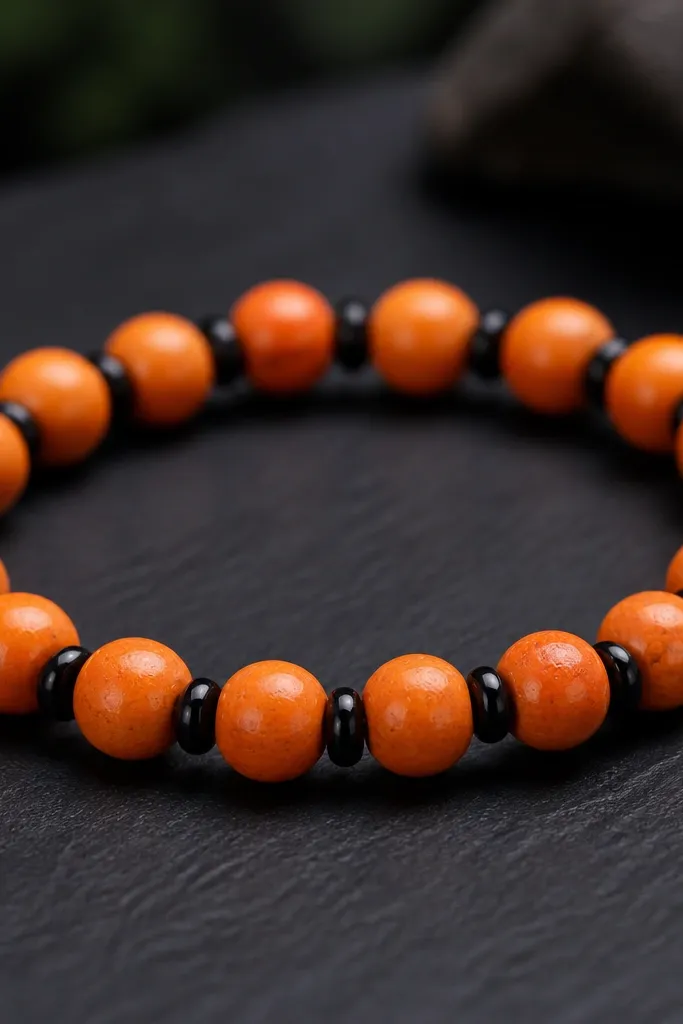
Orange can get loud fast, but black spacers control it. The resin-style spacers look glossy and provide a consistent visual rhythm between clay beads. This bracelet looks bold yet structured because the pattern is predictable. It also hides small imperfections in bead surfaces since the spacers create uniform breaks.
Use 10-12 monarch orange clay beads in 7mm. Add one black resin-style spacer bead (5mm) between each clay bead. String with wire and crimp covers for a crisp, structured feel. Use a small black or silver clasp - I prefer silver so it doesn't disappear.
Pro tipHold the bracelet up to a lamp before closing it - if the orange beads look unevenly spaced, adjust now while the wire is still open.


