
1. Speckle + Gold Micro-Spacer Stack
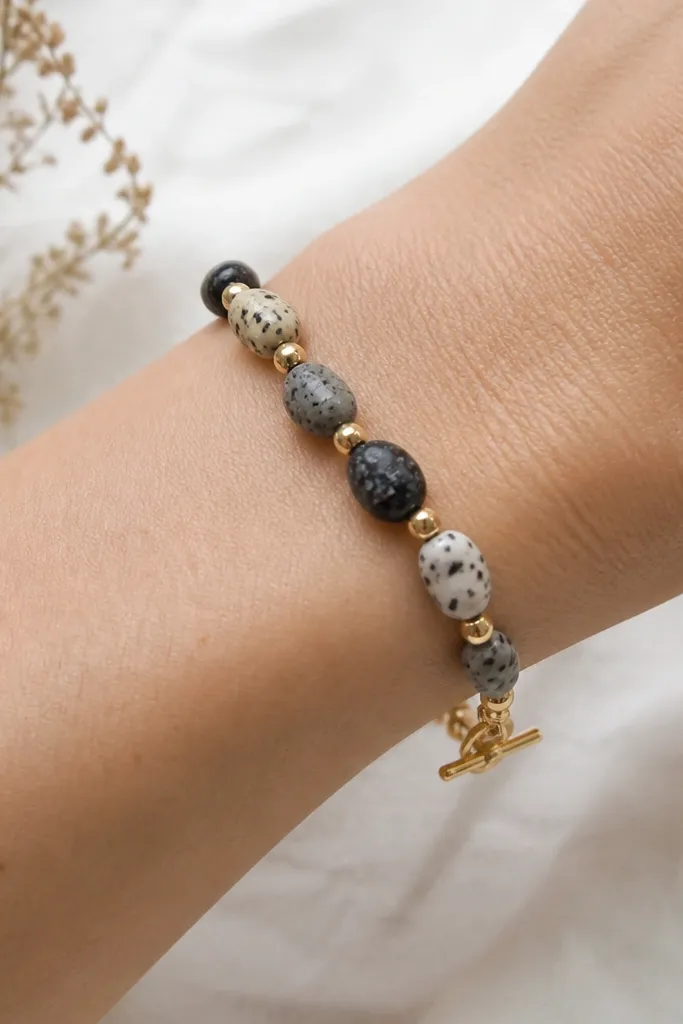
This pattern looks expensive because the clay texture does the work, and the micro spacers only add a thin line of shine. I use speckled clay in a tight palette (black/cream or navy/ivory) so the bracelet stays calm. The gold micro spacers catch light as the wrist moves without overpowering the bead surface.
Use 8mm speckled clay beads plus 3mm gold micro spacers. Plan for 18-22 clay beads on a 7-inch wrist, then adjust to fit. Finish with a gold toggle clasp and 2 jump rings so the clasp sits centered.
Pro tipLay your beads out in a straight line before you string so you can see the repeat and spot color drift early.
AvoidAvoid mixing gold and silver hardware - it makes the bracelet look like parts from different kits.
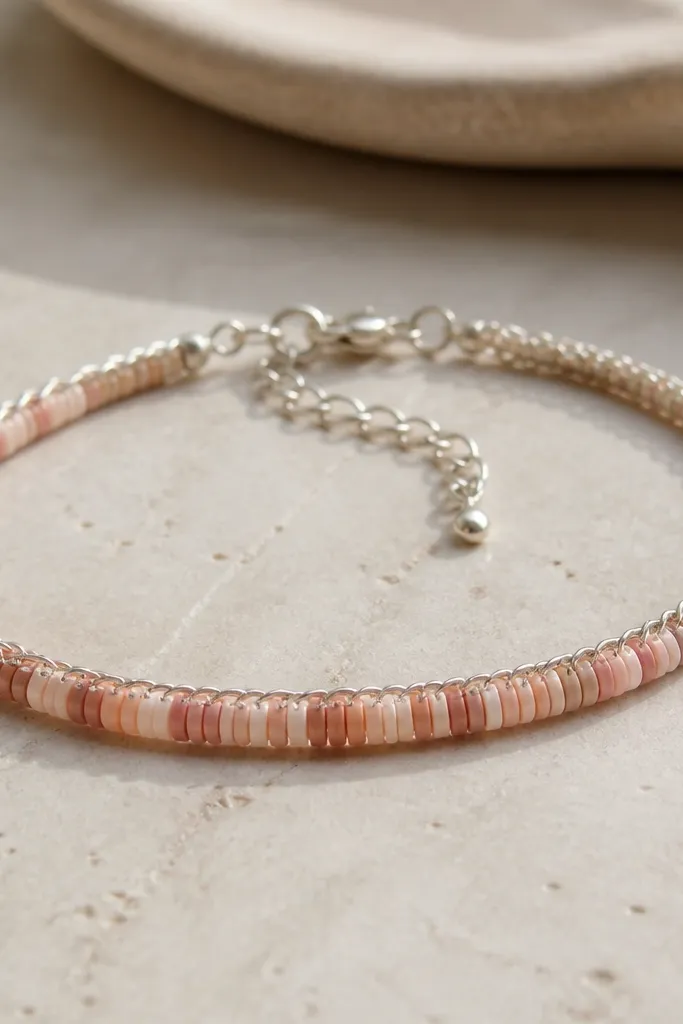
2. Pastel Clay Bead Ladder
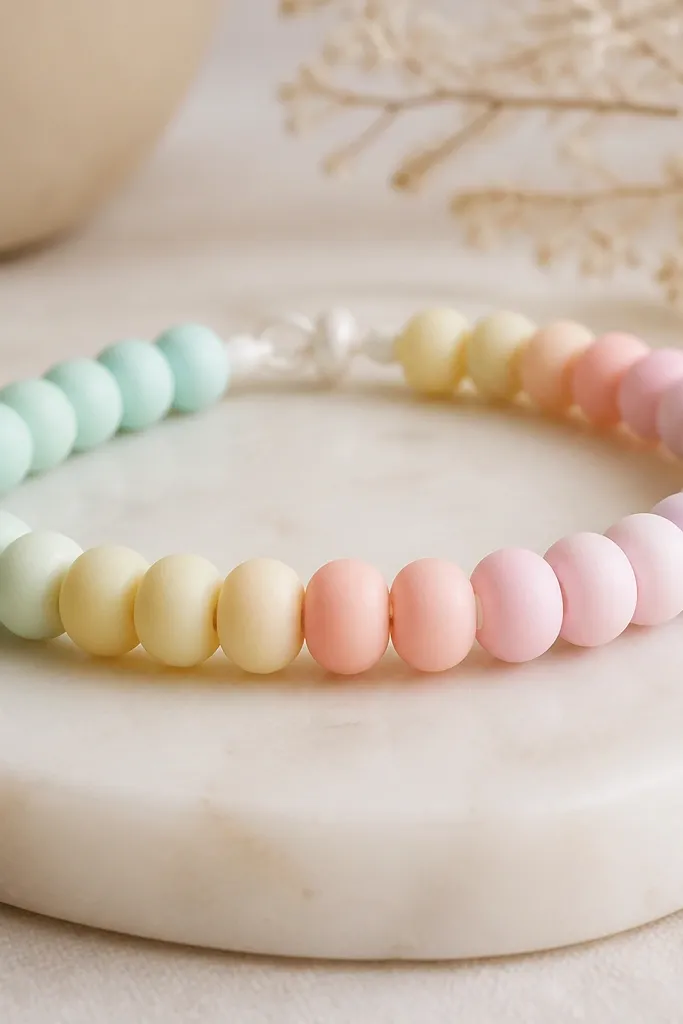
This one is for mornings when you want color without loud contrast. The gradient ladder makes your wrist look longer because each bead shifts gently from one shade to the next. White spacers keep the ladder crisp and stop the clay colors from blending into one blob.
Use 6mm pastel clay beads and 2mm white glass seed beads as spacers. String on elastic cord with a 7.5-inch length for a comfortable fit. Tie a surgeon's knot, then seal with a small dab of clear jewelry glue.
Pro tipIf your beads don't form a smooth gradient, choose the lightest 4 colors you have and repeat them in the same order.
AvoidSkip big gaps between colors - the ladder effect disappears when you leave empty space.
3. Monochrome Clay + Matte Black Spacers
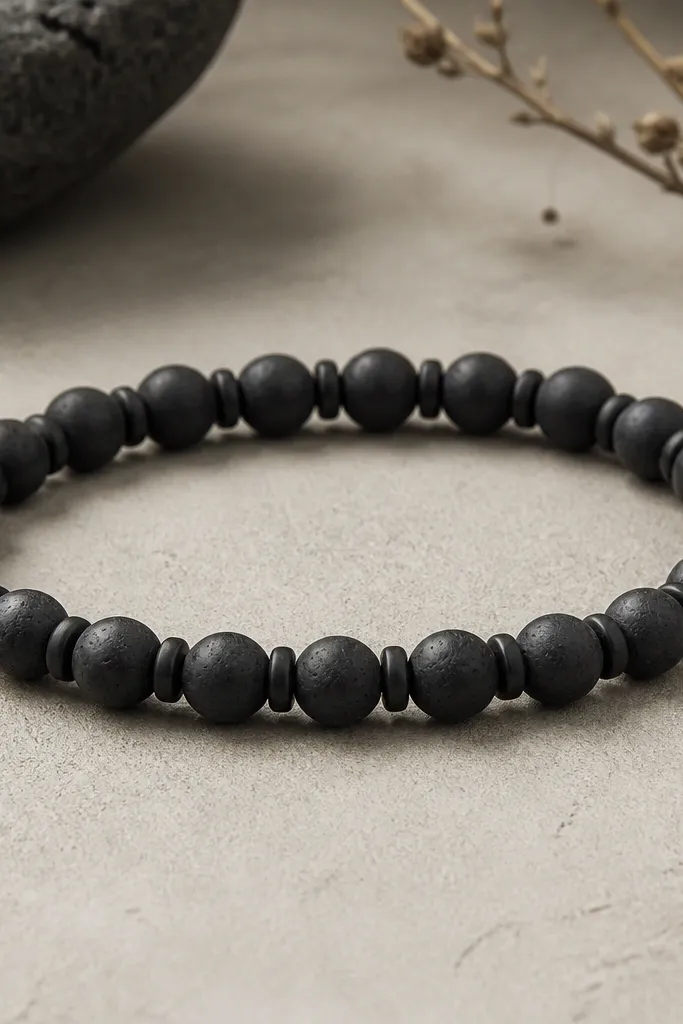
Monochrome looks clean because your eye doesn't bounce between colors. Matte black spacers also reduce shine, which keeps the bracelet looking intentional rather than "crafty." I like this pattern with glossy clay beads too, because the texture contrast shows up without color chaos.
Use 8mm matte black clay beads and 4mm matte black spacers. String with waxed cotton or beading thread for a structured look. Finish with a sliding knot and a small button closure, or use a black cord end cap.
Pro tipPress the bracelet flat against your palm while you string so you can catch twisting before the knot sets.
AvoidDon't add silver rings or bright charms - the matte look gets wrecked.
4. Tortoise Shell Clay + Amber Seed Fringe
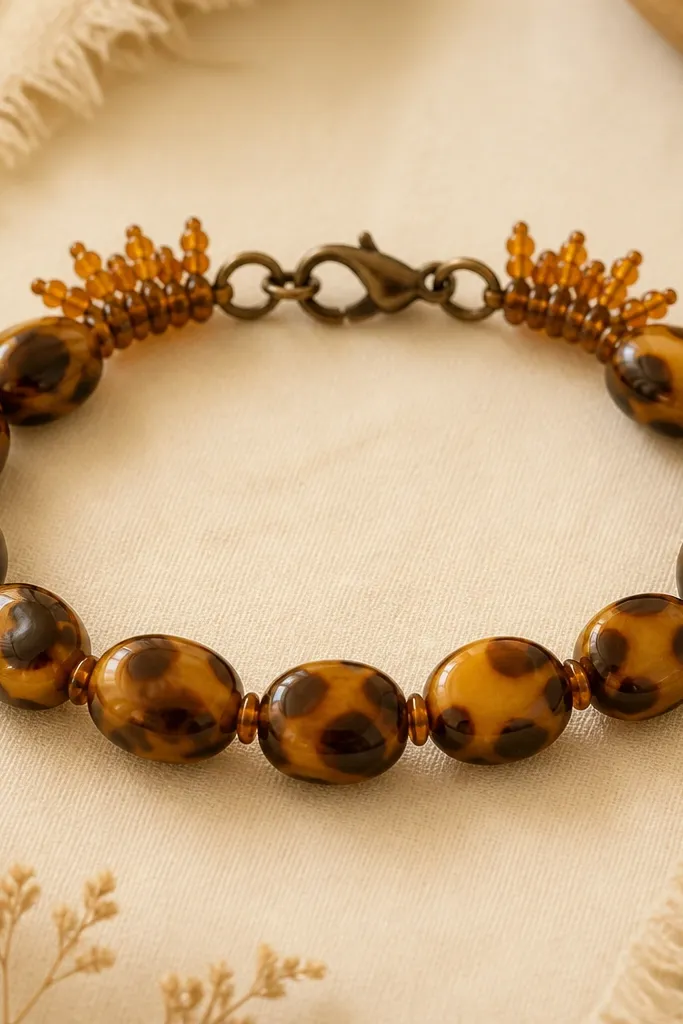
The tortoise shell pattern already has depth, so you add amber seed beads only near the ends to create motion. This reads as "jewelry" instead of "craft" because the fringe frames the clasp rather than covering the whole band. It also hides the last knot area so it looks finished.
Use 7mm tortoise shell clay beads. Between main beads, add 2mm amber seed beads sparingly (one or two). For fringe, string a short loop of seed beads on both ends and tie them into the closure section.
Pro tipMake the fringe ends symmetrical by counting exactly 18 seed beads per side.
AvoidAvoid fringe all the way through the center - it turns the bracelet bulky.
5. Color-Block Clay Bead Belt

Color blocks make a bracelet look graphic. The trick is keeping each block the same bead size and using a tiny gold separator so your eye can see where one block ends. I've worn this with white shirts and denim - it pops without needing a pendant.
Use 6mm clay beads in three colors and make each block 3 beads long, repeated across the bracelet. Add one 3mm gold bead between blocks. Use elastic for speed; aim for 24-26 beads total on a 7-inch wrist.
Pro tipIf you want a sharper look, use only matte clay beads and one glossy accent bead per block.
AvoidDon't mix bead sizes within a color block - the stripes get blurry.
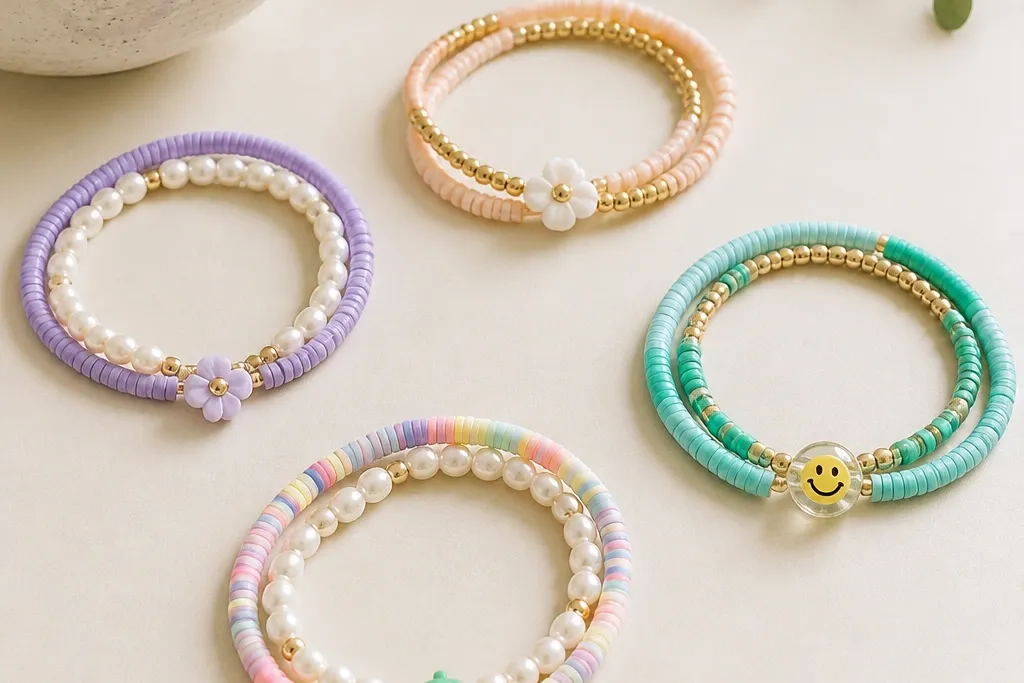
6. Mini Charm Centerline
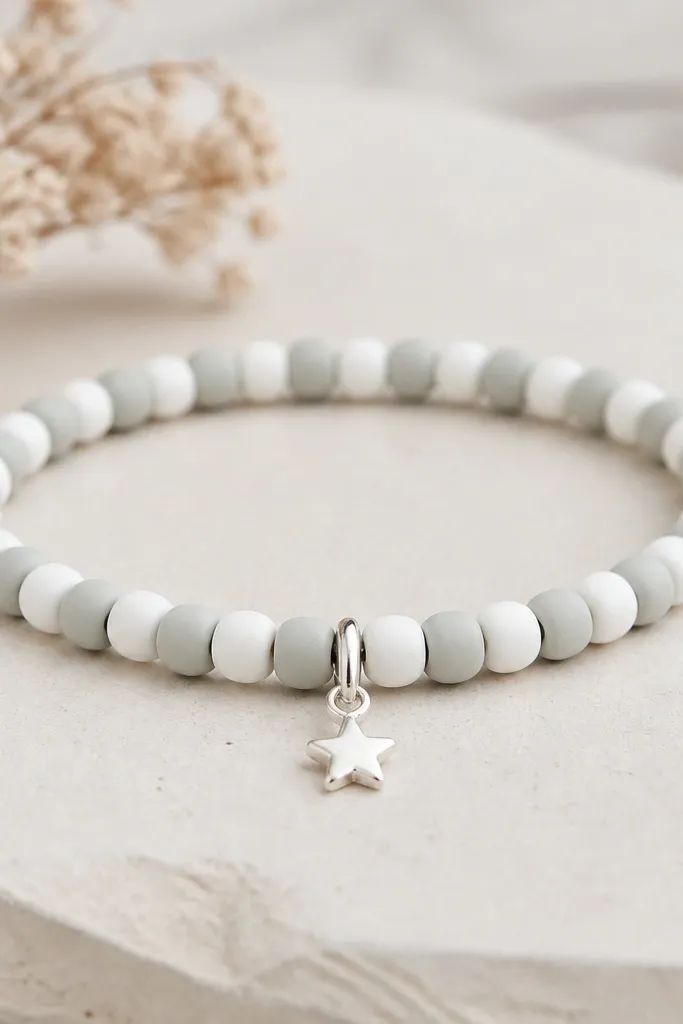
This pattern makes a plain bead bracelet feel personal. The charm works because it's placed at the center front, so it catches light exactly where your eyes land. Keep the rest of the bracelet consistent so the charm doesn't look random.
Use 6mm clay beads alternating pale gray and white. Thread the middle bead position with an extra loop for the charm: slide on the charm, then continue threading. Finish with a small lobster clasp and 2mm jump rings.
Pro tipHang the charm slightly below the bead line by adding one extra seed bead above it.
AvoidDon't place the charm on the side - it rotates and looks like a leftover attachment.
7. Wrap-Style Beaded Cord Bracelet
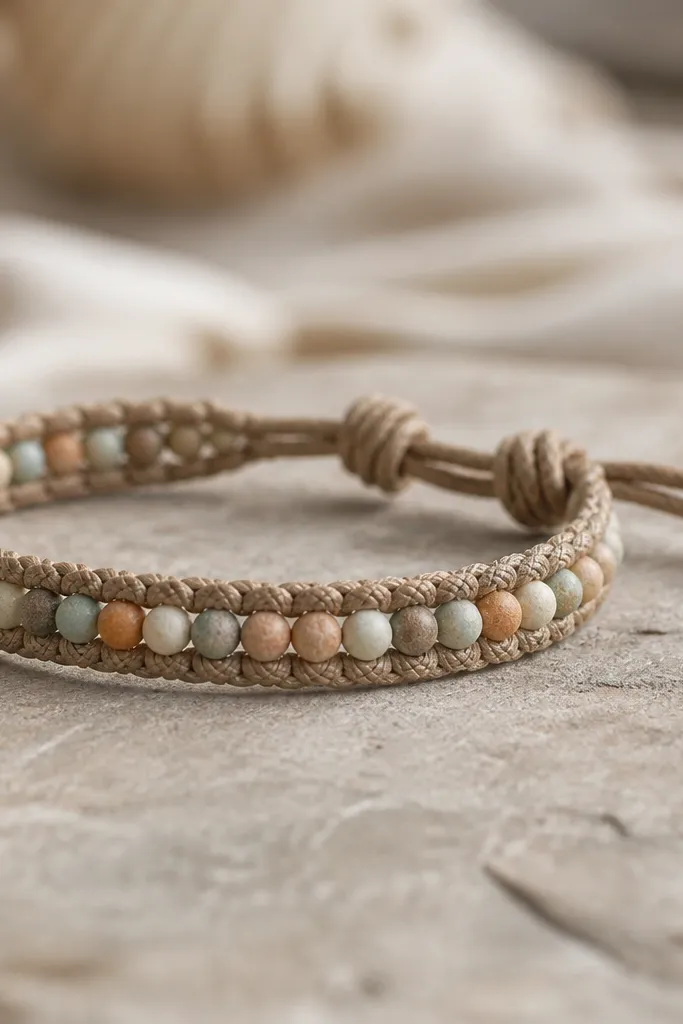
If you want a bracelet that looks layered without bulk, do a wrap-style build. Clay beads sit in one line, and the cord wraps around your wrist for thickness. This also hides uneven bead spacing because the cord tension pulls everything into place.
Use waxed cotton cord and thread clay beads every 1-2 inches along the center strand. Make 2 wraps around your wrist, then tie the ends with a surgeon's knot and a dab of glue. Keep the bead line straight by pinning the cord to a flat board while you work.
Pro tipBefore knotting, tug each section to remove slack so the bead line stays centered on your wrist.
AvoidAvoid stretchy cord here - it makes the wrap sag and the beads drift.
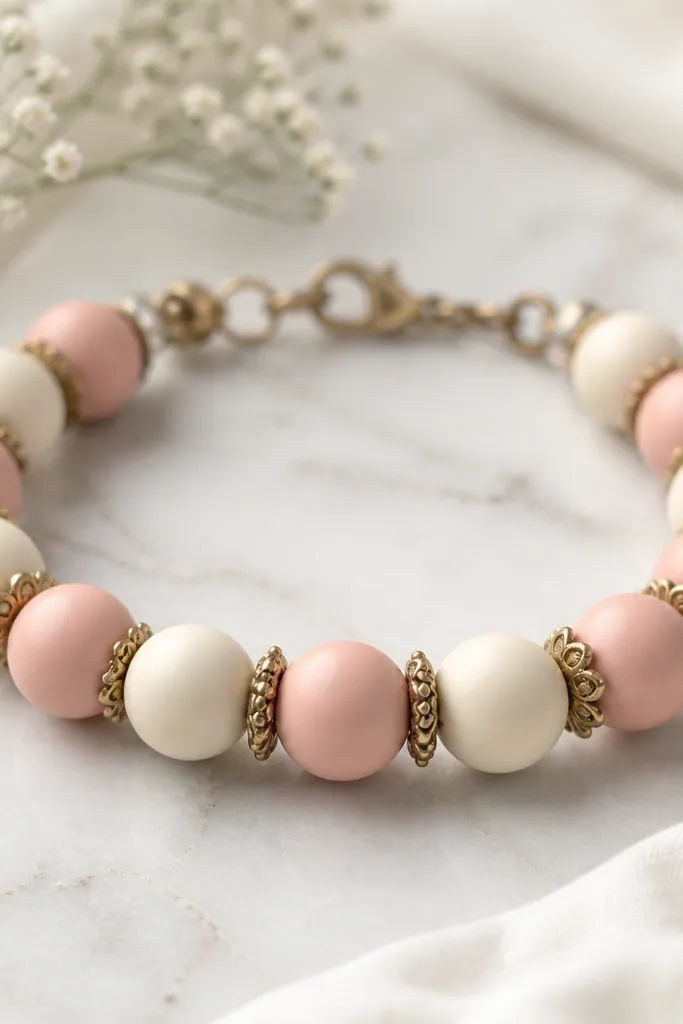
8. Clay Bead + Pearl Drop Sides
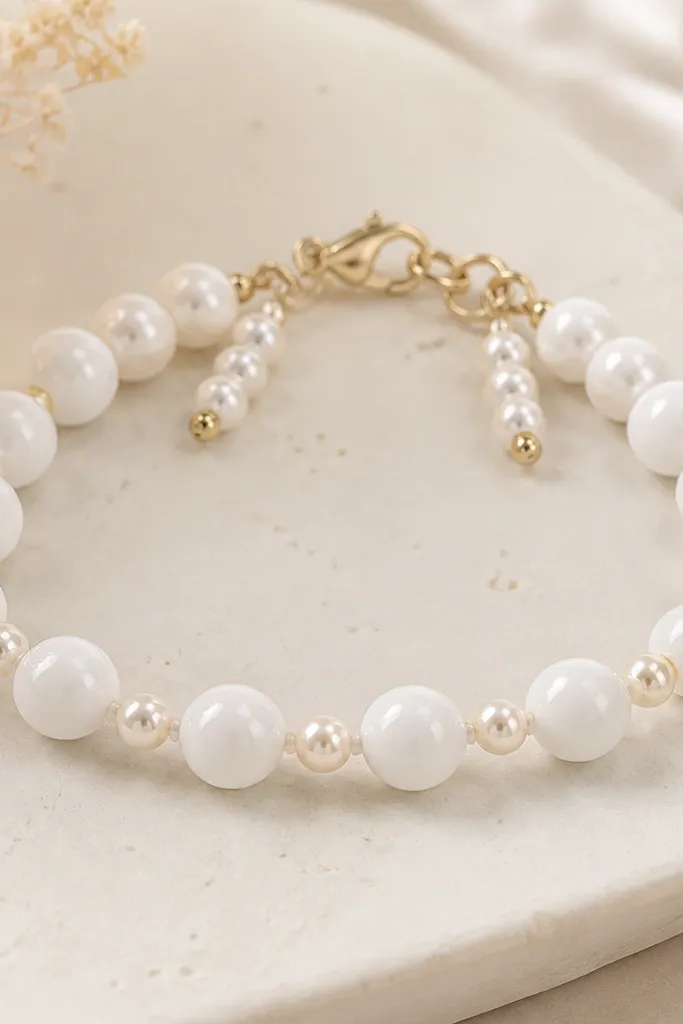
Pearl drops add softness to glossy clay beads. I use this when the clay beads look shiny and smooth, because the pearls echo that finish. The drops near the clasp create movement when you reach for your phone.
Use 8mm white glossy clay beads. Add 4mm pearl-like beads on either side of every third clay bead. Create two short drop strands of 6-8 pearls at each end and connect them to the clasp with jump rings.
Pro tipKeep the drop length under 1 inch so it doesn't snag on sleeves.
AvoidDon't use large pearls with tiny beads - the scale mismatch looks off.
9. Rainbow Clay Bead Micro-Spacing
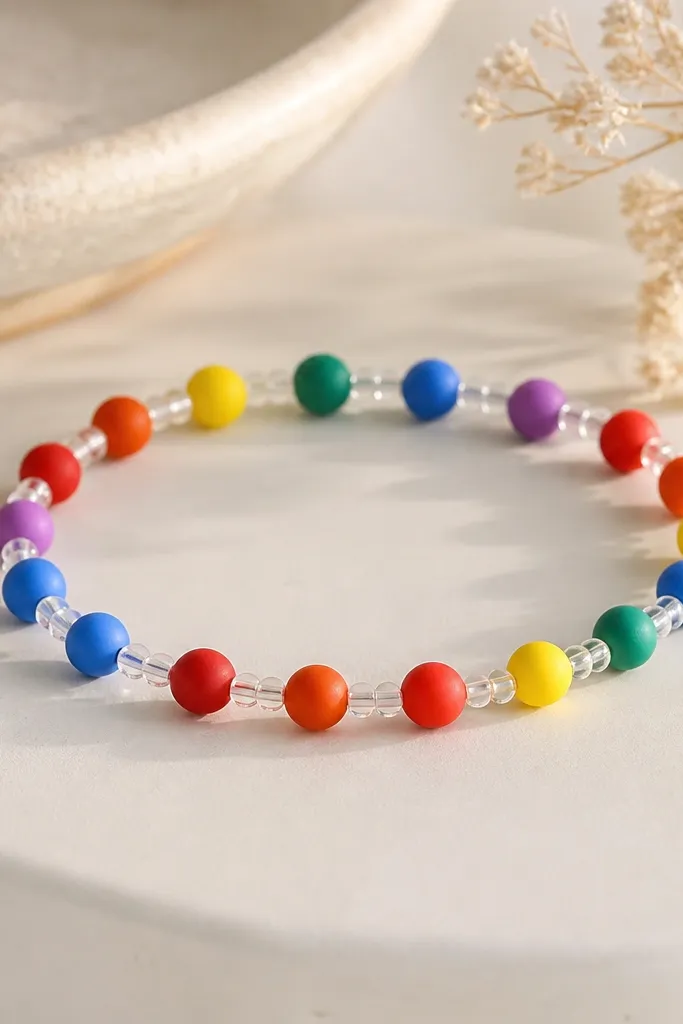
This is the "fun bracelet" pattern that still looks neat. Micro spacing with clear seed beads stops the rainbow from looking like a single stripe. The seed beads also fill tiny gaps so the bracelet stays tight on the wrist.
Use 6mm clay beads in six colors, alternating one color for 2 beads each. Between each clay bead, add 8-10 clear seed beads. String on elastic and tie tight, then seal.
Pro tipLay beads out in a rainbow order first, then remove one clay bead at a time if you need fewer colors for your wrist.
AvoidDon't skip the seed beads - without them the rainbow looks chunky and uneven.
10. Earthy Clay Bead + Wood Spacer Mix
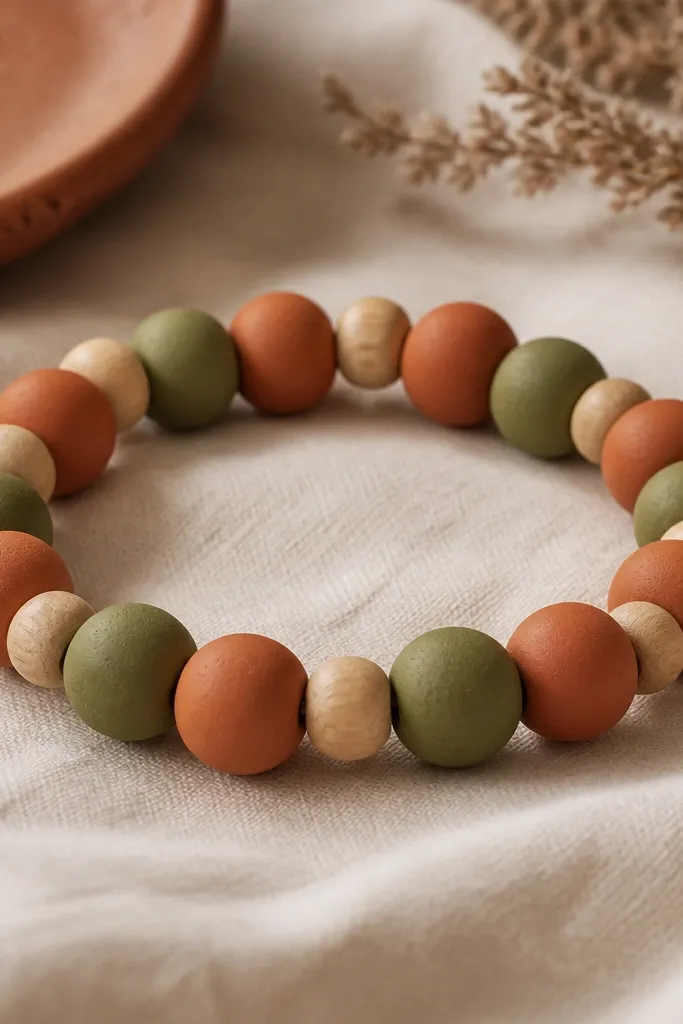
Terracotta and olive clay look grounded, and wood spacers make it feel like a real craft. This combo has a matte, tactile feel - no metal shine needed. It also looks great with linen and denim because the palette matches natural fibers.
Use 8mm terracotta and olive clay beads alternating. Add 4mm light wood spacer beads every other clay bead. String with waxed cord and finish with a simple button closure for that rustic edge.
Pro tipSand the wood ends lightly if they feel rough, then wipe clean so they don't snag cord.
AvoidAvoid glossy wood beads - the shine makes it look store-bought instead of handmade.
11. Two-Tone Checker Clay Pattern
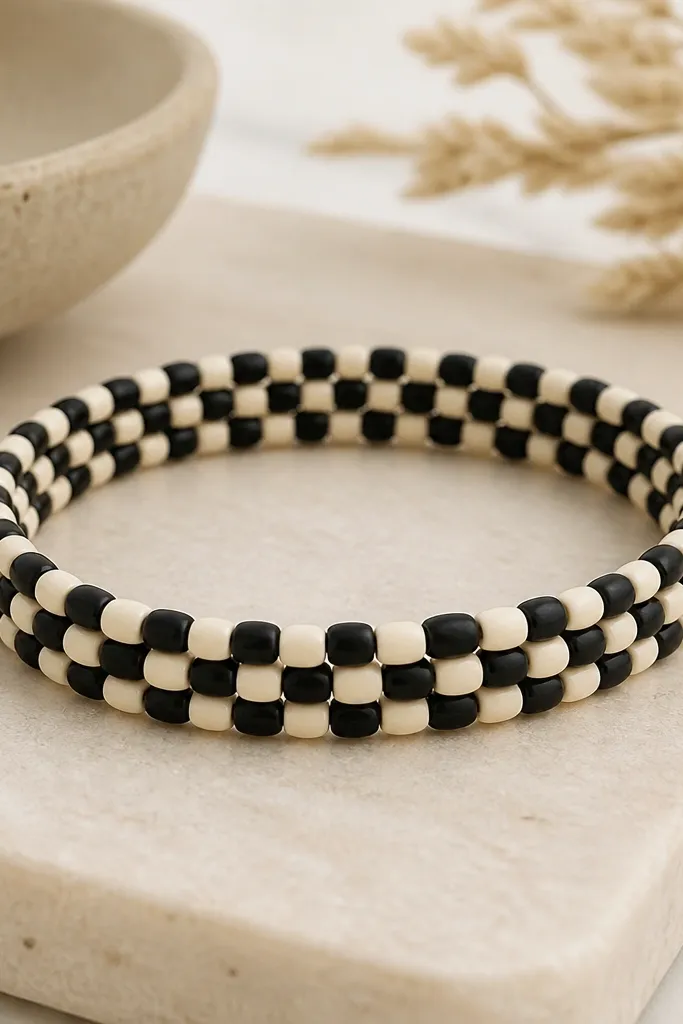
Checker patterns look sharp when beads are the exact same size and finish. No spacers keeps the pattern clean and grid-like. This is a great "starter" bracelet because the repeat is simple and forgiving.
Use 8mm matte black and matte cream clay beads. Alternate beads with no spacers. For a 7-inch wrist, plan about 20-22 beads on elastic and keep tension tight.
Pro tipCount your beads and keep the first color consistent at both ends, so the bracelet doesn't flip the pattern midpoint.
AvoidDon't mix glossy and matte in the checker - it breaks the uniform grid.
12. Halo Clay Beads with Tiny Silver Rings
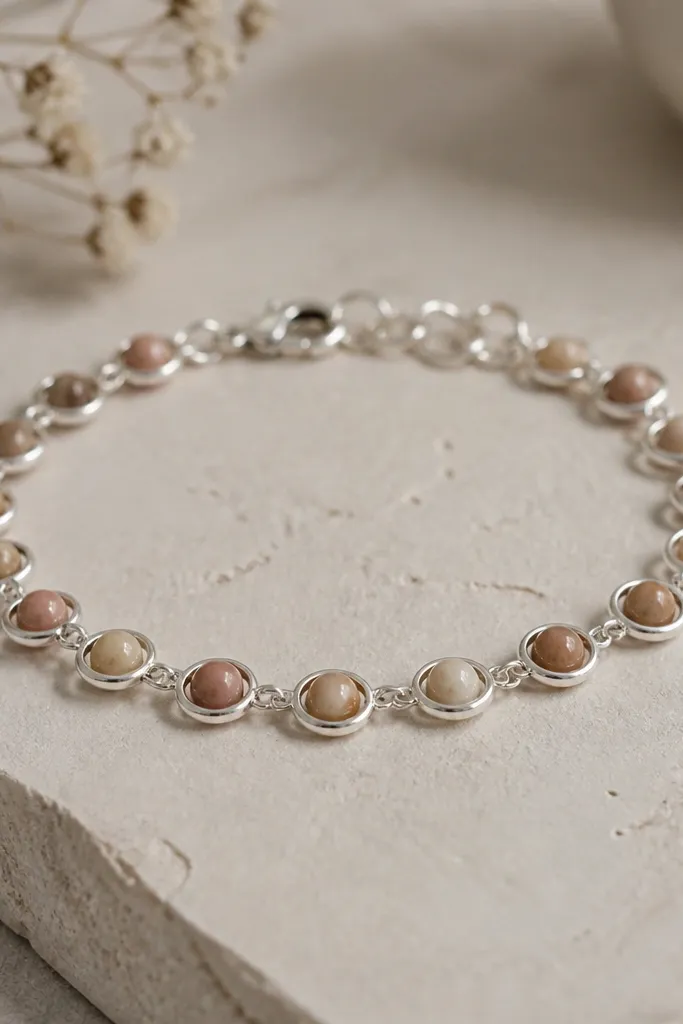
Those little ring frames make each clay bead feel like a charm instead of a bead on a string. I like this when the clay beads have a pattern (marbled or speckled), because the ring gives the pattern a border. Silver reads crisp against almost any clay color.
Use 7mm patterned clay beads and 6mm jump rings or ring spacer links. String so each clay bead sits centered inside a ring section. Use beading wire or elastic with a strong knot, then add a lobster clasp.
Pro tipIf the rings spin too much, add a tiny seed bead on each side to lock the clay bead's position.
AvoidAvoid oversized rings - they make small clay beads disappear.
13. Bead Cap Accent Row
Bead caps add a jewelry finish without turning the bracelet into a heavy mess. I use them on only every third bead so the bracelet stays light. This works best with smooth clay beads because the caps catch light and frame the smooth surface.
Use 8mm smooth clay beads in two colors. Add bead caps (small, 6-8mm) to every third bead, with a 2mm spacer bead between cap and next clay bead. Build on elastic or thread with crimp ends for a cleaner finish.
Pro tipKeep cap colors consistent - all silver caps or all gold caps - for a tidy look.
AvoidDon't cap every bead - it looks like a craft overload.
14. Clay Bead + Chain Link Edge
This pattern makes clay beads feel like they're set into a jewelry band. The chain edges add sparkle and help the bracelet drape flat. I like it for summer because chain catches sun and makes the clay colors look richer.
Use 6mm clay beads and small oval chain links as side rails. String clay beads between two threads or wire runs, then connect to clasp and extender chain. Keep the rails taut so the bracelet doesn't bow.
Pro tipIf you don't want wirework, use a charm bracelet base chain and attach clay beads with jump rings at equal intervals.
AvoidAvoid bulky chain links - chunky links fight the clay bead line.
15. Two-Size Bead Rhythm
Size rhythm makes a bracelet look designed even when colors are simple. The bigger beads act like punctuation - they pull focus and give the bracelet a beat. Clear spacers keep the spacing even so the larger beads don't clump.
Use 10mm clay beads every 3 beads, with 6mm beads filling the rest. Add one 3mm clear spacer bead between each pair of clay beads. Make about 18 clay beads total for a 7-inch wrist.
Pro tipLay out the pattern on a table and mark the positions of the 10mm beads with tape so you don't lose the rhythm.
AvoidDon't alternate randomly - the pattern needs consistent placement of the large beads.
16. Monogram-Look Letter Beads Center
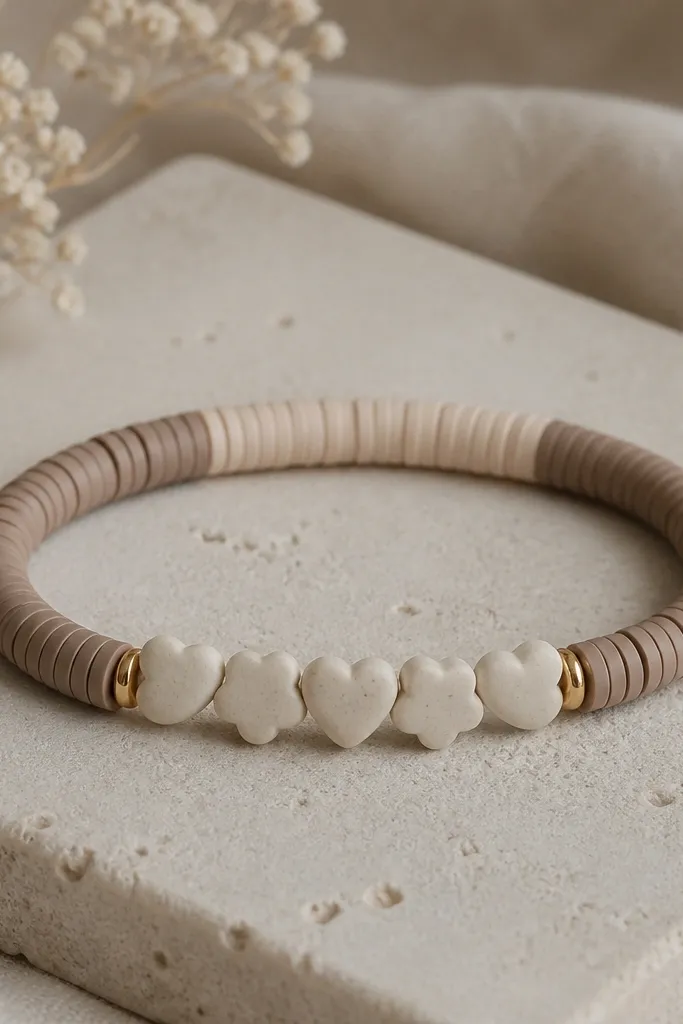
Letter beads give a monogram vibe without needing engraving. Keep the letter section short so it doesn't overpower the bracelet. Neutral clay beads help the letters pop, especially if your letters are silver or black.
Use 8mm beige clay beads and place 3-5 letter beads in the center. Add a tiny spacer bead before and after each letter bead so it stays readable. Tie on elastic or use a clasp with thread for a firmer hold.
Pro tipChoose letters that match your clay finish: glossy letters with glossy beads, matte letters with matte beads.
AvoidAvoid mixing letter bead shapes - different font styles look like a mistake.
17. Brushed Gold Clay + Black Tie Knot Closure
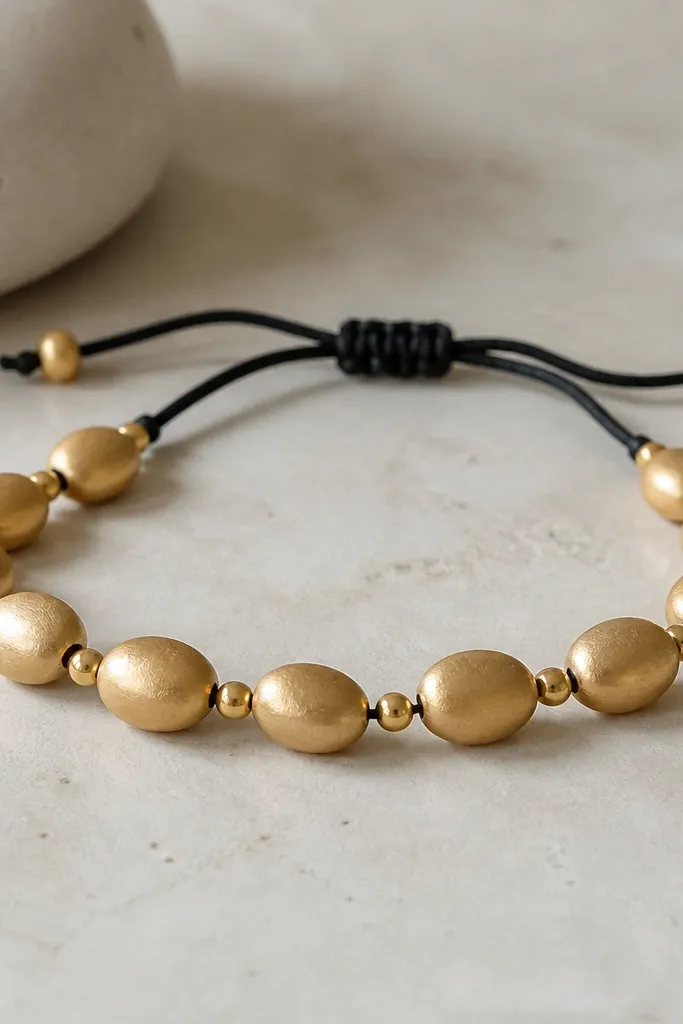
Brushed gold clay beads look like hammered metal when they catch light. Using a black cord tie makes it look like a wearable bracelet, not a bead necklace shortened. The tie knot also lets you adjust fit on the fly.
Use 7mm brushed gold clay beads and 2mm gold seed beads between beads. Use waxed black cord and create two wraps around the wrist before tying. Tie a double overhand knot and trim ends, then seal with a tiny glue dot.
Pro tipThread the cord through each bead carefully and pull tight - brushed gold shows slack more than matte beads.
AvoidSkip thick cord - it makes the knot bulky and throws off the look.
18. Matte Rainbow with Black Seed Bead Grid
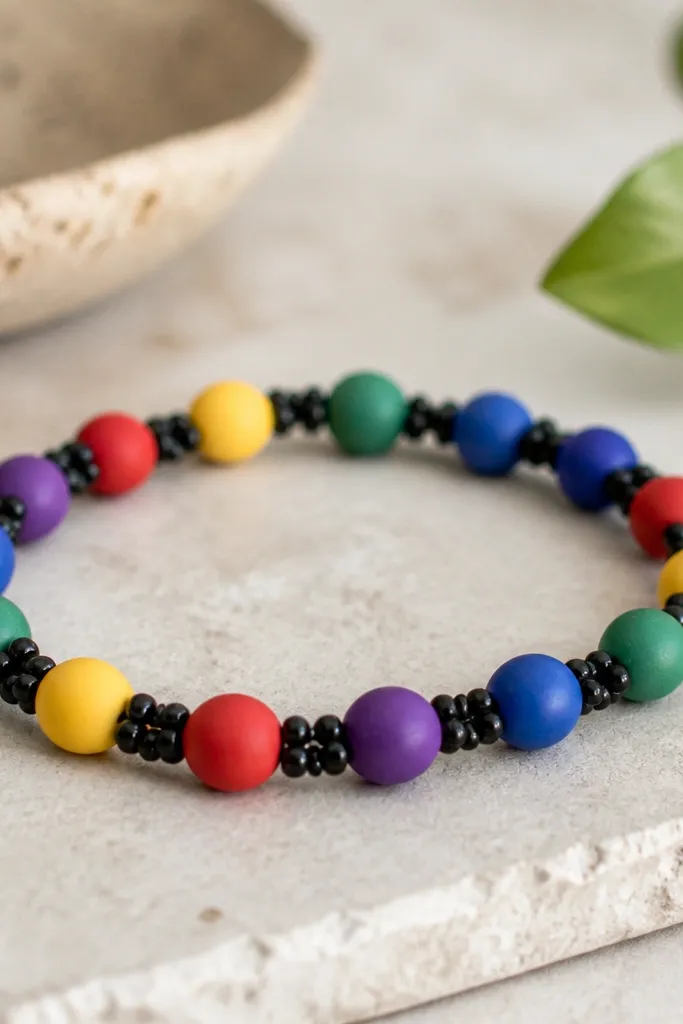
Black seed beads act like grout. They separate each clay color so the rainbow stays organized instead of smudging together. Matte clay keeps everything soft, and the black seed beads add a crisp edge.
Use 6mm matte clay beads in 5 colors, alternating 2 beads per color. Between clay beads, add 6-8 black seed beads. Build on elastic with a tight final knot and seal.
Pro tipIf your seed beads vary in size, sort them by size first so the spacing looks even.
AvoidDon't use clear seed beads - the grid effect disappears.
19. Pastel Starburst Cluster Bracelet

Clusters create interest without adding a pendant. The starburst look happens when you arrange 4 outer beads around 1 center bead - same size each time - then separate clusters with one spacer. I use bright centers like tiny yellow or aqua beads so each cluster pops.
Use 6mm pastel clay beads for the outer four and one 4mm bright bead for the center. Thread in a cluster order, then add 2-3 spacer seed beads before the next cluster. Plan for about 5-7 clusters on a 7-inch wrist.
Pro tipMake one perfect cluster first, then copy it bead-for-bead for every repeat.
AvoidAvoid mixing outer sizes in the cluster - the starburst turns lopsided.
20. Chevron Clay Bead Zigzag
Chevron looks like fabric when the colors alternate in a strict diagonal rhythm. I like this with two colors only - it stays readable and doesn't turn into a rainbow tangle. The zigzag also makes the bracelet look wider in the center.
Use 8mm clay beads in two colors. Build on a loom-like method using thread and a needle: string beads in rows of 3-4, then weave to form the diagonal. If you don't want loom work, use wire and pre-measure the V segments, then connect with a clasp.
Pro tipMark your thread with a washable marker at each chevron point so you keep the diagonal angles consistent.
AvoidAvoid elastic for chevron - it flattens the zigzag and the pattern loses its shape.
21. Clay Bead + Tassel End Caps
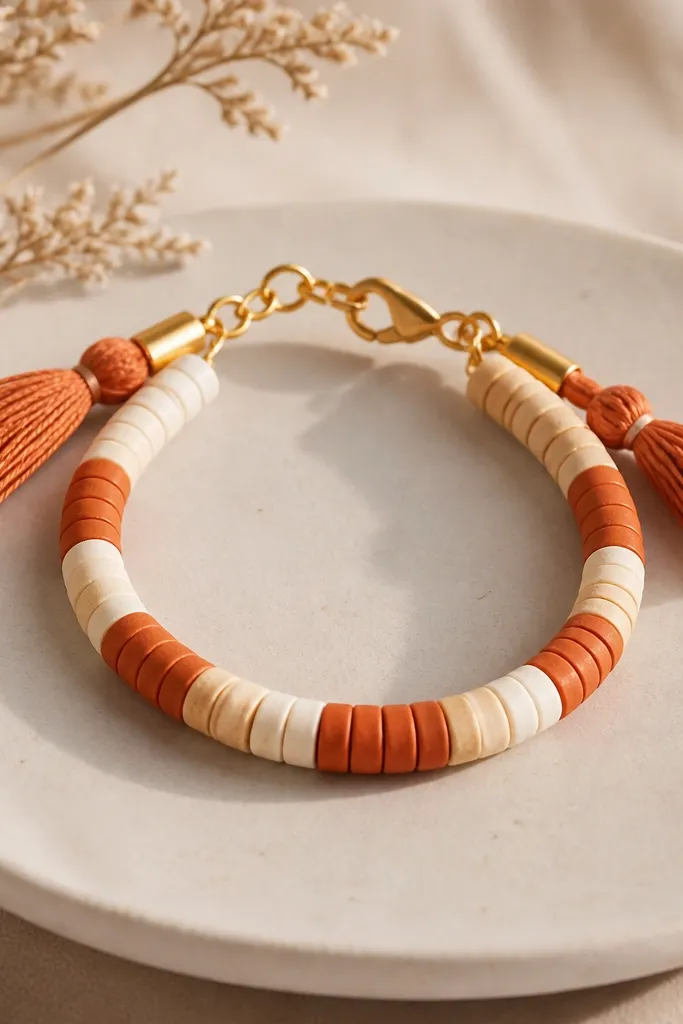
Tassels make clay beads feel like a festival accessory, but you can keep it classy by attaching them only at the ends. The tassels also hide cord ends and make the closure area look intentional. Use a thin tassel so it moves, not flops.
Use 8mm clay beads alternating terracotta and cream. Add a small seed bead spacer near each end to give the tassel anchor point. Attach tassels to a clasp or to cord end caps with a jump ring.
Pro tipTrim tassel strands to different lengths by 1-2mm so it doesn't look like a straight-cut broom.
AvoidDon't use heavy yarn - it makes the bracelet heavy and the beads pull down.
22. Blue Marble Clay with Silver Divider Beads
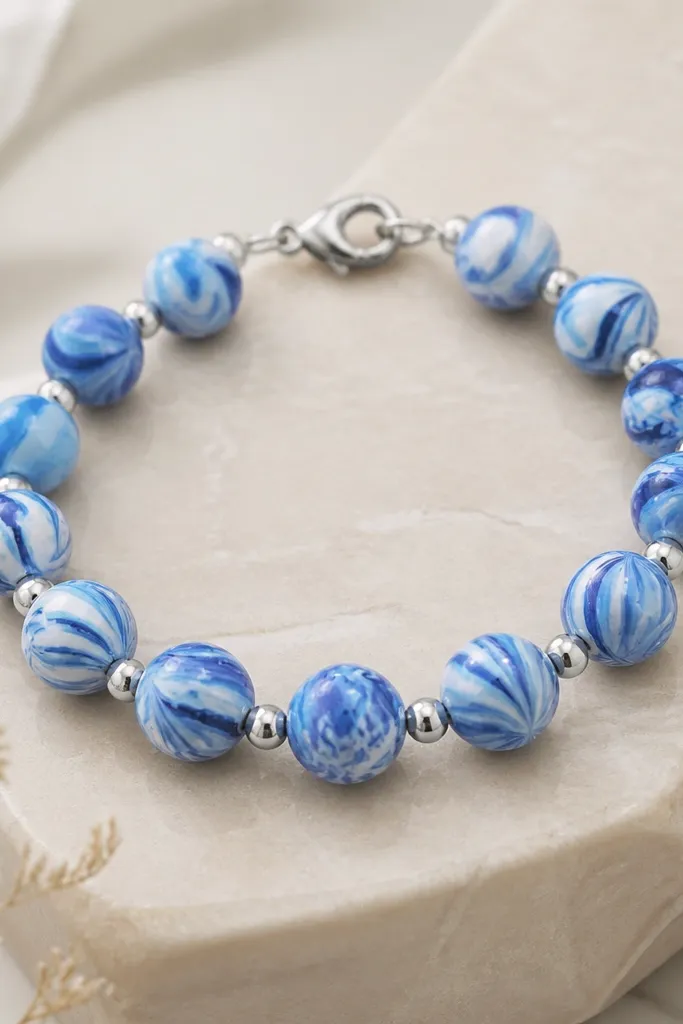
Marble clay has built-in variation, so you only need one silver divider per bead to keep spacing crisp. The divider beads also prevent the marble colors from blending into each other visually. This is a clean, wearable pattern for work outfits and casual weekends.
Use 7mm blue marble clay beads and 3mm silver divider beads. String on beading thread with crimp ends so the bracelet stays firm. Plan about 20 clay beads for a 7-inch wrist, then test-fit before crimping.
Pro tipWhen marble beads vary, place the darkest swirls at the two ends so the center looks balanced.
AvoidAvoid plastic dividers - they look flat and cheap next to marble clay.
23. Clay Bead + Woven Macrame Knot Sides
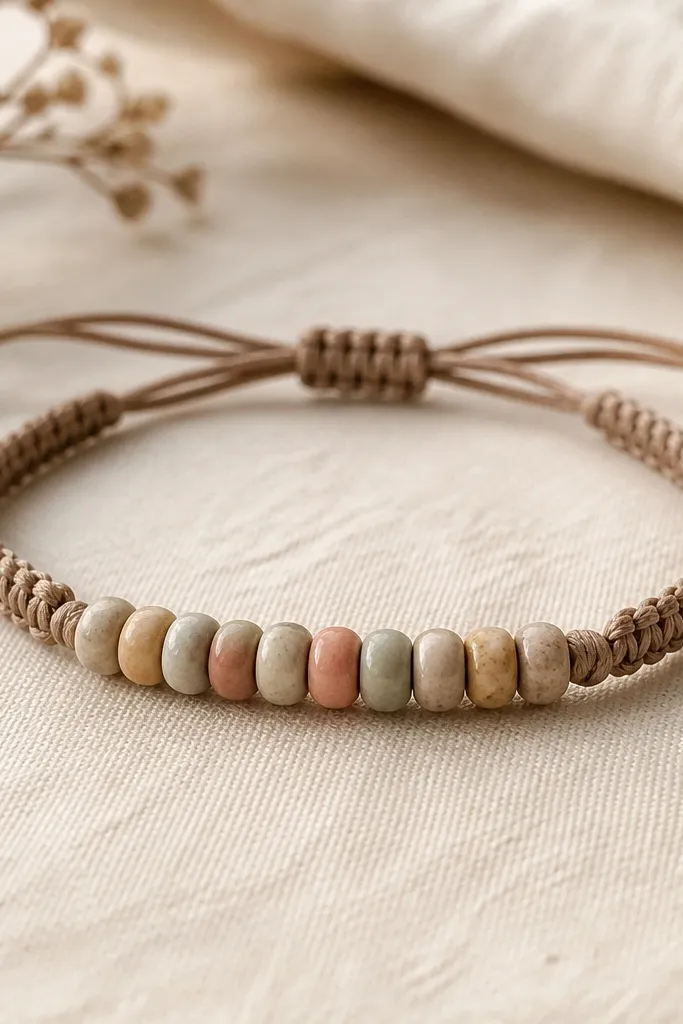
Macrame knots give a handmade frame that makes the clay beads look set. You don't need to cover the whole bracelet with knots; just using them on the sides keeps it balanced and less bulky. I like this pattern for adjustable fit because the knot section stretches slightly with wear.
Use waxed cord and thread clay beads on the center strand only. Make 2-3 square knot sections on each side, keeping them the same length. Finish with sliding cord ends and a small stopper bead to prevent slipping.
Pro tipPull each knot tight, then check the bracelet on your wrist before continuing the next bead section.
AvoidAvoid loose knots - they make the bracelet look messy even if the bead line is perfect.
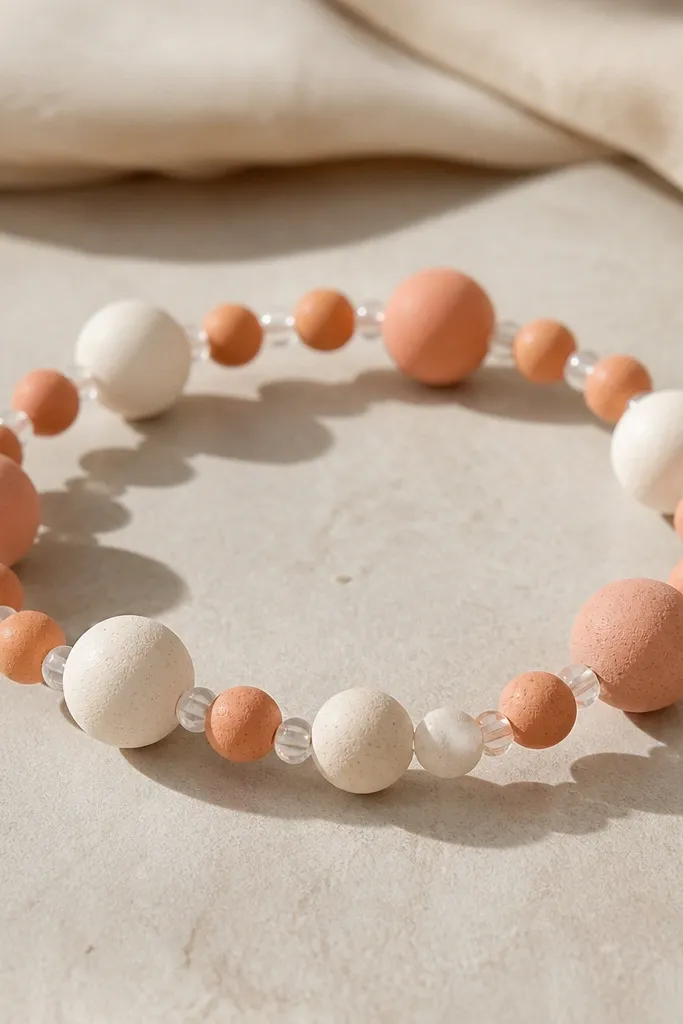
24. Clear Glass Spacer + Clay Bead "Ice" Bracelet
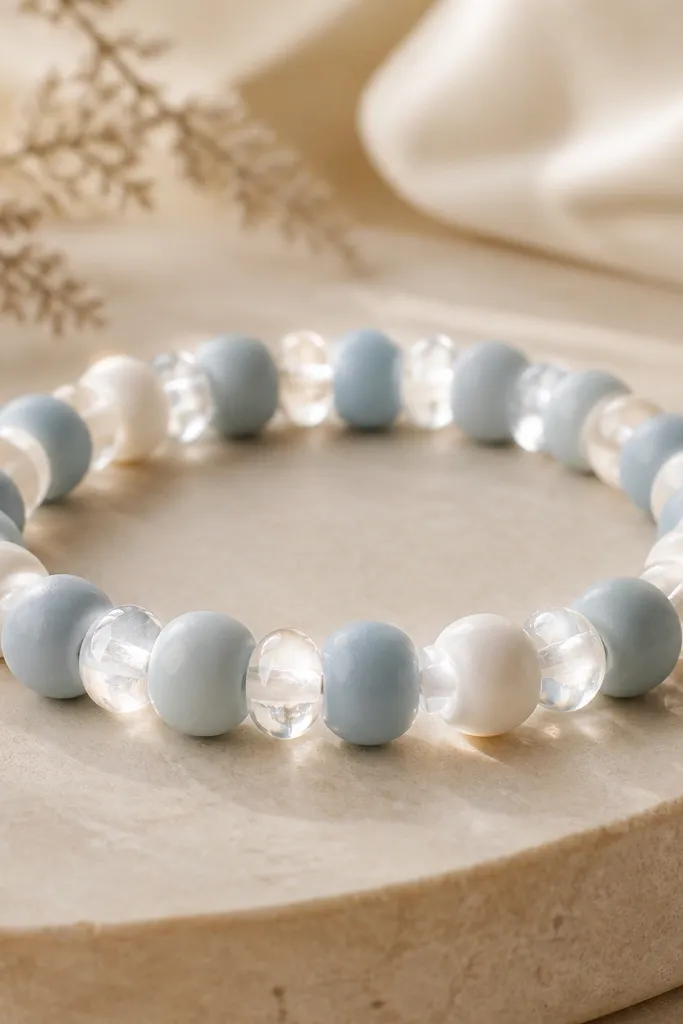
The clear spacers create an "ice" effect because they refract light between clay beads. This works best with pale clay colors like powder blue, white, and icy gray. The bracelet feels airy, not heavy, even with 8mm beads.
Use 8mm pale blue and white clay beads alternating. Add 4mm clear glass rounds between each clay bead. String on elastic for speed, then seal the knot. Keep the spacer count consistent (one clear spacer per clay gap) so it looks tidy.
Pro tipIf your clear spacers look cloudy, wipe them with a microfiber cloth before assembly - the shine matters.
AvoidDon't use colored glass spacers - it clashes with the "ice" palette.
25. Clay Bead + Leather Wrap with 3 Bead Front
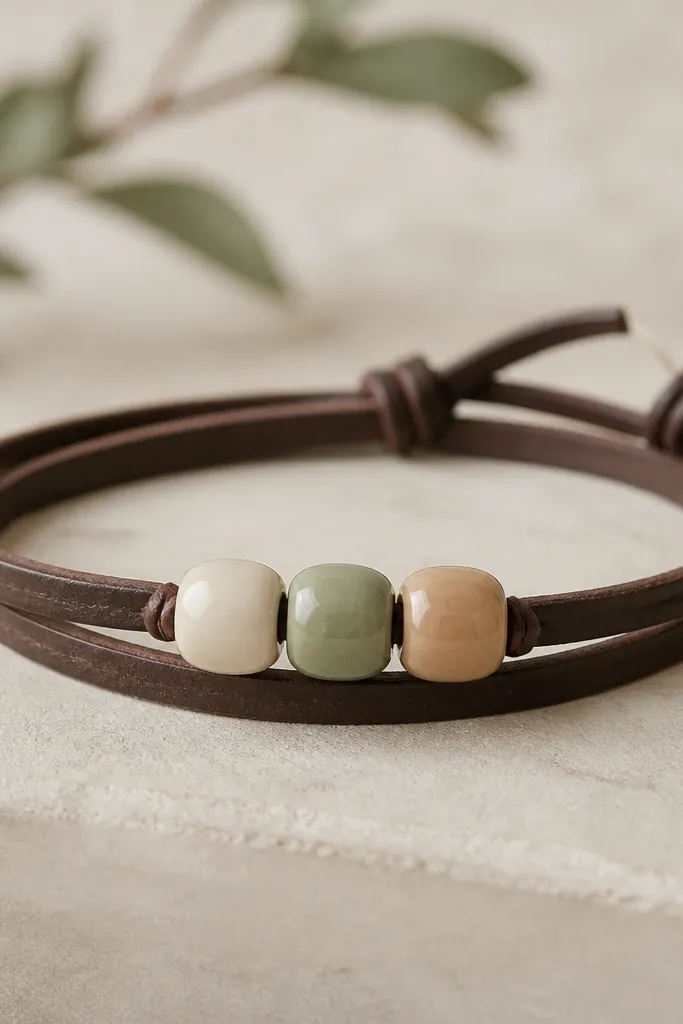
This pattern is fast and looks like you tried harder than you did. Leather wrap gives structure, so the beads stay aligned. The front bead trio keeps the design focused and prevents the bracelet from turning into a full-on bead band.
Use 2 strands of thin brown leather (about 2mm thick) wrapped around your wrist twice. Thread 3 clay beads onto one strand in the center and tie or glue it to the leather at the front. Add a small snap button or wrap tie closure at the back.
Pro tipCenter the bead trio by measuring the distance from the front knot to the back closure so it lands in the same spot every time.
AvoidAvoid thick leather - it makes the bracelet sit stiff and pulls attention away from the beads.


