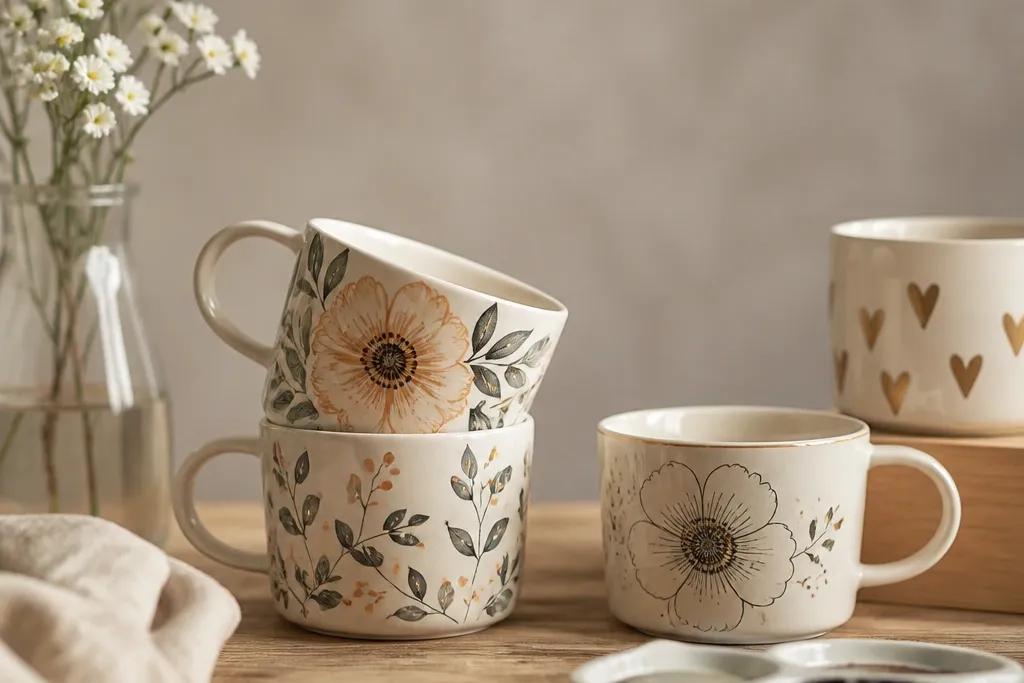
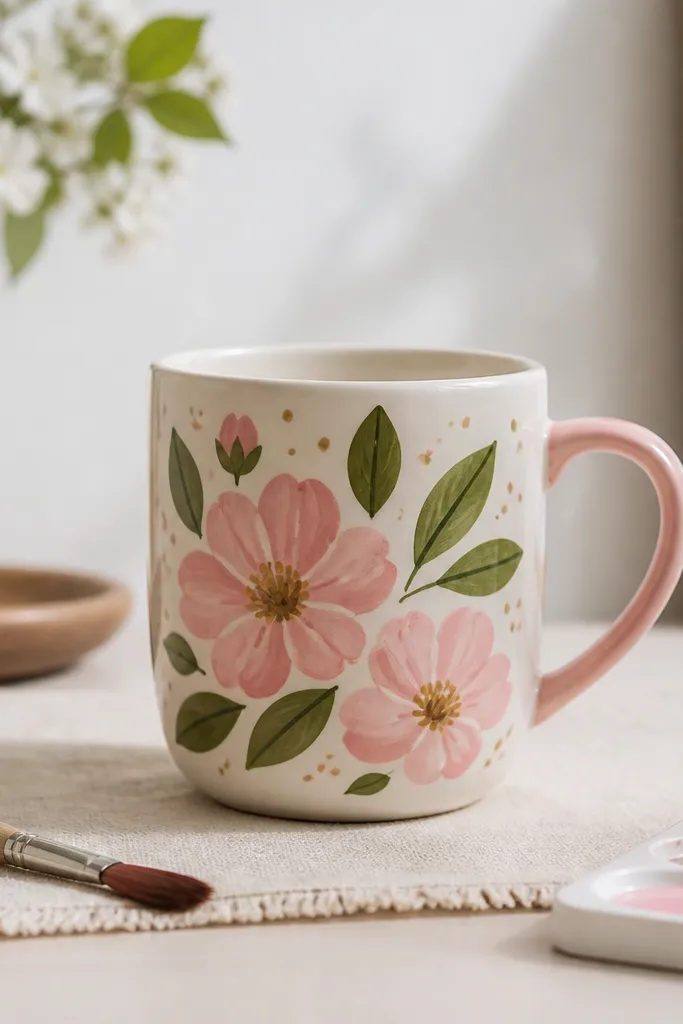
1. Peel-and-Place Vinyl Floral Border
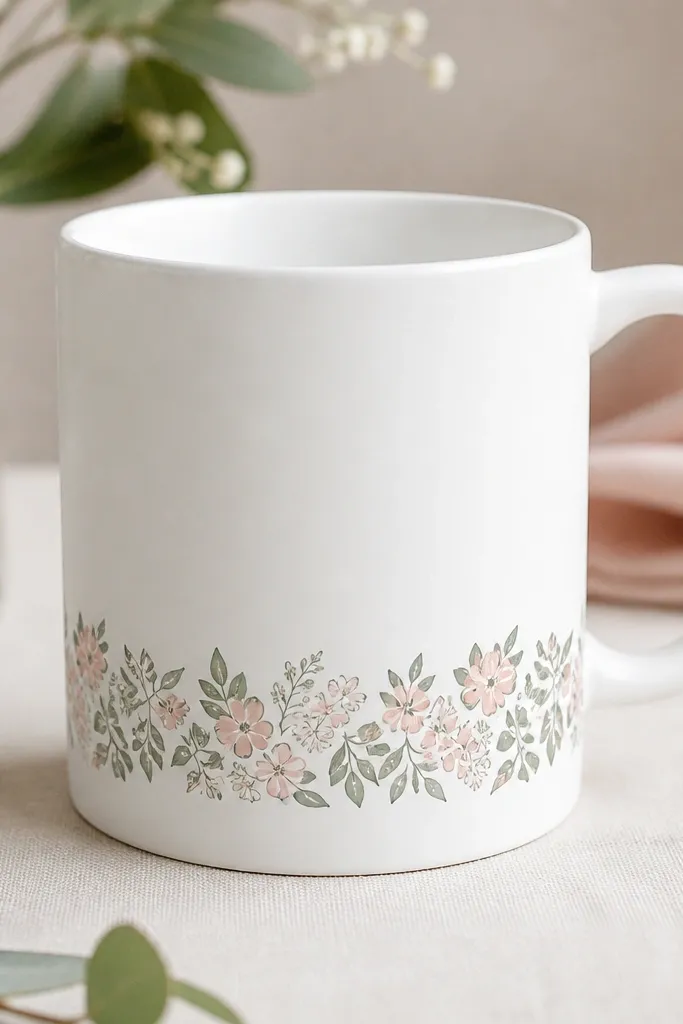
This is removable mug painting without the drama because you paint inside vinyl that you can peel off later. I layer a floral vinyl strip around the mug's bottom edge, then dab acrylic paint over it using a sponge brush. The vinyl creates crisp petal shapes that don't smear on the ceramic curve. The muted palette looks like hand-painted pottery but you still get clean lines.
Use a 1.5 to 2.5 cm tall vinyl border strip wrap. Press the vinyl down firmly with a plastic card so it follows the curve. Paint two thin coats in blush pink and soft sage, then let it cure for 24 hours before peeling. Seal lightly over the painted area only, keeping the sealer away from the vinyl edge while it's still on.
Pro tipAfter peeling, wipe the mug with a microfiber cloth first. Any vinyl residue will show as a dull patch under clear coat.
AvoidDon't use thick paint in one coat - it pools at the curve and bleeds under the vinyl.
2. Stencil Constellations with Removable Masking Tape
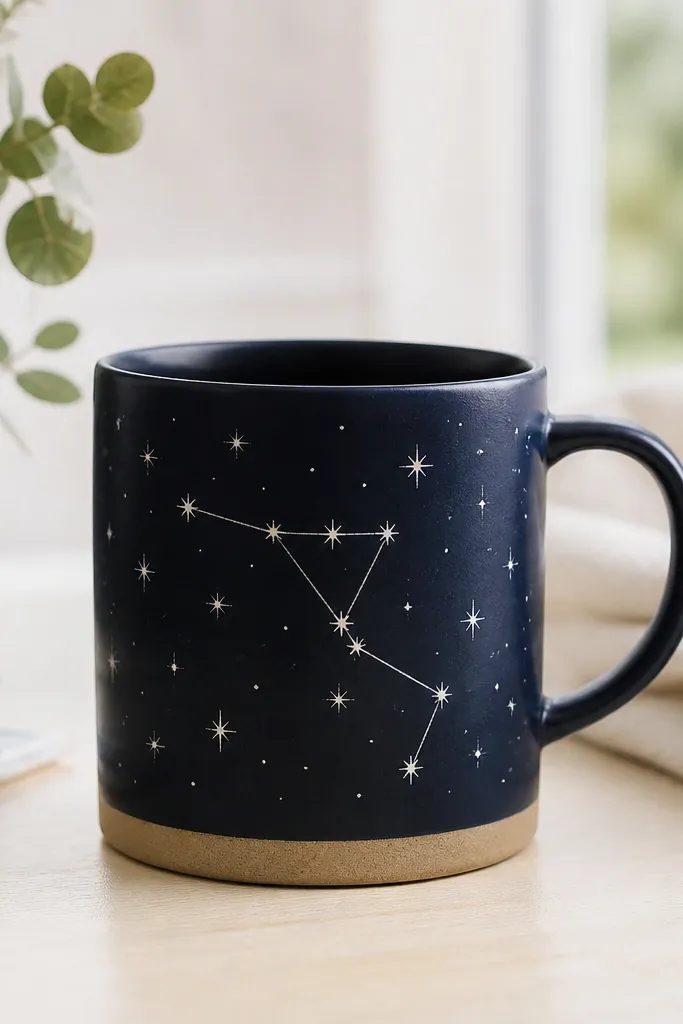
This idea makes the sky look intentional. You tape a stencil-sized "sky window" on the mug, paint the stars and linework inside, then remove tape to reveal clean edges. Because the tape comes off right after the paint sets, the border stays crisp even on a rounded surface. Silver paint pops against navy and looks like night sky glassware.
Start with a navy-painted mug or a dark base mug. Cut a simple constellation stencil from cardstock and tape it in place with painter's tape. Dot star points with a 0.8 mm paint pen filled with metallic silver. Use a fine liner brush for the connecting lines, then remove the stencil and tape after about 20 to 30 minutes (when paint is set but not fully cured).
Pro tipUse a hairdryer on low for 30 seconds between star dots so the paint doesn't spread.
AvoidDon't press the tape too hard - it can lift paint and leave ragged edges when you remove it.
3. Clear Film Transfer City Map
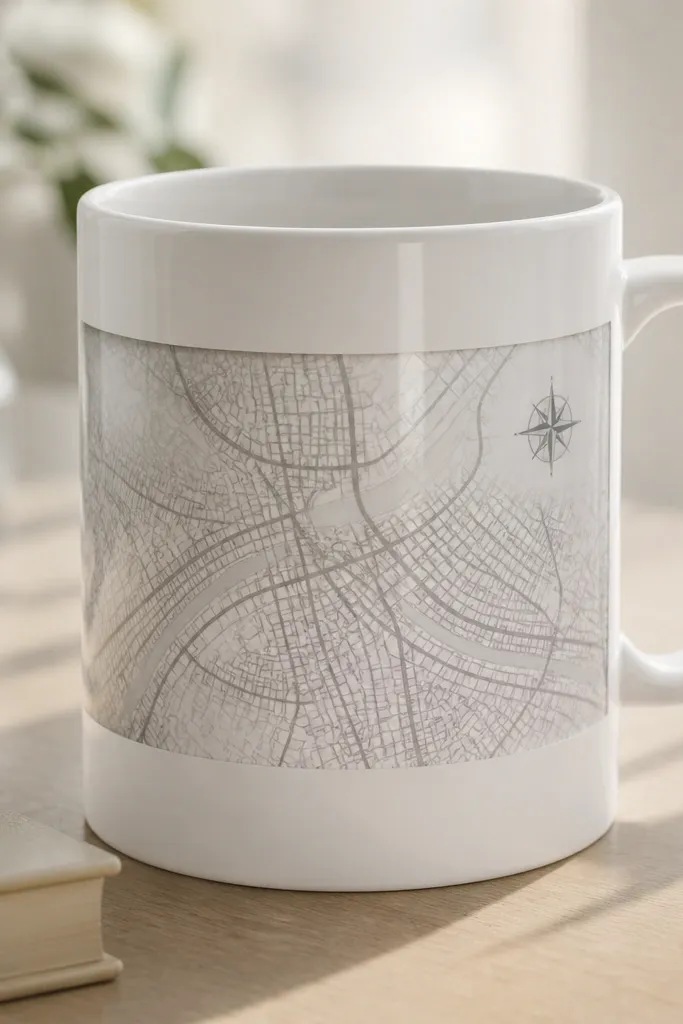
This is my favorite "no drill removable mug painting ideas" because it feels like printed pottery. You print a map graphic onto clear transfer film, then paint over selected areas with acrylic to add color accents. The lines stay sharp, and you can peel the film layer off if you want to change the design later. It looks modern, not handmade-chaotic.
Print a black-and-white map on clear transfer film meant for crafts. Apply the film to the mug while it's clean and dry, smoothing with a plastic burnisher. Paint only a few highlighted blocks - I use muted teal and faded terracotta - so the map remains readable. Seal over the painted areas with a clear acrylic sealer formulated for film or craft transfers.
Pro tipKeep your highlights to about 10 to 15% of the map area. Too much color makes the print look muddy.
AvoidDon't seal the whole film edge-to-edge if you plan to remove it later - that locks it down too hard.
4. Removable Tape Stripes with Color-Blocking Fade
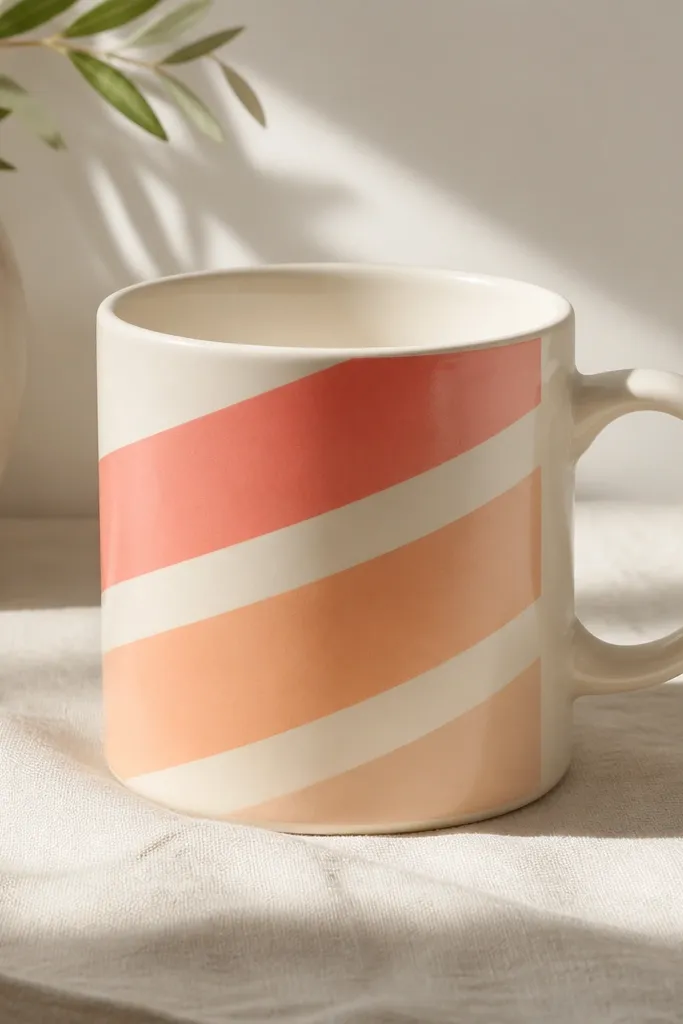
Diagonal stripes look crisp because the eye expects straight lines, and tape makes them possible on a curve. The fade effect comes from layering two shades while the first coat is still slightly tacky. You remove the tape after the paint sets so you get sharp stripes without bleed. The coral-to-peach fade looks like sunset glaze.
Mark off three diagonal bands with light pencil marks. Use painter's tape to create the stripe boundaries and leave a small gap between bands to prevent paint bleed. Dab coral paint first, then blend in peach with a dry foam brush. After 20 to 30 minutes, remove tape while paint is set but not fully hard, then let it cure 24 hours before sealing.
Pro tipBlend with a dry brush using short taps - it keeps the fade soft without streaks.
AvoidDon't rush tape removal while paint is wet. Wet paint pulls under tape and leaves jagged edges.
5. Handle-Frame Quote in Washi Tape
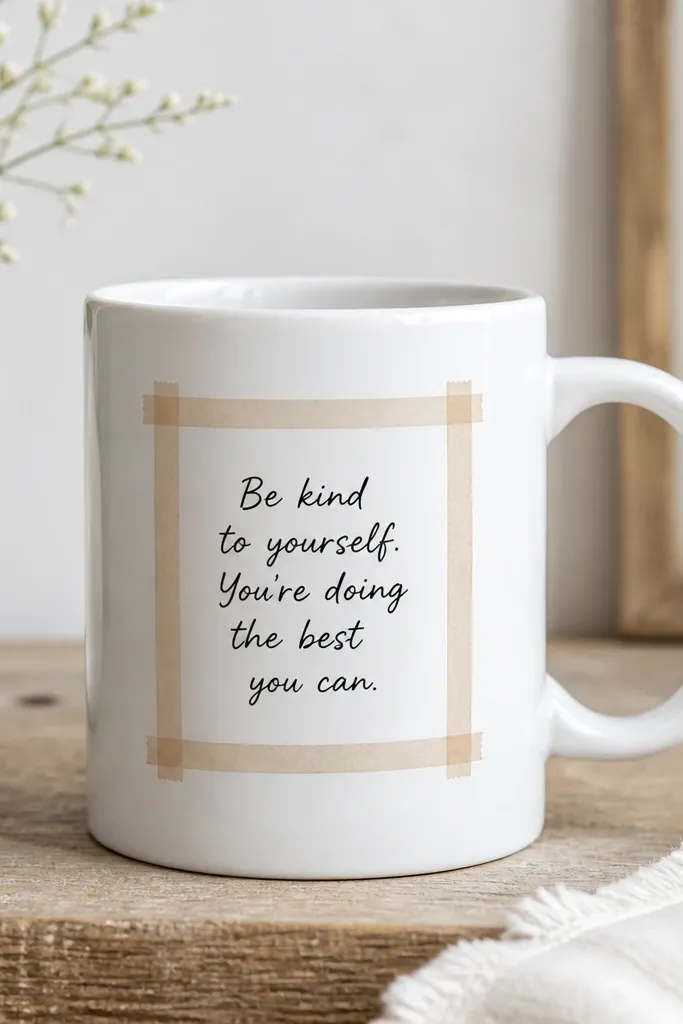
Washi tape is forgiving, and it's removable enough to swap quotes later. You build a frame around the mug, paint the quote inside, and seal only the painted text. Washi also gives you a slightly textured edge that looks like a printed label. It's perfect for gifts where you want the wording to match the person.
Use a medium-width wash tape (about 6 to 10 mm) to form a rectangle that sits 2 to 3 cm above the mug base. Leave space for the handle so the rectangle doesn't cross it. Paint the quote with black acrylic and a fine liner brush. Remove the tape after the paint sets, then seal over the letters with a thin clear coat.
Pro tipPractice the quote on paper first - mug curves make long lines drift if you don't plan the letter spacing.
AvoidDon't use thick paint for text. It dries raised and looks clunky on a mug.
6. Decal-Style Polka Dots with Peelable Mask
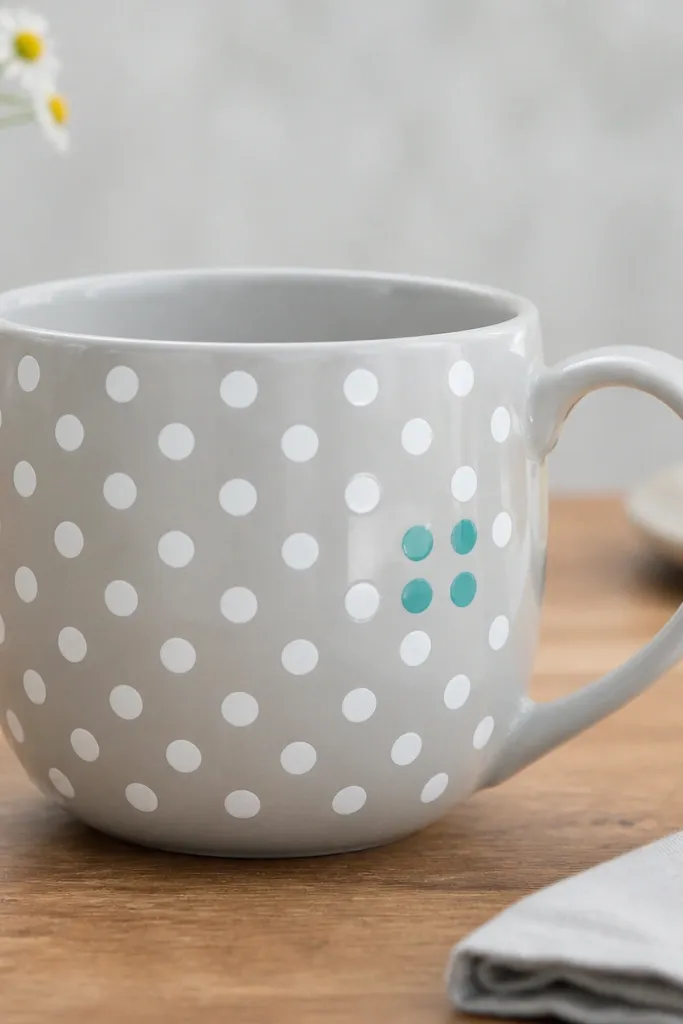
Polka dots are the fastest way to look "designed" because spacing is the whole game. A peelable masking film lets you place dots without waiting for stencils to line up on a curve. Paint over the mask, then peel to reveal clean circles. The teal cluster adds personality without turning into a random mess.
Use a peelable masking film sheet with a dot cutter or pre-cut dot stickers. Place dots in a grid around the mug, keeping the largest cluster centered opposite the handle. Fill dots with a sponge using white acrylic, then add a few teal accents with a paint pen. Peel mask after 20 to 30 minutes and seal only once the paint is dry to the touch.
Pro tipPress each dot edge with a silicone-tipped tool so paint doesn't creep under the mask.
AvoidDon't use a wet brush over masking film. Wet paint runs and creates oval dots.
7. Acrylic Marble Swirl Using Plastic Wrap
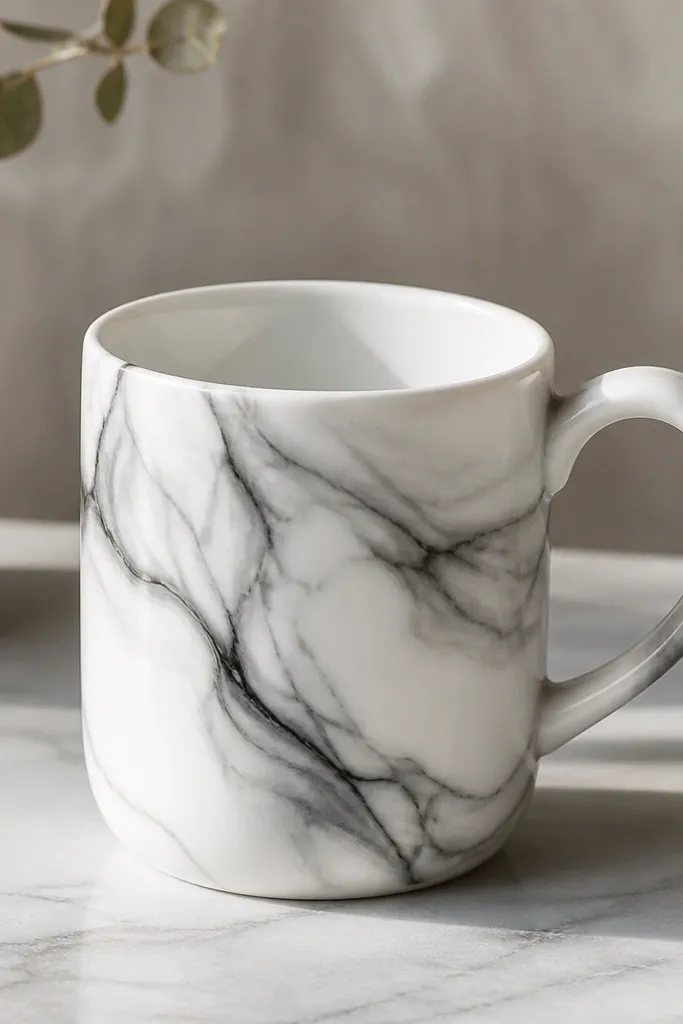
Marble swirls hide small imperfections, which is why this is a lifesaver for removable projects. You paint a base layer, then drag mixed paint through crumpled plastic wrap to create natural-looking veining. It reads expensive because the swirls have variation and depth. Since there's no strict stencil edge, it feels handmade but still clean.
Start with a clean mug and paint a thin base coat with light gray acrylic. Drop darker gray and charcoal paint in small puddles, then press crumpled plastic wrap lightly over the surface. Lift to reveal swirls, then repeat for a few passes. Let it cure fully and seal with a clear acrylic topcoat.
Pro tipUse plastic wrap that's been crumpled and flattened once. Fresh wrap makes deep ridges.
AvoidDon't overwork the swirls. Too many passes turn it into muddy gray.
8. Lemon Slice Border with Cut-Out Fruit Shapes
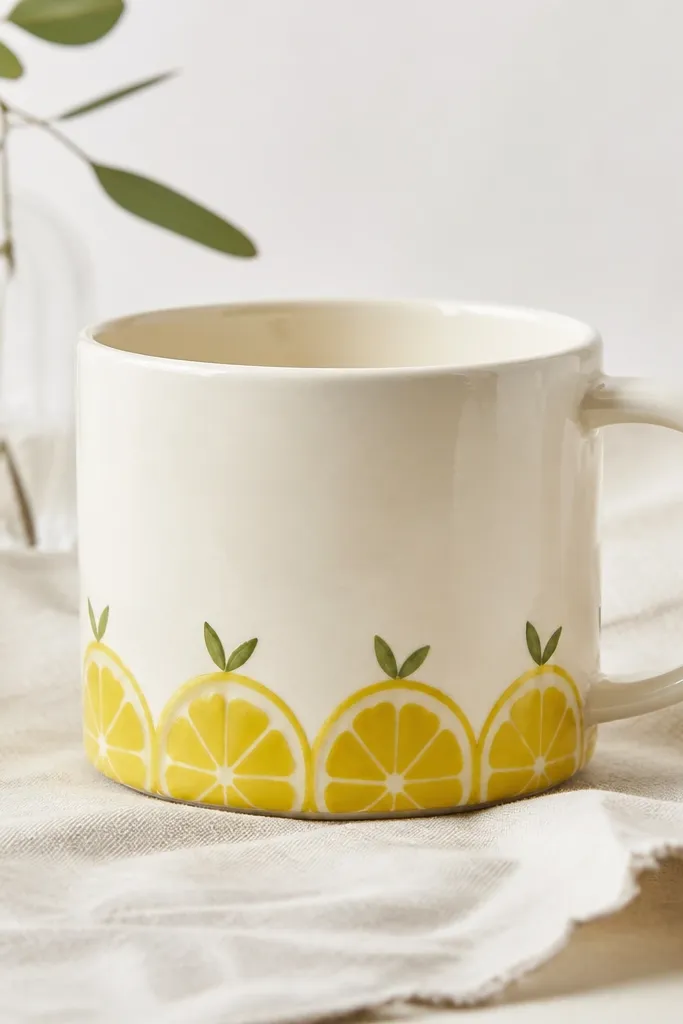
Cut-out shapes give you repeatable results on a curved mug. You press lemon slice cutouts (paper or thin craft film) as a mask, paint the yellow fill, then trace the rind outline. The repeating band looks like kitchen pottery you'd buy in a set. It's cheerful without being loud.
Create lemon slice templates about 4 to 5 cm wide. Position the first slice 1 cm above the mug base, then space others so the seams meet around the curve. Fill slices with bright lemon yellow acrylic, then add a white rind outline using a paint pen. Add tiny green leaf tips with a liner brush.
Pro tipSeal after the white outline dries, not right away. If you seal too early, the pen ink can smear.
AvoidDon't freehand the rind outline. Use a paint pen or small round brush so it stays crisp.
9. Rainbow Ombre Fade with Removable Edge Tape
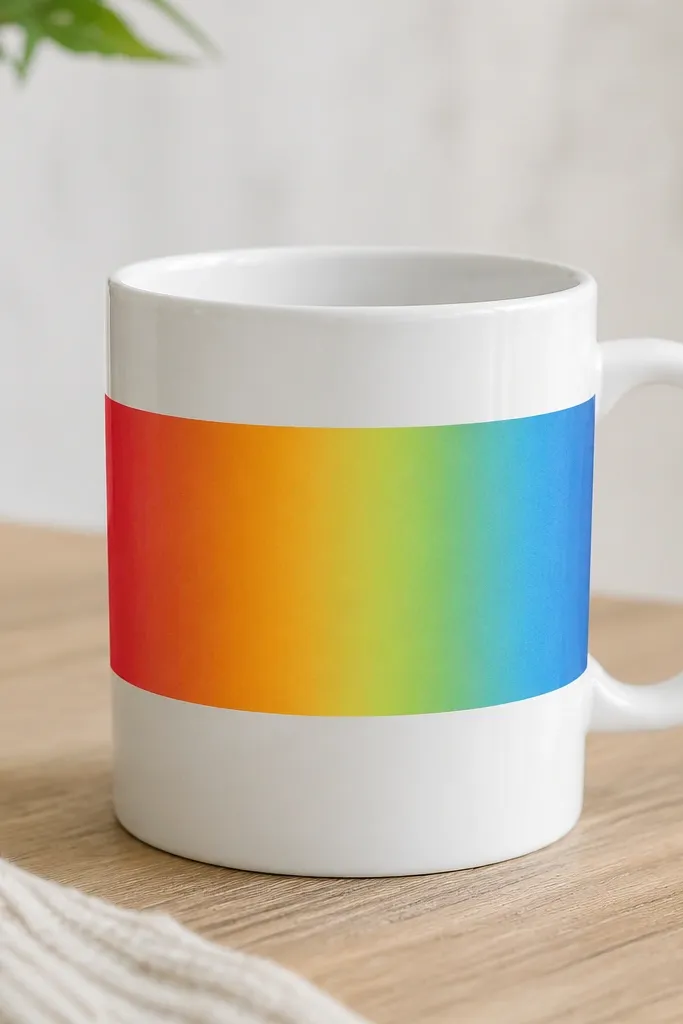
Ombre looks smooth only when you control the edges. Tape makes the top and bottom lines straight, and the fade comes from blending colors while they're still workable. I like this on a plain mug because the band becomes the whole focal point. It looks like rainbow glassware, not a kid's craft.
Tape a horizontal band across the mug middle, 4 to 5 cm tall. Paint red at one end, then orange, yellow, green, and blue in overlapping strokes. Blend by lightly dragging a nearly dry foam brush across the boundary lines. Remove tape after 20 to 30 minutes, then cure 24 hours and seal.
Pro tipKeep each color layer thin. Thick paint makes the ombre look chalky instead of smooth.
AvoidDon't use too much water in your paint. It pools on the curve and creates streaks.
10. Monochrome Botanicals with Painter's Tape Silhouettes

Tape silhouettes are the fastest way to get "ink illustration" on ceramic. You build leaf shapes with tape, paint over the negative space, and remove tape to reveal crisp black forms. Monochrome looks classy because the texture comes from brush shape, not from lots of colors. It also hides small alignment issues because the leaves naturally vary.
Draw a light pencil arc where the leaves will climb. Use painter's tape to block leaf shapes (tear tape ends for leaf tips). Paint over with black acrylic using a small flat brush. Peel tape after the paint sets, then add a few thin vein lines with a fine liner brush.
Pro tipUse matte black acrylic for the most pottery-like look.
AvoidDon't blend edges with a wet brush. Sharp silhouettes look intentional; blurred ones look sloppy.
11. Gold Leaf Look with Metallic Paint and Masked Lines
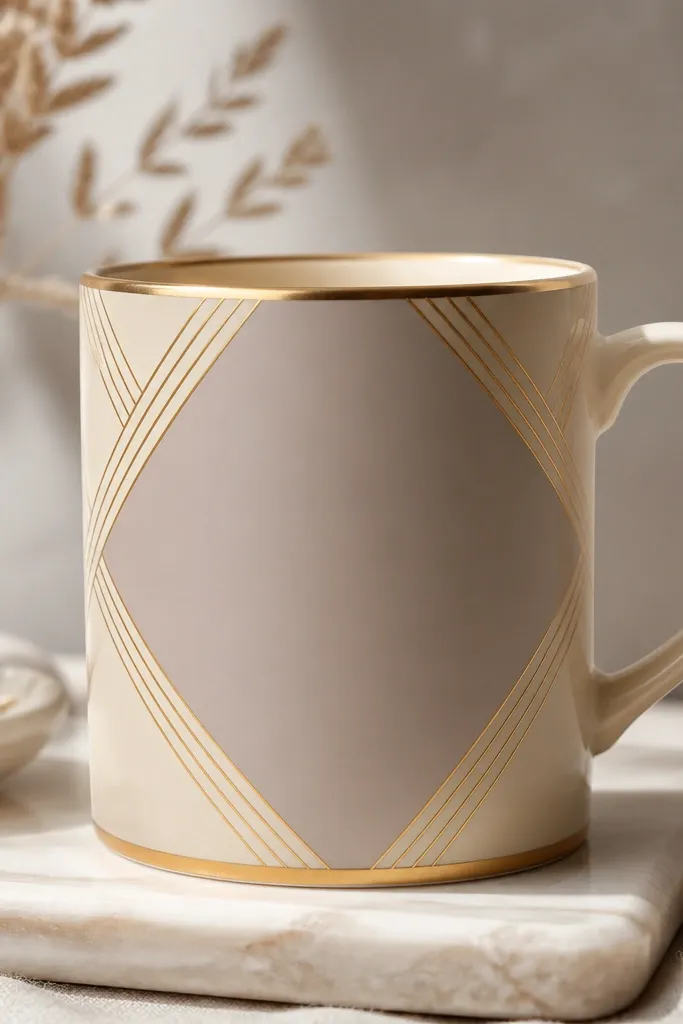
This style mimics gold leaf without the mess. You paint a neutral background, then mask geometric lines and fill them with metallic gold acrylic. The gold reads like jewelry when it hits the light. It's also super easy to remove later if you keep the gold on a film or tape layer rather than dragging it over the whole mug.
Paint the mug a smooth taupe base and let it dry. Tape a geometric frame - I like a simple rectangle with two diagonals. Fill the taped areas with metallic gold paint using a foam brush. Remove tape after paint sets, then seal carefully with a clear acrylic topcoat to keep the metallic from dulling.
Pro tipLet metallic gold cure longer than acrylic colors - 48 hours before heavy washing.
AvoidDon't seal with a thick coat. Thick clear layer can turn gold into a dull, cloudy finish.
12. Removable Washi Starry Night with Glow Paint Accents

This is the mug people ask about in the first five minutes. Washi tape makes star shapes easy, and glow paint adds a fun reveal when the room lights drop. You get clean edges because you peel tape after the paint sets. The navy base makes the white stars look sharp and the glow pop.
Tape star shapes using small pieces of wash tape, then fill with white acrylic. Add glow-in-the-dark paint to 5 to 7 stars only so it doesn't overpower. After 20 to 30 minutes, remove tape and let everything cure. Seal over the white stars with clear acrylic; glow paint needs its own compatible sealer or a lighter topcoat.
Pro tipCharge the glow stars under a bright lamp for 2 minutes, then test before you give the mug away.
AvoidDon't cover glow paint with a heavy glossy sealer. It kills the glow and makes it look wet.
13. Photo Transfer + Hand-Painted Border Frame
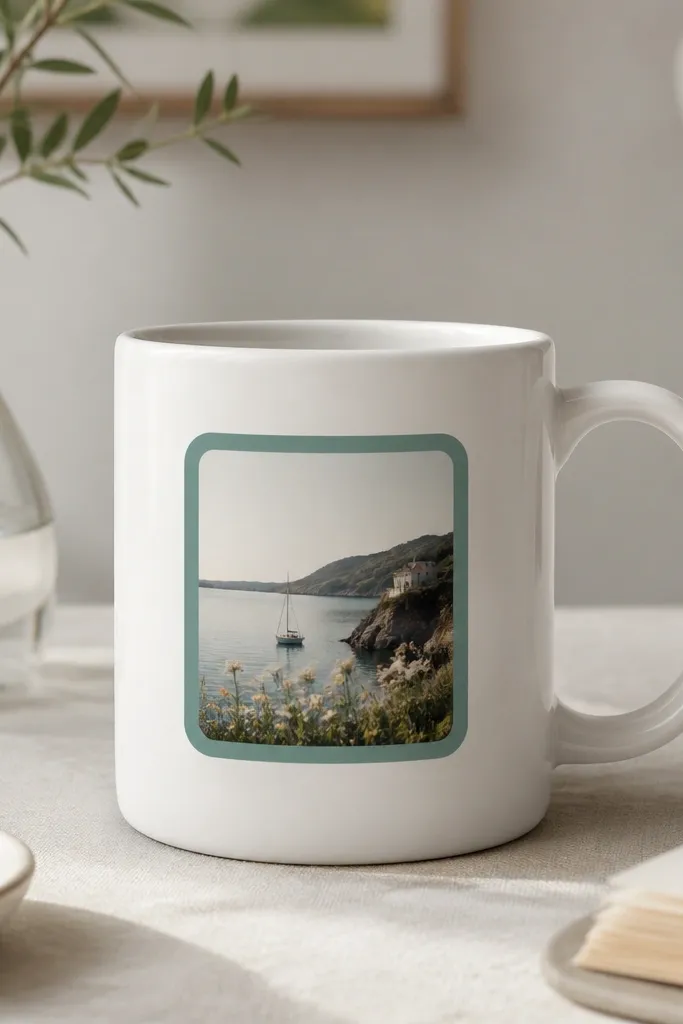
Photo transfers look hard, but the trick is adding a painted border so the edges don't look like a sticker. You apply the transfer, then paint a border with a stencil-like guide. The border anchors the image on the curved mug and makes the whole piece look custom. It also helps if the transfer edge is slightly imperfect.
Use a photo transfer method made for ceramic crafts (laser print on transfer paper is my go-to). Apply the image to the mug, then lightly sand any rough transfer edges after it dries. Mask a rounded rectangle border with painter's tape and paint it in teal with a small brush. Seal the painted border and a small area around the image.
Pro tipChoose photos with high contrast. Light, hazy photos look flat once sealed.
AvoidDon't paint over the transfer right away - it smears if the image layer isn't fully dry.
14. Removable Citrus Wheel with Paint Pen Segments
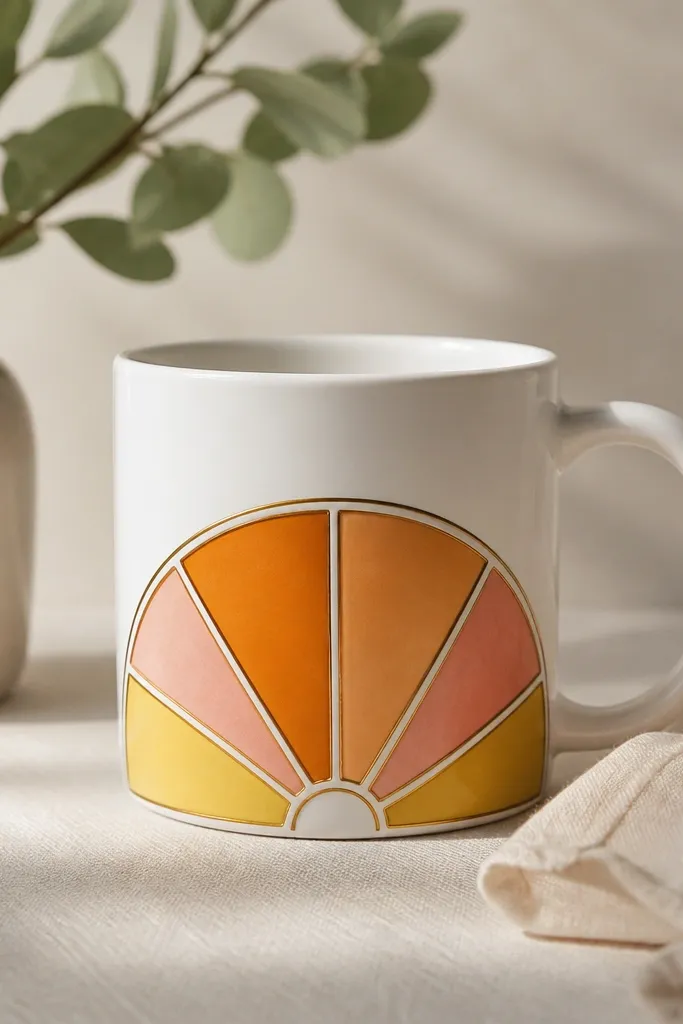
Stained-glass style segmentation makes curved mugs look like design objects. You create "cells" using removable masking lines, then fill each segment with a different fruit color. Paint pens keep the segment lines thin and consistent. The result looks like a modern illustration, not a painted blob.
Draw a citrus wheel shape on paper, then cut a template. Tape segment lines onto the mug with thin painter's tape strips. Fill segments with diluted acrylic in orange, yellow, and pale pink - dab rather than brush for even coverage. Seal after 24 hours, and remove tape-mask only after paint sets so lines stay sharp.
Pro tipUse a ruler and tape for the first two segment lines - the rest will line up faster.
AvoidDon't overload the segment edges with paint. Thick paint makes the lines disappear.
15. Galaxy Drip with Masked Top Edge
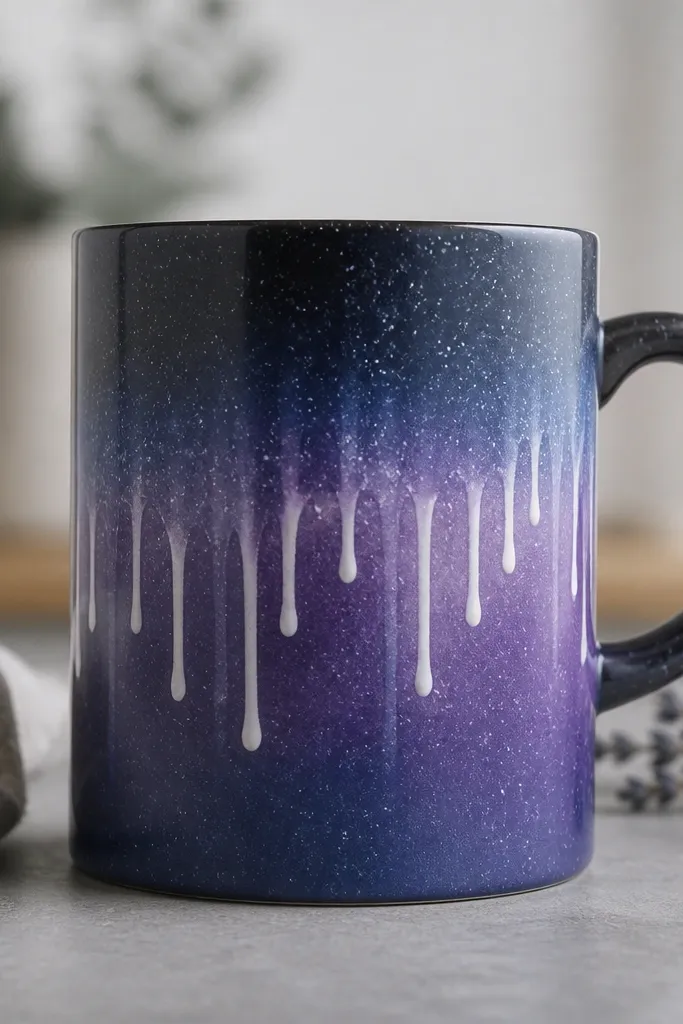
Galaxy drips look messy until you control the top edge and paint thickness. Tape defines where the drip starts, so the drips fall like a deliberate design. For stars, use a splatter tool or toothbrush technique with watered white paint. The dark base makes the gradient look deep and the stars look like they're floating.
Mask a horizontal line across the mug with painter's tape. Paint a gradient band with purple and blue acrylic, blending with a sponge. For drips, load a liner brush with paint slightly thicker than your gradient and touch it at the top edge so it pulls downward. Add star dots with a toothbrush flick, then remove tape after 15 to 20 minutes.
Pro tipPractice drip placement on a scrap tile first. You want paint to fall 1 to 2 cm, not streak 5 cm.
AvoidDon't use paint that's too thin - it runs past the design line and looks like a spill.
16. Removable Botanical Stamp Repeat
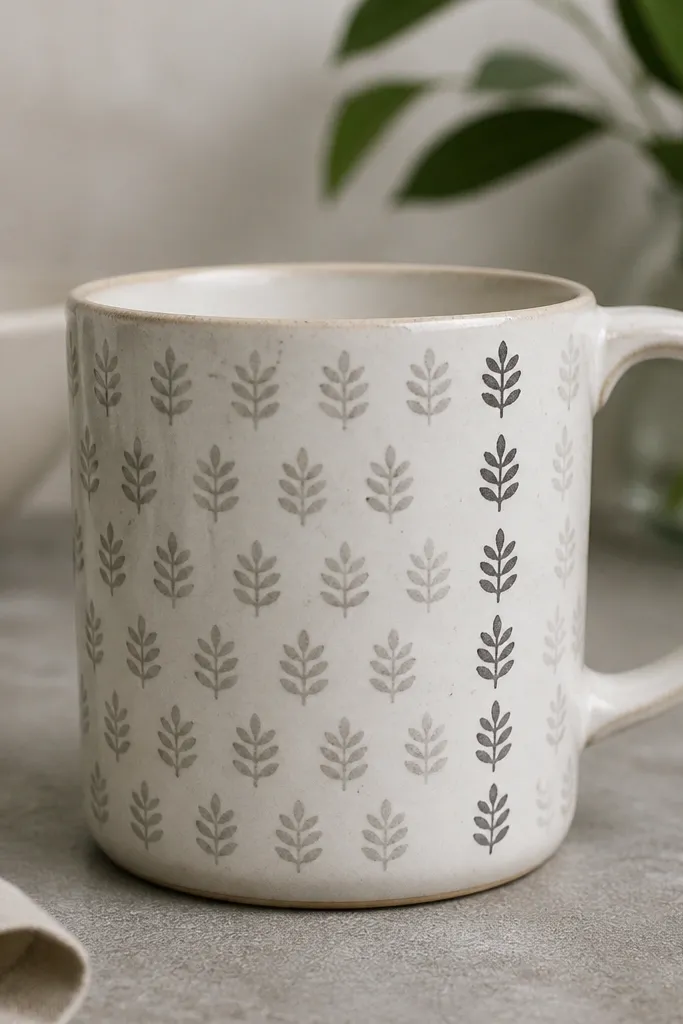
Stamp repeats are one of the cleanest ways to get a pro look fast. You stamp leaves onto a removable masking layer or directly onto a lightly sealed base, then paint over selective areas. The repetition makes it look designed even if each leaf isn't perfectly identical. It's calm, and it works for everyday mugs.
Use a small rubber stamp with leaf shapes. If you want removable behavior, stamp onto a thin adhesive stencil sheet first and peel it onto the mug; then paint over the stamped areas. If you're okay with semi-permanent, stamp directly onto the mug with a fabric-safe paint pad and let it dry. Seal after the paint cures so the stamped texture doesn't wear off.
Pro tipTap the stamp straight down and lift straight up. Angled lifts stretch the leaf edges.
AvoidDon't use watery paint for stamps. It bleeds and blurs the leaf outline.
17. Stamped Initials on Removable Mask Film
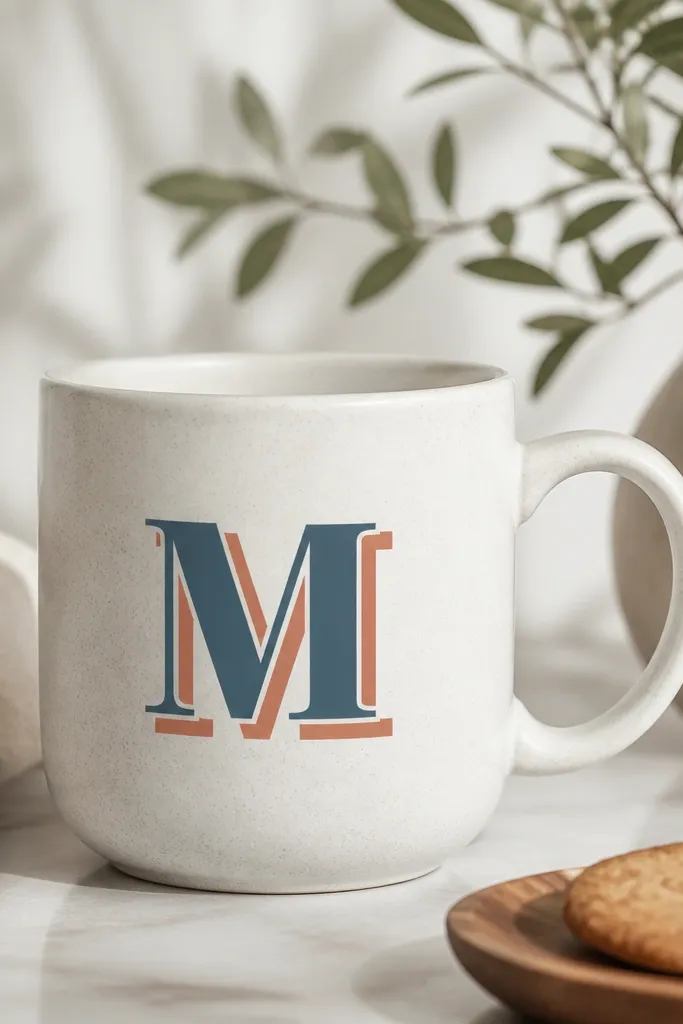
Large initials look classy, and mask film makes them sharp on a curved mug. You place the mask where the initial will sit, stamp or paint within it, then peel. The shadow effect comes from placing a second mask offset by 2 to 3 mm. This style is great for couples and name gifts.
Cut or buy mask film letters in a bold font. Center the initial so it sits just to the left of the handle. Paint inside the mask with acrylic - I like navy on white or white on dark. For the shadow, apply a second mask slightly offset and paint with a lighter shade. Peel masks after paint sets and seal over the painted letter only.
Pro tipChoose a font with thick strokes. Thin letters chip sooner on curved surfaces.
AvoidDon't rush peeling. If you peel before the paint sets, you'll pull up the edges.
18. Watercolor Wash Background with Tape-Resisted Edges
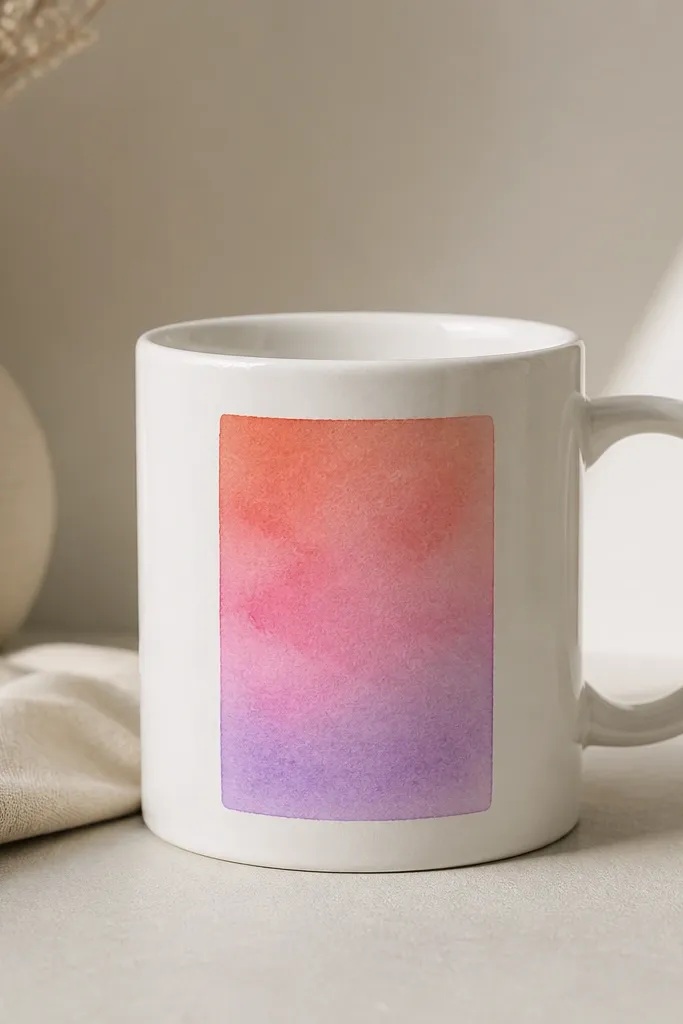
This gives you that painterly look but still looks neat. Tape-resisted edges keep the watercolor wash contained, even on a mug's curve. You build the wash in light layers so it stays airy. Seal it well and it looks like stained ceramic, not craft paint.
Tape a rectangle in the mug center using painter's tape. Mix acrylic paint with a tiny amount of acrylic medium or water to thin it, then apply with a wide sponge in layers: coral first, then pink, then lavender at the corners. Let each layer dry 10 to 15 minutes before adding the next so it doesn't muddy. Remove tape after the final layer sets, then seal once fully dry.
Pro tipUse a fan brush or sponge to keep the edges soft inside the rectangle. Smooth strokes make it look too uniform.
AvoidDon't soak the mug surface. Wet-heavy washes creep under tape and blur the border.
19. Checklist Icons with Micro Stencil and Removable Border
Tiny icons need sharp edges, and micro stencils deliver. You paint a thin border first, then use a small stencil sheet to stamp icons and check marks. The border makes everything look organized instead of scattered. This is a clever mug for someone who loves planning, but it also works for kitchen chores.
Use a plastic stencil sheet with icons and check marks (laser-cut craft stencils work). Tape a thin border around the mug center, 1 cm tall. Place the stencil and paint icons with black acrylic using a stipple brush. Remove stencil and tape after 15 to 20 minutes, then seal lightly over the painted area.
Pro tipKeep labels short - 3 to 6 letters max - so they don't distort around the curve.
AvoidDon't try to fix blurry edges with extra paint. It thickens and makes the stencil look smeared.
20. Tropical Leaf Cutout Silhouette with Reverse Painting
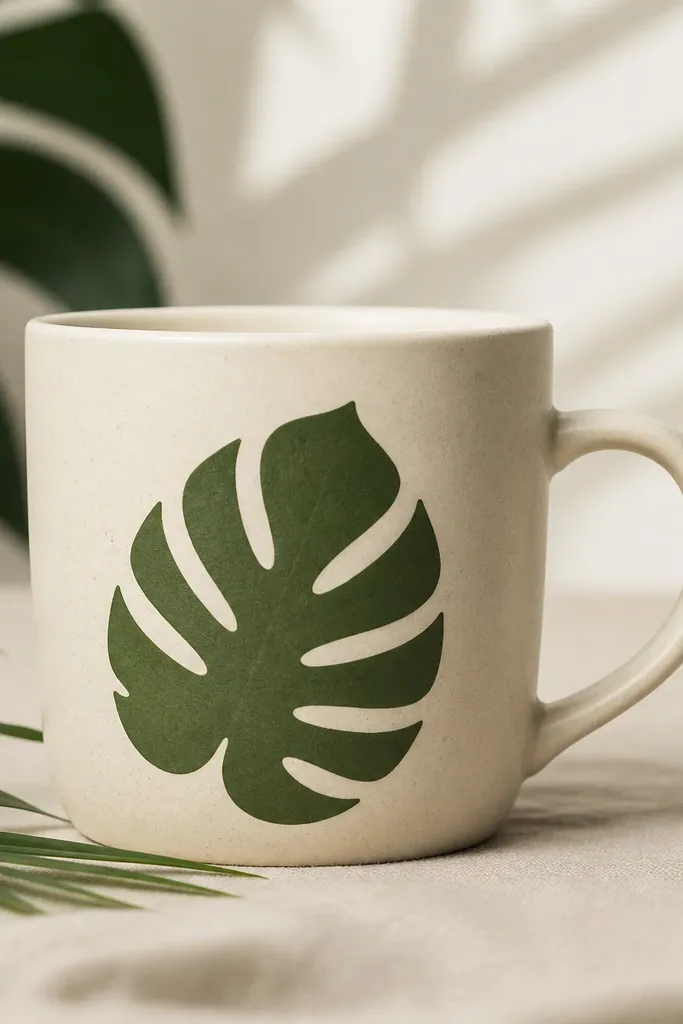
Reverse painting gives you crisp leaf edges that feel like cut paper. You tape a leaf cutout mask, paint the background around it, then peel to reveal the leaf shape as negative space or as a filled layer. This looks great with two greens: one deep for the leaf, one mint for the background. The contrast reads instantly.
Cut leaf shapes from vinyl or stencil film and press them onto the mug. Paint the background around the leaf with mint green acrylic, let it set, then paint the leaf area with deep green if you want it filled. Peel the mask after paint sets. Seal the finished area with a clear acrylic sealer and avoid heavy soaking for the first week.
Pro tipDo two thin coats for the background. Leaf silhouettes look cleaner when the background coverage is even.
AvoidDon't use glossy paint for the background. Gloss shows tape lines and looks plasticky.


