1. Navy-and-Cream Rope Twist with Spacer Beads

This one looks preppy because the colors read like a polo stripe: navy and cream. The gold spacers add a "jewelry" feel without needing any drilled metal parts. The rope-twist cord texture catches light differently than smooth elastic, so it looks more intentional. I like clay beads here that are matte or satin, because glossy beads can look too playful next to the rope texture.
Use 8mm navy clay beads and 8mm cream clay beads, alternating. Add 3mm gold spacer beads after every cream bead. For cord, use 1.0mm waxed cotton in navy, twist it slightly as you thread, and finish with a small gold lobster clasp linked to a jump ring.
Pro tipLay the beads out in order on your table and count spaces with a strip of painter's tape so the pattern stays even.
AvoidSkipping spacer beads makes the bracelet look like a loose string of beads instead of a styled accessory.
2. Pink Candy Stripe with Clear Seed Bead Pinch Points
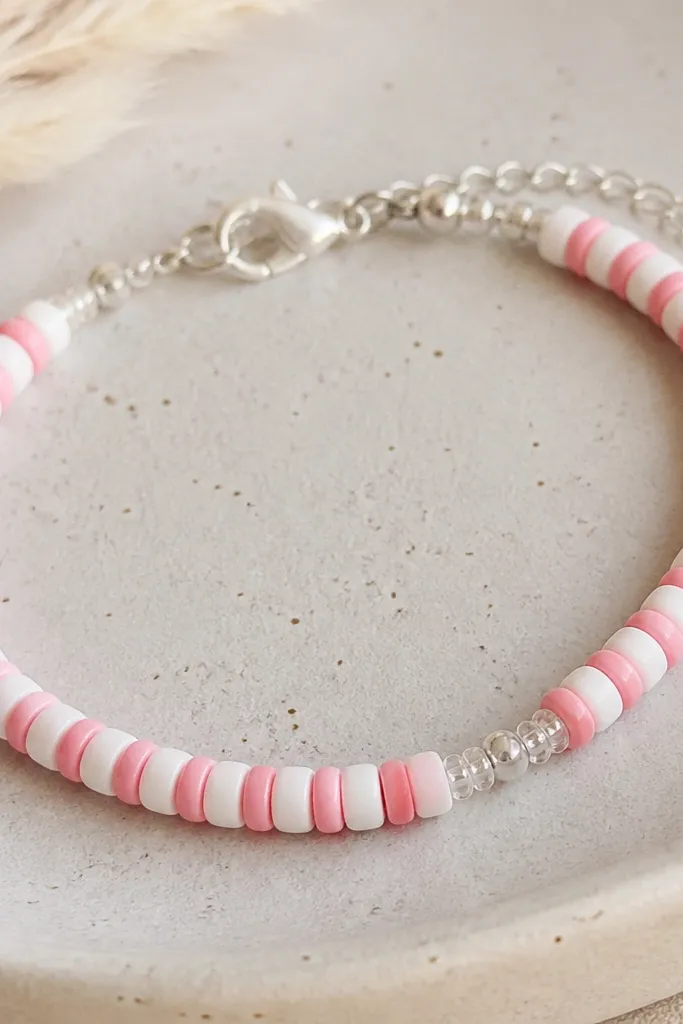
Candy stripes feel preppy when the palette stays to pink and white. The clear seed beads act like a mini "fancy" border, so the bracelet reads polished even though it's just clay beads. I've noticed this design hides small hole-size differences because the seed beads distribute tension. It also adds texture without adding bulk.
Thread 8mm pink clay beads and 8mm white clay beads alternating. At each end, add a cluster of about 12 clear 2mm seed beads before you tie off. Use 0.9mm clear nylon fishing line so the seed beads sit neatly against the clay.
Pro tipTie a surgeon's knot, then add a dab of clear jewelry glue on the knot and let it cure before trimming.
AvoidUsing thick knots right next to the clay beads makes the ends look lumpy and cheap.
3. Black-and-White Checker with Micro Tassel Ends
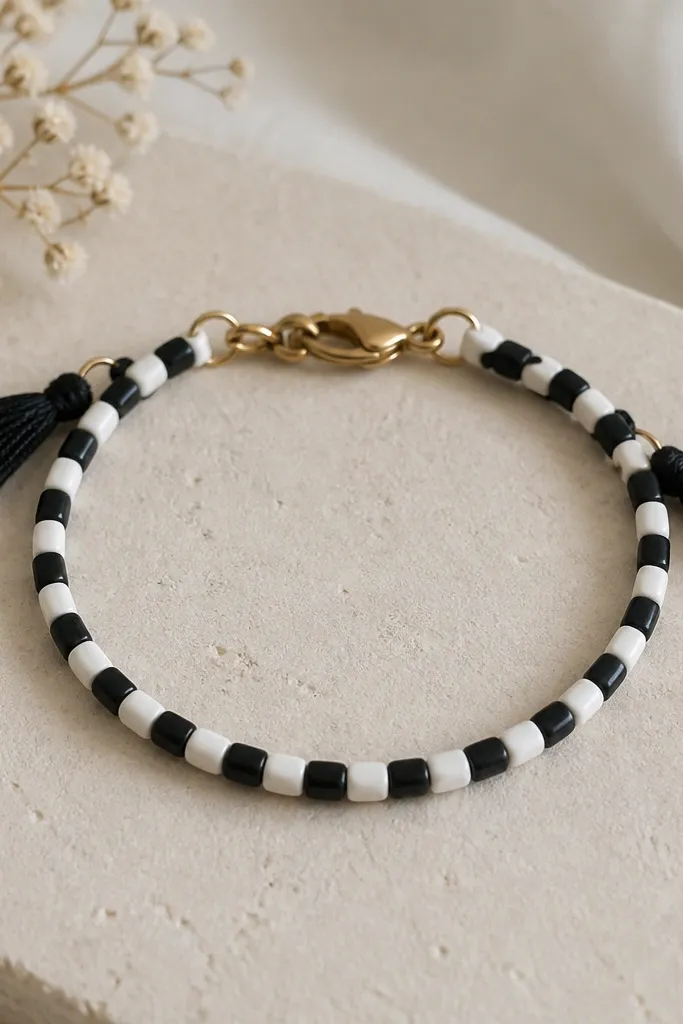
Checkerboard bracelets look instantly preppy because they read like a graphic pattern. Keeping the beads 7mm to 8mm makes the bracelet crisp instead of chunky. The micro tassels add movement and make the ends look designed, not unfinished. If your clay beads are slightly irregular, this design forgives it because the pattern is the focus.
Use 8mm black and 8mm white clay beads alternating for a 6.5 to 7 inch bracelet. Tie on each end with a small jump ring and attach a micro tassel made from 12 strands of black embroidery floss (about 2 inches long). Add a simple toggle clasp for easy on/off.
Pro tipTrim tassels after you attach them, not before, so the length matches the final bracelet tension.
AvoidLong tassels drag on your wrist and turn the look from preppy to messy.
4. Olive Green + Gold Heart Charm Line
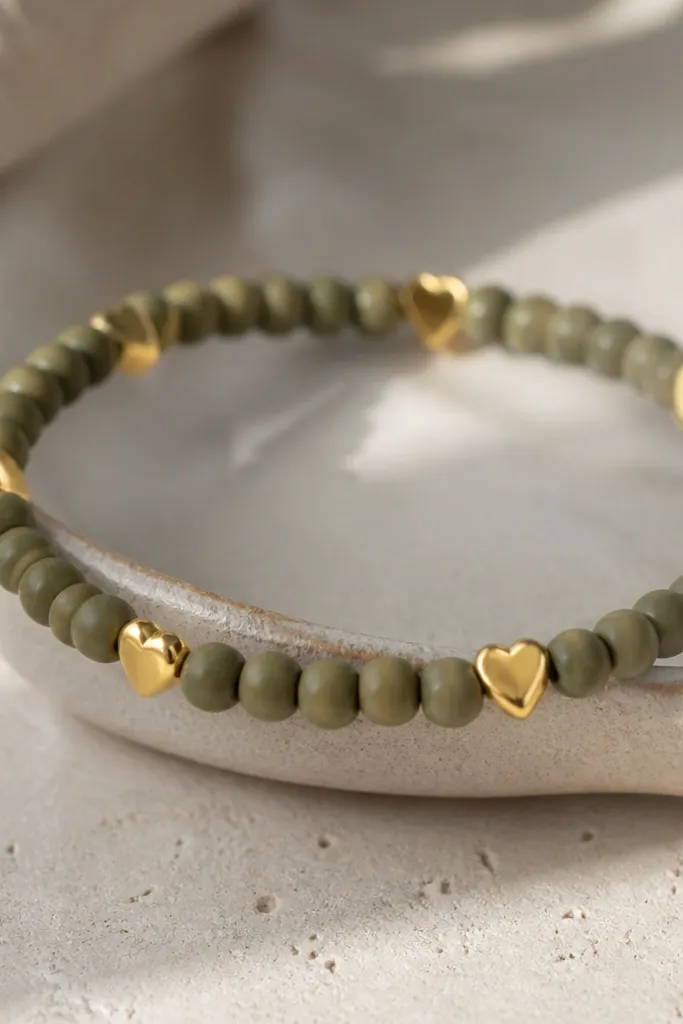
Olive green reads outdoorsy-preppy, especially with gold. The heart charms make it feel like a cute gift bracelet without needing any drilling. I like using matte olive beads with a glossy heart charm so the contrast looks intentional. This setup also looks great with short sleeves because the charms show up as tiny highlights.
Choose 8mm matte olive clay beads. String 1 heart charm after every 3 beads, using 0.8mm clear beading cord. Finish with a gold lobster clasp and small round jump rings. Keep the charm count to 2 or 3 on a standard wrist so it stays clean.
Pro tipIf the heart charm spins, add a tiny seed bead on each side of it to keep it facing outward.
AvoidOverloading with too many charms makes the bracelet busy and harder to wear.
5. Cream Clay Beads with Navy Letter-Style Accent Beads
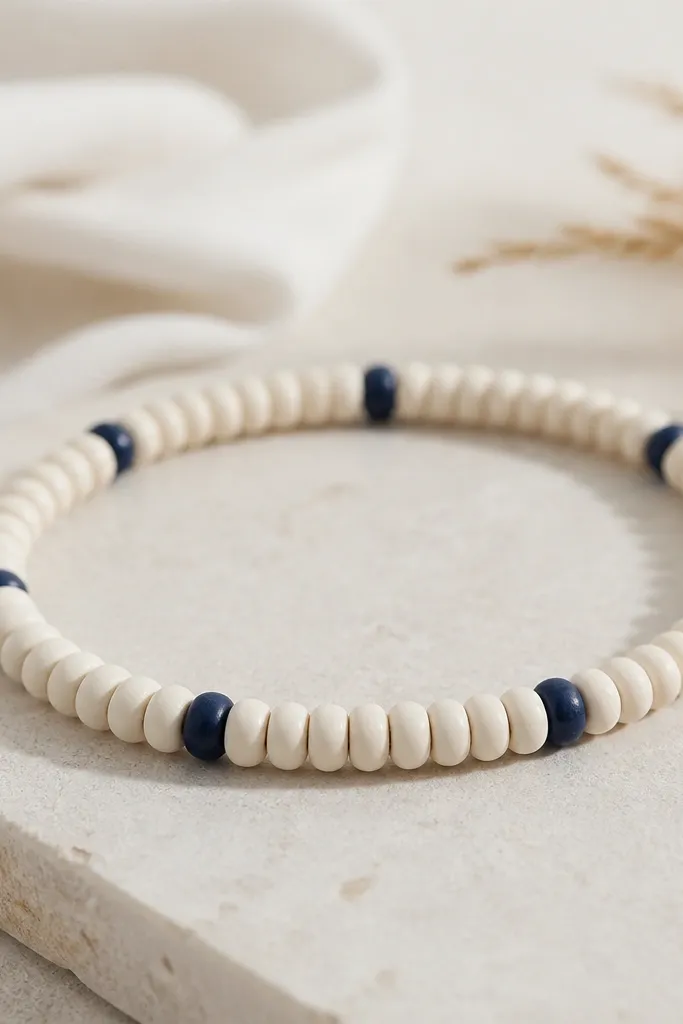
This is preppy because it mimics letter beads without going full novelty. Cream is the base, so the navy accents look intentional instead of random. The key is sparse placement: you only repeat the accent bead every few regular beads. This design also makes your bracelet look more expensive because the eye rests on the main color.
Use 10mm cream clay beads for the main run. Add 6mm navy accent beads (letter-like dots or small rounded shapes) every 3 cream beads. Thread with 1.0mm nylon cord and secure ends with a tight knot plus a small clasp ring.
Pro tipHold the bracelet up to light and check spacing - if two navy accents land too close, move one bead before tying.
AvoidUsing too many accent beads turns it into a cluttered pattern.
6. Cornflower Blue with Silver Crimp-Look Finish

Cornflower blue plus silver reads classic. The "crimp look" finish makes it look like you used metal wire tools, but you can do it with cord and small end caps. This is a great choice if you want a non-stretch bracelet that still feels comfortable. The end caps also stop the cord from fraying where it rubs your skin.
Thread 8mm cornflower blue clay beads onto 0.9mm nylon beading thread. At each end, add a silver end cap (tube) sized for 0.8mm to 1.0mm cord, then tie a knot inside the tube and glue the knot. Close with a small spring clasp linked to the end cap loop.
Pro tipCut cord slightly longer than you think, pull the bracelet to fit, then trim so the end cap sits flat.
AvoidLeaving frayed cord ends at the clasp makes the whole bracelet look unfinished.
7. Beige Clay Beads with Brown Leather-Look Wrap Ends
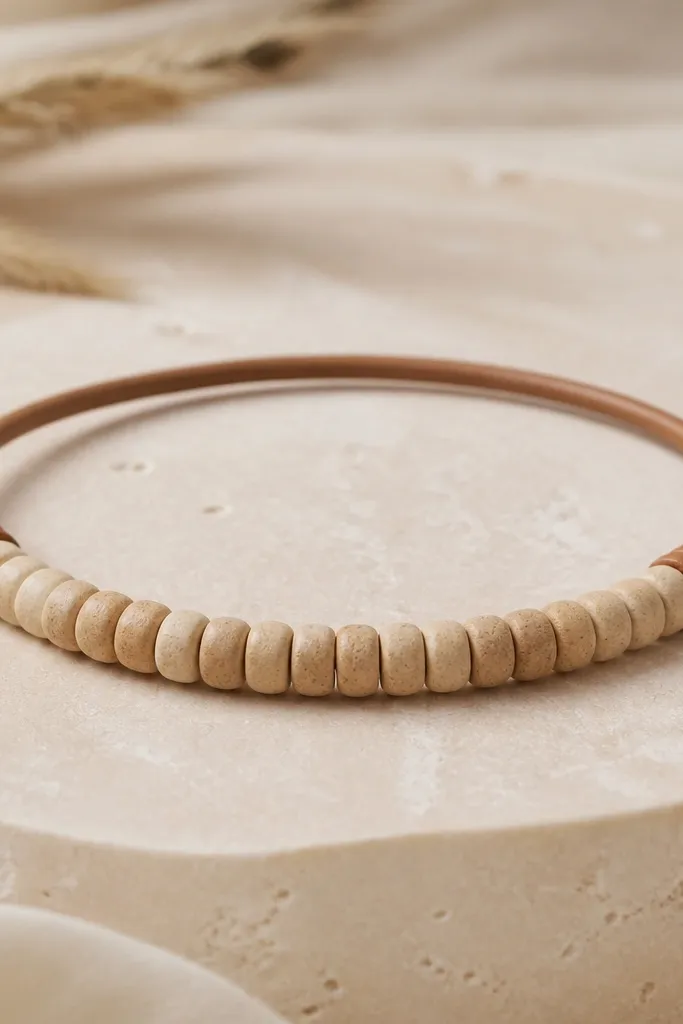
Neutral bracelets look preppy when the hardware looks like it belongs with a belt. The wrap ends give you that leather vibe without punching holes in anything. Beige clay beads keep it soft and wearable, and the brown wrap creates a clean frame. I've worn this with jeans and a white tee and it still looks pulled together.
Use 8mm beige clay beads spaced evenly on 1.0mm waxed cotton. For the wrap ends, use 1/8 inch faux leather cord or thin suede cord. Wrap the cord around the clasp ring 5 to 6 tight turns, then glue and trim. Add a small gold or brass clasp so the metal matches the wrap tone.
Pro tipWrap with tension - if the wrap is loose, it looks like decorative string instead of a finished end.
AvoidUsing a wrap that's too thick hides the bead line and makes the bracelet bulky.
8. Red, White, and Blue Mini Bead Cluster Bracelet
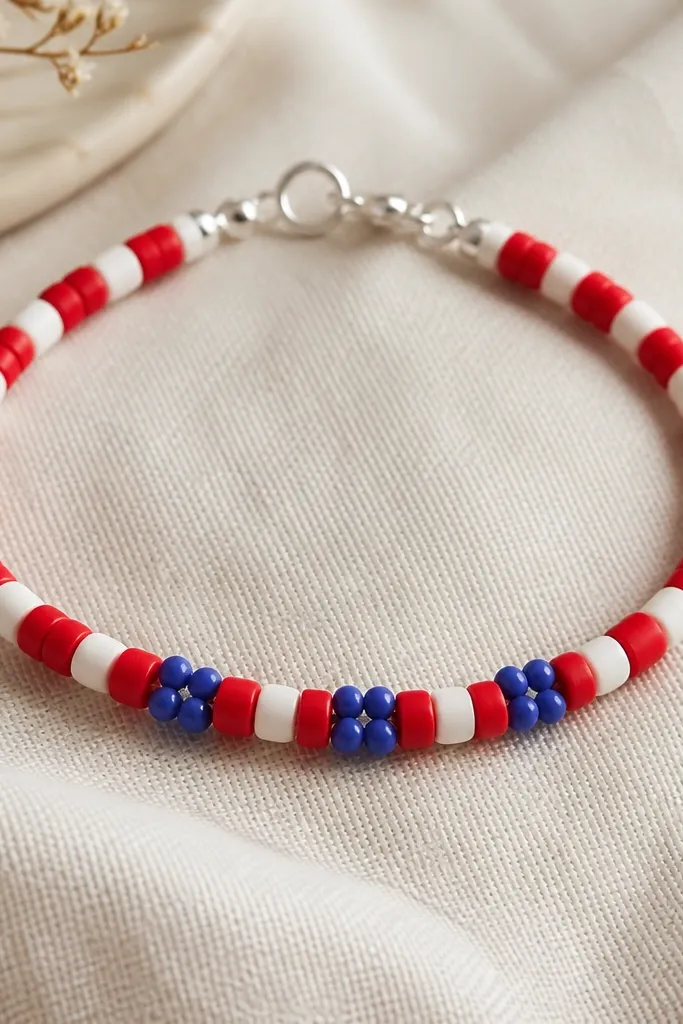
This gives you a patriotic look without feeling like fireworks. The mini clusters create a focal point so you're not staring at evenly spaced colors the whole time. It reads sporty-preppy, especially if you keep the clusters small and tidy. I like to use matte clay here so it doesn't look like plastic novelty beads.
Thread 8mm red and 8mm white clay beads alternating for most of the bracelet. In the middle, replace two regular beads with a cluster of three 6mm blue clay beads spaced close together. Use elastic cord if you want quick wear, or nylon cord with a small clasp if you prefer a firmer feel.
Pro tipMark the center of your cord with a small knot before threading so the cluster lands exactly in the middle.
AvoidMaking the cluster too large turns it into a chunky centerpiece instead of a neat accent.
9. Teal Clay Beads with Gold Link-Style Separators
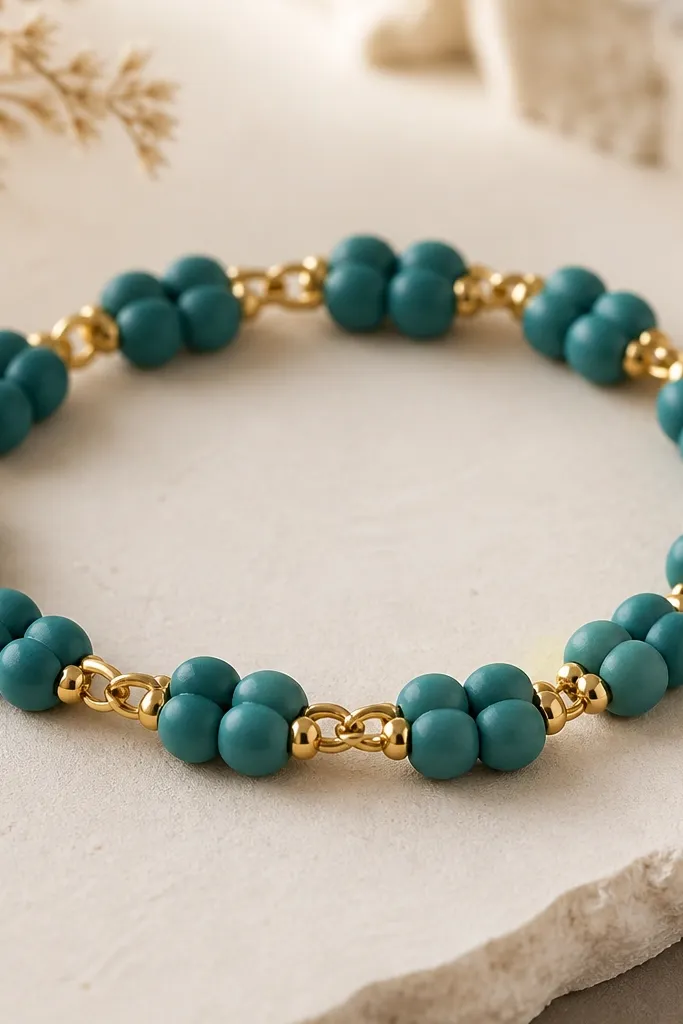
Teal reads fresh, and gold separators make it look like you bought it as a set with a watch. The link separators create rhythm and also keep beads from scraping each other. I've found this design holds up better because the separators absorb some movement that would otherwise wear down clay edges over time. It also makes the bracelet drape better on the wrist.
Use 8mm teal clay beads. Add a gold link separator after every 2 beads, using jump rings or small connector links sized around 4mm. Thread with 0.8mm nylon cord and tie secure knots before closing with a clasp.
Pro tipUse the same number of beads between separators on both sides of the midpoint for a balanced look.
AvoidSkipping separators makes the bracelet feel springy and can cause clay beads to knock together.
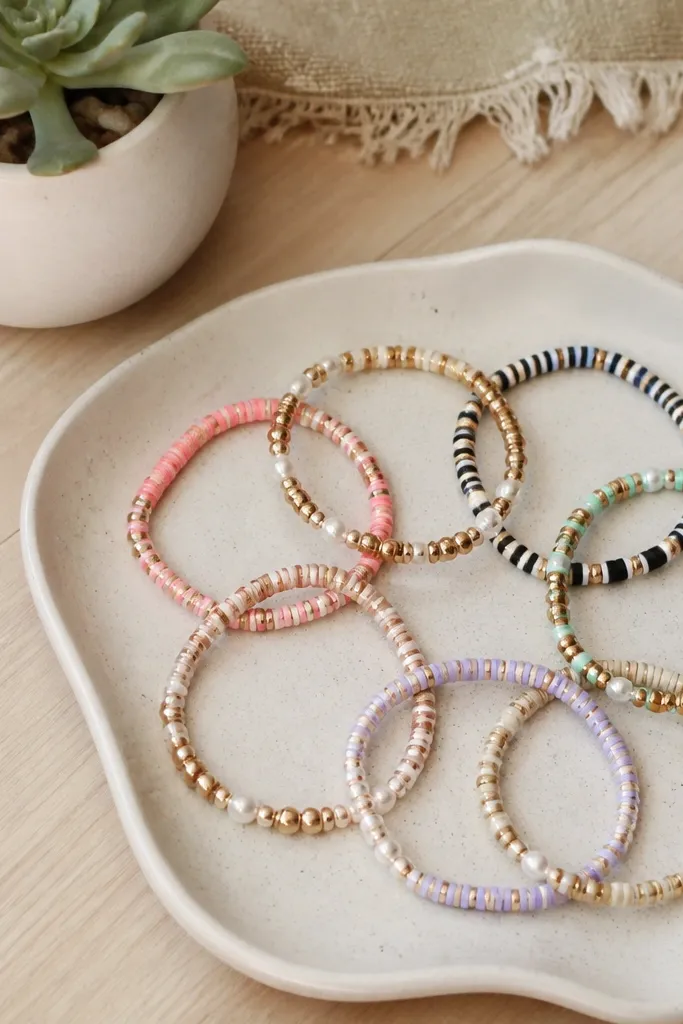
10. Lavender and Silver with Two-Tone Spacer Stripes
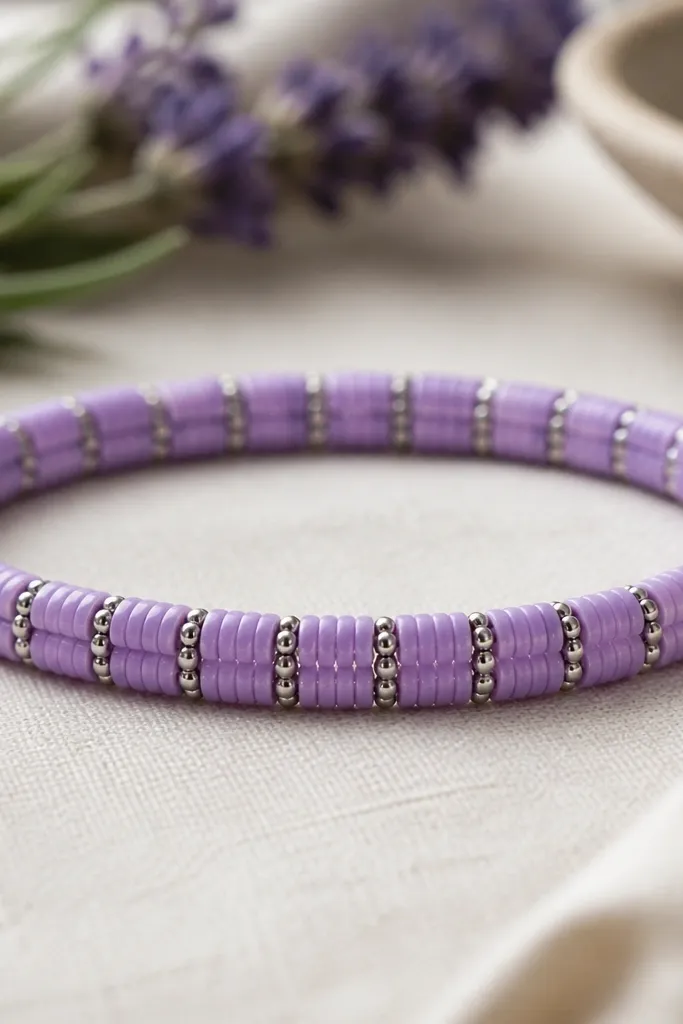
Lavender plus silver is preppy in a slightly romantic way, but it stays modern when the pattern is controlled. The two-tone spacer stripes are the secret - they create a "woven" look without weaving. This works best with beads that have a smooth, even hole, because the cord needs to stay centered for the stripes to line up.
Thread 8mm lavender clay beads as the main row. Add silver spacer beads (2mm) in a line by placing them between alternating bead pairs: for example, after bead 1 add 2 silver spacers, after bead 2 add none, then repeat. Use 0.9mm clear beading cord. Finish with a small silver clasp and tie-off knots inside tiny bead caps.
Pro tipDo a dry run on the table and count beads while watching the stripe line - adjust before threading permanently.
AvoidLetting the silver spacers drift around the cord makes the stripe look messy.
11. White Glossy Clay with Black Mini Rondelles

Glossy white beads look like nail polish when they catch light, and black mini rondelles add contrast that looks intentional. This is a clean, monochrome preppy style that works with everything. The rondelles also add subtle sparkle without glitter. It's the kind of bracelet that looks best close up because of the texture differences.
Use 10mm glossy white clay beads. Between each white bead, string one 4mm black rondelle bead. Thread with 0.8mm black nylon cord for crisp contrast, then tie off with a tight knot and hide it under a small black bead cap.
Pro tipIf the knot shows, add a 3mm spacer bead right after the last rondelle so the knot sits deeper.
AvoidUsing all the same bead size makes it look flat and less styled.
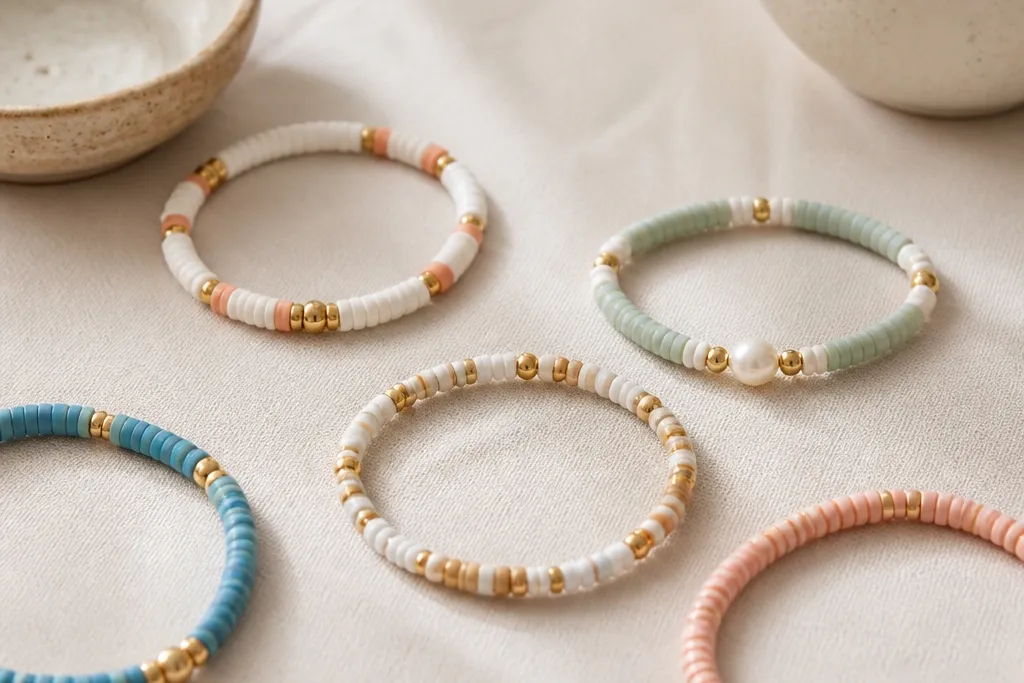
12. Sage Green with Tiny Pearls and Gold Toggle
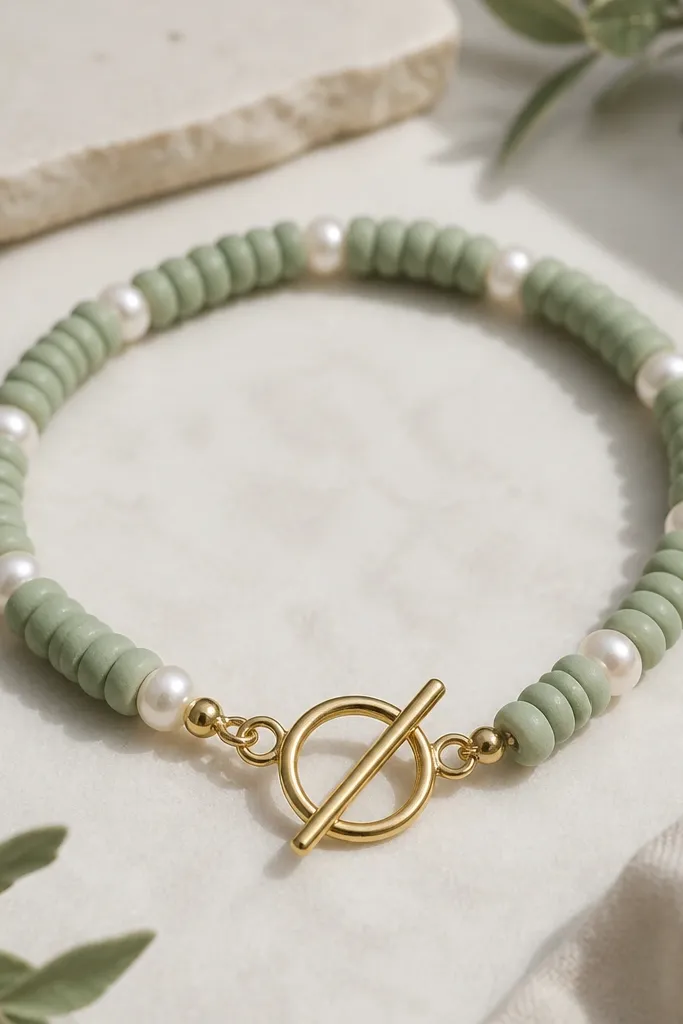
Sage green reads soft and preppy, especially with pearl-like beads. The toggle clasp is a visible design element, so you don't need extra charms. This bracelet feels slightly dressier than a sporty one, and it looks good with spring dresses or a crisp button-up. I like using slightly smaller pearls so the clay still leads.
Thread 8mm sage green clay beads with 4mm white pearl-like beads inserted every 2 clay beads. Use 1.0mm clear elastic cord if you want stretch, then finish with a gold toggle by tying cord ends to jump rings. Keep the bead spacing tight so the pearls don't sag.
Pro tipTest the toggle position before final knotting so it lands on the top of your wrist, not the side.
AvoidUsing oversized pearls makes the bracelet look like costume jewelry.
13. Sky Blue Clay Beads with Diagonal Navy Seed Bead Stripe
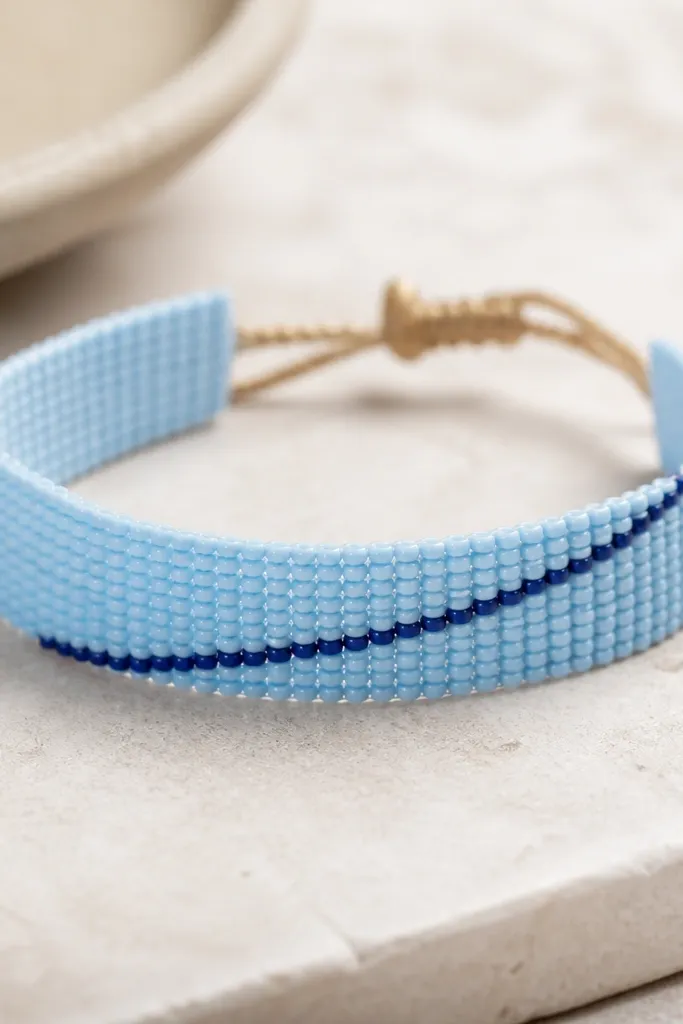
A diagonal stripe is classic preppy design logic, and seed beads make it possible without drilling anything. The stripe also hides minor bead size differences because the seed line gives the eye a straight path. This is one of my favorite looks because it looks "designed" even when your clay beads aren't perfectly uniform. The effect is clean, not busy, if you keep the stripe thin.
Use 8mm sky blue clay beads. Thread them normally, then add navy seed beads (2mm) between selected beads to form a diagonal: for example, start with 3 seed beads near one end and move the placement one bead over every 2 clay beads until the diagonal reaches the middle. Use 0.9mm clear cord and tie secure knots under a small end bead.
Pro tipUse a straightedge under your beads while you plan the diagonal - it helps you keep the line consistent.
AvoidMaking the stripe thick turns it into a random sprinkle instead of a graphic line.
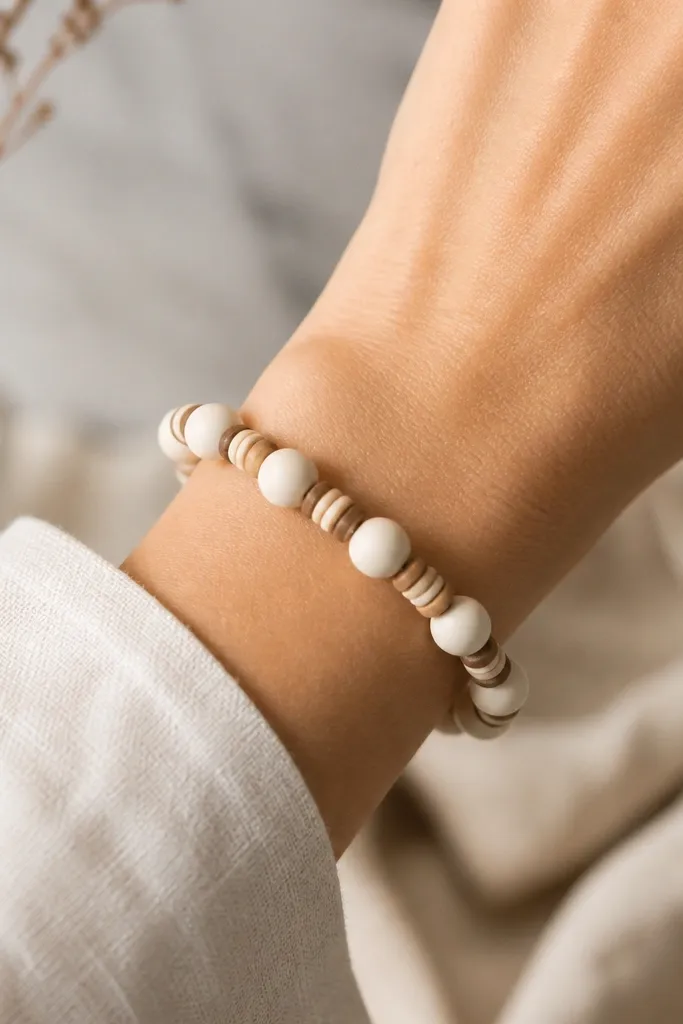
14. Monogram-Style Single Accent Bead with Neutral Base
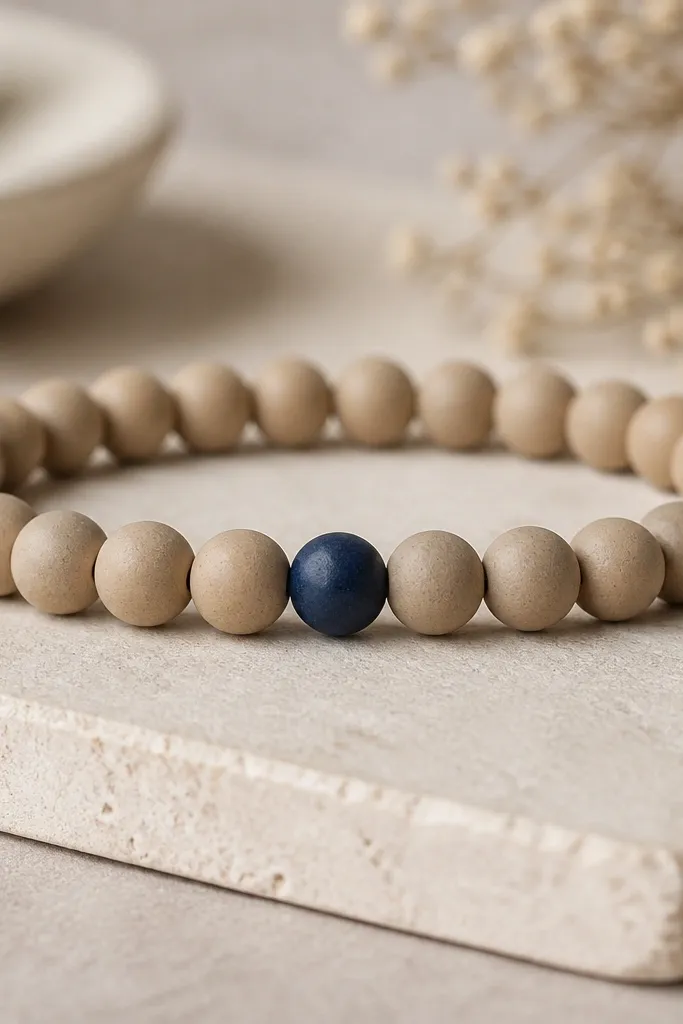
This is the "one statement bead" version of no drill clay bead bracelet ideas. A single accent bead makes the whole bracelet look intentional and clean, like a monogram necklace but scaled down. The neutral base matters - tan and off-white keep it preppy rather than random. I've made this with small irregular clay beads and it still looks tidy because the accent bead anchors the design.
Use 8mm tan clay beads for a tight row. Add one navy accent bead in the exact center, then keep the rest uniform spacing. Thread with stretchy elastic so it sits flat, and secure ends with a double knot and a small elastic bead stopper if you have one.
Pro tipFind your bracelet center by folding the cord in half before threading the beads - mark it with a tiny piece of tape.
AvoidPlacing multiple accent beads spreads the focus and removes the clean monogram effect.
15. Gold-Edged Clay Beads with Matte Pastels
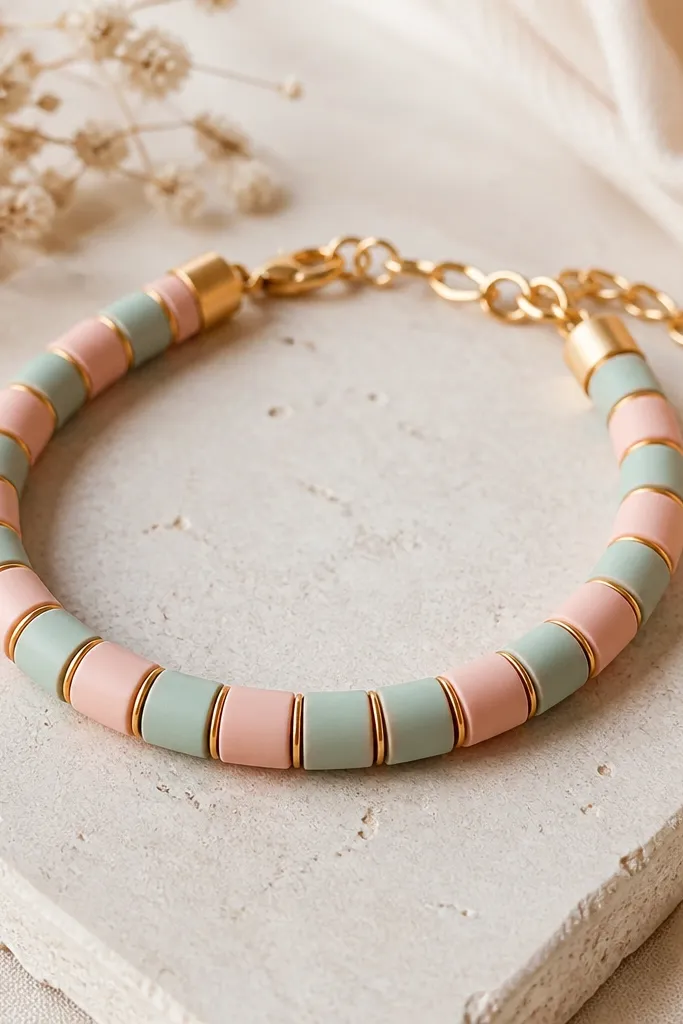
Gold edging is the fastest way to make clay beads look like they have lacquered trim. You get that preppy "fancy" look without needing any drilled details. I like matte pastels here because the gold trim pops against the muted surface. The bracelet reads polished even when the bead holes are slightly uneven.
If your clay beads don't already have gold edges, paint a thin line around each bead hole area with metallic gold acrylic paint and a fine brush. Let them dry fully before stringing. Alternate 7mm pastel pink and 7mm pastel mint clay beads. Finish with gold jump rings and a small clasp.
Pro tipUse painter's tape to mask the bead face while you paint the edges so you don't get gold on the whole bead.
AvoidPainting gold too thick makes beads look messy and can interfere with threading.
16. White and Denim Blue with Denim Thread Wrap Knot
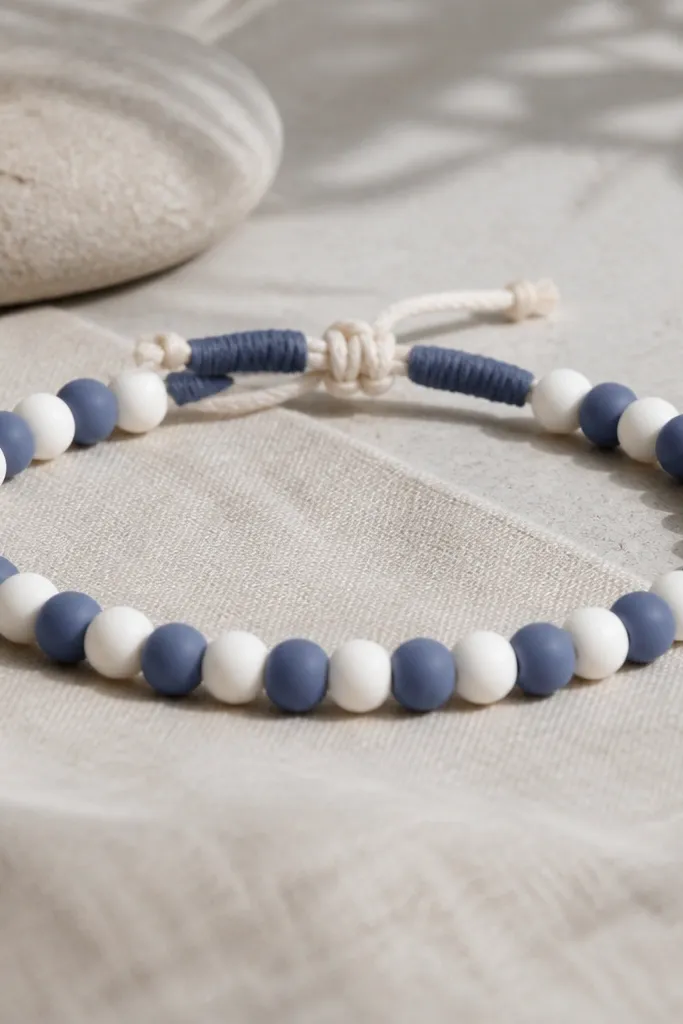
This one looks like it belongs with denim - and it still counts as preppy. The fabric wrap hides the knot and makes the closure look deliberate. White and denim blue is a color combo that reads casual-preppy, especially in summer. The thread wrap also keeps the bracelet from twisting at the ends.
Use 8mm white clay beads and 8mm denim-blue clay beads alternating. String on 0.8mm nylon cord. Tie a tight knot at each end, then wrap denim-blue embroidery floss around the knot area 8 to 10 times and secure with a tiny drop of fabric glue.
Pro tipWrap in one direction only, then pull the thread taut before gluing so the wrap lays flat.
AvoidSkipping the wrap lets the knot show and makes the bracelet look unfinished.
17. Teal and Coral with Two Small Dainty Charms
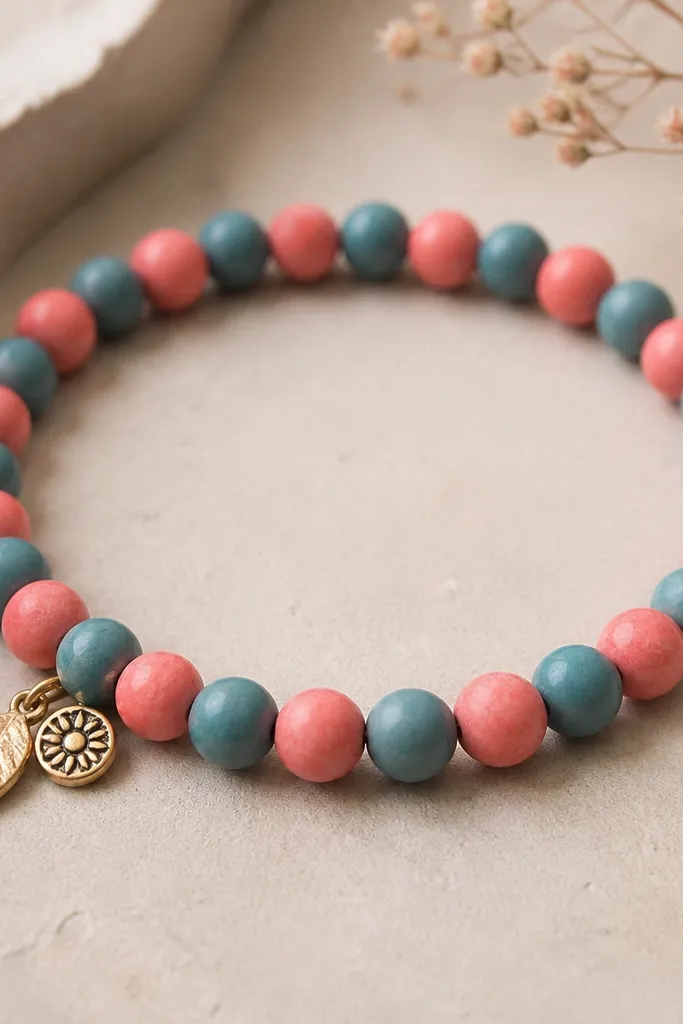
Teal and coral is a summer-preppy combo, and two small charms add a sweet finishing touch. The key is keeping charms light and close so they don't swing and snag. This is a good pick if you want something that looks cute in photos from the side, not just straight on. Clay beads also keep the charms from looking too delicate, since the beads have more visual weight.
Thread 7mm teal beads and 7mm coral beads alternating for about 24 beads total. Add two tiny charms (like a star and a mini coin) after the last 6 beads on one end, using jump rings. Use 1.0mm clear elastic or nylon cord with a clasp.
Pro tipPosition charms on the same side of the bracelet so they face outward when you wear it.
AvoidLetting charms hang at both ends makes the bracelet twist and tangle.
18. Burgundy Matte Clay with Gold Bead Cap Ends
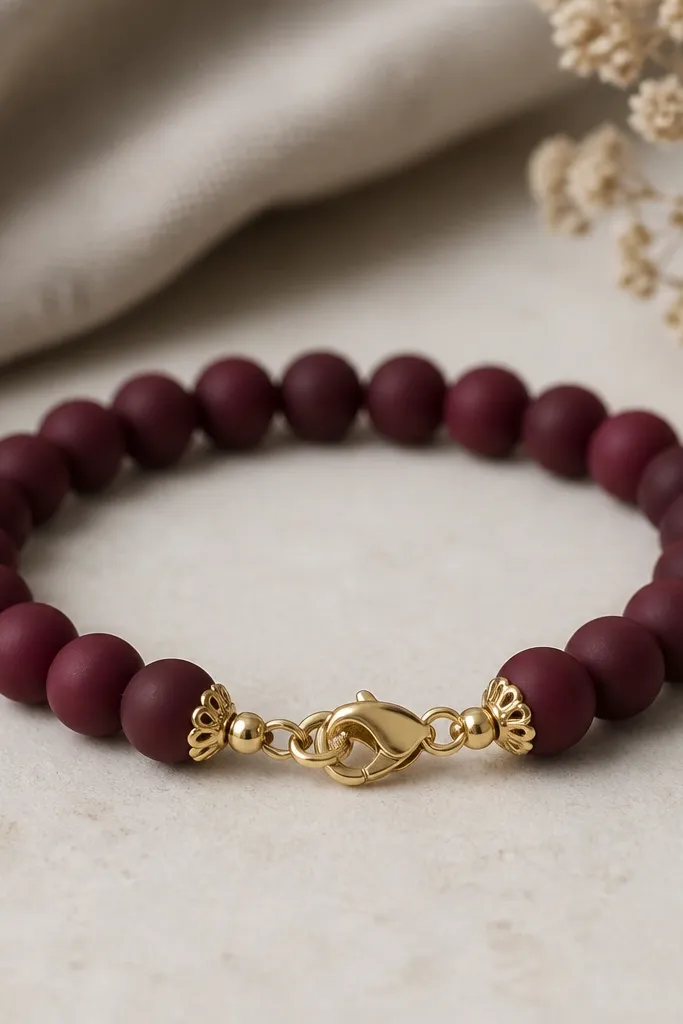
Matte burgundy looks classy, and gold bead caps at the ends make it feel like a real piece of jewelry. This design works because the beads stay uniform, while the end caps give you that "finished" look. I like it for fall outfits, but it also looks great with cream sweaters. The caps also protect the cord ends from fraying.
Use 8mm matte burgundy clay beads. Thread onto 0.9mm nylon cord. Tie a knot at each end, then slide on a gold bead cap sized for 0.8mm to 1.0mm cord. Add a small clasp jump ring to the cap loop if your caps have them, or glue a tiny jump ring into the cap if needed.
Pro tipPress the bead cap closed gently after gluing so it sits smooth and doesn't leave a sharp edge against your wrist.
AvoidUsing caps that are too big leaves cord loops visible and looks sloppy.
19. Mixed Sizes Preppy Stripes with 6mm and 10mm Beads
Preppy stripes look better when the sizes change, not when the colors change constantly. This design uses large beads for the main stripe blocks and small beads to bridge the gaps so the bracelet looks structured. I like this because it hides a couple of slightly off-round beads - the size shift makes the pattern feel deliberate. Choose two colors only, and keep the stripe rhythm consistent.
Pick two colors, like navy and cream. Alternate 10mm navy beads with 6mm cream beads, then switch: 10mm cream with 6mm navy, repeating down the bracelet. Use 0.9mm nylon cord so holes thread smoothly. Finish with a simple clasp and add a tiny spacer bead right before each clasp to keep the last section tight.
Pro tipCount your large beads, not your total beads, so the stripes don't drift as you tie off.
AvoidUsing three or more bead sizes randomly makes it look like a mismatched craft rather than a stripe pattern.
20. White Clay Beads with Light Blue Micro-Rivets and Knot Cover
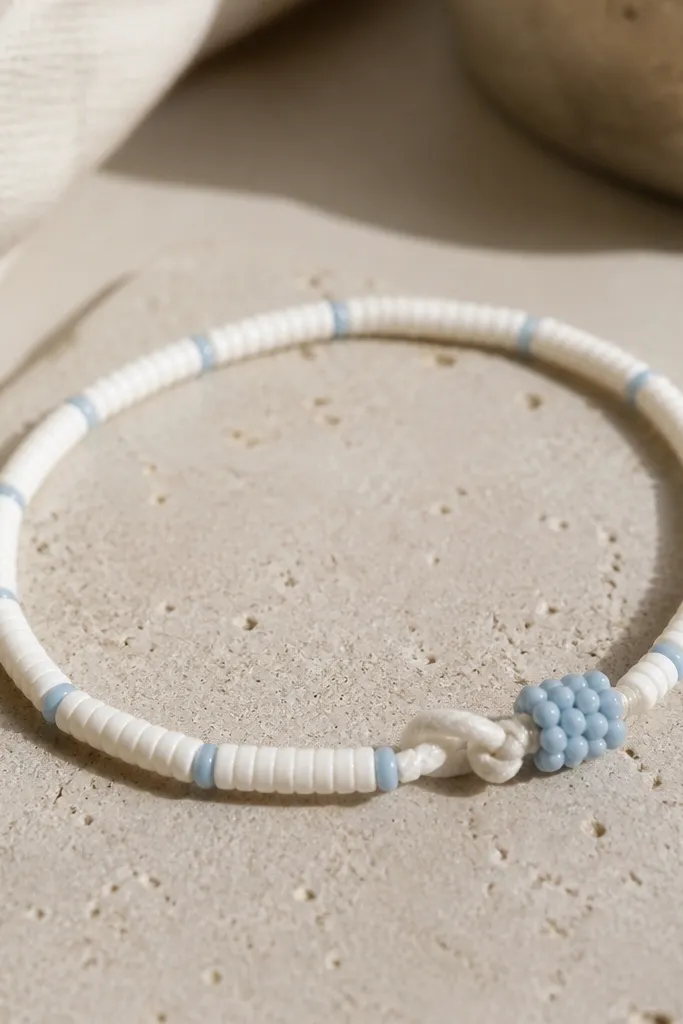
Micro-rivets give a technical, preppy vibe similar to workwear details. The bracelet stays mostly white, so the blue rivets look like accents instead of a full pattern. I love this when you want something clean for school or office casual. The knot cover makes it look intentional, even though it's no drill and hand-tied.
Use 10mm white clay beads as the base. Add one 4mm light blue micro bead between every two white beads. For the closure, tie a knot, then cover it with a small bead cap cluster (like 6 seed beads plus one 6mm clay cap bead). Use 0.8mm black or clear cord depending on your bead holes.
Pro tipBefore tying, slide two beads together and check that the micro bead sits centered - adjust spacing now, not after you trim.
AvoidLeaving the knot uncovered makes the bracelet look like a quick string job.


