
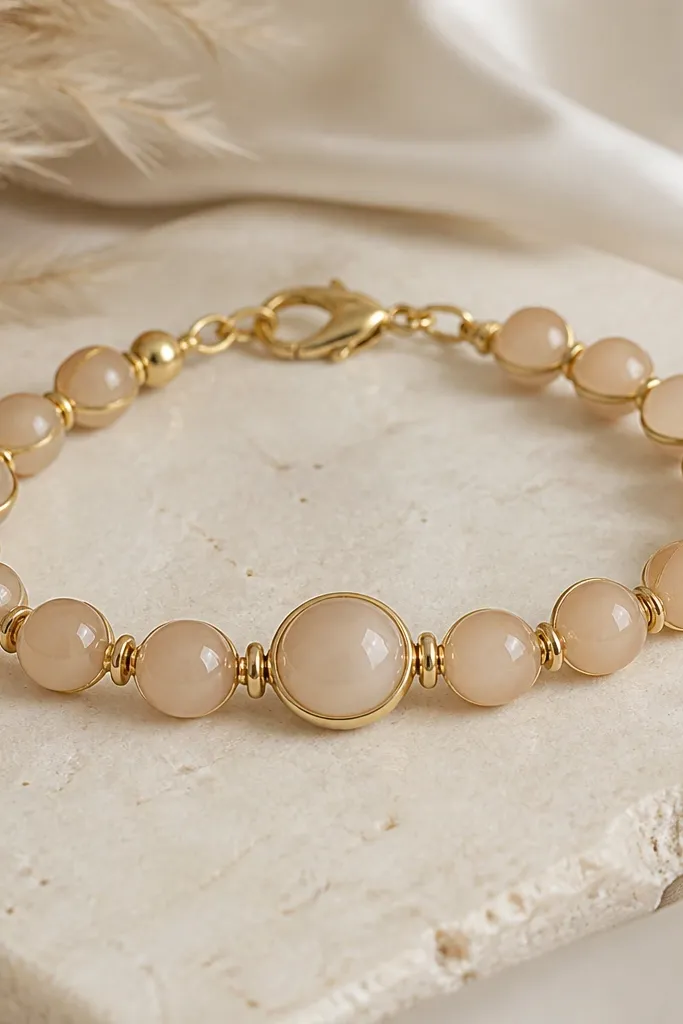
1. Cream Cocoa Marble with Antique Gold Micro-Spacers
This color combo reads luxe because the cream base looks clean and the cocoa lines add depth. The marbling creates natural "pattern jewelry" without needing extra decorations. Antique gold micro-spacers make the bracelet look finished, like it came from a boutique display. Keep the hero bead slightly larger than everything else so the eye lands there first.
Use 6mm cream-cocoa marbled beads as your focal (about 1-2 beads depending on wrist size), then fill with 4mm solid cream and 3mm cocoa. Add 2mm antique gold seed spacers between bead groups, not between every single bead. Finish with an antique gold toggle or lobster clasp in the same shade.
Pro tipSeal your clay beads with a hard-cure clear topcoat after sanding - it's the difference between "matte handmade" and "glass-like luxe."
AvoidAvoid using shiny gold jump rings if your spacers are antique gold - mixed tones make it look rushed.
2. Onyx Black Pearl-Glaze Beads with Gunmetal Bar Spacers
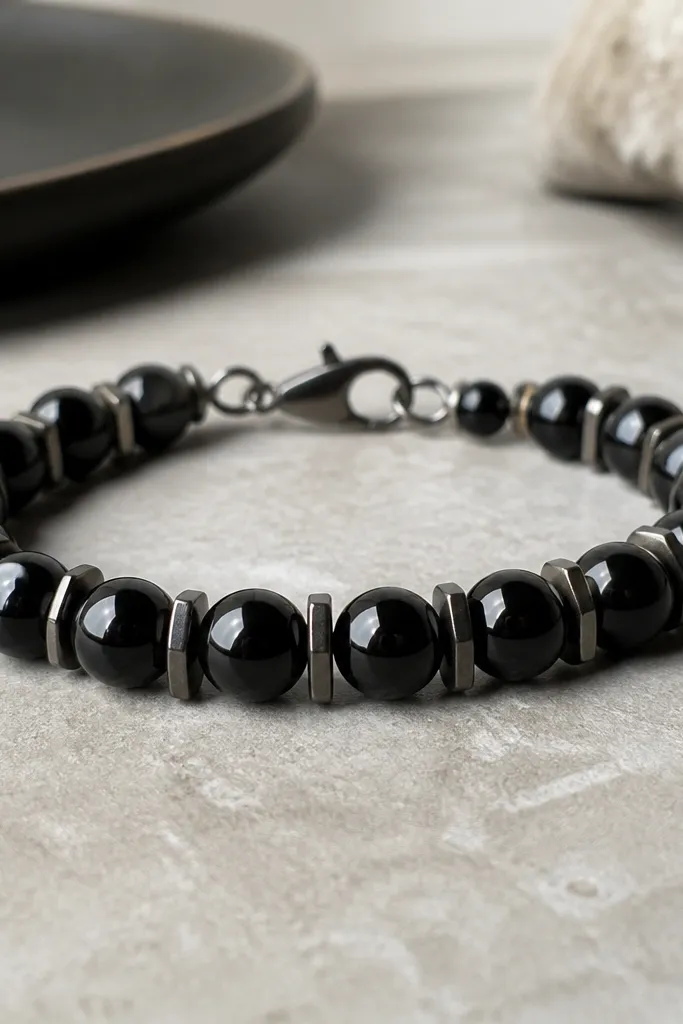
Black beads look expensive when they have depth and shine, not when they're flat and powdery. A pearl-glaze look gives subtle highlights that move when you turn your wrist. Gunmetal bar spacers add a modern, tailored feel and keep the bracelet from looking too "bead heavy." The result is clean, sharp, and easy to pair with anything.
Start with 8mm black onyx-style clay beads for the main run, then insert 4mm black beads between them. Add gunmetal bar spacers around 3-4mm wide between every other bead group. Use a slim gunmetal clasp and keep the bracelet length snug (measure wrist plus about 1 inch).
Pro tipSlightly bevel your focal beads (light sanding on edges) so the glossy finish catches light instead of pooling.
AvoidDon't use matte black beads with shiny spacers - it makes the whole thing look unfinished.
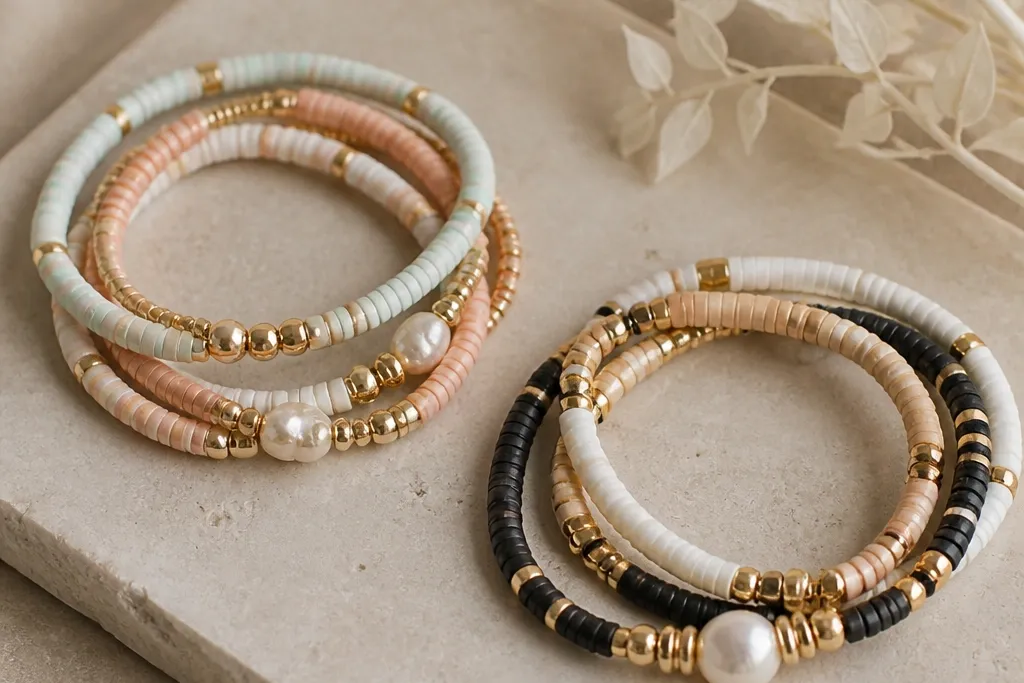
3. Dusty Rose Blush with Champagne Gold Leaf Accent Beads
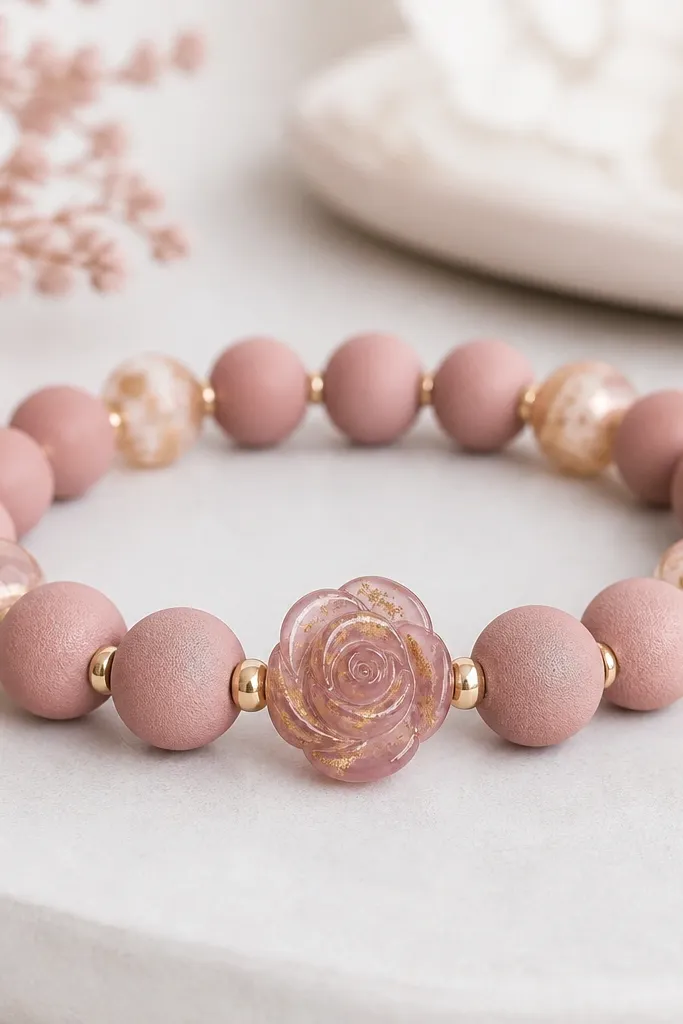
Dusty rose is luxe when it's paired with warm champagne gold, not bright yellow gold. The gold leaf accent bead creates a "natural shimmer" effect that looks like jewelry store pieces. Small spacers keep it airy, so it doesn't bulk up under sweaters. This one looks gorgeous with cream knits and light denim.
Use 6mm dusty rose beads as your base, then swap in 2-3 gold leaf accent beads (slightly larger, around 7-8mm). Add 2mm champagne gold seed spacers between bead clusters. Thread with elastic or stretchy cord for daily comfort, and finish with a small champagne gold lobster clasp.
Pro tipIf you're using leaf flecks, seal the beads slowly in thin coats so the surface stays smooth to the touch.
AvoidSkip neon pink or hot magenta rose beads - they read costume, not luxe.
4. Sage Green + Clear Crystal-Style Clay Beads
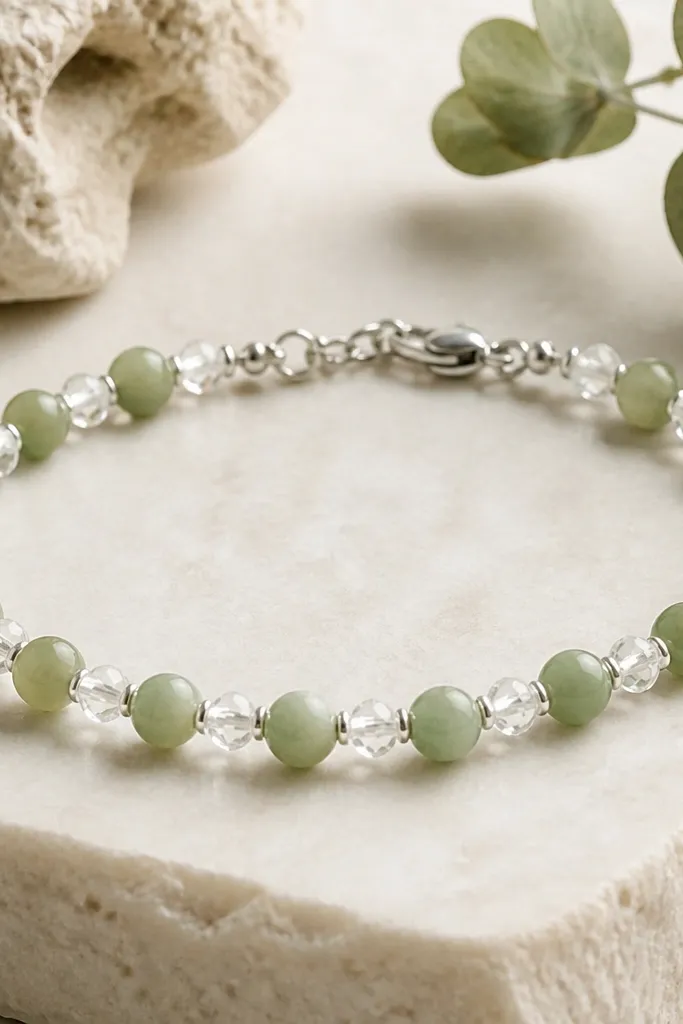
Sage green feels upscale when paired with transparent, faceted beads that throw light. The clear bead style makes the bracelet look brighter without adding extra colors. Silver hardware keeps the palette cool and clean. It's the kind of bracelet you wear with white tops and looks "put together" immediately.
Use 6mm sage beads and 4mm clear faceted clay beads. Place clear beads at intervals so they line up like a subtle sparkle chain. Add 1.5-2mm silver seed beads as separators, then finish with a silver clasp.
Pro tipFaceted clay beads look best when you keep the sage beads slightly matte - let the crystal do the shining.
AvoidDon't add too many clear beads - if they're everywhere, the bracelet looks like craft-store glitter overload.
5. Terracotta Sunset with Antique Brass and White Speckle
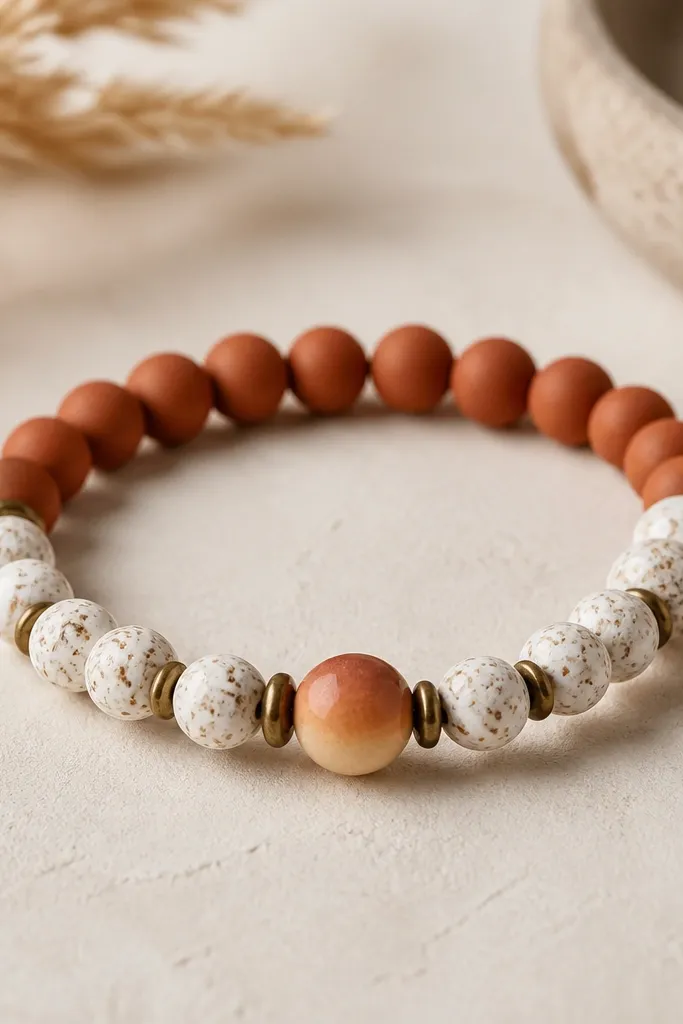
Terracotta plus white speckle looks like handmade ceramic, which reads expensive when it's consistent. Antique brass adds warmth and pairs naturally with the orange-red tones. The ombre focal bead gives movement across the wrist without needing charms. This one feels like late-summer jewelry, even in winter.
Pick 7-8mm ombre focal beads (deep terracotta to cream) and surround them with 5mm terracotta solid beads. Add white speckle beads at 2mm to 3mm scale as separators. Use antique brass round spacers (3-4mm) and a brass clasp.
Pro tipSand the speckle beads lightly so the clear coat doesn't pool in texture grooves.
AvoidAvoid mixing bright orange with flat neon yellow charms - it makes the palette look cheap.
6. Warm Gray + Pearl White with Rose Gold Spiral Spacers
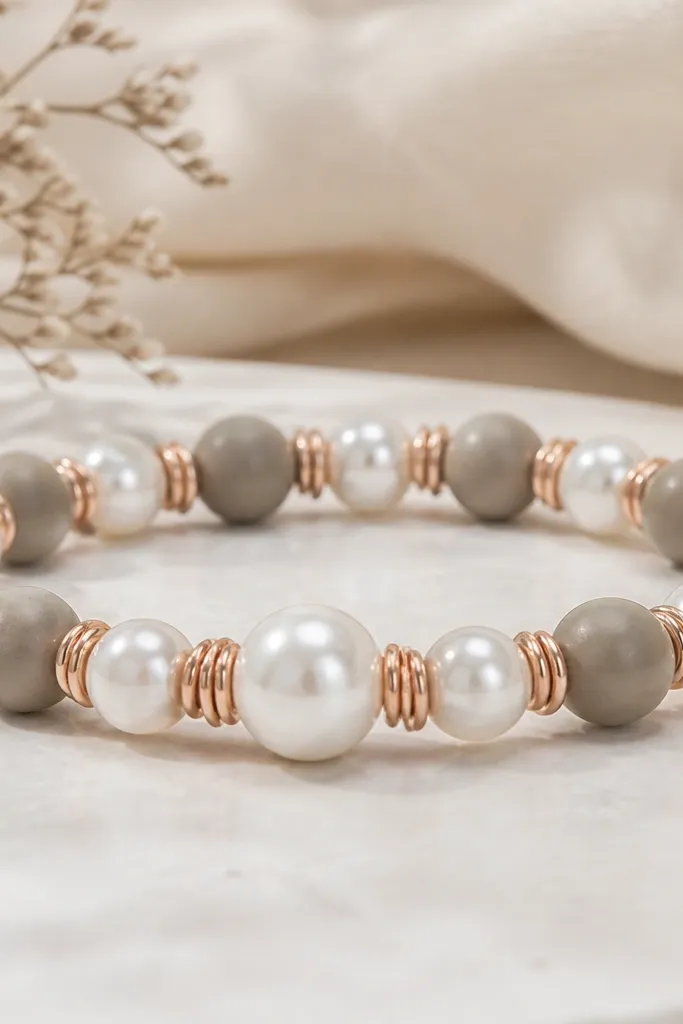
Warm gray is the secret neutral that makes other colors look intentional. Pearl white adds brightness without going stark, and rose gold spiral spacers give a delicate, high-end texture. The bracelet looks refined because the color contrast is soft. It also pairs with rose gold rings perfectly.
Use 6mm warm gray beads and 6mm pearl white beads, alternating. Insert rose gold spiral spacers between every other pair, not between every bead. Keep the center focal as a 8mm pearl white bead. Finish with a rose gold clasp and keep the total bead count even for symmetry.
Pro tipIf your gray beads look chalky, seal with two thin clear coats instead of one thick coat.
AvoidDon't use pure white beads with warm gray unless you want a harsher look.
7. Cobalt Blue + Gold Foil Fleck Beads with Tiny Star Spacers
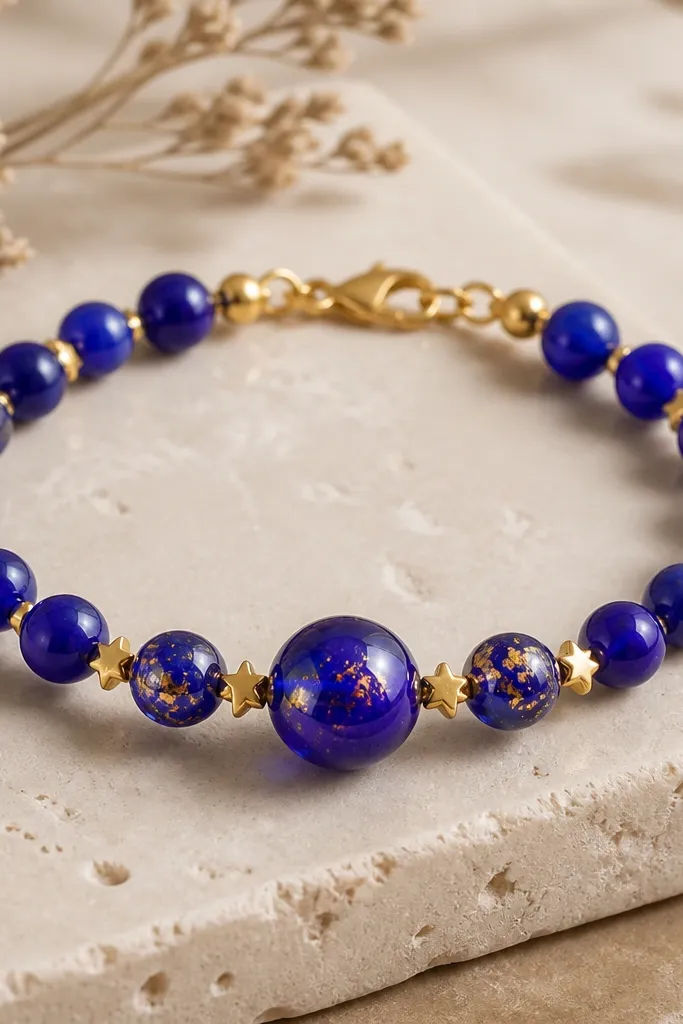
Cobalt reads luxe because it's saturated and holds depth under shine. Gold foil flecks mimic jewelry-store glints, but only if you keep them sparse. Tiny star spacers add detail without turning it into a kids' bracelet. This is a bold piece that still looks classy because the pattern is controlled.
Use 6mm cobalt beads as the base and add 2-3 larger 8mm foil fleck beads. Add gold star spacers (2-3mm) at the same interval on both sides of the focal bead. Thread on stretchy cord or nylon line, then add a gold clasp.
Pro tipSeal foil fleck beads gently so the foil isn't exposed - exposed foil can snag clothing.
AvoidAvoid adding multiple different gold textures in one bracelet - it looks like mismatched parts.
8. Emerald Green + Black Micro-Seed Bead Edging
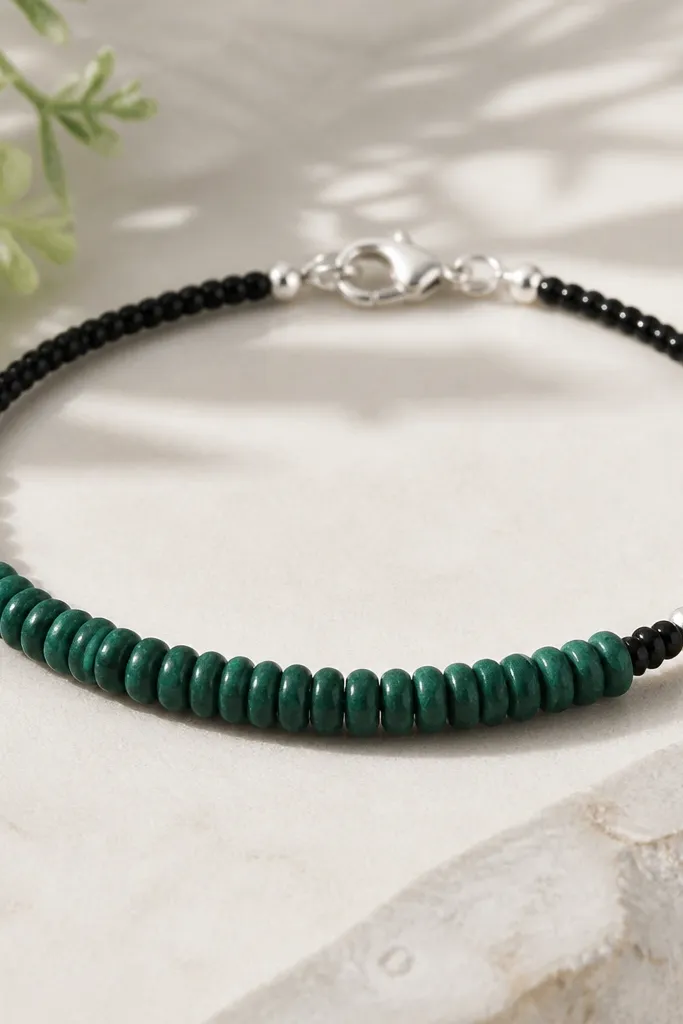
Emerald green looks high end when you frame it with dark micro beads instead of more clay beads. The black seed bead edging creates a clean outline effect, like a bezel. Silver hardware keeps the palette crisp. It's a "jewelry" look even though the main components are simple beads.
Pick emerald green 7mm beads as anchors. Between anchors, weave a short section of black micro seed beads (2-3mm seed) before the next emerald bead. Use silver seed beads only if you want extra sparkle - otherwise keep it black. Finish with a silver clasp and tie off securely with the same knot method each time.
Pro tipKeep seed bead sections equal length on both sides of the focal bead for a balanced look.
AvoidDon't overfill with seed beads - if the border gets thick, the bracelet loses its luxe framing.
9. Frosted White + Champagne Pearl Clay Beads with Gold Chain Link
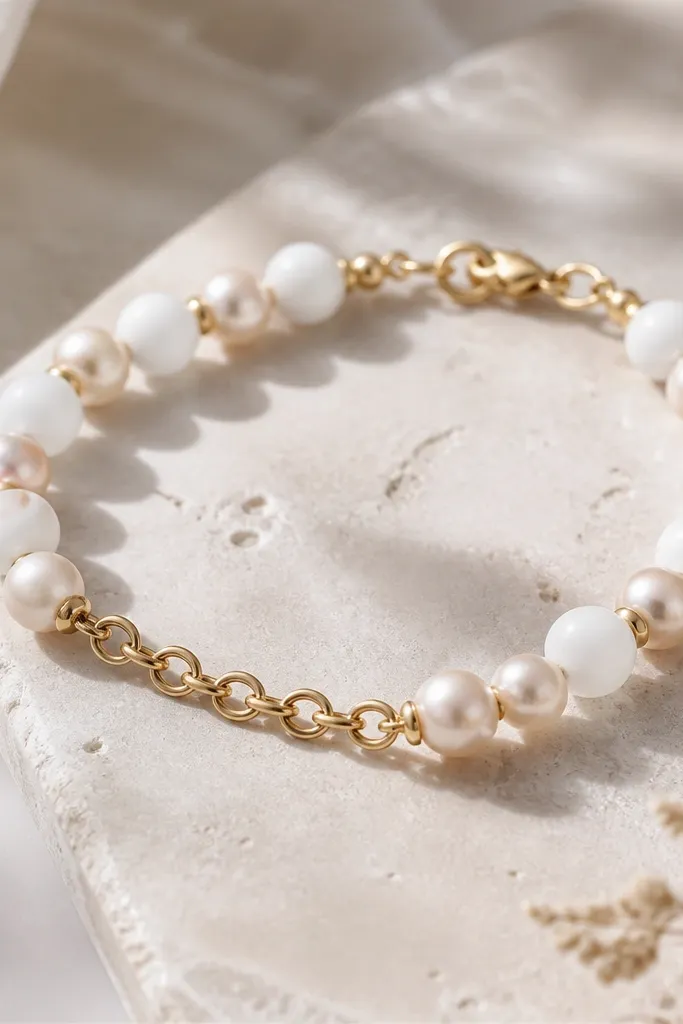
Frosted white gives a soft, expensive texture, especially when paired with champagne pearl clay beads. The little gold chain link segment adds a jewelry-store detail and breaks up the solid bead run. This combo looks great under warm lighting because the champagne beads glow. It also feels lighter on the wrist than fully solid beading.
Use 6mm frosted white beads and 6mm champagne pearl beads alternating. Insert a 1-2 link gold chain section between the center two beads. Keep the chain length short so it doesn't tangle - about 8-10mm. Use a gold clasp and make sure the chain sits flat against your skin.
Pro tipIf your beads are frosted from sanding, seal with matte-to-satin clear so you keep the frosted look but gain durability.
AvoidAvoid using a long chain segment - it catches on sleeves and makes the bracelet rotate.
10. Mocha Brown + Rose Quartz Pink Accent Beads
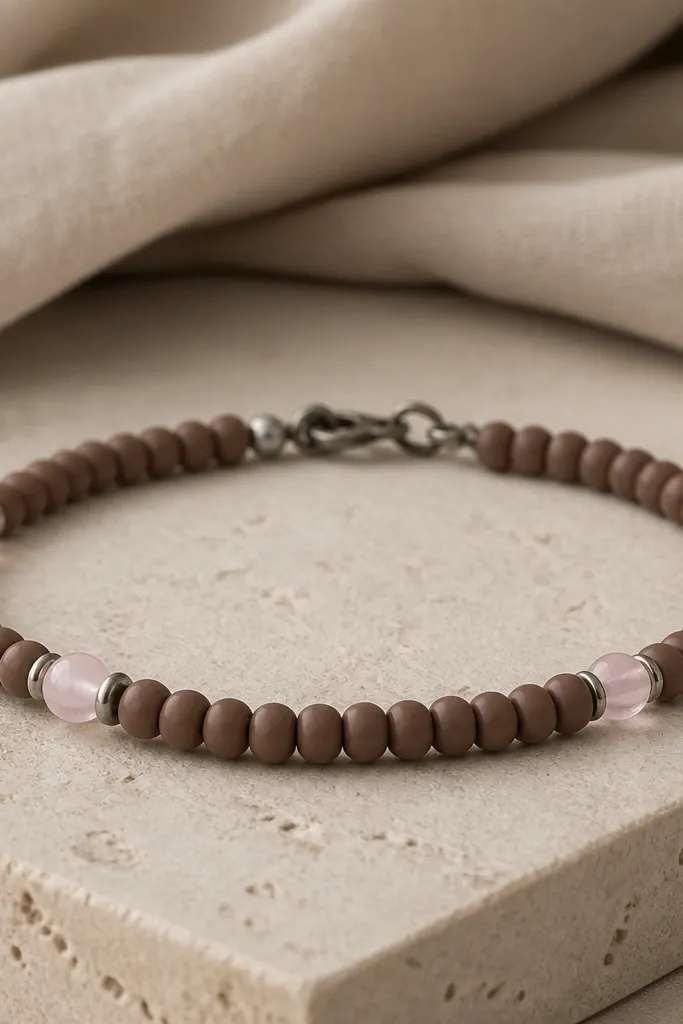
Mocha brown is a grown-up neutral, and rose quartz pink adds a "soft romance" without going bright. Translucent pink clay beads look luxe when they're sealed with a glossy topcoat for light diffusion. Brushed steel hardware keeps it modern and prevents the palette from looking too bridal. The spacing makes the pink feel intentional.
Use 8mm mocha brown beads as the main run. Add 3-4 rose quartz translucent beads at 6-7mm size, placed at equal intervals around the bracelet. Add 2mm brushed steel spacers between mocha beads. Use a brushed steel clasp and measure for a snug fit.
Pro tipWhen you place translucent beads, keep them slightly off-center in the cluster so the light hits them at different angles.
AvoidDon't use bright hot pink with mocha brown - it screams costume.
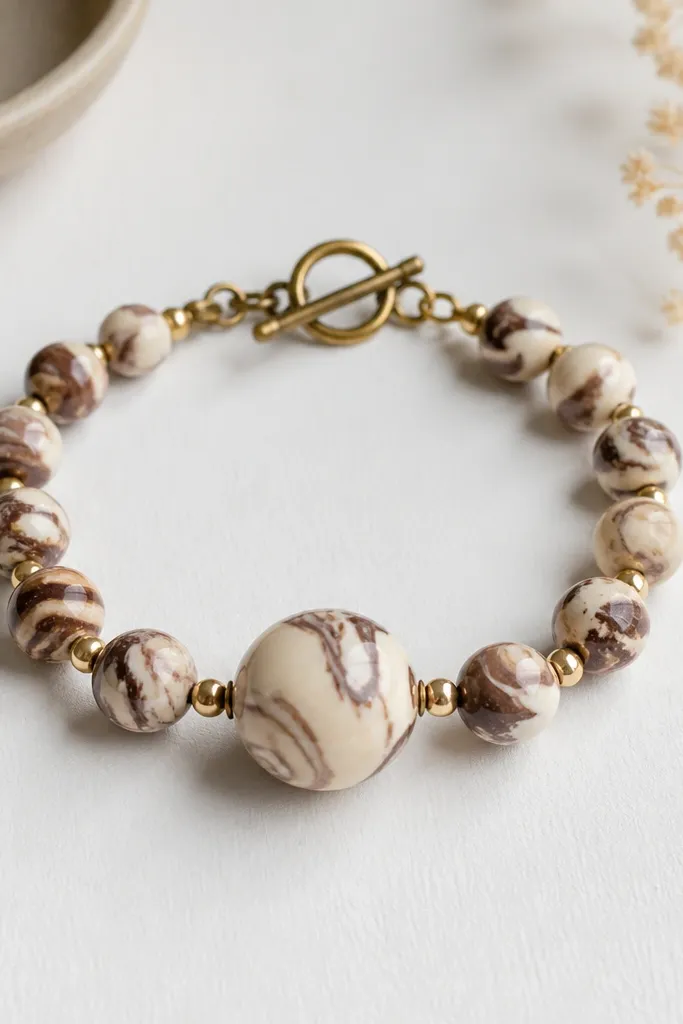
11. Black and White Zebra Marbled Beads with Silver Crisscross Spacers
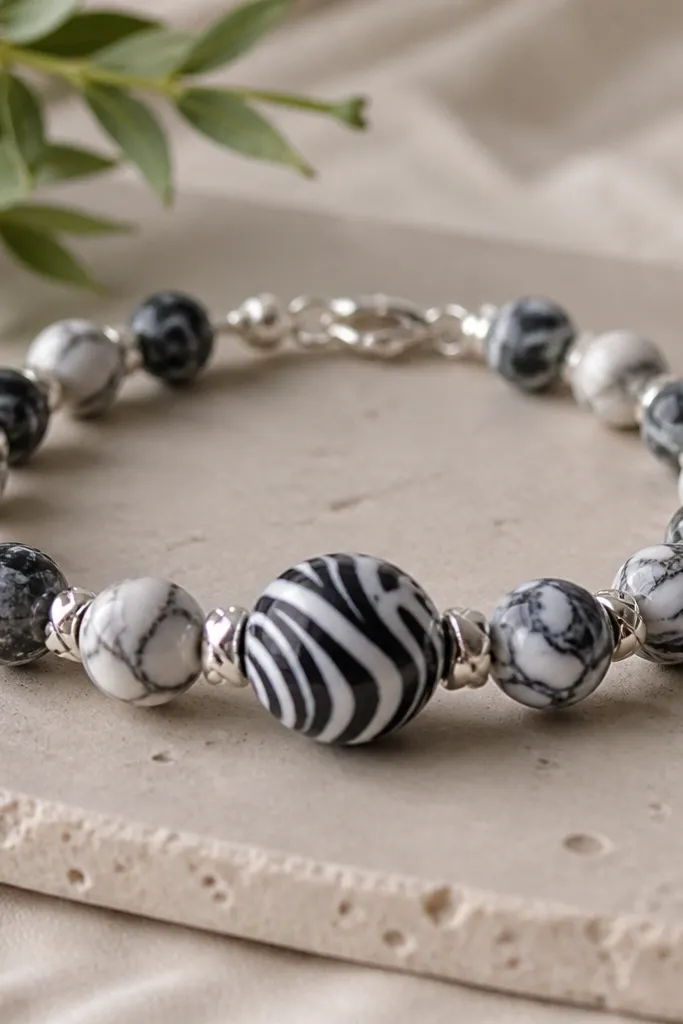
Zebra marbling looks expensive when the contrast is sharp and the pattern is consistent. Silver crisscross spacers add movement and a jewelry-like texture. This bracelet works because the palette is only two colors, so every bead feels deliberate. The larger focal bead makes it read like a statement piece, not a random mix.
Make or buy 7-8mm black/white zebra marbled beads as the core and use 5-6mm matching marbled beads as the rest. Add silver crisscross spacers (3mm) between bead groups, not between each bead. Keep your clasp silver to match the spacers and avoid color drift.
Pro tipIf marbling isn't uniform, sort beads by contrast level and place the highest-contrast ones in the center third of the bracelet.
AvoidDon't mix zebra marbling with other patterns like florals in the same bracelet.
12. Champagne Nude + Gold-Rimmed Clay Beads
Gold-rimmed beads look luxe because they mimic the look of enameled jewelry. The champagne nude base keeps the bracelet warm and flattering. Thin gold edging creates a highlight line around each bead. It also makes the bracelet look more expensive even if your bead shapes are simple.
Use 6mm champagne nude clay beads. Add a gold rim by painting thin metallic acrylic around the bead circumference (or using gold leaf carefully) and letting it cure fully before sealing. Keep the rim thickness consistent - about the width of a fine marker line. Thread with gold seed spacers and finish with a matching gold clasp.
Pro tipAfter the gold rim cures, apply a clear coat over the entire bead so the rim stays smooth and won't flake.
AvoidSkip thick paint rims - they feel raised and can scratch skin.
13. Satin Teal + Silver Faceted Spacer Beads
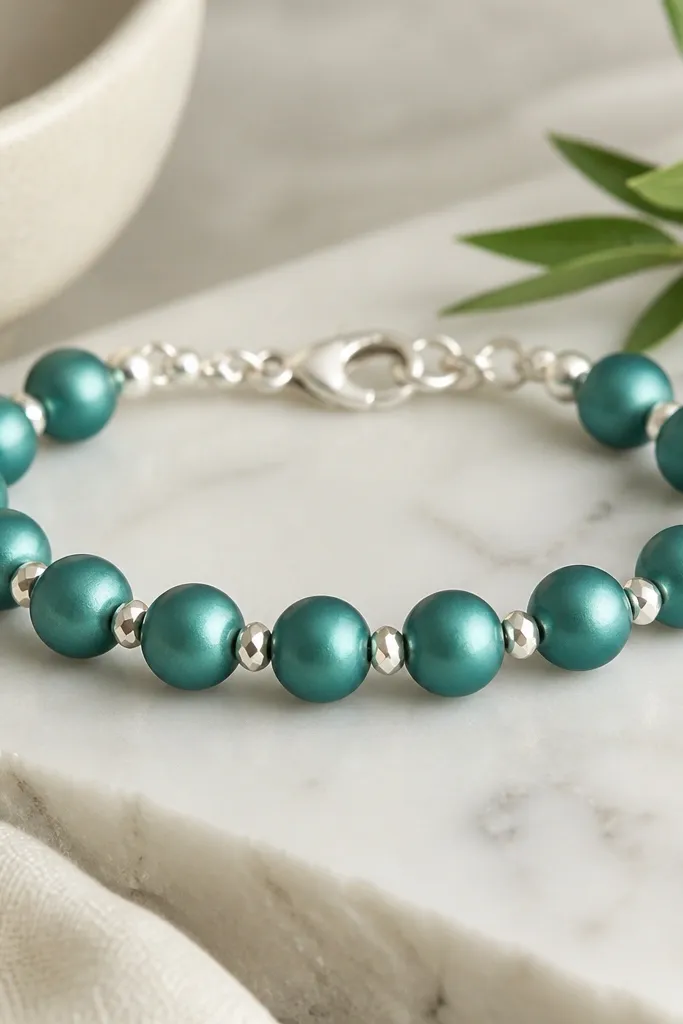
Satin teal reads high end because it sits between matte and shiny - it looks like fabric under light. Faceted silver spacers add crisp sparkle without overpowering the teal. The contrast is clean: smooth clay texture plus sharp metal facets. It's a strong color that still feels wearable.
Use 7mm satin teal clay beads and 4mm faceted silver spacer beads placed at regular intervals. Alternate bead groups so the faceted pieces appear like punctuation marks. Keep the bracelet length consistent and use a silver clasp. Seal the teal beads with a satin-clear finish so you keep that soft look.
Pro tipTest your satin sealer on one bead - some brands turn teal greener after curing.
AvoidDon't seal satin beads with a full gloss coat - it turns the color flat and too shiny.
14. Pearl Gray + Clear Glassy Clay Topcoat for Mirror Shine
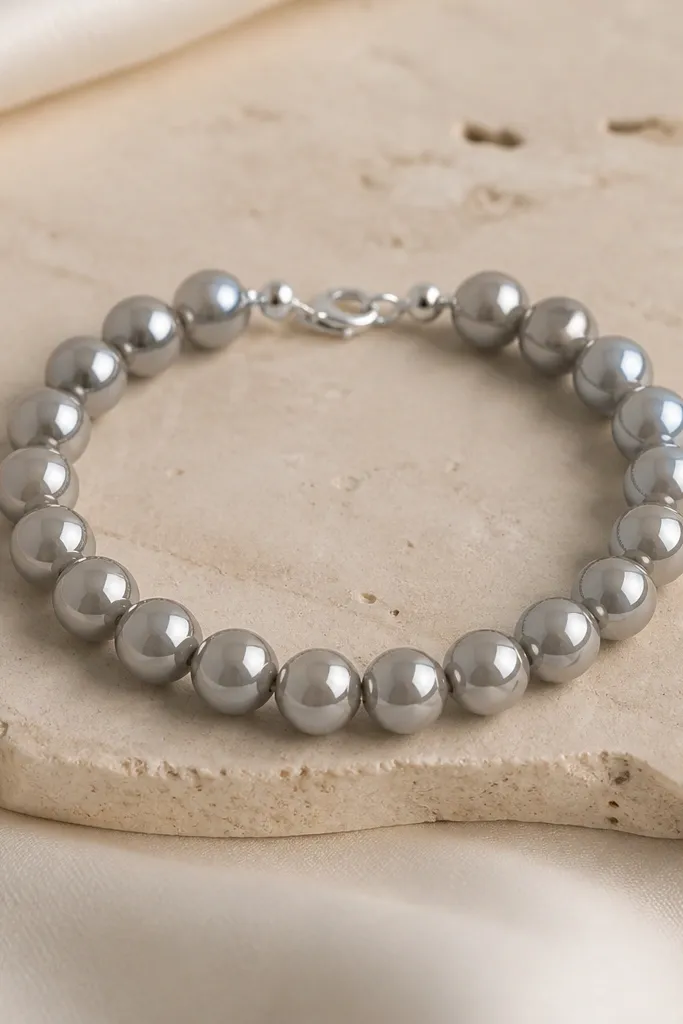
This is the luxe look when you nail finish. Mirror-shine pearl gray beads look like tiny glass pearls, especially when you keep everything else simple. Clear spacers (or very small seed beads) prevent the bracelet from looking chunky. The uniform bead size makes it feel "high-end set" instead of mixed craft beads.
Use 6mm pearl gray beads all the same size. Add 1.5-2mm clear spacer beads between each bead or every other bead, depending on how dense you want it. Use small silver jump rings and a minimal clasp. Seal with multiple thin coats of clear topcoat, sanding lightly between coats if you want true glass smoothness.
Pro tipAfter the final cure, rub one bead with a microfiber cloth - you'll see if any spots look dull.
AvoidAvoid mixed matte and glossy beads in the same strand - it breaks the "glass set" look.
15. Red Wine + Antique Brass Bead Caps with a Center Teardrop
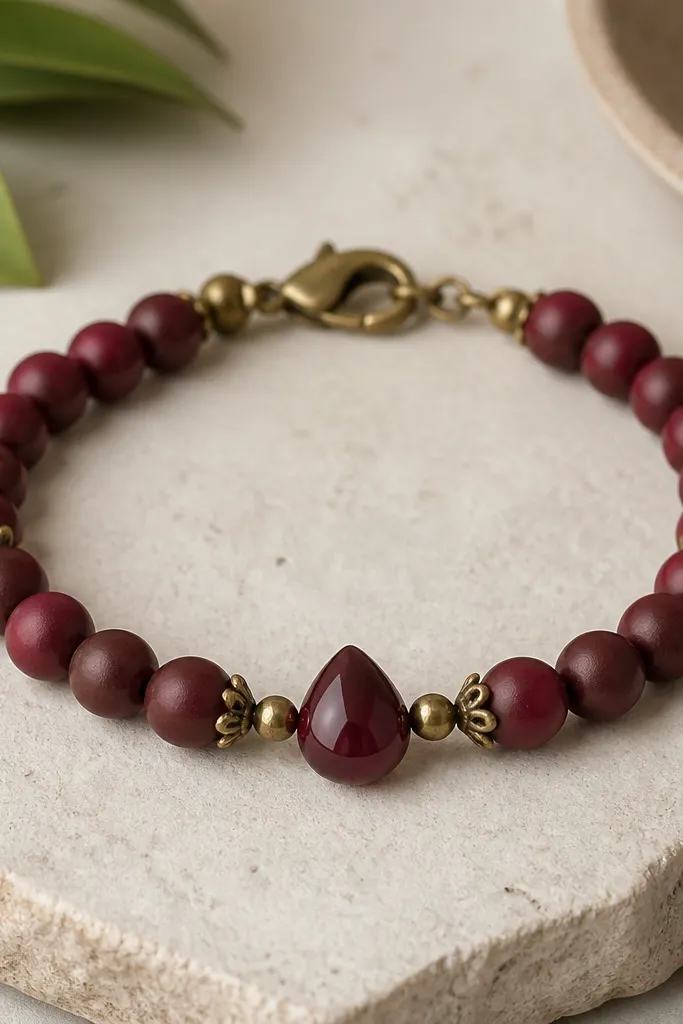
Deep red wine reads luxe because it's dark and warm, and it looks richer under shine. Bead caps add that "jewelry finding" vibe and make simple clay beads look mounted. The teardrop center bead gives a focal silhouette that feels more expensive than round beads. Antique brass keeps the warm tone cohesive.
Use 6mm red wine round beads and add antique brass bead caps on every other bead. Place a 9-10mm teardrop bead at the center, slightly darker (nearly burgundy). Keep the rest simple with 2mm brass spacers and an antique brass clasp. Thread so the teardrop sits facing up when worn.
Pro tipIf bead caps rotate, add a tiny dab of clear jewelry glue inside the cap before sealing the bead assembly.
AvoidDon't cap every bead - it looks heavy and can snag on clothing.
16. Champagne Pearl + Blush Pink Micro-Seed Halo
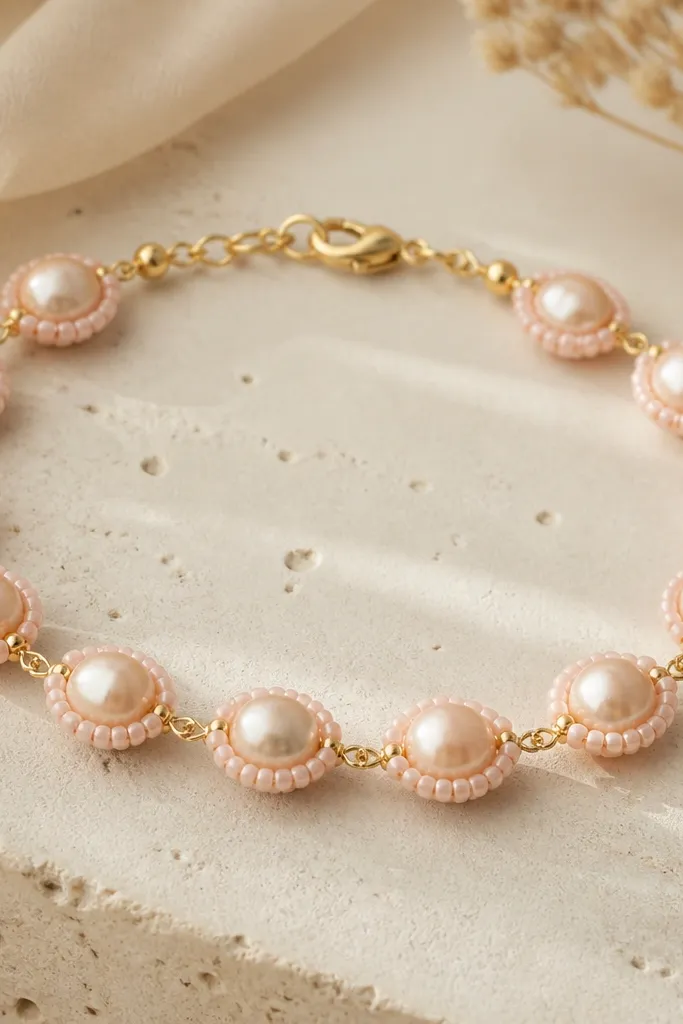
The halo effect makes each clay bead look framed, like a mini pendant. Champagne pearls give the luxe base, and blush micro seed beads add soft color just around the edges. This look reads expensive because the texture change is controlled. It's also great for people who want something dainty but still eye-catching.
Use 6mm champagne pearl clay beads. Build tiny seed bead halos around each bead with blush micro seed beads (about 1-2 seed rows). Keep halos consistent in size so the bracelet looks uniform. Use gold findings and a delicate gold clasp, then check how it sits on your wrist.
Pro tipUse a thinner seed bead needle and pull tension tight so the halo hugs the clay bead without gaps.
AvoidDon't make the halo too tall - tall seed halos catch on sweater cuffs.
17. Ivory Bone + Brushed Silver Bar Beads with Side Gradient
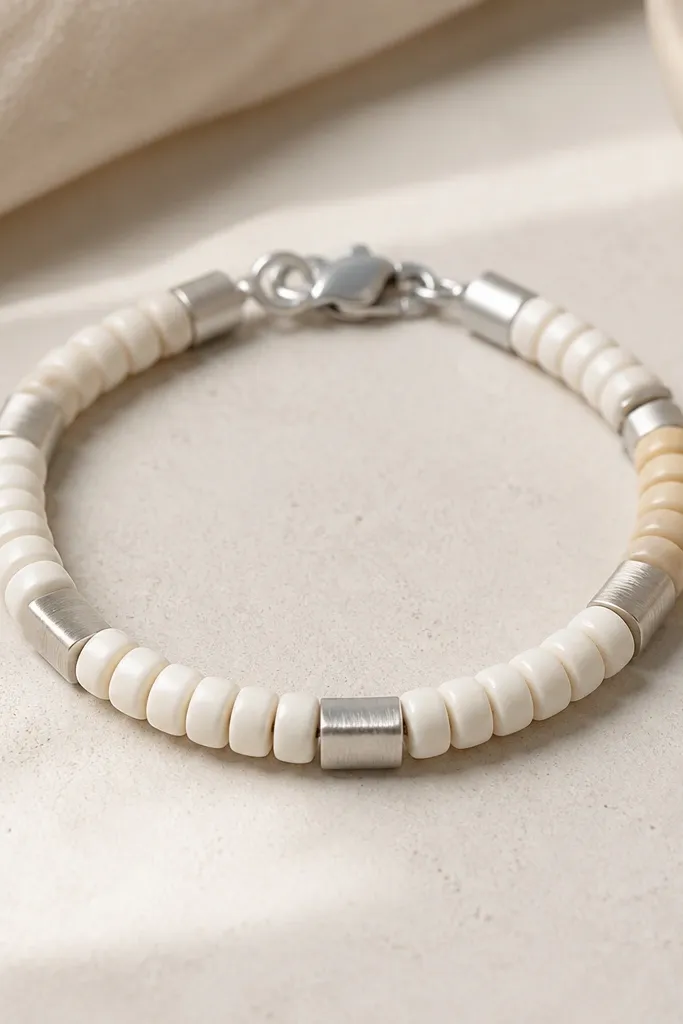
Ivory bone is luxe when it's warm and creamy, not stark white. The brushed silver bars add a clean, linear look that feels modern. A subtle side gradient adds interest without turning it into loud color blocking. This bracelet pairs with black, navy, and camel coats like it was planned.
Use 6mm ivory bone beads as the majority. Add 4-5 beads of a slightly darker ivory (like oatmeal-tan) clustered along one side to create the gradient. Insert brushed silver bar spacers between clusters, not between every bead. Finish with a brushed silver clasp and keep the gradient beads in the same relative position each time.
Pro tipBefore you string, lay beads out in order on a tray and take a photo - it helps you spot if the gradient drifts.
AvoidAvoid mixing ivory with bright white seed beads - it makes the palette look mismatched.
18. Teal Watercolor Swirl + Silver Frame Bead Spacers
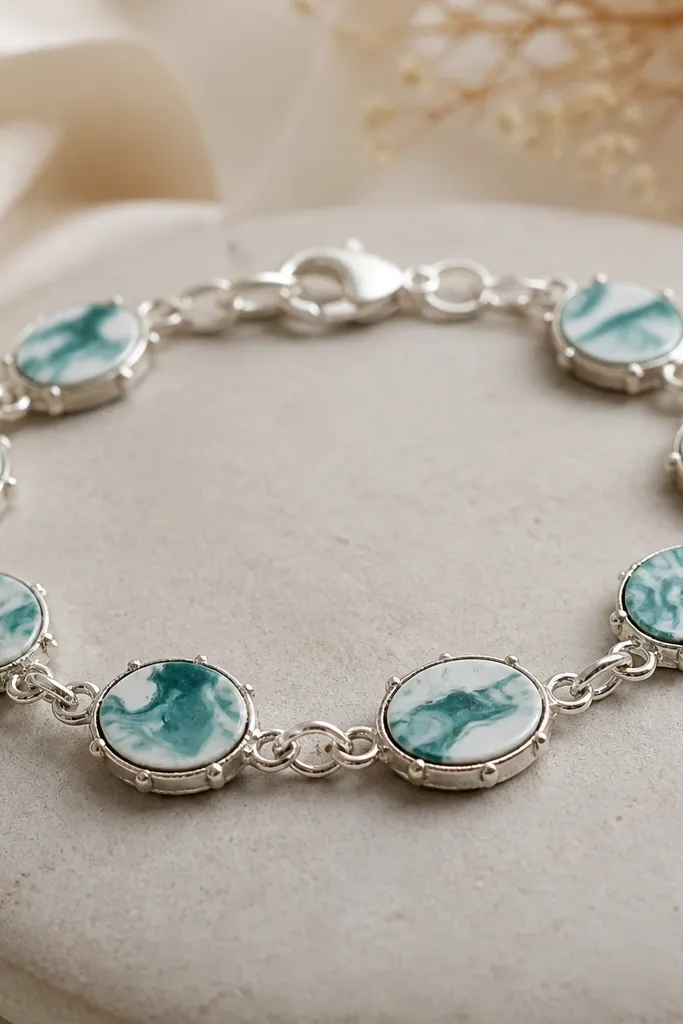
Watercolor swirl beads are luxe because the pattern looks like art, not like random marbling. Silver frame spacers give structure and keep the swirls from blending into a single blob of color. The bracelet looks airy because the bead groups are spaced. It's a great "vacation jewelry" style that still reads polished.
Use 8mm teal watercolor swirl beads as anchors. Add silver frame spacers (small rectangular or oval frames) around 4-5mm and fill gaps with 4mm solid teal beads. Keep the solids matte or satin so the swirls look deeper. Finish with a silver clasp and adjust spacing so the bracelet lies flat.
Pro tipIf the swirl beads feel too busy, reduce the number of swirls and increase the solid teal beads to balance.
AvoidDon't pair watercolor swirls with metallic clay everywhere - it turns into visual noise.
19. Midnight Plum + Gold Filled Chain Extender Finish
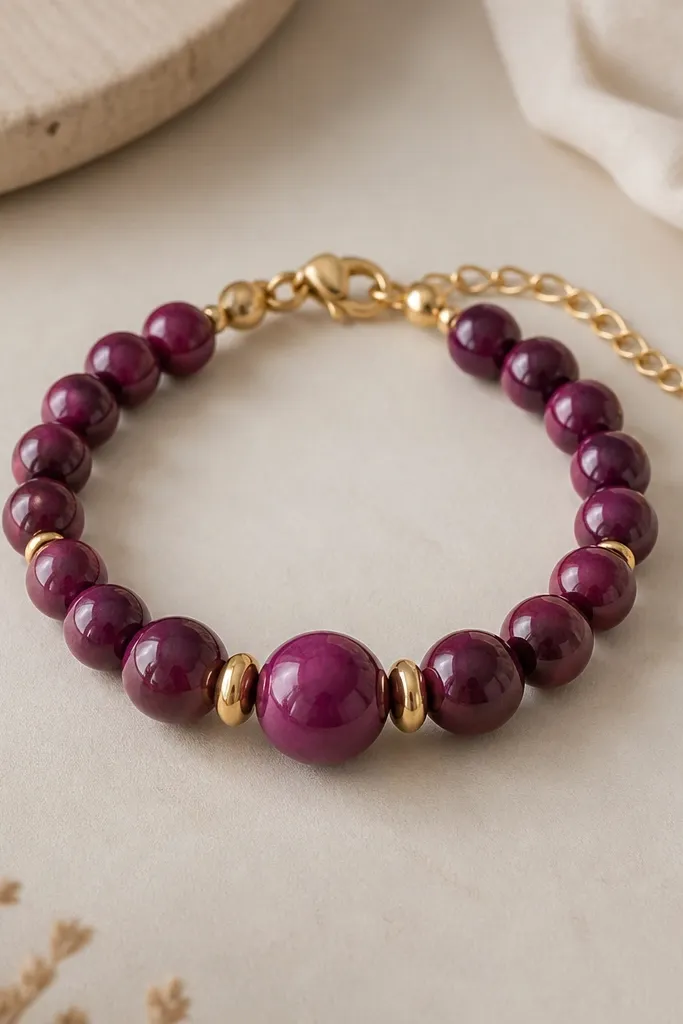
Midnight plum looks luxe because it's dark enough to feel evening-ready but not harsh like black. A gold-filled chain extender is a small detail that makes the bracelet feel like real jewelry, not a fixed-length craft. It also helps fit - I've used extenders for bracelets that otherwise twist. The larger center beads keep the design intentional.
Use 7mm midnight plum glossy clay beads with 8mm beads in the center (about 2 beads). Add 2mm gold seed spacers between bead groups. Use a gold-filled clasp with a chain extender section around 1-1.5 inches so you can adjust fit. Seal beads well so they don't dull under handling.
Pro tipMake sure the extender chain sits behind the wrist, not on top - it keeps the bracelet from tangling hair and sleeves.
AvoidAvoid using a super short clasp with no adjustment - it makes the bracelet twist when your wrist swells.
20. Sandstone Beige + Tiny Brass Rivet Spacers
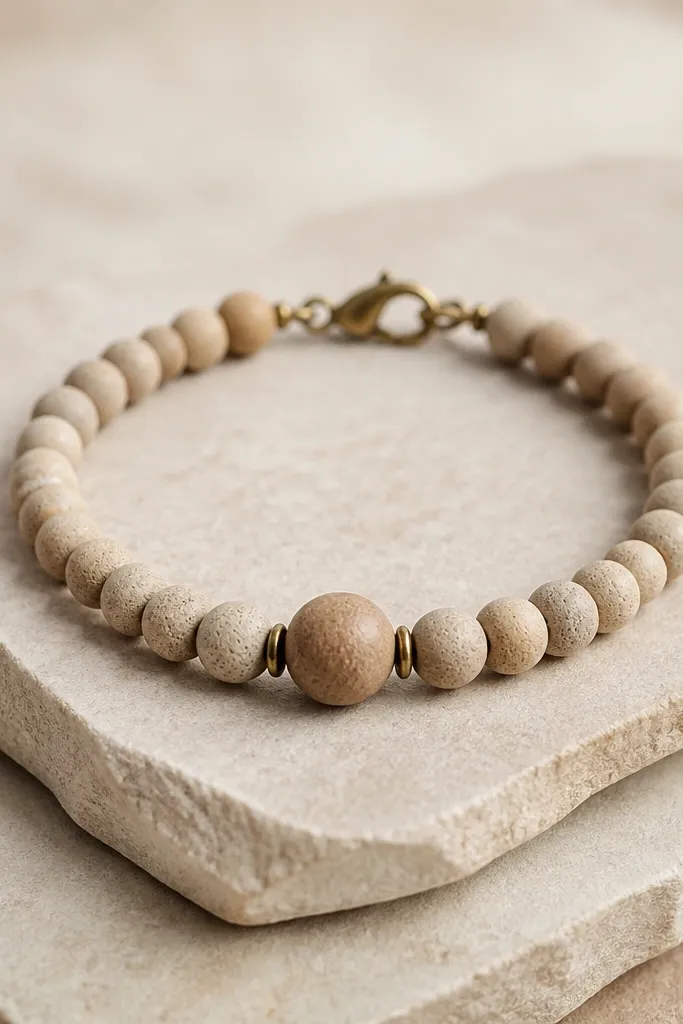
Sandstone beige is one of those colors that looks expensive because it's warm, calm, and forgiving with skin tones. Tiny brass rivet spacers add a bit of architectural detail, like hardware on a high-end bag. The design stays minimal, which makes the bead finish do the talking. It looks great with linen sets and casual knits.
Use 6mm sandstone beige beads and add a darker 7-8mm center bead for depth. Insert brass rivet spacers at regular intervals so the pattern repeats. Keep spacers tiny (around 2-3mm) so you don't lose the minimal look. Finish with a brass clasp and thread tight enough to keep spacing even.
Pro tipIf your beige beads look uneven, sand them lightly after cure so every bead reflects light the same way.
AvoidDon't mix brass with silver findings - neutral colors highlight mismatched metal fast.


