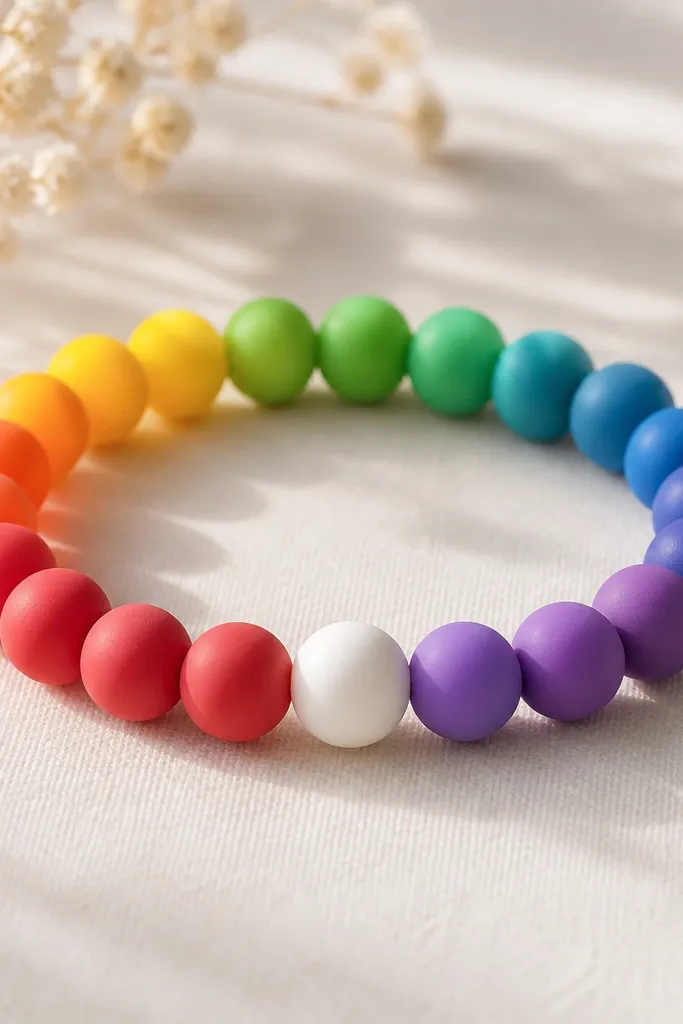
1. Single-Color Rainbow Fade on Elastic
Pick one clay bead color family and do a smooth fade. I've built this with 8mm round beads in five shades (terracotta, burnt orange, coral, peach, blush). The gradient makes the bracelet look designed even if you're not perfect with spacing. Elastic keeps it low maintenance - no clasp to fight.
Cut elastic cord to wrist measurement minus 1cm for snug wear. Thread beads in order from darkest to lightest, then tie a tight double knot. Put a tiny dot of jewelry glue on the knot, let it set 10 minutes, then trim flush.
Pro tipUse a bead tray or a piece of parchment to line up beads in shade order before you thread. It stops color-mixing mistakes.
AvoidDon't stretch the elastic while knotting - it makes the bracelet loosen fast and the knot slips.
2. Monochrome Matte with Tiny Gold Seed Beads
Matte clay looks best when the bracelet has micro-detail. I use matte black or matte charcoal 8mm beads and add 3-4 seed beads (size 11) between each one. The gold specks catch light when you move your wrist. It still stays low maintenance because you're not adding many parts.
String 8mm matte clay beads and insert 3 seed beads between beads. Keep consistent spacing by counting seed beads every time. Finish with a simple elastic knot or a small crimp loop if you're using thread.
Pro tipIf your seed beads snag, switch to a slightly thinner needle or thread. Seed beads hate rough tension.
AvoidDon't use chunky metal spacers with matte clay unless you want a heavier look - it can make the bracelet feel busy.
3. Two-Tone Block Pattern with 6mm Spacers
Block patterns look crisp and "graphic." I do alternating groups like 3 teal beads, 3 white beads, repeated, with 6mm silver spacers between the groups. The spacer beads give your eye a break so it doesn't look random. This one is forgiving because the pattern hides small thread twists.
Use 8mm clay beads for the blocks and 6mm metal spacers. Create a repeat: (teal teal teal spacer) (white white white spacer). Tie or crimp ends so the first block sits centered at the clasp.
Pro tipLay out one full repeat across your table and build exactly to that length before you cut the cord.
AvoidDon't mix bead sizes inside the blocks. It makes the pattern look accidental.
4. Heart Charm Accent with Neutral Clay Base
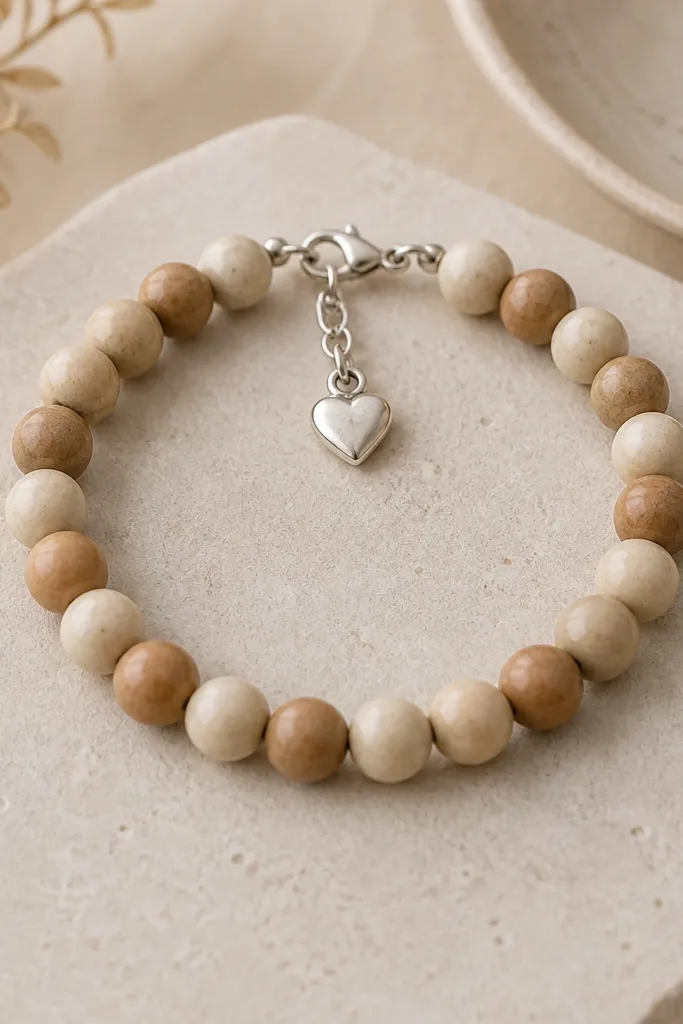
A single charm changes the whole vibe without adding effort. I use neutral clay beads like oat beige or warm taupe as the base, then add one small heart charm at the center front. It reads cute and personal even when the bracelet is simple. Low maintenance because you're not adding multiple dangly parts that catch on sleeves.
String 8mm neutral clay beads all around. Leave a 2-3 bead gap where the charm will sit, then attach the charm using a small jump ring to a short piece of wire or a loop in your thread. Finish with a clasp or elastic knot.
Pro tipCenter the charm by marking the clasp point with a piece of tape on your wrist before you assemble.
AvoidDon't attach the charm with long wire ends. It swings and twists the bracelet.
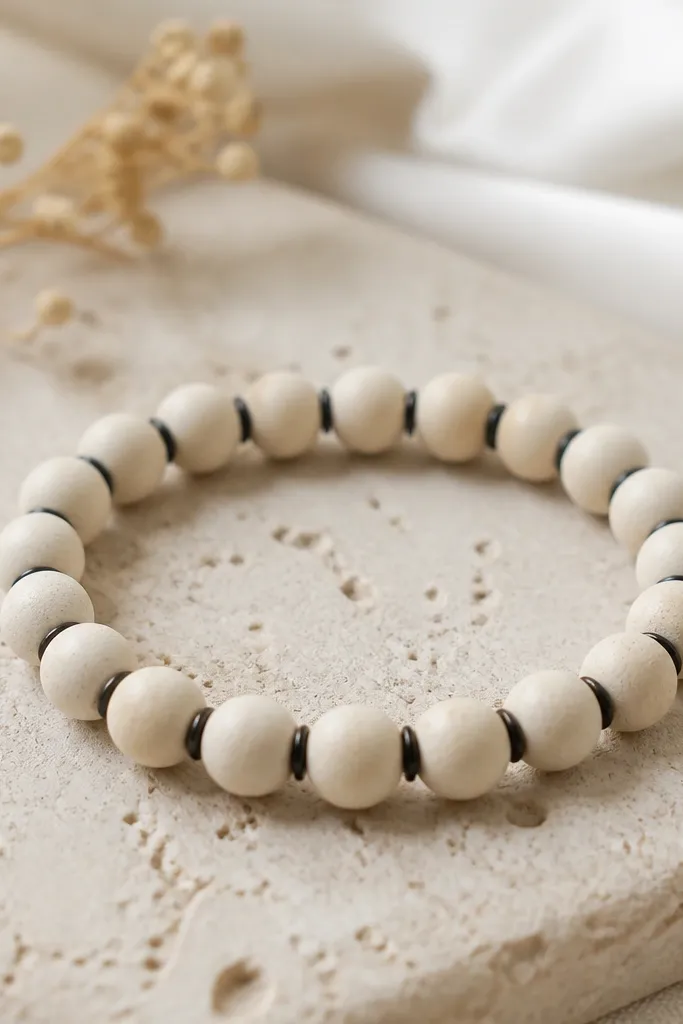
5. Boho Sunburst with Wood-Look Clay and Brass Rings
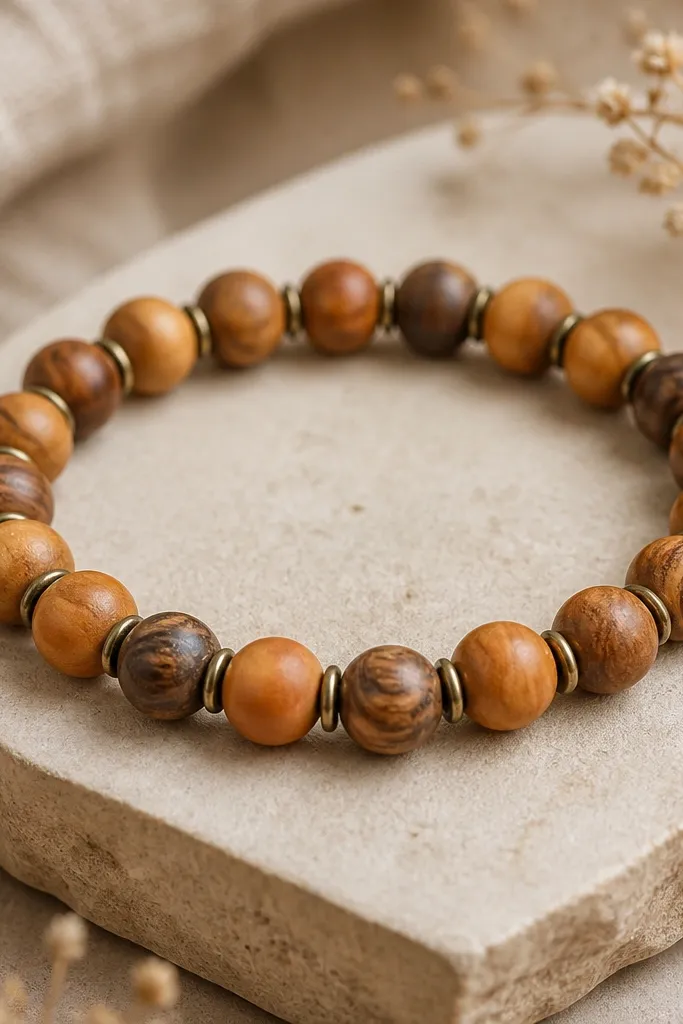
This looks like a sunburst because the brass ring beads create tiny flashes. I use wood-look clay beads (10mm) for the main rounds and add brass ring beads as the highlights. The rings also help keep the bracelet from clumping. It's still low maintenance because the main part is just round beads.
Thread 10mm wood-look beads, then slide in one brass ring bead between each clay bead. Repeat to your wrist length. Use nylon thread + crimp beads for a neat finish that doesn't stretch out over time.
Pro tipIf rings rotate too freely, add a tiny seed bead after each ring to keep motion controlled.
AvoidDon't overuse ring beads - too many makes the bracelet feel noisy and catches on fabric.
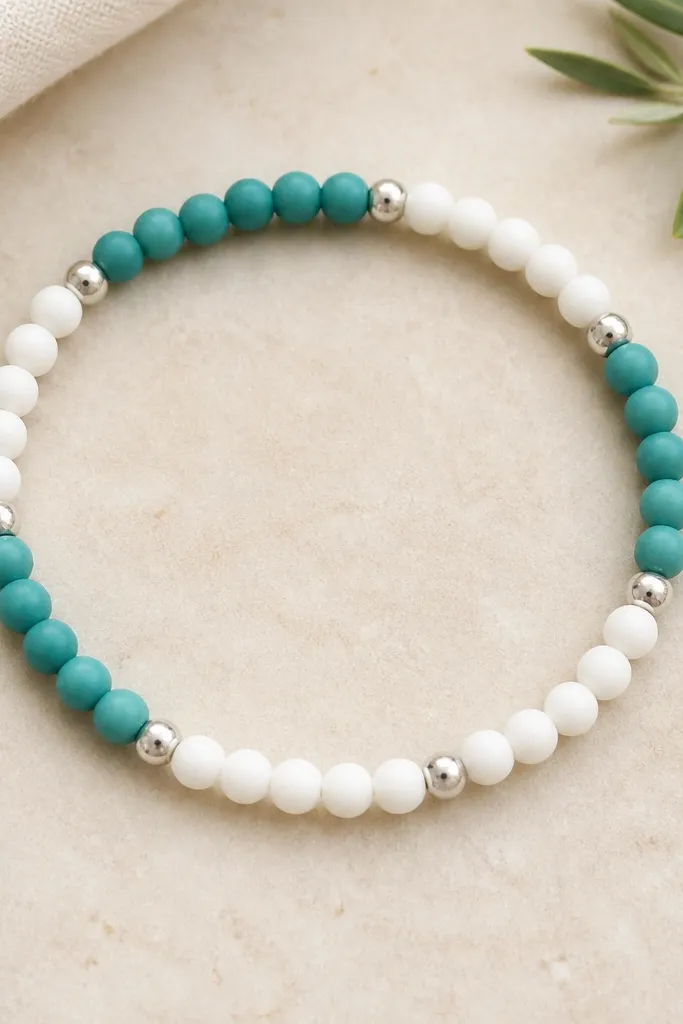
6. Tiny Galaxy Drops with Silver Micro Spacers
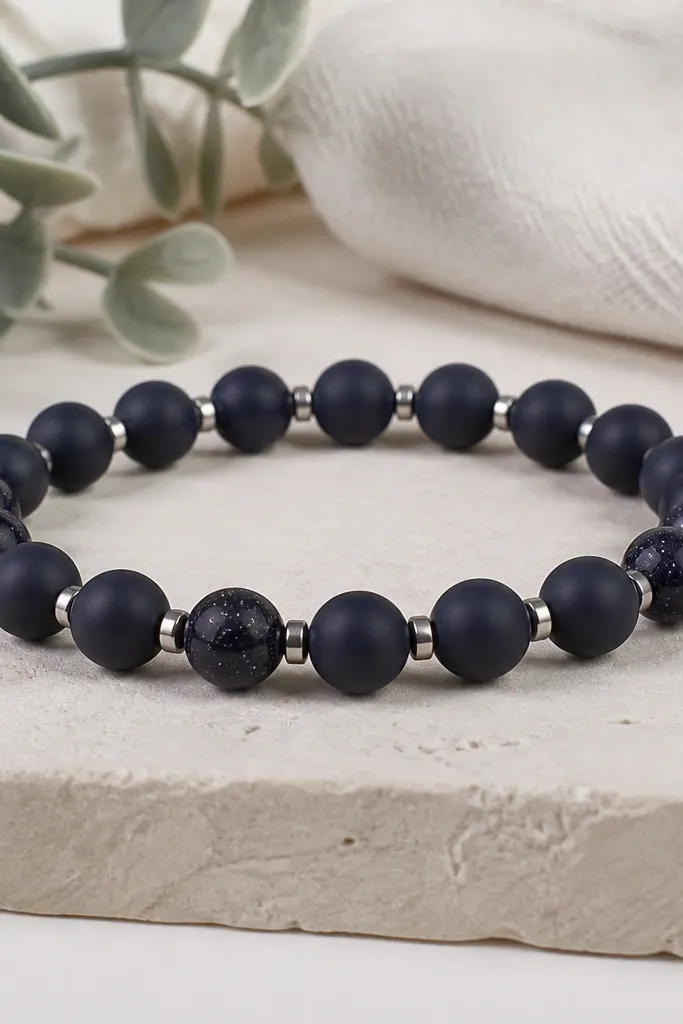
Speckled clay beads look like "galaxy" when you add silver micro spacers. I used 7mm navy speckle beads and mixed in 2mm silver cylinder spacers. The spacers create clean breaks so the bracelet reads sleek instead of messy. It's low maintenance because all pieces are uniform and easy to thread.
Alternate: navy speckle bead, silver micro spacer, navy speckle bead. Keep a consistent rhythm and check tension every 10 beads. Finish with a small lobster clasp and jump ring if you're using thread.
Pro tipChoose a clasp that matches silver hardware so the bracelet looks intentional up close.
AvoidAvoid mixing warm gold and cool silver in the same bracelet unless you're going for a two-tone look.
7. Chunky 10mm Single Strand with Soft Sliders
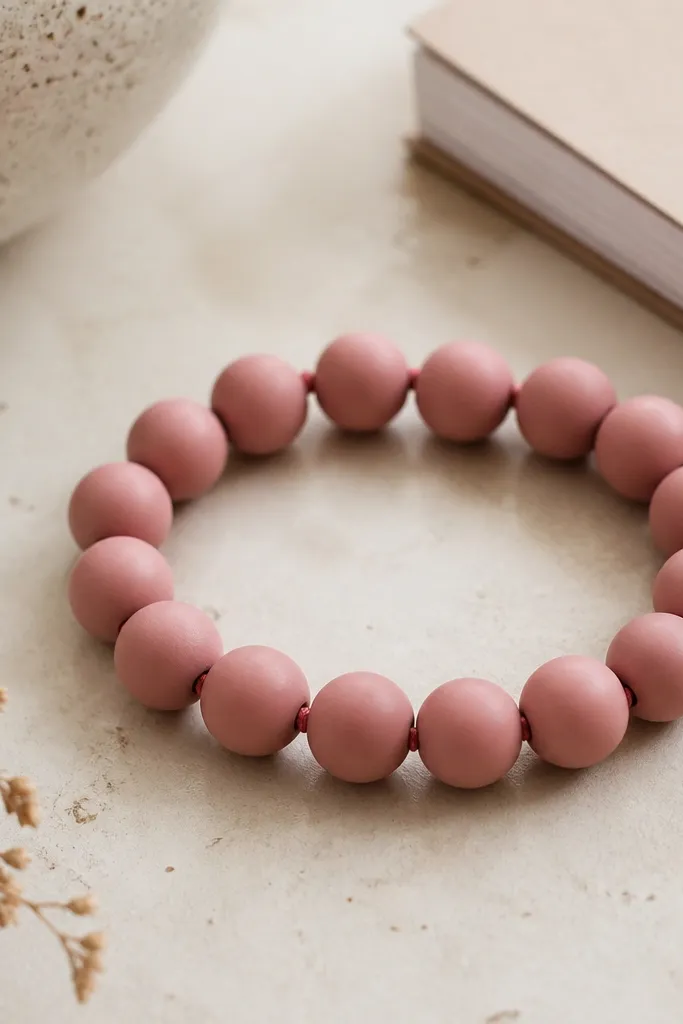
If you want the least fiddly build, go chunky and simple. I used 10mm dusty rose beads and strung them tightly on elastic. The big beads cover uneven spacing and look bold without needing extra charms. "Soft slider" style comes from adding a couple of small stopper beads to keep the bracelet from rolling.
Thread elastic through 10mm beads, then add two 3mm stopper beads near the ends (before the knot). The stoppers keep the bracelet from twisting. Tie the knot, glue it, and trim.
Pro tipUse matte beads for this style - gloss makes the elastic shine and look cheap faster.
AvoidDon't use too much empty space between beads. It makes chunky bracelets spin around your wrist.
8. Pastel Checkerboard with Two Sizes of Clay Beads
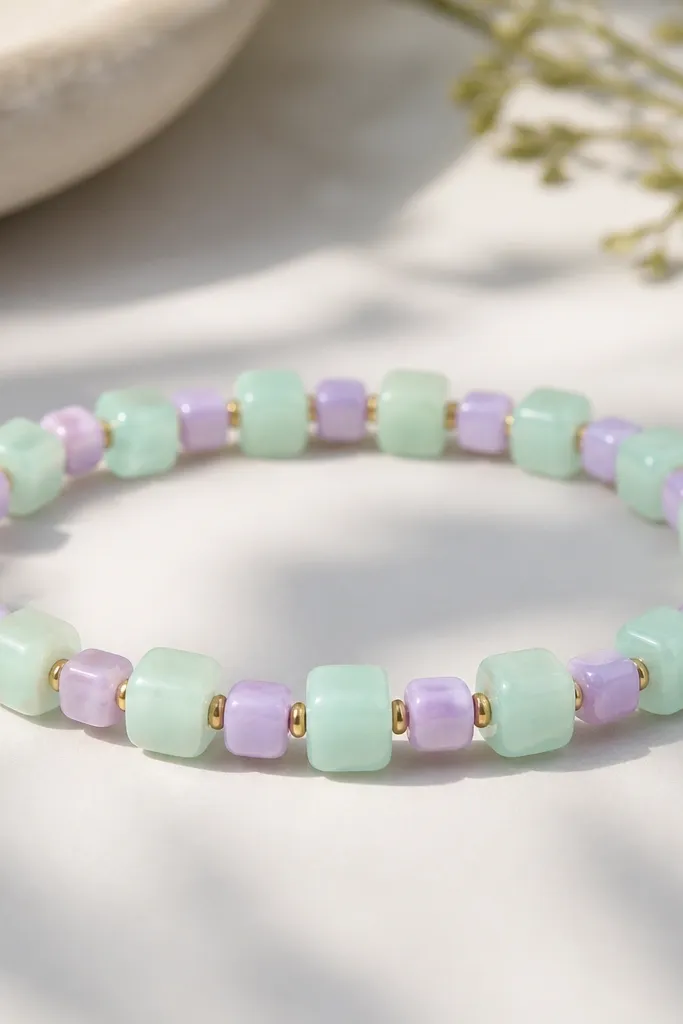
Checkerboard patterns look handmade in the best way. I use two bead sizes to create the "grid" effect: 8mm mint beads and 6mm lavender beads, repeating. The size difference makes the pattern visible even from a distance. Low maintenance because you're still just threading two bead types.
Start with an 8mm mint bead, then 6mm lavender, repeat. Use elastic for speed or thread for sharper alignment. If you use thread, crimp after you confirm the bracelet sits centered when worn.
Pro tipKeep your bead holes consistent. If one bead is tighter, it will throw off the checker rhythm.
AvoidDon't mix matte and glossy finishes in a checkerboard unless the colors match perfectly.
9. Neutral Speckle + Clear Crystal Accent
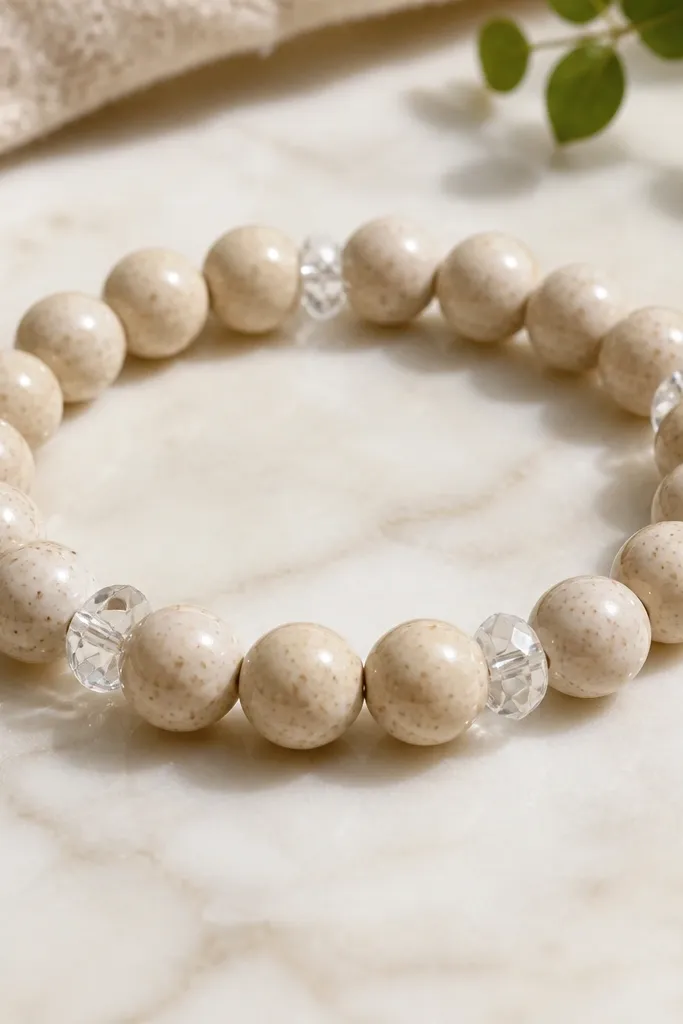
This is my go-to when I want "pretty" without adding many parts. Use speckled oatmeal clay beads as the texture and add one clear faceted spacer every third bead. The crystals catch light during walking and look like you put more effort in than you did. Elastic keeps it simple.
Thread 9mm speckle beads, then insert a clear crystal spacer after every third clay bead. Keep the crystal size around 4-6mm so it doesn't overpower. Finish with an elastic knot hidden between two beads.
Pro tipIf crystals slide, add a tiny seed bead before and after each crystal.
AvoidDon't place crystals back-to-back. The bracelet starts looking like random glitter.
10. Zigzag Fringe Look Using Bead Caps
You can fake a fringe edge without adding chain. I use bead caps (small metal caps) on alternating beads so the surface catches light in a zigzag rhythm. The clay beads stay the main focus, and the metal caps just shape the look. It's low maintenance because you're still threading rounds.
Use 8mm clay beads and cap every other bead with a small bead cap. Thread normally, then add caps so they face the same direction each time. Finish with thread and crimp for a clean, flat end.
Pro tipPin the direction of bead caps by sorting them before you string - the caps are easy to flip by accident.
AvoidDon't use oversized caps with small beads. It makes the bracelet feel top-heavy.
11. Monochrome Cream with Black Micro Beads Between
This one looks like pinstripes. I use cream clay beads (matte or semi-matte) and insert a short string of black seed beads between each main bead. The contrast makes the bracelet read neat, even with an elastic finish. It's low maintenance because the pattern repeats and takes no measuring beyond your wrist length.
Thread cream beads with 5-7 black seed beads between. Keep the seed bead count consistent. Tie the knot at the back of your wrist and hide it under one cream bead if possible.
Pro tipIf your bracelet twists, add one extra seed bead on alternating gaps to create slight friction.
AvoidAvoid uneven seed bead clumps. They make the spacing look messy.
12. Two-Strand Look from One Bracelet Pattern
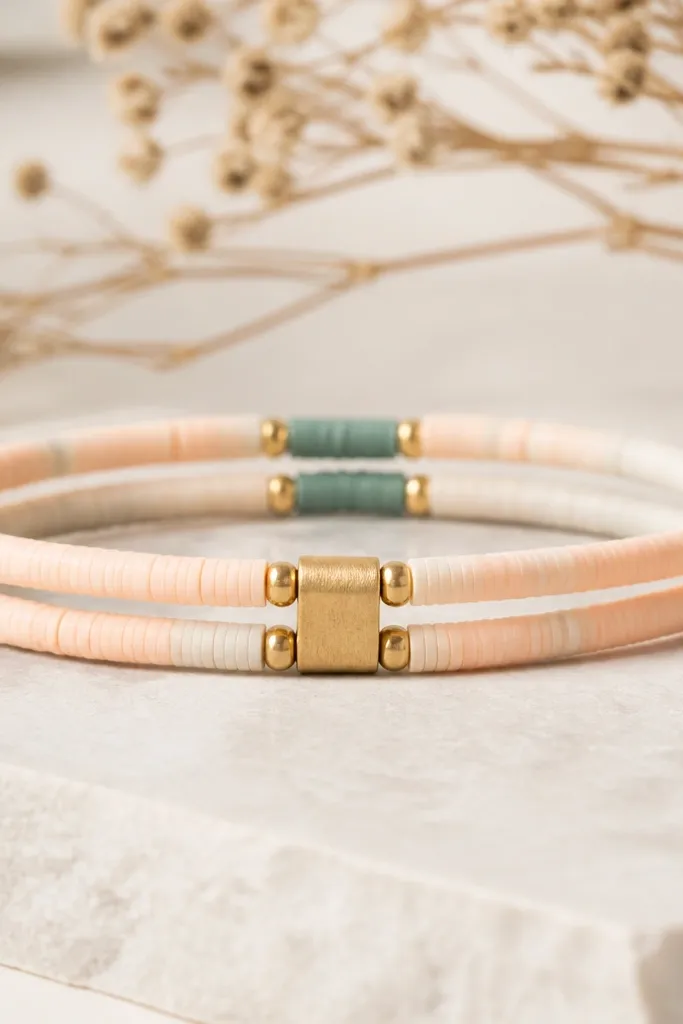
You can get a layered look without building two separate bracelets. I use a central divider bead or small spacer and thread beads so they sit in two lines against each other. The effect is clean and gives your wrist more visual texture. Low maintenance because you still have one closure to manage.
Use elastic or thread with a central divider. For elastic, thread beads in two interleaved sequences, then tie so both rows stay aligned. For thread, use crimp points and keep tension even; check alignment before flattening crimp.
Pro tipUse slightly different bead sizes for each row (like 7mm and 9mm) so the "two strand" look is obvious.
AvoidDon't rely on luck for alignment - if you don't check tension mid-build, the rows collapse.
13. Terracotta + Brass Coin Clay Accent
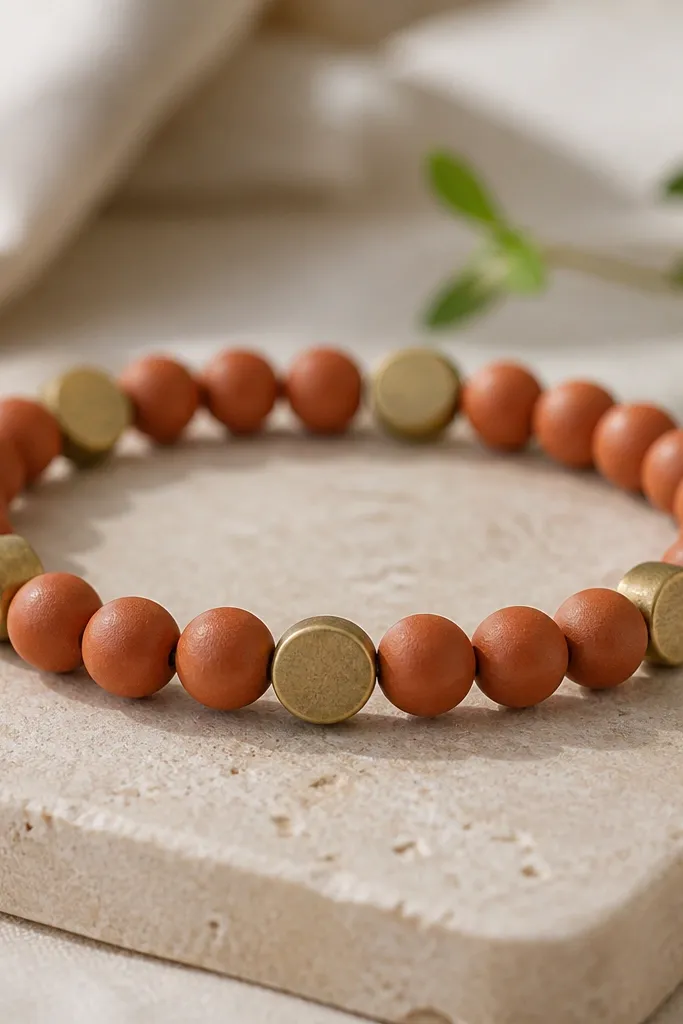
Terracotta already has warmth, so brass makes it look antique without trying. I use terracotta clay beads as the base and add brass coin beads every 3-4 clay beads. The coins are light and don't snag easily. This is low maintenance because the build rhythm is simple.
Alternate: terracotta bead, terracotta bead, brass coin bead, repeat. Keep coin spacing even so it doesn't drift. Use thread and clasp if you want the coins to sit flat against the wrist.
Pro tipIf coin beads rotate, add a seed bead layer so they face outward.
AvoidDon't choose very heavy coin beads - they pull the bracelet out of shape.
14. Lemon Lime with Tiny Triangle Spacers
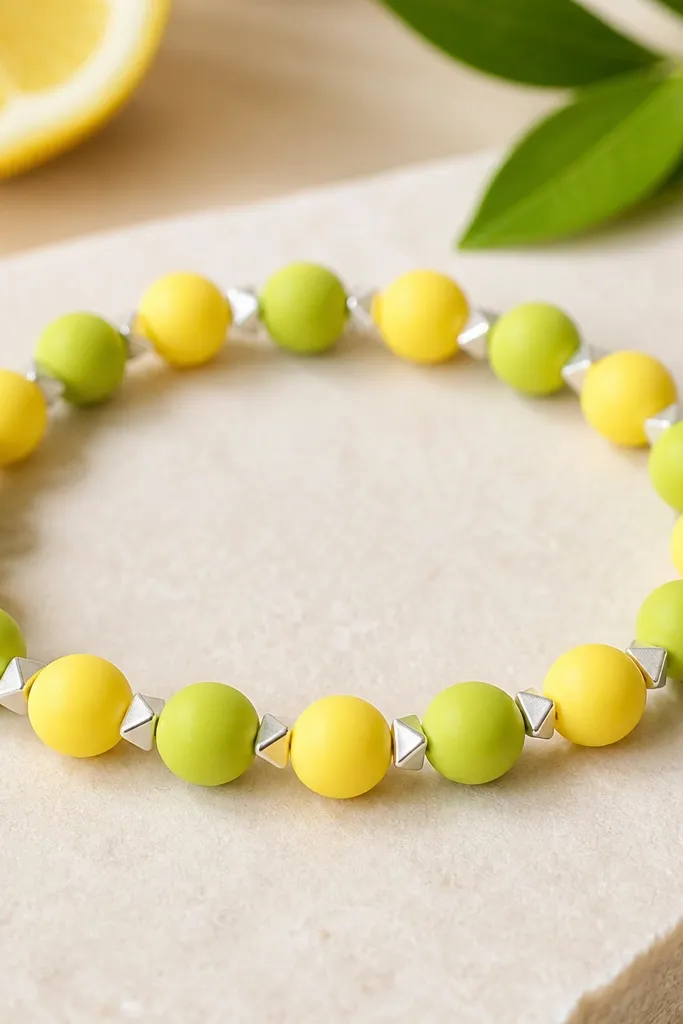
Triangle spacers make the bracelet look geometric. I use alternating lemon and lime clay beads, then add tiny triangle spacers between them. The triangles create a crisp "stop" point so the beads don't slide. It's low maintenance because you repeat the same three-part sequence.
Build repeat: lemon clay bead, triangle spacer, lime clay bead, triangle spacer. Keep spacers small (around 3-4mm) so they don't overpower the clay beads. Finish with elastic or crimp + clasp.
Pro tipSort spacers by size first. Mixed triangle sizes show up quickly in bright colors.
AvoidAvoid large spacers in neon colors - they make the bracelet look like craft store clutter.
15. Pastel Rainbow with Flat Slider Knot Closure
A flat knot closure can look tidy and still be fast. I built this with pastel rainbow beads and used a flat knot that sits under the last two beads. The bracelet still slips on quickly, but it doesn't look like a messy knot. Low maintenance because you don't fight a clasp.
Use elastic cord and tie a flat knot after threading the last bead. Slide the last bead pair so the knot hides between them. Add a small glue dot and trim after it sets 10 minutes.
Pro tipChoose bead colors that match the elastic shade so any knot peek disappears.
AvoidDon't glue the entire end of the elastic. It makes the knot bulky.
16. Black + White Marble Clay with Silver Chain Extender
Marble clay looks high-end with the right hardware. I use black-and-white marble clay beads and pair them with a silver chain extender at the clasp. That extender fixes the most annoying beginner problem: bracelets that fit tight one day and loose the next. Low maintenance because you adjust fit without rebuilding.
String marble beads with nylon thread and crimp beads. Attach a clasp plus a short 1-inch chain extender using jump rings. Keep tension so beads touch lightly - not so tight they strain the chain.
Pro tipTest fit twice: once before you crimp, once after. Adjust before the final flattening.
AvoidAvoid skipping the extender when you're between sizes. Rebuilding is a pain.
17. Tiny Flower Beads with One Center Spacer
Flower-shaped beads add detail without adding hardware. I use small flower clay beads (around 7mm) and put one larger spacer bead at the center front. The center spacer makes the bracelet look balanced. Low maintenance because the bead shapes guide the pattern for you.
Thread the flower beads straight around and stop at your wrist length. Choose one center spacer bead (like 8mm) and place it at the halfway point before you tie or crimp. Make sure your clasp sits opposite the spacer for symmetry.
Pro tipCount beads before you cut cord. Flower beads hide miscounts until you're already knotting.
AvoidDon't mix flower shapes with different thickness - they sit at different angles.
18. Gradient Teal to Seafoam with Brass Tube Spacers
Tube spacers add a polished look to gradients. I used deep teal beads, then mid teal, then seafoam, with brass tube spacers between each clay bead. The tubes create a clean line and stop the beads from bunching. Low maintenance because you repeat the same spacing pattern all the way around.
Use 8mm clay beads for the gradient and 3mm brass tubes. String: teal bead, tube, next teal shade, tube, and so on until it matches your wrist length. Finish with crimp + clasp for best long-term fit.
Pro tipKeep your brass tube count equal to your clay bead count minus one. It makes the rhythm look even.
AvoidDon't over-crimp. A crushed tube can cut your thread over time.
19. Earthy Olive with Antique Copper Jump Rings
Copper jump rings give you movement, but you only need a few. I use olive clay beads and add antique copper jump rings every other bead. The rings add texture and a little swing when you walk. Low maintenance because you don't need charms or chains.
Thread olive beads and insert a jump ring between beads. If rings twist, add a seed bead right before the ring so it sits flat. Finish with an elastic knot or thread with a small clasp.
Pro tipPick jump rings that are small enough to sit between beads without widening the bracelet.
AvoidAvoid mixing copper and silver hardware here. The bracelet looks mismatched fast.
20. Pastel Sprinkles Using Confetti Clay Beads

Confetti clay beads already have the detail. That's why this is low maintenance: you don't add extra patterns, you just keep the spacing consistent. I use 8mm confetti beads in pastel tones and string them straight with elastic. The bracelet looks fun and cheerful even with zero metal parts.
Thread all confetti beads until you reach wrist length. Tie a double knot and glue it. Hide the knot by pushing it under a bead and trimming the ends.
Pro tipChoose confetti beads with the same hole diameter. Mixed holes make the stringing uneven.
AvoidDon't add extra charms to confetti beads. It turns playful into clutter.
21. Monochrome Rose Clay with Tiny Pearls
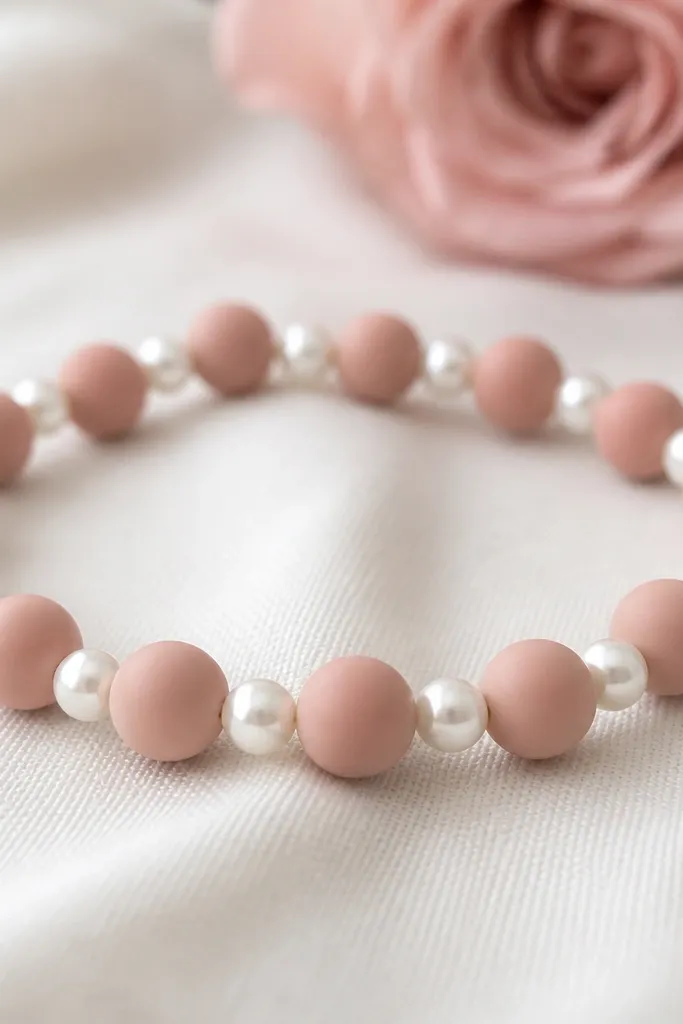
This is the "casual but pretty" combo. I alternate matte rose clay beads with tiny faux pearls (around 4mm). The pearls soften the clay and make the bracelet feel more dressed-up without being fragile. Low maintenance because the pattern is one repeat.
Use 8mm clay beads and 4mm pearls, alternating. Keep pearl spacing consistent and don't over-tighten - pearls can crack if you strain the cord. Finish with elastic or thread + clasp.
Pro tipIf pearls slide, use a slightly thicker stringing material or add one seed bead between clay and pearl.
AvoidAvoid glossy rose beads with very shiny pearls; the mismatch reads cheap.
22. Mini Tassel End Caps with One Bracelet Row
End tassels make a bracelet look styled even when the bead row is basic. I use one row of 8mm clay beads (white or pale gray) and add mini tassel end caps at both ends. The tassels move lightly and don't tangle much if you keep them short. Low maintenance because the bead work stays simple.
String the clay beads first and finish with a clasp. Attach tassel end caps to each side using jump rings near the clasp points. Keep tassel length around 1 inch so they don't catch on sleeves.
Pro tipTrim tassels after the first wear. Your body heat and movement will settle the fibers.
AvoidDon't make tassels longer than 2 inches. Long tassels snag constantly.
23. Two-Color Rope Twist Look Using Twisted Wire Spacers
Twisted wire spacers create a rope effect without real rope. I alternate teal and cream clay beads and insert twisted wire spacers every 2 beads. The twist adds texture and makes the bracelet look more complex than it is. Low maintenance because you repeat the same sequence and the wire pieces help guide spacing.
Use 8mm clay beads and twisted wire spacers around 4-6mm. Build repeat: teal teal spacer, cream cream spacer. Finish with thread and crimp so the wire spacers sit snug and don't slide.
Pro tipIf wire spacers rotate, add a tiny seed bead on one side to lock direction.
AvoidAvoid mixing too many metals. Keep all spacers in the same finish.
24. Charcoal Clay with Matte Silver Bar Spacers

Bar spacers make a bracelet look modern and clean. I use charcoal matte clay beads and matte silver bar spacers between each bead. The bars keep the spacing even and create a straight, tidy rhythm. Low maintenance because the build is just alternating pieces.
String: charcoal bead, bar spacer, charcoal bead, bar spacer. Keep bar length small (3-5mm) so it doesn't flip. Use nylon thread with crimp beads for a crisp finish.
Pro tipBefore crimping, slide the bars into alignment by gently pressing them flat with your fingers.
AvoidDon't use shiny silver bars with matte charcoal. The contrast looks harsh.
25. Rainbow Beads with One Center Letter Bead
One letter bead is enough personalization. I used a rainbow arc of 8mm beads and placed a single white letter bead at the center front. The placement matters - it makes the bracelet look intentional rather than random. Low maintenance because you only add one extra special bead.
Thread beads in rainbow order around your wrist. Mark the center point by counting beads - place the letter bead when you hit halfway. Finish with elastic for speed or thread + clasp for sharp alignment.
Pro tipChoose letter beads with flat faces so they don't spin sideways on elastic.
AvoidAvoid using multiple letter beads. It turns into a name bracelet that needs more care.
26. Summer Blue with White Star Clay Beads
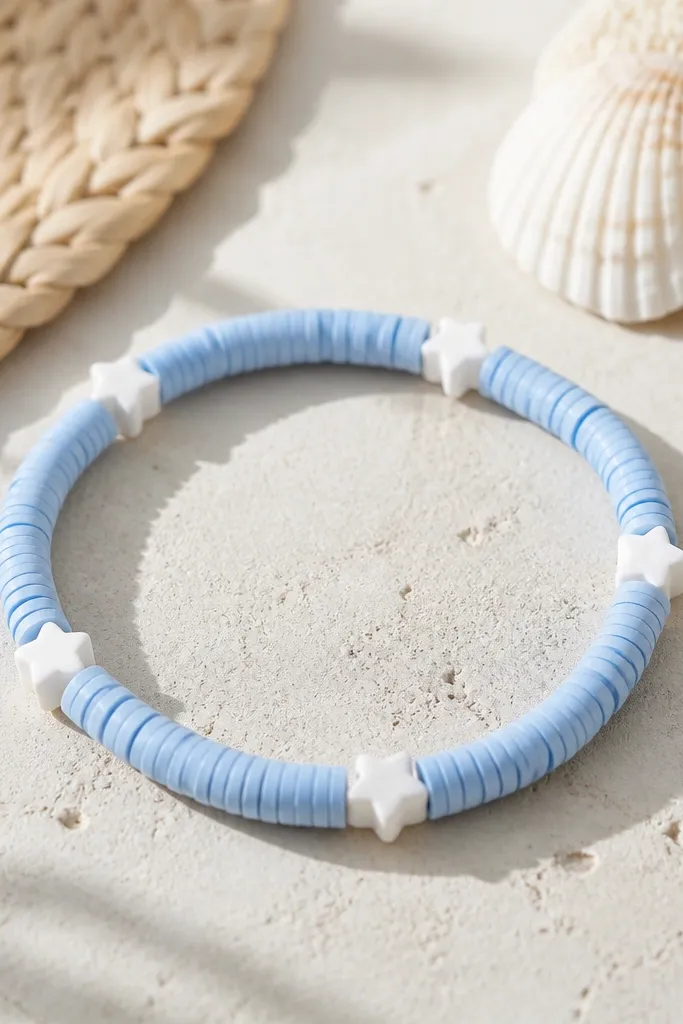
Stars make it feel nautical without needing any charms beyond the clay. I use light blue 8mm beads and add a white star clay bead every 4 beads. The star shape gives you a focal point that pops when you move your wrist. Low maintenance because it's a simple repeating pattern.
Thread light blue beads and insert one star bead at set intervals. If star beads rotate, use a slightly stiffer stringing thread so orientation stays stable. Finish with a clasp or elastic knot hidden under a bead.
Pro tipSort your star beads by hole alignment before stringing. Some stars tilt more than others.
AvoidDon't place star beads too close together. It looks like a mistake instead of a pattern.
27. Teal Beads with Micro Macrame Knot Stops
Cord + knot stops look handmade and hide tension issues. I used teal clay beads on waxed cotton cord and tied small micro knots between beads. The knots keep each bead from sliding, so the bracelet stays neat. Low maintenance because you don't need metal parts - just consistent knots.
Cut waxed cord and thread through clay beads. Tie micro knots at each gap, then trim tails after finishing. If you want a cleaner finish, melt the ends lightly with a lighter and press them flat.
Pro tipUse a ruler to measure knot spacing by marking your cord with a washable pen before you tie.
AvoidAvoid loose knots. Loose knots let beads drift into uneven clumps.
28. Matte Sand Clay with Brown Leather Wrap Ends
This gives a "bracelet + wrap" look without heavy jewelry tools. I use matte sand clay beads and attach them to short leather wrap ends. Leather ties are low maintenance because you can adjust fit quickly and you don't need clasps. It also looks intentional for summer outfits.
Use leather lace or thin leather strips and knot them to bead stringing sections. You can thread beads onto a thin wire core tied to the leather, or use crimp connectors if you prefer thread. Keep the leather ends about 1 inch long for easy tying.
Pro tipCondition the leather once with a tiny amount of leather balm so it stays flexible.
AvoidDon't use thick leather. Thick leather makes the bead row lift and look uneven.


