
1. Cinnamon Snow Cable Knit
I love this one because it looks like knitwear from arm's length away. Use a cocoa brown for the cable lines, then add warm-white "snow" specks in the negative spaces between the cables. The small teal border makes it feel wintery without going full Christmas. It also hides small brush mistakes because the knit pattern is forgiving.
Paint 3 vertical cable columns about 1.25 inches wide each on a standard 11-12 oz mug. Leave a 0.5 inch gap between columns so the "snow" can show. Use a flat brush for the broad cables, then a liner brush for the twisted center lines. Outline the area with a thin teal line 1/4 inch below the rim.
Pro tipTap snow dots with the tip of a round brush by loading very little paint, then repeat in clusters so it looks intentional.
AvoidDon't use bright red for the knit - it turns into a holiday mug instead of a cozy winter everyday mug.
2. Hot Cocoa Steam Monograms

Steam curls make a mug feel warm even if you only paint one letter. I use muted burgundy for the monogram so it looks classy, then paint steam in two tones: cocoa at the base and warm beige higher up. The fade makes the steam look like it's dissolving into winter air. It's also quick - one big letter and a few loops.
Choose one letter and center it on the mug. Paint the letter with a paint pen or liner brush, filling it in thick enough to stay opaque. For steam, paint 6-8 loops starting 1 inch above the mug bottom, then add lighter beige on the upper half of each loop. Keep the steam width narrow - about 1/4 inch - so it doesn't crowd the letter.
Pro tipPractice the loop size on paper first; steam looks best when each curl is slightly different.
AvoidDon't outline the monogram in black - it looks harsh and kills the soft winter mood.
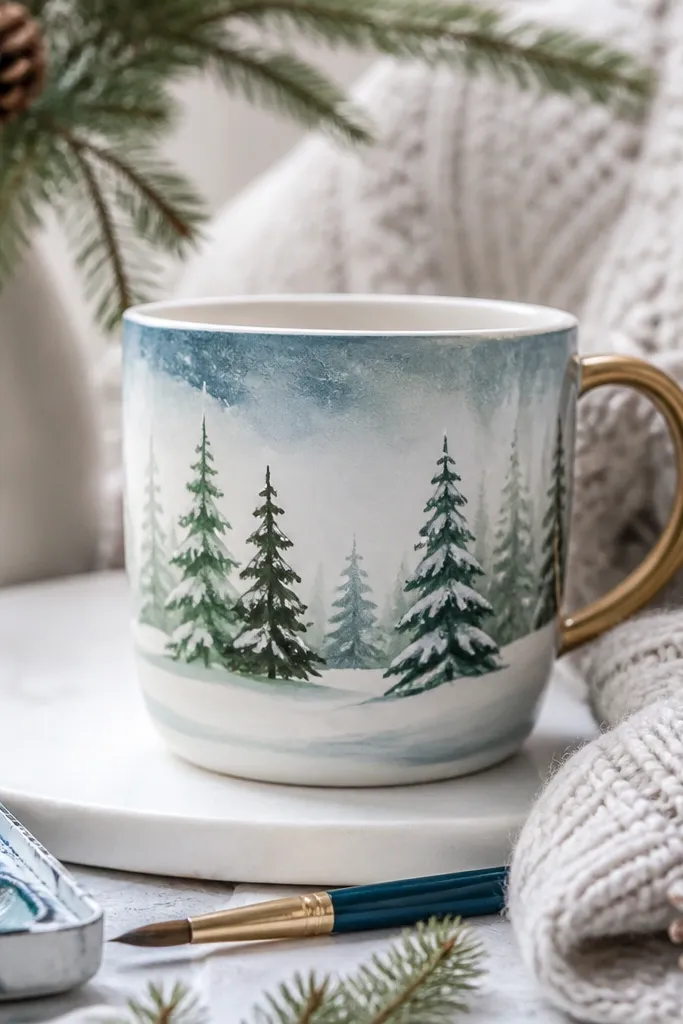
3. Winter Pine Silhouette Band
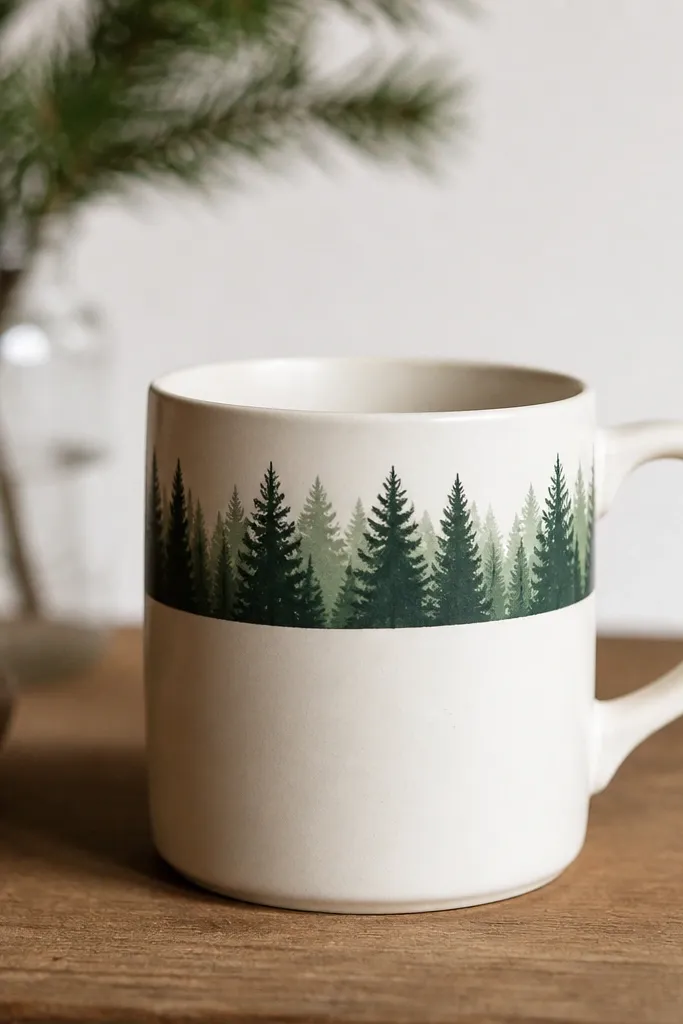
A single pine band gives winter vibes without the headache of full scenes. I paint one dark silhouette layer in evergreen green, then add a thinner back layer in slightly lighter green to create depth. The warm white background keeps everything cozy and not too "outdoorsy." This design also looks good even after years because it's simple to repaint if needed.
Mark a straight line around the mug 2 inches below the rim. Paint tree triangles that vary in height - aim for 5-7 trees across the width. Add a back layer by placing smaller, lighter triangles behind the front ones near the center. Leave the mug body unpainted or lightly coated with warm white for consistency.
Pro tipUse a sponge or stipple brush for snow caps - just tiny off-white bumps on the tips.
AvoidSkip tiny branches - they make the silhouette look muddy once sealed.
4. Snow Globe Window Frame
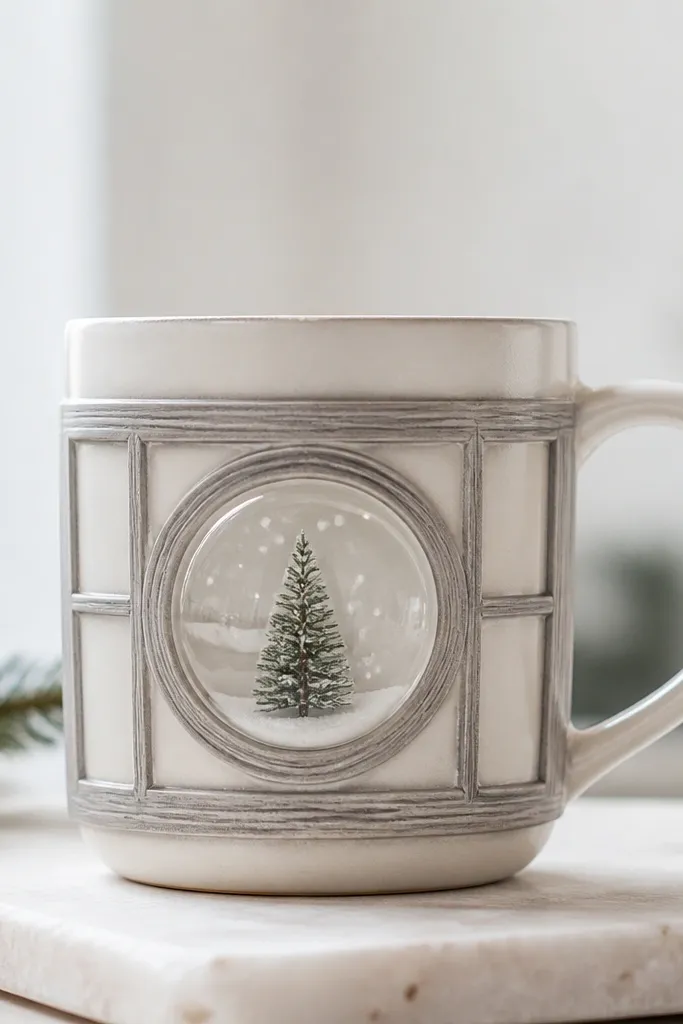
This gives you a clean, decorative look that still feels winter-cozy. The gray frame makes the art feel like a mini scene, and the central globe keeps it focused. Dots for snow are easy and read well on the curve. It also looks great for gift mugs because it feels "finished" even with minimal painting.
Paint a rectangle frame around a central circle. Keep the frame thickness around 1/8 inch. Inside the circle, paint one tiny pine tree in dark green, then add snow dots in warm white and a few pale blue dots for contrast. Add a faint gradient behind the pine by lightly blending blue-gray paint with a damp sponge.
Pro tipUse a craft knife to score a light outline in pencil first, then erase - it keeps the circle centered.
AvoidDon't overfill the globe with heavy snow - it turns into a blob once the seal coat goes on.
5. Mitten and Scarf Stripes
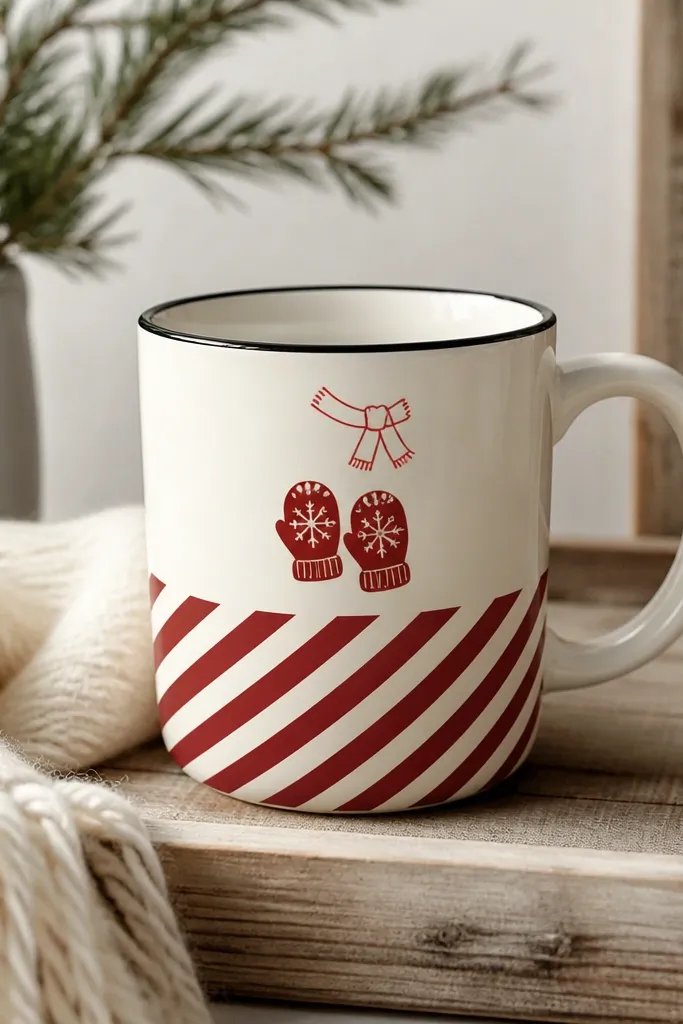
This one looks playful but still cozy. Diagonal stripes feel like scarf fabric, and the mitten icon tells you it's winter even if you paint fast. I use cream and muted red with a tiny bit of dark charcoal for the icon outlines. The contrast makes it pop without needing glitter.
Tape diagonal strips on the lower half of the mug - about 3/4 inch wide each. Paint alternating cream and muted red, then remove tape while paint is still slightly tacky to avoid jagged edges. Draw a mitten shape in charcoal centered on the striped area, then add a thin scarf line above it with two short fringe ticks.
Pro tipPress tape down firmly with your fingertip so paint doesn't bleed under the edges.
AvoidDon't use super-thin paint for stripes - it creates patchy lines that look cheap after sealing.
6. Warm White Snow Hills
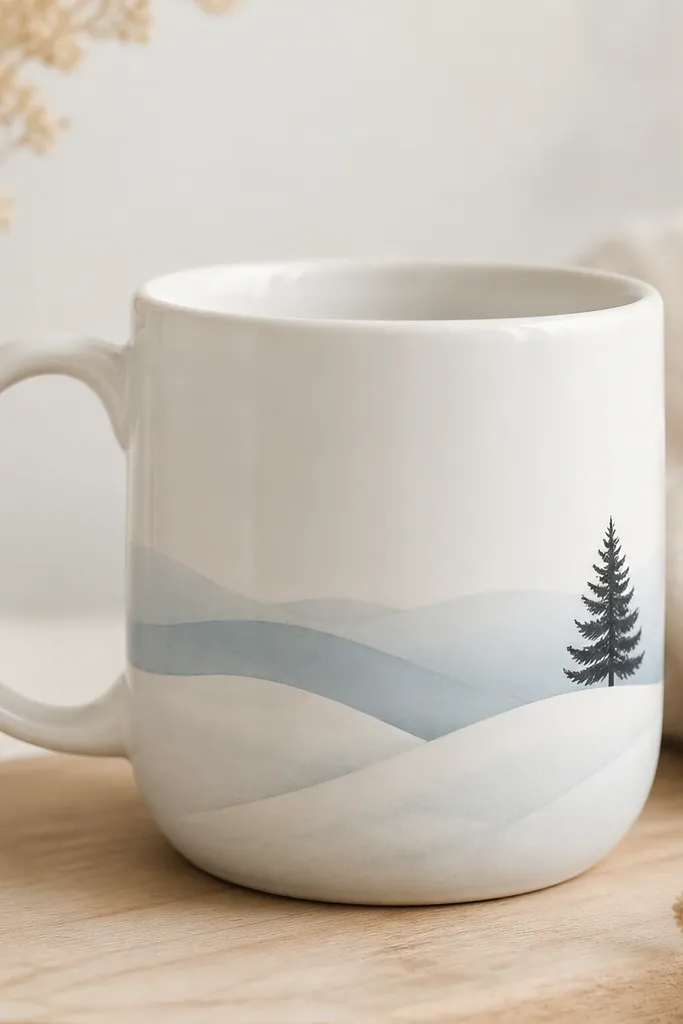
Snow hills are my go-to when I want calm, not busy. Layering warm white over pale blue creates depth without making it look like a kiddie scene. Add one small evergreen tree to anchor the composition. The result feels wintery and soothing, like early morning outside.
Paint two sweeping curved bands across the bottom third of the mug. Use pale blue for the back hill and warm white for the front hill, letting the front overlap. Then paint a single tree with a dark evergreen trunk and triangle layers. Keep the tree about 1.5 inches tall so it doesn't overpower the hills.
Pro tipDrag the brush lightly at the top edge of the snow hill so it looks soft, not like a cutout.
AvoidAvoid sharp, straight edges on the snow - they look like stickers.
7. Plaid Checkered Cozy Bottom
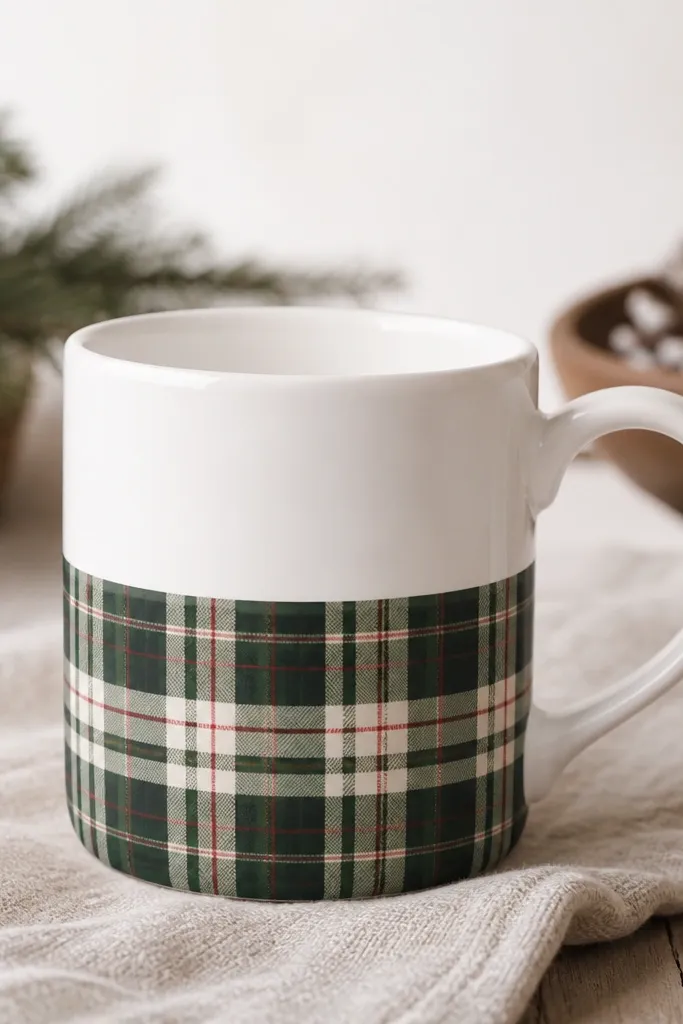
Plaid works because it's geometric, and geometry hides minor brush unevenness. I keep it to the bottom half so the mug doesn't look cluttered. The dark green and muted red scream winter flannel, and the cream lines tie it back to the mug base. It also photographs well, even in low light.
Start by painting a thin dark green grid with a ruler and tape. Then add muted red lines crossing it at consistent spacing, about 1/4 inch apart. Finish with cream lines that sit between the colored ones. Leave the upper half untouched or lightly coated with a single warm-white wash.
Pro tipUse a small ruler or a strip of plastic packaging as your straightedge for each line.
AvoidDon't freehand all the lines - crooked plaid looks sloppy fast.
8. Berry Wreath Rim Border
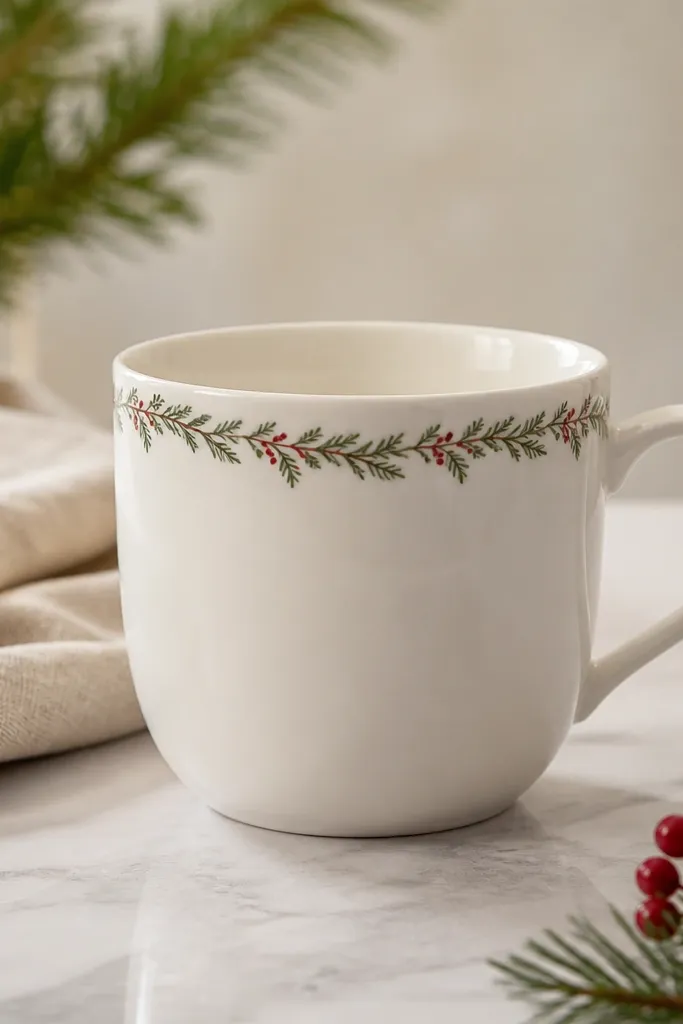
A rim border is the easiest way to make a mug feel winter-cozy without painting the whole surface. Evergreen leaf shapes and berry dots are small, repeatable marks, so it stays budget-friendly and quick. Keep the berries muted red so it feels cozy, not overly festive. The clean body keeps the design classy.
Paint a 1-inch band of leaves around the mug just below the rim. Each leaf is a simple teardrop with a short center line. Add berries as 0.1-0.15 inch circles in alternating spacing. Leave a 1/2 inch unpainted area between the border and any other art so it looks intentional.
Pro tipDo one side first, then rotate the mug and match your leaf spacing - consistency makes it look store-bought.
AvoidDon't make berries too big - oversized dots look like paint splatter.
9. Glittery Frosted Starburst (No Mess Version)

Starbursts feel like cold light on snow. I paint crisp rays in pale blue, then add a thin ring of warm white around the center for a frosted look. Use glitter sparingly - it should catch light on a few rays, not cover everything. This makes the mug look winter-special without turning into a sparkly mess.
Draw a circle center about 2 inches wide. Paint 10-12 rays radiating out with pale blue. Add warm-white dots where rays meet the circle to simulate frost crystals. For glitter, mix a tiny amount into clear medium and paint it only on 3-4 rays.
Pro tipUse a toothpick to place glitter on just the ray tips so it stays controlled.
AvoidAvoid glitter-only designs - loose glitter rubs off and leaves bare spots.
10. Cocoa Heart Pocket
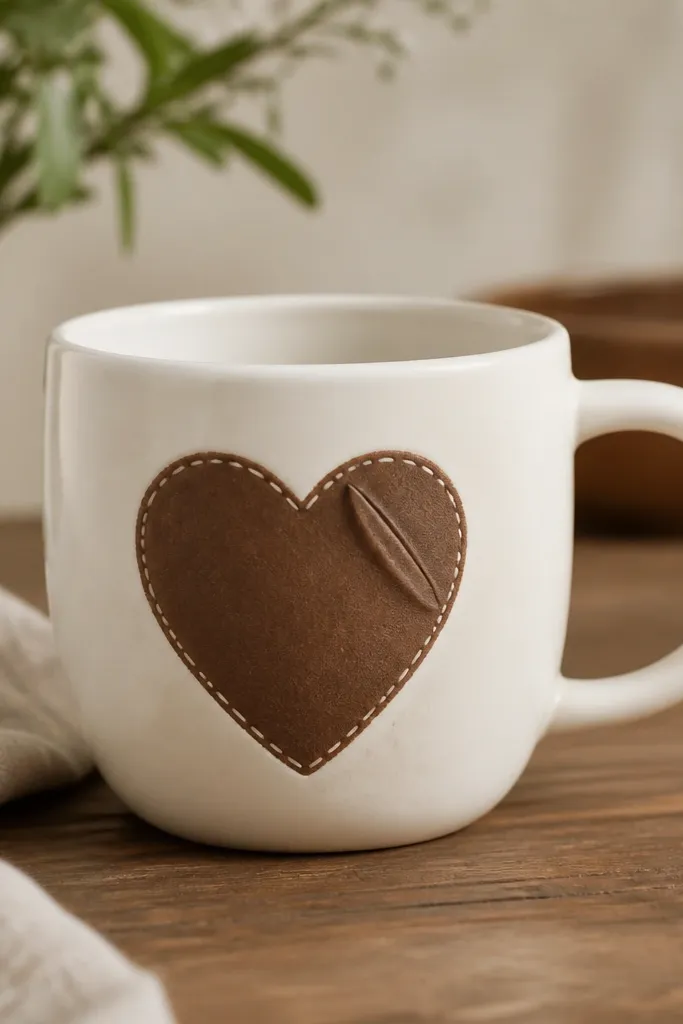
Hearts work for winter because you can make them look like fabric. I paint the heart in cocoa brown, then add a lighter cocoa highlight on the left side to mimic a stitched pocket. A simple stitched border makes it feel hand-made. It's cute, but the brown palette keeps it grown-up.
Center a heart about 3 inches wide. Add a curved "pocket fold" line from the top center down to the heart's middle, using a slightly darker shade. Then draw a dashed stitch border around the heart edge in warm beige. Keep the stitch dashes consistent length, about 1/8 inch.
Pro tipLet the heart base dry fully before adding the stitch line so it doesn't bleed.
AvoidDon't use neon browns - they read as cheap when sealed.
11. Let It Snow Thick Letters
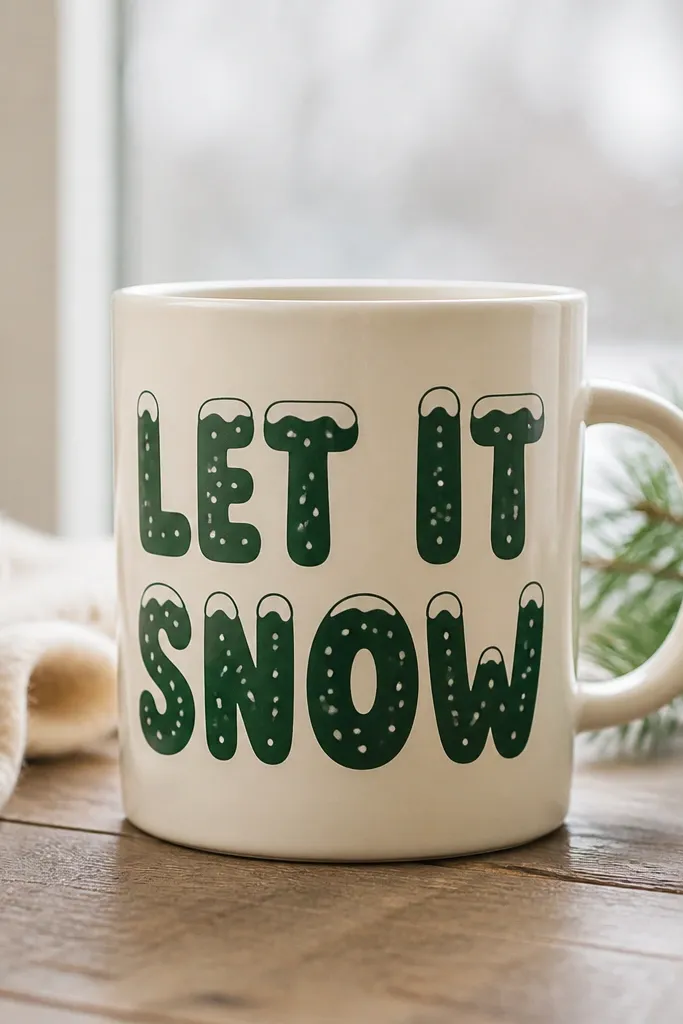
Big letters make the mug feel cozy fast. Thick strokes hide brush wobble, and the snow dots inside the letters add texture without needing detailed art. I use dark evergreen for the main letters and a lighter green-beige for highlights along the top edge. It looks like winter typography on a favorite sweater.
Paint the phrase in all caps with a stencil or freehand block style. Make letters about 1 inch tall each, leaving even spacing. Fill the interior with dark green, then add warm-white dots inside after the base dries. Add a thin lighter highlight line along the top of each letter to give a dimensional feel.
Pro tipIf your letters look too flat, add one shadow stroke under each letter with diluted paint.
AvoidSkip thin script lettering - it chips and looks messy on a curved mug.
12. Pinecone Texture Dots
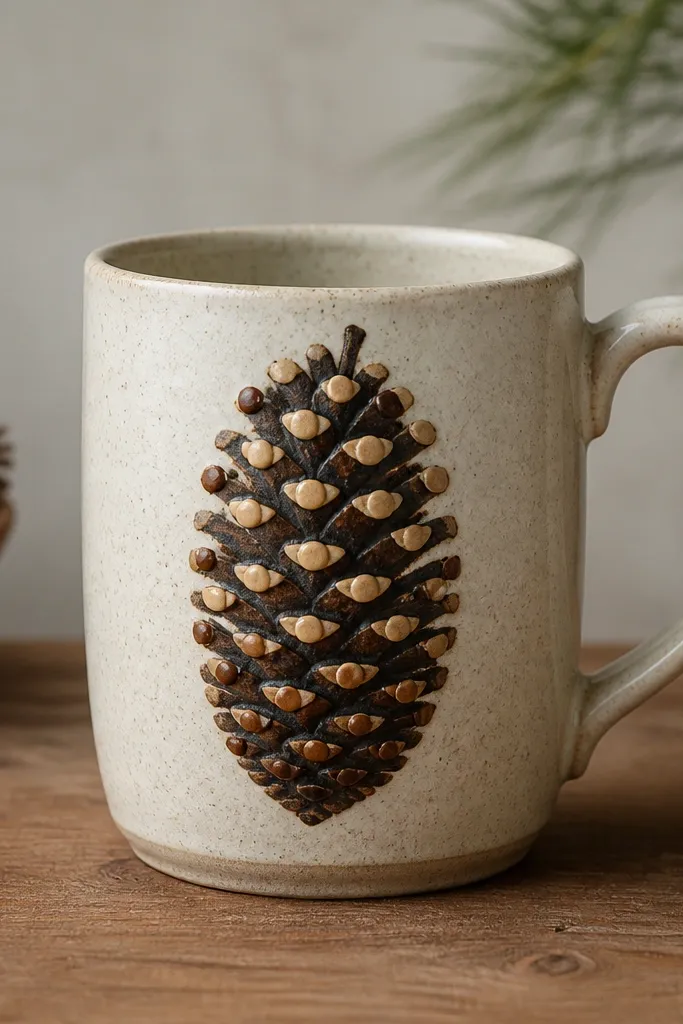
Texture reads as "real" even when you're painting. A pinecone made from dot rows looks like it has bumps, and it feels very winter without full illustration skills. I keep the palette to two browns and one tan highlight so it stays warm. This one also hides uneven paint coverage because the dots create the pattern.
Draw a simple pinecone outline about 2.5 inches tall. Paint the base in dark brown. Then create rows of dots using a round brush: tan dots in the center of each segment row and darker brown dots at the edges. Add a tiny green stem at the top in evergreen.
Pro tipUse the side of a small sponge for the background around the pinecone so it looks like it sits in a soft shadow.
AvoidDon't overwork the dots - too many layers smear and lose the pinecone pattern.
13. Snowman Side Profile with Scarf Loop
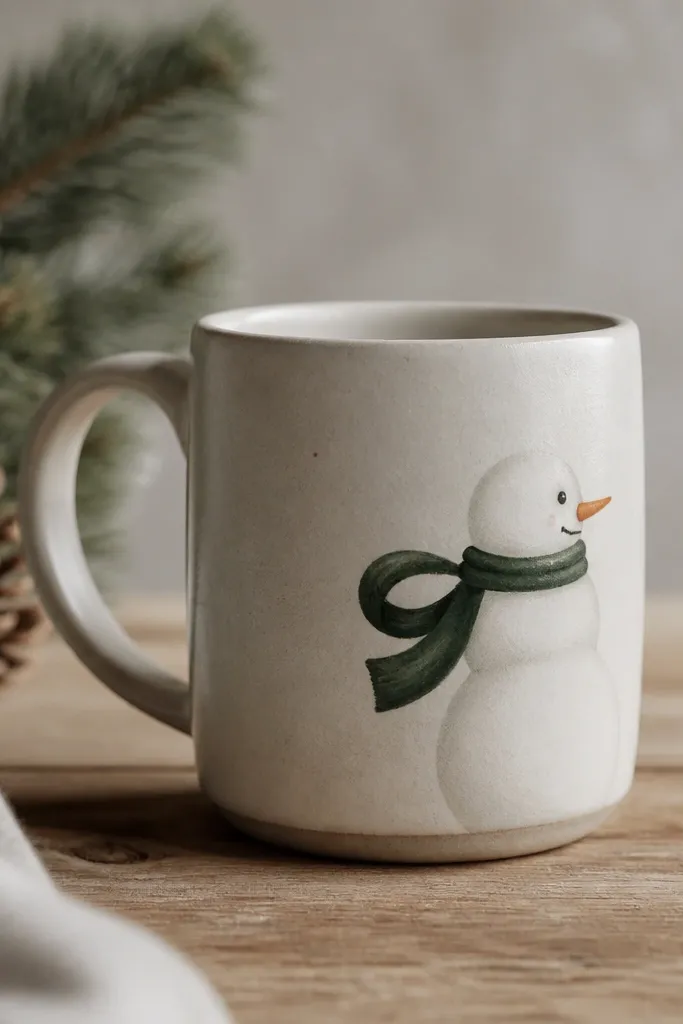
Side profile looks cute on a mug because the curve naturally frames the character. Keep it small so it doesn't look like a cartoon glued on. The scarf loop gives motion and makes it feel cozy, especially in dark green with a warm red stripe. Add a tiny carrot nose and two dot eyes.
Place the snowman so its base sits around the mug's midline, about 1.5 inches above the bottom. Paint three circles for the body and head, but overlap them slightly so it wraps the curve. Draw scarf as a curved band crossing the neck, then add a thin red line down the scarf center. Finish with a small black twig arm pointing outward.
Pro tipUse a damp paper towel to soften the scarf edge slightly so it looks like fabric.
AvoidAvoid chunky white blobs for the body - use clean circle edges so it doesn't look like paint splatter.
14. Maple Leaf Fade Ombre
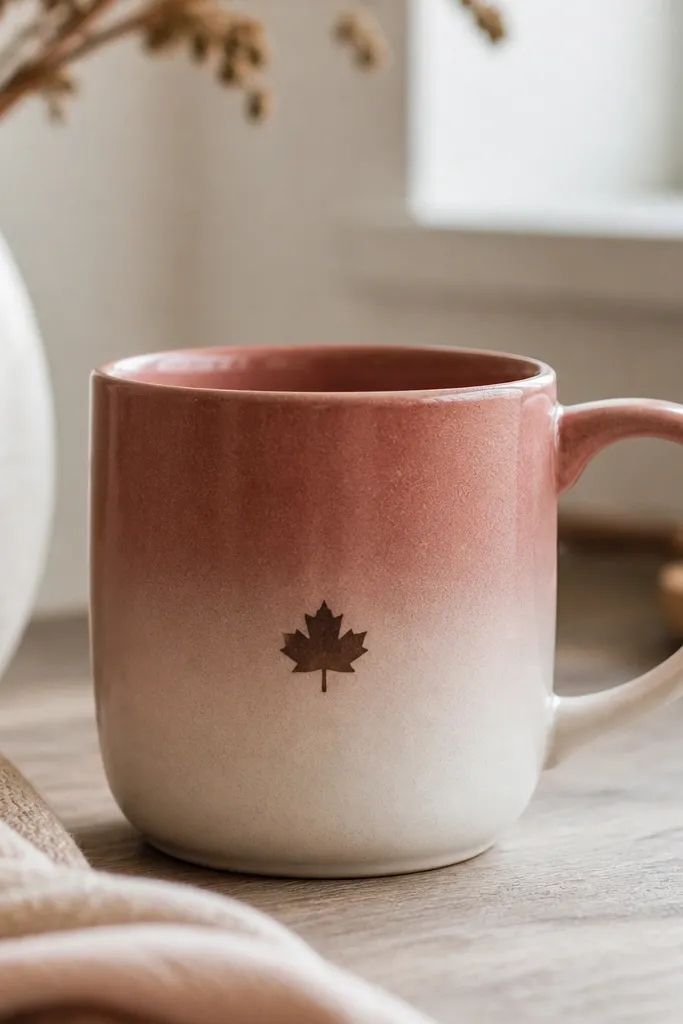
Even in winter, maple colors feel cozy when you fade them instead of using solid blocks. The ombre from muted red to warm white makes the mug look like a warm drink stain on snow. The single leaf silhouette keeps it from looking like abstract paint. I like dark brown for the leaf so it looks like woodcut art.
Paint a soft gradient across the bottom third: start with muted red at the very bottom, blend upward into warm white using a damp sponge. Keep the transition smooth, about 1 inch tall. Then paint a maple leaf silhouette on top of the gradient, centered, about 2 inches wide. Add one or two simple vein lines with a lighter brown.
Pro tipWork in small sections and stop while it still looks slightly streaky - the next layer smooths it.
AvoidDon't paint ombre with a stiff brush only - it leaves visible lines.
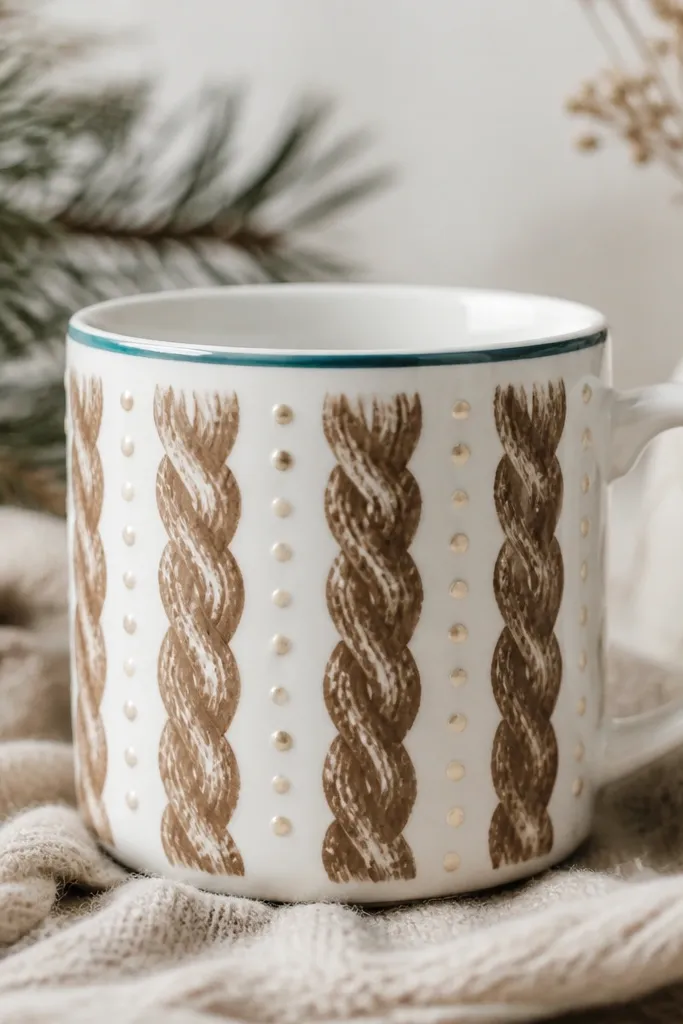
15. Thermal Mug Sleeve Pattern (Painted)
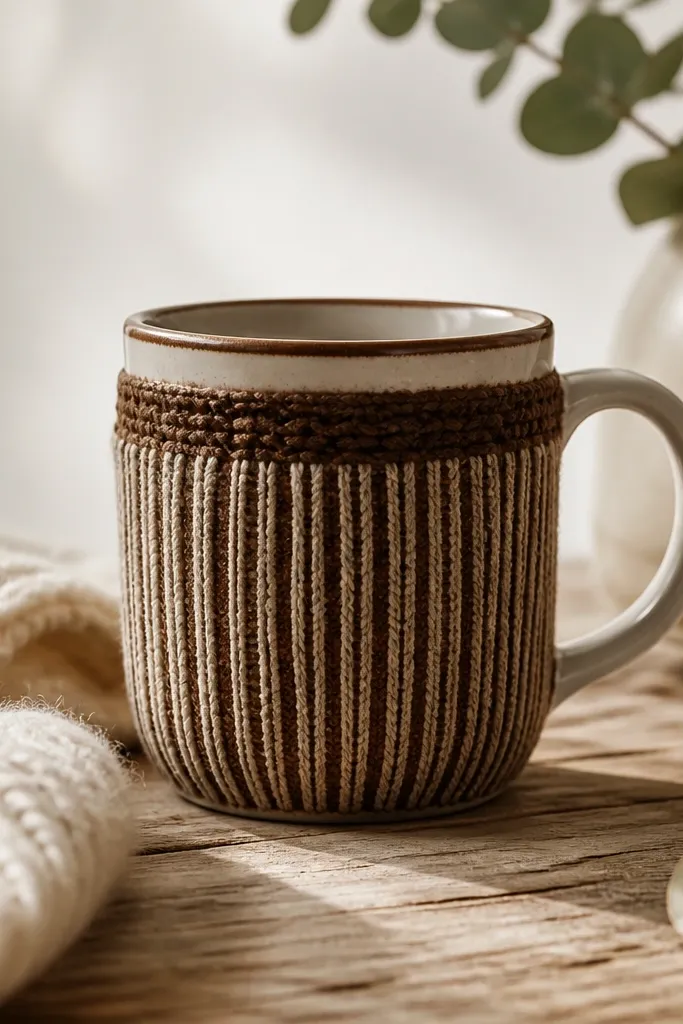
This is my "fake store-bought" trick. You paint the ribbed texture with alternating thin lines, then add a cuff band so it looks like the mug has a cozy sleeve. The cocoa and cream combo looks warm and not seasonal-fussy. It also makes your mug look thicker and more substantial.
Paint a 2-inch tall cuff band around the mug near the top in cocoa brown. Then paint vertical ribbing lines from the cuff down, alternating cream and cocoa. Each rib should be about 1/8 inch wide, with consistent spacing. For depth, add a slightly darker wash on one side of each rib by brushing diluted brown lightly.
Pro tipUse masking tape as a guide for the first few ribs, then freehand the rest once you have the spacing.
AvoidDon't make ribs too wide - it looks like stripes, not knit.
16. Snowy Windowpane Frames

Windowpane grids look cozy because they mimic the way winter light hits glass. Each square becomes a mini snow area, so you don't need a full landscape. I use pale gray lines for the frame and warm-white dots for snow. A tiny house shape in dark green or brown anchors the center.
Paint a vertical and horizontal grid across the mug, aiming for 6-9 squares depending on mug height. Use pale gray for the lines, then fill each square with a few snow dots. In the center square, paint a simple house rectangle with a triangle roof. Keep the roof color muted green or chocolate brown.
Pro tipLet the grid lines dry, then add snow dots so they don't smear into the lines.
AvoidAvoid overcrowding every square - leave some empty squares so it looks airy.
17. Birch Bark Winter Wrap
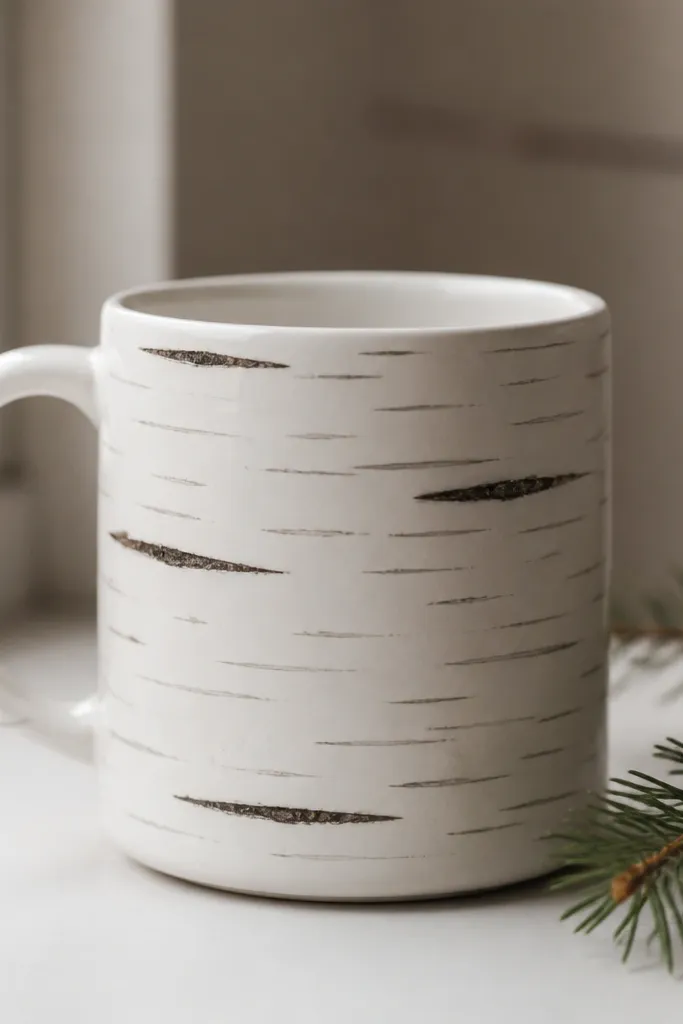
Birch bark looks wintery without screaming Christmas. The trick is thin streaks, not thick swaths. You get a natural texture feel by layering gray lines over warm white, then adding a few darker marks for contrast. A tiny evergreen branch makes it feel like cold air and pine trees.
Paint the whole mug warm white first if you're starting from plain ceramic. Then use a liner brush to paint thin gray streaks that vary in length. Add a few darker brown streaks thicker than the gray ones, spaced apart. Finish by painting a simple evergreen branch on one side - 4-6 short strokes with small dot tips.
Pro tipWiggle your wrist for streak edges so they look organic, not printed.
AvoidDon't make all streaks the same length - that's when it looks fake.
18. Berry and Pine Watercolor Wash
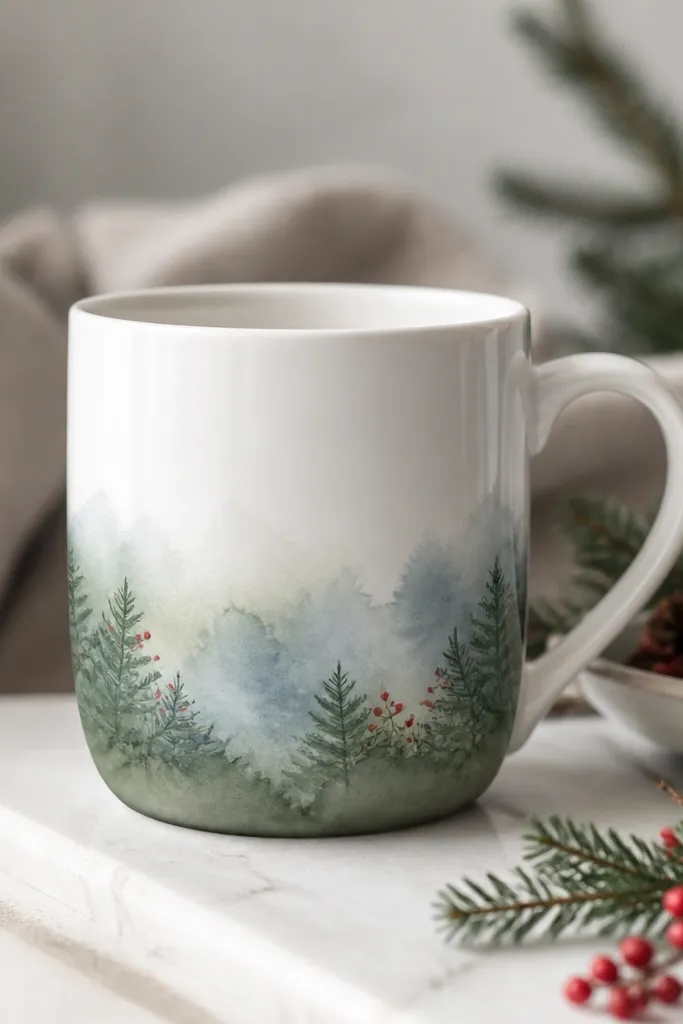
If you like the "painted by hand" look, watercolor-style washes are perfect. You get cozy winter color without tight lines, and feathered edges feel softer on the ceramic curve. I do muted evergreen and pale blue for the background, then add red berry dots and tiny pine tips on top. It looks artsy but still readable.
Thin evergreen green paint with water until it looks like light ink, then paint a horizontal wash across the lower half. While it's still wet, dab pale blue into it lightly with a sponge for variation. After drying, add red berry dots and small pine tip triangles. Keep the berry dots clustered near one side so it looks like a sprig.
Pro tipUse a hair dryer on low for quick layer building, then don't rush the seal coat.
AvoidDon't use too much water - it can bead and leave patchy spots after sealing.
19. Snowflake Lace Border
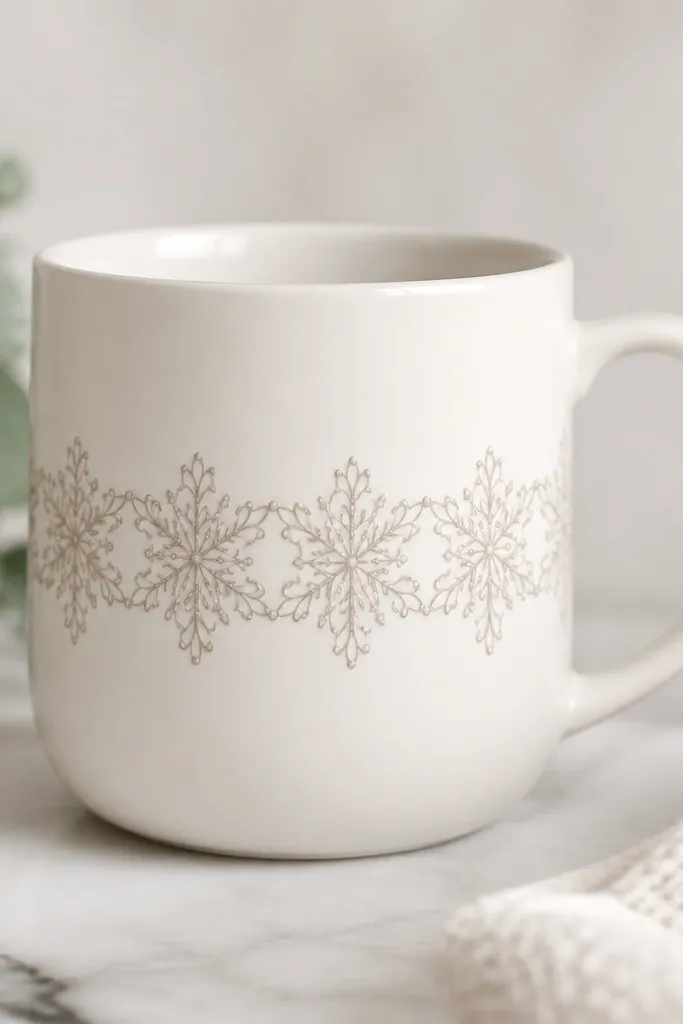
Lace borders look fancy, and you can do them with simple repeated shapes. I draw a snowflake motif once, then repeat it around the mug with consistent spacing. The thin connecting loops make it look like knitted lace. This design makes even a plain mug feel like it belongs in winter decor photos.
Draw a light pencil guide line around the mug at the center. Paint a repeating snowflake in each segment, using small dots for the tips and short lines for arms. Connect them with thin loops so the border feels continuous. Keep the lace border height around 1 inch so it stays delicate.
Pro tipDo one full loop of motifs first, then come back to clean up any uneven spacing with a fine liner.
AvoidDon't make the snowflakes too big - large lace motifs look like cartoons on a mug.
20. Campfire Ember Glow
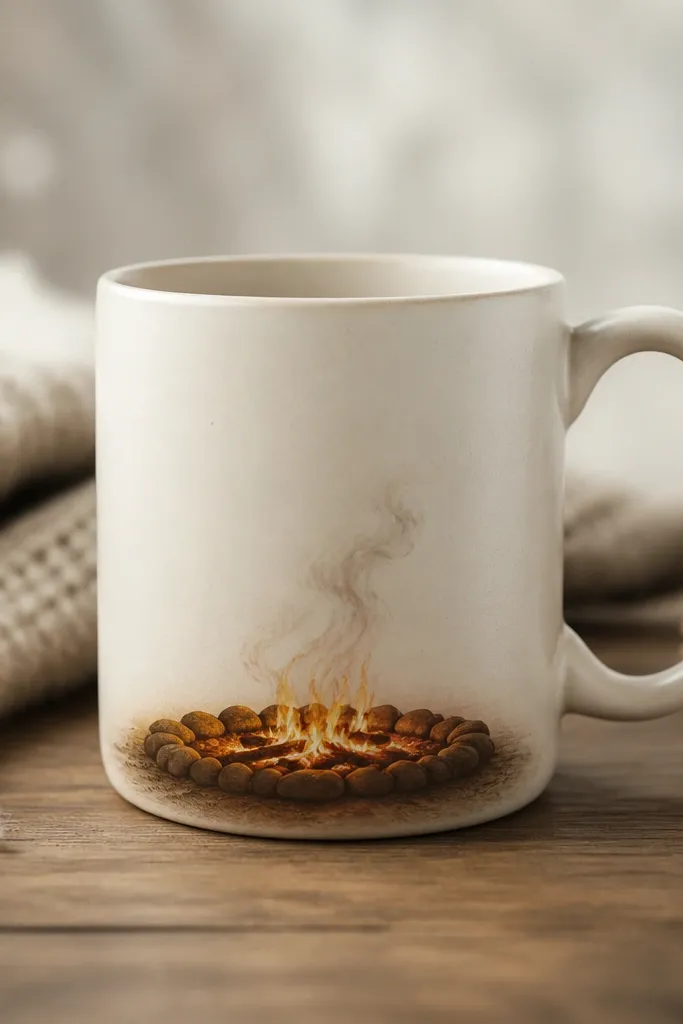
This one gives cozy warmth without a single snowflake. The ember glow feels like you're holding a mug by the fire. I paint a dark brown "pit," then layer orange and yellow circles around it so the center stays darker. Add a few smoke swirls in light gray so it reads as winter camp vibes.
Paint a circle fire pit about 2 inches wide near the bottom center. Fill with dark brown, then dab orange around the edges and yellow near the center using a sponge or stipple brush. Add 4 smoke swirls that rise 1-1.5 inches up the mug. Keep smoke lines thin so they don't look like scribbles.
Pro tipWipe your brush on a paper towel before loading yellow so the glow stays soft.
AvoidAvoid painting fire like a flat orange blob - layered dabbing makes it look real.


