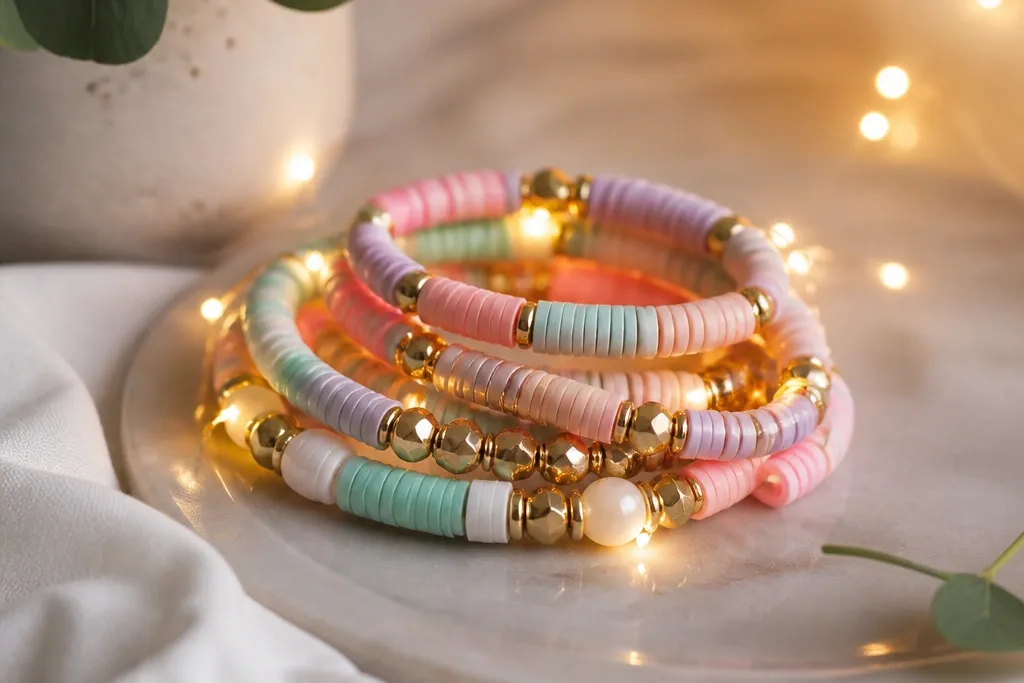
1. Warm Sunburst Clay Beads with Micro-LED Halo
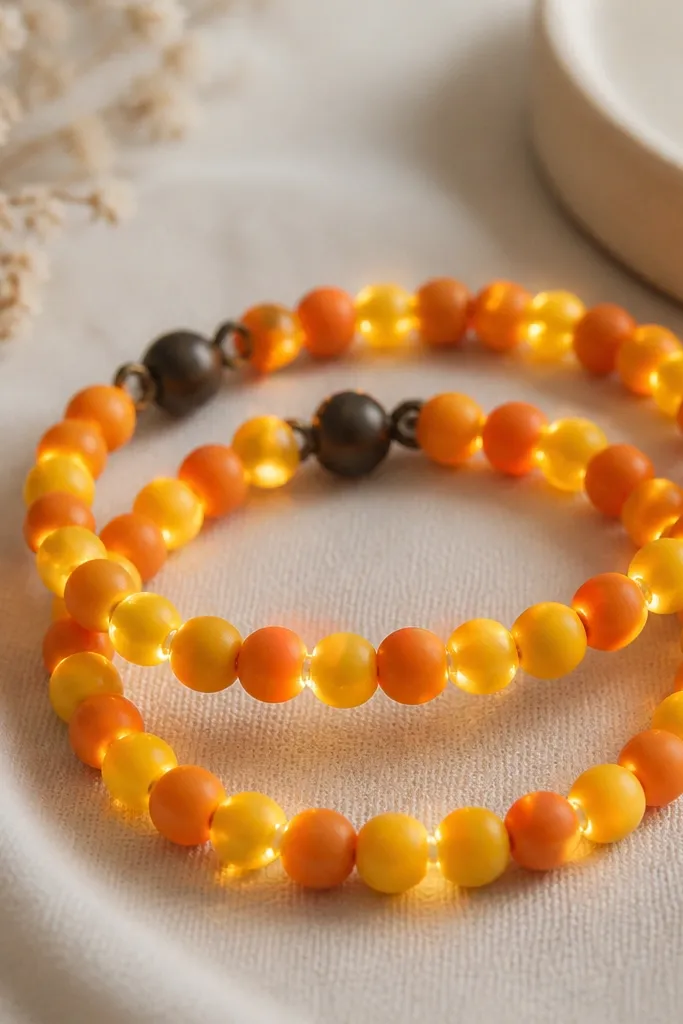
This design uses a gradient of orange to yellow clay beads so the glow looks like sunlight trapped in the bracelet. The warm white LEDs sit in the middle row, not the edges, which keeps the light from getting distorted by clay texture. Because the beads are all small, the bracelet reads delicate and matches well for BFFs. It looks best on wrists with a thin chain bracelet already, because the glow becomes the focal point.
Use 6mm beads in three bands: orange (40%), amber (40%), and a few bright yellow (20%). Thread a nylon beading line through beads, then position the LED strand in the center gaps between bead groups. Finish with a bead cap near the toggle or lobster clasp so the wire doesn't show when the bracelet flexes.
Pro tipBefore sealing, turn the LED on and bend the bracelet slightly - if any bulb shifts, add one extra anchor bead cap at the clasp side.
AvoidDon't run the LED wire tight across the bead faces - it makes the bracelet kink and the lights look uneven.
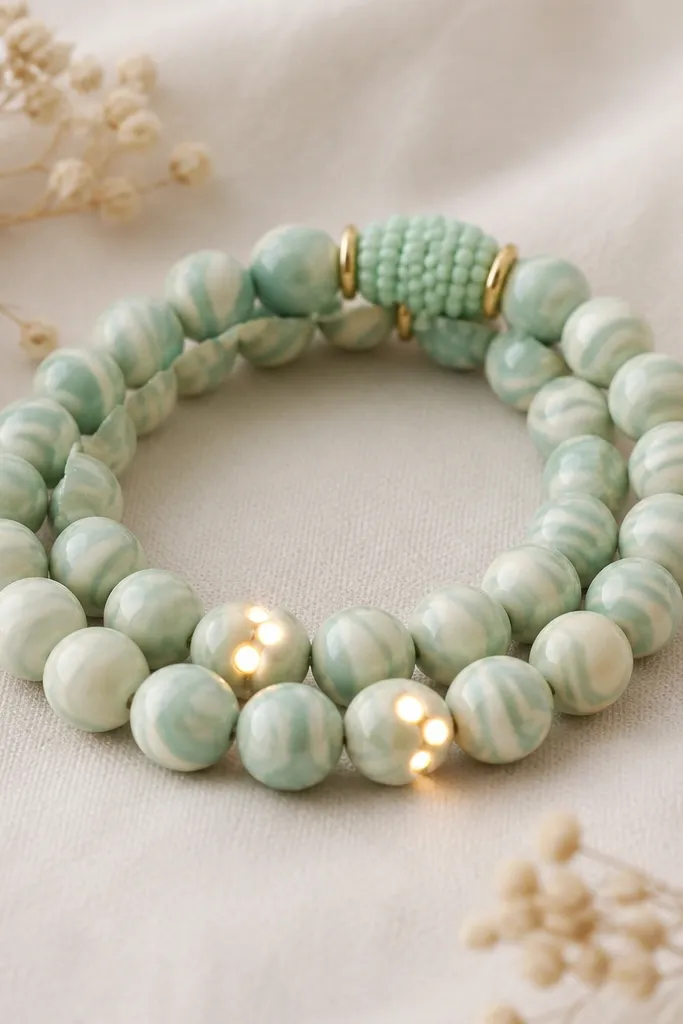
2. Sea Glass Pastels with Lighted Wave Centerline
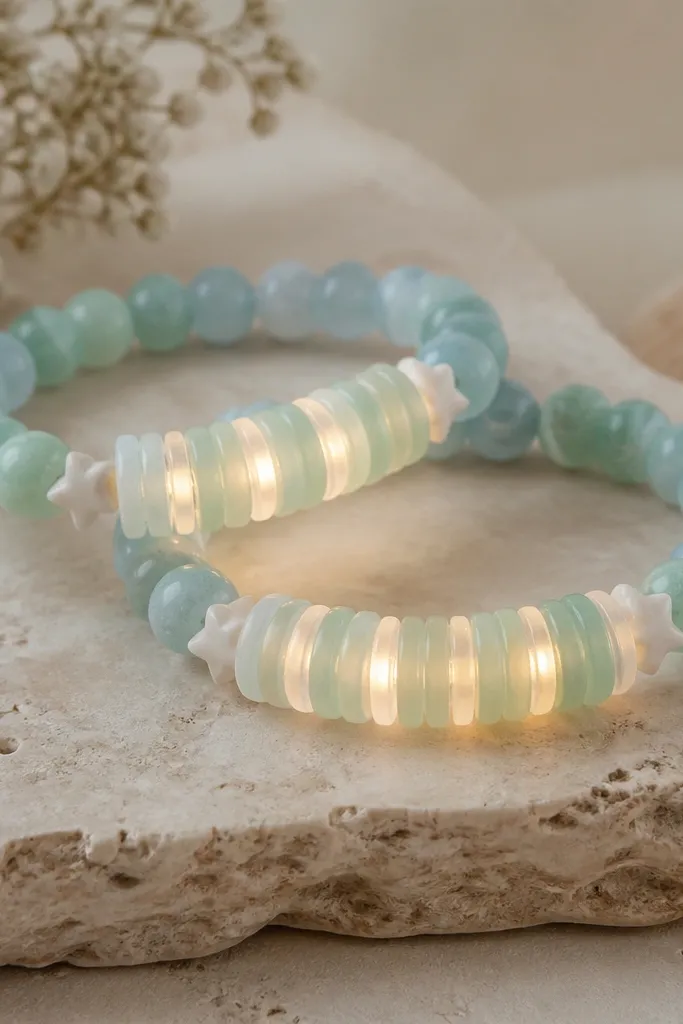
Sea glass colors glow softly because the clay is slightly translucent at the edges. The LED line follows a "wave" curve, so the glow moves visually as your wrist turns. Star spacers keep the bracelet from looking flat and give the light a place to pause between bulbs. This set looks cute with summer dresses and also works for indoor parties because the colors stay calm.
Make 8mm seafoam and pale blue beads, plus 6mm mint beads mixed in. Add white star spacers every 5-6 beads, then route the LED strand through the center so it lands behind the larger beads. Seal with a matte protective coat so the clay doesn't go glossy and reflect glare.
Pro tipIf you're using slightly opaque clay, add one or two "frosted" beads per cluster so the glow has depth.
AvoidSkip glossy varnish on sea-glass beads - it can create harsh reflections that hide the LED glow.
3. Black Licorice Beads with Red LED Spark Dots
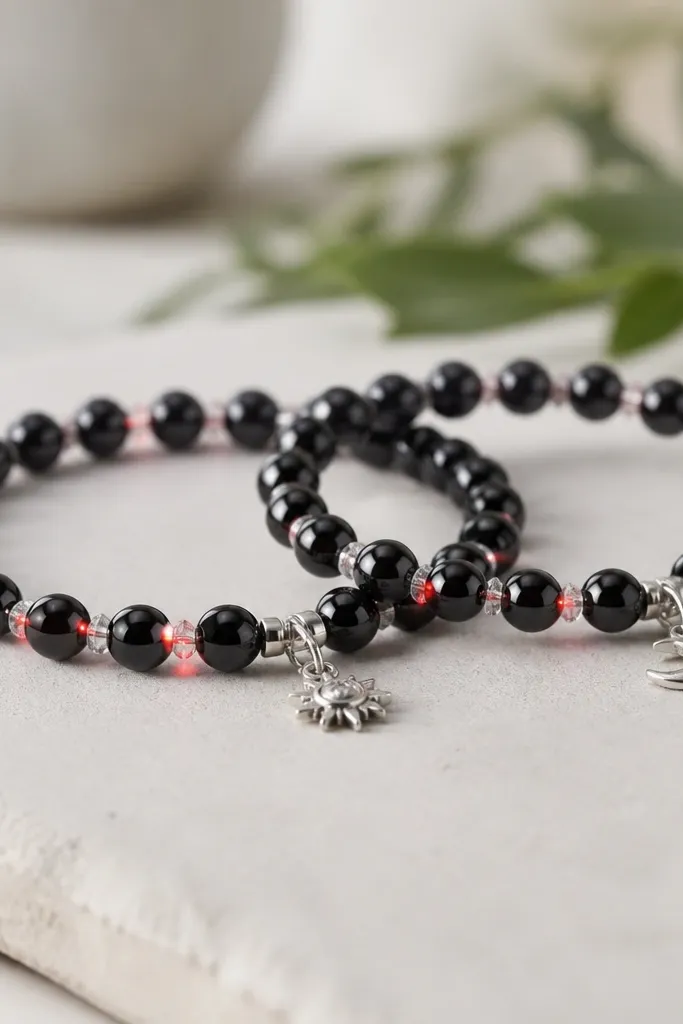
This one is dramatic and looks great at night because the red LEDs contrast sharply against black clay. I like using 8mm beads because they hold the LED glow without looking cluttered. Tiny clear spacers make the red light scatter a little, like sparkly candy. It's the bracelet I grab when the outfit is simple and I want a bold accessory.
Use glossy black clay for the main beads and add 4mm clear spacers every third bead. Route a red micro-LED strand through the center, placing LEDs between black beads so the wire doesn't press into bead faces. Glue only the bead cap near the clasp, then test the blinking mode before you fully seal.
Pro tipTurn the LED to a steady mode if you want a cleaner look in photos.
AvoidDon't mix too many accent colors - black plus red already does the work.
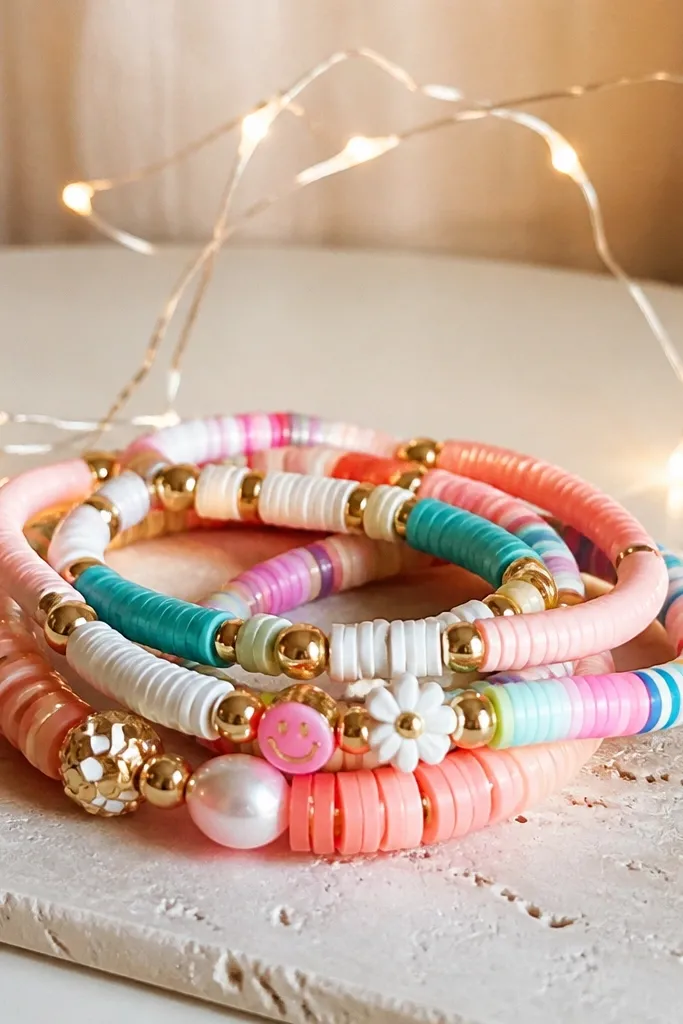
4. Pink Confetti Clay with Tiny LED Sprinkle Trail
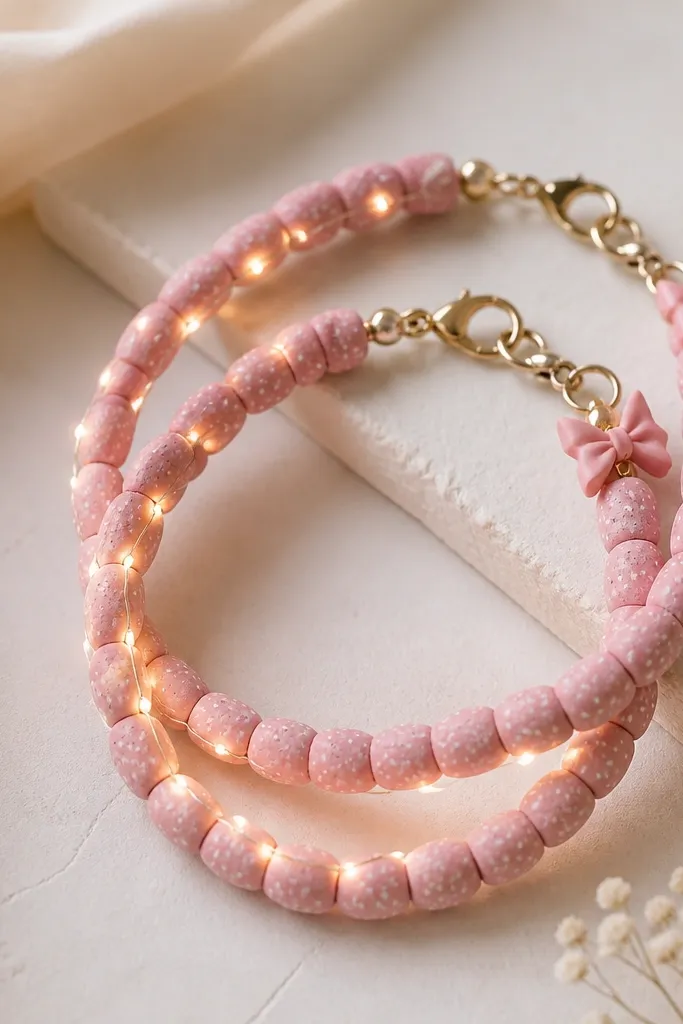
Confetti specks make the light feel like it's sparkling from inside the beads. Running the LED along one side gives a playful diagonal glow, which looks more dynamic than a straight line. The pink bow charm adds a cute BFF vibe without overloading the bracelet. This set looks especially good with denim jackets and casual tops.
Use 7mm pink confetti beads and 5mm smooth pink spacers. Place the LED strand so it sits behind the beads on the outside edge of the wrist, then keep the wire route consistent from one bracelet to the other. Attach the bow charm using a small jump ring to a bead cap at the clasp.
Pro tipIf the LED wire is thicker than your bead hole, switch to a slimmer strand or drill a slightly larger bead hole before assembly.
AvoidDon't center the LEDs - the diagonal trail is what makes it look intentional.
5. Rose Gold Clay Beads with Copper Wire Light Spine
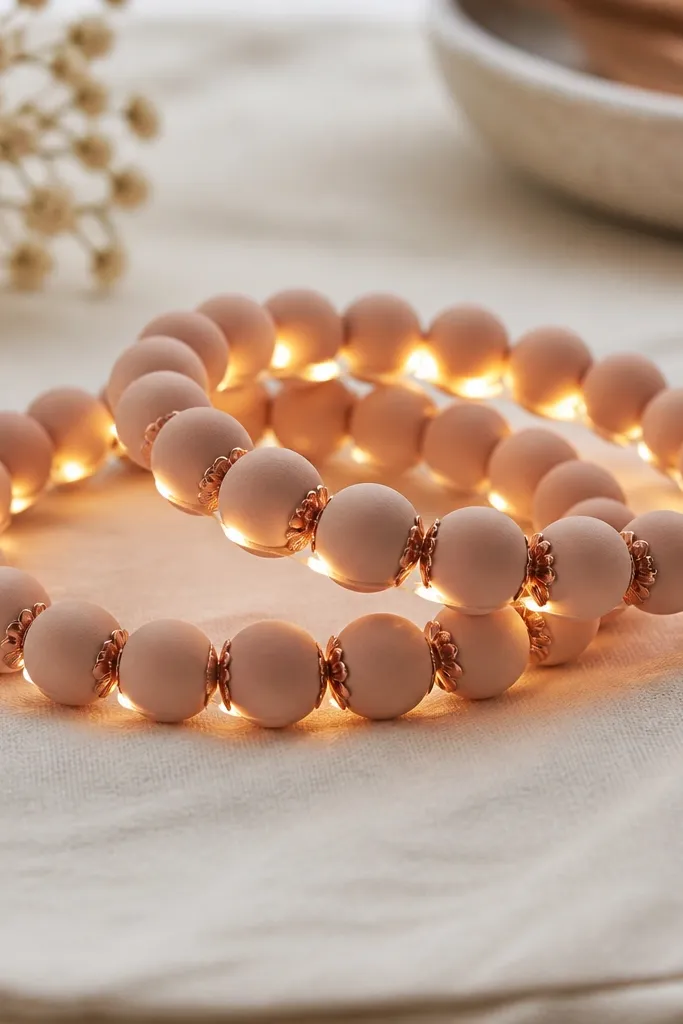
Rose gold clay has a soft metallic look, so warm LEDs make it look like jewelry lighting. The copper wire spine gives structure, so the bracelet stays straight and doesn't twist into a messy loop. LEDs sit between beads, protected by bead spacing. It's the cleanest-looking option if you want something that still feels "grown-up."
Use 10mm rose-gold clay beads with drilled holes large enough for the LED wire. Thread the copper wire spine through the bead holes, then place the micro-LED strand alongside and secure with tiny glue dots under bead caps. Keep the clasp side with a bead cap and a short wire tail hidden under it.
Pro tipUse a small pair of needle-nose pliers to keep the copper spine straight before you glue bead caps.
AvoidDon't let the wire cross itself inside beads - it creates bulk you'll feel on your wrist.
6. Lavender Bloom Beads with Purple LED Petal Glow

The flower texture on lavender beads breaks up the light and creates a petal-like shimmer. Purple LEDs keep the color family tight and make the bracelet look like a matching set, not two separate crafts. I like the battery pack placement behind the clasp because it doesn't tug at the bead line. This one is a hit for spring birthdays and bridal showers.
Make lavender beads with a light flower stamp and drill holes slightly off-center so the LED sits flatter. Use 8mm beads and 6mm plain spacers so the LED has visible gaps. Hide the battery pack behind the clasp band using a small ribbon-like clay strip glued to the clasp base.
Pro tipTest the bracelet while it's still unsealed so you can adjust where the wire sits before you lock everything in.
AvoidAvoid thick clay stamps that leave sharp edges - they can cut the LED wire insulation.
7. Teal Marble Clay with White LED Lightning Line
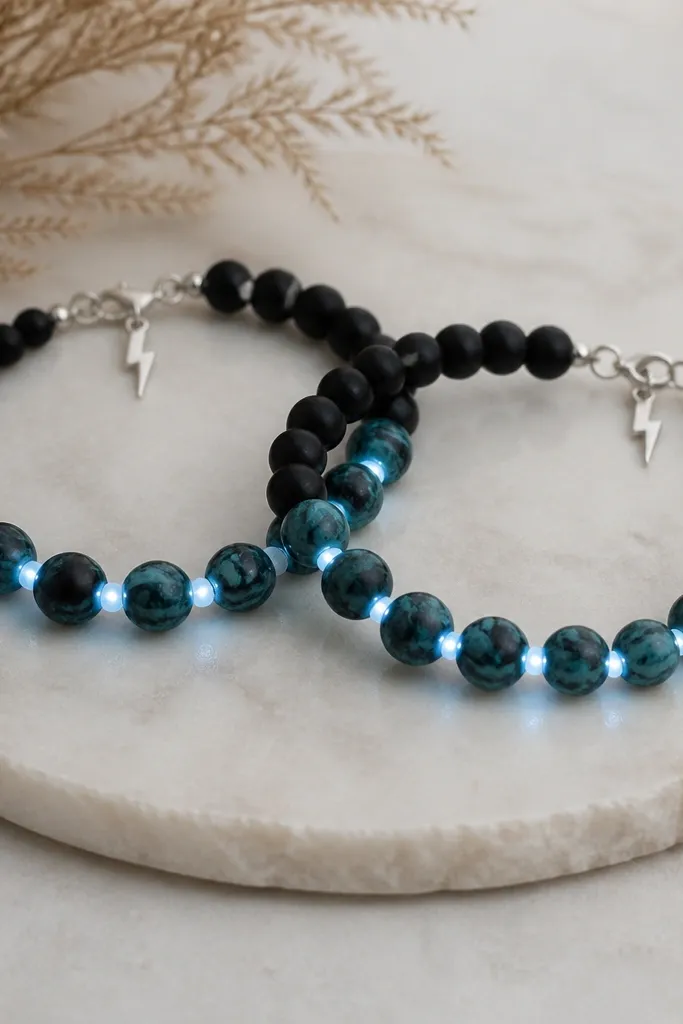
Marble clay has natural swirls, and white LEDs make those swirls pop like lightning under glass. The zigzag line adds energy without needing extra charms. Teal marble reads cool and modern, especially against neutral outfits. This is the set I'd wear to a concert or a night market.
Use 9mm teal marble beads and 5mm black spacer beads. Route the LED strand in a zigzag pattern by placing LEDs at every other bead gap. Add a lightning charm on a bead cap at the clasp side so the charm doesn't fight the zigzag.
Pro tipUse matte black or dark gray spacers - they hide wire best under white LED glare.
AvoidDon't use clear spacers everywhere - they can create too much glare and wash out the marble.
8. Mint and Cream Swirl Beads with LED Dot Clusters
Instead of lighting the whole bracelet, this design lights three "clusters" so the glow looks deliberate and less busy. Swirl beads already have movement, and the dot clusters guide the eye. It's also easier to assemble because you anchor the LED in fewer spots. Great for people who think full-light bracelets look too busy.
Make 8mm swirl beads, then plan three LED clusters of 3-4 bulbs each. Keep the rest of the bracelet LED-free by threading regular bead gaps. Anchor each cluster with a bead cap at the start and end so the wire stays put when you wear it.
Pro tipMark the bracelet length on a spare string first, then measure where your wrist sits before you place the LED clusters.
AvoidAvoid long LED gaps without anchors - the wire shifts and the clusters drift.
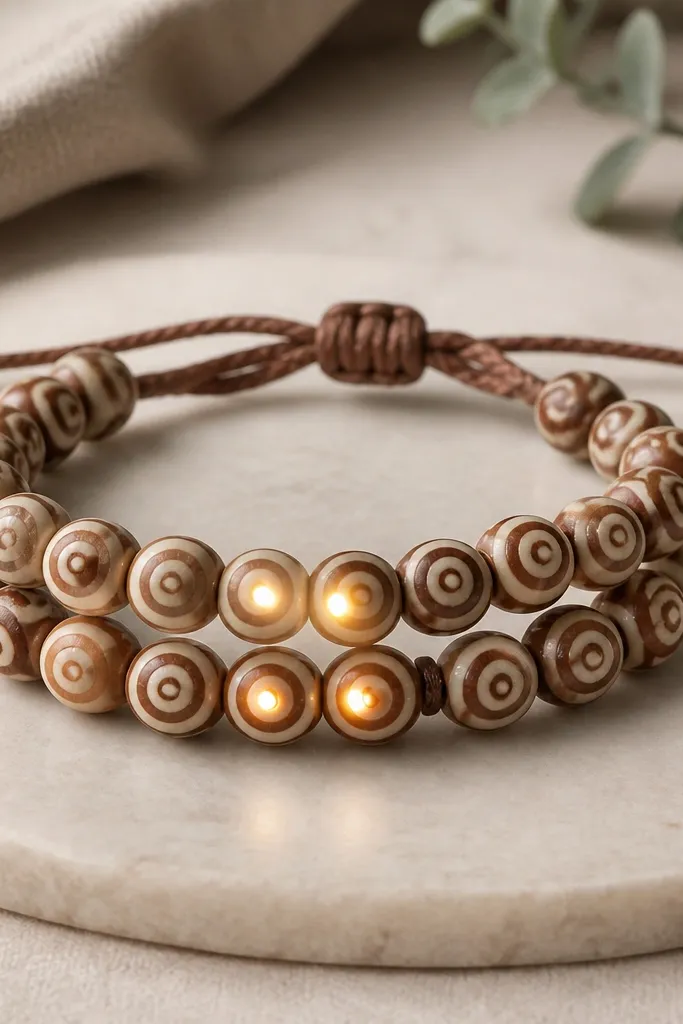
9. Chocolate Brown Clay with Warm Amber Light Ribbon
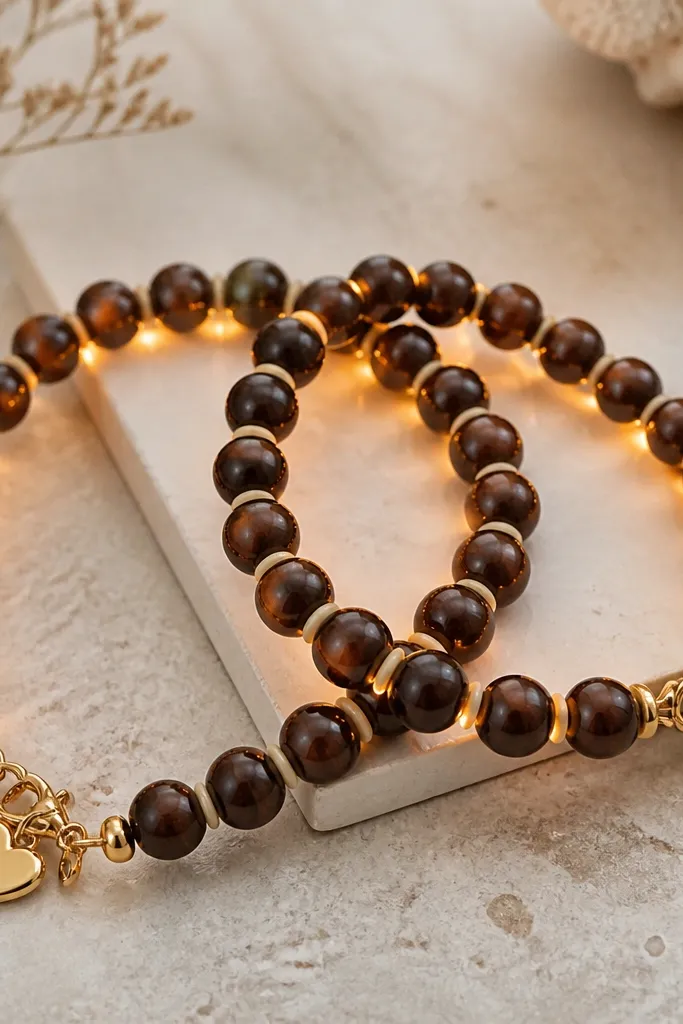
Brown clay plus amber light looks like a candle effect. Routing the ribbon along the inner curve means the glow looks soft when your wrist bends. Cream spacers keep it from looking heavy. This set works for fall outfits and also for cozy indoor events.
Use 10mm chocolate beads and 6mm cream spacers every 2-3 beads. Route amber LEDs along the inner side path, then glue bead caps near the clasp to hide wire turns. Add a small gold heart charm to the clasp bead cap so it doesn't swing into the light line.
Pro tipIf your LEDs look too bright, choose a diffuser setting or cover bulbs with a thin layer of translucent amber clay before assembly.
AvoidDon't use cool white LEDs with brown clay - it looks harsh against the warm tones.
10. Cobalt Blue Beads with Silver LED Starline

Cobalt blue makes silver-white LEDs look crisp, like tiny stars. Glitter particles inside the clay scatter the light and add sparkle without extra charms. Straight center placement keeps the design classy and easy to match. This one looks great with white tops and silver rings.
Use 7mm cobalt beads and add 5mm star beads every 6-7 beads. Place LEDs in the center gaps so the bulbs face outward when worn. Keep the battery pack behind the clasp, and cover the wire with a silver bead cap or small silver spacer.
Pro tipUse a light hand when sanding bead holes - rough edges catch wire insulation.
AvoidSkip chunky glitter clays - they can create uneven surfaces that distort LED light.
11. Coral Peach Clay with Pink LED Heart Corners
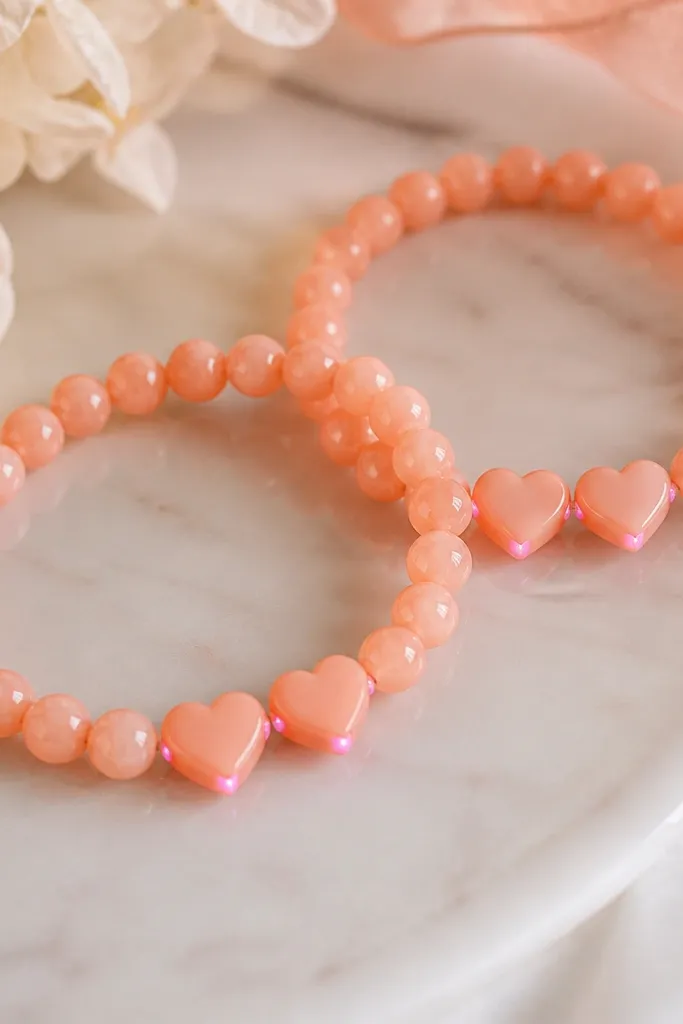
Lighting only the heart corners makes the bracelet feel like a secret detail, not a full light show. Coral peach clay has a friendly tone, so pink LEDs look sweet without being childish. The heart shapes give you a clear "BFF" visual that matches well across two wrists. It's a good choice if you want something subtle for daily wear.
Use 8mm coral beads and 6mm peach spacers. Add heart-shaped clay charms at two points, then place pink LEDs behind those hearts (bulbs aimed toward the heart faces). Anchor with bead caps so the wire stays flat under the charms.
Pro tipAim the LED bulbs toward the heart face, not the side - the difference is obvious once you turn them on.
AvoidDon't put LEDs under the thickest part of the heart - it blocks light and looks dim.
12. Sunflower Yellow Beads with Golden LED Petals
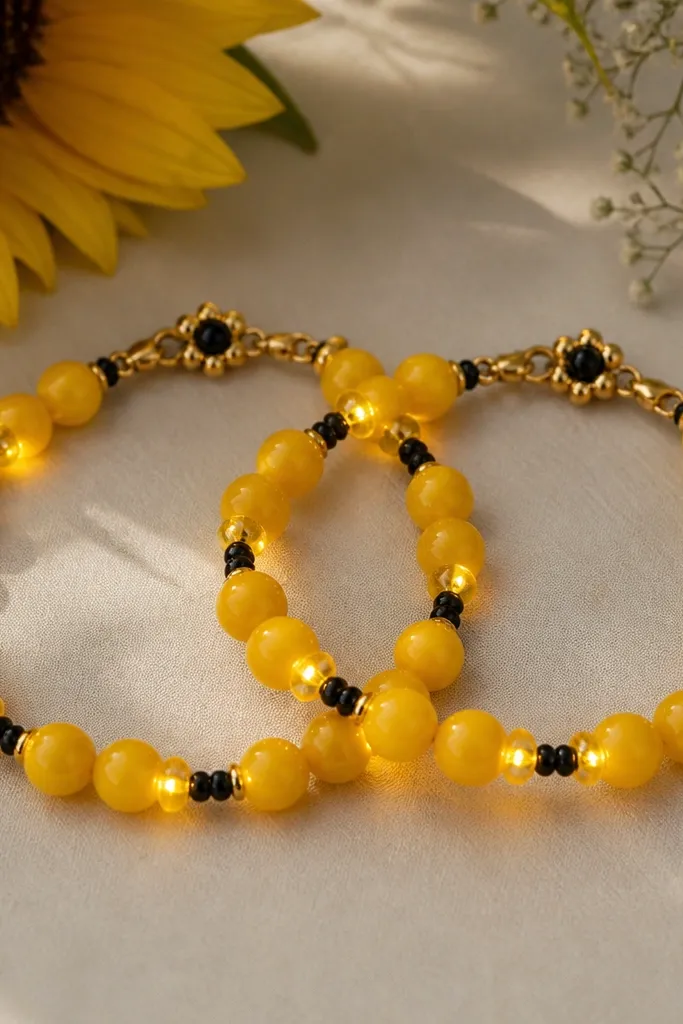
Golden LEDs make sunflower yellow clay look like it's lit from within. The circle pattern breaks up the bracelet into "petal zones," which looks intentional even when the bracelet rotates. Black seed accents ground the bright color and help hide wire shadows. This set is perfect for summer festivals.
Use 9mm sunflower beads, then add 4mm black seed beads every 4-5 beads. Place golden LEDs in a repeating pattern: one bulb per bead group gap, not between every two beads. Finish with a clasp charm that mimics a sunflower center using a black bead and a small bead cap.
Pro tipIf your clay beads are slightly uneven, sort them by size before threading so the LED gaps look consistent.
AvoidAvoid equal LED spacing across the whole bracelet - the sunflower look needs grouped petal zones.
13. Berry Mix Beads with Blue LED Night Berries
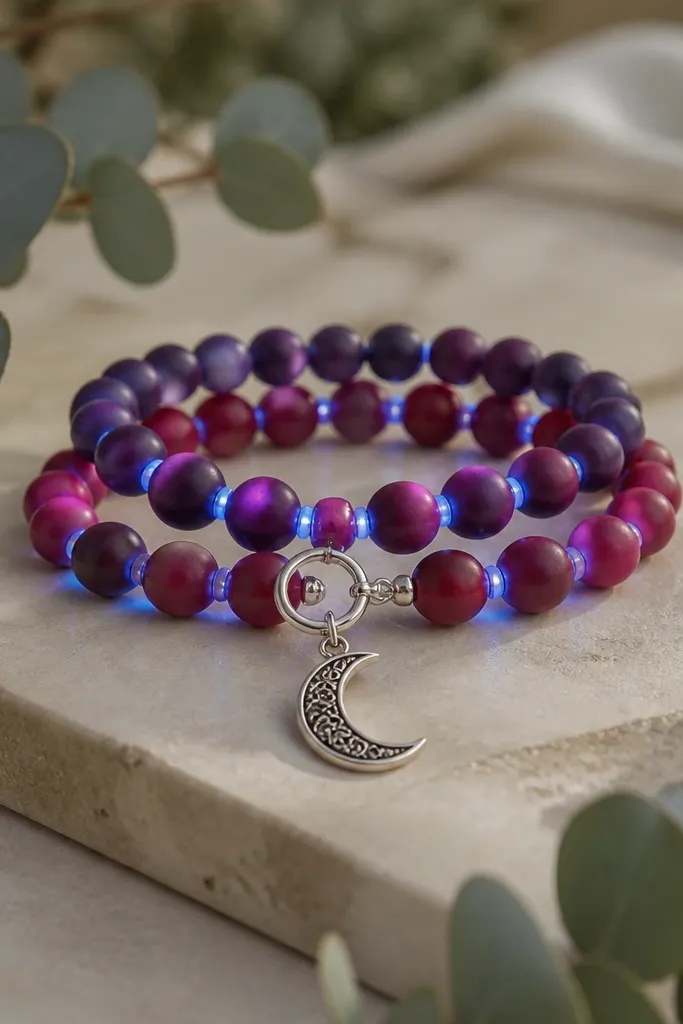
Mixed berry beads look expensive under cool blue LEDs because the colors deepen instead of washing out. The blue glow also makes the magenta beads look more saturated. A moon charm at the clasp gives you a clear focal point when the bracelet is viewed straight on. Great for evening events and photo booth nights.
Use 8mm deep purple and 7mm magenta beads mixed, then add 6mm berry red spacers. Route blue LEDs between bead gaps so the bulbs face outward. Hide the wire under a silver bead cap near the clasp and add the moon charm to the clasp loop.
Pro tipChoose a clasp that stays centered on your wrist - I like lobster clasps with a short extension so the charm doesn't ride up.
AvoidDon't use warm LEDs on berry mixes - blue makes the colors pop more cleanly.
14. Pearl White Clay with Warm White LED Bubble Strand
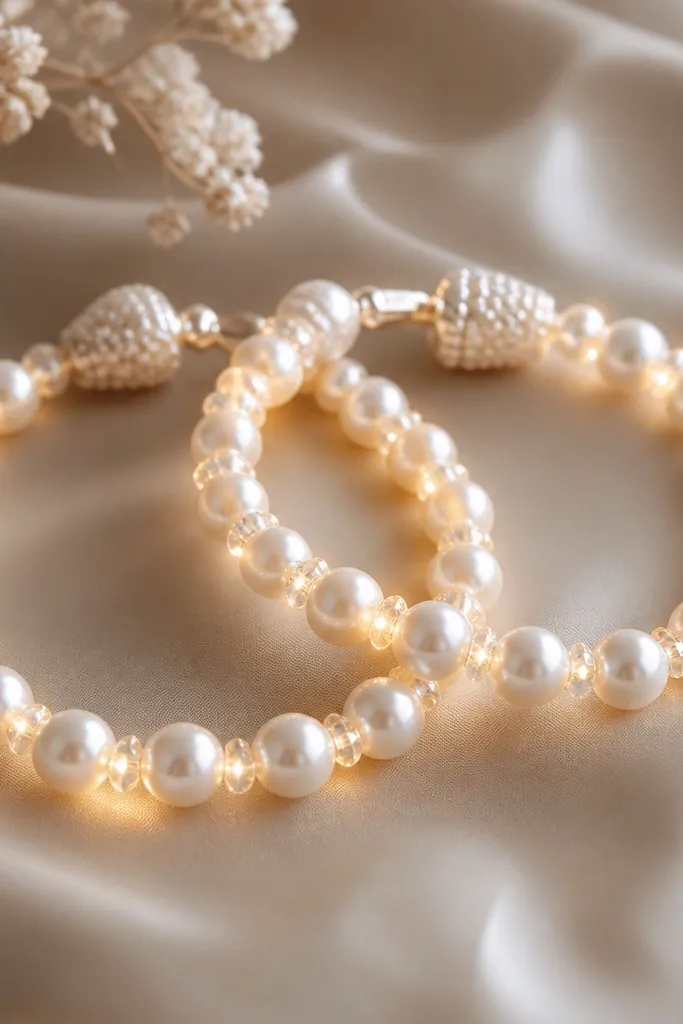
Pearl white clay catches warm light in a way that looks like soft jewelry lighting rather than craft lights. The continuous LED strand creates a smooth glow band, which looks great when you stack bracelets. Clear micro spacers between beads add a subtle sparkle. This is the cleanest option for bridesmaids and formal outfits.
Use 8mm pearl white beads and 4mm clear round spacers. Run the LED strand through the center path so bulbs sit between bead holes, then cover wire turns with pearl bead caps. Seal clay with a satin finish so it stays pearly but doesn't reflect harsh glare.
Pro tipIf the LEDs dim after assembly, check the battery pressure - sometimes the wire bundle pushes the battery pack loose.
AvoidDon't skip sealing - pearl clay scuffs easily and loses that glow effect.
15. Matte Sage Beads with Covert Green LED Side Glow
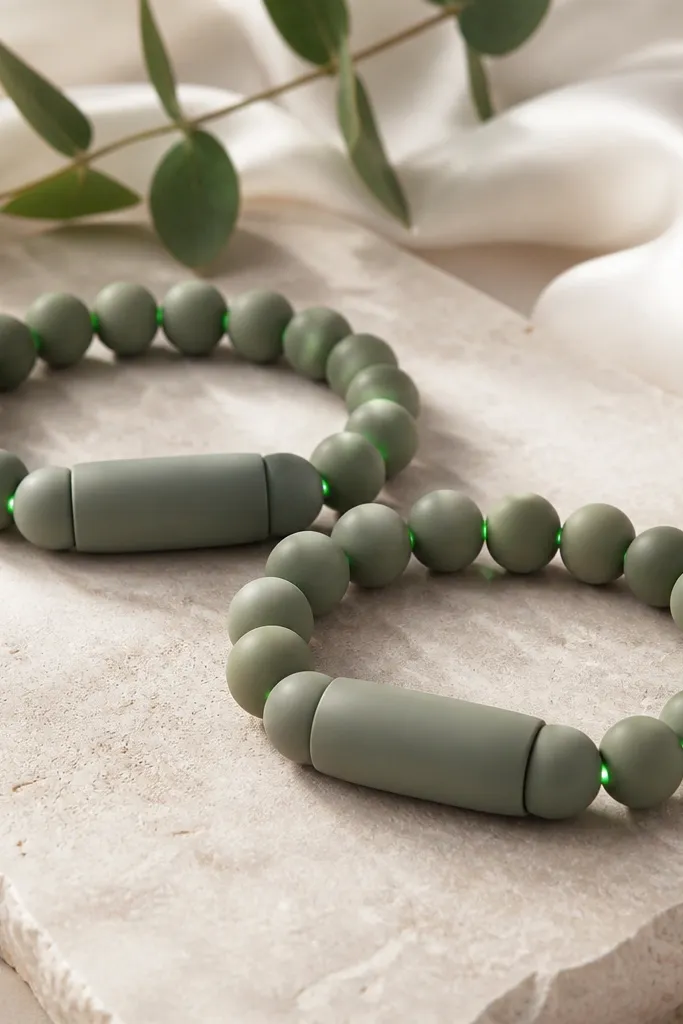
Matte sage looks calm, and green LEDs add a subtle "alive" effect without screaming. Side glow feels more grown-up than a full front line because you notice it when you move. Green LEDs also make the beads look slightly deeper, like moss under light. This is a favorite for everyday wear because it's interesting up close but quiet at a distance.
Use 9mm matte sage beads and 6mm matching spacers. Route a green micro-LED strand along the side edge of the bracelet, not the center, then hide wire under a flat clay cover panel near the clasp. Keep the bracelet slightly looser so the cover panel doesn't press against your skin.
Pro tipMatte clay shows smudges - wipe beads with a dry microfiber cloth before you seal and assemble.
AvoidAvoid glossy topcoat on matte beads - it turns the side glow into glare.
16. Terracotta Earth Tones with Ember LED Flicker
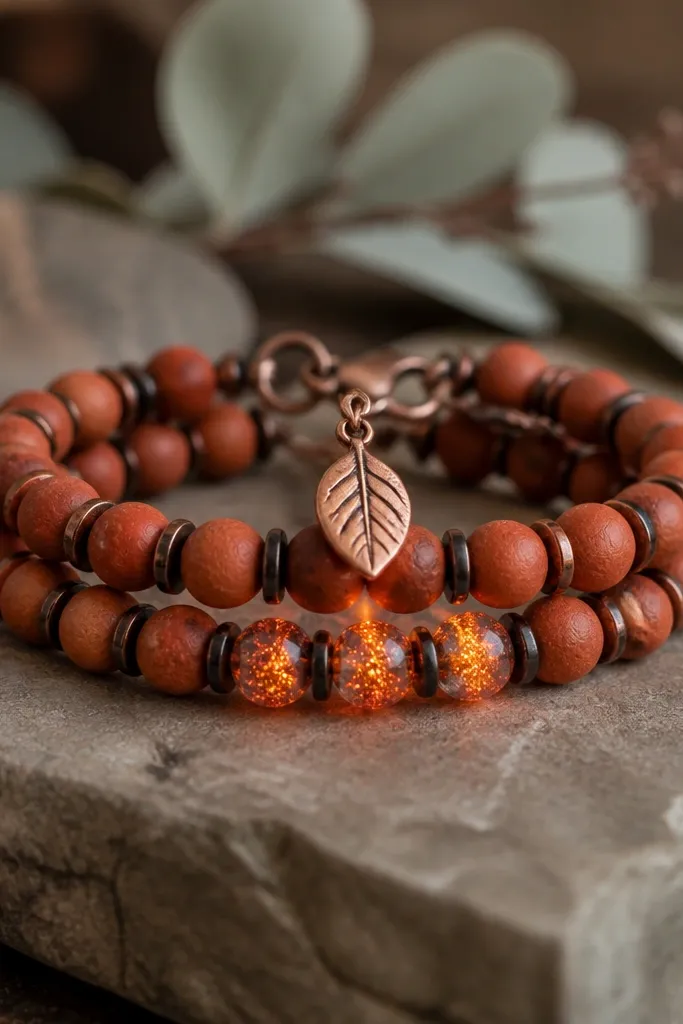
Terracotta plus ember/orange LEDs looks like warm firelight. The flicker mode adds a playful effect that feels natural with earth tones. Copper leaf charm ties the color story together and gives you something to look at besides the lights. This set is perfect for fall dinners and evening walks.
Use 8mm terracotta beads, then alternate with 6mm burnt umber spacers. Place ember LEDs in the center path and aim bulbs outward so flicker reads clearly. Attach a copper leaf charm on a bead cap at the clasp side, then glue the battery pack cover panel flat against the inside of the clasp area.
Pro tipTest flicker in a dim room before sealing - some modes look too intense near beads that are glossy.
AvoidDon't use very bright neon clay colors with ember LEDs - it clashes with the earthy vibe.
17. Black-and-White Checker Clay with Cool White LED Grid
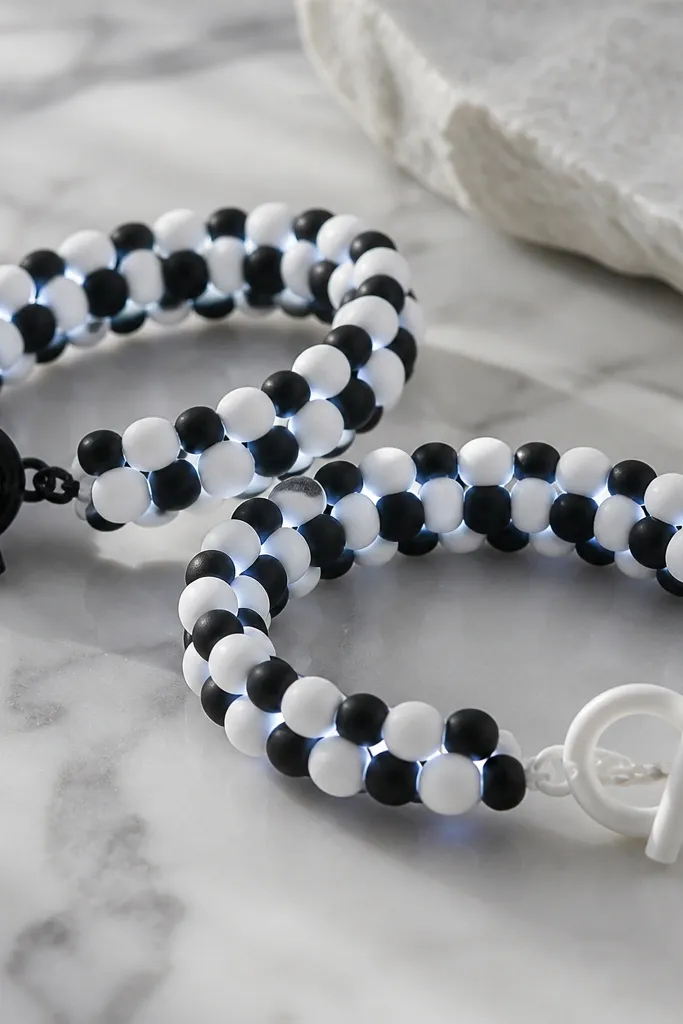
Checker beads make the bracelet look designed, and cool white LEDs make the pattern feel like a mini light sign. The color contrast stays sharp in photos, which matters if you're gifting or posting. Using one toggle color per bracelet still keeps the set matchy because the bead pattern is identical. This is a bold option for people who like graphic accessories.
Use 7mm black and white beads in an exact alternating sequence. Place cool white LEDs in the center so bulbs align with every other bead gap. Finish both bracelets with the same clasp style but swap toggle colors for a fun BFF twist.
Pro tipLay out beads in a long strip on your table and count before you string - one swapped bead ruins the checker rhythm.
AvoidDon't eyeball bead order - the grid only looks right with strict alternation.
18. Rainbow Gradient Beads with Multi-Color LED Staircase
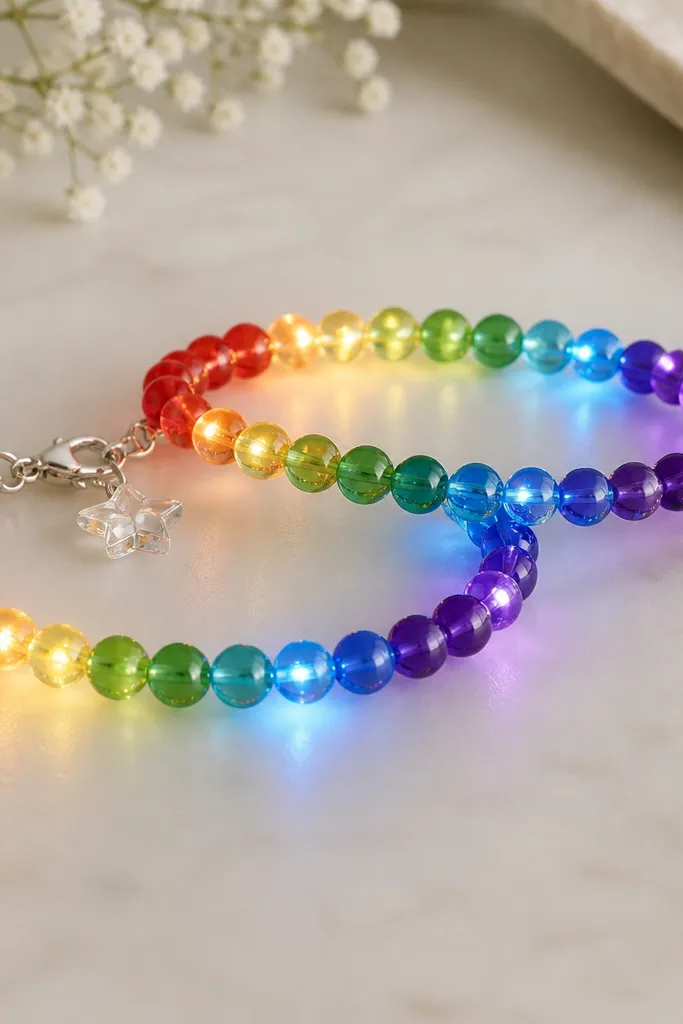
Rainbow gradients look best with multi-color LEDs because the light follows the color story instead of fighting it. The staircase placement means the glow rises in steps as the bracelet curves, which looks lively without being messy. Clear star charms catch the colored light and make the bracelet feel like a wearable light effect. This is the set I'd bring to pride events or group celebrations.
Use 6mm beads in a smooth red-orange-yellow-green-blue-violet gradient across about 28-32 beads. Position multi-color LEDs so you light every third gap, shifting the "active" bulbs to create steps. Keep the star charm near the clasp so it's visible when you show your wrist.
Pro tipIf your LED strand has fixed colors, plan your bead colors to match its order so you don't get random clashes.
AvoidAvoid mixing too many bead sizes - large size changes make the staircase glow look uneven.
19. Galaxy Navy Clay with Blue LED Constellations
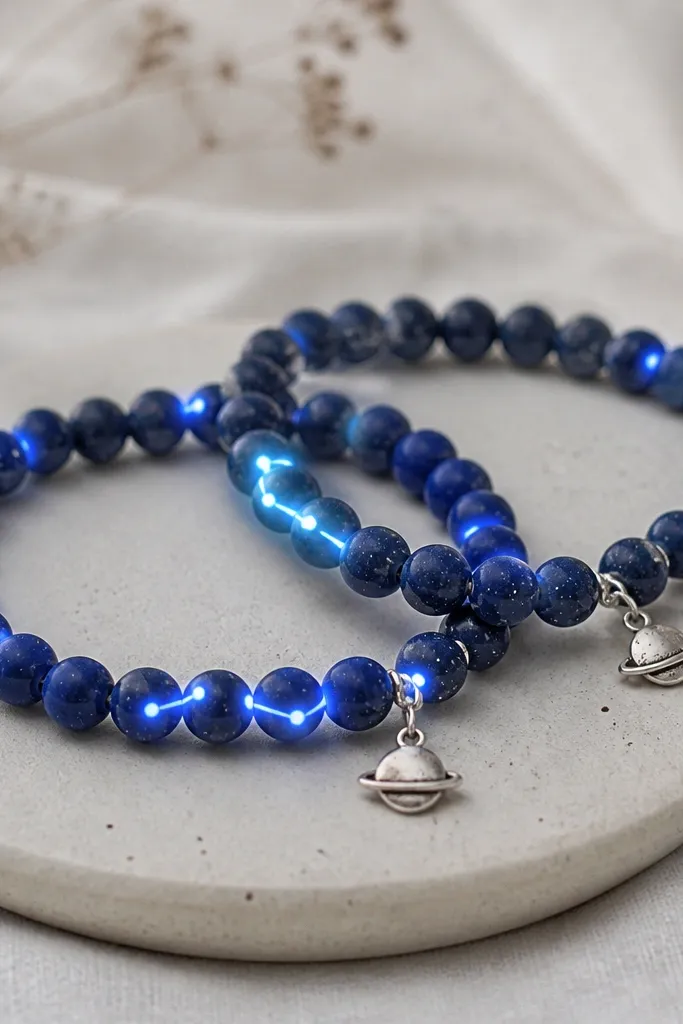
Dark navy clay makes blue LEDs look like a night sky. Constellation-style placement is more interesting than a full light strand because it gives you "patterns" your eyes can follow. Speckled clay adds sparkle even when LEDs are off. This set feels special without needing tons of extra charms.
Use 8mm galaxy beads with fine white specks and drill clean holes. Plan 3-4 constellation lines across the bracelet by placing LEDs in connected gaps, leaving other gaps unlit. Anchor wire with bead caps at each constellation line start so it doesn't drift.
Pro tipTurn the LEDs on and take a quick phone photo - if the constellation lines are hard to see, move bulbs slightly closer together.
AvoidDon't place LEDs randomly across the whole bracelet - it turns into noise instead of constellations.
20. Champagne Champagne Clay with Gold LED Warmline
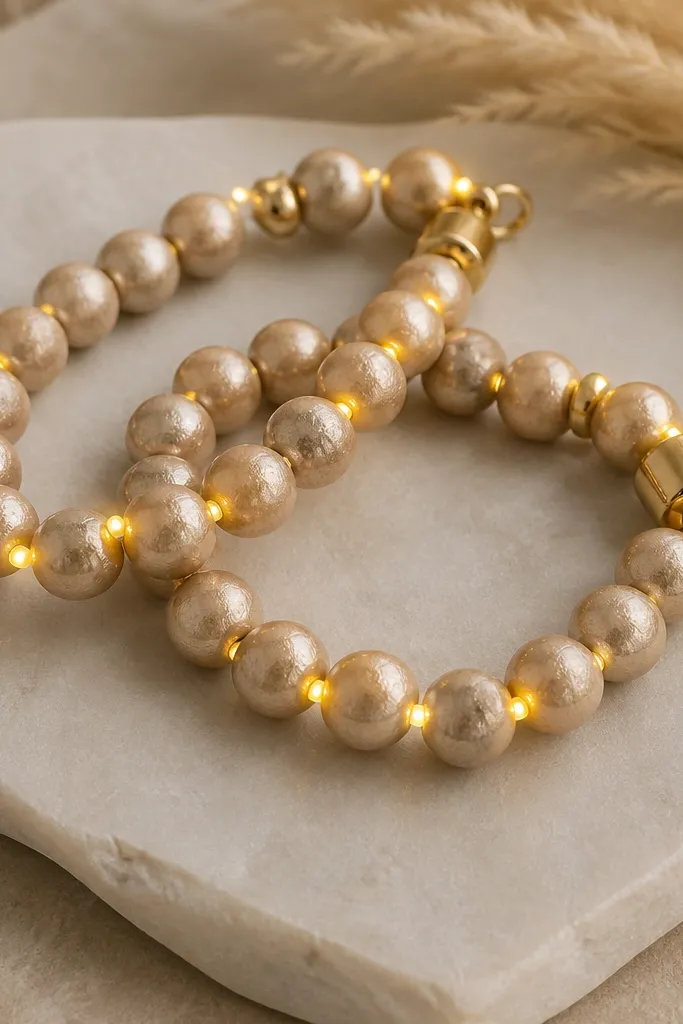
Champagne-toned clay plus gold LEDs looks like luxe party jewelry. Keep the design simple: a single warmline reads expensive and clean. The metallic sheen in the clay helps the LEDs look smoother instead of pixel-like. This set works for New Year's, weddings, and holiday dinners.
Use 10mm champagne beads and 4-6mm gold-toned spacer beads. Route gold LEDs through the center gaps, then cover the wire turns near the clasp with a gold bead cap. Seal with a satin topcoat so the finish looks like jewelry, not craft shine.
Pro tipIf your champagne clay is too reflective, use matte spacers so the light doesn't glare.
AvoidDon't add too many charms - gold LEDs already give a strong focal point.
21. Cherry Red Clay with White LED Cherry Stem
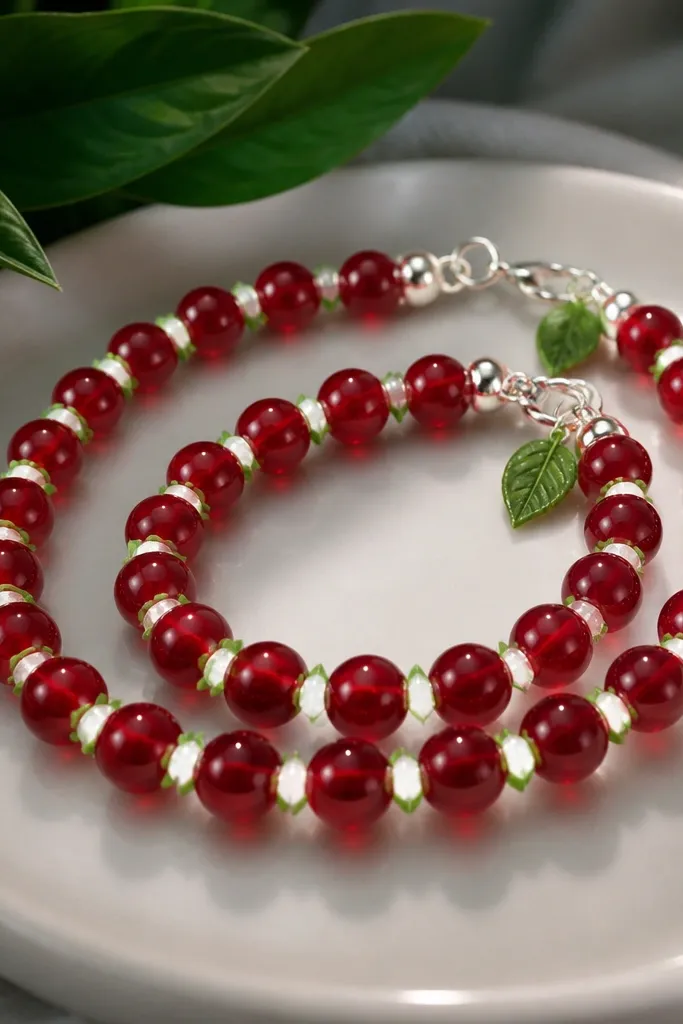
Cherry red beads are bold, and white LEDs behind green stem spacers look like the stem is lit. The green pieces act like mini diffusers, so the glow feels softer and more "fruit-like." It's a cute theme that still reads as jewelry because the light is tied to a specific element. Wear it with black, cream, or denim for maximum contrast.
Use 9mm cherry red beads and add small green stem spacers every 4-5 beads. Place white LEDs behind the green spacers so bulbs face the stem centers. Glue stems to bead caps only after you test the glow direction.
Pro tipCut a thin strip of translucent clay and place it under the stem as a diffuser if the light looks too harsh.
AvoidAvoid green spacers that are too thick - thick clay blocks the LEDs and kills the effect.
22. Cinnamon Swirl Beads with LED Twirl at the Wrist Turn
This is a "movement" design. The LED arc is placed where your wrist naturally turns, so it lights up at the right moment instead of constantly. Cinnamon swirl beads already look like motion, and the arc glow makes it feel like a twirl. A braided cord clasp also hides the wire because it gives you a fabric-like tie point.
Use 8mm cinnamon swirl beads and 6mm cream spacers. Place LEDs in a short arc of 4-5 bulbs centered on the bracelet midpoint, then keep the rest unlit. Use waxed cord or braided elastic for the clasp and route the LED wire into the cord knot area before final tying.
Pro tipTest on your wrist - if the arc doesn't land on the outer side when you move, adjust the arc placement by one bead gap.
AvoidDon't use a stiff clasp with a movement design - stiff hardware makes the bracelet rotate less and the LED arc won't show.
23. Holographic Pearl Beads with Prism LED Scatter
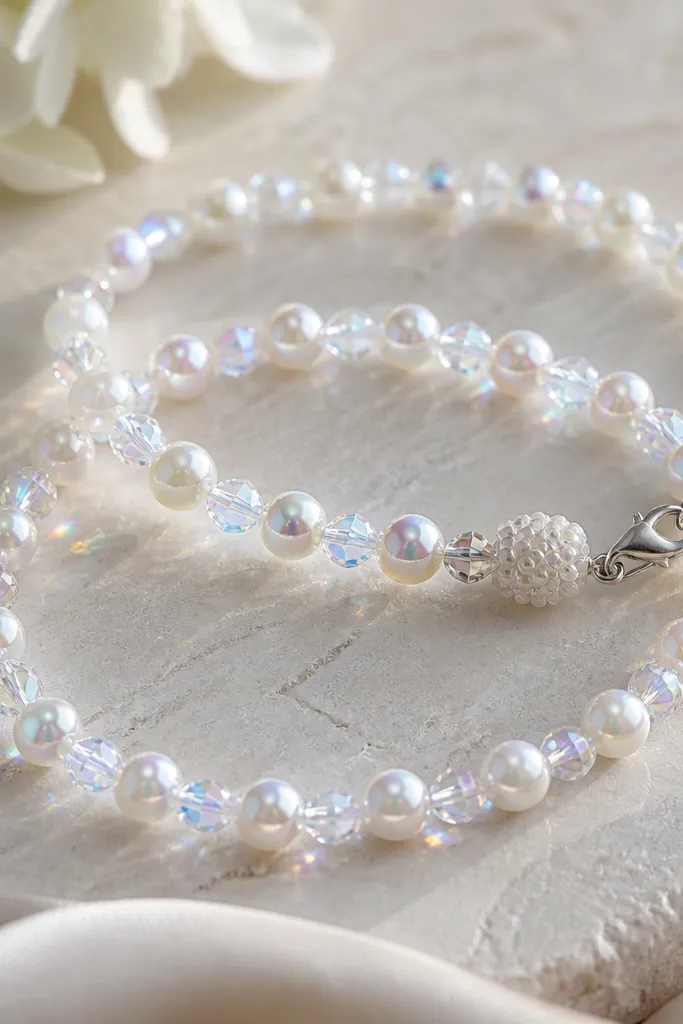
Holographic pearl clay looks special under cool LEDs because tiny color shifts appear as the bracelet turns. Add clear prism spacers and the light scatters into little rainbow flashes. This set looks high-end even though it's just clay beads and small hardware. It's a great "camera bracelet" for night photos.
Use 8mm holographic pearl beads and add 4-5mm clear prism spacers every 2-3 beads. Route cool white LEDs through the center path so bulbs face outward. Hide battery pack at the clasp behind a cluster of three beads so the wire has a short, straight route.
Pro tipWipe the holographic beads with a microfiber cloth right before sealing to remove dust specks that dull the sheen.
AvoidDon't use matte clay spacers with holographic pearls - they kill the prismatic effect.
24. Monochrome Gray Clay with Silver LED Edge Highlights
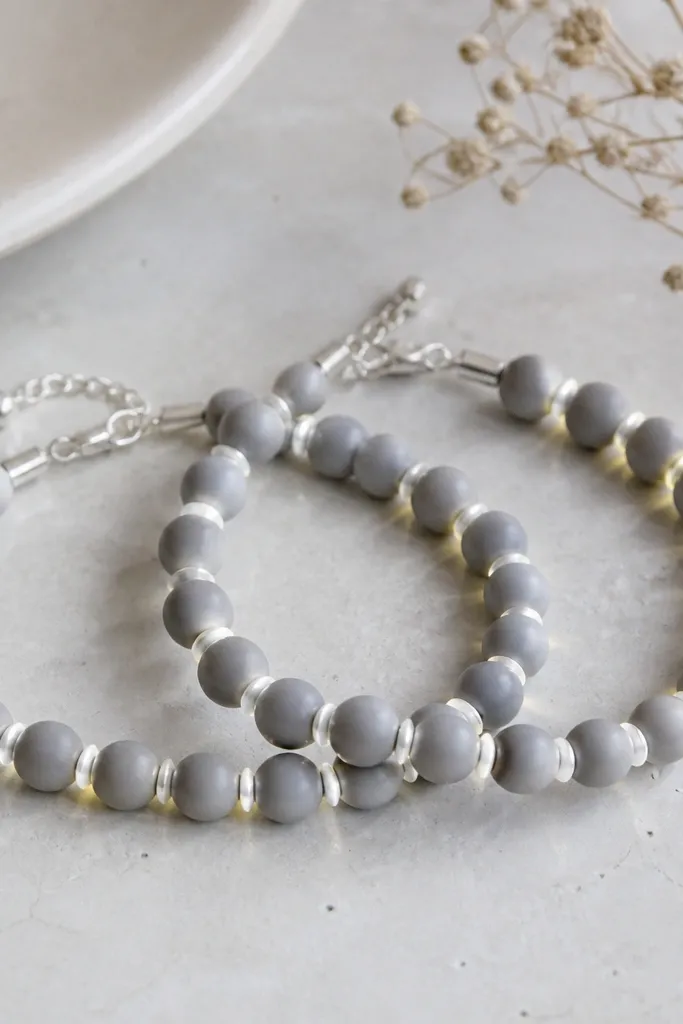
Monochrome gray is the kind of color that looks clean even when the lighting is messy. Edge highlights make the bracelet look like it has a hidden frame of light. Silver LEDs stay neutral, so the bracelet matches almost every outfit. This set is for BFFs who like minimal style but still want the glow.
Use 8mm matte gray beads and 5mm gray spacers. Place LEDs along the outer edge gaps so bulbs sit between beads and face outward. Add a silver chain extender so the clasp sits slightly off-center and doesn't cover the light edge.
Pro tipIf the LED wire shows at a certain angle, rotate the bead order so the smoothest bead faces the outside.
AvoidAvoid placing LEDs in the exact center when using matte gray - center glow can look flat and less dimensional.
25. Multi-Texture Hearts Beads with LED Heartline
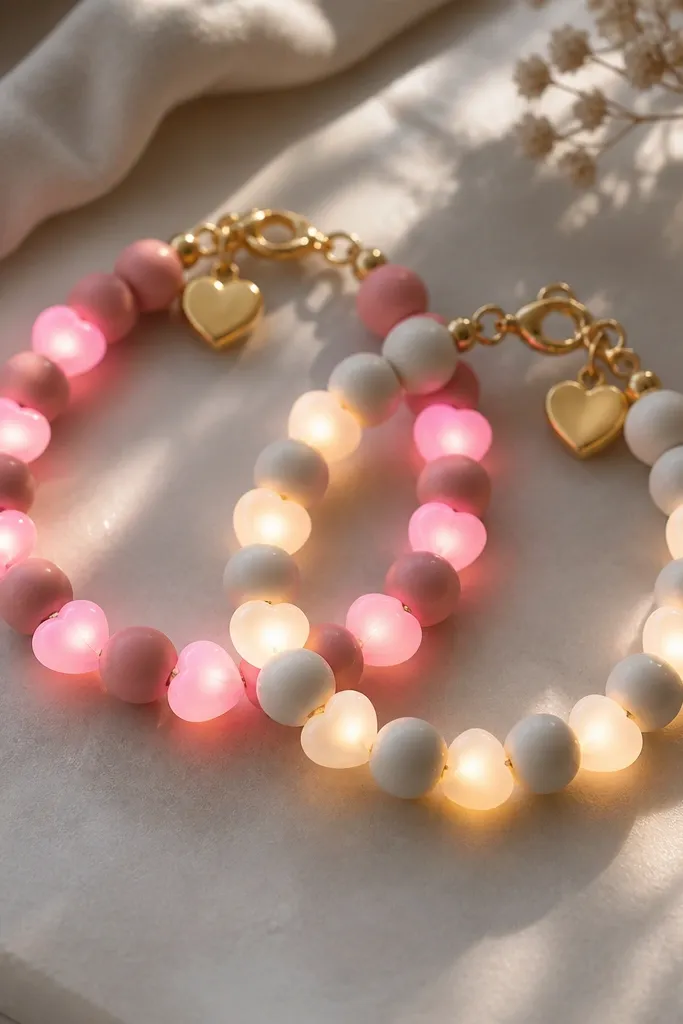
Hearts add instant theme, and putting LEDs behind them makes the heart shapes look like they're lit from within. Mixing textures helps too: smooth round beads keep it jewelry-like, while heart beads add character. When you use a heartline pattern, the bracelet reads as intentional from across the room. This is great for Valentine season or for BFF anniversaries.
Use 8mm smooth round beads and 10mm heart beads at two or three points around the bracelet. Place LEDs right behind the heart beads so bulbs face the center of the heart. Hide wire under bead caps attached to the clasp bead cluster, then test glow before sealing.
Pro tipSand the heart edges lightly so the LED wire doesn't snag on sharp clay ridges.
AvoidDon't use hearts all the way around - too many heart shapes makes the bracelet feel costume-like.


