1. Terracotta Oval + Cream Dots on Black Cord
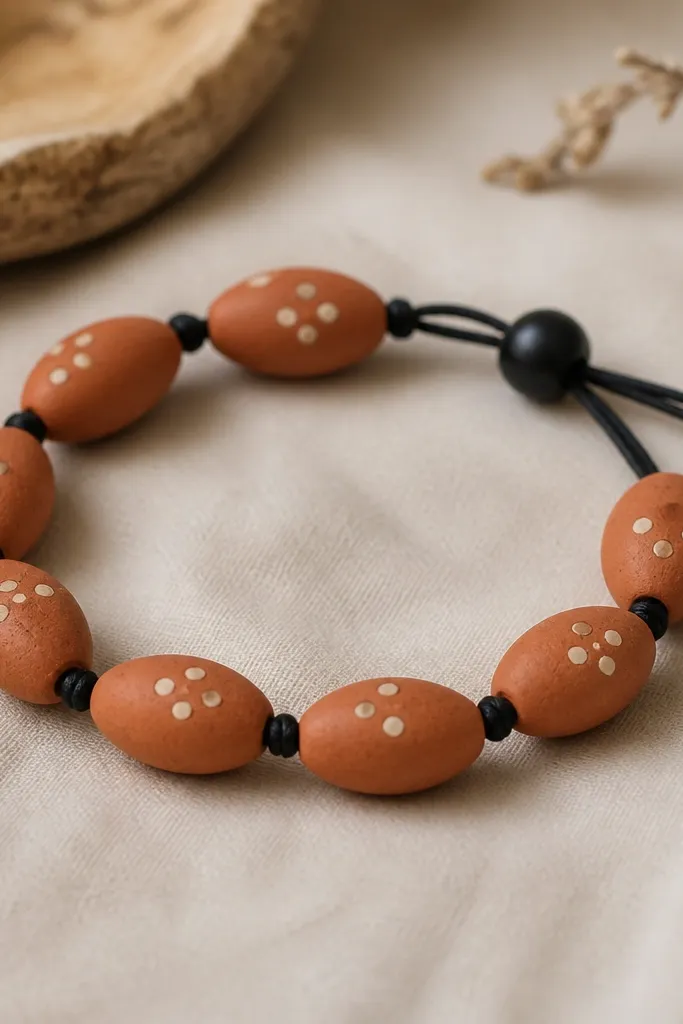
This look is warm and readable from a distance because the terracotta stays the star. The cream dots act like punctuation without turning the bracelet into a busy pattern. I like it with matte black cord because the clay's soft, baked color doesn't fight shiny hardware. The oval shape also keeps the bracelet from twisting as you wear it.
Roll terracotta clay into short ovals about 10 mm long and 6 mm thick. Press tiny cream dots using a needle tip or a dot tool, then pierce holes straight through at the center line before baking. String on black nylon or waxed cord and finish with a small sliding knot or a simple adjustable closure.
Pro tipAfter baking, lightly buff the beads with a soft microfiber cloth - terracotta looks deeper with less shine than gloss.
AvoidDon't use glossy clear coat on terracotta if you want the cozy look; it can make the color look plastic.
2. Marbled Sage and White with a Single Gold Accent Bead
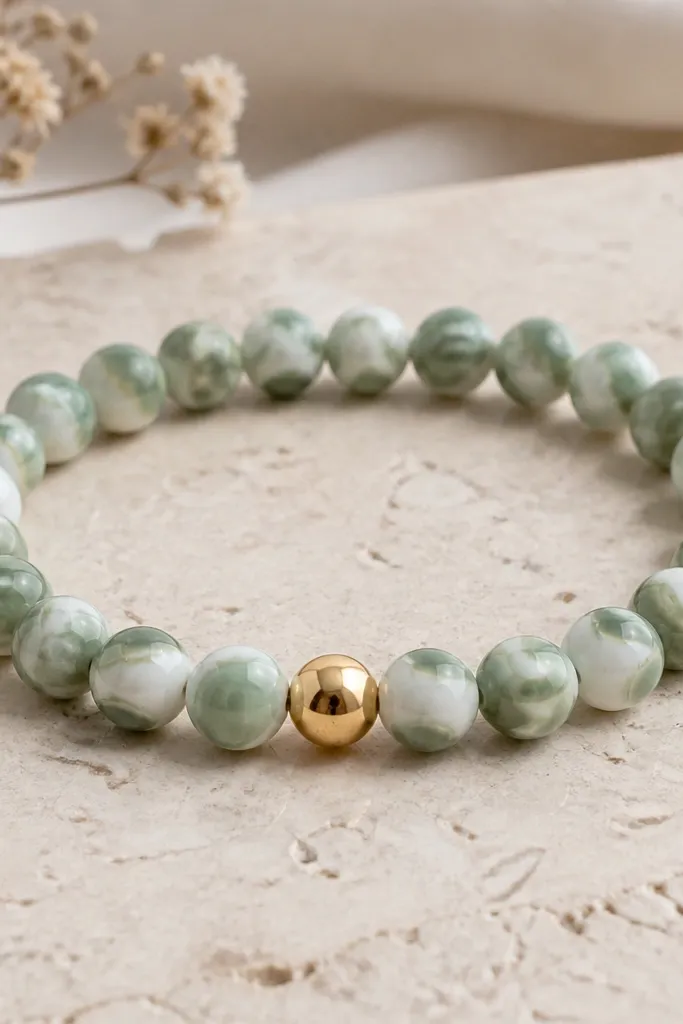
Marbling gives you movement without needing a pattern you have to repeat perfectly. Sage and white read soft and wearable, and the single gold accent bead keeps it from looking too plain. Clear elastic shows off the bead color while keeping the bracelet easy to put on. The gold bead also makes the bracelet look intentional in photos.
Create a thin marbled sheet: blend sage with white, then twist two colors lightly and roll. Cut into 8-9 mm rounds, then shape into slightly flattened discs so the bracelet sits flat. Add one tiny gold accent bead near the clasp area (either a metal spacer or a baked clay bead finished in metallic paint). Bake, then string with clear elastic using a tight double-knot.
Pro tipUse a thin blade to cut the rounds - jagged edges make marbling look messy fast.
AvoidAvoid over-mixing the marbled colors; if you fully blend, you lose the swirls.
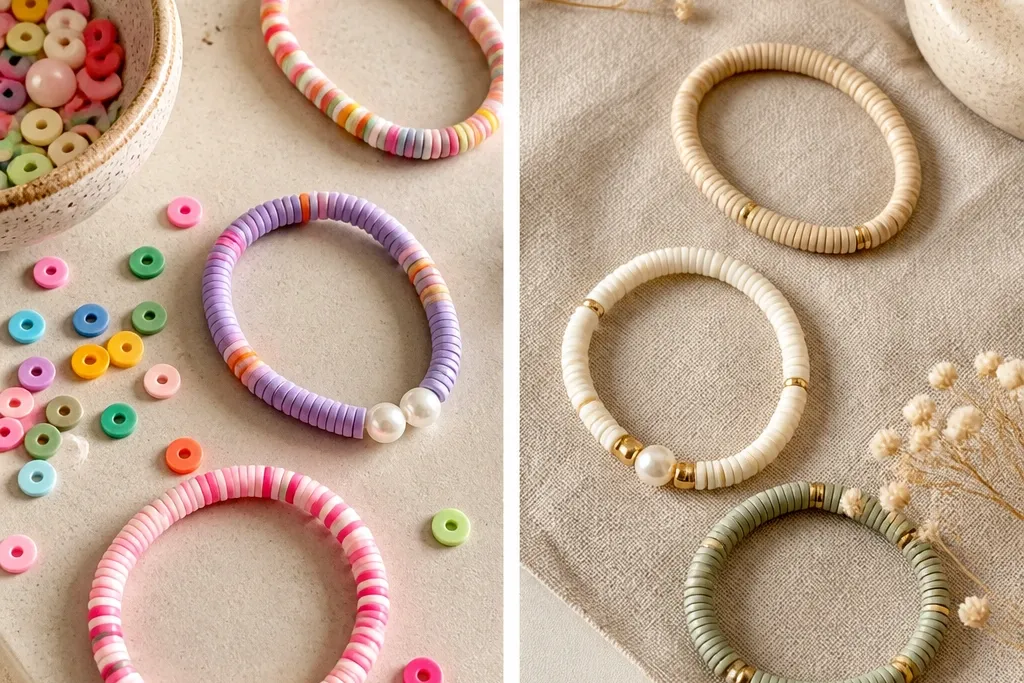
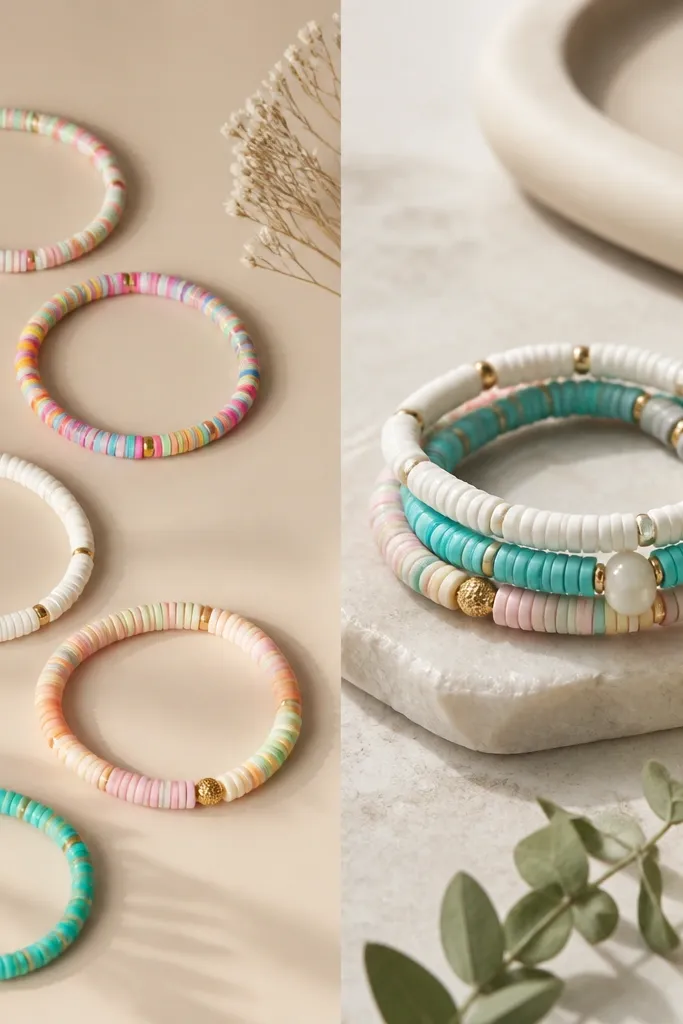
3. Rainbow Micro-Disc Bracelet with Alternating Sizes

Micro-discs look playful, but they can get cheap-looking if they're all the same size. Alternating sizes makes it feel like a design, not a craft project. Rainbow works best when you keep the palette to one direction - like red to violet in order - so the eye follows a clean path. The flat disc also stacks neatly on the wrist.
Roll each color into a thin sheet, cut discs using a craft punch around 6 mm and 8 mm for the two sizes. Pierce holes through the center with a needle tool, then bake on a parchment-lined tray. String alternating discs in color order, then tie with elastic and hide the knot under two tiny stopper beads.
Pro tipDo a quick "dry run" on the cord before baking so you know you have the right number of each color.
AvoidDon't make the discs too thick; thick discs catch on sleeves and feel bulky.
4. Black Clay Beads with White "Scribble" Lines
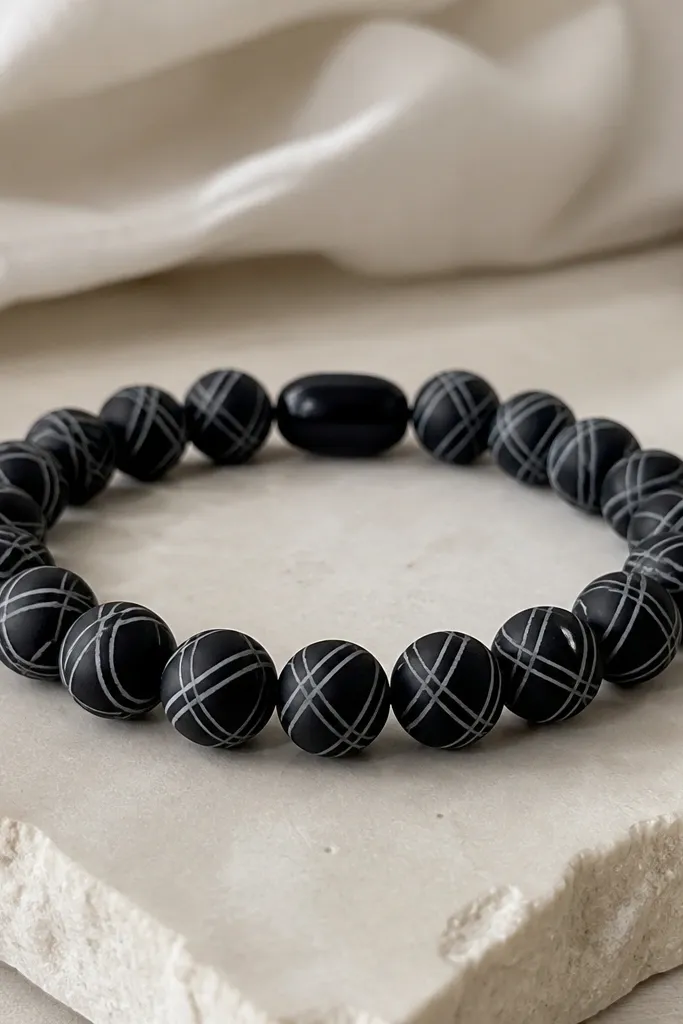
This is the easiest way to get a graphic look without complex painting. White scribble lines look like hand-drawn marks, and the matte black keeps it modern. I like using a translucent white clay or white acrylic paint mixed with a tiny bit of water for those lines. The diagonal direction makes the bracelet feel dynamic rather than flat.
Condition black polymer clay, roll into cylinders, then round them into 9-10 mm beads. Use a fine needle to drag through a thin strip of white clay applied on the surface, then twist the bead slightly so each scribble lands differently. Bake, then seal with a satin finish so the scribbles stay crisp. String on black cord with a clasp or elastic plus stopper beads.
Pro tipIf your scribbles smear, chill the beads 10 minutes before drawing - the clay firms up fast.
AvoidSkip thick paint blobs; they crack and look like sticker residue.
5. Pearl-Effect Clay Beads with Blush Center Dot
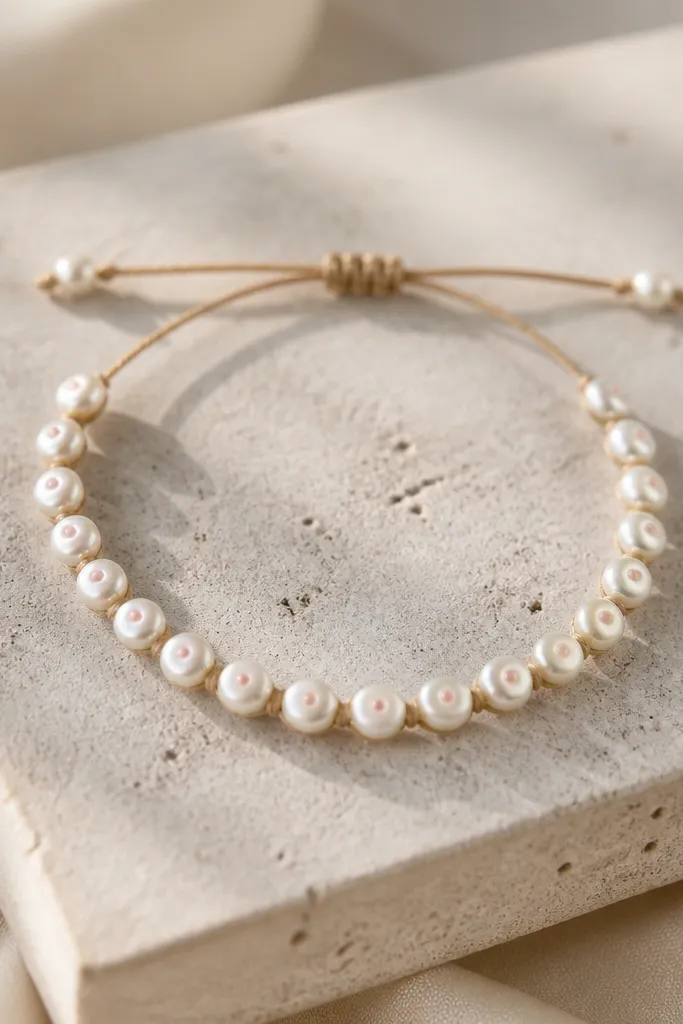
Pearl-effect beads look expensive because they reflect light in a gentle way. The blush dot gives you a focal point on each bead, and it's subtle enough for daily wear. Tan cord supports the warm neutrals without stealing attention. This is a great "work outfit" bracelet - it doesn't scream color, it just glows.
Use off-white polymer clay and mix in a small amount of pearl mica for a soft sheen, then roll into 8-9 mm rounds. Press a tiny blush dot using a micro ball of clay at the top center, then pierce the hole through the dot line before baking. Bake until set, then string on tan waxed cord and knot between beads if you want less sliding.
Pro tipSeal with satin varnish instead of gloss for a more realistic pearl reflection.
AvoidDon't overdo the mica; too much makes the beads gritty and sparkly in a cheap way.
6. Coiled Rope Beads in One Color Block
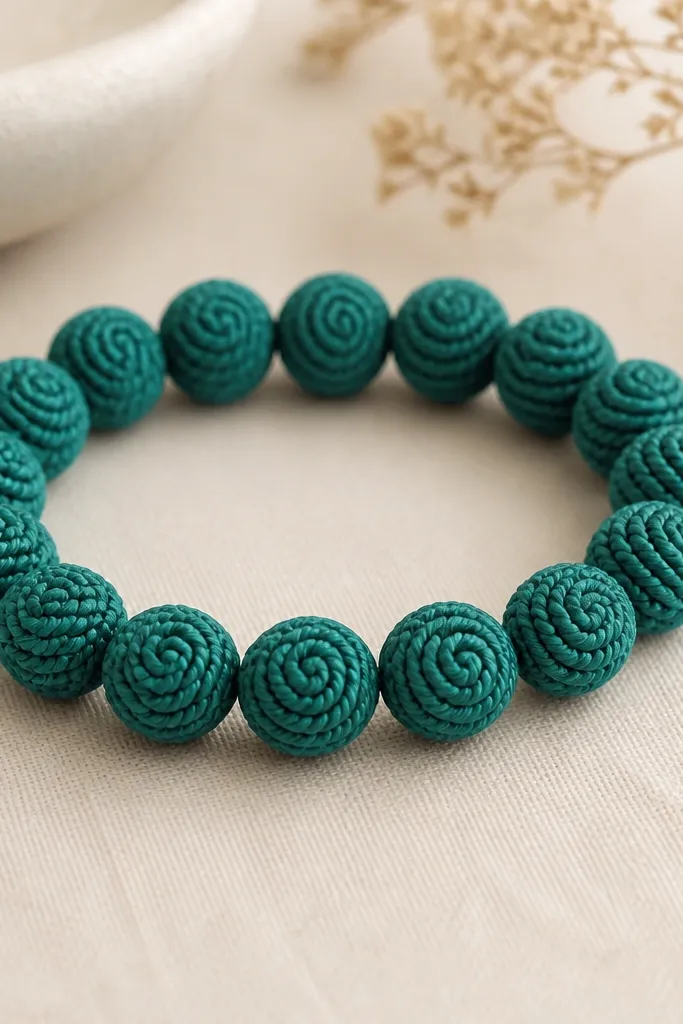
Rope-coil beads create texture without needing multiple colors. If you keep the coil tight and the bead size consistent, it reads like a handmade artisan bead, not a lump. Teal is a strong choice because it holds contrast even with matte clay. The coiled texture also grips the cord slightly, reducing bead clack.
Roll a long thin snake of teal clay, then wrap it around a toothpick or a 3 mm dowel to form tight coils. Slice into 8-10 mm bead lengths and pinch the ends to even them. Pierce through the center lengthwise before baking so the hole stays aligned. Bake and string on matching teal cord for a monochrome look.
Pro tipUse a ruler to keep coil length consistent - it affects how many beads you get for the bracelet.
AvoidAvoid loose coils; they snag on cord and look uneven after baking.
7. Tiny Heart Cutouts on Blush Pink Beads
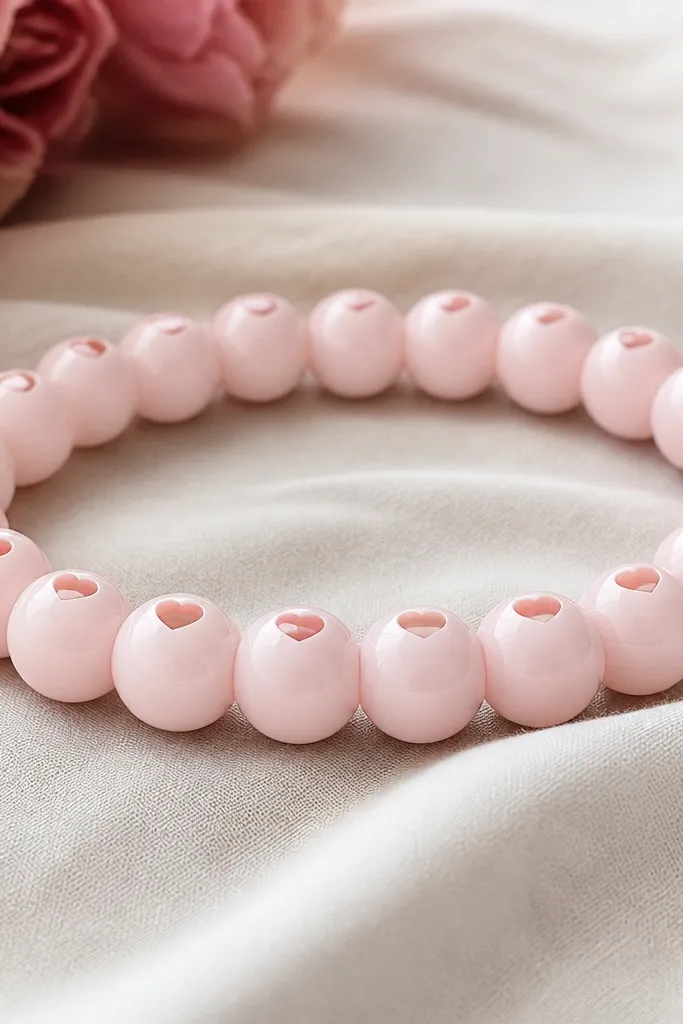
Negative space makes clay beads feel lighter and more design-forward. Tiny hearts are instantly readable, but you keep them small so they don't look cartoonish. Blush pink gives a soft base, and the cutouts create a subtle shadow effect. This bracelet looks great stacked with simple bangles.
Roll blush clay into 9 mm rounds, then press tiny heart shapes into the surface using a micro cutter or sculpting tool. Create the hole through the center before baking, since drilling after can crack thin areas. Bake fully, then lightly sand the edges of the cutouts for clean lines.
Pro tipIf your heart cutouts collapse, chill the beads 15 minutes before baking - it firms the clay walls.
AvoidDon't cut hearts too close to the hole; thin bridges crack under cord tension.
8. Dipped Color Fade Beads with Satin Seal
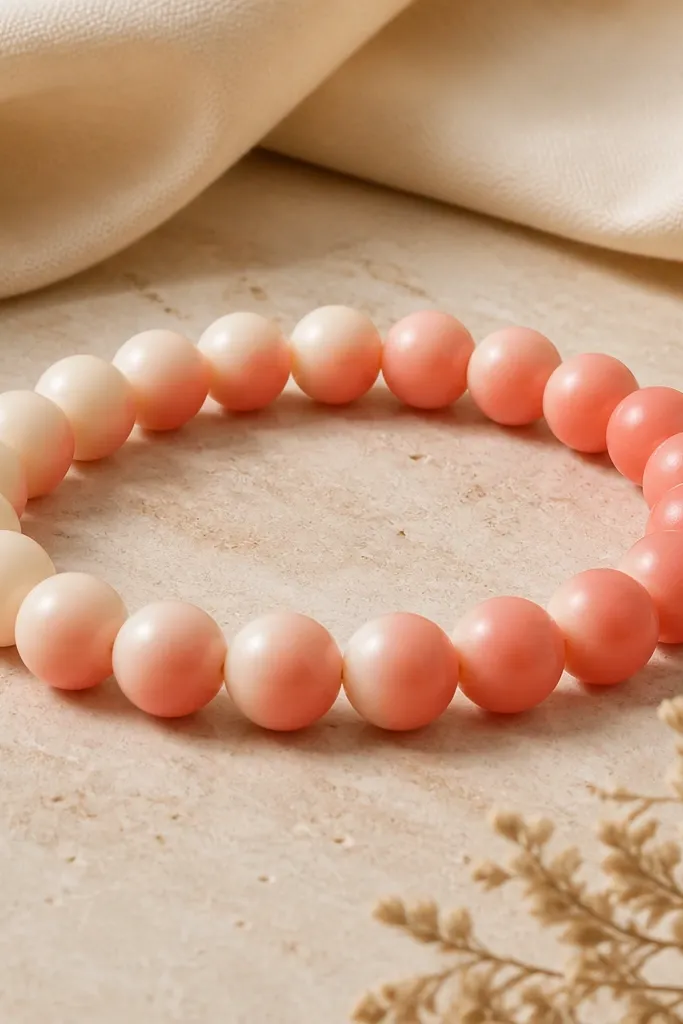
Color fade is one of the fastest ways to look "planned," even if you're making beads in batches. The smooth gradient feels modern, and satin finish keeps it from looking like candy. Cream-to-coral also flatters warm skin tones and works with everyday tops. You get movement because each bead's gradient faces a slightly different direction when strung.
Condition cream clay and coral clay. Roll two logs, cut thin strips, and blend one end of each bead by rolling it through a strip of coral. Shape into 10 mm beads, pierce holes, and bake. After baking, lightly sand and seal with satin varnish so the fade looks smooth.
Pro tipKeep the gradient length about 1/3 of the bead; too much fade turns into muddy stripes.
AvoidAvoid glossy seal on gradients; it makes the transitions look streaky.
9. Galaxy Speckle Beads with Star-Tip Metallic Flecks
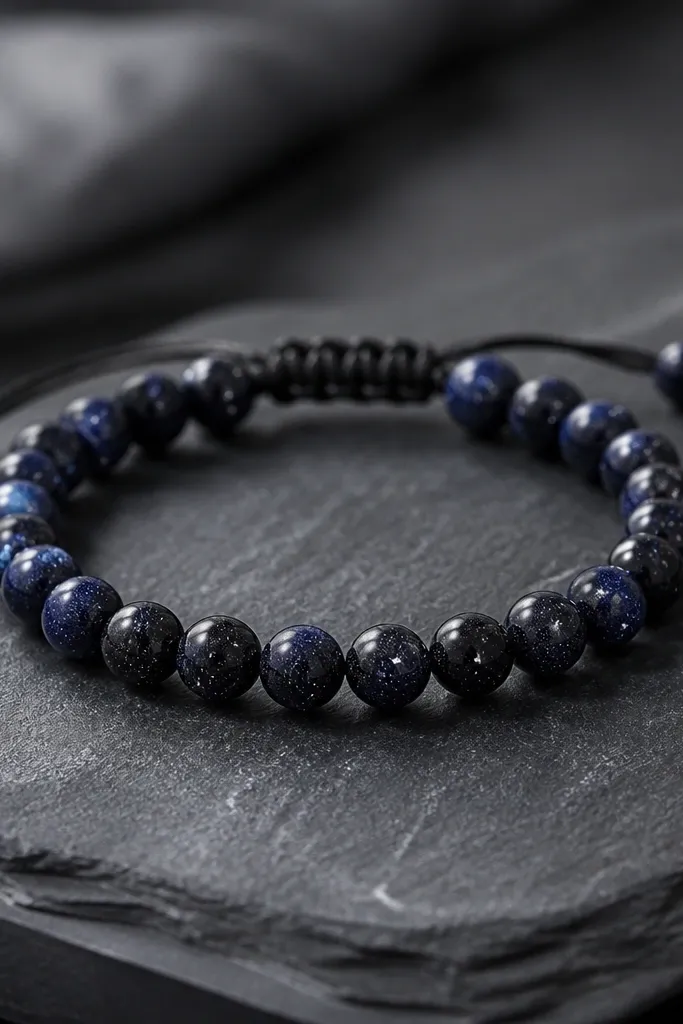
Galaxy beads are messy-looking during the build, then gorgeous after baking. The trick is controlled speckling: tiny dots read as stars, while a few larger "flares" add depth. Metallic flecks at the tips of a few beads look like highlights when the bracelet moves. Navy and black keep the look wearable even for casual outfits.
Roll dark navy clay into 9-10 mm rounds or slightly bumpy beads. Flick tiny bits of white clay or use a stiff brush with diluted white acrylic to create speckles, then add a few silver mica flecks on top. Pierce holes before baking so you don't disturb the speckle field. Bake, then seal with satin or matte so the stars stay speckly instead of smeary.
Pro tipPractice speckle on a scrap sheet first; you want dots, not splats.
AvoidDon't over-seal with gloss; glossy varnish pools and turns speckles into smears.
10. Checkerboard Beads in Chocolate and Cream
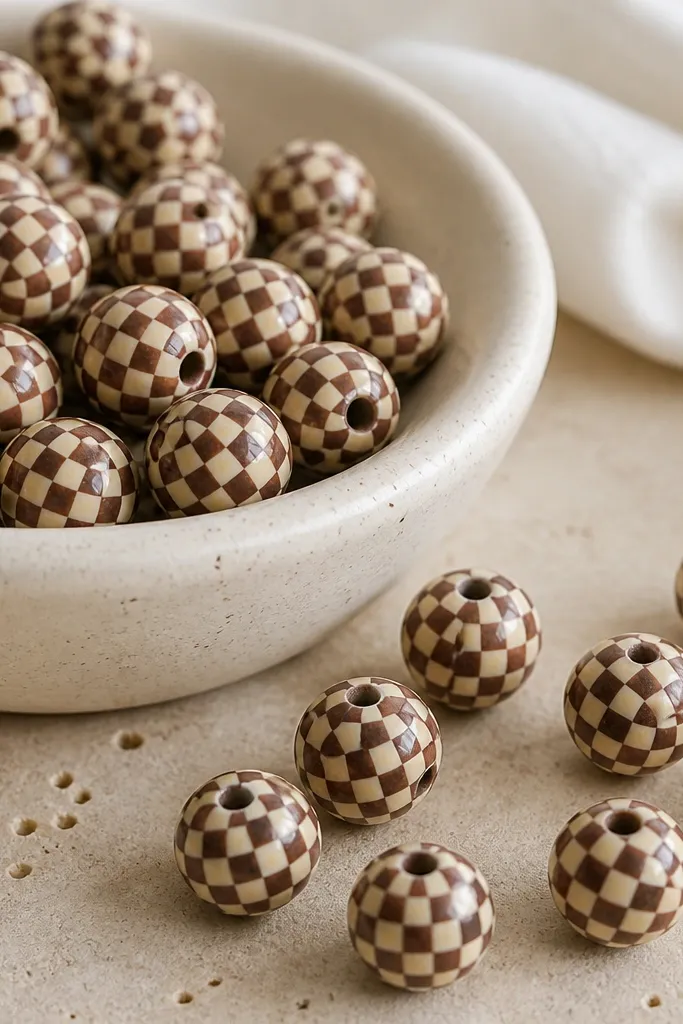
Checkerboard looks hard, but you can do it with a simple clay stack method. Chocolate and cream makes it feel like dessert, not a kids' craft. Crisp squares matter - when the pattern edges blur, it reads sloppy. The bracelet looks best when beads are uniform and the squares line up across each one.
Roll thin sheets of chocolate and cream clay. Cut strips, stack into a checker block pattern, then slice into thin slabs and wrap around a dowel to form beads. Pierce holes before baking, then bake flat on parchment. Sand lightly only if you need to remove seam lines.
Pro tipAlign the pattern by pressing the bead seam to the same side each time while forming.
AvoidAvoid thick checker blocks; they crack when baked through.
11. Strawberry Slice Beads with Glossy Sealed Edges
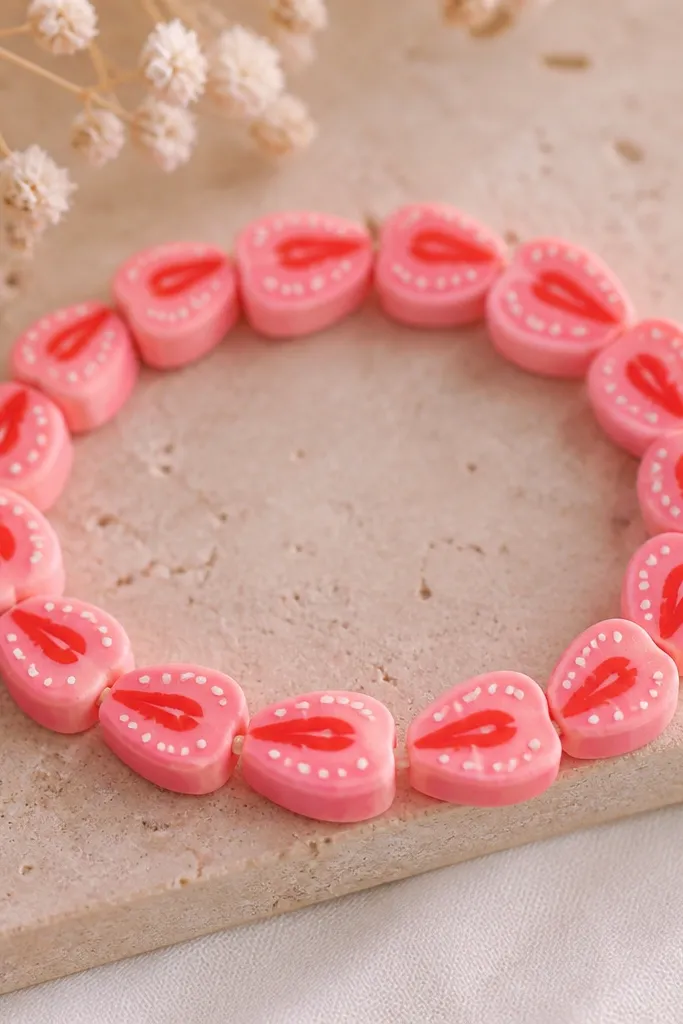
Strawberry slice beads are a fun, food-inspired look that still reads "jewelry" when you keep the slice thickness thin. The seed dots make the design pop, and a glossy edge seal gives a fresh-from-the-fruit stand vibe. I like this bracelet for summer outfits and beach days. The key is clean layering so the slices look like one piece, not glued chunks.
Layer pink clay with a thin darker red stripe in the middle. Add tiny white seed dots using a needle. Shape into 10 mm slice beads, then pierce through the center line. Bake, then apply a careful glossy seal just to the top and bottom surfaces so edges stay shiny without flooding the seeds.
Pro tipUse a thin brush and do two light seal coats; one thick coat pools around the seeds.
AvoidDon't make the slice too thick; thick slices feel heavy and can warp.
12. Textured Linen Beads with One Burnt Orange Accent
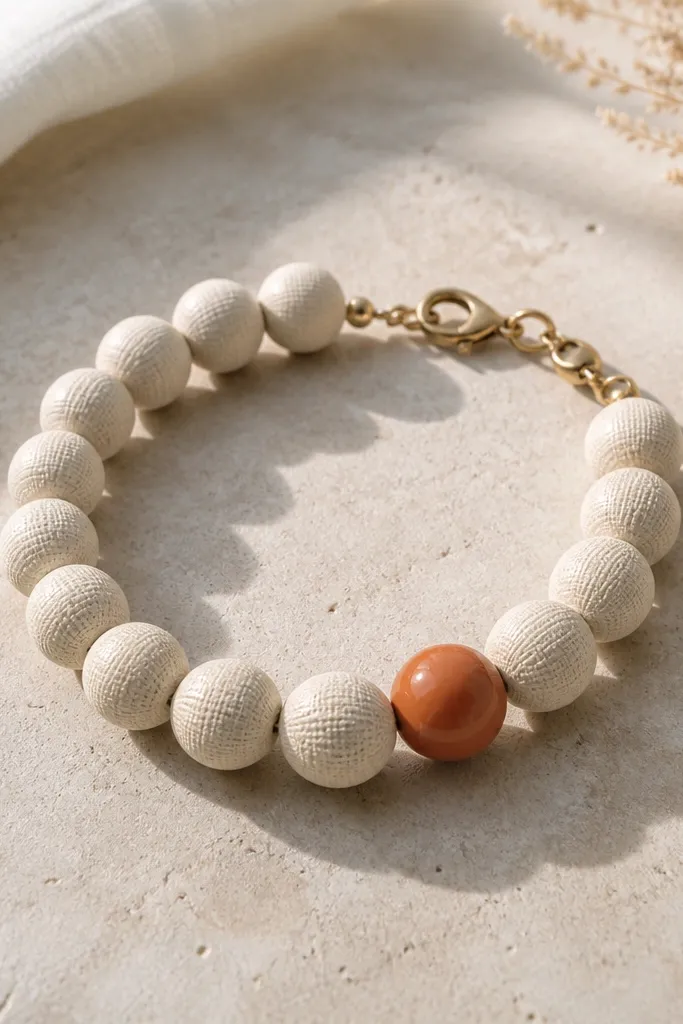
Texture is the whole point here. Linen texture makes plain clay look like fabric, and off-white keeps it classy. One burnt orange accent bead breaks the neutrality and gives you a focal point that looks intentional. This is the bracelet I reach for when I want something soft with visual interest.
Roll off-white clay into 9 mm rounds. Press a linen fabric piece lightly onto the surface - don't fully flatten, just imprint texture - then remove carefully. Pierce the hole through the center, and bake. Add one smooth burnt orange bead near the closure area as contrast, then string on cream cord.
Pro tipBake a test bead after pressing fabric; some fabrics imprint too deeply and create weak spots.
AvoidAvoid pressing fabric so hard that it thins the bead - it can crack during baking.
13. Mini Flower Beads with Center Pearl Dot

Raised mini flowers look adorable, but they only look good when the petals are thin and consistent. The pearl center dot ties the flower to a jewelry feel instead of a cartoon charm. Pale yellow + cream reads sunny without being loud. The flat flower shape also sits nicely against the wrist compared to chunky beads.
Roll pale yellow clay and cut small circles. Use a sculpting tool to shape five to six petal bumps around each circle, then add a tiny pearl mica dot in the center. Pierce the hole through the flower's center before baking. Bake thoroughly, then do a quick satin seal so petals don't get dusty-looking.
Pro tipKeep flower beads uniform by measuring diameter - 10 mm flowers look best on 7-inch bracelets.
AvoidSkip thick petal lumps; they chip at the edges after a few wears.
14. Two-Tone Twist Beads with Hidden Seam
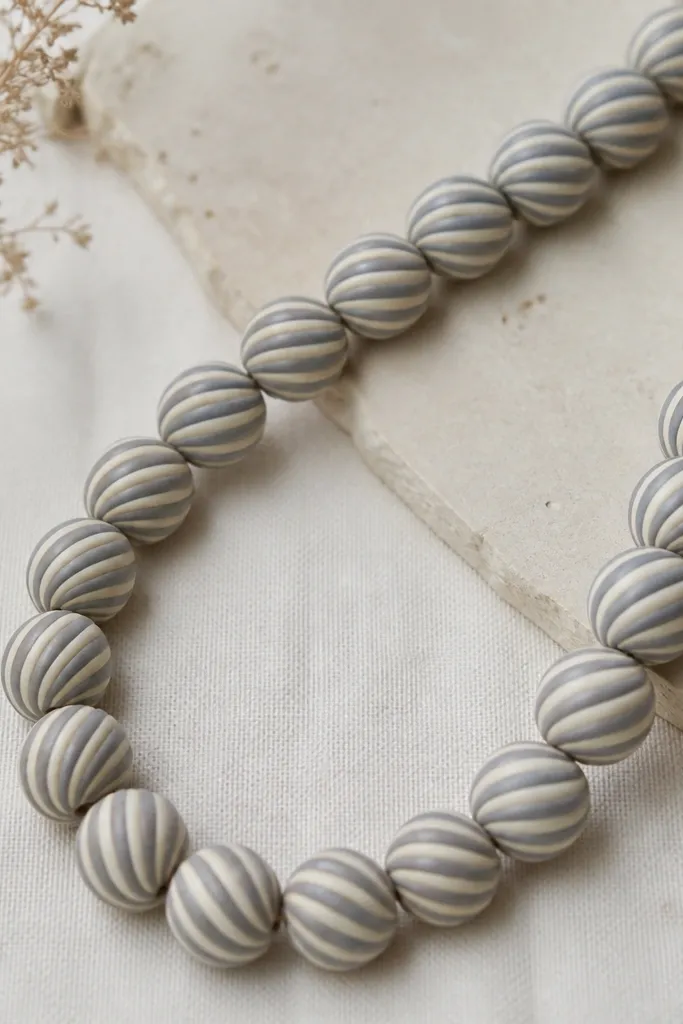
Twist beads look advanced because they create a spiral effect, but you don't need complicated tools. The muted gray makes the cream pop, and the twist pattern catches light as you move. Hiding the seam matters - when the seam faces the same direction each time, your bracelet looks polished. These beads also feel sturdy because the form is wrapped rather than layered.
Roll two thin logs: cream and muted gray. Twist them together lightly, then wrap around a dowel and pinch to even the bead. Place the seam under the bead when you shape so it faces the wrist. Pierce through the center and bake. After baking, buff seam edges lightly only where needed.
Pro tipRotate your beads while stringing so the twist lines alternate direction - it looks more intentional than perfectly aligned spirals.
AvoidDon't leave a visible seam ridge; it makes the bracelet feel handmade in a rough way.
15. Monochrome Matte Beads with Tiny Brass Spacer
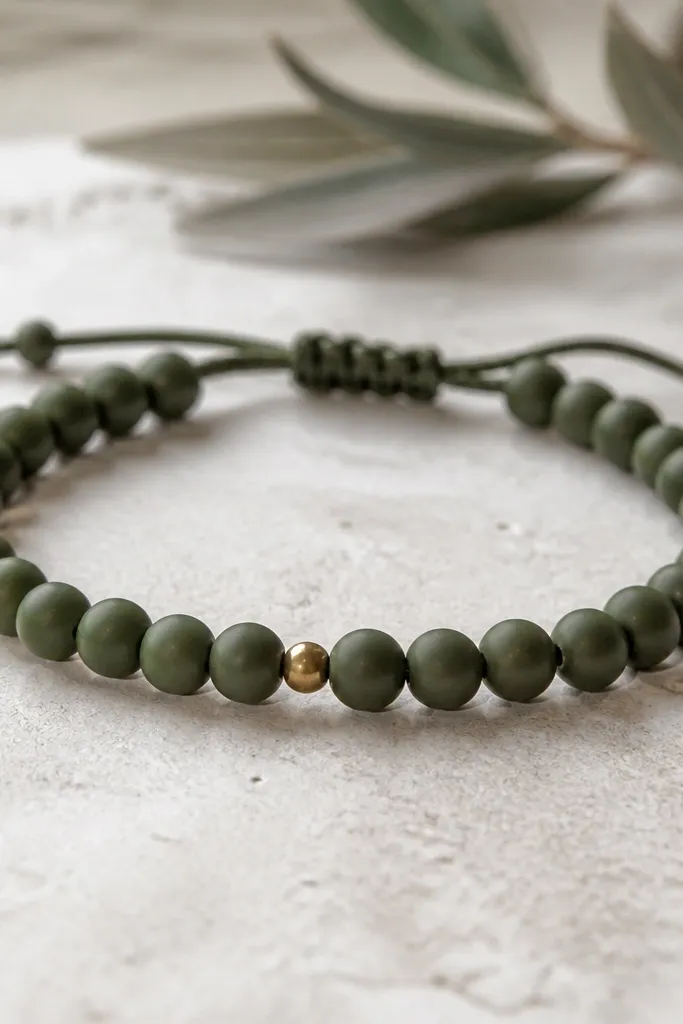
Matte monochrome looks clean and modern, especially when the clay color is deep. Olive is forgiving - it pairs with denim, knits, and office wear. A single brass spacer adds warmth without turning the bracelet into a mixed-metal mess. The spacer also prevents beads from grinding together, which keeps the surface looking fresh.
Roll olive clay into 8-9 mm rounds, pierce holes, and bake on parchment. After baking, use matte sanding paper (like 800-1000 grit) on the surface if you want consistent matte. String beads with a tiny brass spacer bead in the center, then tie elastic with a tight knot and hide it under a small stopper bead.
Pro tipIf your clay bakes shinier than you want, sand lightly before sealing - matte comes from surface texture, not from matte varnish alone.
AvoidAvoid mixing too many metals; two brass accents max looks intentional.


