
1. Blush Marble Drop Bead Bracelet
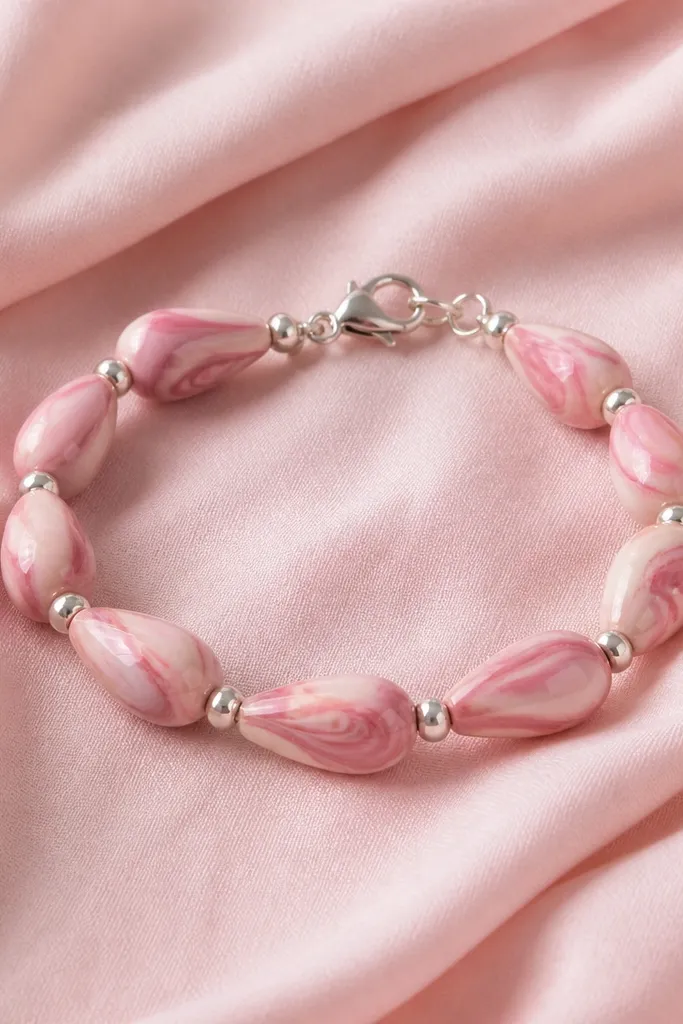
This one looks expensive because the marble pattern creates natural movement. I use blush pink clay mixed with a small amount of warm white, then roll and slice for veins that look organic instead of striped. The drop shape makes the bracelet catch light as you move your wrist, especially with a clear gloss topcoat. Silver micro spacers keep the pink from looking flat.
Make 8-10 drop beads about 8mm long and 6mm wide, with a center bead slightly larger. Use 1.5mm silver spacer beads between every other drop bead. Finish with a lobster clasp and 2mm jump rings so the clasp sits centered. This style looks best with a simple watch and a plain tee.
Pro tipRoll the marble log tight, then slice with a sharp blade so the veins stay crisp. Seal with a thin glaze and cure fully before threading.
AvoidDon't skip smoothing - lumpy marble edges make the glossy finish look bumpy and cheap.
2. Pink Gumball Beads with Tiny Gold Specks
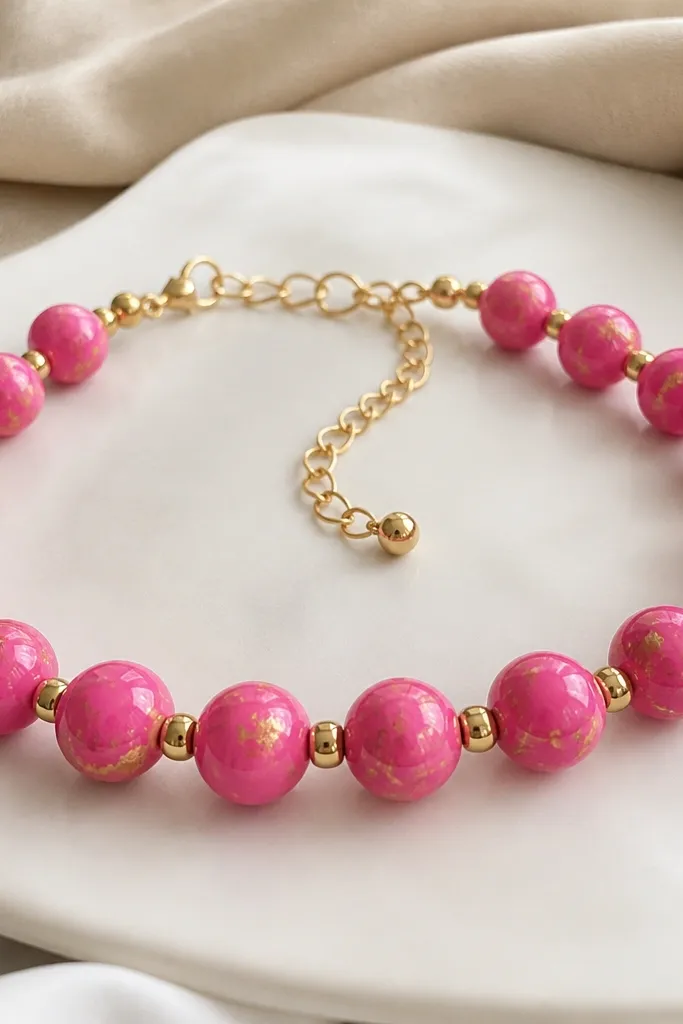
The effect here is playful but still polished because the gold flecks are controlled. I press micro flakes or gold-colored mica into the surface before baking, then glaze so the flecks look embedded, not dusty. The round "gumball" beads are uniform, which makes the bracelet feel neat even with fun color. Gold spacers add warmth against the pink.
Use 10-14 round beads at 7mm diameter, aiming for an even row spacing. Add 1mm gold seed beads or 1.5mm gold spacer beads between beads so the bracelet doesn't clump. Finish with a short extender chain so you can adjust fit. Wear it with denim or a white sweater.
Pro tipDust off excess mica before baking so you don't get glitter fallout later.
AvoidDon't use chunky glitter - it scratches skin and looks messy after a few wears.
3. Cotton Candy Gradient with Clear Crystal Spacer

This gradient reads "soft" instead of childish because the beads transition in tiny steps. I blend three pink shades: pale blush, bubblegum pink, and a slightly deeper rose, then roll beads in a repeating sequence. Clear crystal spacers break up the pink and make it sparkle when you move. The gloss finish makes the gradient look smooth, almost like candy.
Make 12-16 beads in 3 shades, with a gentle fade from one side to the other. Use clear bicones or 2mm crystal spacers between every two beads to keep the bracelet light. String on elastic cord if you want quick wear, or use memory wire if you want a rigid stack look. This one pairs well with pink nail polish and gold rings.
Pro tipLay beads out in order before threading and take a quick photo to confirm the gradient flows the way you want.
AvoidDon't mix too many pink tones - five shades turns into random rather than gradient.
4. Matte Rose Beads with One Glossy Center Stripe
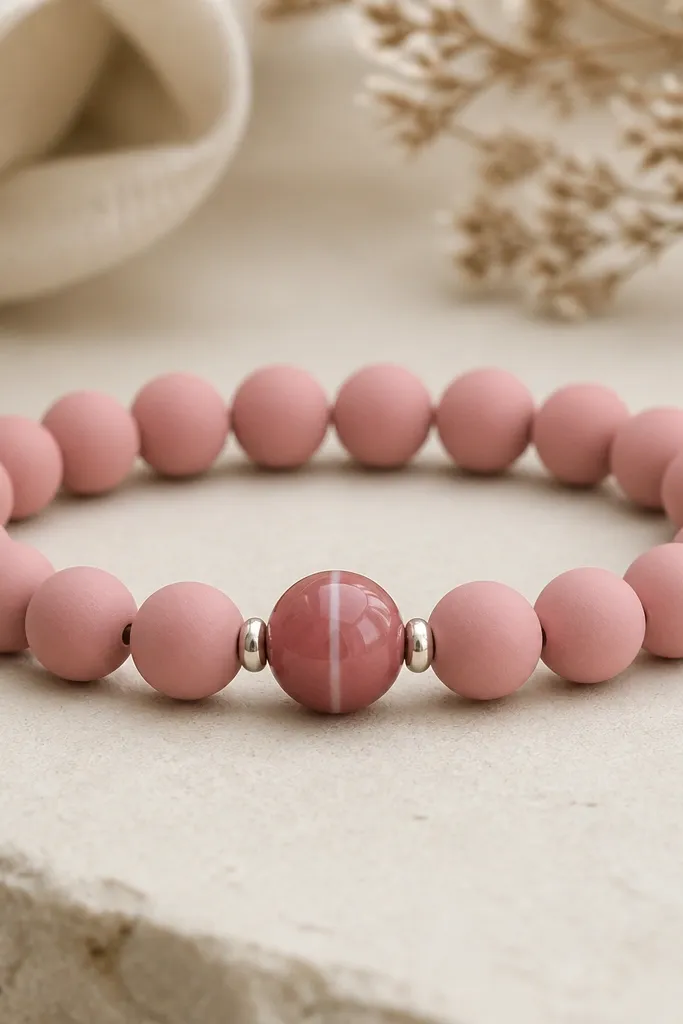
Matte beads look modern, and the glossy center bead makes the bracelet feel designed without adding bulk. I bake the whole set matte by skipping glaze, then apply a small stripe of clear gloss or a glossy clear coating only to the middle bead. That contrast creates a focal point your eye lands on instantly. The light stripe also helps the bracelet look symmetrical.
Use 8mm matte rose beads for the body and make one center bead at 10mm. Add 1mm silver spacers at both sides of the center bead, then keep the rest mostly bead-to-bead. If you want a clasp, use a simple magnetic clasp with a 2mm jump ring connection. Great for office outfits because it doesn't glare.
Pro tipUse a fine craft brush to paint only the stripe area with gloss so it stays crisp.
AvoidDon't gloss the whole bracelet - the matte look disappears and it starts to look like random craft beads.
5. Hot Pink Heart Charm Bracelet with Micro Beads
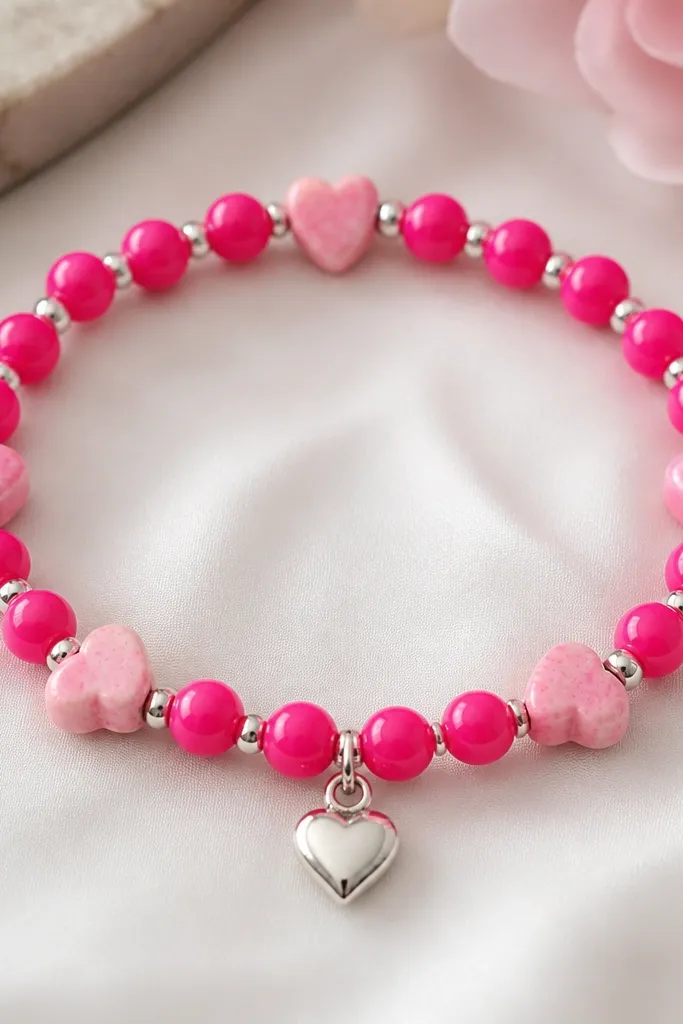
Hearts are cute, but they look best when the rest of the bracelet is controlled. I keep the bead palette mostly hot pink and use tiny 2mm micro beads around the charms so the hearts don't look floating. A center heart charm gives you that "love note" feel, and the silver hardware keeps it from looking too sweet. The hearts also photograph well because they have clear edges.
Make 10-12 round hot pink beads at 7mm and add 2-3 heart charms cut from thin clay. Keep hearts smaller than your main beads - about 9mm tall works well. String with elastic and tie a tight double knot, then dab knot with a tiny bit of glue meant for jewelry. Add a small charm jump ring to the center heart.
Pro tipUse a toothpick to poke a clean hole through the heart before baking so stringing doesn't crack the charm.
AvoidDon't make heart charms too thick - thick hearts feel heavy and distort on elastic.
6. Pink Pearl Look Beads with Speckled Core
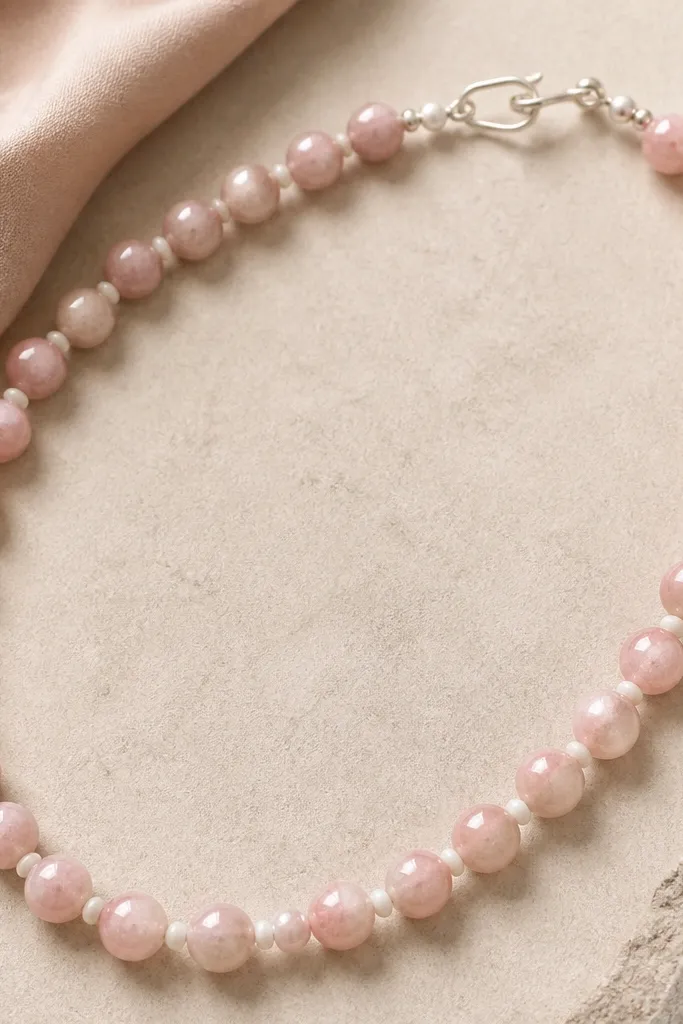
If you want the "pearl bracelet" vibe without buying pearls, this is the route. I tint the clay a pale pink and mix in a tiny amount of white for that soft pearl glow. The speckled core adds depth so the beads don't look flat. A satin finish (not full gloss) makes them feel more like real pearls.
Use 8mm beads and keep them uniform so the bracelet looks like a set. Add 1mm white seed beads between some beads, not every gap, so it doesn't look beaded-to-the-brim. Seal with a satin polymer finish or a light matte varnish made for polymer clay. Wear with creams and soft neutrals.
Pro tipSand very lightly after curing, then buff - satin looks best when the surface is smooth, not powdery.
AvoidDon't use matte on rough beads - it highlights every tiny ridge.
7. Rose Quartz Facet Illusion Bracelet
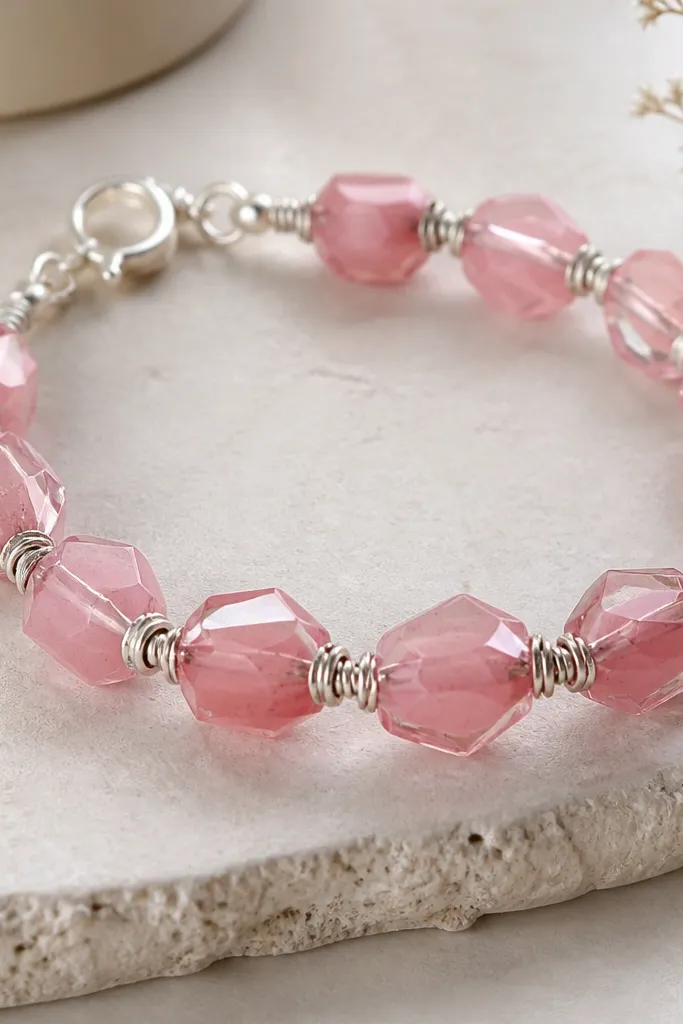
This one tricks the eye. You shape beads into faceted forms, then use translucent pink clay or a thin translucent layer so light seems to pass through. The faceting creates sparkle without crystals, and silver wire-wrapped spacers make it feel like jewelry-store work. It looks best in daylight because facets throw tiny highlights.
Make 6-8 faceted beads, each about 10mm across, with a slightly smaller center bead. Add 2mm round seed beads or tiny silver spacers at the edges of each facet bead. Use jewelry wire or strong thread for spacing, and finish with a clasp so the beads sit evenly. This bracelet looks great with black outfits and chunky rings.
Pro tipUse a flat sanding block to keep facets sharp, then seal with a glossy clay glaze to boost the "gem" look.
AvoidDon't round every facet - true gem shine comes from crisp edges.
8. Pink Shell Swirl Beads with Brass Spacers
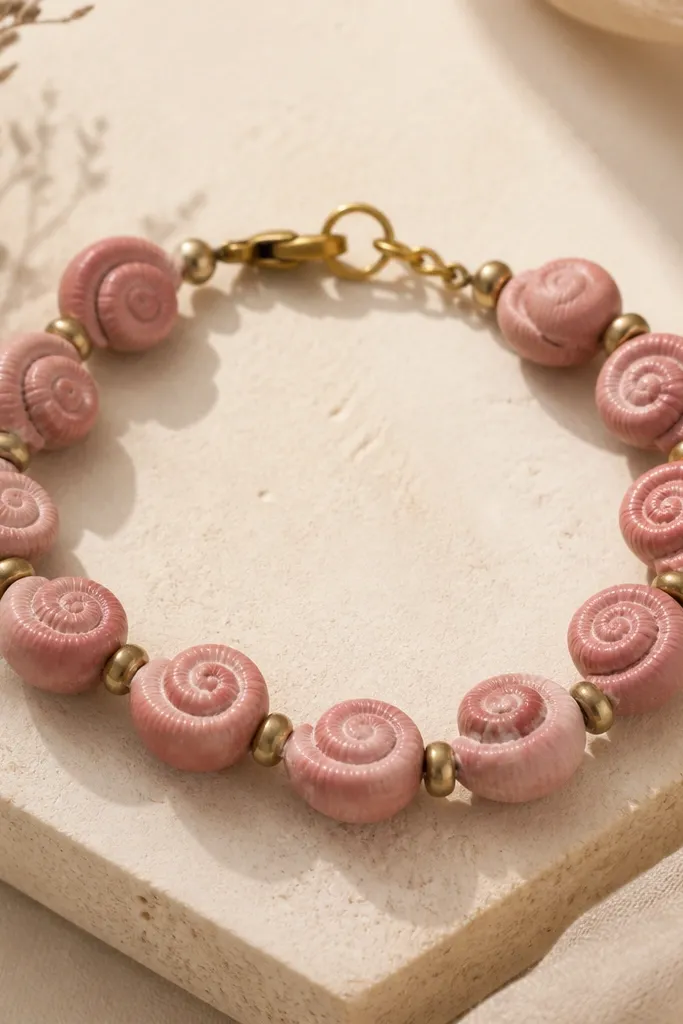
Shell swirls look fancy because the spiral lines create dimension even when the color stays simple. I make a pale pink base, then add slightly darker pink lines that twist around the bead. Brass spacers warm the palette and make the bracelet feel more "coastal brunch" than "craft project." A soft gloss finish keeps the swirl lines crisp.
Shape 10 beads at about 8mm wide with a swirl channel that runs from top to bottom. Use 1.5mm brass spacers between beads and keep the spacing consistent. Add a brass toggle clasp so the hardware matches the spacers. This one looks great with linen and gold hoop earrings.
Pro tipPractice one bead first and check that the swirl lines don't smear when you press them into the base.
AvoidDon't overwork the swirl - too much pressing makes the lines disappear.
9. Blush Bow Tie Bead Bracelet
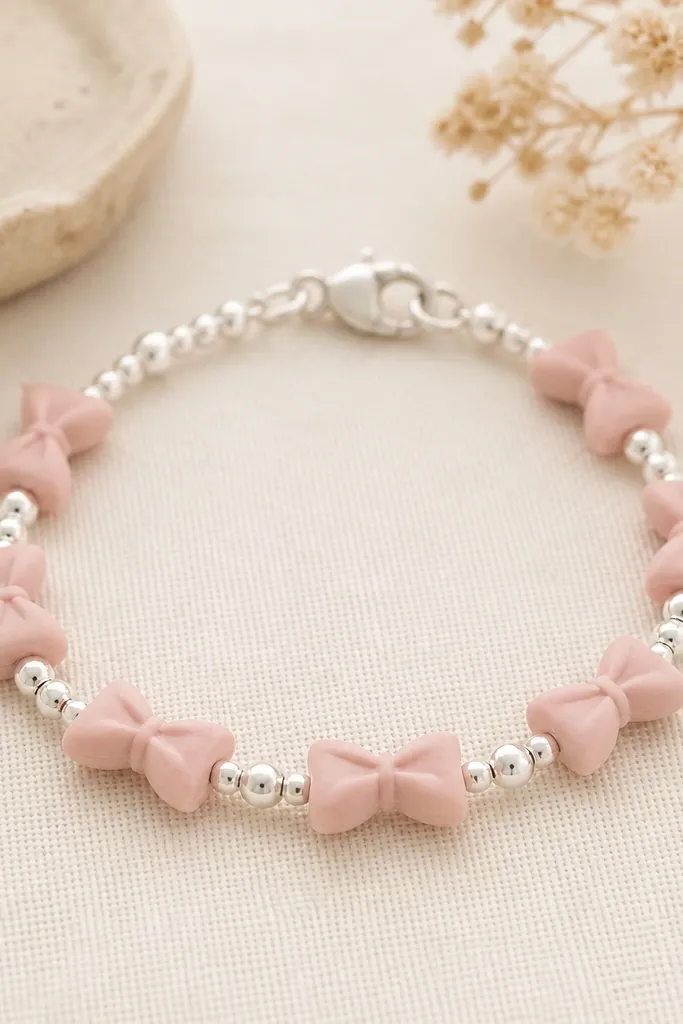
Bow tie beads turn a bracelet into a mini outfit. I use a light blush pink and keep the bow shapes crisp, then add tiny silver beads between each bow so the bracelet has rhythm. The bows act like the focal point, so you don't need extra charms. Gloss glaze makes the bow edges look clean and smooth.
Make 6-8 bow tie beads about 12mm wide, and add round spacer beads between them. If your wrist is small, reduce the number of bows and increase round spacers so it doesn't feel tight. Use elastic if you want quick slip-on wear, or string with wire for a more structured look. Pair with a satin scrunchie and a simple pendant necklace.
Pro tipCut bow tie pieces with a sharp blade and dry them flat before baking so the edges stay defined.
AvoidDon't make bows too big - they twist on the wrist and you lose the neat bow shape.
10. Pink Cookie Cutter Bead Mix with One Accent Color
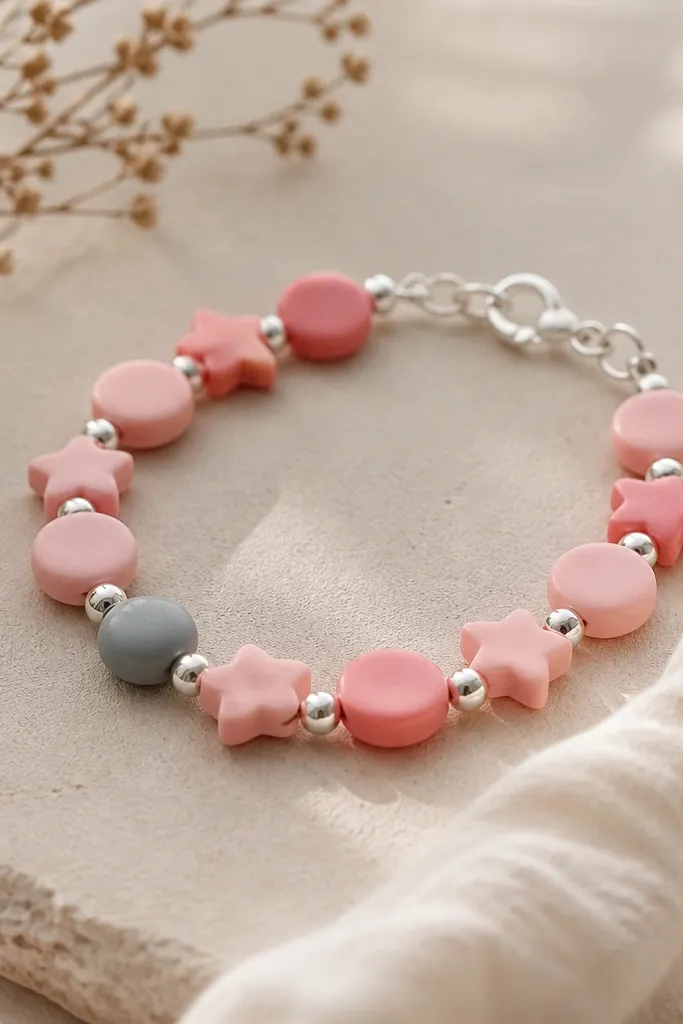
This is how you get "cute and curated" without random bead soup. I use pink clay for most shapes, then add one accent color bead - usually a tiny mint or soft lavender bead - so the bracelet has a designed moment. The shapes keep your bracelet visually interesting even with matte finishes. Silver spacers tie everything together.
Use cookie cutters to make 10-14 shapes, mixing circles, little stars, and mini rounded squares. Keep the accent to one or two beads only so it doesn't overpower. Sand edges after curing so shapes sit flat next to each other. String with elastic and finish with a small metal crimp bead or knot cover for a tidy look.
Pro tipArrange shapes on a table in rows first, then take a photo. If the pattern doesn't read from the photo, it won't read on your wrist.
AvoidDon't leave sharp corners un-sanded - they snag hair and look rough.
11. Rose Fade Beads with Tiny Tassel Charm
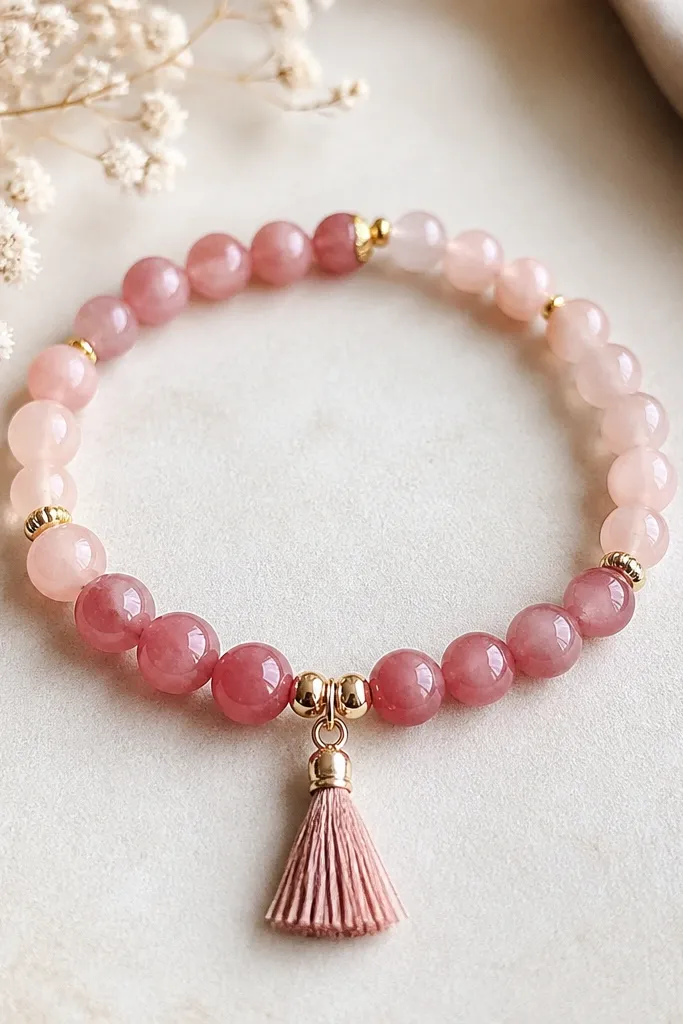
A tassel charm adds movement, and clay beads keep it lightweight. The rose fade beads go from pale to deeper pink, then the tassel gives a second layer of texture. I keep the tassel small - around 8-12mm - so it swings gently instead of flopping. Gold-toned spacers and a warm pink tassel make it feel cohesive.
Make 12 beads at 7-8mm with a smooth fade, then choose one center bead slightly larger. Attach a tiny tassel charm using a jump ring that sits behind the center bead. Use elastic with a strong knot if you want comfort, or use a wire-and-clasp build for a cleaner hang. This looks great with sundresses and sandals.
Pro tipThread the tassel after you string the main beads, then test the swing before you tie off the final knot.
AvoidDon't use a long tassel - long tassels tangle and end up looking messy.
12. Pink Terrazzo Bead Bracelet with Clear Coat
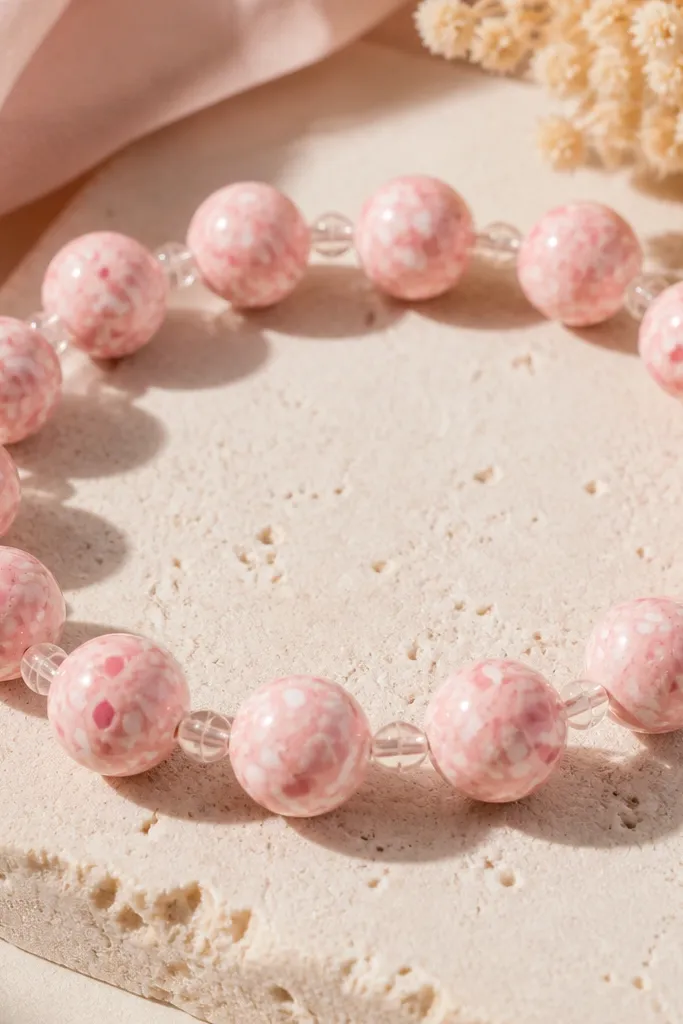
Terrazzo beads look like stone because you mix tiny specks into the clay base. I use a pale pink base and add small pieces of white and a deeper rose, then tumble the mixture gently so specks stay scattered. Gloss coat is the difference between "craft beads" and "jewelry beads" here because it makes the specks look sealed under glass. Clear seed beads add sparkle without changing the color story.
Roll 10-16 terrazzo beads at 6-7mm, aiming for consistent size. Add clear seed beads in between bead gaps, not as a full line, so the pink stays the star. Seal with a thick clear polymer glaze for a smooth top layer. Finish with a clasp or elastic depending on your comfort level.
Pro tipAfter curing, dip one bead in clear glaze and check it under bright light. If it looks glassy, you're ready for the whole batch.
AvoidDon't rush the clear coat - thin coats leave a rough surface that dulls the terrazzo look.
13. Pink Rolo Beads with Braided Macramé Edge
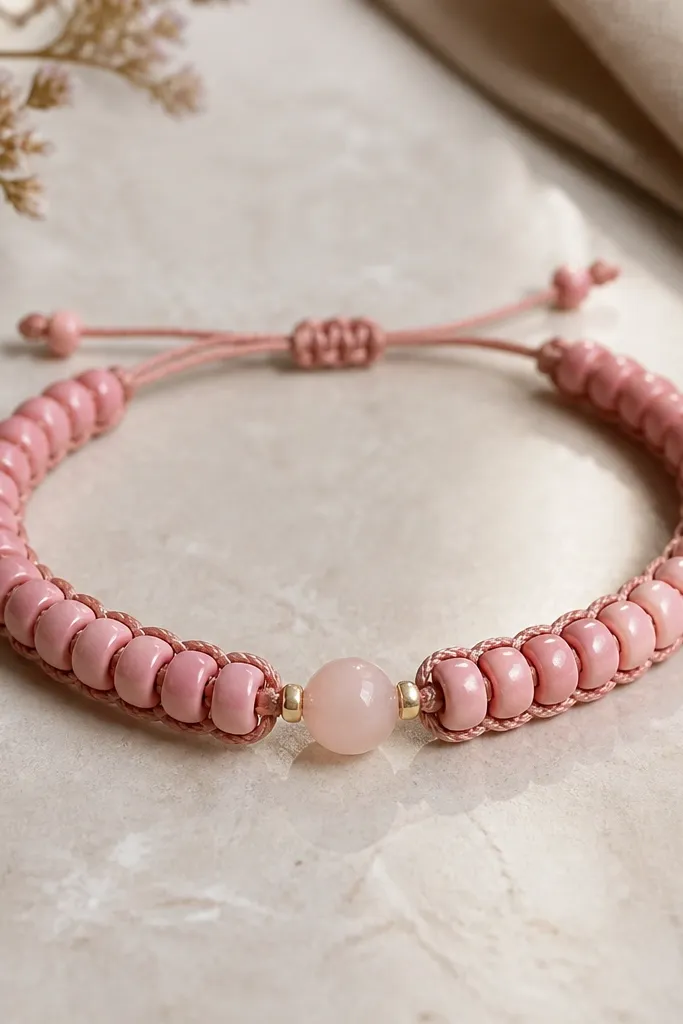
This one looks different because it combines clay beads with cord. I use oblong rolo beads in two pink shades, then add a braided macramé cord edge so the bracelet feels textile-soft. The cord frames the beads, which makes the bracelet look deliberate even if the bead pattern is simple. A small center bead acts like the anchor point.
Make 7-9 rolo beads at about 10mm long and 6mm wide. Use a sliding knot or a small button closure made with cord ends. Keep your cord thickness around 2-3mm so it doesn't overpower the beads. This bracelet looks great stacked with thin bangles or worn alone with a loose blouse.
Pro tipBurnish the cured cord ends with a lighter carefully and seal with a tiny bit of clear glue so it doesn't fray.
AvoidDon't use too-thin cord - it slides around and the beads end up uneven.
14. Peony Pink Beads with Micro Flower Spacers
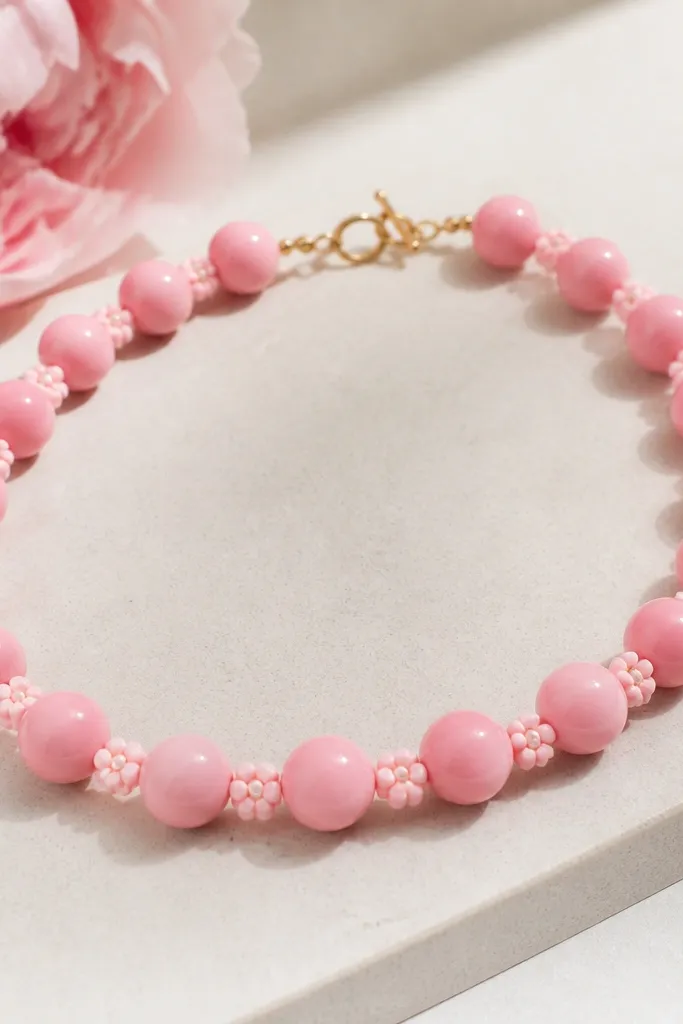
The flower spacers make this bracelet feel like it came from a boutique, and the peony pink base keeps it romantic. I use a peony shade (a slightly cool rose) and then a lighter pink for the micro flowers so there's contrast without chaos. Gloss glaze makes the flower edges look crisp. Tiny spacers also prevent the beads from rubbing and wearing paint off.
Use 10-12 peony pink round beads at 7mm and add 6-8 micro flower spacers around the bracelet edges. Keep the flowers slightly smaller than your main beads so the bracelet stays comfortable. String on elastic and reinforce knots with jewelry glue. Add a small metal clasp if you want a non-elastic feel, but elastic is easiest for a first build.
Pro tipSculpt micro flowers with a thin layer so they don't feel bulky next to round beads.
AvoidDon't glue spacers in random spots - if the flowers aren't spaced evenly, the bracelet looks lopsided.


