1. Two-tone pencil tray with a "drop lip"
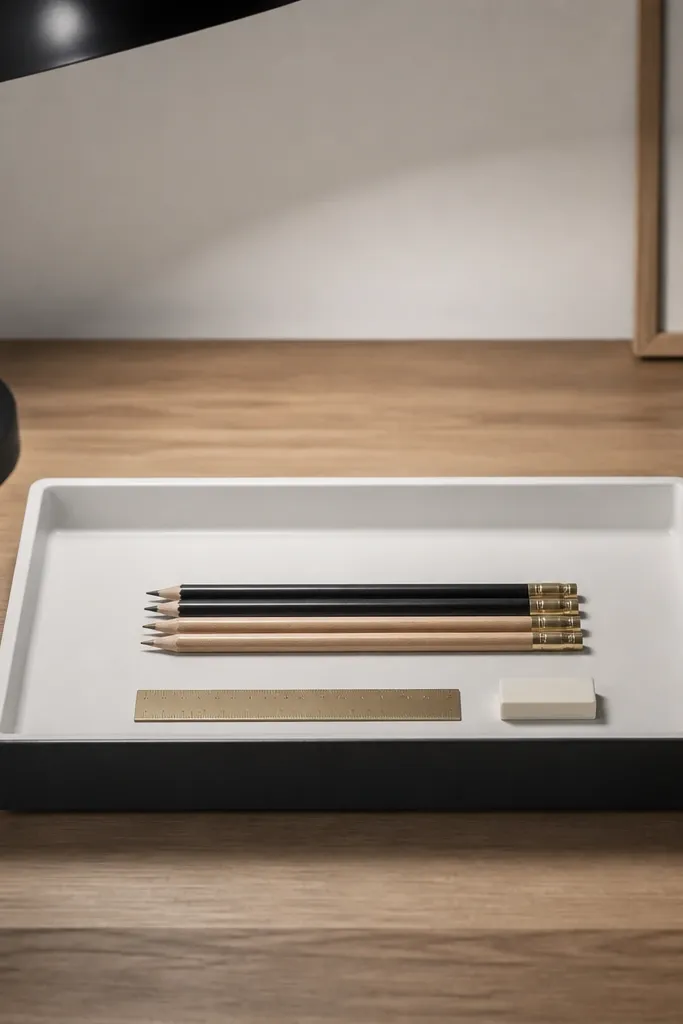
This setup makes the pencil area look intentional while preventing the usual scatter. The white body reads clean, and the charcoal lip gives a visible boundary where pencils land instead of rolling into the desk edge. I like trays with a raised front lip because kids naturally push items forward, and the lip catches them. The visual boundary keeps the "mess zone" contained.
Use a tray around 10-12 inches wide so it fits standard pencil lengths without turning into a deep junk pit. Pick a matte finish (powder-coated metal or matte plastic) so scuffs don't show as much. Place it 2-3 inches from the desk edge so dropping items doesn't create a constant mess line.
Pro tipAdd one 1-inch piece of painter's tape on the tray base as a "start line" so pencils always sit the same direction.
AvoidAvoid glossy trays - fingerprints and smudges show every time a kid grabs a pencil.
2. Cable braid station with labeled binder rings
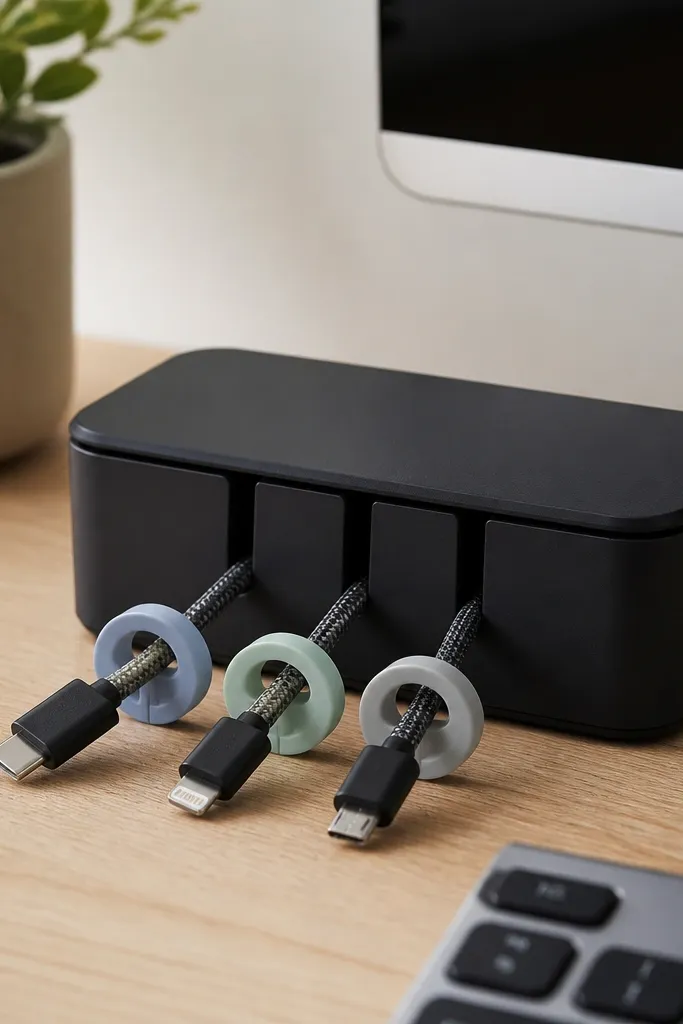
Loose cords make a desk look chaotic even when everything else is tidy. Braiding keeps tangles from forming, and the binder ring tags let you identify chargers fast without digging. I've used this for school laptops and a desktop printer - the rings are easy to flip and read. When cords are stored in one "station," the desk surface stays visually quiet.
Get a compact cable box or a small lidded organizer (about 8x6 inches) and feed cords through a side gap or organizer channel. Use binder rings or key rings with label tape wrapped around them - keep labels to 1-2 words like "Laptop" and "Printer." Keep the station near power outlets so kids don't reroute cords across the room.
Pro tipWrite labels using a label maker, but test on a scrap first to make sure the tape color matches your desk vibe.
AvoidDon't label with tiny handwriting - it looks messy and kids won't read it.
3. Clear acrylic paper sorter with three heights
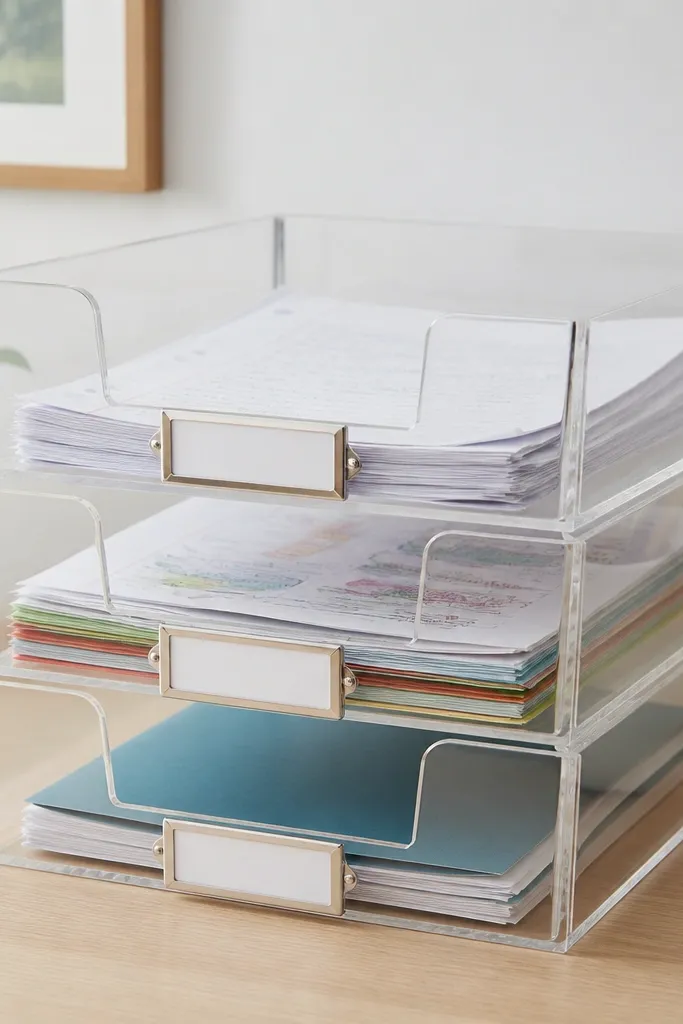
Acrylic paper sorters keep paper visible so you don't lose things to drawers. The three heights make it easy to separate "today" from "later" without thinking. I like the look because it stays clean - you can wipe it in seconds. It also stops the classic pile-on-the-corner problem.
Choose a sorter with compartments tall enough for letter-size paper (8.5x11) without bending. Use small label cards in white or light gray so the sorter looks calm, not crowded. Put it next to the desk writing spot, not across the desk, so the routine is automatic.
Pro tipUse a single label style for everything on the desk: same font size, same card color, same placement.
AvoidAvoid overcrowding the top compartment - when it's full, paper spills and the acrylic looks messy fast.
4. Fabric pencil caddy with color-coded pockets
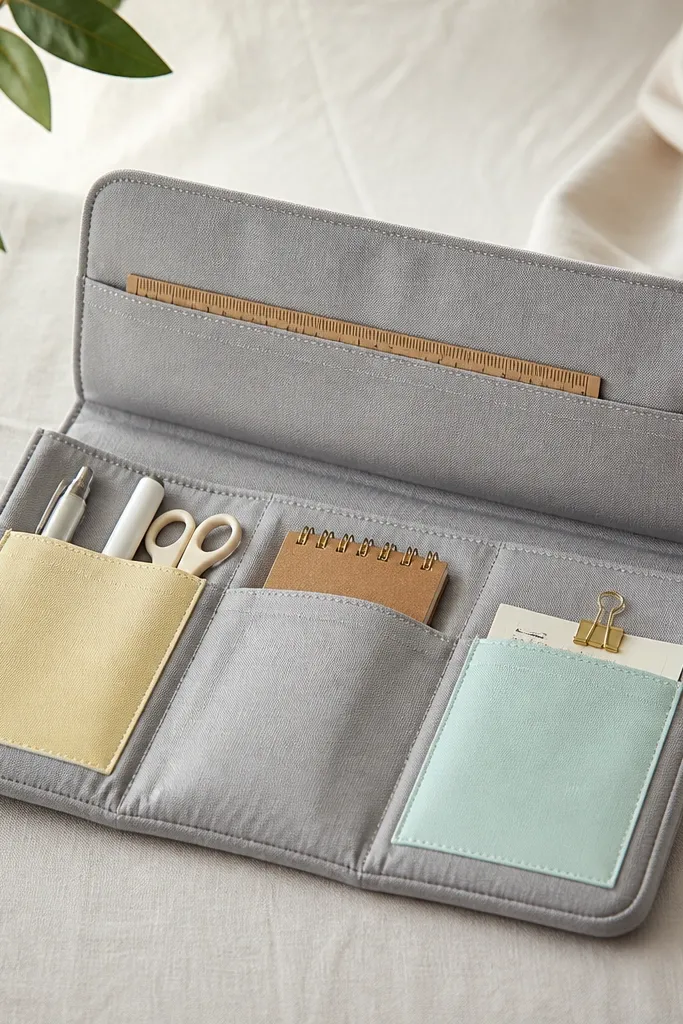
Fabric caddies hide the messy stuff kids toss in when they don't care about organization. The pockets give you quick sorting without visible clutter. I've found that color-coded pocket accents work better than printed labels for younger kids because they grab by color first. It still looks neat because the caddy fabric absorbs visual noise.
Pick a caddy with rigid sides so it doesn't collapse into a bag. Choose a neutral outer fabric (gray, oatmeal, or cream) and add two color accents only. Put it on the desk edge closest to where they sit - the shorter the reach, the less dumping happens.
Pro tipAssign one color per item type (yellow for pencils, mint for markers) and keep it consistent for a full week before changing anything.
AvoidAvoid caddies with floppy bottoms - they tip and turn into a dumping funnel.
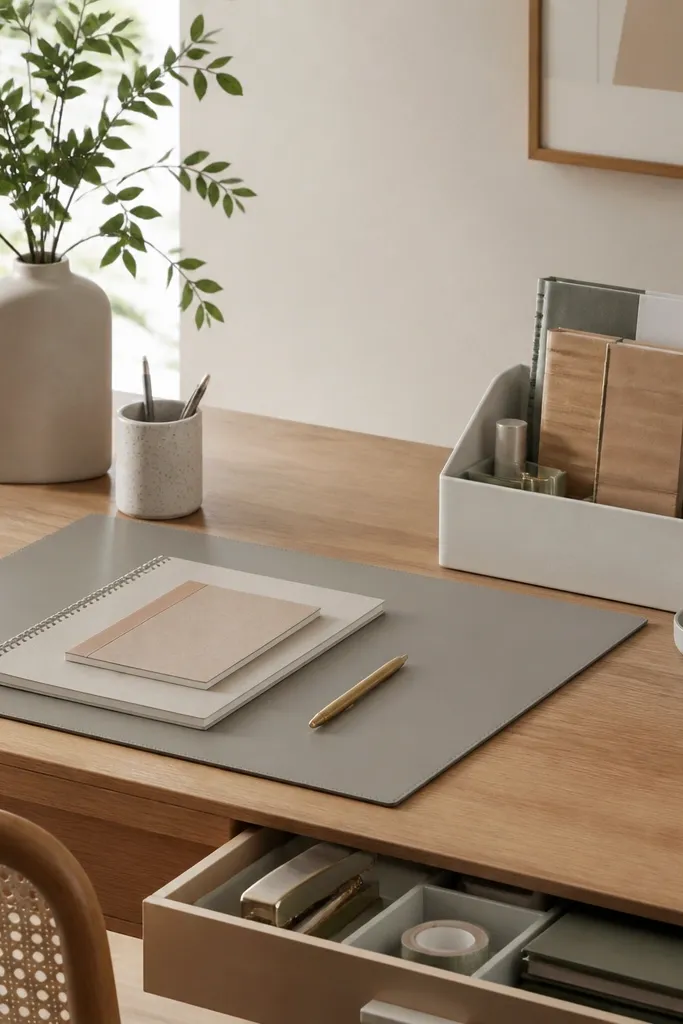
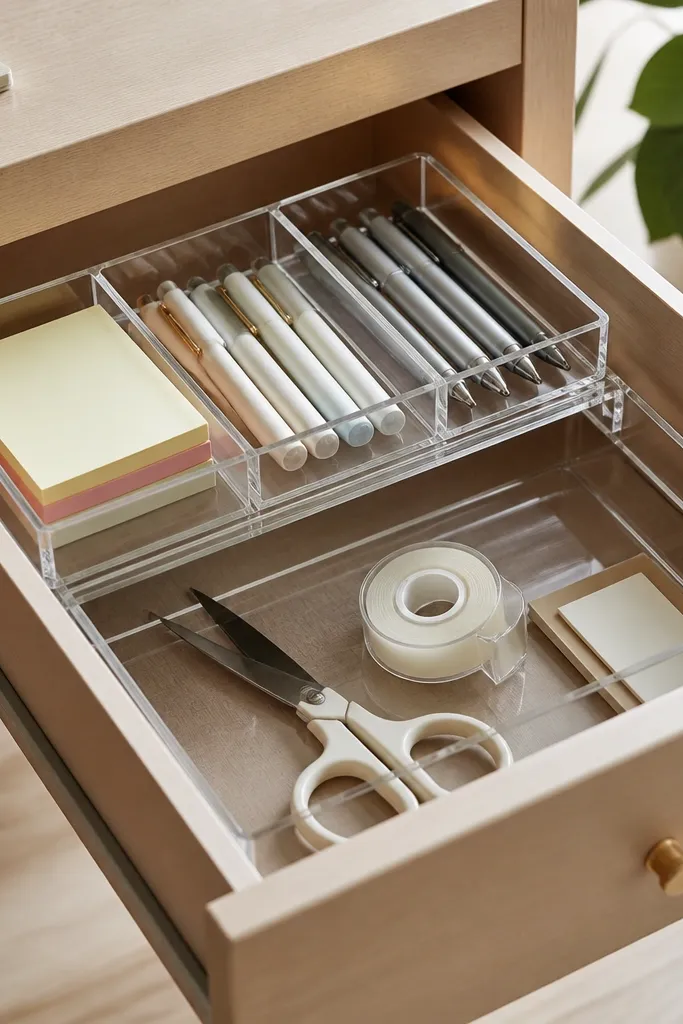
5. Drawer "tray within tray" for desk smalls
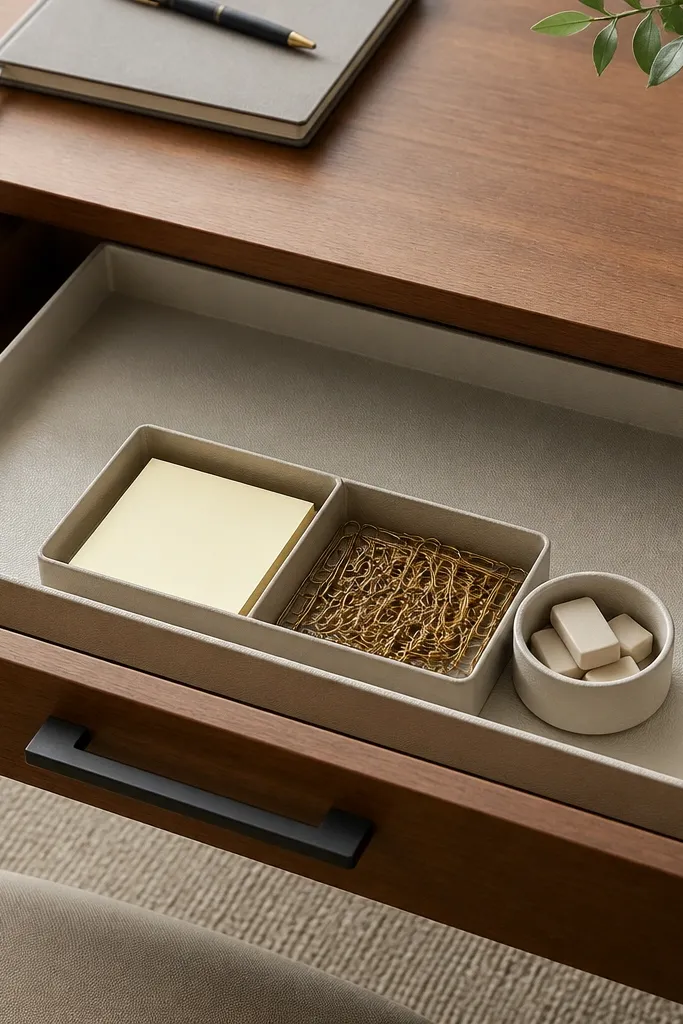
This is the method I use when desk drawers start looking like a junk drawer. A tray within a drawer keeps everything in one visual block, so you don't have random items migrating across the drawer. The shallow layout makes it easy to spot what's missing. It also makes your desk look tidy even when the drawer is open.
Measure your drawer depth first. Aim for a tray that leaves at least 1 inch of clearance so it slides easily. Use two heights: one shallow for clips and sticky notes, and one slightly deeper for tape and erasers. Keep the total number of compartments low so kids can actually remember where things go.
Pro tipPut your most-used item in the front-right compartment - that's the one your hand finds first.
AvoidAvoid mixing tall and short containers in one row - the tall ones tip and steal space.
6. Under-desk bin shelf for seasonal school supplies
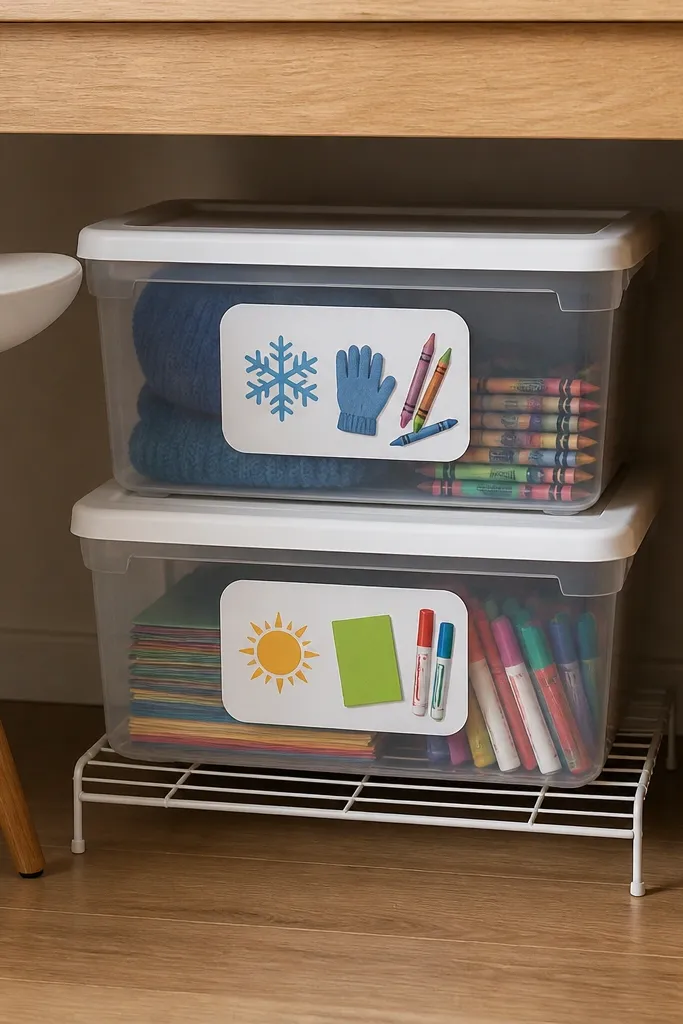
Seasonal stuff looks like it sneaks in, then never leaves. A bin shelf under the desk keeps it out of sight while still reachable when the season changes. I like clear bins with colored tape labels because you can see contents without opening everything. The desk surface stays clean all year because seasonal items never join the daily pile.
Use a wire or solid shelf that fits the under-desk clearance so bins sit flat. Keep bins to two sizes max: one medium and one smaller so you can stack neatly. Put "season swap" items in the larger bin and "backup" supplies in the smaller one.
Pro tipAttach a small ruler strip to the bin lid edge so you can align them the same way each time you pull them out.
AvoidAvoid opaque bins without labels - you'll forget what's inside and repurchase items.
7. Standing desktop organizer for the kid-proof desk corner

Standing organizers help because they create a single "grab zone" for kids. When the desk has a dedicated corner for tools, the rest of the surface stays clear for homework. Light wood looks warm, and the open compartments make it easy to see what's there. The bottom tray catches paper scraps so they don't end up under books.
Choose a standing organizer that's wide enough to hold glue sticks vertically without tipping (about 4 inches wide per compartment). Keep the bottom tray shallow so scraps don't pile into a thick mound. Place it at the corner closest to where kids sit so they don't carry supplies across the desk.
Pro tipIf your kids mix up scissors and glue, add a small colored dot sticker on each tool handle so they match the organizer pockets.
AvoidAvoid organizers with too many tiny slots - kids shove everything into one and it looks messy.
8. Magnetic side rail with clip-on catch for notes
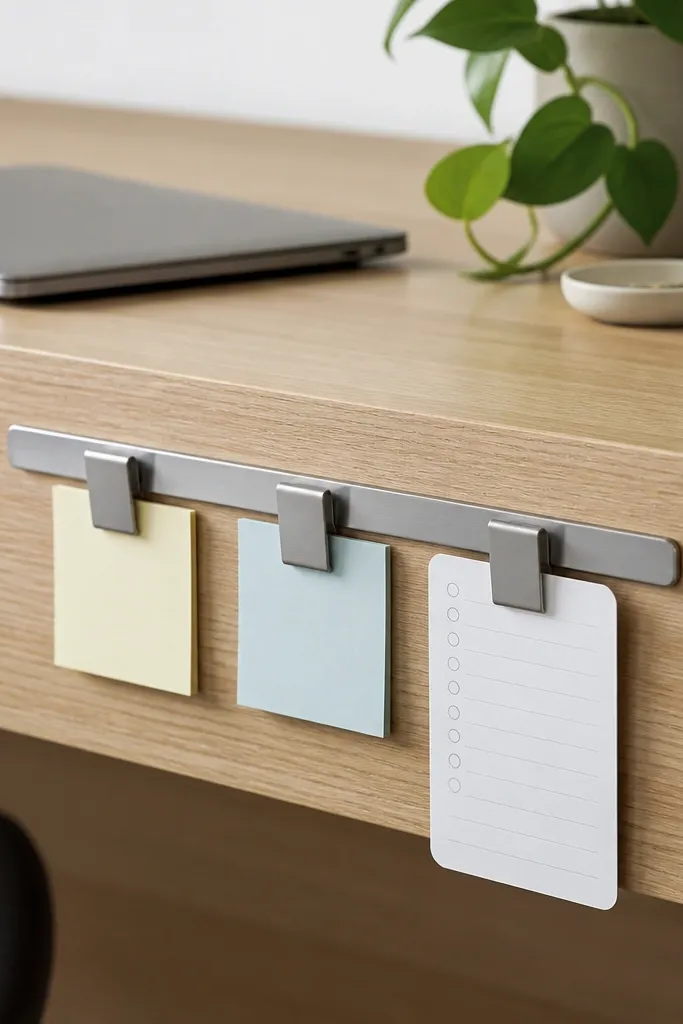
Side rails keep notes off the writing surface. I like this because it turns "floating notes" into a visible, repeatable system. Magnetic clips are fast to move, so kids can update the checklist without dragging paper piles around. The rail also hides the mess because notes live in one vertical strip.
Mount the rail on the desk side panel, not on the front, so it doesn't block elbows. Use clip holders that are sized for 3x5 cards and small sticky note pads. Keep a stack of blank 3x5 cards in one pocket so you can add notes without hunting.
Pro tipUse one color for "today" notes (like bright green) and a neutral color for "later" (like gray).
AvoidAvoid placing the rail too low - kids knock clips off when leaning forward.
9. Lidded mini trash can with a paper bag liner
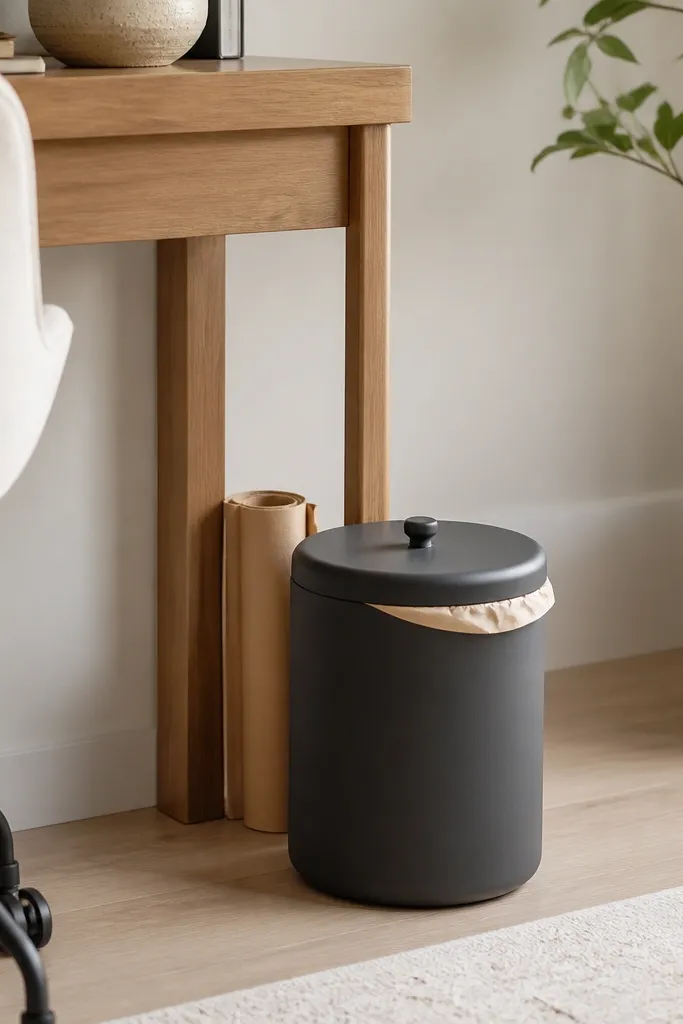
A desk looks disorganized when trash lives on the surface. A mini can nearby stops crumpled paper from breeding. The lidded top contains odors from snack wrappers and keeps the desk area looking tidy. Paper bag liners make it easy to swap without smearing - I've done this with kids eating at their desks.
Place it within one step of the desk, ideally under the "non-writing" side. Use a can that fits a standard roll of small paper liners or cut parchment-size liners if needed. Keep spare liners on a small hook or in a pocket bin so you don't wait for trash day.
Pro tipTape a small "trash only" label on the lid in a high-contrast color so kids don't throw away crayons by accident.
AvoidAvoid liners that tear easily - if the bag rips, you'll stop using it and trash returns to the desk.
10. Book stand with built-in bookmark file
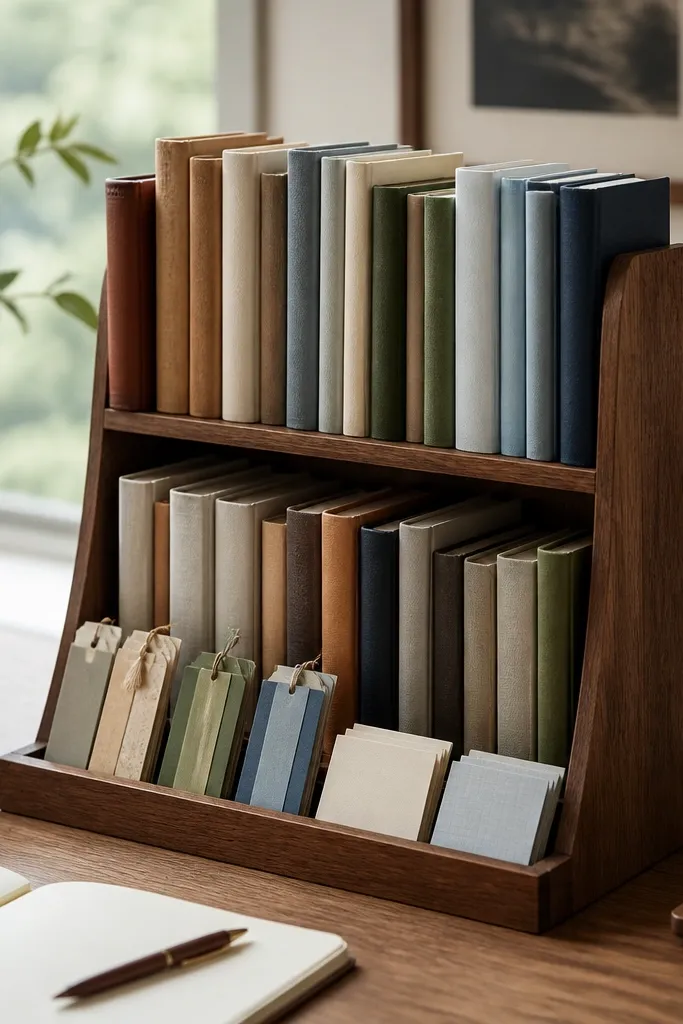
When books are flat, bookmarks and worksheets slide everywhere. A book stand keeps reading materials upright and visible, which reduces the urge to pile papers on top. The thin front channel gives one home for bookmarks and folded notes. This looks neat because the desk has vertical lines instead of scattered paper.
Use a book stand that holds letter-size textbooks or thick notebooks without wobbling. Add a slim DIY channel using a narrow strip of acrylic or wood glued to the stand front edge, just tall enough for bookmarks. Keep worksheets in the same orientation each time - top edge aligned.
Pro tipKeep three bookmark sizes only: one for the current book, one for "next," and one spare. Too many sizes looks chaotic.
AvoidAvoid stands that wobble - kids bump them and papers spill back onto the desk.
11. Spice-jar style label cabinet for supplies

Small metal bits look messy when they're loose in a drawer. Using jar-style containers makes the desk look intentional and also makes it easy to see when you're running low. I've kept binder clips, rubber bands, and push pins in glass jars because they wipe clean and don't stain. The aligned labels make it look calm even with different items.
Pick jars with similar heights so the shelf lines up. Use white or cream label tape and apply it at the same height on every jar. Store jars in a shallow shelf area so kids can reach without tipping them.
Pro tipPut the jar you use most (paper clips) at eye level for the person doing homework.
AvoidAvoid mixed jar sizes on one shelf - it looks like a collection, not a system.
12. Desk mat with "activity lanes" tape markings
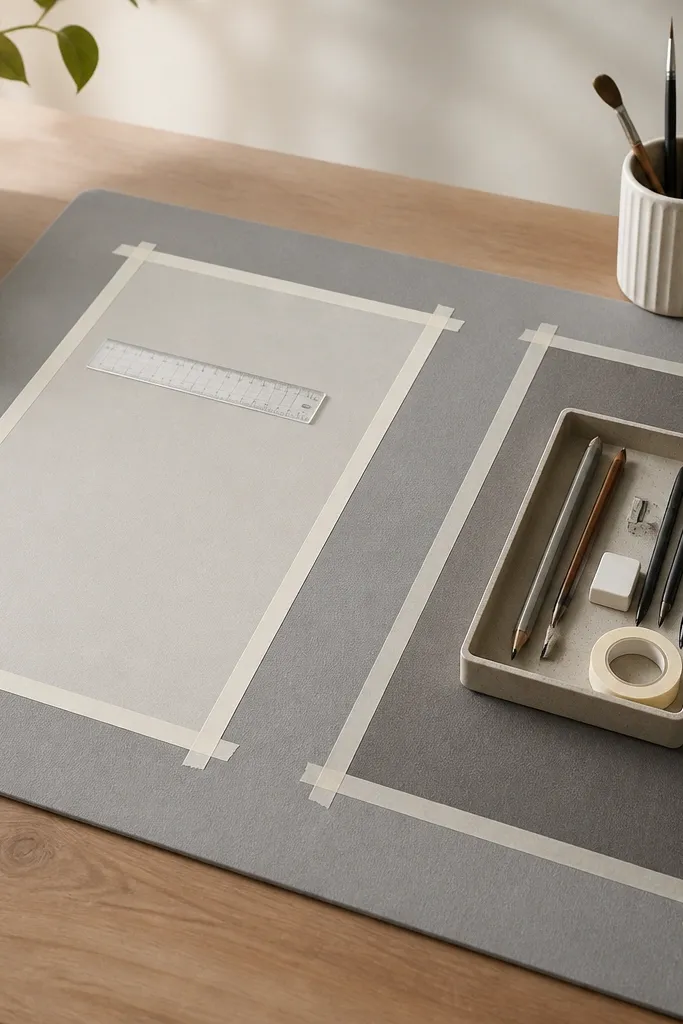
A mat makes the desk surface easier to wipe, and the tape lanes stop paper from spreading. I use this in homes where kids push everything outward while writing. The lanes create invisible boundaries without needing extra furniture. The result looks tidy because items stay in their lane.
Choose a mat with a slight texture so tape sticks and paper doesn't slide too much. Use painter's tape for the lanes and place them under the areas where you want paper to land. Keep the lanes simple: writing lane and supplies lane only.
Pro tipReplace tape every 2-3 weeks if it lifts - fresh tape keeps the lines crisp.
AvoidAvoid making the lanes too small - kids will work off the mat and scatter anyway.
13. Acrylic drawer risers for "see-through tidy"
Risers turn one deep drawer into two usable heights, and that keeps items from sinking to the bottom. Acrylic makes it easy to spot what's inside without opening everything. This looks clean because the drawer becomes a layered grid instead of a pile. It also helps kids find items faster, which reduces desk-top clutter.
Use risers that are sturdy and wide enough not to wobble. Place smaller bins on the upper layer and keep heavier items lower. Keep bin colors consistent by using clear bins with colored labels only on the front.
Pro tipLabel the front of each bin with a single icon (pencil, scissors, tape) so kids can read it without spelling.
AvoidAvoid frosted acrylic - it hides the contents and you'll start re-stuffing randomly.
14. Wall-mounted swing hooks for backpacks and lunch bags
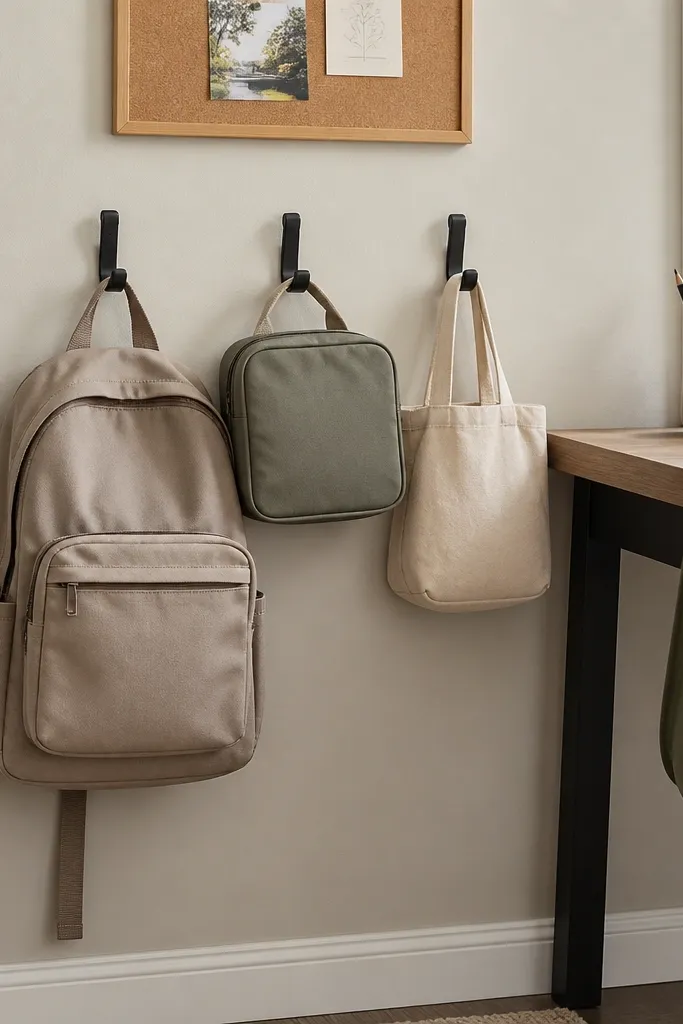
Backpacks falling onto chair backs make desks look messy fast. Swing hooks keep bags off the desk and off the floor, which also reduces lost straps and morning scrambling. Matte black hooks look sharp against light walls and don't look like kid clutter. This setup also protects the desk area from crumbs and paper spills.
Mount hooks at kid height so they can hang bags without dragging them. Use at least two hooks for rotation: one for the current day, one for backup or after-school items. Keep the hooks close to the desk so kids don't walk across the room carrying messy items.
Pro tipAdd a small strip of Velcro on the wall under each hook so lunch bag straps don't swing into the desk.
AvoidAvoid hooks that are too far from the desk - kids will still toss bags onto chairs.
15. Laminated checklist board with clip rails
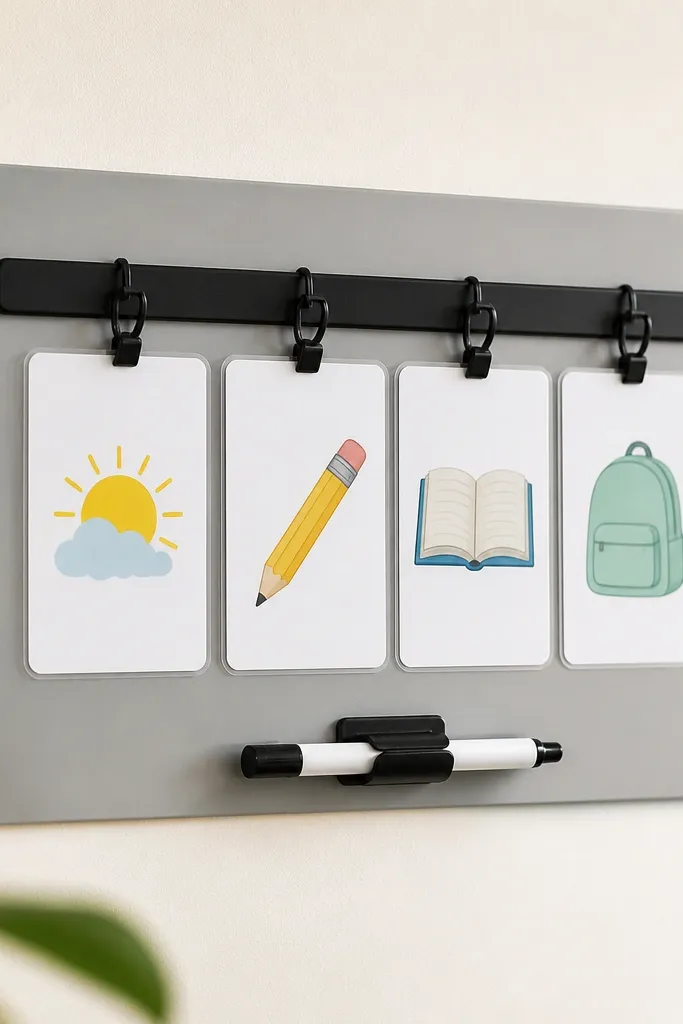
A checklist board keeps daily desk behavior consistent, which is the real engine behind year round desk organization. The clip rail makes cards easy to swap when schedules change for seasons or sports. I've used laminated boards because they wipe clean after marker smudges. The board also reduces the surface pile of notes since tasks live on the wall.
Use a board about 12x16 inches so it's visible but not huge. Add a clip rail along the top or side and hang four cards maximum. Use dry-erase markers for adults and pencil or washable markers for kids so it stays clean.
Pro tipPut the board at eye level for the kid who uses the desk most, not at adult eye level.
AvoidAvoid handwritten lists on loose paper - they end up under notebooks.


