1. Mini Terracotta Labels + Color-Block Drawer Zones
This setup looks cohesive because the labels repeat the warm terracotta tone that also matches clay pots. Inside the drawer, you create zones by color: one section for writing tools, one for small classroom supplies, one for "misc finds." The drawer front stays clean and photo-ready since anything messy stays inside.
Use a pack of self-adhesive divider sheets or pre-cut acrylic dividers and paint or contact-paper the exposed divider faces in three colors. Add small terracotta-colored label tags on binder clips attached to the drawer front edge. Put a pothos or snake plant on the desktop so the warm label color and green foliage read as one palette.
Pro tipPrint labels on matte sticker paper and cover with clear tape so they survive sticky fingerprints.
AvoidAvoid glossy labels that reflect light - they look cheap beside real leaves.
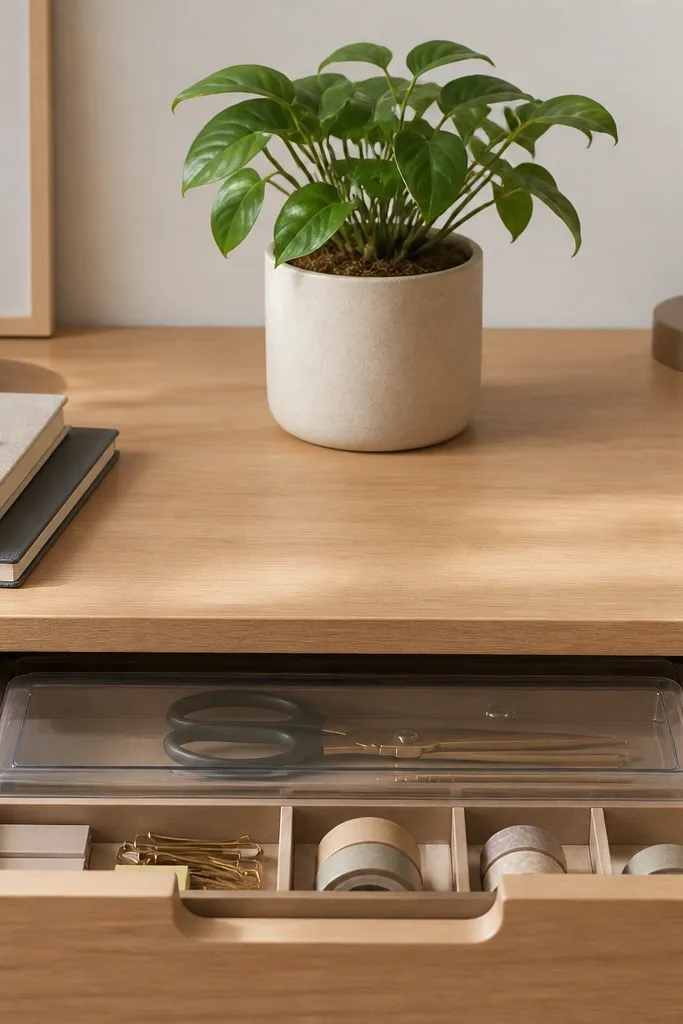
2. Clear Lid Pencil Tray Drawer Insert
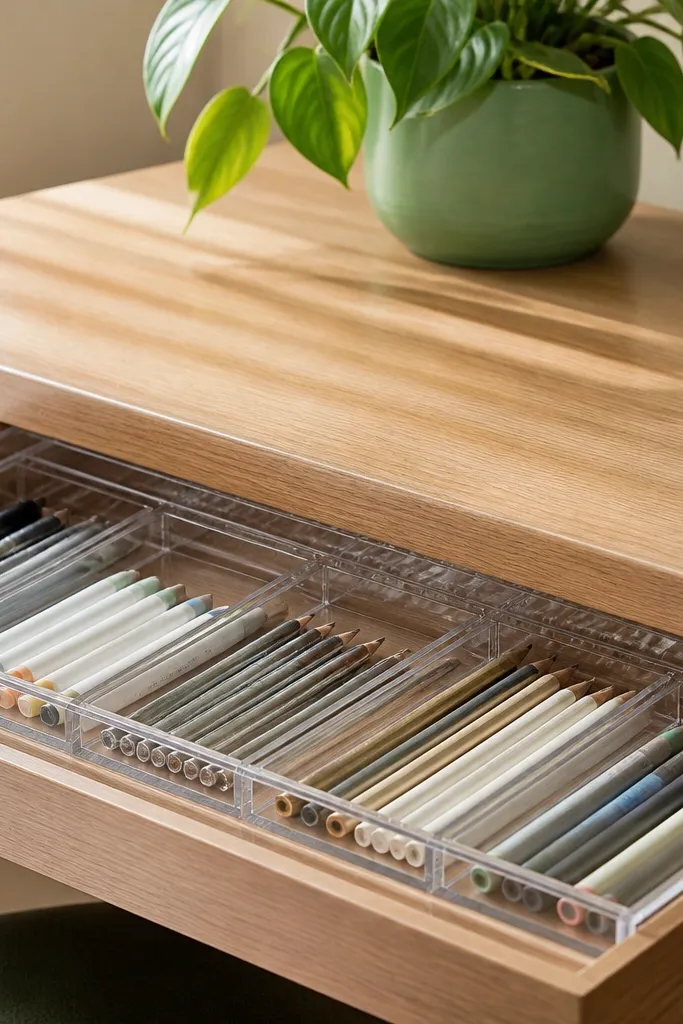
A clear lid keeps the drawer from becoming a scratch-and-clutter box. It also looks tidy next to plants because you can see what's inside without opening everything. I like it for the "writing daily" drawer because pencils get knocked around constantly.
Buy a shallow clear acrylic organizer that fits your drawer width, then add flexible foam drawer liner under it so it doesn't slide. Use a lid panel or a clear cover cut to drawer depth with a smooth edge. Keep markers and pencils in separate blocks so you don't end up with ink-stained chaos.
Pro tipAdd one small cloth bin inside the tray for erasers - they stay clean and don't roll.
AvoidDon't leave sharp acrylic edges exposed; kids will snag sleeves on them.
3. Canvas Bin Drawer for Crayons and Glue Sticks
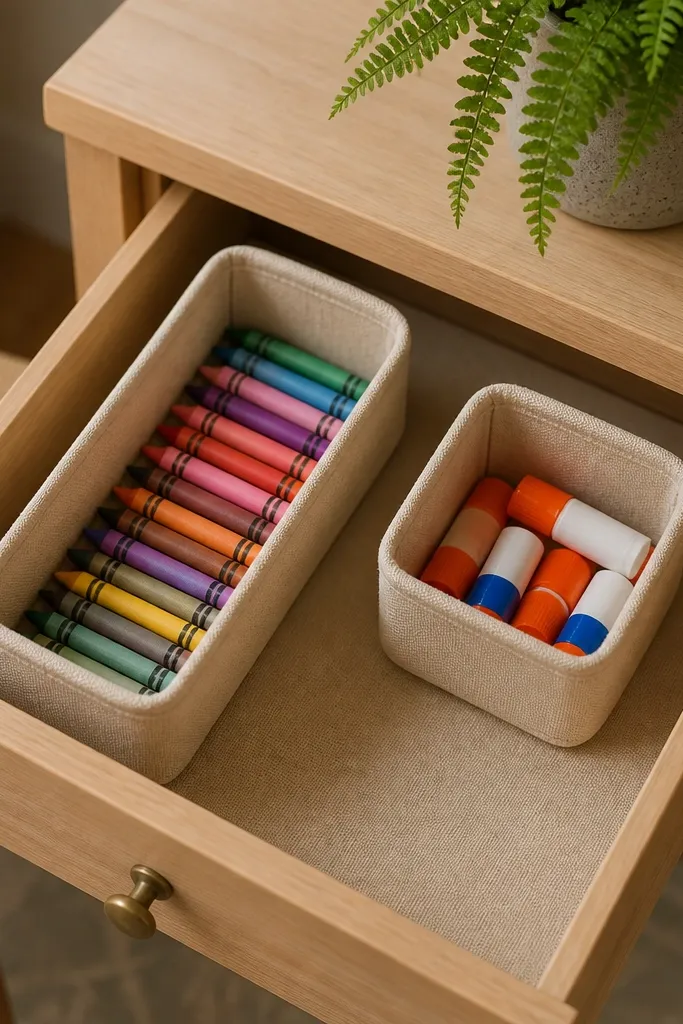
Canvas hides mess and scuffs, which matters when you have kids. The neutral fabric color makes the drawer look warm and calm next to greenery. It also reduces the "everything spills everywhere" problem because bins lift out and reset fast.
Line the drawer with cotton canvas or a canvas drawer liner sheet. Use two bins made for craft storage: one long, one square. The key is height: keep bins about 1 to 2 inches below the drawer rim so nothing gets pushed out when the drawer closes.
Pro tipSew or tape a small loop on the front of each bin so little hands can pull them out without tipping the whole drawer.
AvoidAvoid thin polyester bins that flop; they collapse and jam the drawer track.
4. Book Spine Divider for Receipts and Homework Sheets

Vertical dividers keep paper from turning into a pancake stack. It looks neat because every sheet sits aligned, and it's easy to flip through when you need a worksheet fast. Kids also stop crumpling paper because it has a place to stand.
Make dividers from leftover thin plywood strips or thick chipboard cut into uniform widths, about 3 inches tall for the right depth. Space dividers so standard letter paper fits upright without bending. Use a drawer liner in light gray or warm white to make the paper stand out with the plant's green.
Pro tipUse two categories only: "Today" and "Archive." Too many folders turns into a junk drawer again.
AvoidDon't overpack; if the stacks press into the dividers, the whole system looks messy fast.
5. Cable-Plus-Botanical Side Drawer (S-Loop Layout)
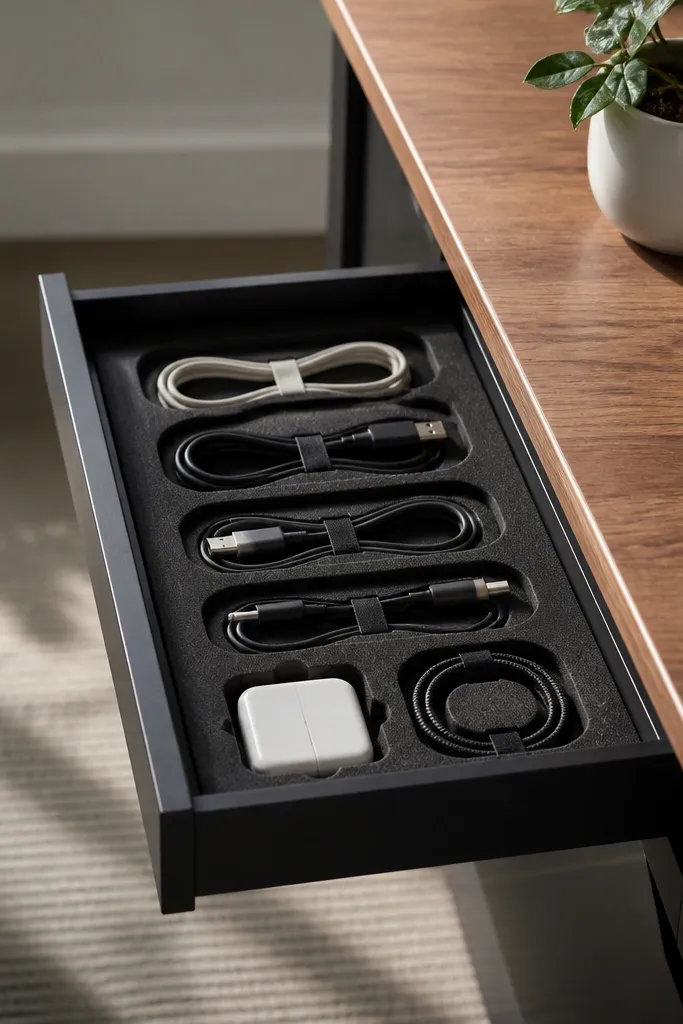
This keeps chargers and cords from tangling into a knot you dread. The drawer still looks clean because cables are controlled in loops, not piled. It pairs well with plants because you get a tech-free surface look - greenery is visible, wires are hidden.
Use stick-on foam cable management channels or cut craft foam into curved "rails." Clip cords with Velcro ties so each loop is the same size. Leave a dedicated pocket for headphones and another for USB cables. Keep the drawer shallow so cables don't get crushed by a closing slam.
Pro tipLabel the Velcro ties with tiny black tape tags so kids can put the right charger back.
AvoidAvoid tying cables too tight; you'll weaken them and replace cords sooner.
6. Stacking Soda-Can Drawer Tubes for Markers

These tube holders are cheap, sturdy, and they look intentional. The circular shape prevents markers from rolling into each other. With plants on top, the desk reads warm and handmade instead of "storage bin everywhere."
Cut the tops off cleaned soda cans and sand the rim smooth. Paint inside and outside with matte acrylic in cream and sage tones. Seal with a clear matte spray so marker ink stains wipe off. Arrange tubes with 1/4-inch gaps so you can grab one without pulling the whole cluster.
Pro tipAdd a thin felt strip at the bottom so the tubes don't scratch the drawer liner.
AvoidDon't leave sharp metal edges; even a small bite feels dangerous with kids around.
7. Drawer-with-Lid for Scissors and Tape (Safety Front)
A lidded bin stops scissors from disappearing and stops tape from unraveling into a mess. It also keeps the top of the drawer visually neat, which matters when plants are right above it. This is the drawer I use for "sharp and sticky" items.
Use a lidded plastic bin with internal dividers, sized so it sits flush with drawer front. Put scissors in a narrow slot so blades face down and handles face out. Tape rolls go in a shallow tray with a lip so they don't roll. Keep lid color matte white or light wood to match common plant pot tones.
Pro tipStore one extra tape roll in the bin's back corner so you don't hunt mid-project.
AvoidAvoid open trays for scissors; one spill and the drawer looks chaotic.
8. Oversized Slot Tray for Rulers and Measuring Tape
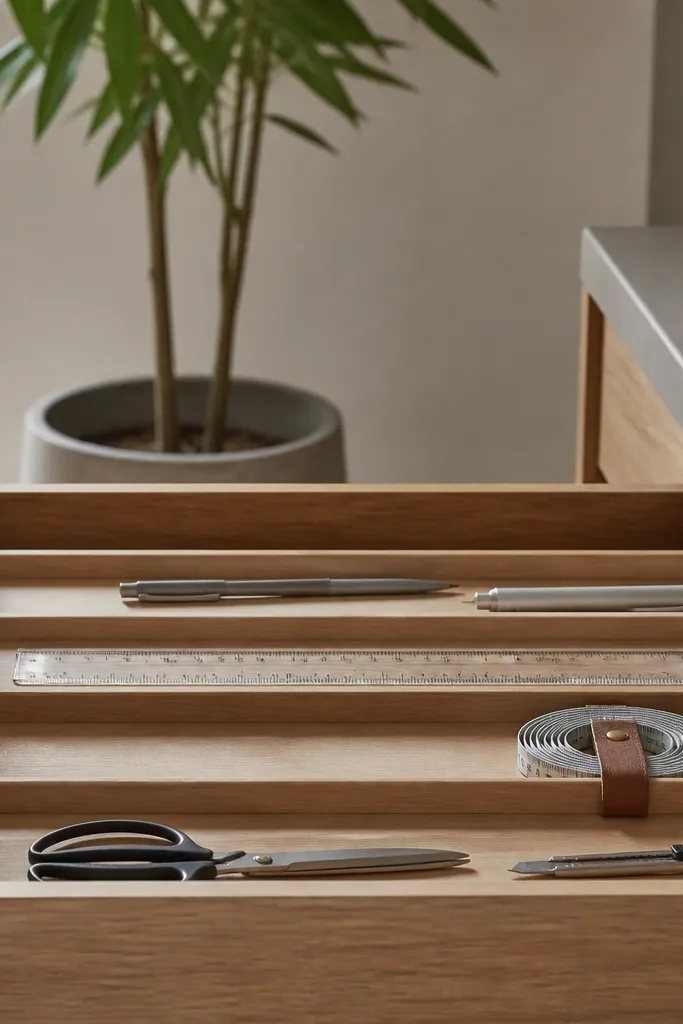
Long tools look messy when they're stacked, so give them their own horizontal home. This drawer setup makes the desk feel organized because the ruler aligns visually. It also prevents damage to edges when kids shove things in.
Install two or three long dividers in the drawer so each slot holds a ruler or tape at a slight angle. Use a thin rubber shelf liner at the bottom so tools don't slide. If you have a narrow drawer, store rulers vertically using a tall divider and a base stop strip.
Pro tipCoil the measuring tape and wrap it with a small cloth tie so it doesn't unwind when the drawer moves.
AvoidDon't let rulers float without a stop strip; they slide and scrape the drawer base.
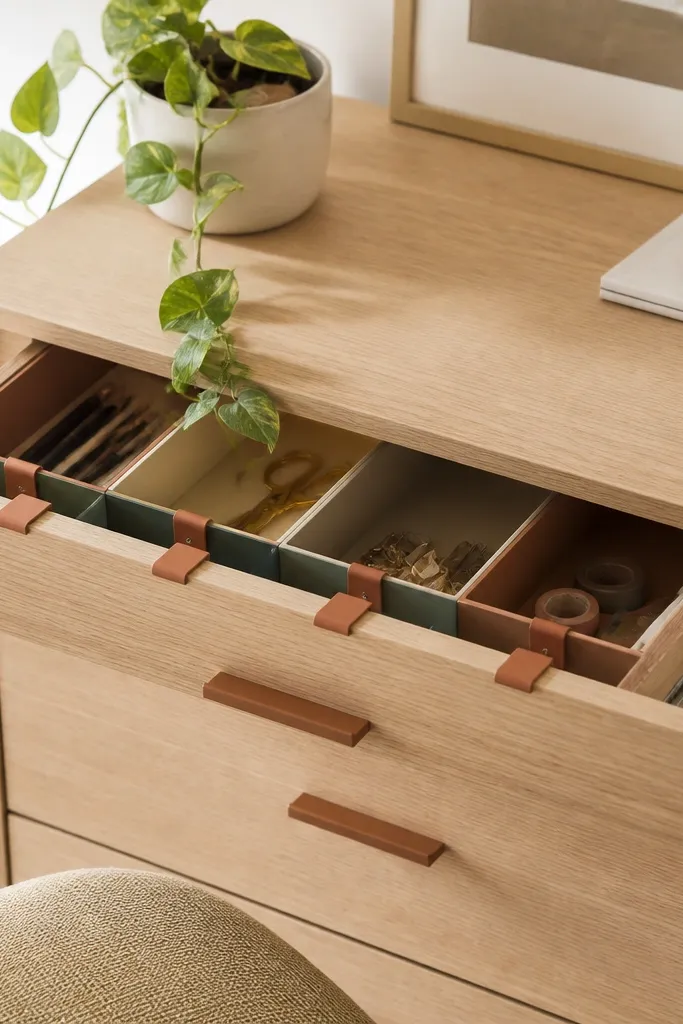
9. Painted Wood Divider Drawer for Craft Supplies
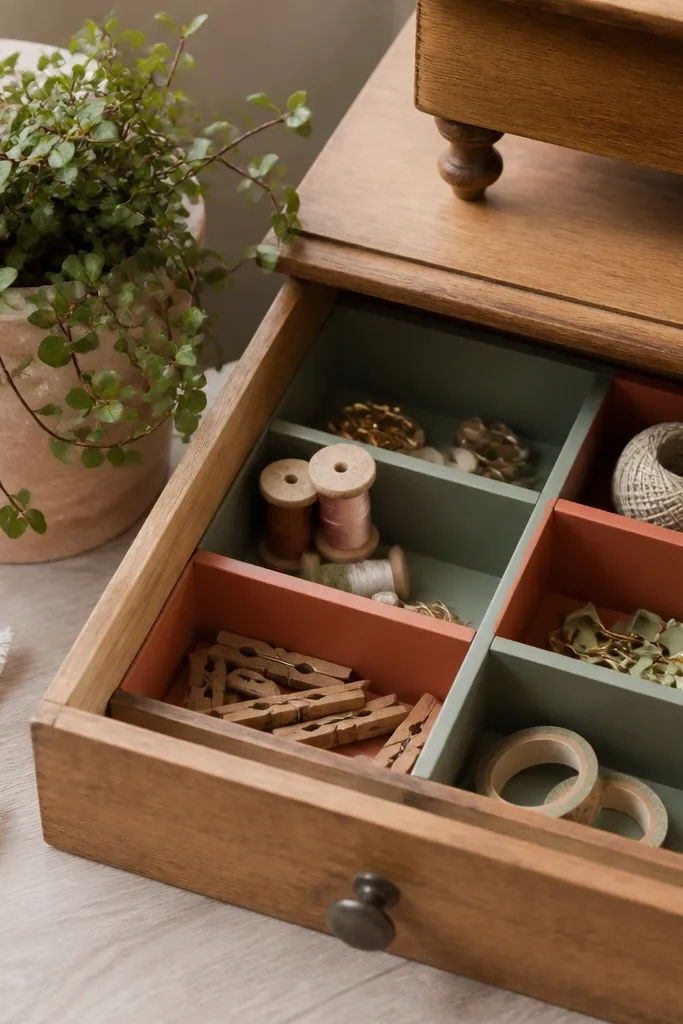
Wood dividers look solid next to real plants because both feel natural and tactile. Painting the dividers in muted colors ties the drawer to the pot color without looking like a theme park. This works best for craft supplies that don't fit in small bins: beads, pipe cleaners, and mini fasteners.
Cut dividers from thin plywood or use unfinished wooden craft divider inserts. Paint with matte acrylic and seal with a clear topcoat. Keep section sizes consistent so items don't migrate. For the "small stuff," add a shallow tray with a lip so beads don't fall into divider gaps.
Pro tipUse one divider color per drawer, not per item. It keeps the look calm.
AvoidAvoid high-gloss paint; it reflects harsh light and makes the drawer look plasticky.
10. Vertical File Drawer for Coloring Pages
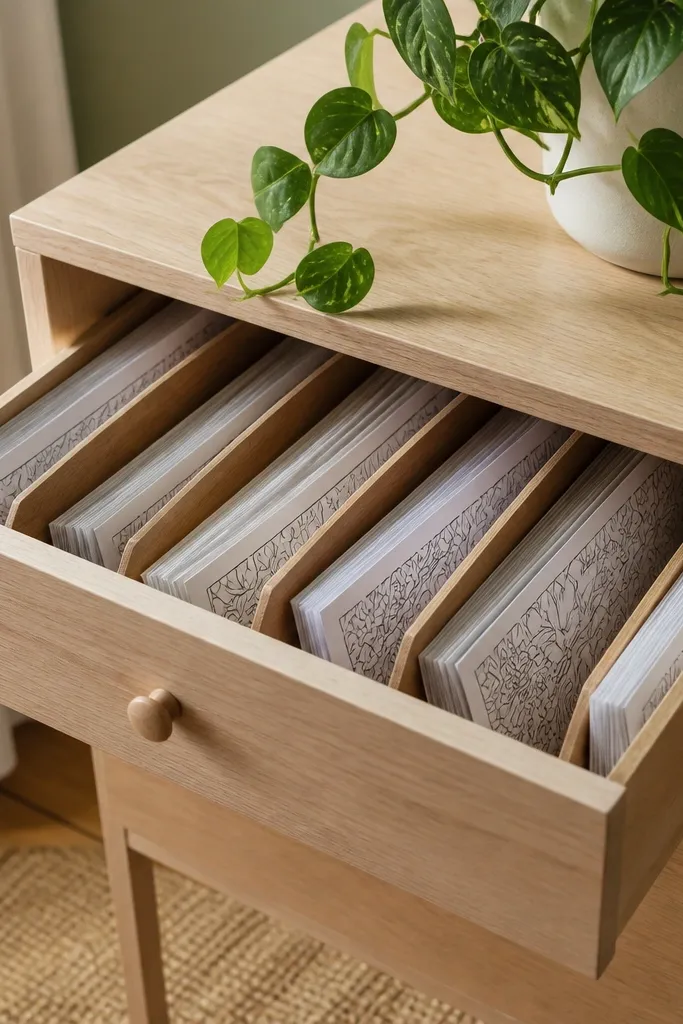
Coloring pages get wrinkled when they're stacked. Upright storage keeps them flat and easy to grab without tearing. The desk looks styled because the drawer front stays orderly and the greenery gets the visual focus.
Use vertical dividers made from foam board covered in contact paper so they're smooth. Cut dividers to the drawer depth minus 1 inch so pages don't scrape the back. Add a low front stop so pages don't slide forward when the drawer opens.
Pro tipSort by size: one section for letter-size, one for half-sheet. It stops the constant reshuffling.
AvoidAvoid thin dividers that bow; they make pages fall over and look messy.
11. Chalkboard Tape Labels on Drawer Fronts
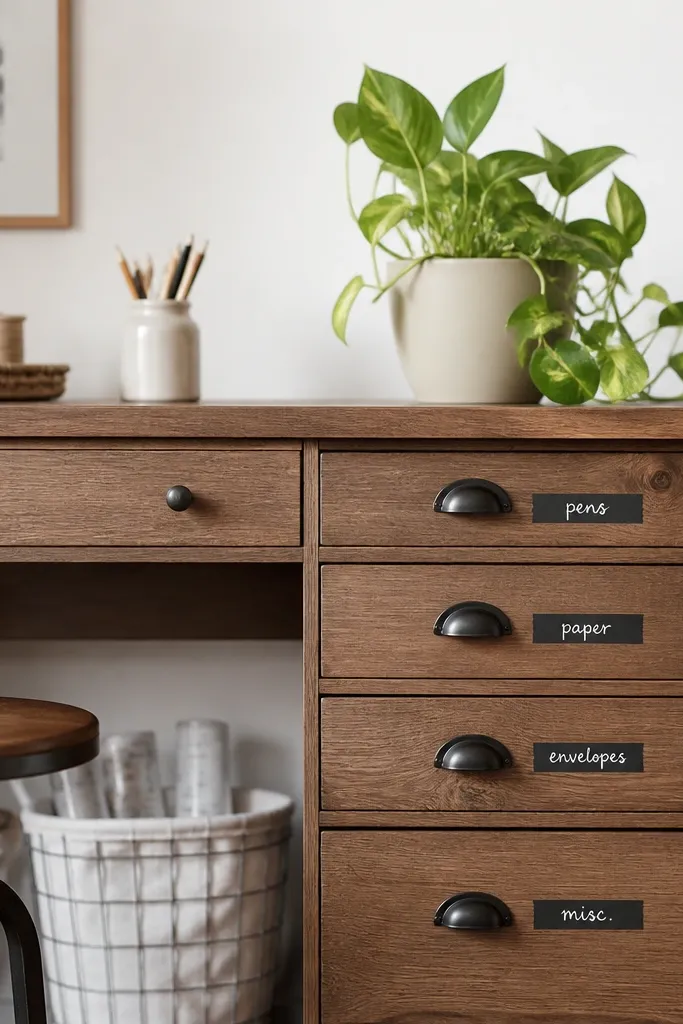
Chalkboard tape gives you a clean, matte label that won't fight with plant colors. The best part is you can erase and rewrite when your kid switches activities. It also makes the desk feel "designed" instead of random storage.
Apply chalkboard tape in straight lines across each drawer front. Handwrite with white chalk or a chalk marker. Keep label text short: "Markers," "Tape," "Paper," "Chargers." Use a small plant on top so the matte labels match the natural look.
Pro tipTake a quick photo of the labels once you set them - you'll remember the layout when you reorganize later.
AvoidAvoid permanent marker on tape; it stains and looks messy after a few changes.
12. Two-Level Drawer Organizer for Sticky Notes
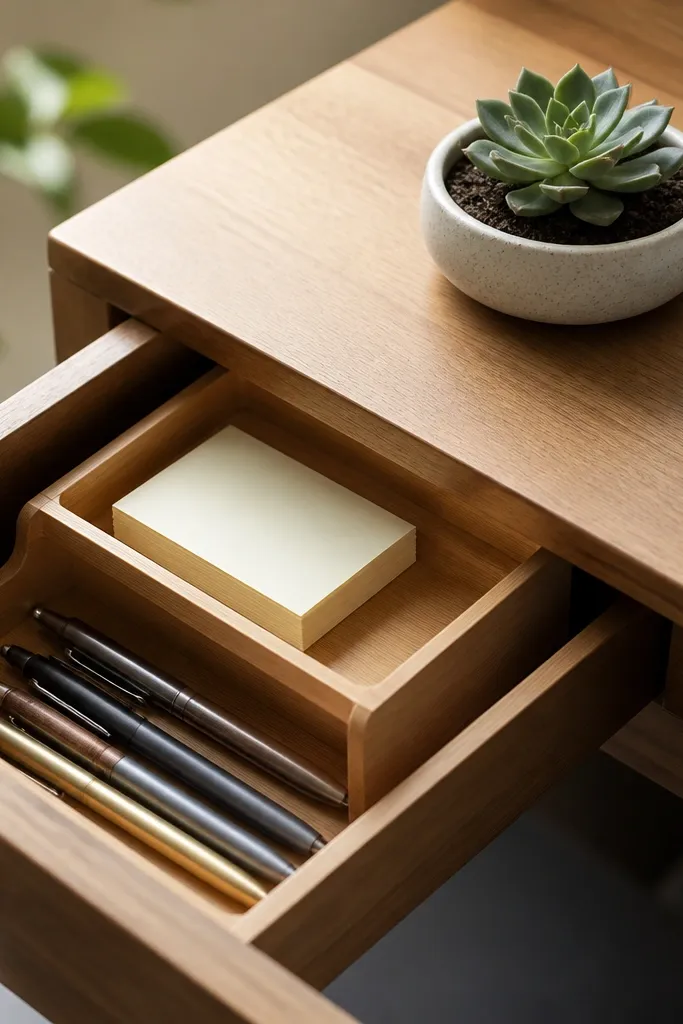
Sticky notes multiply fast. A two-level insert stops them from becoming a messy pile and keeps pens close so the desk is functional. The top tier stays visually calm next to a small plant like a succulent.
Use a tiered organizer insert or build one with two shallow trays stacked inside the drawer. The upper tray should be just deep enough for one stack of notes. Put pens in a lower tray with slots so they don't roll.
Pro tipStore one "blank backup" pad behind the front stack so you never run out mid-homework.
AvoidAvoid overfilling the upper tier; crushed sticky notes look wrinkled and sloppy.
13. Magnetic Spice-Rack Inserts for Metal Tools
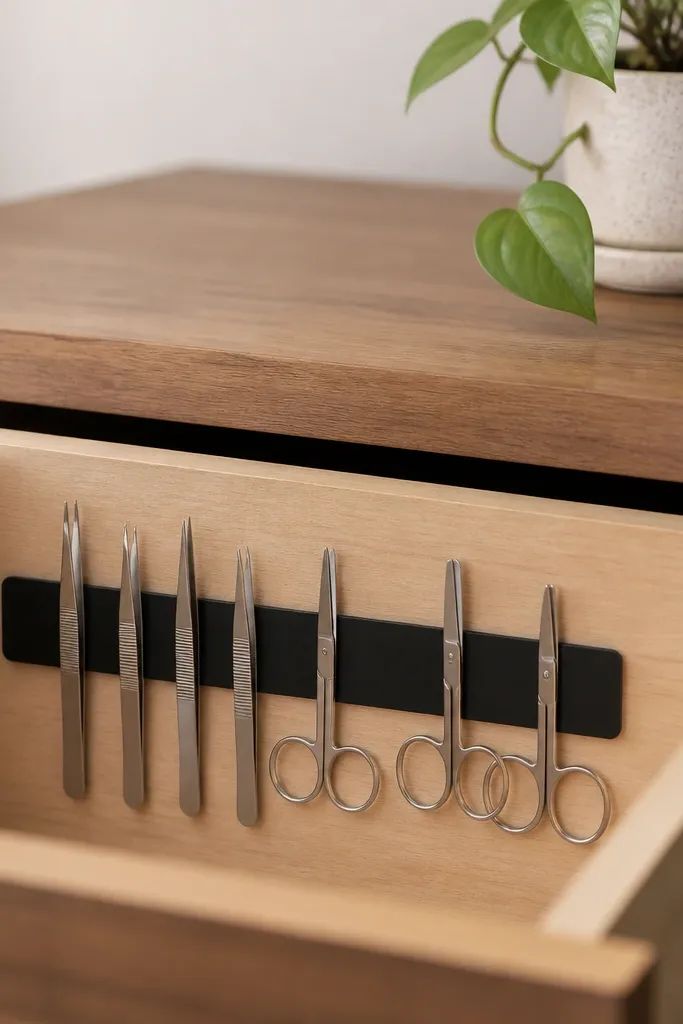
Metal tools behave better when they're held in place. A magnetic insert keeps tweezers, small scissors, and metal craft tools from sliding around. It also looks crisp beside plants because you get straight lines instead of scattered piles.
Cut a magnetic sheet to drawer size and mount it under a removable tray. Add a shallow divider so tools sit in rows. For tweezers, use a narrow foam strip so they grip without scratching. Keep the magnet under a liner so it's protected from dust.
Pro tipGroup by use: "detail tools" in one row, "cutting tools" in another row.
AvoidAvoid magnets directly touching raw wood; they can pull dust and leave marks.
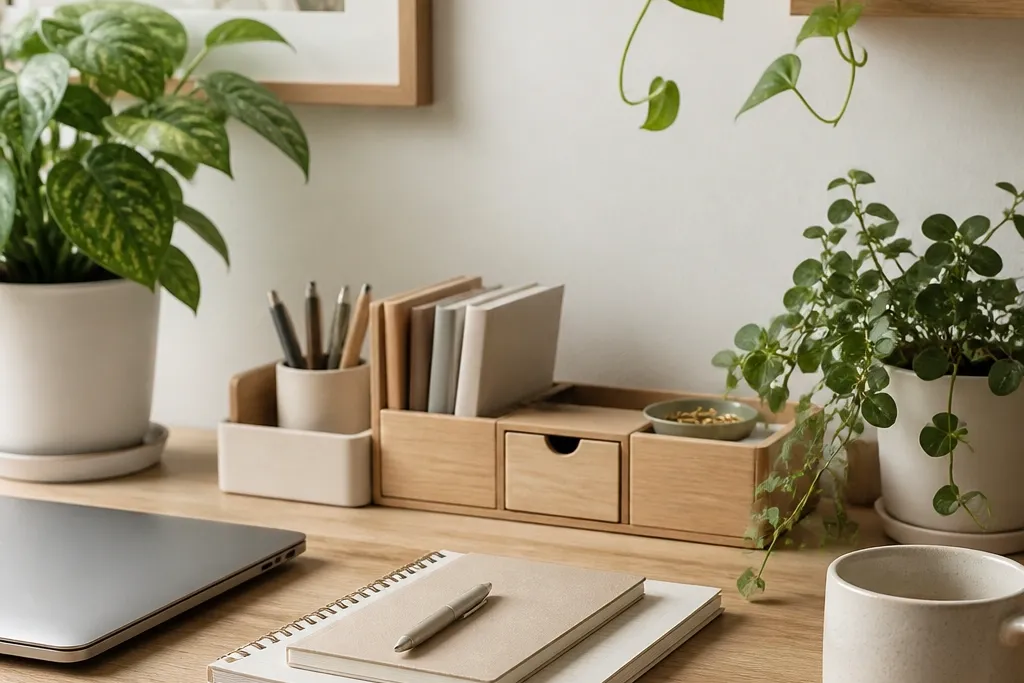
14. Lidded Acrylic Mini Drawers Inside One Big Drawer
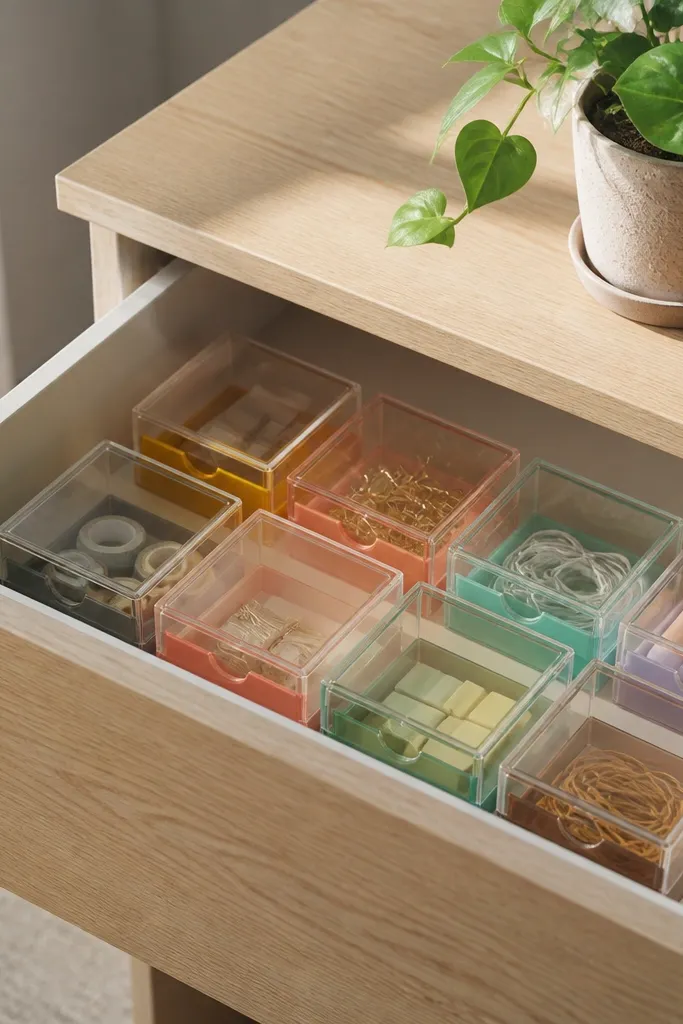
Mini drawers make the desk feel organized even when everything is messy in the background. The lids reduce dust and keep tiny items from mixing. When you place plants on top, the desk reads clean because the drawer interior looks like a tidy set.
Use stackable acrylic mini organizers sized to your drawer. If you can't find the exact fit, use two staggered rows so there's no wasted space. Add a small label strip on the front of each mini drawer. Keep the acrylic matte-backed or under a thin cloth cover if glare bothers you.
Pro tipStart with only four mini drawers for the first week; adding more too fast makes kids ignore them.
AvoidAvoid crystal-clear everything; it shows fingerprints and looks messy quickly.
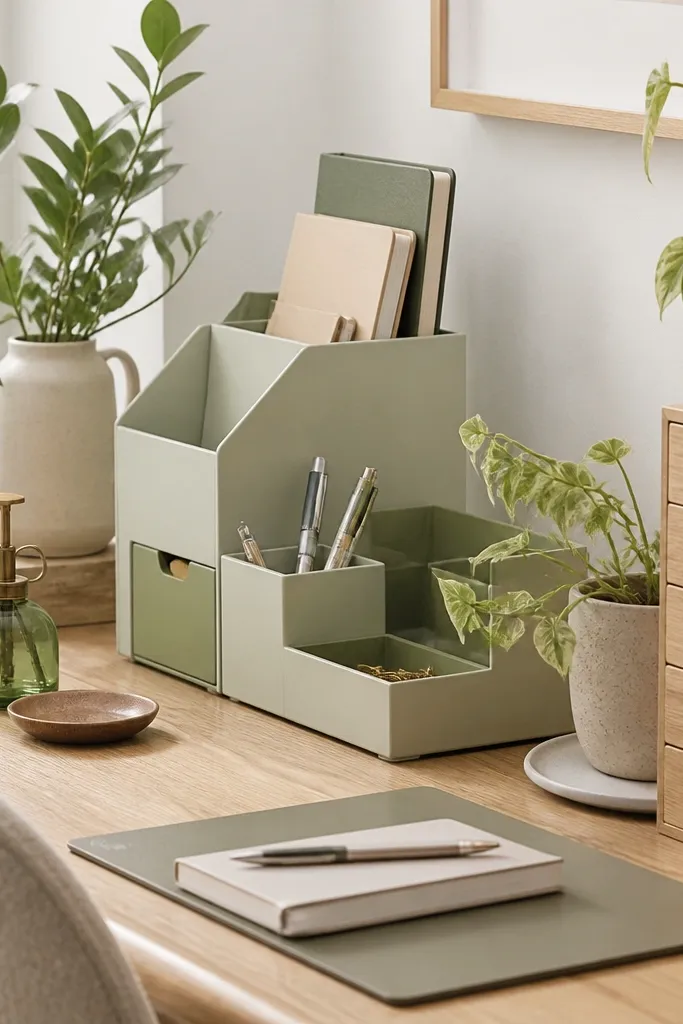
15. Plant-Height Drawer Pulls with Matching Sage Handles

This is an aesthetic fix that changes behavior. When drawer pulls match and align, kids grab the right drawer without yanking the wrong one. It also makes the drawer area look intentional, which matters when your plants are visible and you want the desk to look styled.
Swap standard pulls for sage or muted green handles, about 4 inches center-to-center for most desk drawers. Keep the drawer fronts clean and paint or contact-paper any scuffed areas. Use one plant pot color that repeats the handle tone - sage works with clay and off-white ceramic.
Pro tipMark pull positions with painter's tape first. The holes are easy to mess up and hard to fix.
AvoidAvoid oversized pulls that force kids to pull from the side; it loosens screws over time.
16. Drawer Tray for Water Bottles and Plant Supplies
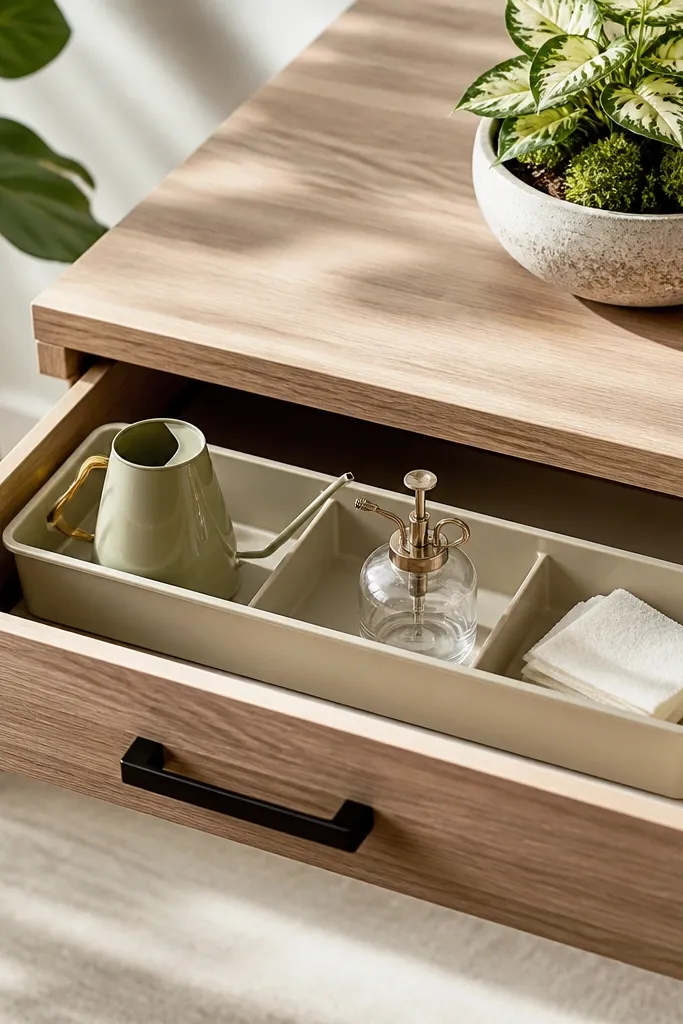
If you keep plant care tools near the desk, the plants stay healthier and the desk stays cleaner. This drawer keeps water mess contained so you're not wiping spills off the main desktop. The drawer looks neat beside greenery because everything wet or messy is hidden.
Use a removable tray with a slight lip so bottles don't slide. Add a waterproof liner or a rubber mat under the tray. Store a small pack of plant wipes folded in a corner compartment. Keep the drawer near the desk edge for quick care.
Pro tipPut a tiny drop cloth under the tray in case a bottle leaks. It saves hours later.
17. Rattan-Style Woven Basket in a Drawer for Art Scraps
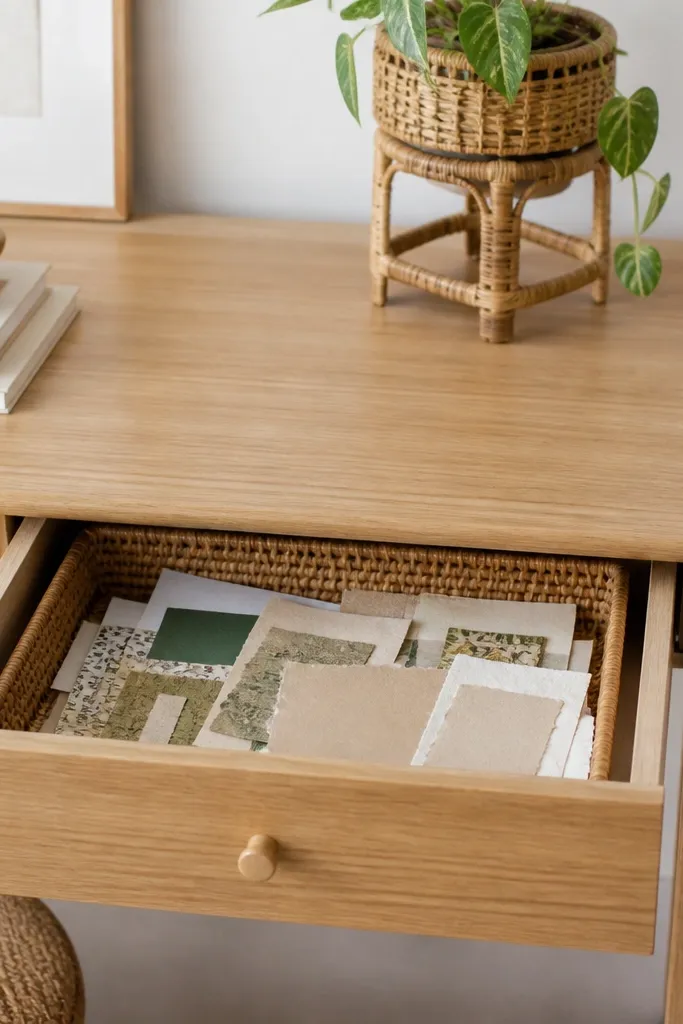
Woven baskets look natural next to plants and hide the messy middle. Art scraps are the kind of junk that makes drawers ugly fast, so putting them in a basket makes the drawer look purposeful. The woven texture also makes the desk feel warmer than plastic bins.
Choose a basket that fits snugly but doesn't scrape when opening. Line the basket with a thin paper liner or cloth so scraps don't snag. Keep scraps sorted by thickness: one side for thin paper, one side for thicker cardstock if you can fit a divider.
Pro tipAdd a small label card tucked under the basket handle - kids can see what belongs there.
AvoidAvoid baskets that are too tall; they tip when the drawer closes and look crooked.
18. Drawer Insert with Pegboard Back for Clipboards and Templates
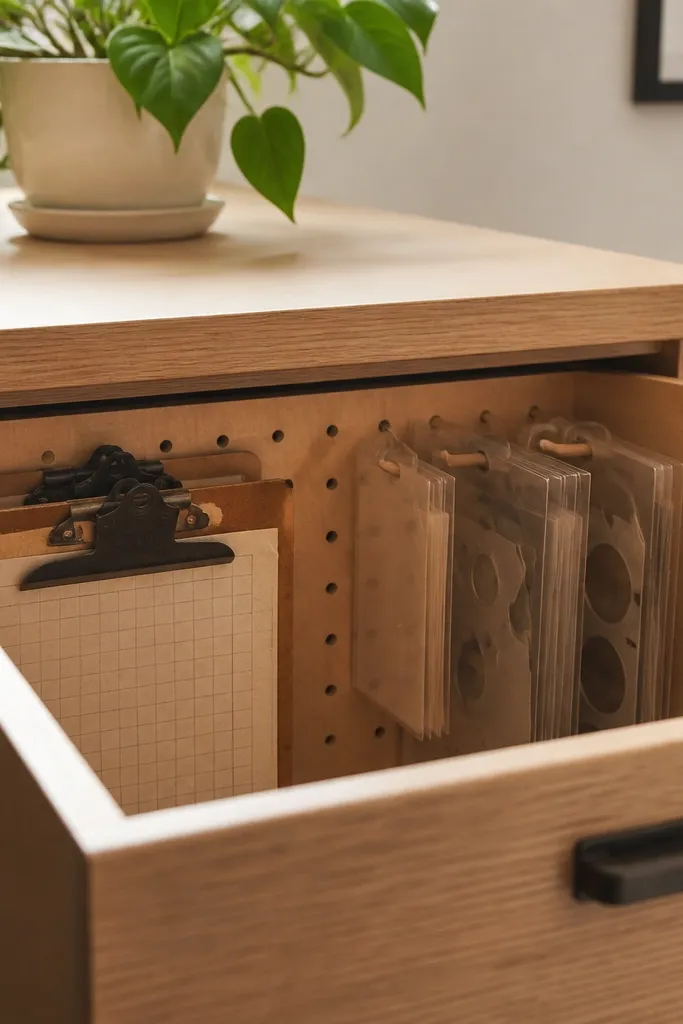
Pegboard makes the drawer feel like a tiny organizer wall. Thin items stay upright and don't bend, and you can hang templates you use weekly. It looks clean next to plants because the back panel keeps everything aligned.
Cut pegboard to drawer back size and secure it with screws or strong adhesive hooks designed for furniture. Use pegs or small plastic hooks to hold folders by their top edge. Add a shallow tray on the front for pencils so the drawer can handle both paper and tools.
Pro tipUse folder clips on templates so they don't slip off the peg when kids pull quickly.
AvoidAvoid flimsy pegboard; it bows and makes folders slide.
19. Slim Drawer for Plant Pots Accessories (Stickers, Labels, Stakes)

Plant accessories are easy to lose, and when they're missing you end up with messy handwriting on pot rims. This drawer fixes that by giving stakes, labels, and sticker packs a home. It also makes your desk look tidy because the plant area stays clean.
Use slim dividers or cut foam board into narrow vertical bars. Store stakes in one narrow compartment and labels flat in another. Keep sticker packs in a small lidded sleeve so they don't spill out. Match the drawer liner color to your pot color - off-white looks best with terracotta.
Pro tipWrite labels ahead of time on blank plant tags and store them in the drawer for the next repotting day.
AvoidAvoid mixing plant labels with general school labels; kids grab the wrong ones and everything gets mixed up.


