1. Matte Black Shelf Frames with Clear Lidded Bins
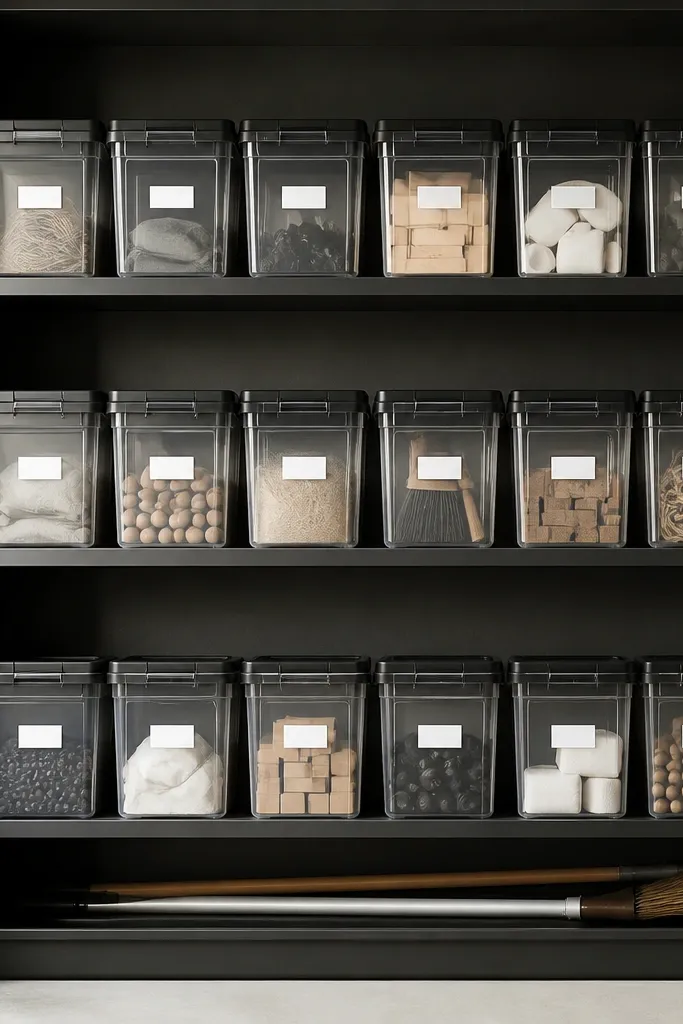
This setup looks expensive because the shelf frame is uniform and the bins match in shape and lid color. Clear bins show order without looking like a warehouse when everything inside is grouped. The matte black finish hides dust and fingerprints better than shiny chrome. White labels on black lids read clean from across the garage.
Choose shelf spacing of 12 inches for small bins and 16 to 18 inches for bigger ones. Use bins that are the same height across the wall so the label line stays level. Put the most-used categories at eye level for adults and kids - like "bikes," "sports," or "car wash."
Pro tipPrint labels in one font size (I use 1-inch tall labels for bin fronts) and place them dead center, not off to the side.
AvoidAvoid mixing different bin styles (open totes next to lidded boxes). It reads messy even when the contents are neat.
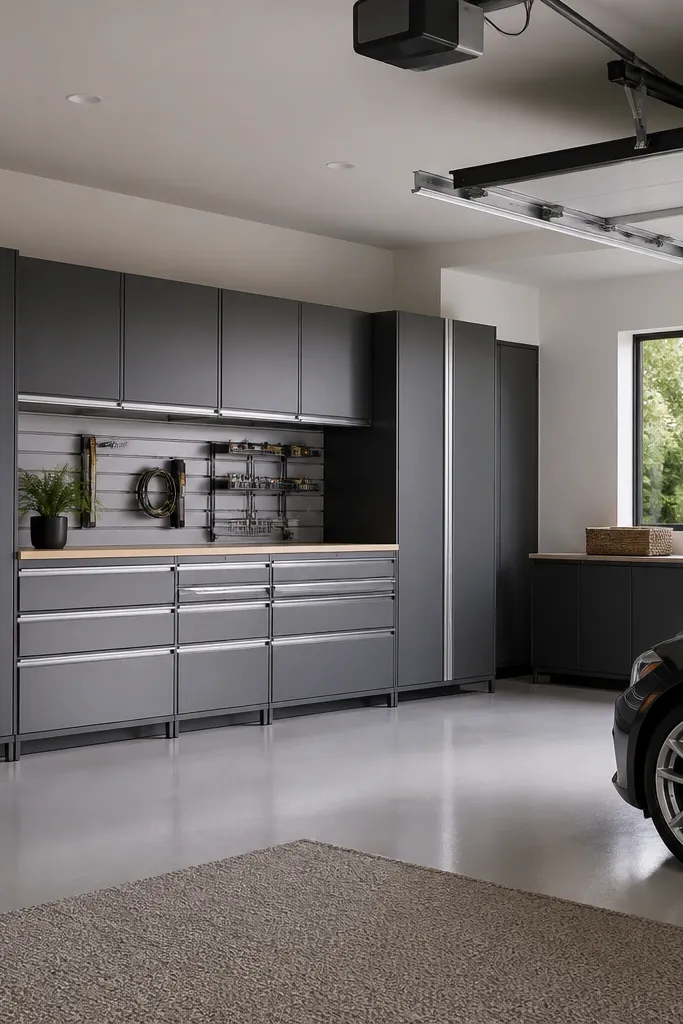
2. Slatwall + Color-Coordinated Tool Clips for a Clean Line
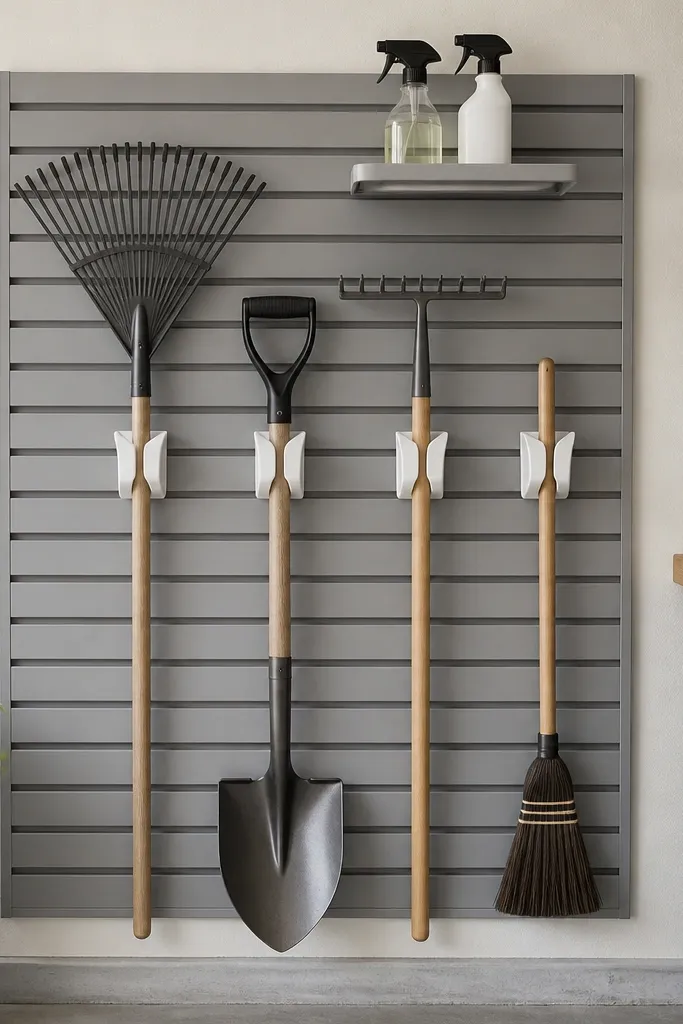
Slatwall makes tools look designed because everything hangs vertically and aligns to the same grid. Use one clip finish and keep tool handles in a single orientation. That visual grid is what makes the wall look modern instead of like a junk hook board. Add a narrow top shelf so small items don't sit on the floor.
Mount slatwall at least 1 inch off the floor so you can sweep under it. Hang long tools from the same height line - I start the bottom of handles about 6 inches above the floor. Keep clip colors consistent: matte white or matte black clips with gray panel looks sharp.
Pro tipSet a "no-hanging-overlap rule" - if two handles would touch, add a second clip row and move one tool.
AvoidDon't hang tools randomly on different peg heights. Uneven spacing is what makes it look cheap.
3. Two-Tier Pegboard Drawer Wall for Kid-Friendly Small Parts
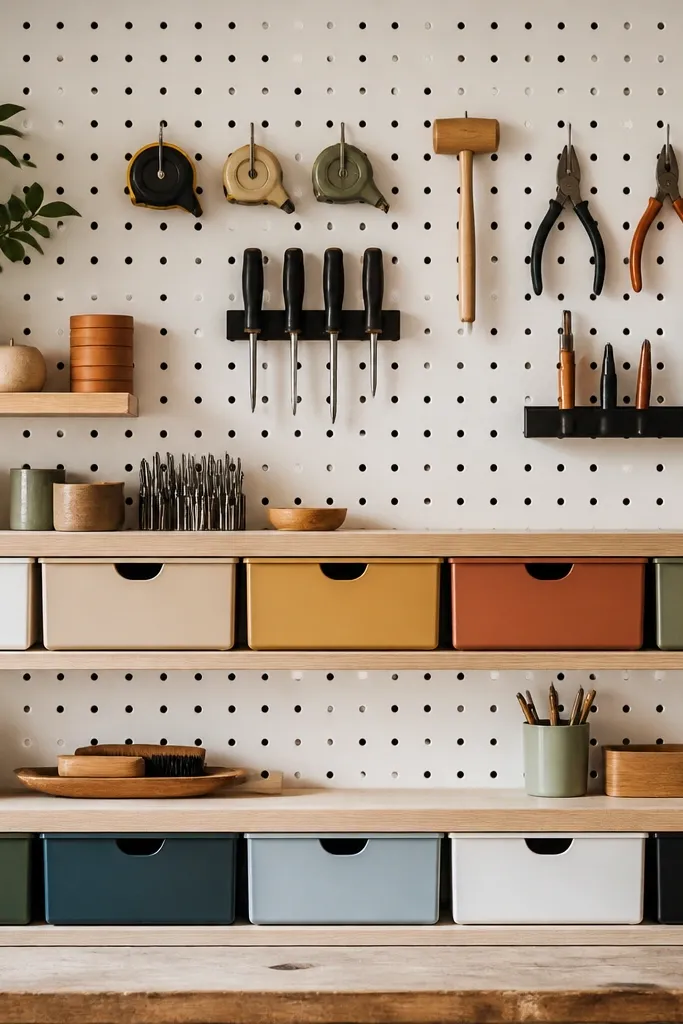
This is one of the fastest ways to make a garage feel curated. Pegboard gives you structure, and drawers hide the messy parts that always spill out of open bins. The two-tier layout makes "small parts" easy for kids to access without dumping everything into the floor. Matching drawer colors keep the wall looking intentional.
Use a pegboard size that fits your wall studs, then add ledges at two consistent heights. Choose shallow drawers (about 2 to 3 inches deep) so kids can see contents. Label with category names like "nuts & bolts," "scissors," "batteries," and "art supplies."
Pro tipPut the most-used kid items on the lower drawer row and lock the upper row if you store anything breakable.
AvoidAvoid open hooks for small parts. They turn into a scattered mess in a week.
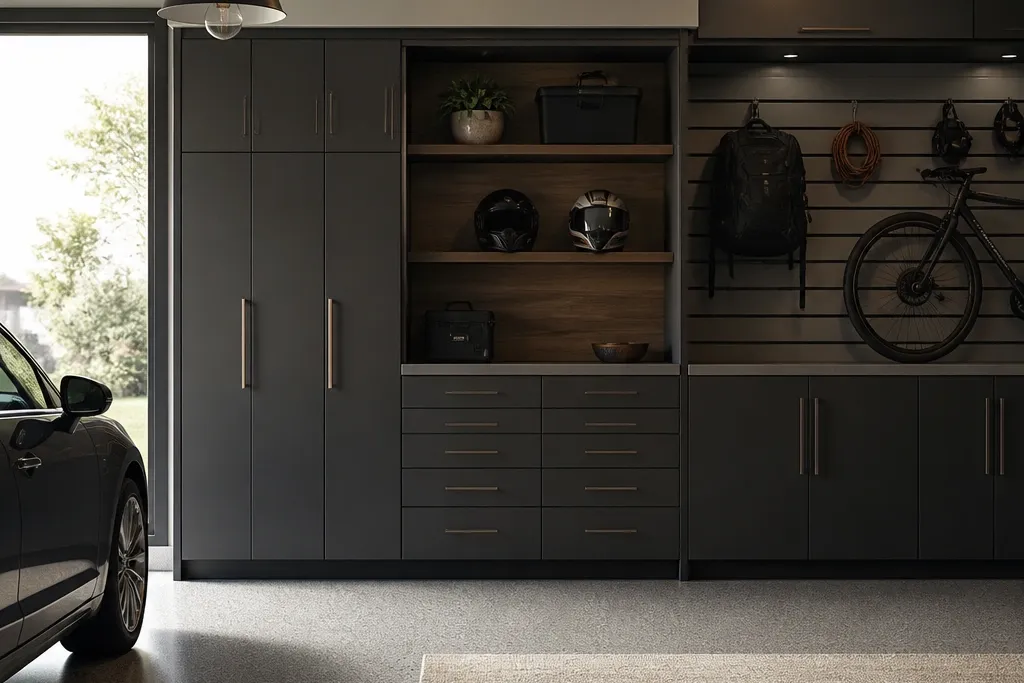
4. Floor-Only Storage with Hidden Base Cabinets
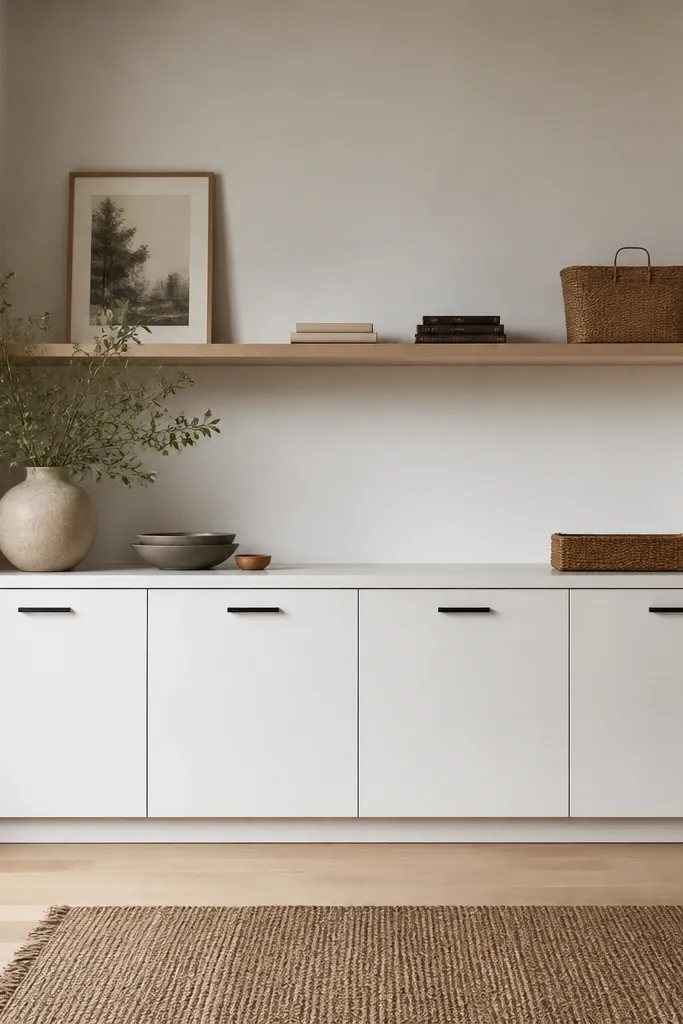
The "expensive" look often comes from what you don't see. Base cabinets create a clean lower line and hide bulky clutter like camping gear, extra paint supplies, and seasonal tools. Matte white doors plus matte black pulls looks modern and stays readable even in garage lighting. When the floor is clear, the whole space feels bigger.
Leave 2 to 3 inches of clearance from the bottom edge of the cabinets to allow sweeping. Use soft-close hinges if you can - the closed look matters more than you'd think. Store heavy items on the bottom shelves inside the cabinet, lighter items on the top shelf.
Pro tipAdd magnetic door catches or a simple child-safe latch so kids don't slam doors and pop hinges.
AvoidAvoid tall cabinets that reach too high without planning access. If you can't reach it cleanly, it turns into a junk drawer.
5. Clear Hanging Bike Wall with Matte Handlebar Hooks
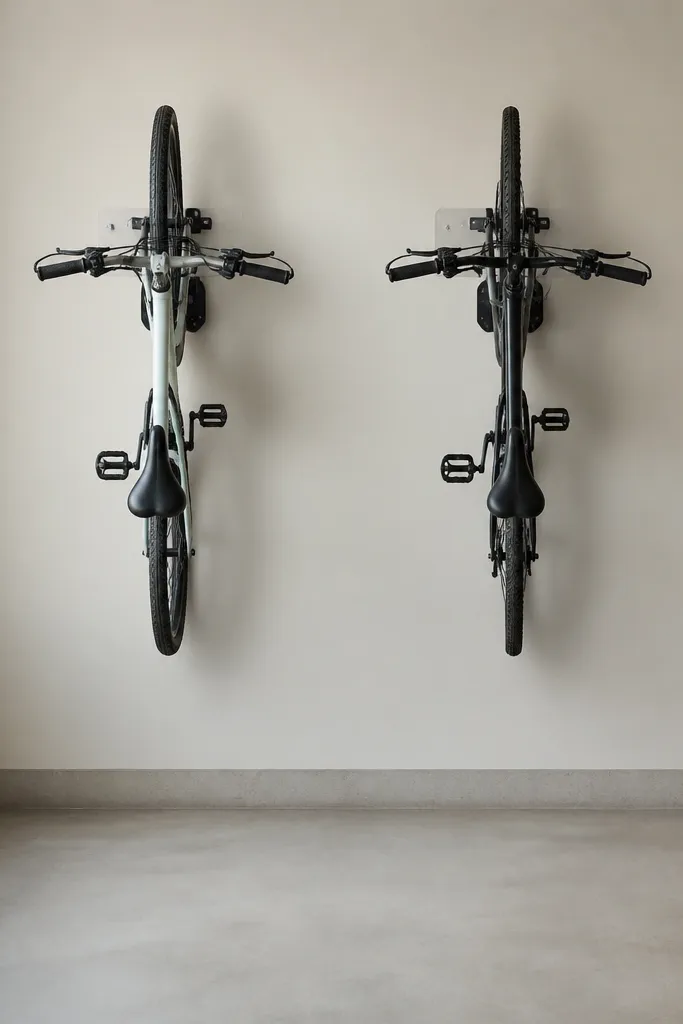
Bike storage looks expensive when it's vertical, spaced, and protected. Hanging bikes on a consistent grid removes floor clutter and keeps tires from scuffing the ground. Matte black hooks look grounded and modern, and the clear guards prevent scratches and keep the setup from looking beat up. Even if the bikes are messy, the wall presentation stays clean.
Use hooks designed for the bike frame or handlebar with a consistent height so both bikes line up. Space hooks so handlebars don't touch - I leave about 3 to 4 inches between them. Store helmets in a small labeled bin on a nearby shelf.
Pro tipWipe the hooks with a dry microfiber before hanging the bikes. That small step keeps the matte finish from looking dusty.
AvoidDon't hang bikes by random straps or cords. Uneven sag makes the whole wall look temporary.
6. Pegboard Tool Shadow Boxes with Label Tabs
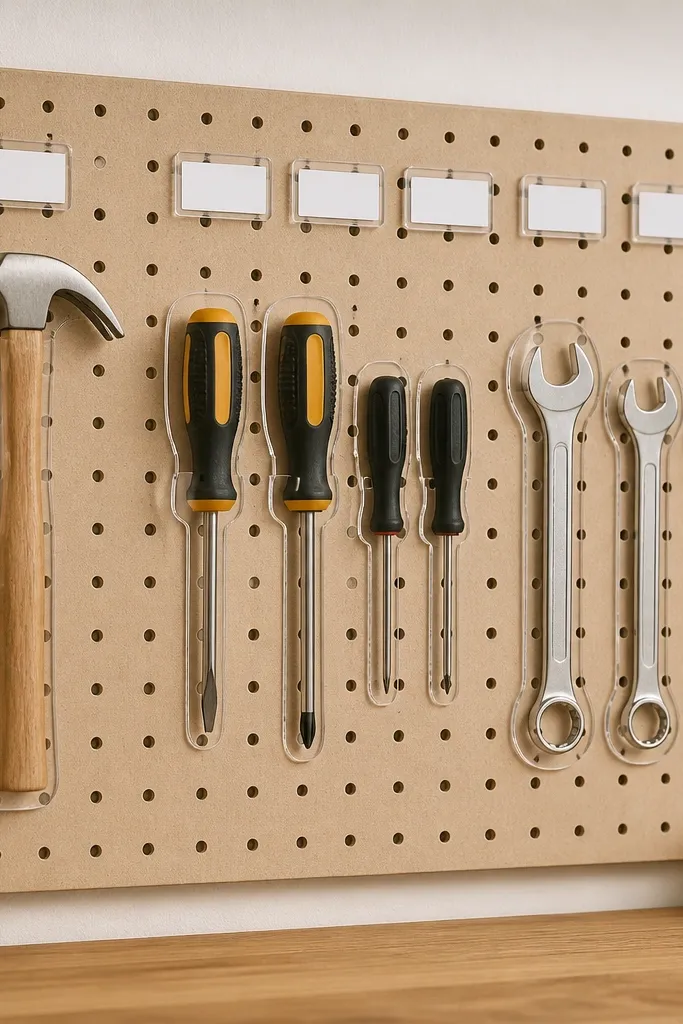
Shadow-box style storage makes tools look like a shop display. It's not about expensive tools - it's about the outline and spacing that makes everything read as intentional. Transparent acrylic over a pegboard area creates a "frame" effect that makes the tools pop. Label tabs keep kids from guessing where the tool goes.
Cut acrylic to fit around a pegboard section, then mount it with standoffs so it's slightly off the board. Use pegboard hooks that match the tool handle widths. Keep label tabs in one color and one font size so the wall looks consistent.
Pro tipTrace the tools onto the acrylic with chalk first. You'll get cleaner placement than measuring blindly.
AvoidAvoid mixing tool sizes without a plan. If one tool sits deeper or higher, it ruins the uniform look.
7. Laundry-Style Rolling Carts for Paint and Supplies
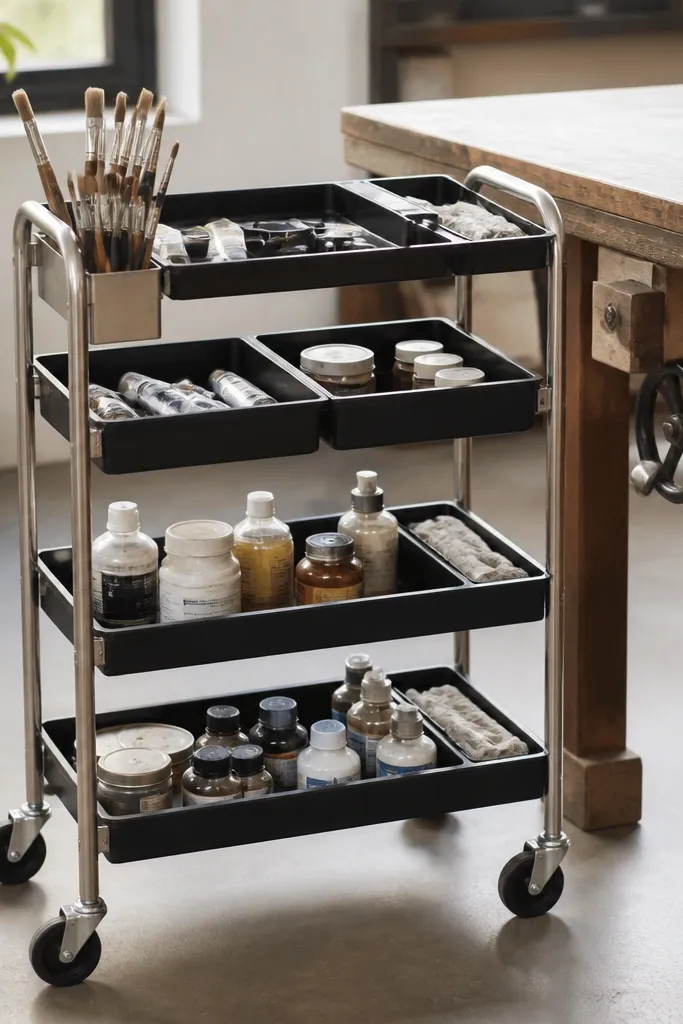
Rolling carts look expensive when they're clean and repeatable. You get a "station" that moves out of the way when you're not using it. Labeling each bin makes the cart feel like part of the garage system rather than a temporary pile. Stainless or powder-coated metal frames also resist scuffs better than wood-only setups.
Choose a cart with at least two shelves and a top flat tray. Use small, matching bins for rags, brushes, and rollers. Keep spray bottles in a separate bin with a lip so they don't roll.
Pro tipAdd a magnetic strip to the side for metal tools like scissors or small wrenches.
AvoidAvoid leaving paint cans uncapped on shelves. It makes the cart look grimey fast.
8. Workbench with a Two-Color Tool Rail and Drawer Inserts
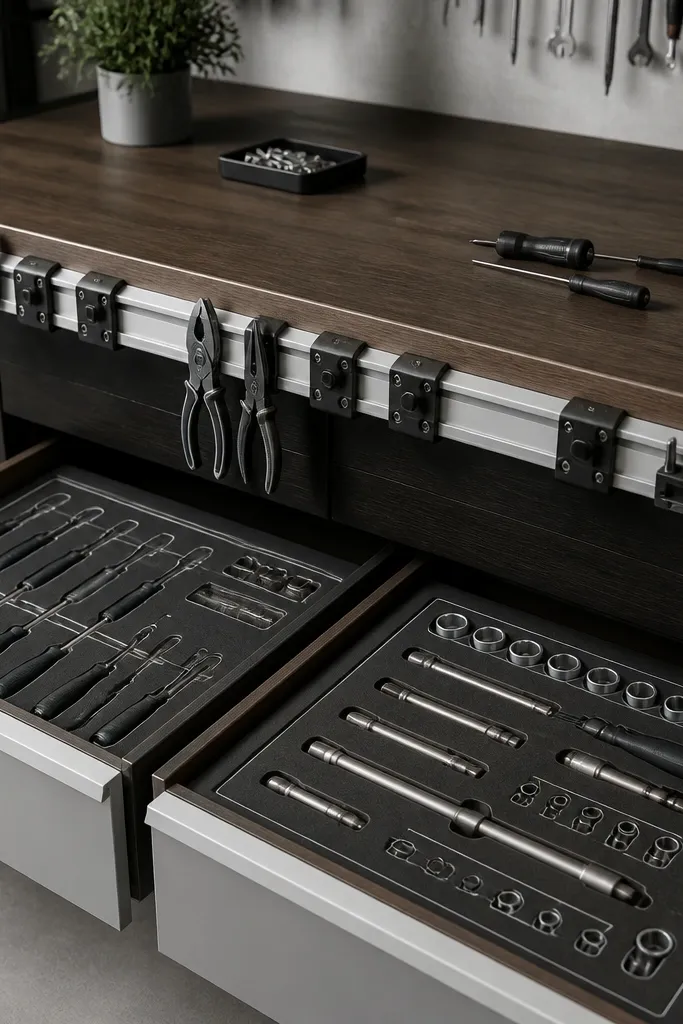
A workbench looks high-end when the tools feel "built in." Drawer inserts with outlines make it easy to put things back fast, which matters when kids use the space. The two-color rail adds a crisp modern line along the bench front. Foam inserts also keep metal tools from clinking around, which keeps the garage quieter and cleaner.
Use one foam thickness across all drawers so tool depth looks consistent. Keep socket drawers separate from hand tool drawers. Mount the rail so it sits centered on the bench front edge - not offset.
Pro tipMeasure your most-used tools first and design around them. If the insert is sized for rare tools, daily tools will look sloppy.
AvoidAvoid random drawer chaos. Even a gorgeous bench looks cheap if drawers spill out tools.
9. Ceiling-Mounted Storage with Color-Matched Webbing Straps
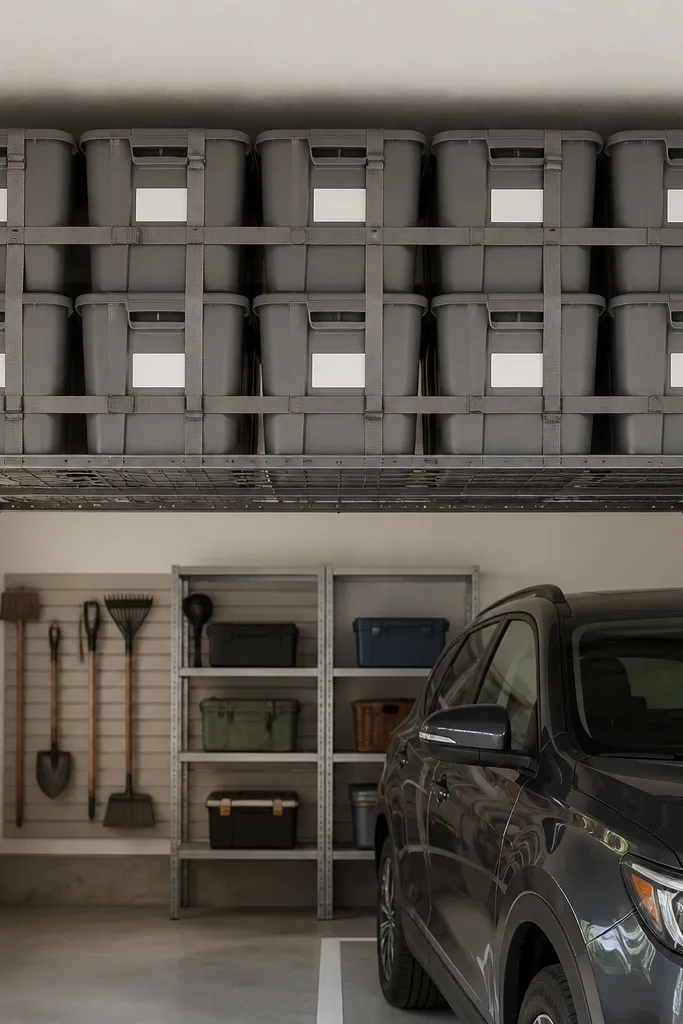
Ceiling storage looks expensive when it's tidy and evenly tensioned. Matching straps keep the bins from swinging and prevent the "bags of stuff" look. I like gray or black webbing because it blends with garage ceilings. Labels are still visible from a ladder, so you don't have to dig.
Use a rack rated for garage storage and mount into joists or proper ceiling anchors. Keep bins grouped by season: holiday stuff on one row, camping on another. Use straps long enough that you can tighten without crushing bins.
Pro tipTension straps the same way each time. If one bin hangs lower, the whole ceiling line looks off.
AvoidAvoid clear bags tied with string. It looks like you're temporarily storing items.
10. Corner Utility Wall with a Hidden Trash + Recycling Bin Cabinet
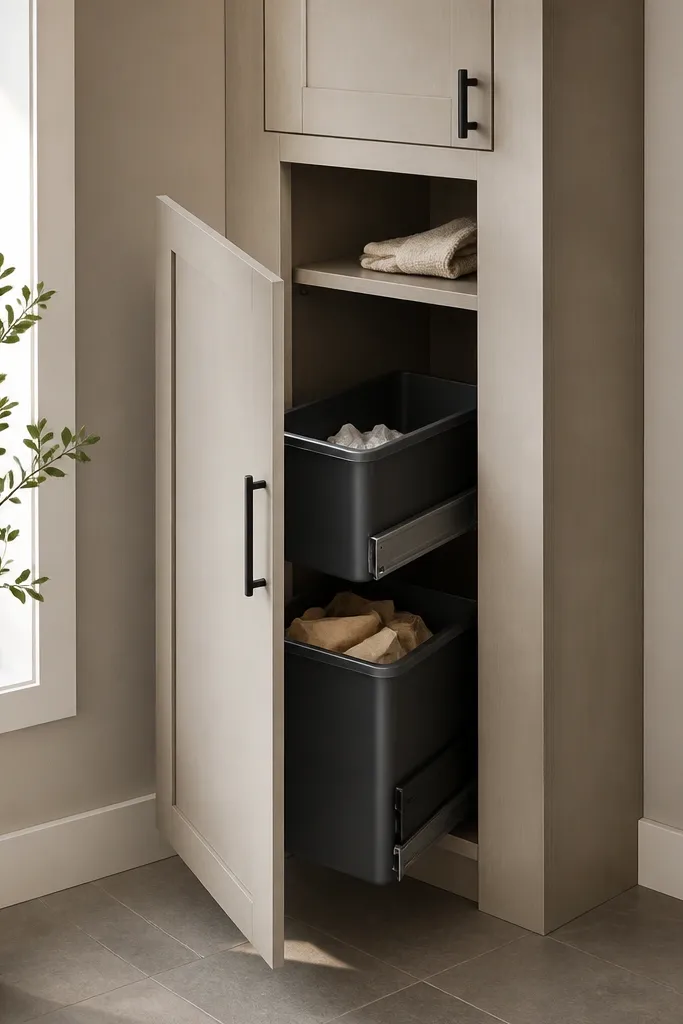
Garages look messy when trash and recycling live on the floor. A pull-out bin cabinet keeps bags contained and makes cleanup fast for kids and adults. Matte black pulls and a simple cabinet door make the corner look like a built-in. It also prevents the constant smell and the random cardboard pile.
Use a cabinet that fits your corner width and allows bins to fully pull out without bumping the wall. Add a small top shelf for gloves, tape, and a lint brush. Label the pull-out bins with simple icons, not long text.
Pro tipPut a roll of trash bags in the glove shelf. You'll stop "searching for bags" and the cabinet stays organized.
AvoidAvoid leaving recycling loose in open bins. Cardboard always escapes and the corner looks grimy.
11. Magnetic Label Strips and a Color-Key System for Everything

This is the labeling system that makes your garage look expensive because it looks designed, not improvised. Magnetic label strips let you change categories without replacing every label. The color-key dots keep kids from reading long words - they match the bin color to the board. Everything stays consistent even when your storage changes.
Mount a label board at kid eye level, then add bins with matching colored dots at the same height on each bin front. Use one labeling size and one font style. Keep the color key limited to 4 colors so it doesn't turn into a rainbow mess.
Pro tipWrite labels with category names only. Add a small note on the back of the label card for you, not for kids.
AvoidAvoid mixing label styles across bins. Different fonts and sizes make the whole garage look like a patchwork.
12. Built-In Looking Storage Bench with Flip-Top Lid Bins
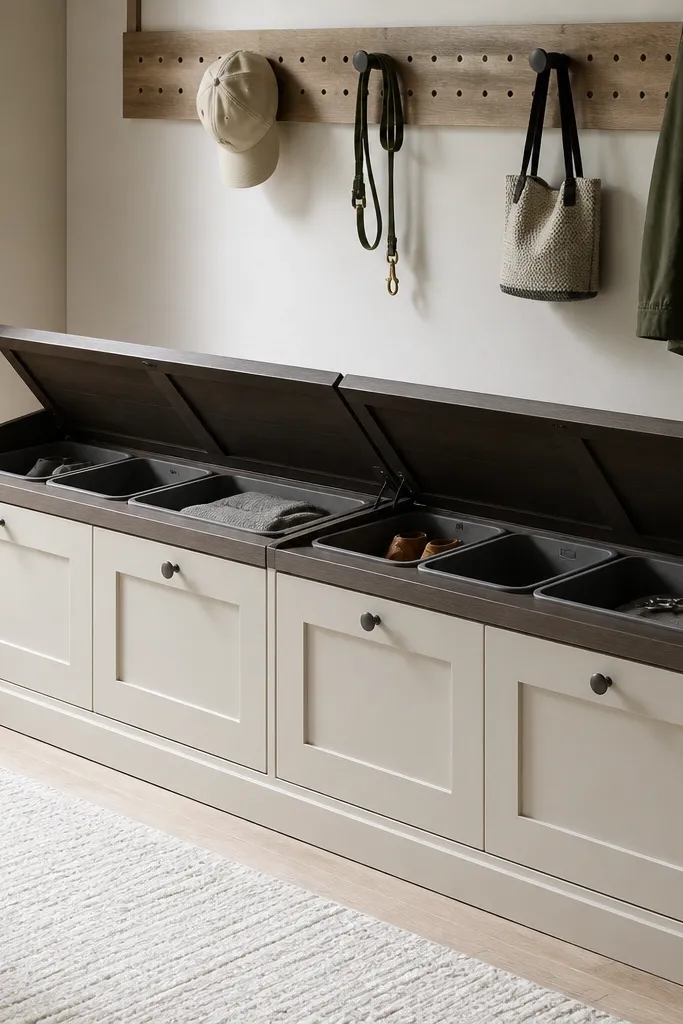
A bench hides the chaos that always accumulates in garages - gloves, balls, extension cords, and random small toys. Flip-top lids keep dust down and prevent kids from dumping everything. When the bench is the same color all the way around with clean seams, it reads like built-in furniture. Pairing it with a small peg strip gives you quick access without cluttering the floor.
Use bins that fit under the bench top with a consistent gap so lids close smoothly. Choose one bench depth that works for your wall space - 18 inches is a sweet spot for most garages. Add a pegboard strip above for the daily grab items like a flashlight and measuring tape.
Pro tipPaint or stain the bench top before assembling the bins. You'll get cleaner edges around the lid openings.
AvoidAvoid mismatched lid colors. If every lid is a different shade, the bench stops looking intentional.
13. Wall-Mounted Hose Reel + Matching Spray Bottle Holders

Outdoor gear looks expensive when it's controlled. A wall-mounted hose reel keeps the hose from turning into a tangled rope pile. Matching spray bottle holders keep chemical clutter from spreading across shelves. The aligned horizontal row reads modern, especially when the wall is otherwise minimal.
Mount the hose reel at a height that lets you reel in without stepping on a stool. Use a set of holders that accept bottle shapes without wobble. Keep the bottles in a single family of colors - gray and black labels look sharp against light walls.
Pro tipCoil the hose the same way every time. A consistent coil pattern looks better than "whatever fits."
AvoidAvoid storing the hose on the floor looped around a bucket. It always looks temporary.
14. Clear Bin Pantry Wall for Garage Snacks and School Supplies
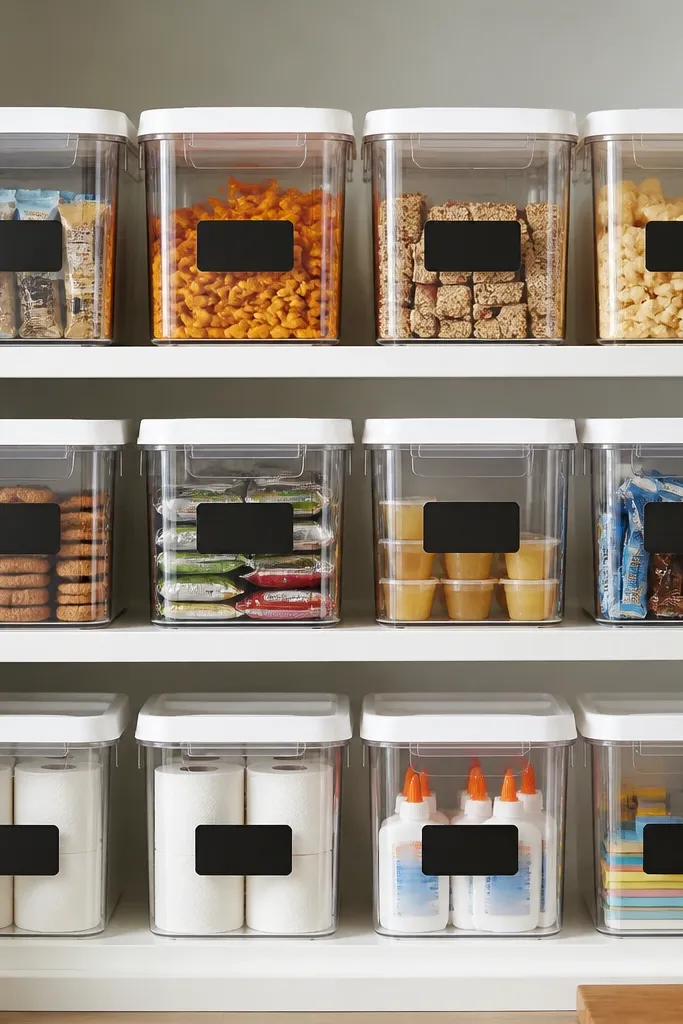
Yes, garage snacks and school supplies belong in a storage wall. The expensive look comes from treating it like a pantry: consistent bin sizes, consistent labels, and a clean shelf background. Clear bins keep you from opening everything to find what you need. White lids make the wall look bright even under garage lights.
Pick three bin sizes and stick to those - too many sizes breaks the grid. Use a white shelf board or painted plywood backing so the bins look crisp. Place bins by frequency: daily-use snacks at the front row, seasonal items higher.
Pro tipUse label tape with a matte finish so light doesn't glare and make labels hard to read.
AvoidAvoid leaving random bags (chips, batteries, glue) in open drawers. Bags look messy fast.


