1. Matte Black Letter Tray Pair for Daily Paper
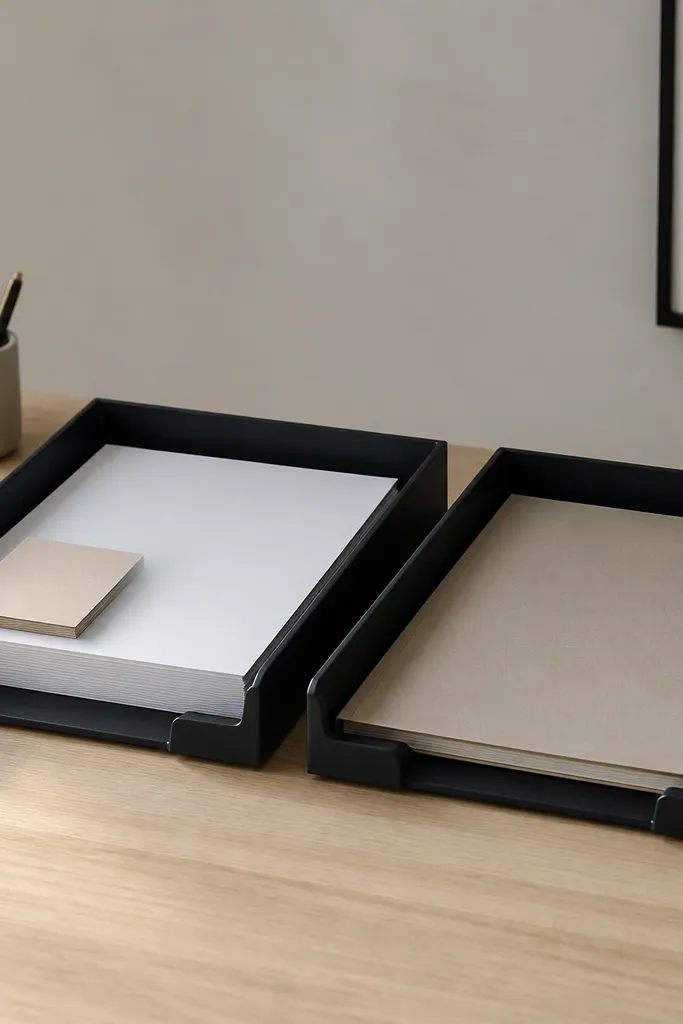
Letter trays make paper look intentional because they create crisp edges and a clear "place." Matte black makes the paper look sharper and hides small smudges from sticky fingers. Keep one tray labeled "to do" and one "done," so the desk stays calm even during homework mode.
Buy trays that are about 10-12 inches wide and 2-3 inches tall. Add white address labels or label tape to each tray so the category is obvious. Place them side-by-side along the back edge to keep the front edge clear for writing.
Pro tipUse two sizes: one slim tray (under 1 inch) for sticky notes and one standard tray for folders. The different heights add that designer look.
AvoidAvoid mixing glossy black trays with matte black accessories - the shine mismatch reads cheap.
2. Linen-Front Pencil Organizer with Brass Tone Pull
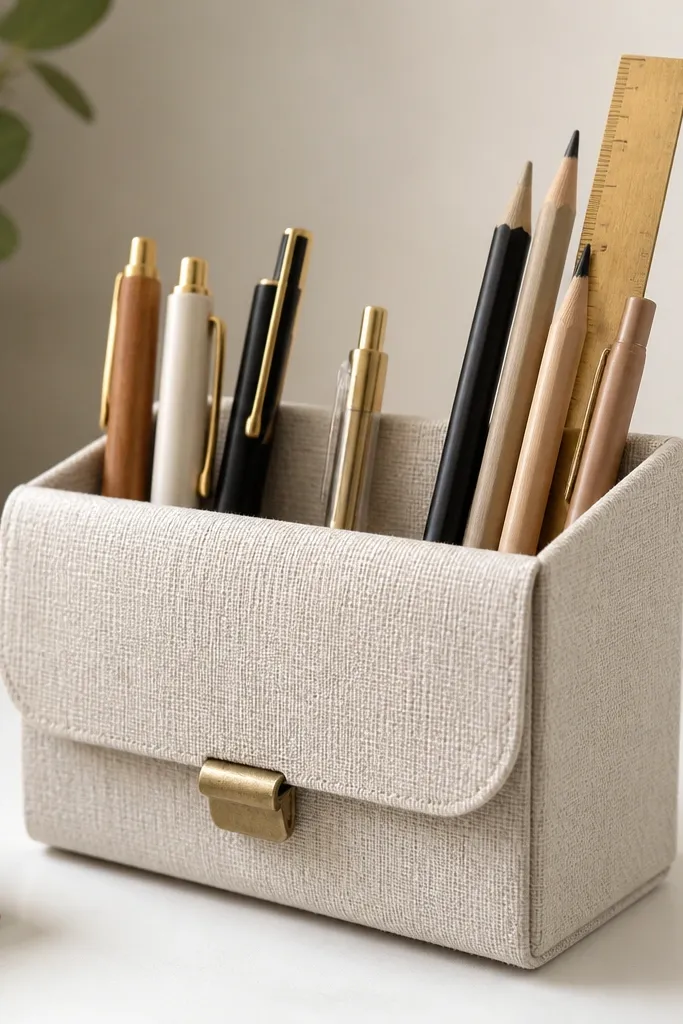
Fabric-front organizers soften the desk and hide the chaos of kids' supplies. Linen looks warm and expensive next to metal hardware, especially in beige or cream tones. A brass-tone pull adds a "furniture" feel, not a craft-store feel.
Choose a fabric organizer that has rigid edges so it doesn't flop. Fill it with a mix of tall items (ruler) and short items (markers) so it stays neat. Keep the organizer within 6 inches of your writing spot so it becomes the default landing zone.
Pro tipWrap loose cords and tape in a small matching linen pouch so everything near the organizer looks coordinated.
AvoidDon't use a floppy fabric bin with no structure - it collapses when kids grab items.
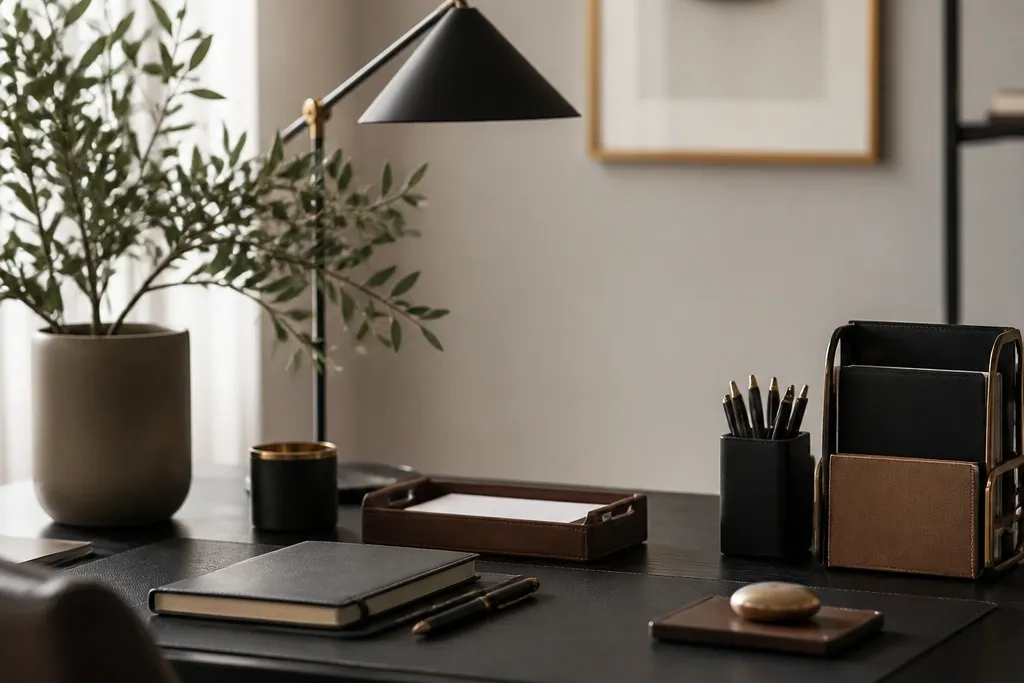
3. Brushed Nickel Cup for Pens Only
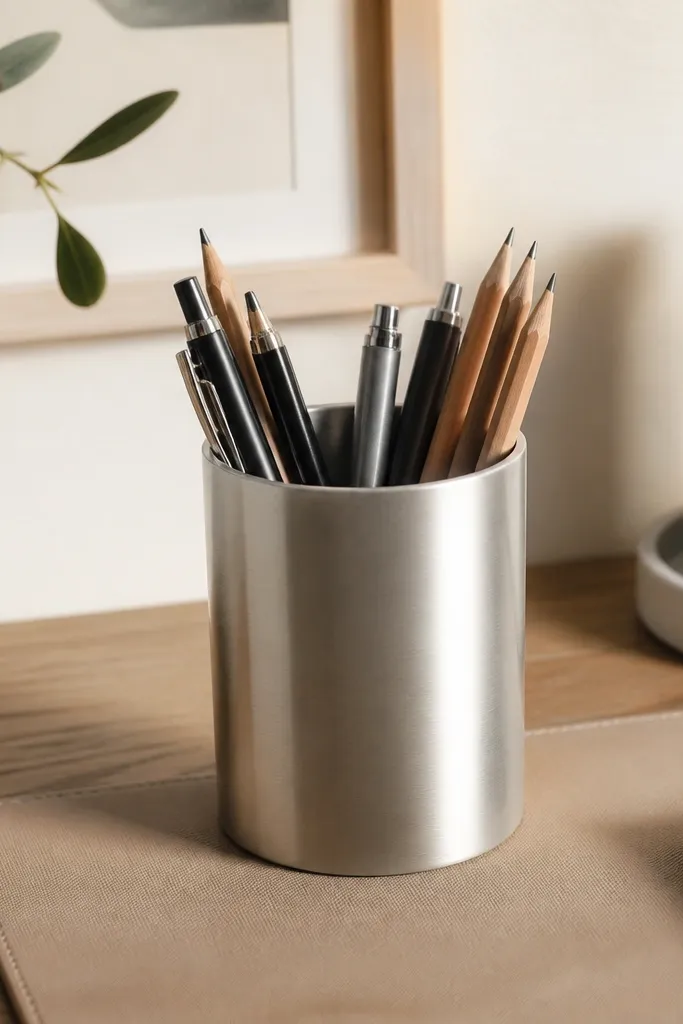
A metal cup instantly reads "adult" and tidy because it has weight and clean lines. When you keep it pens-only, it looks curated instead of random. Brushed nickel also plays nicely with most desk hardware and lamp bases.
Get a cup about 3.5-4 inches wide and 4-5 inches tall. Use a second container for markers so the color mix doesn't spill into the "luxury" zone. Place it near the keyboard corner, not the center where it becomes clutter bait.
Pro tipAdd a small rubber band around the pencils inside the cup to keep them from spreading outward.
AvoidDon't let the cup hold every tool - mixed heights and colors make it look messy.
4. Felt Cable Wraps in Charcoal for Charger Clutter
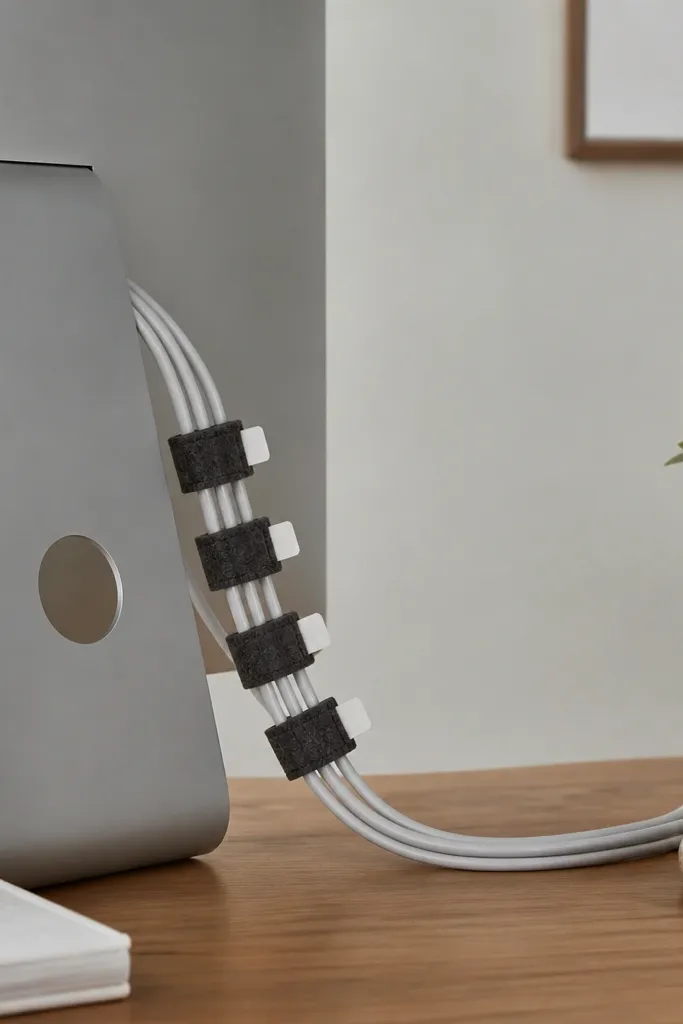
Felt makes cords look like accessories instead of tangled trash. Charcoal hides dirt and scuffs from everyday use, and the wraps keep cords from springing back into loops. When cords are organized at the source, the desk surface stays clean.
Use wraps sized for each cord thickness, not one-size-fits-all. Label each wrap with a tiny white label so kids plug the right charger back in. Bundle cords behind the monitor, then bring them forward only where you need them.
Pro tipUse a short Velcro strip to close each wrap tight - it keeps the felt from loosening over time.
AvoidAvoid open cord loops on the desk edge; they look messy even when "tidied."
5. Shallow Tray for Sticky Notes and Paper Clips
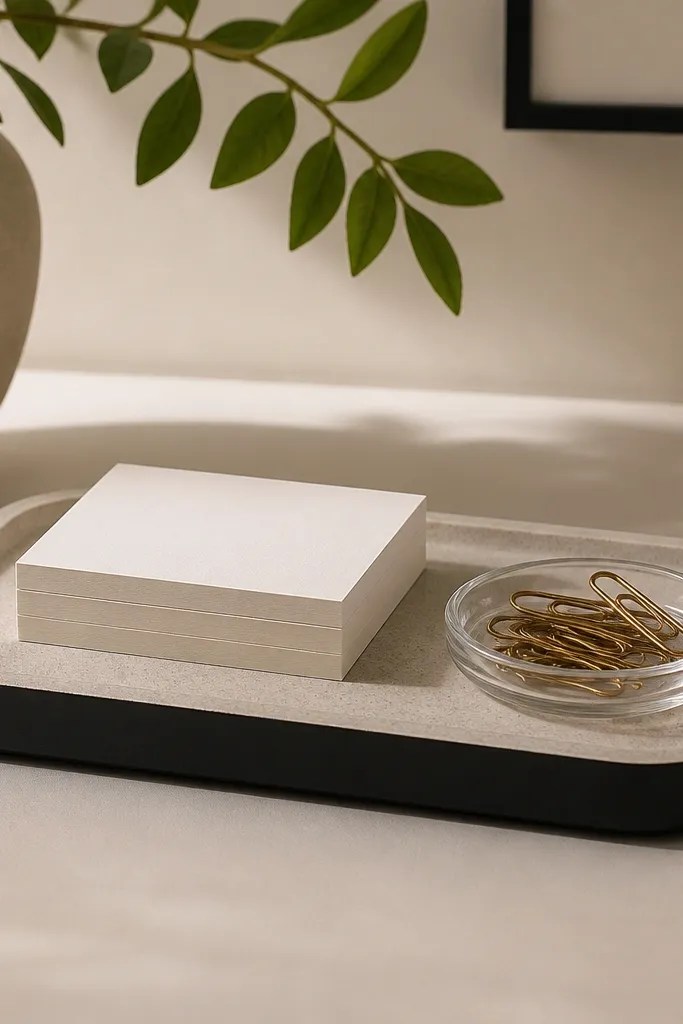
Small trays stop micro-clutter from multiplying. Sticky notes and paper clips look chaotic when they're scattered, but they look styled when grouped in one shallow "station." A stone-like top adds a luxe texture without needing real stone.
Pick a tray that's 8-10 inches long and under 1.5 inches tall. Use one clear dish for clips so you can see what you have. Keep this tray within arm reach of your keyboard for quick resets.
Pro tipStore spare sticky note pads flat underneath the tray so you never see extra pads.
AvoidDon't place this tray next to a larger bin - the clutter will spill into the tray's edges.
6. Stacked Wood Risers for Books and Reference Cards
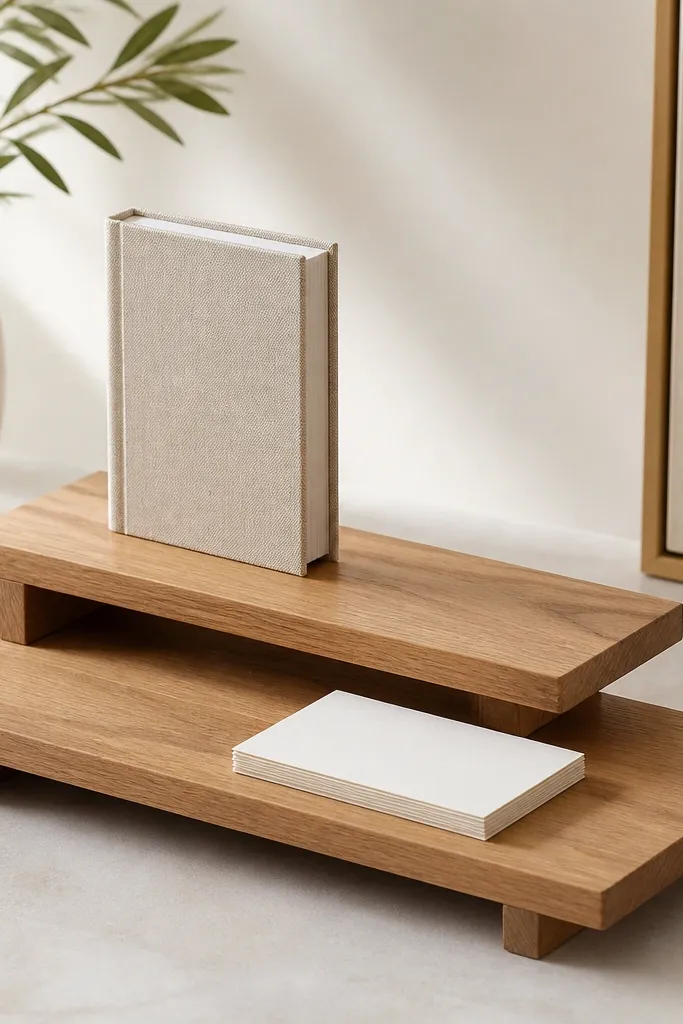
Height variation looks expensive because it creates display levels instead of a flat pile. A light oak riser matches many desks and makes paper edges look crisp. When your reference materials have a "stand," they stop migrating around the keyboard.
Use risers that are roughly 10 inches wide and 2-3 inches tall. Keep only one book or one paper set per level. Place risers at the back corner so they don't crowd the writing area.
Pro tipAdd a thin felt strip under the riser to prevent sliding and protect the desk finish.
AvoidAvoid stacking risers too close together - the gap makes it feel like a random pile.
7. Clear Acrylic Organizer Box with Black Divider Sheet
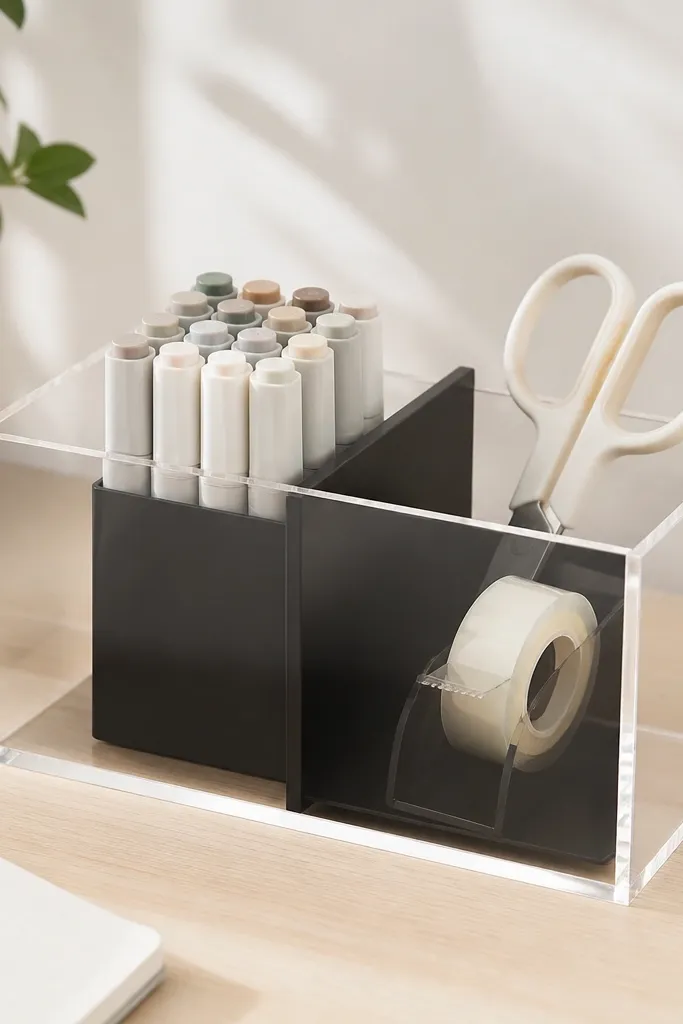
Clear acrylic gives you that modern, expensive office look because you can see everything at once. Adding a black divider sheet creates clean separation, so the contents don't blend into a color soup. This works great for kids because you can spot what's missing fast.
Use a box around 9x6 inches and 3 inches tall. Cut a piece of matte black craft foam to fit as a divider so it stays opaque. Put frequently grabbed items in the front section and less-used tools in the back.
Pro tipStick small strip labels on the inside front edge using white label tape so they're hidden until you open it.
AvoidAvoid clear organizers with no dividers - they look like a desk drawer dump.
8. Matte White Ceramic Catch-All for Keys and Small Tech
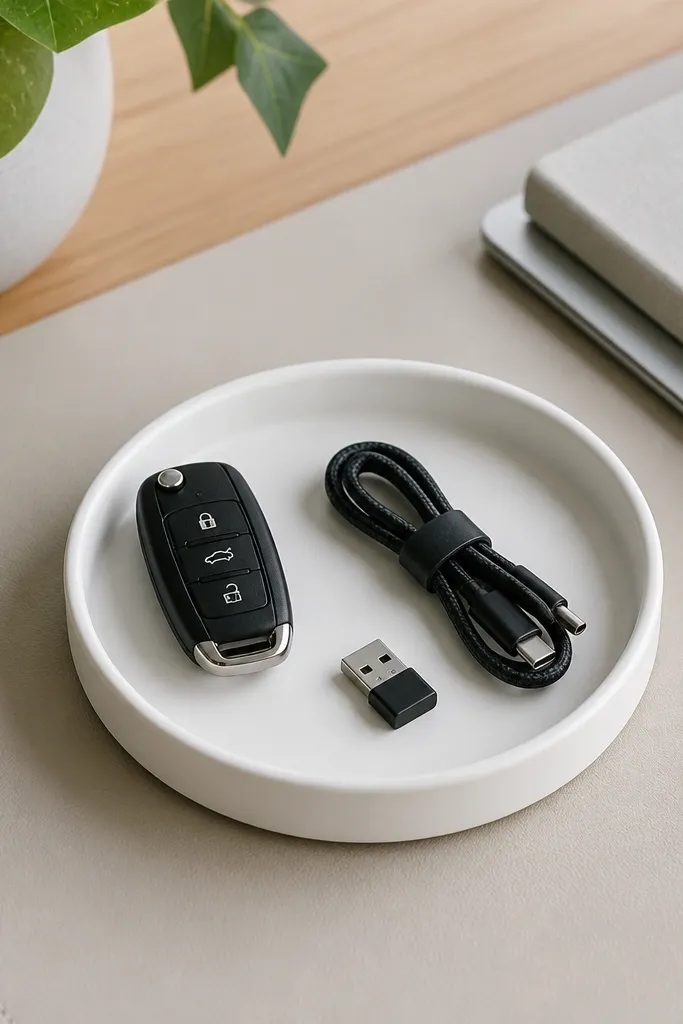
Ceramic catch-alls read like a home-office accessory, not storage. Matte white brightens the desk and makes tiny items look intentional. It's also a lifesaver for kids because keys and small tech tend to vanish into backpacks.
Choose a dish about 5-7 inches wide with a raised lip. Keep only two categories in it: keys and one tech item type (like adapters). Place it in the same corner every day, near the door side of the desk.
Pro tipAdd a thin strip of felt under the dish to stop it from sliding when kids bump the desk.
AvoidAvoid mixing coins, paper clips, and random trash in one dish - it turns into a junk bowl.
9. Drawer Insert for Markers with Color-Sorted Slots
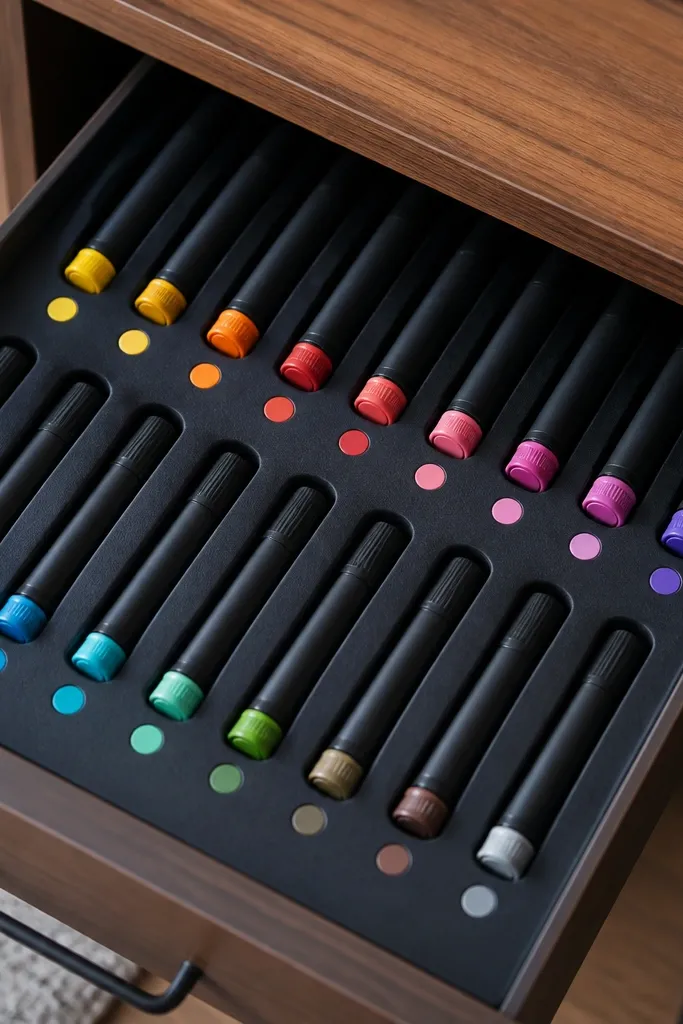
Color-sorted slots make the drawer look like a product display. Painting the insert matte black makes the drawer feel designed, even if the insert is cheap cardboard. Your markers stay upright and easy to grab, which keeps the desk surface clean.
Use a piece of 1/2-inch foam board or stiff cardboard cut to the drawer's inside dimensions. Divide into 6-8 slots using vertical partitions. Add small color dots for marker families (basic colors and skin tones) so kids put them back correctly.
Pro tipKeep one empty slot as a "new marker" holding space so you don't break the system.
AvoidDon't leave the slots too wide - markers slump and it looks sloppy.
10. Two-Tier Tray for Envelopes and Mail Sorting
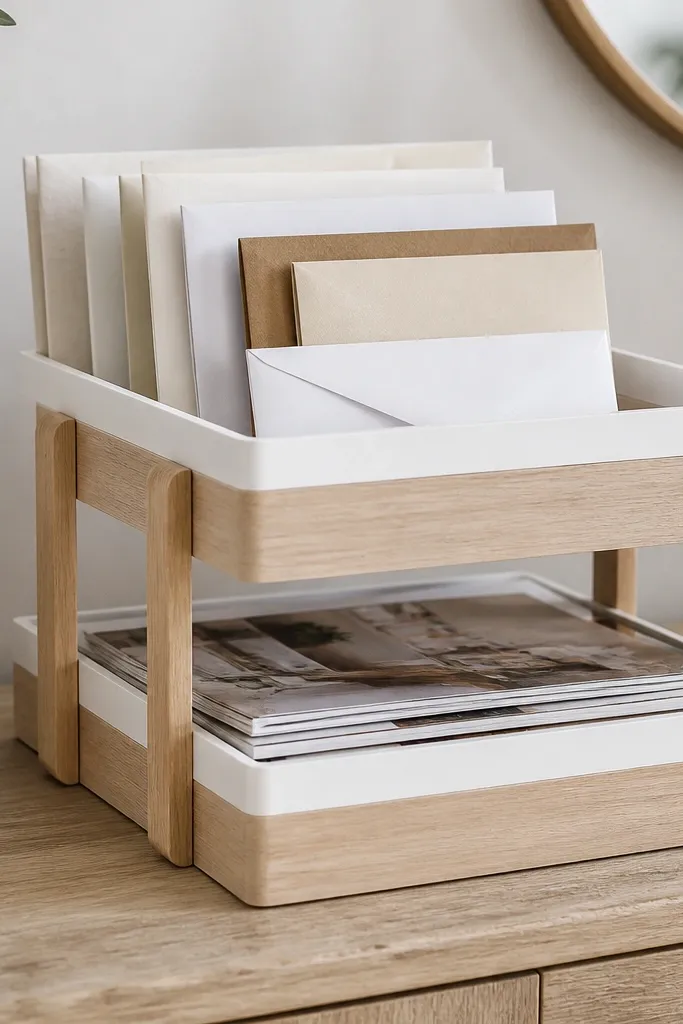
Mail trays look expensive because they create vertical structure and keep paper from spreading. A two-tier setup lets you separate "action" mail from "read later" without extra bins. Light wood keeps the desk warm and kid-friendly.
Choose a tray with tiers at least 6 inches apart so envelopes don't sag. Put envelopes in the top tier and keep bottom tier as a temporary catch-all for bulk paper. Put it near the desk's center back so it becomes the default place mail lands.
Pro tipUse one small stamp-style label on each tier: "To Do" and "Later."
AvoidAvoid a tray that's too shallow - envelopes slide and it looks messy fast.
11. Photo Frame as a Desk Tray for Receipts and Forms
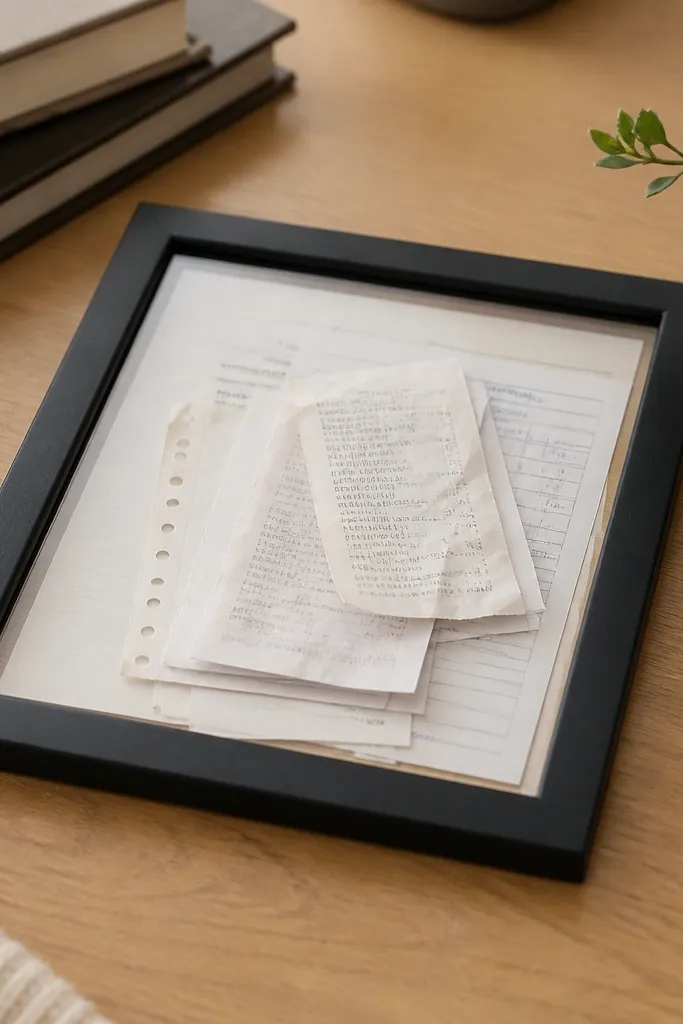
A frame tray gives you a clean border and makes paper look like it's part of the decor. Black frames make receipts and forms look crisp and controlled. The frame also keeps paper from curling and sliding around.
Remove the back of a photo frame and add a thin acrylic sheet or clear plastic from an old report cover. Cut to fit so paper sits flat. Keep the frame tray on the right side of the desk for paperwork that needs attention.
Pro tipUse binder clips to hold loose papers upright inside the frame so edges stay even.
AvoidDon't skip the clear sheet - without it, paper warps and looks sloppy.
12. Magnetic Pegboard Strip for Scissors and Rulers
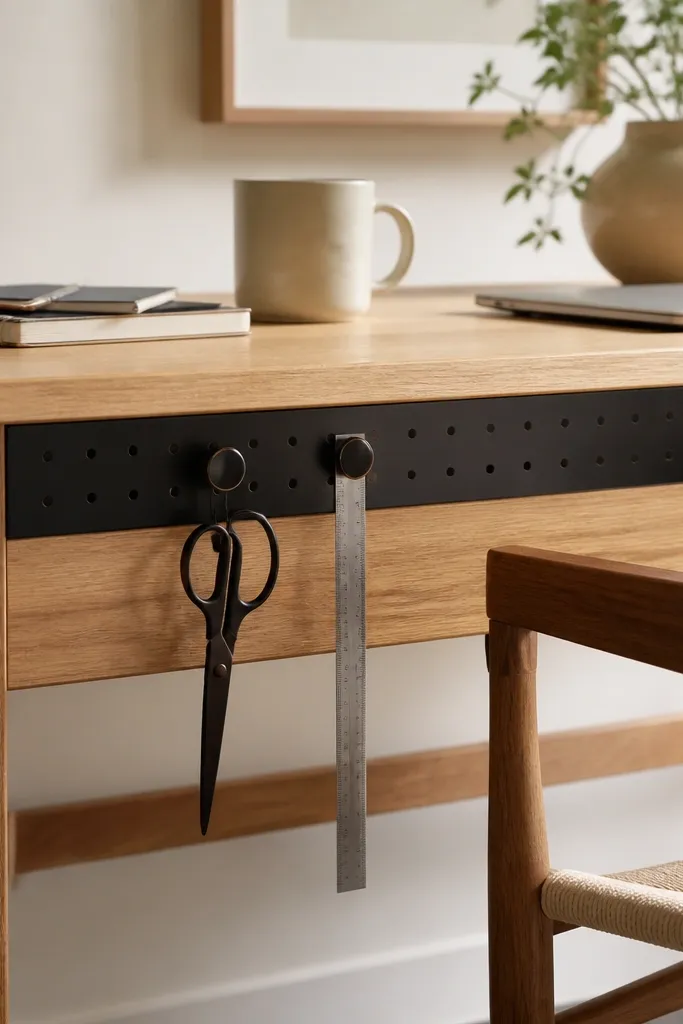
Pegboard strips turn tools into wall decor. When scissors and rulers hang vertically, the desk surface stays clear and the items feel easier to grab. Matte black keeps it consistent with other "luxury" desk finishes.
Mount a pegboard strip under the desk lip using screws or strong adhesive tabs designed for mounting. Use magnets or peg hooks sized for metal tools. Keep heavy items like rulers closer to the mounting point so they don't tip.
Pro tipAdd one small label sticker near each hook so kids know where everything returns.
AvoidAvoid hanging lightweight paper tools with heavy tools - it makes the system feel random.
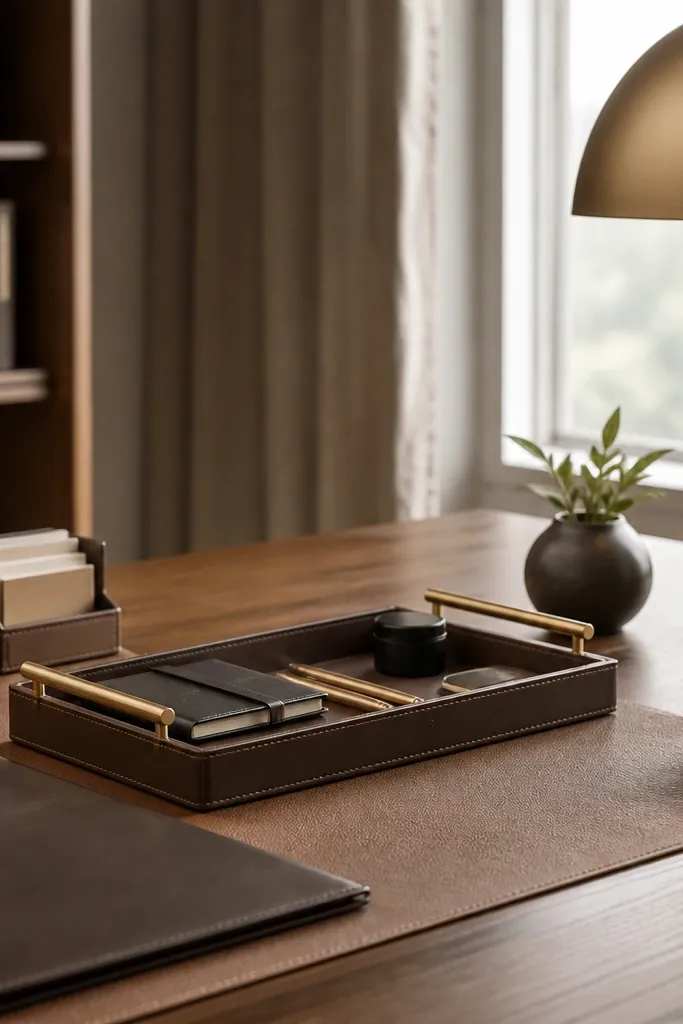
13. Faux Leather Desk Mat with a Matching Pencil Slot
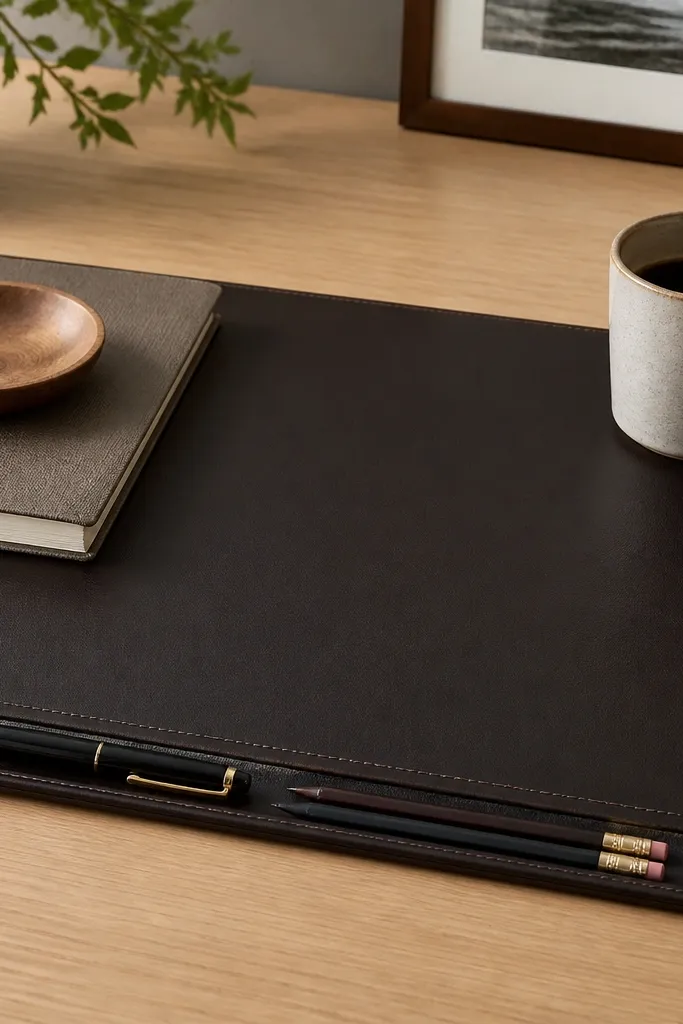
A desk mat instantly makes the whole setup look finished. Espresso faux leather looks close to real leather but wipes clean with a damp cloth. The pencil slot is the secret for keeping the front edge tidy.
Choose a mat sized to cover at least 75% of the desk surface. Make sure the pencil slot is wide enough for your thickest pencil. Place it so the slot sits directly in front of your writing spot.
Pro tipUse a small microfiber cloth and wipe daily - the mat stays smooth instead of looking dull.
AvoidAvoid mats with shiny finishes; they reflect light and can look cheap on camera.
14. Folded Fabric Napkin as a Drawer Divider for Small Stuff
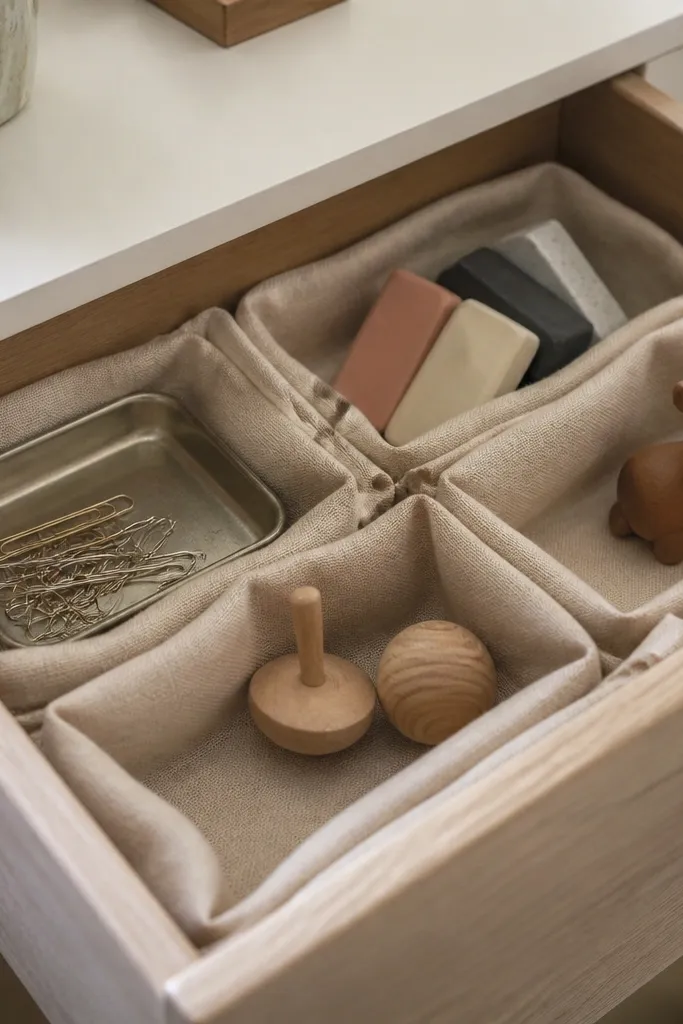
Fabric dividers make small items feel controlled without buying a dozen inserts. Beige or cream napkins look warm and expensive next to black desk hardware. The folded edges create crisp compartments that kids can understand.
Use a thicker cotton or linen napkin, not a thin one that collapses. Fold into a rectangle divider that matches your drawer depth. Add a tiny label on painter's tape on the drawer front for "clips," "erasers," or "small tools."
Pro tipWash and iron the napkin so it keeps sharp folds - wrinkled fabric reads messy.
AvoidAvoid using bright patterns; they compete with the rest of the desk instead of calming it.
15. Two-Color Storage Bins: Lidded for Mess, Open for Tools
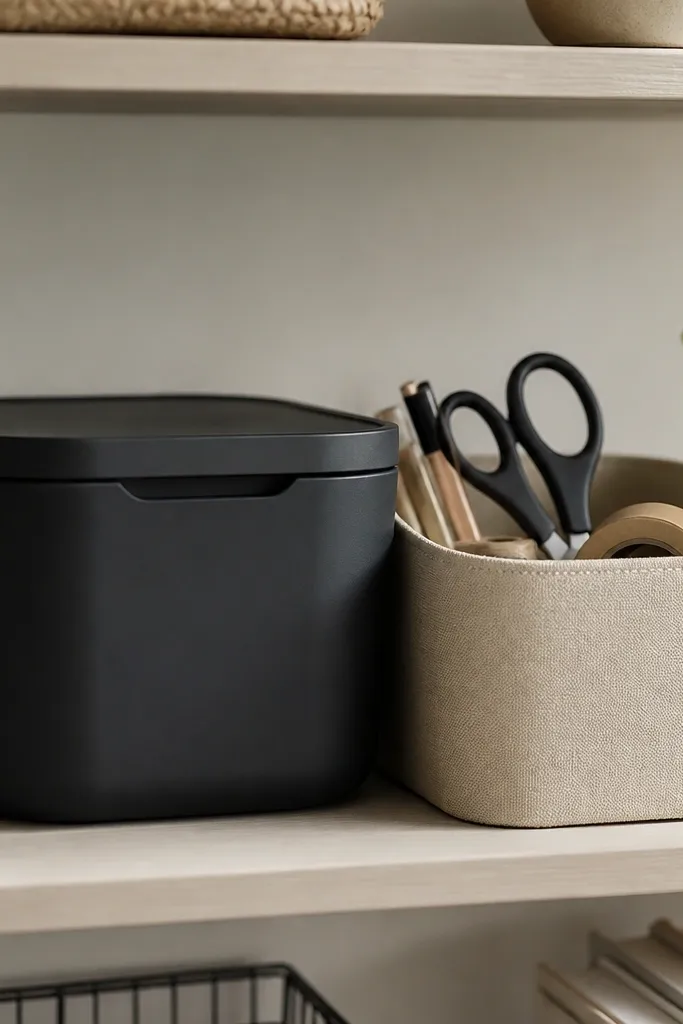
This is the fastest way I've found to create a luxury high end look expensive desk organization feel. When you separate "hide" and "show," you control what the eye sees. Matte black lids hide the mess, while open bins show only the items you want on display.
Pick bins in two matching tones, not four. Keep lidded bins under the desk or on a back shelf where kids can't dump them. Use the open bin only for tools you grab daily.
Pro tipUse the same label style on both bins: white label tape with black text.
AvoidAvoid open bins for everything; they turn into a visual clutter trap.
16. Clear Stamp-In Organizer for Tape, Glue, and Labels
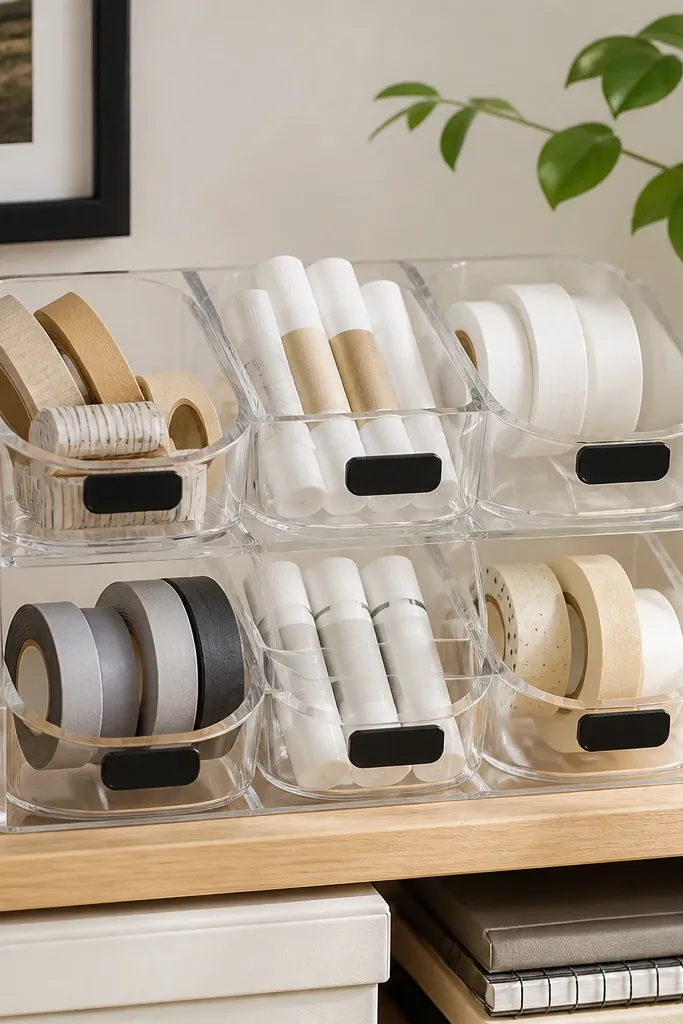
Clear stamp-in organizers keep small supplies visible and easy to return. Circular compartments are great for tape rolls because they stop wobbling. Black labels make the whole thing look like a branded office product.
Choose an organizer with compartments that match the sizes of your tape rolls so they don't slide. Label each compartment with a short word: "Tape," "Glue," "Labels." Put it on a shelf near the desk so it's part of the workflow.
Pro tipWipe the organizer with glass cleaner before labeling so the adhesive sticks cleanly.
AvoidAvoid overcrowding compartments; squeeze items only makes the organizer look chaotic.
17. Vertical Magazine Holder for Kids' "Finished Work"
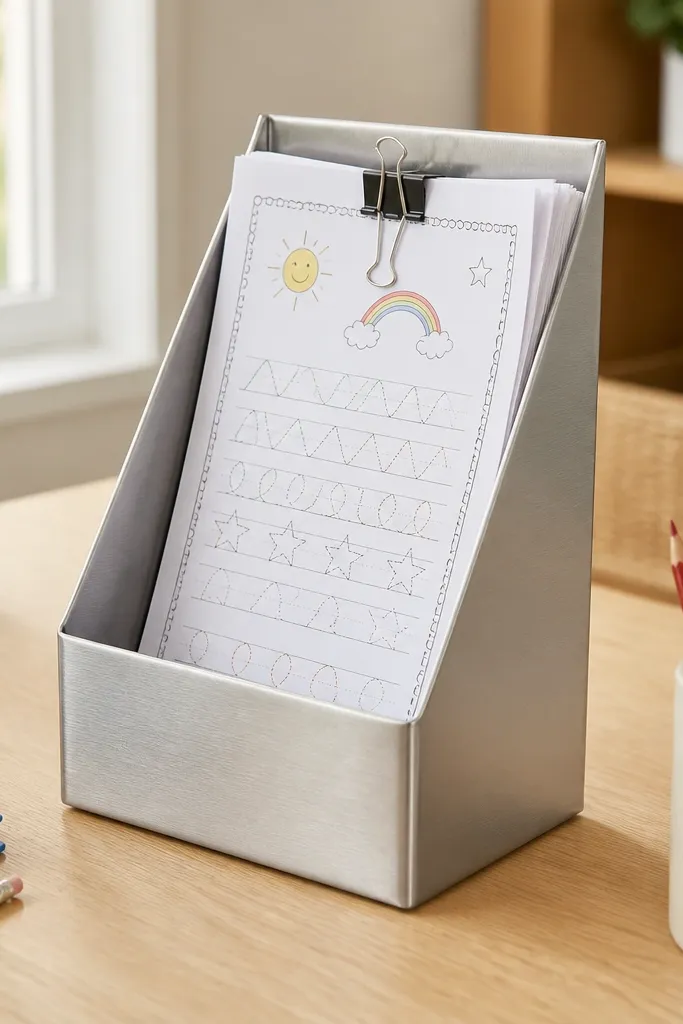
A vertical holder is like a visual scoreboard for kids. It keeps finished work upright, so it doesn't end up mixed with active papers. Brushed silver reads clean and modern, and it matches metal desk accessories.
Use a holder about 8-10 inches wide and tall enough for a stack of worksheets. Clip the stack with one binder clip so it doesn't fan out. Place it on the side of the desk where you can quickly grab it during review time.
Pro tipAdd one color clip for "return to school" and another for "keep at home."
AvoidAvoid using a holder that's too wide; stacks slide and the edges look uneven.
18. White Porcelain Ramekins for Clips, Erasers, and Thumbtacks
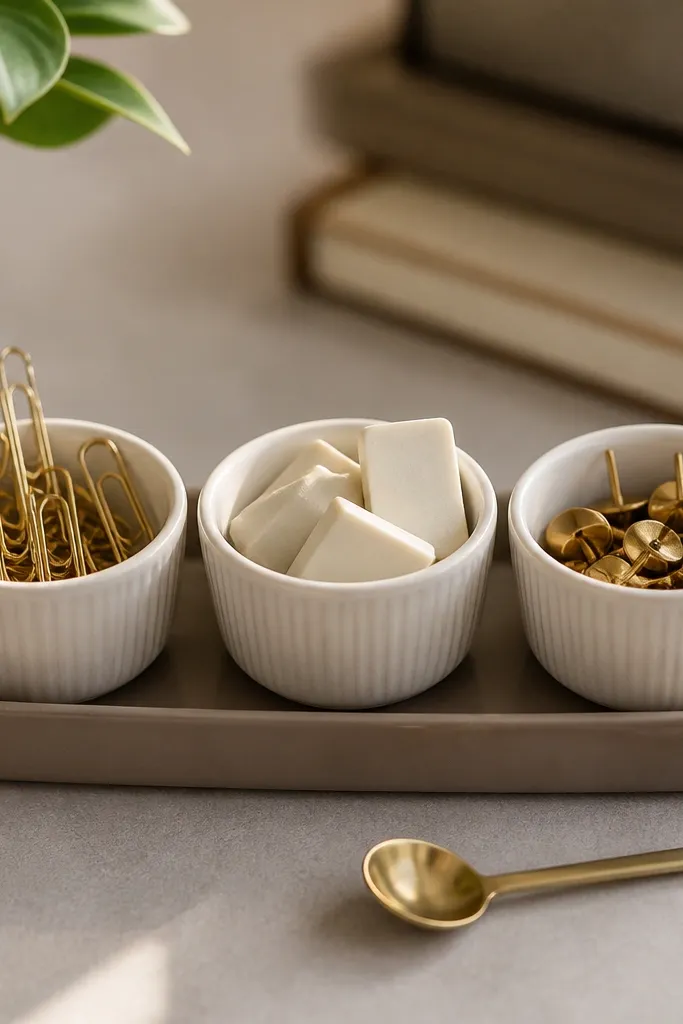
Porcelain ramekins look like you stole them from a high-end kitchen display, and that look carries over to desks. Small round containers keep each item category contained. White also makes it easier to spot when you're low on supplies.
Pick ramekins around 2.5-3 inches wide so they don't take over your desk. Group them on a tray to keep the visual footprint small. Use one tray for "tiny office" and keep the rest of the desk clear.
Pro tipAdd a tiny dot label sticker on the bottom edge so you don't see labels from across the room.
AvoidAvoid mixing wet items like sticky notes with metal clips in the same ramekin.
19. Under-Monitor Bookends for Standing Notepads
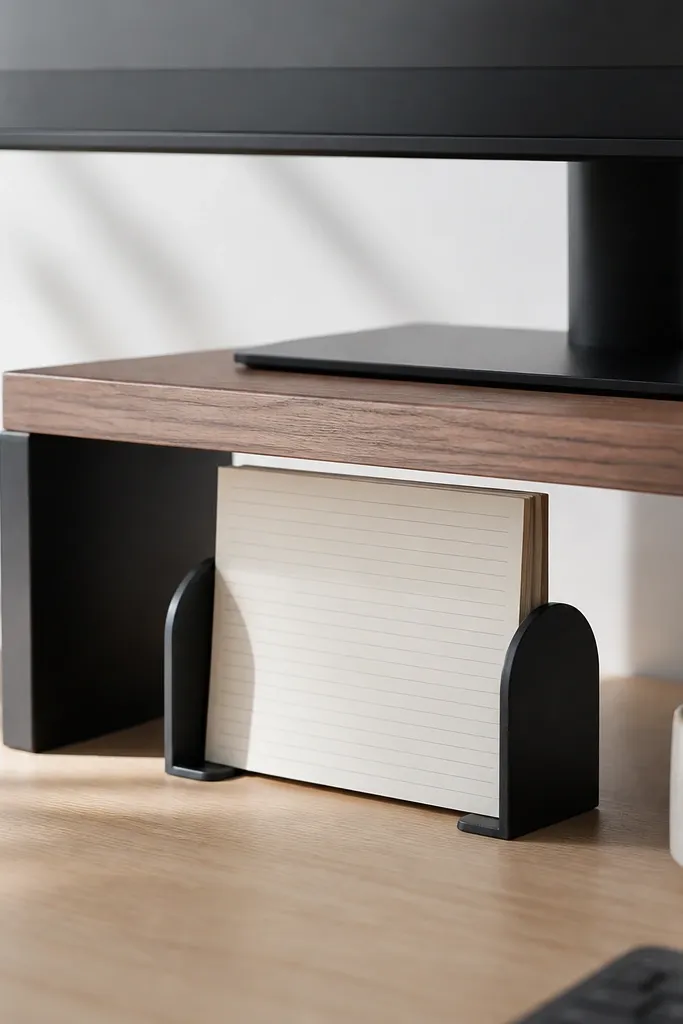
Bookends create a clean "display shelf" for your top notepad. When the notepad stands upright, it's easier to grab and harder to lose under keyboard piles. Black bookends also make the setup look more intentional and less temporary.
Place bookends under the monitor so the notepad stays within your eye line. Use a notepad with a thick cardboard backing so it stands straight. Make sure the notepad doesn't block vents or touch the monitor screen.
Pro tipKeep one pen clipped to the notepad with a binder clip so you never hunt for a writing tool.
AvoidAvoid leaning the notepad; a slanted pad looks like an afterthought.
20. Stacked Tray and Box Combo for Kids' Art Tools
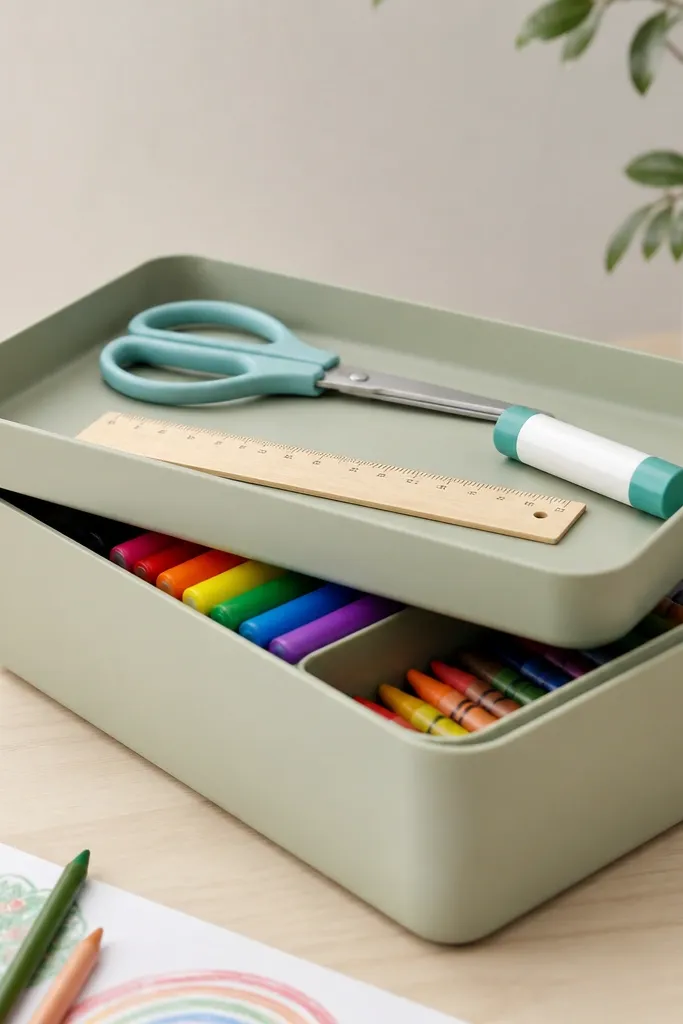
This combo keeps the desk looking styled because only a few items are visible. Kids art supplies look chaotic when they're all on the surface, so the lid hides the bulk. The shallow tray above is your daily tool strip.
Use a lidded box sized about 12x8 inches. Put a shallow tray on top that's 1-2 inches shorter in width so it doesn't overhang. Keep the visible tools to 5-7 items max.
Pro tipUse a strip of painter's tape on the top tray edge as a "fill line" so you stop adding when it hits the mark.
AvoidAvoid making the top tray too large - it invites overfilling and kills the clean look.
21. Matte Clear Storage Box for Tech Accessories with Labels
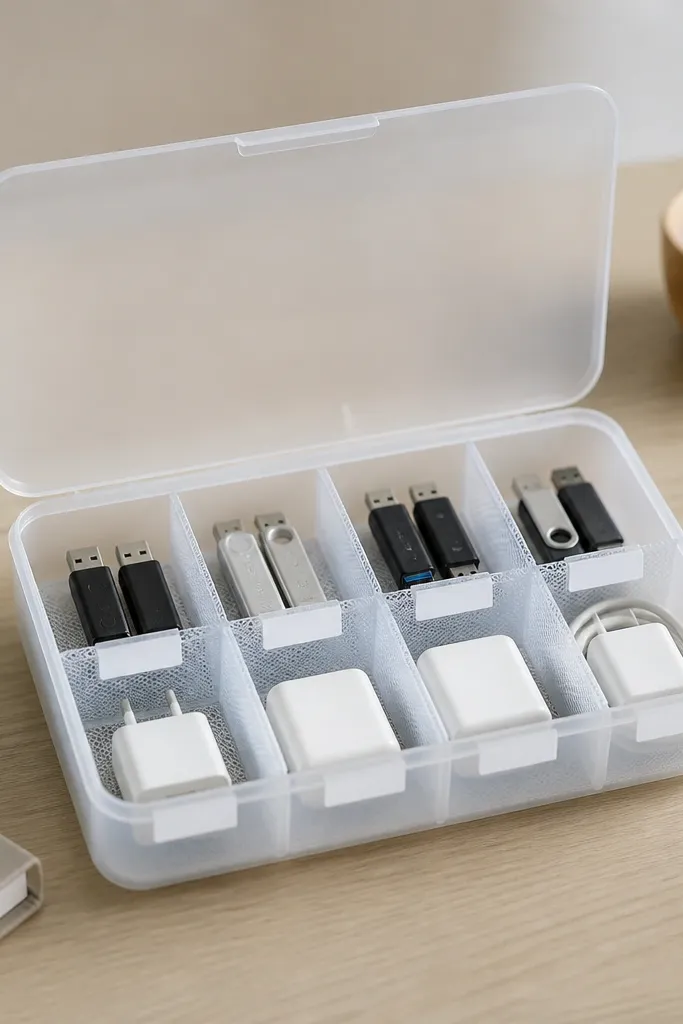
Tech clutter is the fastest way desks look messy, even if everything else is tidy. A labeled box fixes that by keeping adapters, USB drives, and charging bits in one place. The matte clear look is less shiny than full clear, so it reads more premium.
Choose a box with compartments or add small dividers from thin acrylic. Label with short words and keep labels consistent in size and font style. Store it on a shelf or inside a drawer close to your computer.
Pro tipPut a small "inventory" card inside the lid with what's supposed to be there.
AvoidAvoid storing loose chargers loose in a box without dividers; they jam and you end up dumping it.
22. Desk Shelf Styling: One Plant Pot + One Tray + One Bin
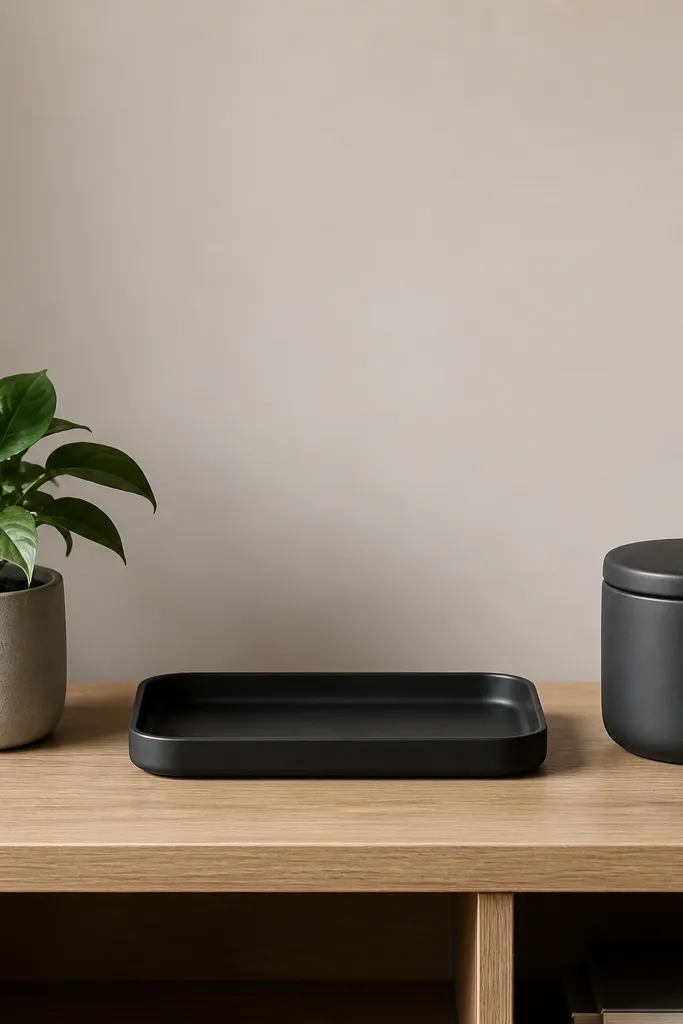
Gaps are what make a desk look expensive. When you style a shelf with three items and leave space between them, the shelf stops looking like storage and starts looking like design. The plant adds softness; the tray holds essentials; the bin hides overflow.
Use one tray in the same finish as your other desk organizers, like matte black. Keep the plant small enough to fit the shelf height without touching cables. Place the bin on the far right so the visual weight stays balanced.
Pro tipMeasure shelf spacing: leave at least 1 inch between the tray and the plant pot edges.
AvoidAvoid filling the shelf with multiple small items; it creates visual noise.
23. Ruler-and-Notebook Side Car with Hidden Storage
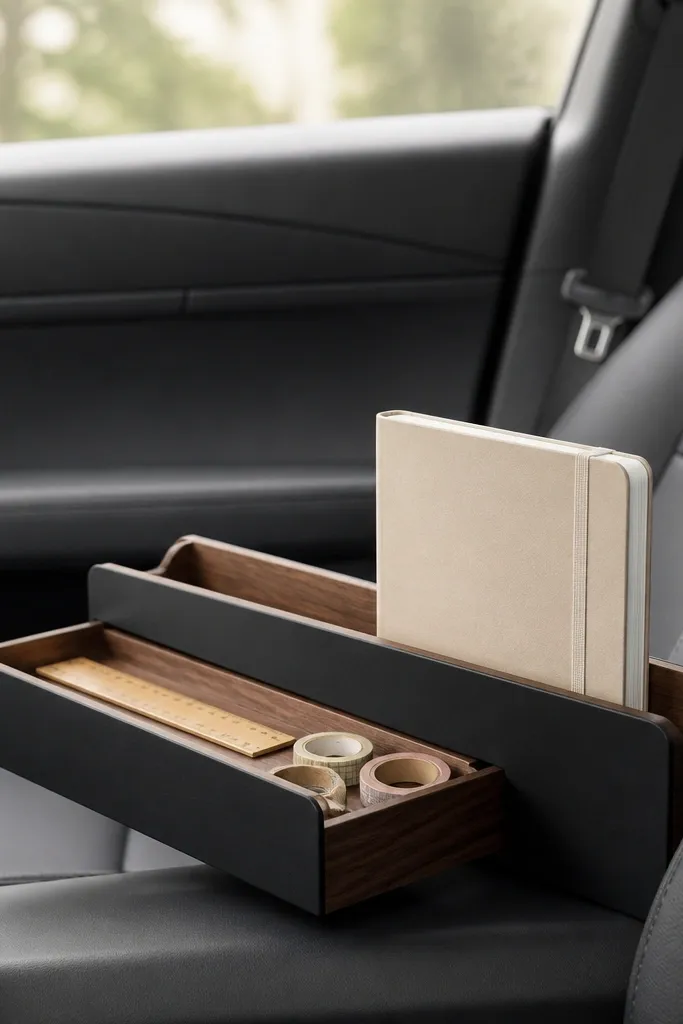
A side car creates a dedicated workflow area that doesn't spill into the rest of the desk. The hidden pull-out keeps tools that usually clutter the surface out of sight. When the notebook looks framed and straight, the whole desk looks put together.
Use a slim organizer that fits the desk depth without blocking chair movement. Keep the notebook upright with the spine against a back stop so it doesn't lean. Store rulers and tape in the pull-out so kids don't drag them across the desk.
Pro tipMatch the front finish to your other organizers - matte black front panel, matte black labels.
AvoidAvoid placing this beside the keyboard - it gets bumped and the look falls apart.
24. Under-Desk Hanging Pocket for School Supplies
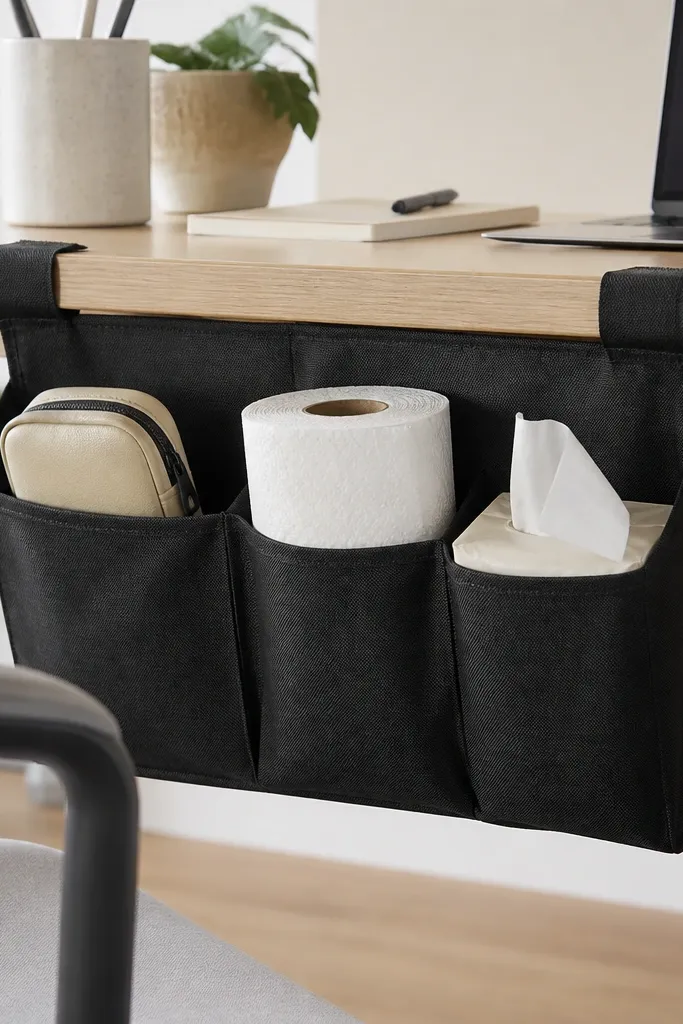
Hanging pockets are a clean way to keep school supplies off the desktop. Black fabric hides stains from glue and marker smudges, and the pockets keep everything vertical. Kids can grab what they need without turning your desk into a dumping ground.
Attach the pocket using Velcro straps or hooks that don't damage the desk finish. Fill pockets with categories: writing pouch, wipes/tissues, and backup supplies. Keep the pocket low enough for kids to reach but high enough to avoid chair contact.
Pro tipAdd a single white label strip to each pocket to make returns fast.
AvoidAvoid overstuffing; stretched pockets look tired and messy.
25. Two-Section Desk Drawer with One "Trash" Slot

A drawer that includes a trash slot keeps tiny junk from spreading across your desk surface. It sounds basic, but it stops the slow creep of clutter. The "luxury" part is the clean divider lines and consistent labeling, not fancy materials.
Use foam board dividers painted matte black so the drawer looks intentional. Make the trash slot wide enough for wrappers so you don't shove trash into other compartments. Label the slot with a small white strip on the divider edge.
Pro tipEvery evening, empty the trash slot into a nearby bin - it keeps the drawer always looking reset.
AvoidAvoid hiding trash in with office supplies; it turns everything into a sticky mess.


