1. Matte black tool rail with stud-mounted hooks
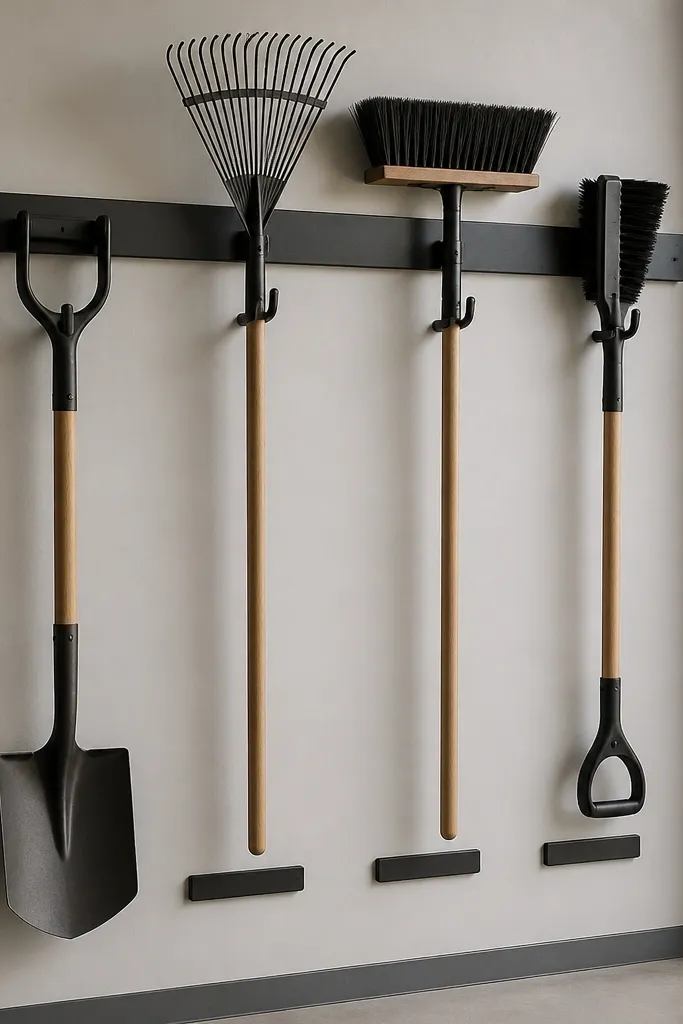
This looks luxe because the rail creates one continuous line, and every hook repeats the same silhouette. Matte black hardware hides scuffs from use and looks sharp against light wall paint. The hooks hold tools in a consistent angle so the wall stays visually calm even when tools are different shapes. I like using a rail that's long enough to span two studs so the whole line feels intentional.
Find studs and mount the rail with lag screws, using a level and a tape measure to keep the rail height consistent. Keep hook spacing around 5-6 inches center to center for long-handled tools so heads don't bump each other. Paint the wall a warm white (not bright blue-white) if it's currently beige or patchy.
Pro tipLabel under each hook with a 1-inch black-on-white label and a clear label protector so it doesn't peel from garage humidity.
AvoidDon't mount hooks into drywall - it makes the rail wobble and the whole wall reads cheap fast.
2. Slatwall panels in powder-coated white with hidden cord paths
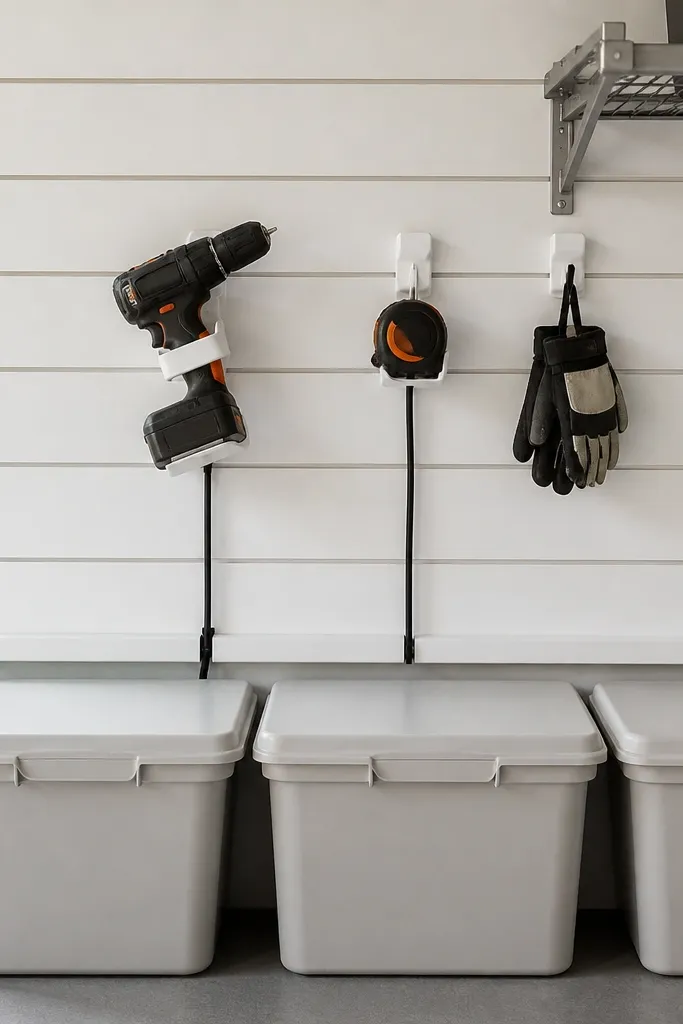
Slatwall looks high-end when the panel color matches the hooks and the wall has a clean, uninterrupted field. Powder-coated white makes the garage feel brighter and keeps black cords from looking tangled. Hidden cord paths matter because loose cords make any system look messy even when bins are organized. The small accessories hanging close to the panel create that gallery-like spacing.
Use slatwall panels sized to your wall section and install level with a stud finder. Pair with white hooks and a few specialty holders like a drill holster and a cord wrap hook. Add a slim cable channel along the base so cords don't loop across the floor.
Pro tipRun cords through the channel first, then attach a cord wrap hook so the cable never touches the ground.
AvoidSkip mixed hook finishes - chrome hooks on white panels look random and cheap.
3. Clear-lid drawer cabinets for kid-safe garage wall storage
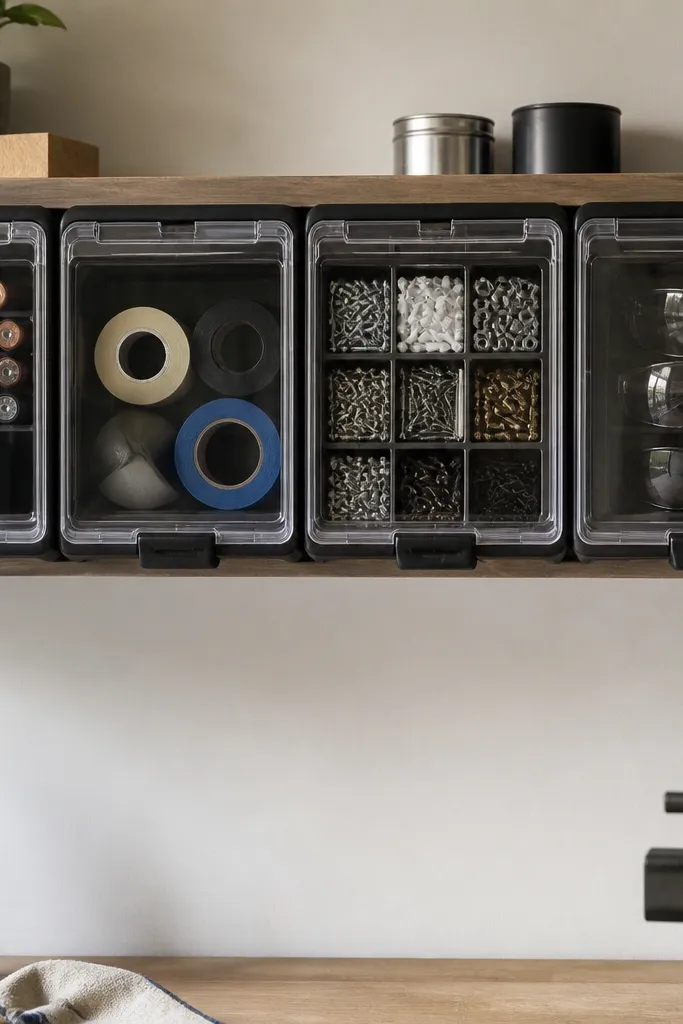
Closed drawers with clear lids look luxe because you can see contents without losing order. For kids, clear lids help them find what they need, while the latch keeps small parts and chemicals out of reach. The matte black hardware matches other garage systems and looks intentional. I've found that when you can see through a lid, you stop overstuffing because you can count what's there.
Mount cabinets into studs, leaving 2-3 inches of clearance above the floor for easy sweeping. Use small bins inside the drawers so screws and bits don't shift. Choose label stickers that are water-resistant and wipe-clean.
Pro tipPut the most-used items at kid eye level (about 36-48 inches from the floor) and keep chemicals higher.
AvoidDon't use frosted bins with no labels - kids pull them out and dump them.
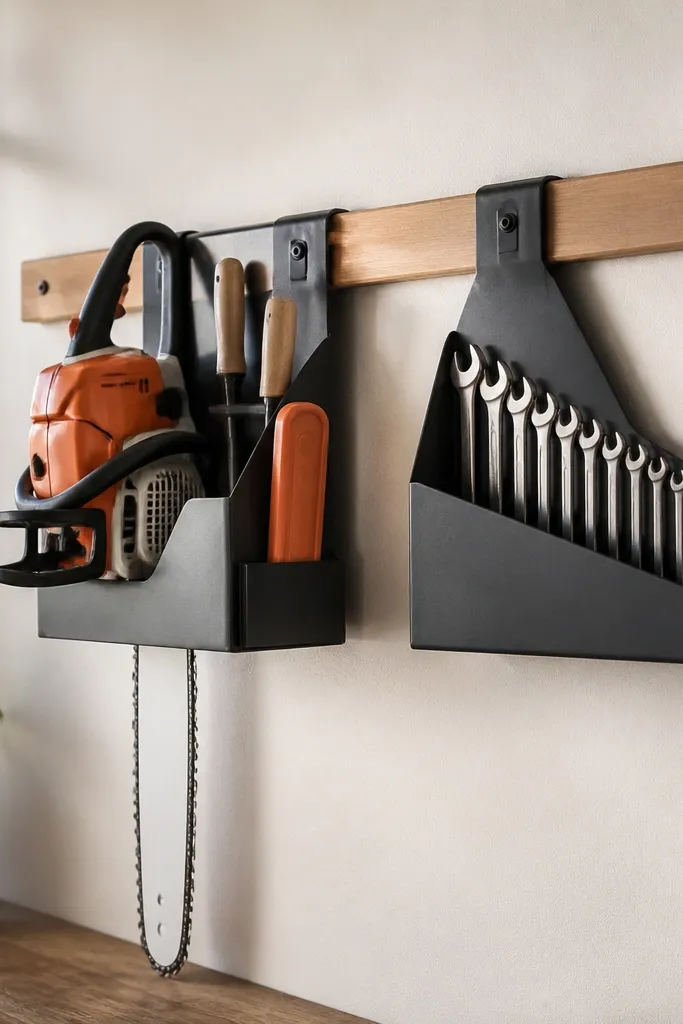
4. Shadow board for hand tools with matching wood stain
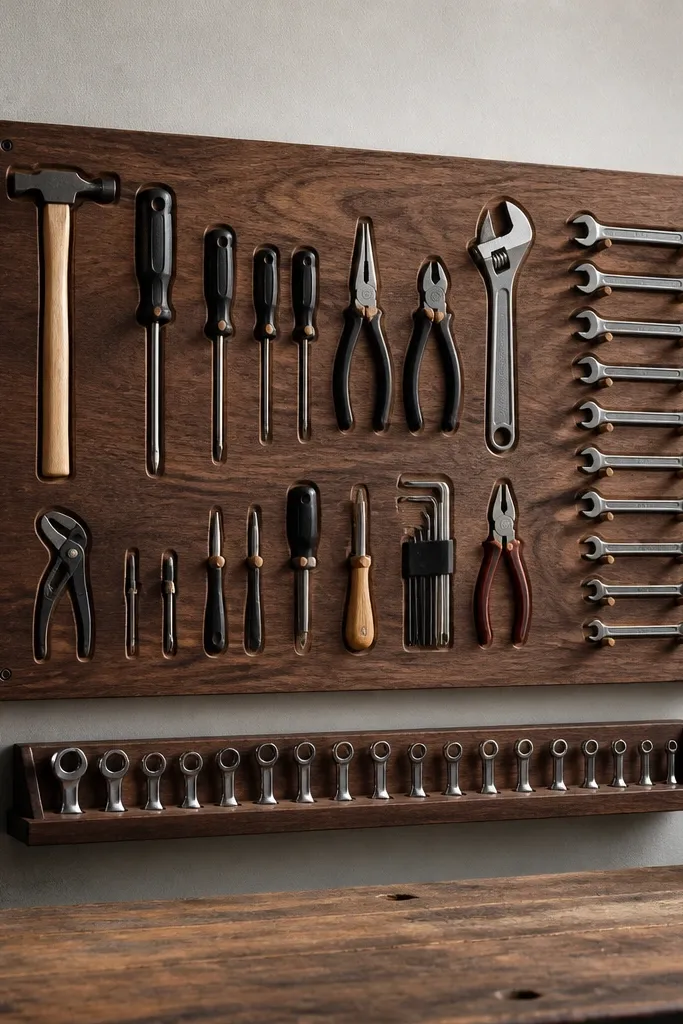
Shadow boards look expensive when the wood tone matches your garage vibe and the tool cutouts are consistent. The "shadow" effect happens because tools sit slightly proud of the board, so you get a clean outline instead of a cluttered flat hang. I like warm walnut stain because it hides minor scratches and looks good with matte black hardware. This setup also protects tool handles from dust compared with open hooks.
Use 1/2-inch plywood or a solid wood board, stain it, and seal with a satin clear coat. Space pegs or hooks so each tool has at least 1 inch clearance from neighbors. Mount with a French cleat or heavy-duty wall brackets so the board sits flat.
Pro tipMark tool placements on cardboard first and tape it to the wall for 10 minutes before you cut - it saves me from one ugly spacing mistake.
AvoidDon't freehand cut random slots - uneven spacing is what makes shadow boards look DIY-cheap.
5. Pegboard with a frame border and hidden mounting rails
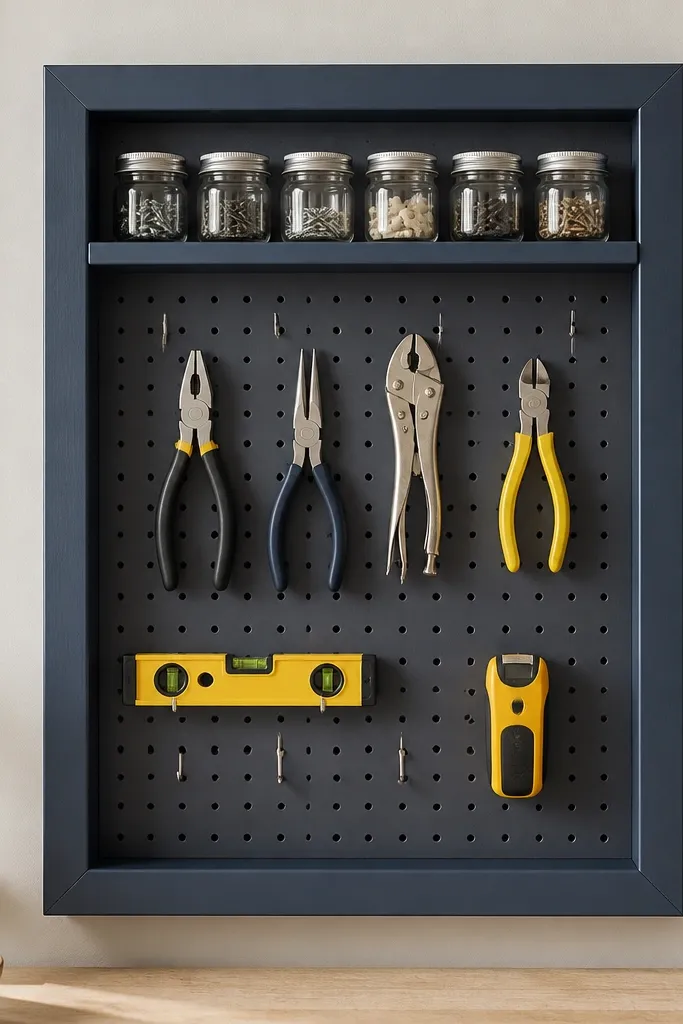
A pegboard alone can look utilitarian. A framed pegboard looks luxe because it turns the wall panel into a designed feature. The border also hides uneven edges and gives you a clean visual boundary. I've used this when the garage wall has patchy drywall or old paint - the frame makes it look finished instead of patched.
Use pegboard with a sturdy backing and mount to studs with a rail system so it doesn't warp. Frame it with 1x2 wood painted the same color as the wall or a contrasting black. Add a top shelf with a lip so items don't slide forward.
Pro tipUse only one peg type (same hook thickness) so the silhouette stays consistent across the board.
AvoidAvoid overloading - if everything crowds the pegboard, it looks chaotic no matter how nice the frame is.
6. Industrial pipe corner rack with matching end caps
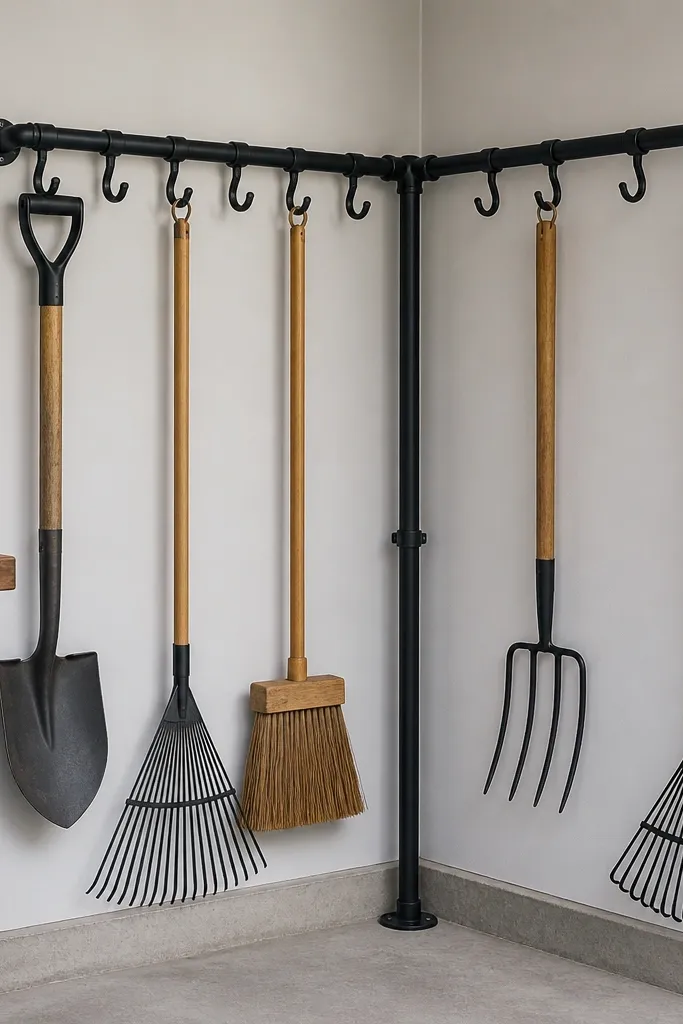
Pipe racks read high-end when the joints and end caps look intentional. The corner placement uses wasted space and keeps tools off the main wall path. Matching end caps matter because exposed raw pipe ends look unfinished. This is one of my go-to setups for small garages where you can't spare a big cabinet.
Use schedule-40 black iron pipe with wall flange brackets anchored into studs. Plan the height so tool heads clear each other by 1-2 inches. Keep the pipe diameter consistent (1 inch looks clean for most tool sizes).
Pro tipAdd a rubber bumper strip behind the rack where it meets the wall so it doesn't scratch paint.
AvoidDon't mix pipe diameters - it makes the rack look like leftover parts.
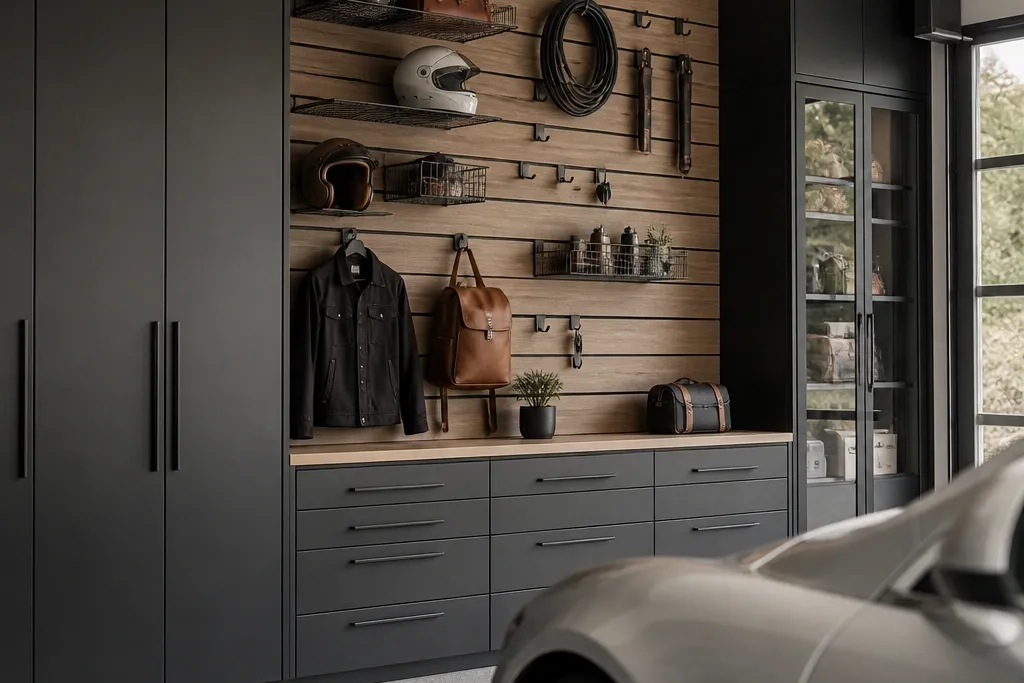
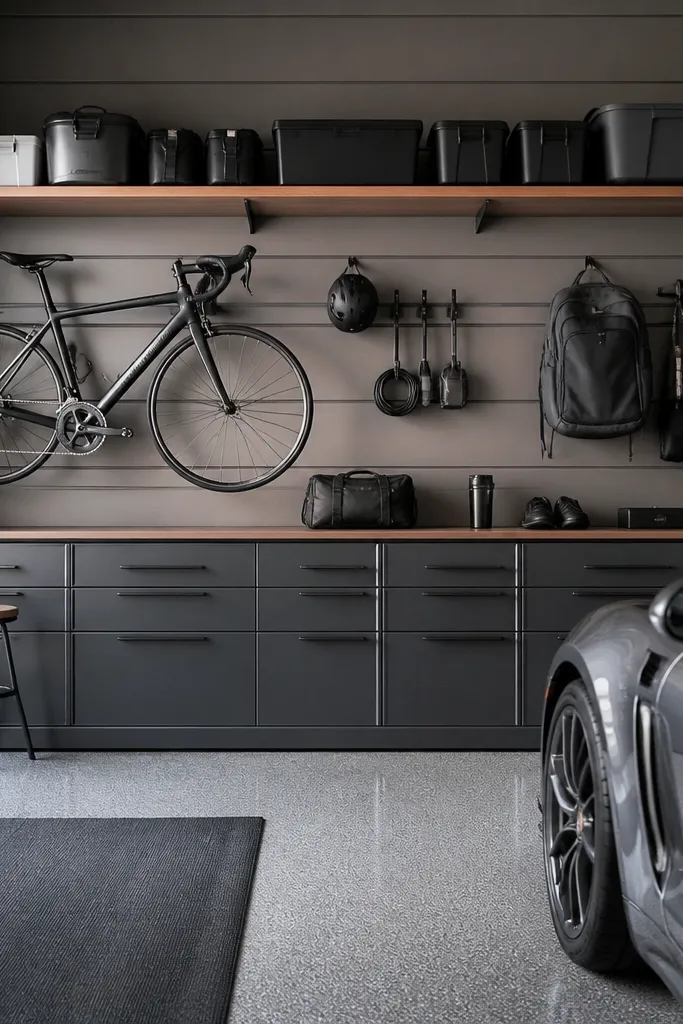
7. Closed cabinet lane with matte brass pulls and labeled bins
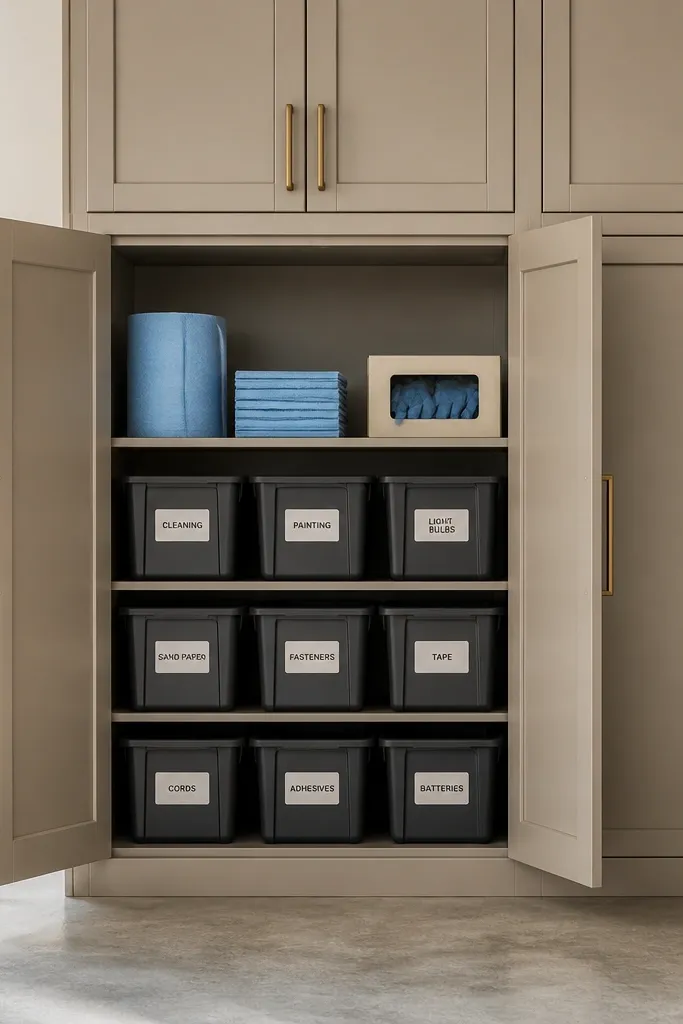
Cabinets instantly make a garage look like a workshop instead of a storage closet. Matte brass pulls add warmth and contrast against a cool wall paint. Labeled bins keep the interior from looking cluttered when you open the door. This is the only wall setup I'd use for things you don't want kids handling.
Choose cabinets that are shallow enough to avoid blocking door clearance, usually 12-15 inches deep. Mount into studs and use a level across the entire row. Use white bins with a flat front so labels stick cleanly.
Pro tipUse a label printer and apply labels to the bin before loading - it keeps the spacing perfect.
AvoidSkip clear tape labels on the inside - they peel when the bin gets wiped down.
8. Magnetic strip for metal bits and small hand tools
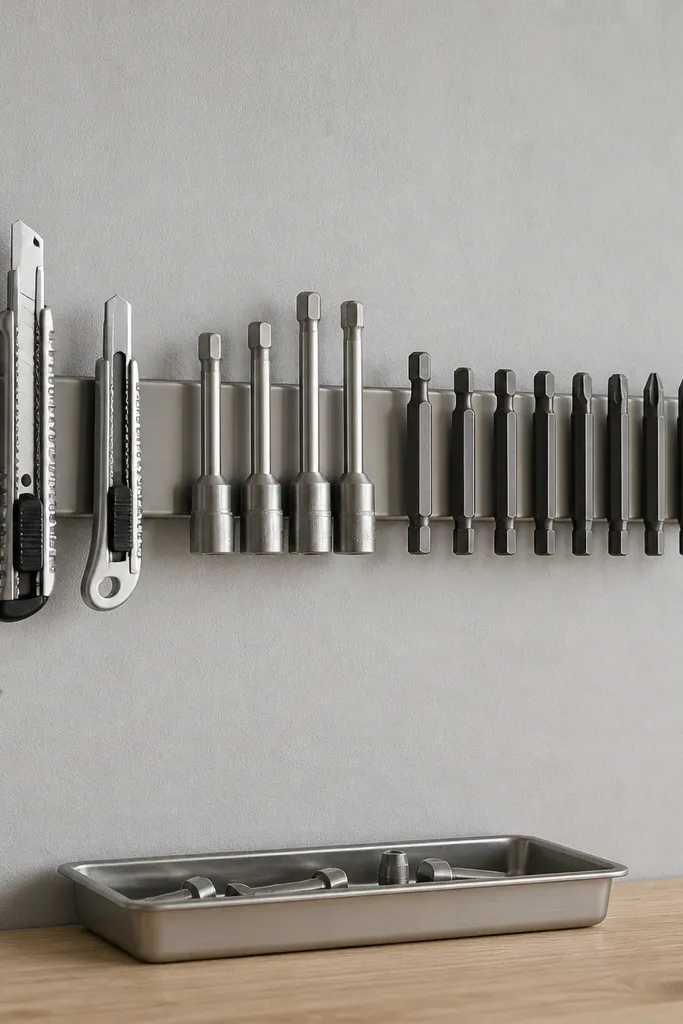
Magnetic strips look slick because the items float in a straight line and you can see exactly what's missing. Stainless steel reads clean and modern, and it resists rust better than painted strips. It's great for small metal tools that get mixed into drawers and vanish. The tray below prevents the "one fell behind the strip" problem.
Mount the strip into studs or a solid backing board, using anchors that match the wall type. Keep a 1-2 inch spacing between tool clusters so you can grab without bumping. Pair with a small drop tray made from a shallow metal or acrylic sheet.
Pro tipGroup by size: put the smallest bits at one end and larger tools at the other so you don't hunt.
AvoidDon't mount on flimsy drywall - the strip will pull away and the magnets won't hold steady.
9. Ladder-style shelf for paint cans and long supplies
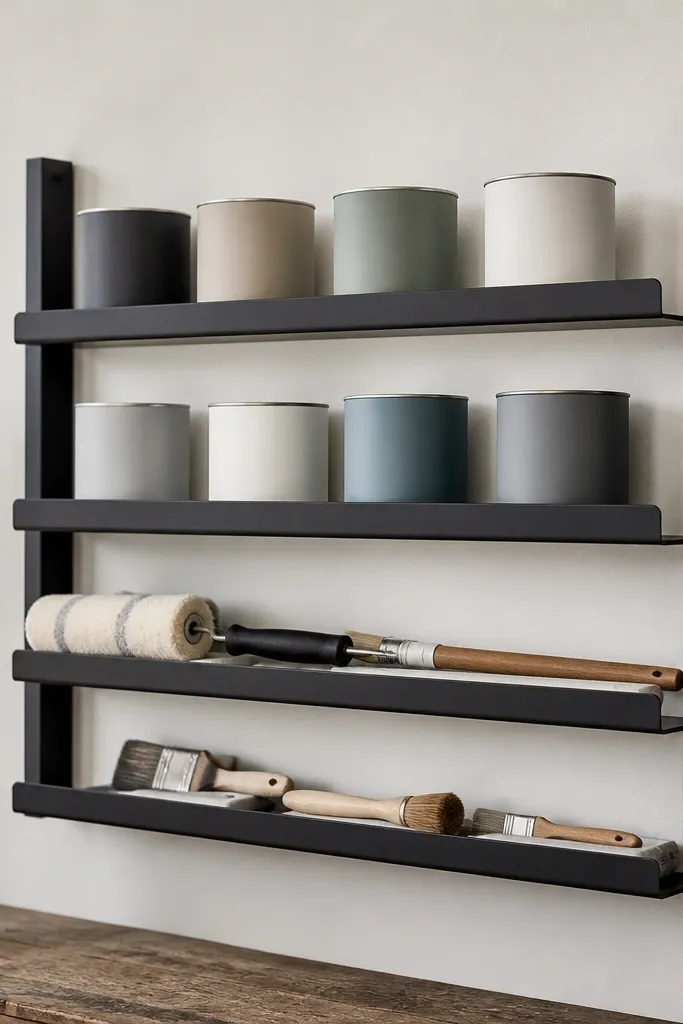
A ladder shelf creates a "designed" look because the structure repeats and frames everything. The metal finish looks luxe and wipes clean when you get paint splatter. Upright paint storage means lids stay aligned and you don't stack cans into a messy pile. It also gives you vertical organization without bulky cabinets.
Use a shelf with rungs spaced to fit 1 gallon cans and roller handles. Put the shelf at a comfortable height so you're not reaching above shoulder level. Add a lip or stop bar so cans can't slide forward when you grab a roller.
Pro tipLine the bottom of rungs with a thin felt strip so cans don't scratch and labels stay intact.
AvoidDon't set the shelf too high - if you reach, you'll start storing cans on the floor again.
10. Corner pegboard with matching bins for seasonal gear
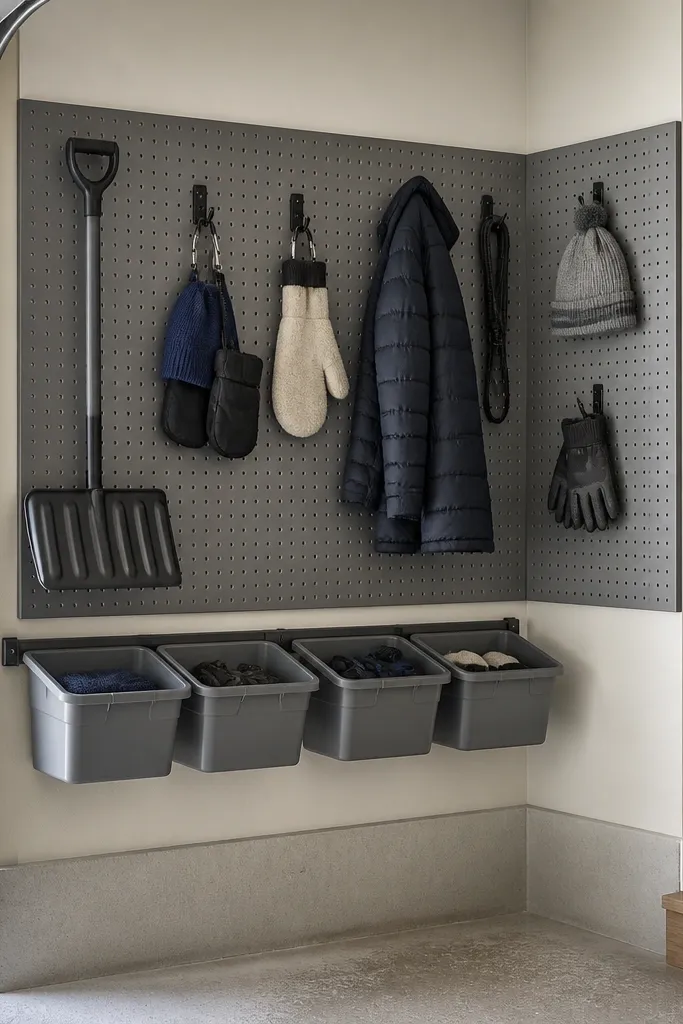
Corners waste space, so they're where organization looks instantly better. A pegboard in the corner lets you hang long or odd shapes that don't fit bins. Matching bins keep the corner from turning into a junk nook. I like gray bins because they hide dust and still look clean against white pegboard.
Mount the pegboard into studs and add a simple rail at the bottom for bins. Choose bins that have a flat front so you can label consistently. Keep the pegboard hooks limited to one tool type per row for a tidy look.
Pro tipUse one color label for each season - spring, summer, fall, winter - so you don't have to guess later.
AvoidDon't mix too many bin sizes - the corner looks random fast.
11. PVC conduit organizer for extension cords and chargers
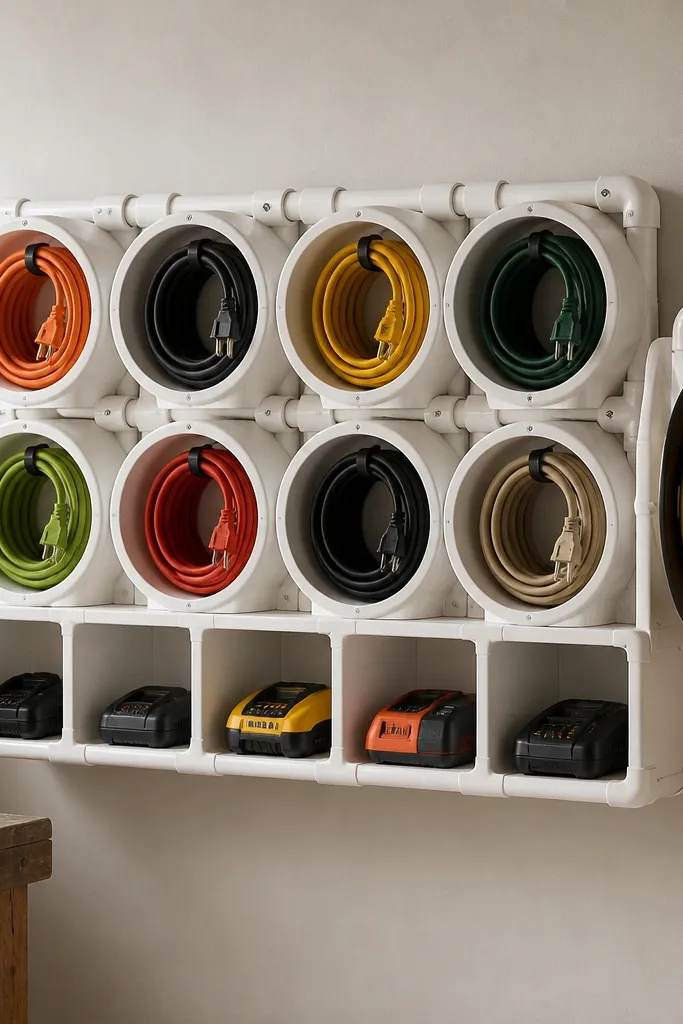
This is one of the most practical luxe-looking builds because it makes cords look intentional instead of tangled. PVC is cheap, smooth, and easy to clean. When cords wrap against a rounded holder, they keep their shape and don't sag. The result looks clean because the cords sit in a defined pattern.
Use a board backing (like 1/2-inch plywood), then mount PVC conduit holders secured with screws. Space holders about 6 inches apart so cords don't overlap. Paint the PVC white or match your wall color, and use a clear coat if the garage gets humid.
Pro tipWrap cords with a simple Velcro strap and attach the strap color to the cord type.
AvoidAvoid open cord piles below - they ruin the whole visual system.
12. Wall-mounted trash and recycling station with matching steel bins
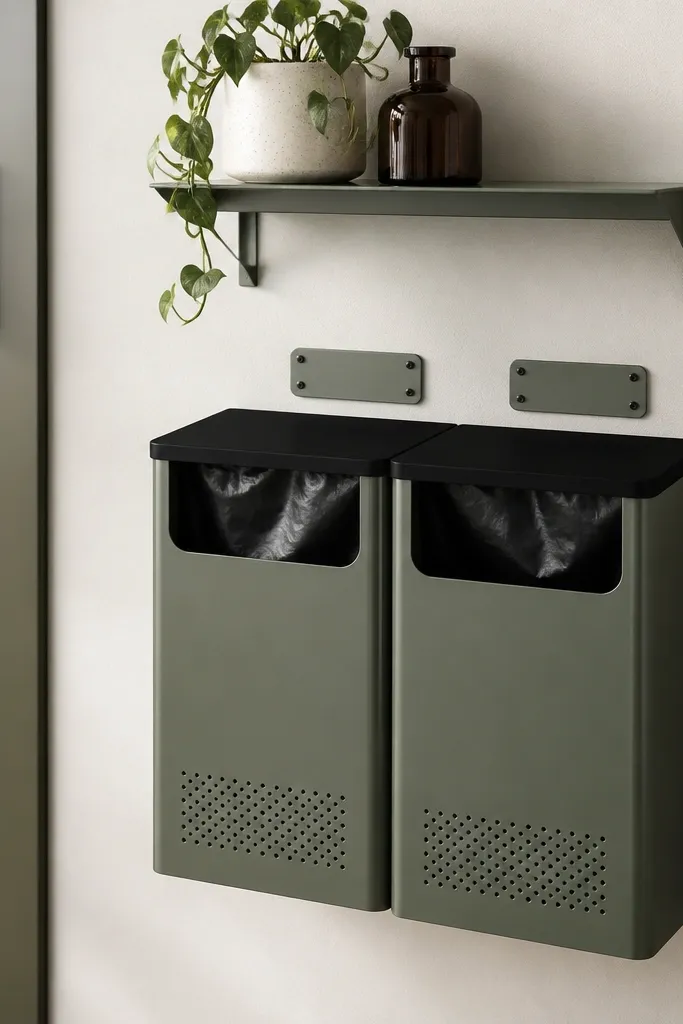
A "luxe" garage wall isn't only tools. When trash and recycling have a home, you stop leaving bags on the floor and you keep the wall area crisp. Steel bins look cleaner than plastic because they resist scuffs and wipe down easily. The matching lids and label plates make the station look like it belongs in a showroom.
Mount bins into studs and use the manufacturer's bracket or a heavy-duty L-bracket system. Keep the height so the opening lines up with your trash bag without bending too low. Add a small shelf above for gloves and a roll of contractor bags.
Pro tipPut a silicone mat under the bins to stop rattling when kids bump the door.
AvoidDon't place bins too close to storage - bag edges get stuck and everything starts tearing.
13. Garage wall spice-style organizer for small hardware
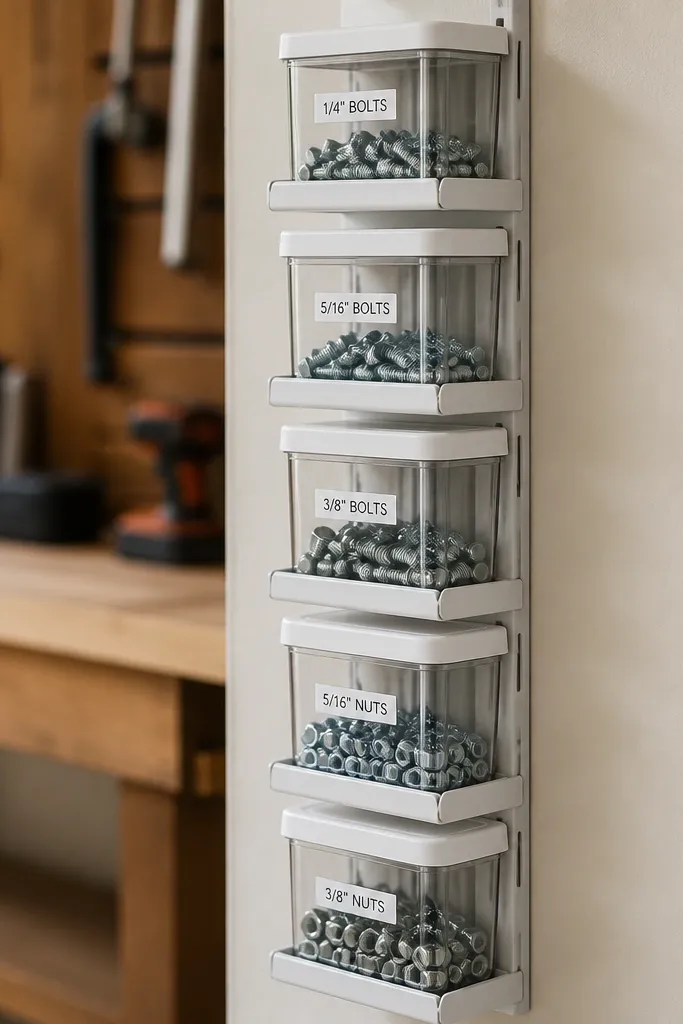
This looks luxe because it's uniform and readable. Clear containers with white lids match and keep the wall from turning into a label soup. I've used this to sort washers, nuts, drywall anchors, and tiny brackets that normally disappear. When each container has a count, you restock faster and you stop buying duplicates.
Use containers sized for small hardware, each mounted to a rail with a lip. Label with a label printer and include size and quantity. Mount at about 48-60 inches so you can read labels without climbing a step stool.
Pro tipStore only one type per container and keep the rest in a closed drawer for bulk.
AvoidDon't mix jar shapes - mismatched lids look messy even when contents are organized.
14. Leather-look tool handle hangers with matching tote hooks
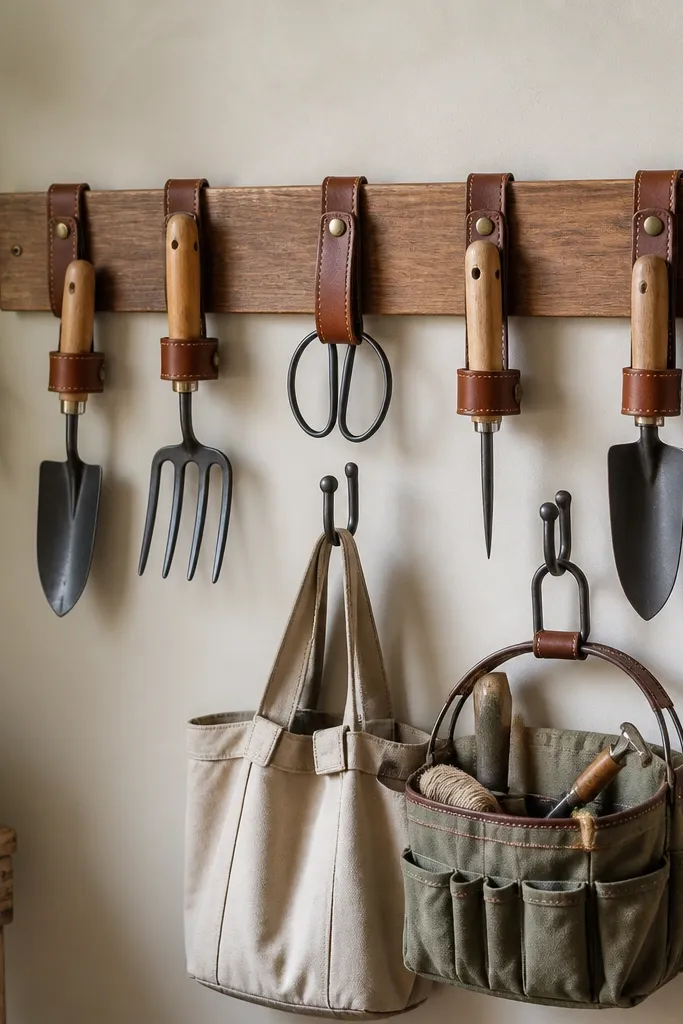
Leather-look straps make a garage wall feel intentional and warmer than plain metal hooks. They also protect tool handles from scratches and reduce the "clink" noise when you hang tools. The brown tone pairs well with matte black rails and light wall paint. This setup looks luxe because the straps repeat and create a consistent visual rhythm.
Mount a metal backing rail into studs, then attach leather-look straps or strap-style holders. Keep spacing about 7 inches for larger handles and 5 inches for smaller ones. Use a matching tote hook set so bags hang flat instead of swinging.
Pro tipWipe the leather-look straps with a damp cloth and dry - dust in garages sticks to textured materials.
AvoidSkip mixed strap colors - it looks like you added parts as you went.
15. Ledge shelf with closed fronts for car care products
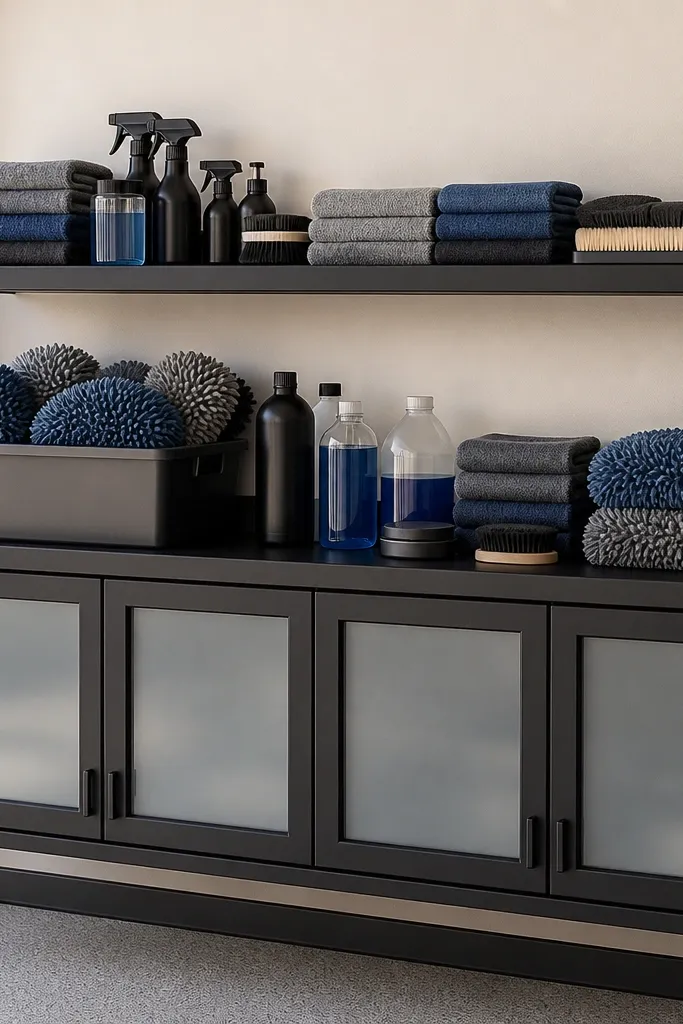
Car care products look messy fast because bottles crowd and labels smear. A shelf with a ledge keeps items from sliding and gives you a clean front edge. Closed-front cabinets hide the mess when you open the door. This looks luxe because the shelf line and cabinet framing create straight geometry.
Use a shelf board with a sealed finish like polyurethane for wipe-down. Choose cabinets with clear or frosted glass only if you label everything inside. Keep bottle groupings tight: spray bottles together, towels together, mitts together.
Pro tipStore sprays in a shallow bin with a lid so drips don't stain the shelf.
AvoidDon't leave loose bottles on the ledge - one spill makes it look neglected.
16. Pegboard + acrylic label system with color-coded zones

Labels are where garages look expensive or chaotic. Acrylic label holders make labels look crisp and they resist humidity better than paper stickers. Color-coded zones help kids and guests find the right hook without reading tiny text. I like using one color dot per category and keeping the rest black text on white.
Mount label holders in a straight row below the pegboard so they align with hook positions. Use hooks in only one finish so the wall doesn't look like a bargain bin. Put heavy tools in the lower zone and light items higher.
Pro tipWrite labels with exact names like "Impact driver bits" instead of "bits" so people put tools back correctly.
AvoidSkip full-color labels - they fade and look like dollar-store stickers.
17. French cleat system for ultra-clean tool organization
French cleats look luxe because the wall hardware disappears behind the system. You see straight lines, and tools hang from matching hangers that line up. It's also practical - you can move hangers as your collection changes. I use this when my garage is evolving because it keeps the wall looking organized even after you add new tools.
Install the cleat into studs with consistent spacing, usually using long screws through a ledger board. Build hangers from 3/4-inch wood with a matching angle and add a stop lip. Paint or seal the wood so it matches the rest of your wall finish.
Pro tipStart with three hangers and test the layout for a week before adding more so you don't overbuild too fast.
AvoidDon't mount the cleat on studs that are too far apart without a backing board - hangers can feel loose.
18. Closed flip-door cabinet with pegboard inside for paint tools
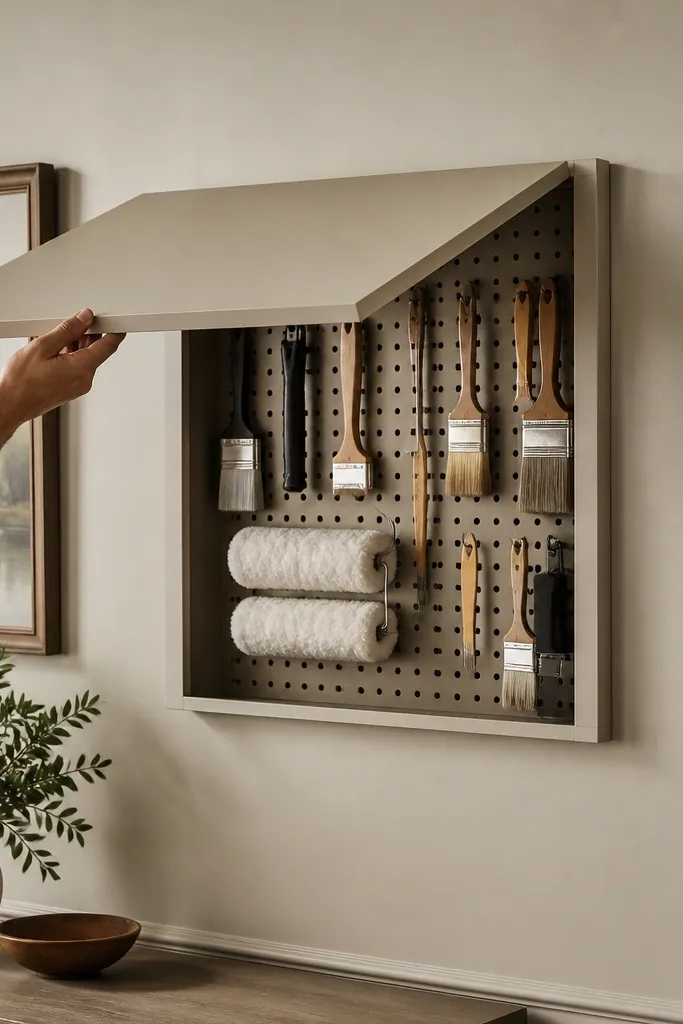
Open paint tool storage looks messy because brushes and rollers get odd shapes. A flip-door cabinet keeps the wall looking sleek, and the pegboard inside makes tools still easy to grab. The luxe feel comes from the smooth exterior panel and hidden latch. This is how I keep paint areas from turning into a visual mess.
Use a shallow cabinet with a door that clears the wall hooks when opened. Install pegboard on the inside back panel and add hooks sized for paint tools. Keep brushes in rows by size and add a small lip at the bottom for roller covers.
Pro tipHang roller covers on hooks and store them with the cover open - it reduces musty smell compared with sealed piles.
AvoidSkip storing wet tools inside - dry them first or the inside starts smelling and labels peel.


