1. Snap-Lid Clear Bins with Color-Dot Lids for Sports Gear
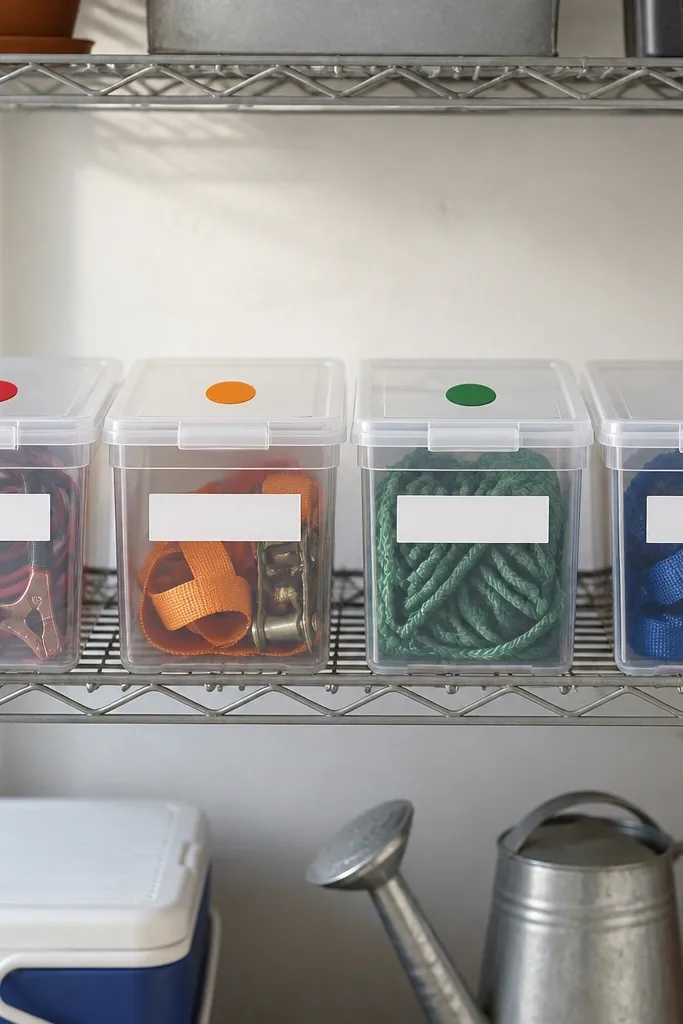
I use clear snap-lid bins for sports because they look neat even when the garage gets dusty. The color dot on the lid is what makes it work year round - you don't have to read labels every time. I like red/orange for "active gear" and green/blue for "seasons and backups," so kids can sort quickly. The clear sides keep you from opening every bin just to find one glove.
Pick bins that fit your shelf width without gaps bigger than 1/2 inch. Add a 1-inch vinyl dot sticker centered on the front edge of each lid, then a small label strip underneath it. Keep the bin size consistent across the row so the front looks aligned.
Pro tipPut the most-used bin at eye level and keep the overflow in the top row, not the bottom.
AvoidAvoid open-top bins for sports gear - they collect grit and look messy fast.
2. Pegboard Wall with 6-Inch Tool Shadow Layout
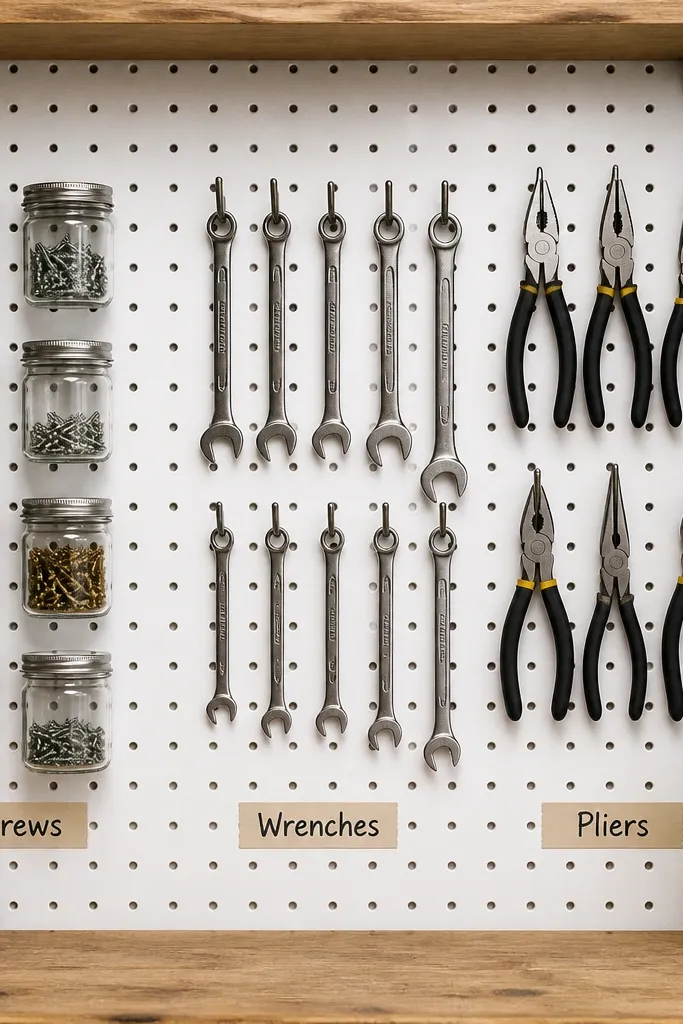
Pegboard looks clean when the tools hang in a repeatable pattern. I measure 6 inches between vertical hook columns and keep tool sizes consistent within each column. That spacing makes the wall look calm instead of crowded. It also turns "where is it?" into a quick glance.
Use a white or light gray pegboard so labels stand out. Install hooks first in dry-fit positions, then mark holes with a pencil so the final layout is straight. For kids, hang the light tools lower and keep heavier tools in the second row.
Pro tipPrint labels on white vinyl and wrap them around the pegboard edge so they don't peel when you wipe dust.
AvoidAvoid random hook heights - a pegboard with mixed spacing looks chaotic even when it's organized.
3. PVC Pipe Tool Rack with Caps for Hand Tools
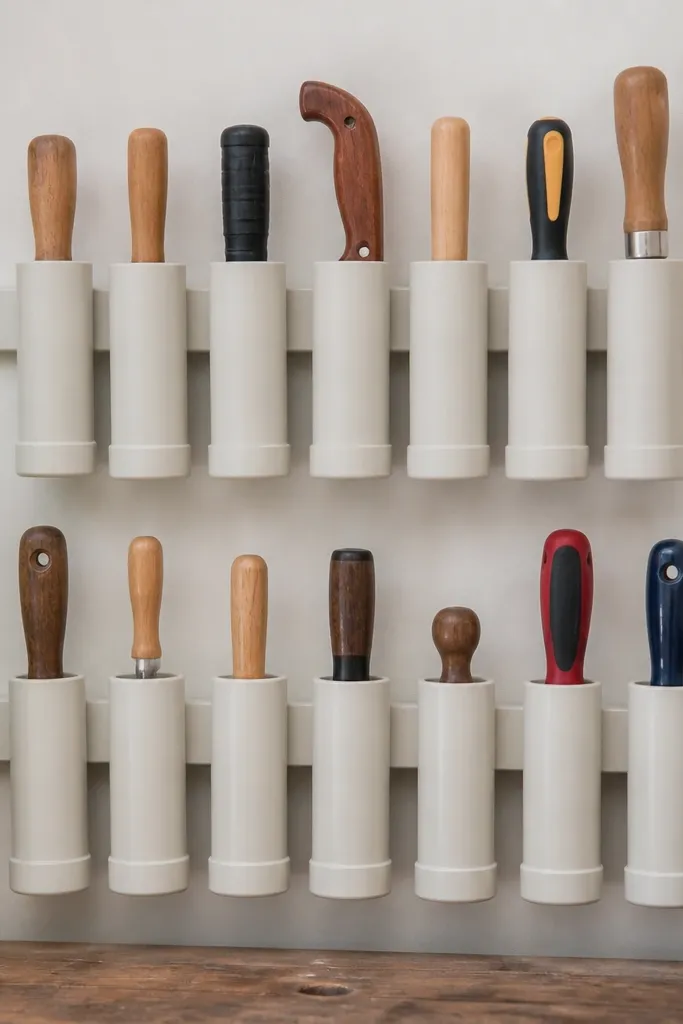
This is my go-to for small hand tools because PVC stays clean and doesn't care about garage humidity. The end caps keep tools from sliding out sideways, and the open top makes it easy for kids to grab the right thing. I like the off-white look because it hides grime better than bright colors.
Cut PVC into 10-inch sections for screwdrivers and 12-inch sections for smaller wrenches. Glue end caps on one side only, then mount the rack to a board first so it's easy to level. Paint with a plastic-friendly spray paint and let it cure 48 hours.
Pro tipMark each tube opening with a small vinyl label so the shape alone doesn't confuse people.
AvoidAvoid bare PVC with no paint - it shows dust and scuffs like crazy.
4. Overhead Bike Lift with Floor-Only Seasonal Bins
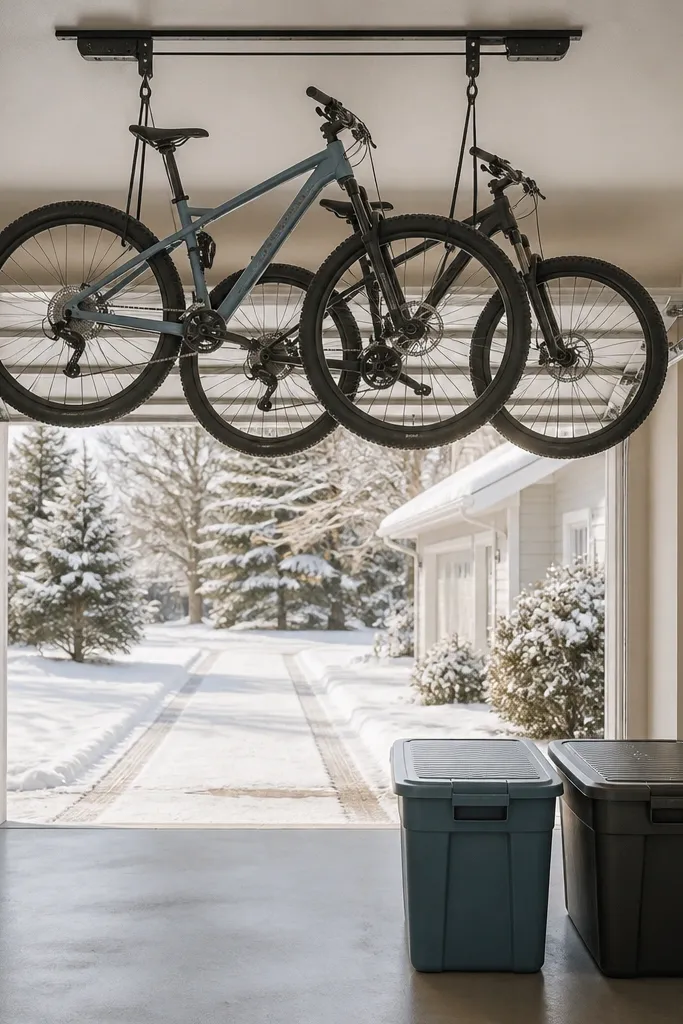
Parking bikes overhead instantly makes the garage feel bigger. The floor looks tidy because you only leave seasonal bins down there - winter gear, helmets for that season, and spare parts. I've learned that leaving daily clutter on the floor ruins the "year round" part, because floor items get kicked and dragged. Overhead storage changes the behavior.
Install the hoist into ceiling joists, not drywall anchors. Use two lidded bins for seasonal items and keep them 12 inches away from the garage door tracks. Hang any straps so they don't flop onto the floor.
Pro tipAdd a small hook near the hoist for the bike pump so it doesn't migrate to the floor.
AvoidAvoid storing random boxes on the floor under bikes - it looks messy the moment you move one bike.
5. Wall-Mounted Scrap Wood Slat Shelves for Paint and Small Supplies
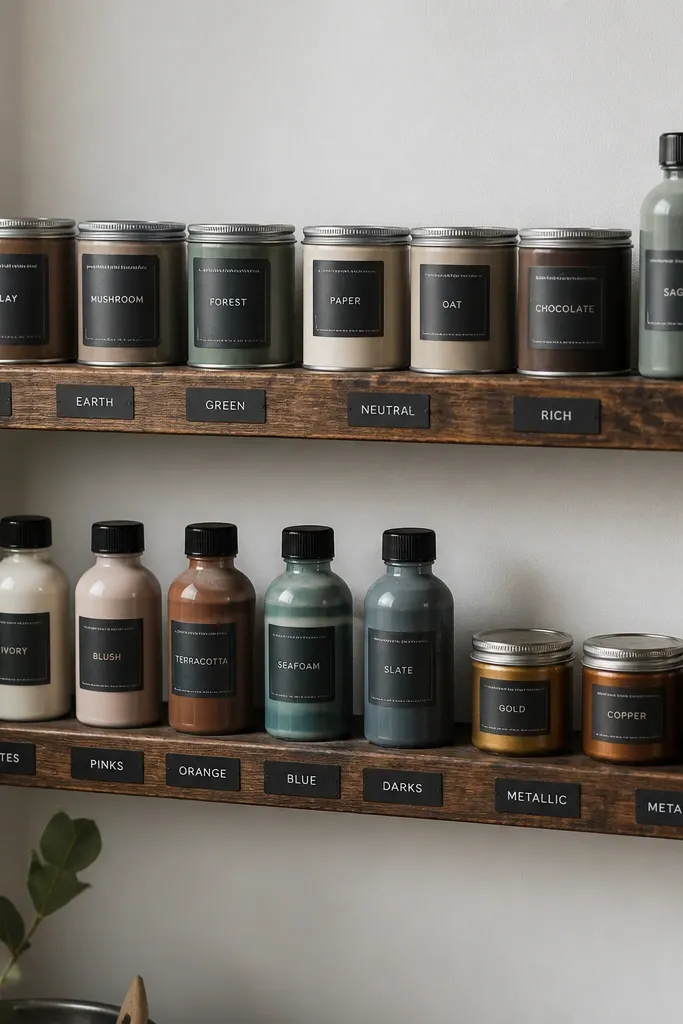
Scrap wood shelves look warmer than metal racks, and they're cheap if you already have offcuts. I keep them shallow so bottles don't get lost behind bigger items. The slat gaps let you see what's on the shelf, and the wood stain hides minor scuffs from seasonal use. It reads intentional instead of improvised.
Use 1x3 or 1x4 boards cut to 18 to 24 inches long. Stain with a basic oil stain and seal with a clear water-resistant topcoat. Mount into studs and leave 2 to 3 inches of clearance above the highest container lid for easy access.
Pro tipUse shelf-edge labels rather than front labels when you store bottles - it keeps the front clean.
AvoidAvoid glossy finishes - they show every fingerprint and water spot.
6. Tarps-to-Bin System for Seasonal Patio Covers
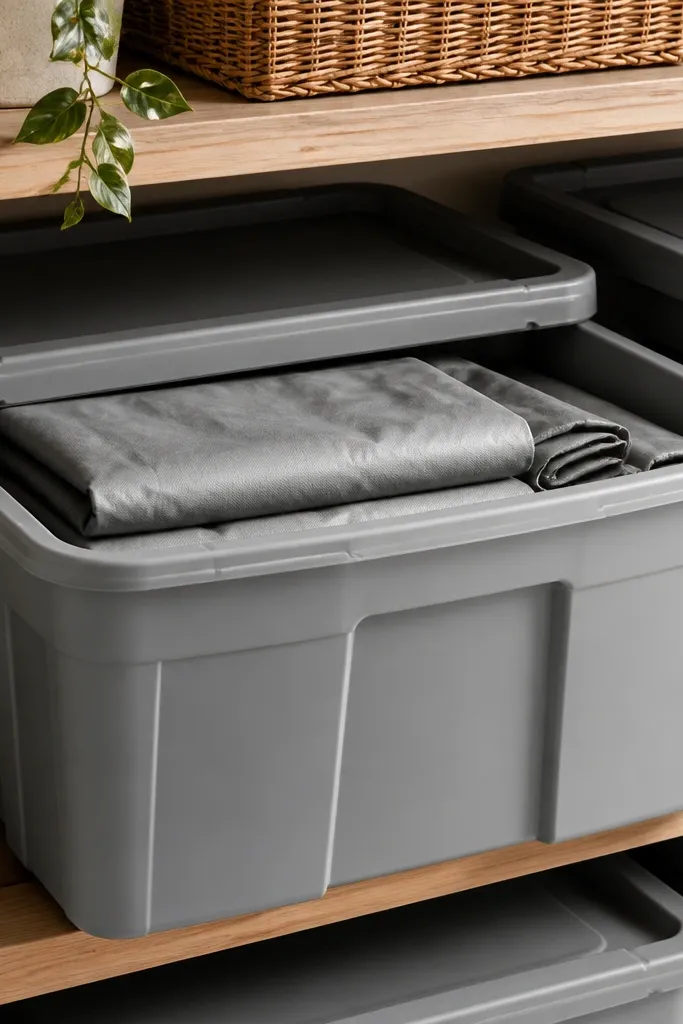
Instead of stuffing tarps into bags that split, I fold them into a bin with a matching tarp layer. The tarp acts like a soft barrier so the fabric doesn't absorb garage dust. It also makes the bin look organized because the folded shape stays consistent. This setup looks clean even when you grab it in a hurry.
Use two large bins, one for spring and one for fall. Fold tarps into a consistent rectangle (I do 24x36 inches), wrap them in a clean tarp sheet, then slide into the bin. Label the bin front and the lid so you still find it when the shelf is dusty.
Pro tipAdd a small strip of Velcro on the bin lid to keep the tarp fold from sliding.
AvoidAvoid leaving tarps in thin contractor bags - they tear and turn into a mess.
7. Clear-Label Vinyl Strip for Hardware Drawer Inserts
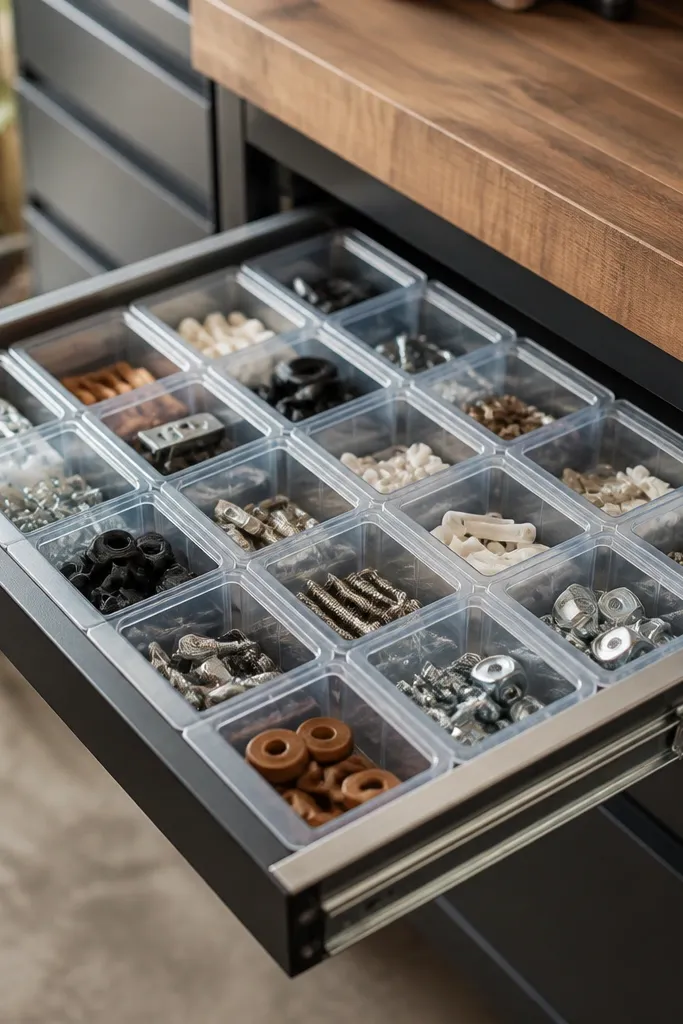
Hardware organization looks best when the labels are consistent and visible from one angle. I use small clear bins inside a drawer so screws don't roll around. Vinyl label strips wrap around the front lip, so the label doesn't peel off when you wipe the drawer. It keeps the drawer looking tidy instead of chaotic.
Buy a set of small clear organizer bins that fit the drawer width. Print labels on white vinyl, then apply on the outside front and wrap the ends slightly around so they're protected. Use a permanent marker on the bin itself only as backup - vinyl is the look.
Pro tipGroup by use, not by metal type - 'wood screws', 'drywall anchors' reads faster than a chemistry label.
AvoidAvoid handwritten paper labels - they smear and fade after garage cleaning.
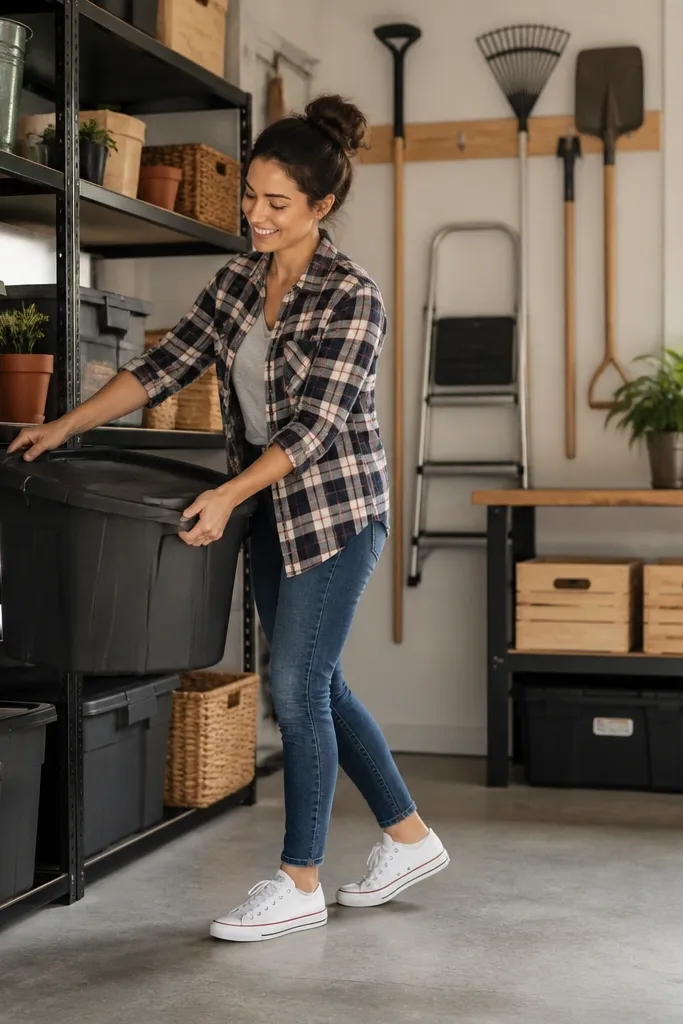
8. Wire Shelf with Lidded Bins and a Dusty-Weekend Wipe Plan
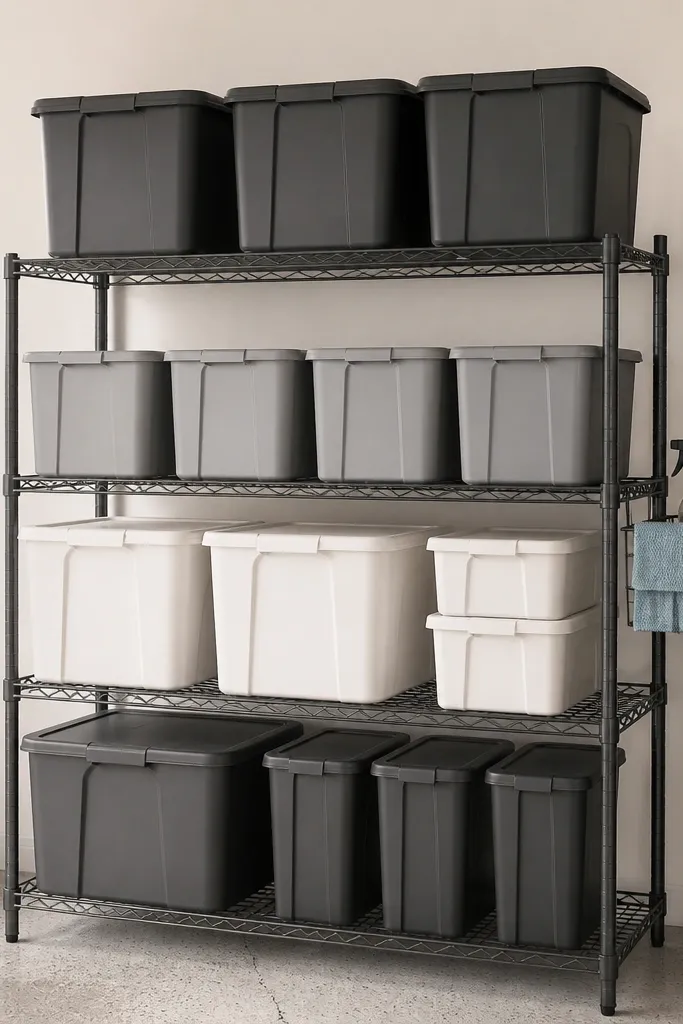
Wire shelving is cheap and strong, but it looks messy if you leave stuff uncovered. I solved that by putting everything in lidded bins and keeping labels facing outward. The result looks put-together because the front is uniform. I also keep cleaning tools at the shelf so dust doesn't build up for months.
Choose bins that stack without wobble and keep the top shelf for light items. Place a small cleaning caddy on the floor next to the shelf with a microfiber towel and a basic cleaner. Wipe labels once a week during the first month so the vinyl sticks cleanly.
Pro tipUse one cleaning schedule: 10 minutes every Sunday night for the shelf area only.
AvoidAvoid mixing uncovered items with lidded bins - the uncovered ones make the whole setup look sloppy.
9. Curtain Rod for Rakes and Brooms at Kid Height
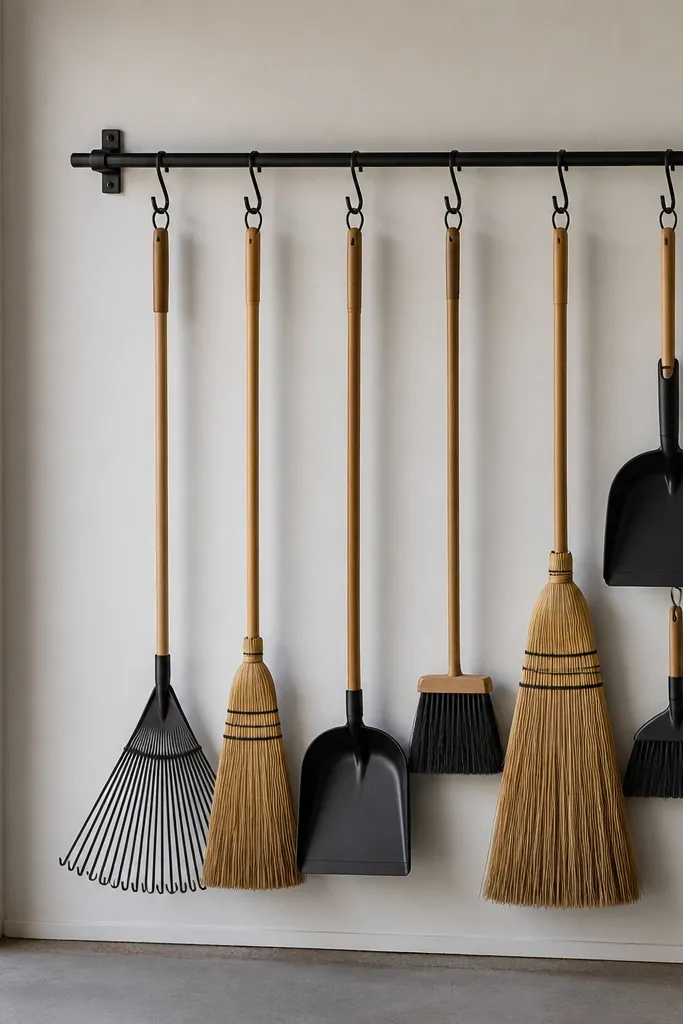
A curtain rod sounds too simple, but it's the cleanest way I've found to hang long yard tools without buying a full rack. It keeps handles aligned, so the wall looks orderly. I mount the rod at a height where my kid can grab the broom without pulling it down. That prevents the "tool pile" from returning.
Mount brackets into studs and use a rod that's at least 1 inch thick. Clip brooms with simple S hooks or strap hangers so they don't scratch. Keep the dustpan on a separate hook so it doesn't swing into other tools.
Pro tipLabel the hook positions with small color dots so kids know which one is theirs.
AvoidAvoid mounting into drywall only - the rod sags and the tools fall.
10. Milk Crate Turntable for Back-of-Garage Kids' Cleanup
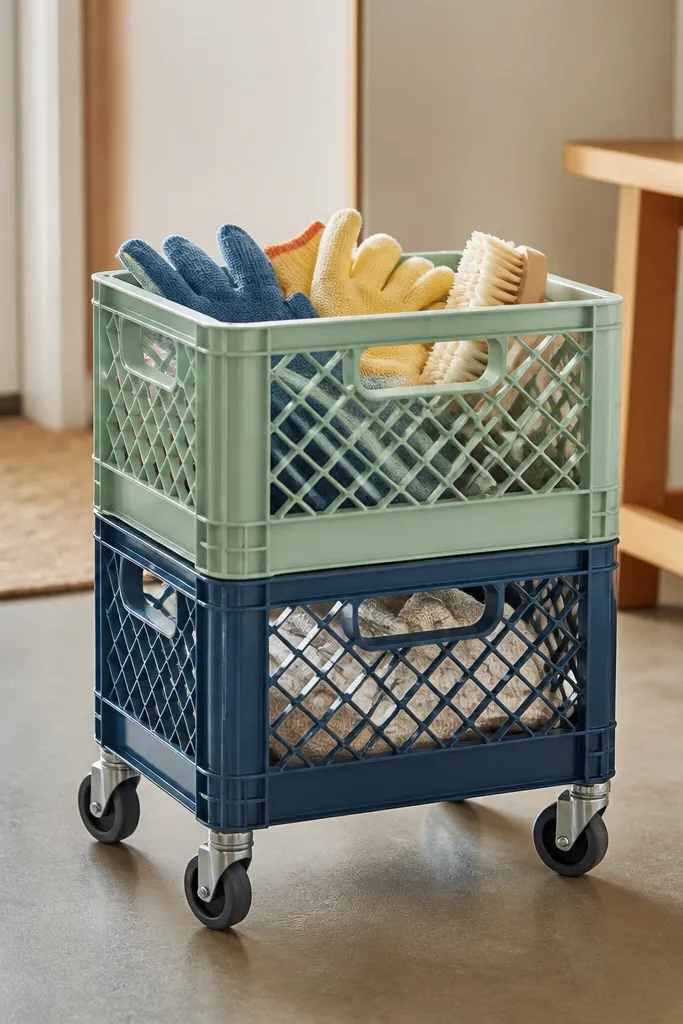
This is how I keep cleanup supplies from living in a drawer where kids can't reach. The rolling cart stays in the same spot, and the crates make it easy to see what's inside. It looks tidy because the crates match and the labels are consistent. When it's time to clean, the cart rolls out in one move.
Use two milk crates of the same color and mount them to a plywood base on caster wheels rated for at least 100 pounds. Add a vinyl label to each crate front. Keep the cart near the garage door, not in the back, so it gets used daily.
Pro tipAttach a small "return hook" on the handle so the gloves go there first after cleanup.
AvoidAvoid mixing crate sizes - the uneven stacks look messy fast.
11. Magnetic Strip for Wrenches and Socket Bits
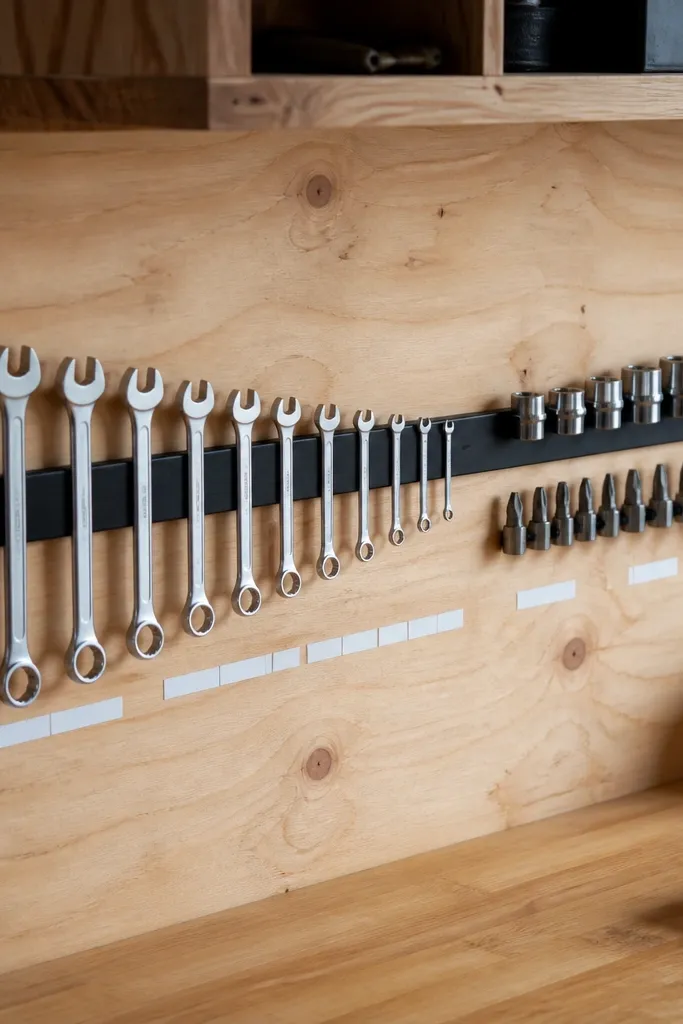
Magnetic storage looks clean because every piece lines up. I use it for small metal tools that otherwise vanish into a drawer. The strip also helps with the year-round part because magnets don't care about season humidity. It's satisfying to pull a tool and put it back in the exact spot.
Mount a magnetic strip to a plywood backing board and then mount the board to a stud. Use short strips for kids' tools and keep heavier tools higher up. Add vinyl labels at the ends of each cluster so kids don't guess.
Pro tipClean the strip once a month with a dry microfiber cloth so tools slide smoothly.
AvoidAvoid putting rusty tools on the magnet - they leave residue and look dirty.
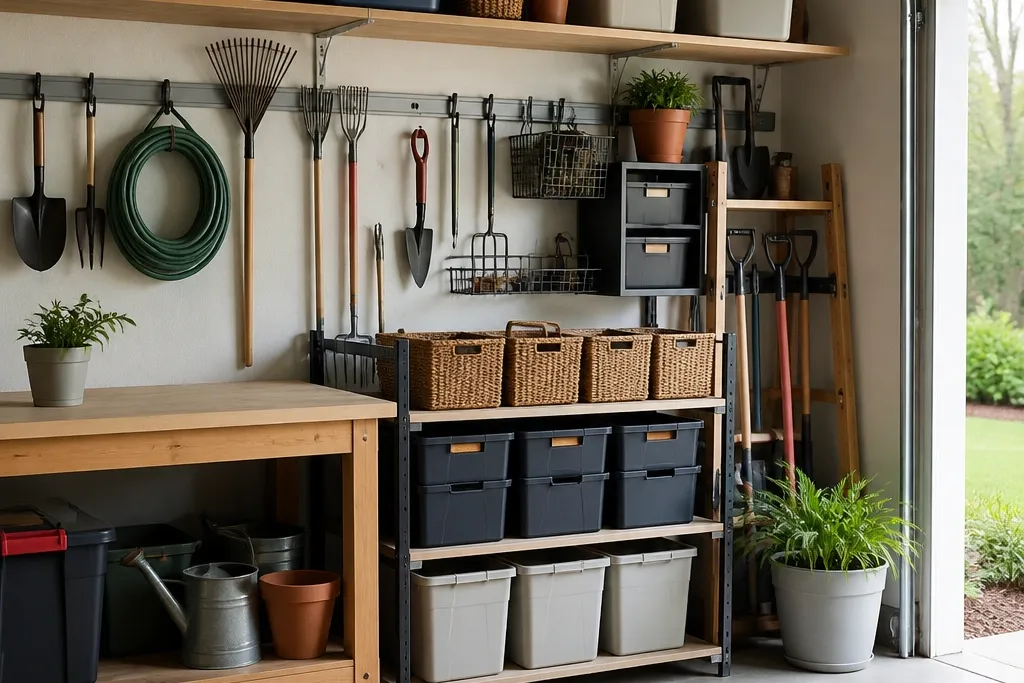
12. Corner Flooring with Interlocking Mats and Bin Lockers
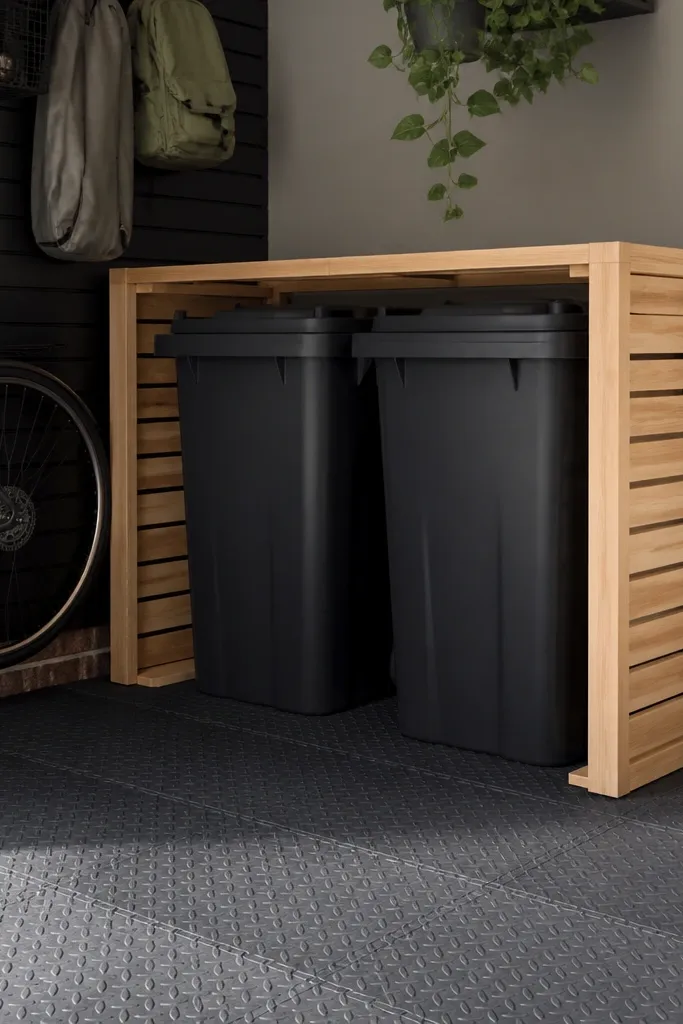
The floor matters for how long it stays organized. Rubber mats keep sand and grit from spreading, and the dark color hides scuffs. I build a simple bin locker frame so bins don't slide around when kids run past. The corner becomes a dedicated "mud and sports" zone that stays visually controlled year round.
Use interlocking mats sized to your corner and trim with a sharp utility knife. Build a basic locker from 2x2 framing and plywood so the bins sit snug with a 1-inch gap for airflow. Keep the locker height low enough that kids can reach the front bin lids.
Pro tipAdd a small label on the locker door or front rail so everyone knows what belongs there.
AvoidAvoid storing bins directly on concrete - they collect moisture and smell musty.
13. Expandable Tension Rod for Ladder Accessories
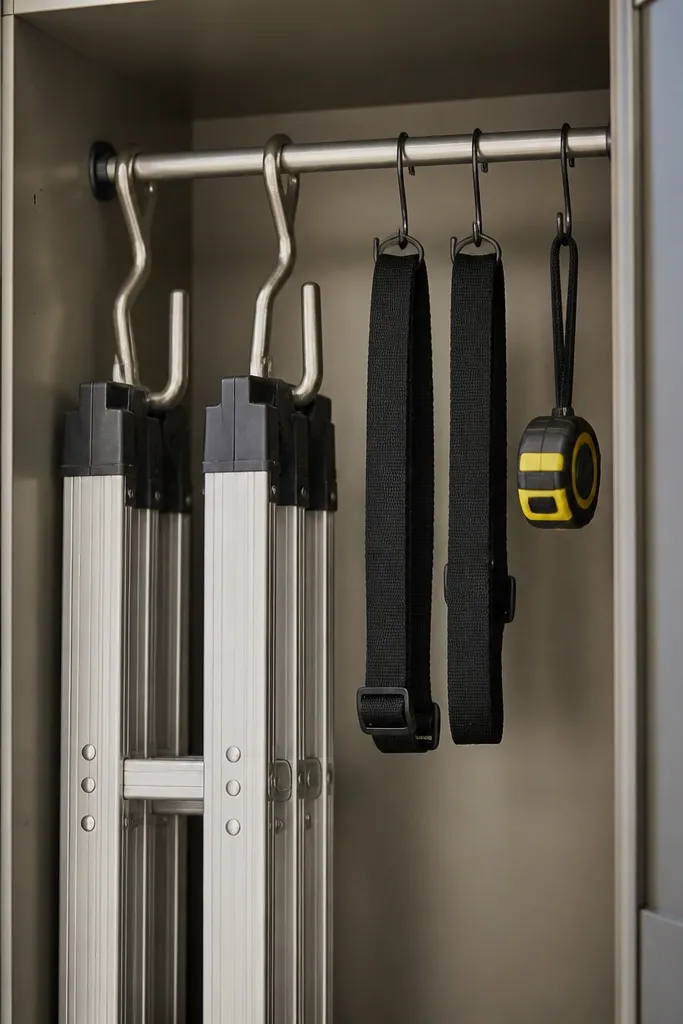
A tension rod inside a bin keeps long accessories from tangling. I use this for ladder straps, replacement handles, and small measuring tools. It looks organized because items hang vertically and sit above the bin base. When you pull the bin down, everything is visible without rummaging.
Use a tall lidded bin and put an expandable tension rod inside before you add accessories. Keep strap hooks and small items attached to the rod with S hooks. Label the bin lid and front with a single category name.
Pro tipWrap fragile ends in a small strip of foam tape so they don't scratch the bin.
AvoidAvoid overstuffing - if the rod touches the lid, it will bend and sag.
14. Sheet-Pan Organizer for Car Cleaning Supplies
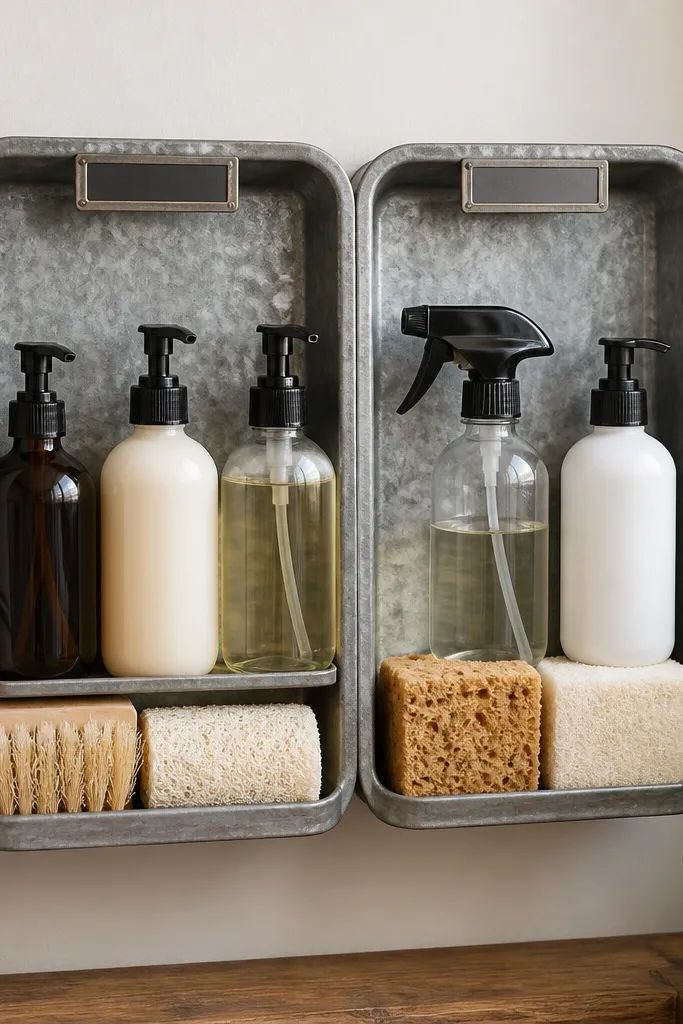
Sheet pans look industrial, and they're cheap if you buy them at a restaurant supply or thrift store. I mount them so car cleaning bottles stand up and sponges stay contained. The galvanized surface wipes clean in seconds, which matters when you're cleaning in the garage during spring and fall. Everything looks intentional because the containers line up inside the pan edges.
Use two sheet pans sized to your wall space and mount with L-brackets. Add rubber shelf liner to the bottom so bottles don't slide. Label the top rim with vinyl so it's visible even when the pan is half full.
Pro tipUse one pan for liquids and one for tools so leaks don't ruin the sponge side.
AvoidAvoid painting sheet pans - chips show and it starts looking worse.
15. Hose Reel Station with Quick-Drain Bin for Nozzle Heads
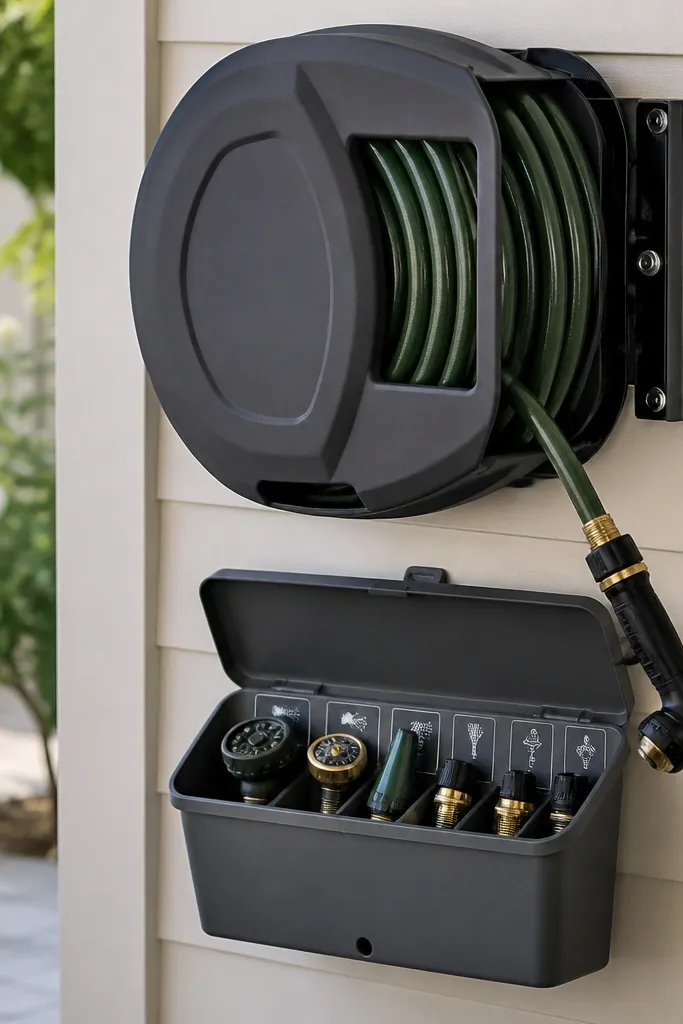
Hose-end attachments rot when they sit in puddles, and that's why they end up scattered. I keep a small bin under the reel with a quick-drain hole so water doesn't pool. That keeps nozzles from smelling and makes the garage look controlled. The station looks neat because the reel and bin share the same wall zone.
Mount the hose reel to a stud and place a lidded plastic bin under it. Drill a drainage hole near the bottom and keep it above a shallow tray or use a small bucket to catch water. Sort nozzles by type and label the bin front.
Pro tipDry the nozzles for 10 minutes on the edge of the bin after use before snapping the lid.
AvoidAvoid storing nozzles in a deep bin without holes - they end up slimy and messy.
16. Seasonal Bin Wall with Clear Front Panels and Hidden Lids
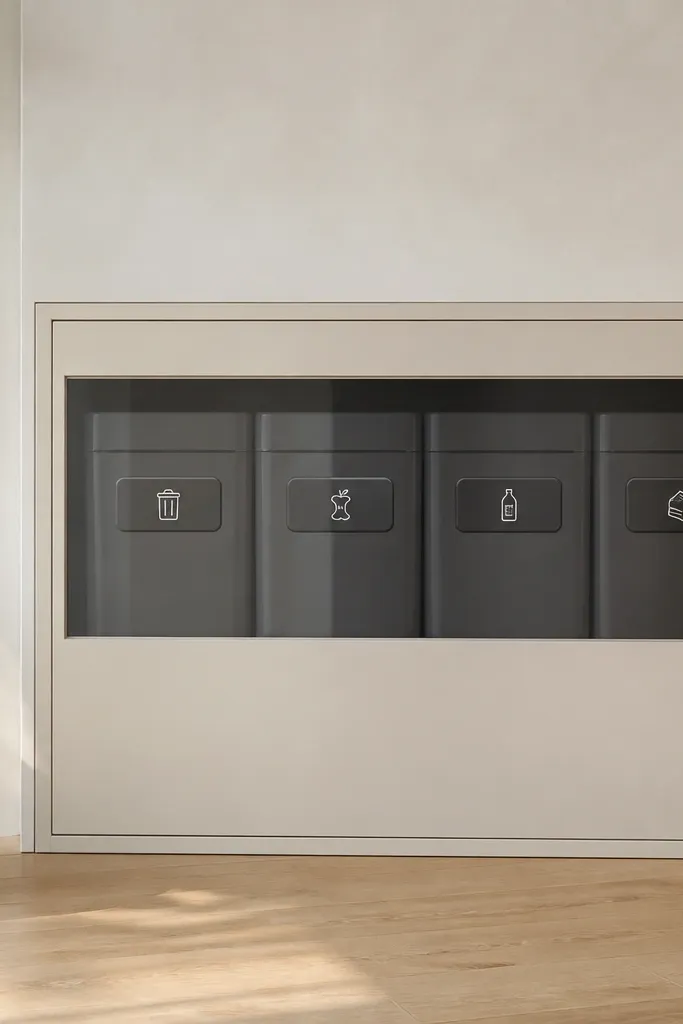
This is the "looks tidy even when you forget" setup. The clear front lets you see what's inside, but the lids stay hidden so the front stays clean. I use it for holiday decorations, winter gloves, and camping items that only come out a few times a year. The hidden-lid look helps the garage stay aesthetic instead of turning into a stack of open bins.
Build a shallow frame from 1x2 lumber and install clear acrylic or polycarbonate panels. Place lidded bins inside the frame so only the front is visible. Use vinyl labels on the acrylic and keep the frame painted the same color as the wall or shelves.
Pro tipUse bins with matching lid heights so the front panel looks flat and even.
AvoidAvoid leaving random bin heights behind the panel - it creates a bumpy visual mess.
17. Bed Sheet Dust Covers for Paint Cans on Shelves
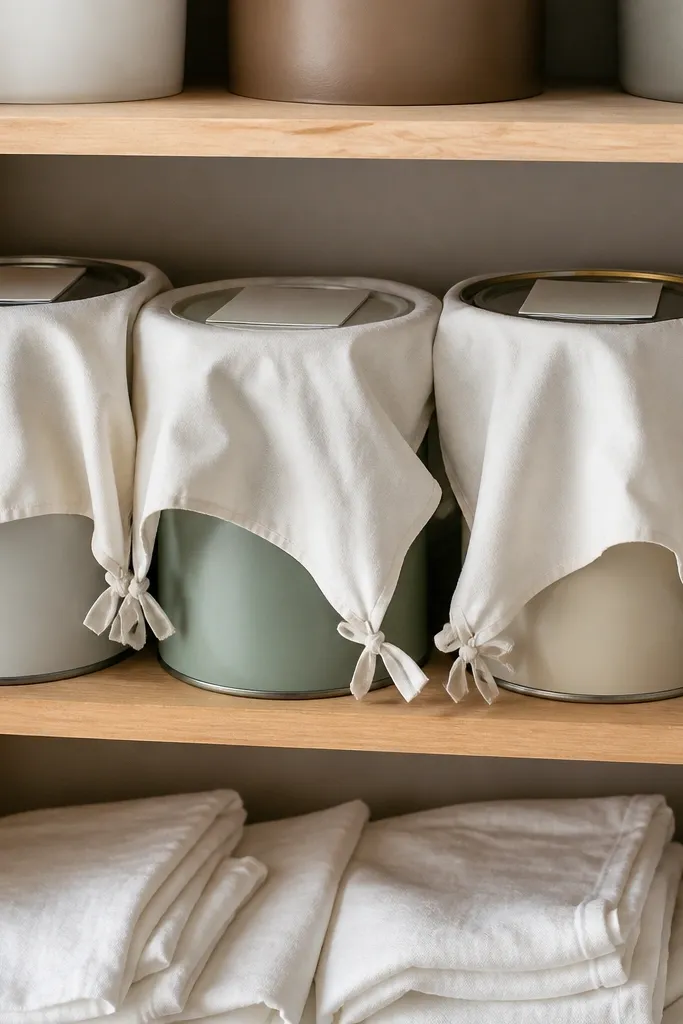
I learned the hard way that paint cans look awful when the shelf dust sticks to the tops. I use clean bed sheets as dust covers and tie the corners so they don't slip. It keeps the shelf looking crisp, and it's cheap. The fabric also softens minor scuffs when you shuffle cans around.
Use plain cotton sheets or old clean ones, washed and fully dried. Cut into rectangles sized to cover the top and front edge of each shelf row. Tie with simple cloth ties or thin elastic near the corners, then label the can lids clearly.
Pro tipWash and reuse the sheet covers - keep one extra clean cover in a drawer for quick swaps.
AvoidAvoid using towels with lint - they shed and make everything look dirtier.
18. Two-Tier Jump-Box for Kids' Helmets and Scooters Parts
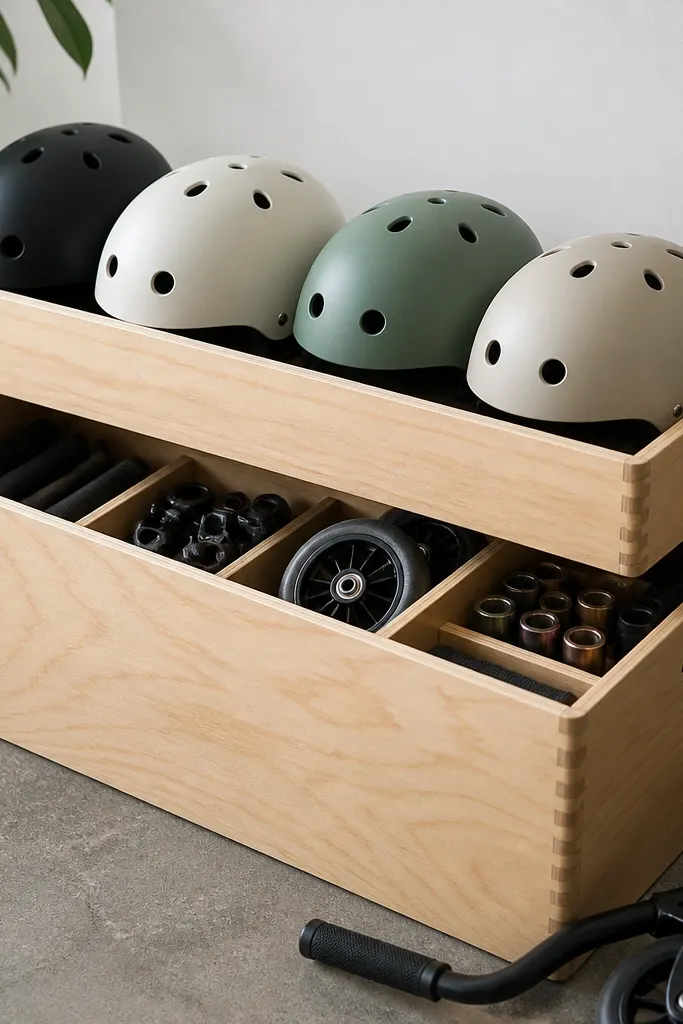
This keeps kid gear from spreading across the garage. Helmets sit on the top tray so they dry and don't get squished. The lower tier holds small parts like scooter chargers, spare wheels, and wrist guards in smaller bins. It looks neat because the gear is in two clear zones, not scattered on shelves and the floor.
Build a box from 3/4-inch plywood with two levels: a shallow top tray and a deeper bottom compartment. Line the bottom with rubber shelf liner and add small snap bins inside. Keep the top tray low enough that kids can place helmets without climbing.
Pro tipAdd a small "helmet face forward" sticker so they always stack the same way.
AvoidAvoid one big open bin - helmets roll and smaller parts disappear.
19. Label-First Garage Door Storage for Gloves and Flashlights
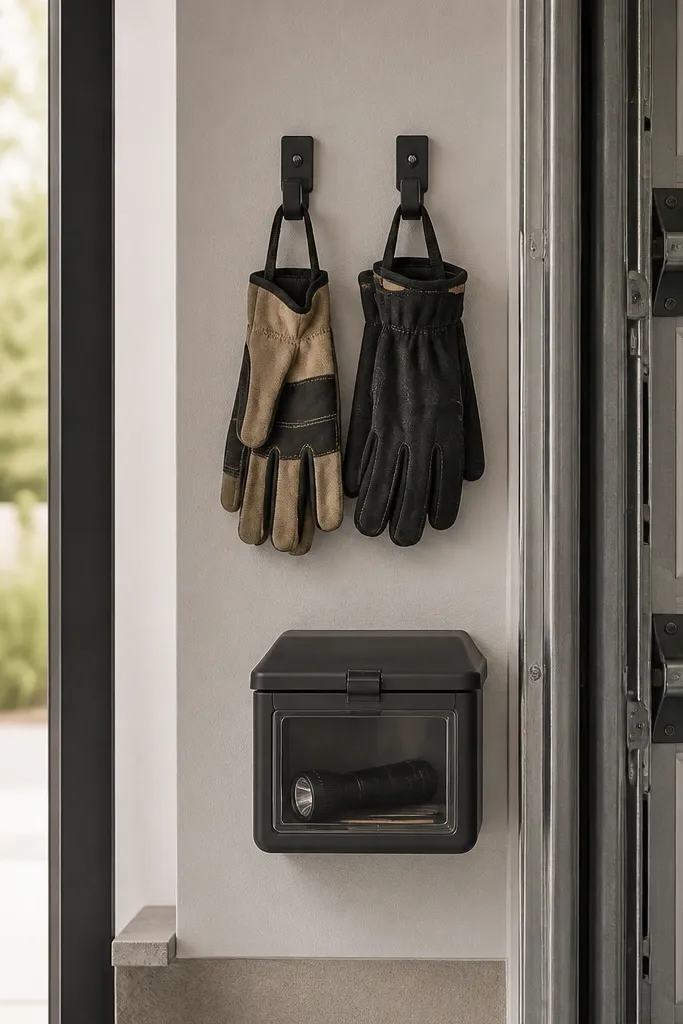
The garage door area is where you grab stuff in a rush, so I keep it simple and label-first. Two hooks for gloves and a small bin for flashlights, batteries, and a phone charger means you stop hunting. The look stays clean because it's compact and consistent - no random bags. This also helps year round because you're not constantly moving items as seasons change.
Mount two heavy-duty hooks into studs and keep spacing about 8 inches apart so gloves hang neatly. Use a small lidded bin for flashlights and batteries and label the bin front with vinyl. Place the setup at a height that adults can reach easily without crouching.
Pro tipPut the same label style everywhere: one category word, one simple icon sticker for kids.
AvoidAvoid storing bags here - they flop and make the wall look cluttered.


