
1. The Bike Wall That Actually Holds Weight
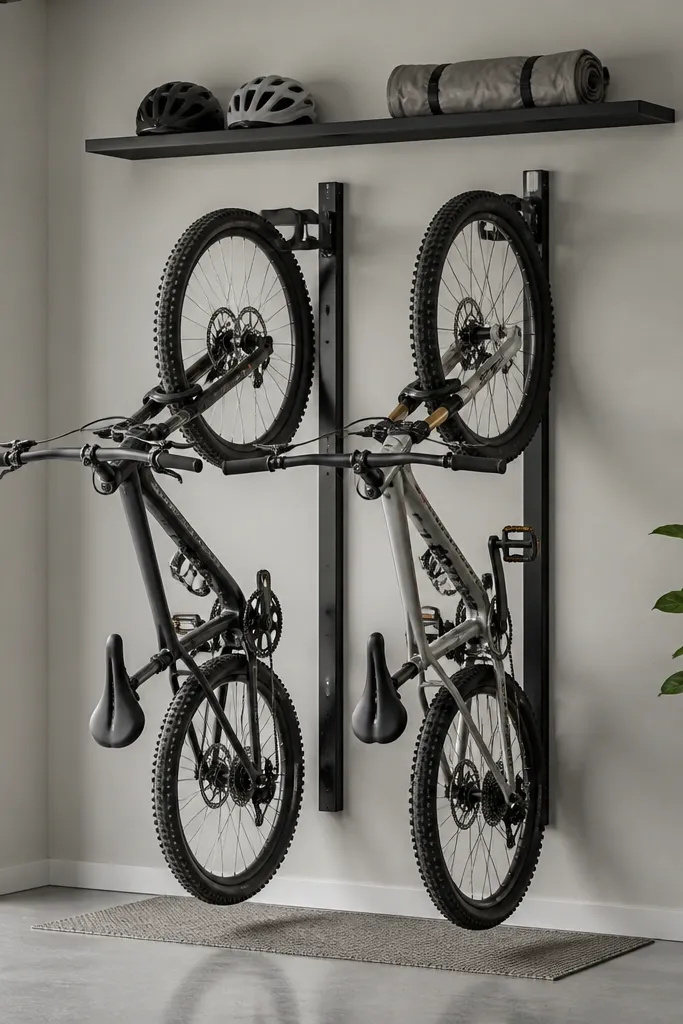
This layout uses a vertical rail and wheel hangers so the bikes don't lean and take over the floor. I like the look because the bikes are visible, not hidden, and the wall stays clean. I pair it with a thin shelf for helmets so small items don't end up on the ground again. The contrast of dark hangers against a pale wall makes the system easy to spot when you walk in.
Mount the rail into studs, not drywall anchors. If your garage is cinder block, use the right concrete anchors and keep the rail level with a laser or a long level. Hang by the front wheel so the bike sits steady; leave at least 4 inches between bikes so handlebars don't bump. Use a shelf that's 10-12 inches deep for helmets and gloves.
Pro tipRun a strip of painter's tape on the wall first and test the bike height by lifting one bike into place; adjust before you drill.
AvoidAvoid screwing hangers into drywall - after a couple seasons, bikes start sagging and the whole wall looks off.
2. Pegboard Tool Wall With Color-Coded Jars
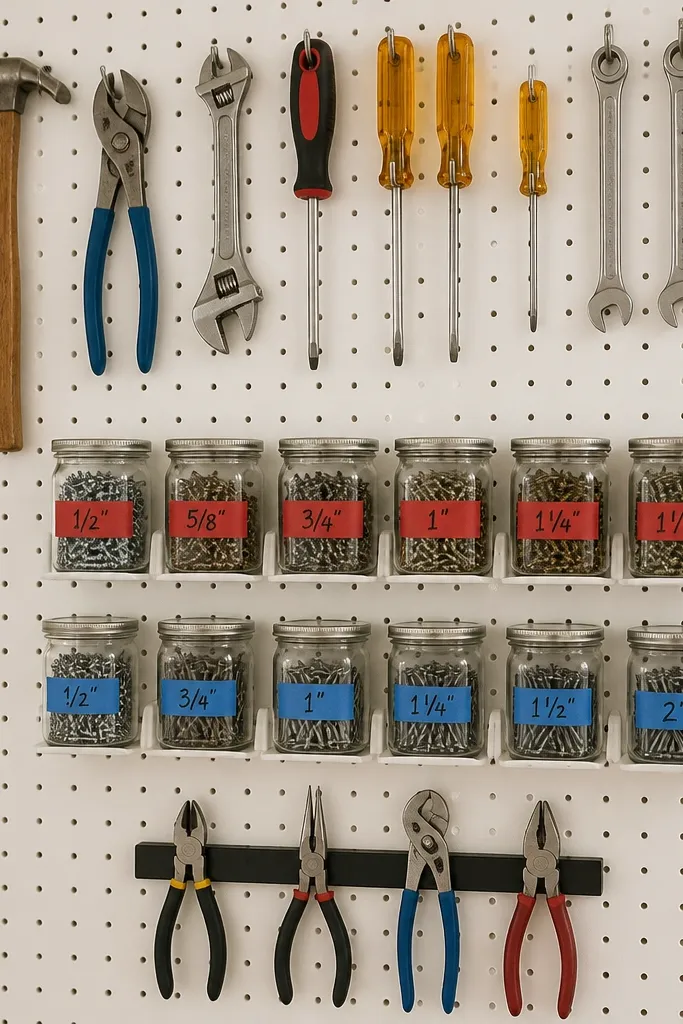
Pegboard works when you commit to repeatable spots. I use hooks for tools and jars for fasteners because kids and guests can see what's missing. The colored tape bands make it fast to sort even when labels get smudged. Clear jars also show fill level at a glance, so you refill before you're mid-project.
Use 1/4-inch thick pegboard and add a few deeper bins for tape measures or drill bits. Jars should be uniform in size; I've had good luck with jars that are about 3-4 inches tall so they don't crowd the tools. Label with a black marker on white tape stuck to the jar lid. Install the pegboard with a solid backing board if your wall is uneven.
Pro tipGroup by task, not by brand - screws with drill bits, nails with hammer, and keep the jar for "misc" out of the main tool zone.
AvoidAvoid mixing jar sizes and random hook spacing; it turns into a clutter magnet because nothing has a predictable home.
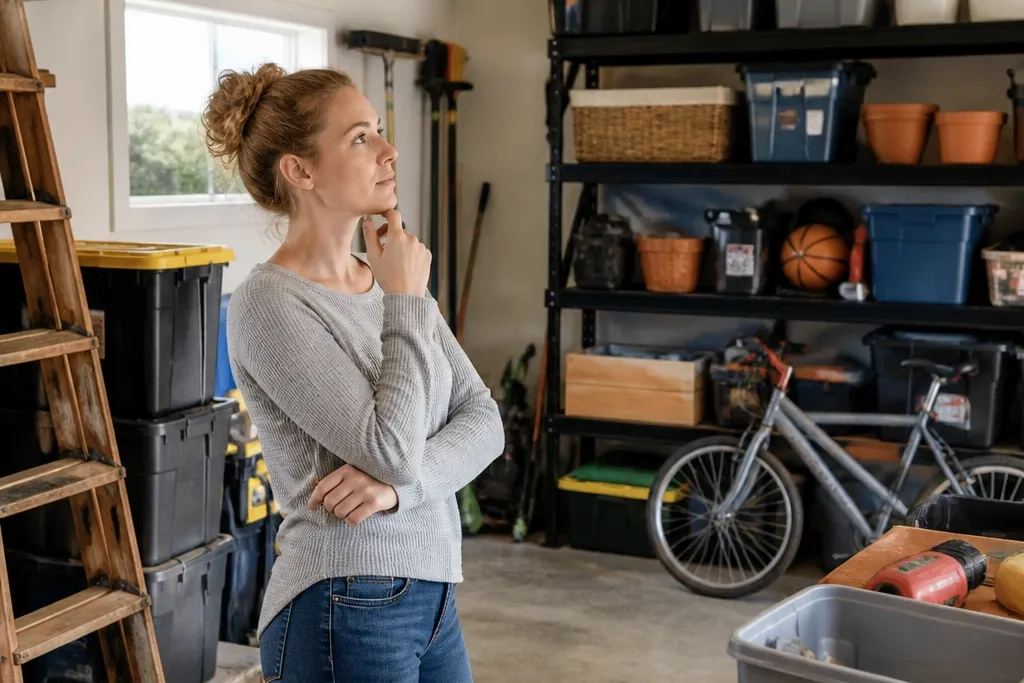
3. Rolling Bin Stack for Kids Sports Gear
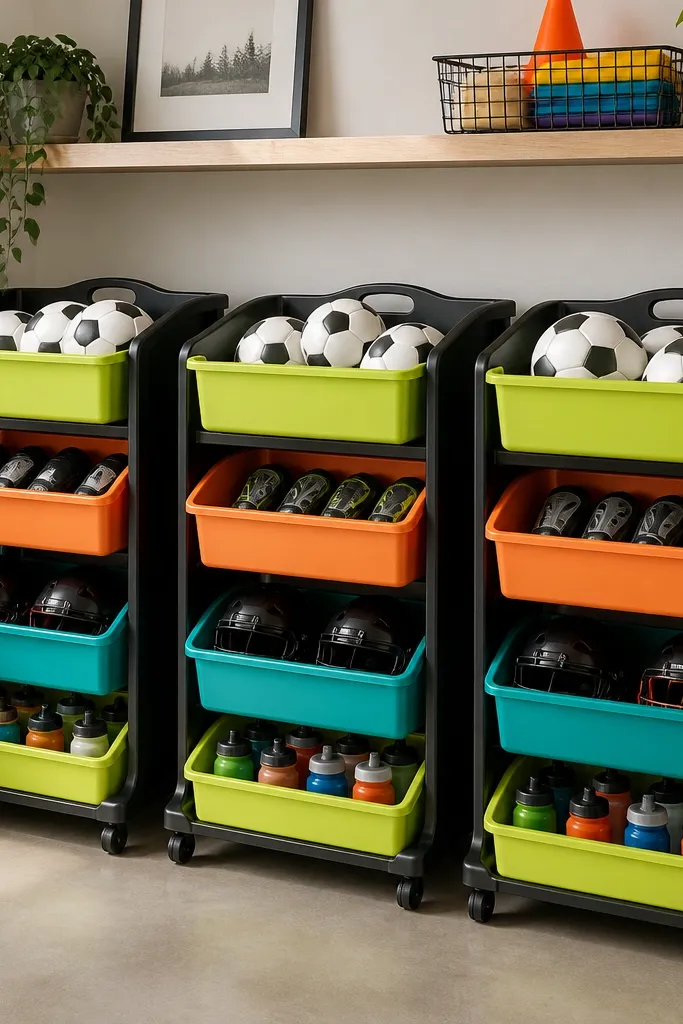
Rolling bins make kids' stuff easier because you can move the whole unit to the car or driveway. I use clear-front or label-forward bins so you don't open 10 containers to find shin guards. The bright bin colors reduce the "where is it?" arguments because each sport gets a consistent visual. Keeping it under a shelf prevents the top-of-cart pile that always shows up later.
Choose carts with lockable wheels if your garage floor is sloped. I set up two carts for "practice weeks" and one for "season items" so the system isn't overloaded. Use bins about 10-12 inches wide so they fit between cart rails without gaps. Label the cart front at eye level from the garage doorway.
Pro tipSet a weekly reset rule: after practice, everything goes back into the bins that stayed at the front of the cart.
AvoidAvoid stacking loose bins on the floor; they slide, tip, and the labels get ignored.
4. Garage Cabinet + Drawers for Power Tools

A cabinet with drawers beats open shelves for power tools because dust and kids' hands don't mix with your chargers. Foam inserts are the difference between "misc tools" and a real system - tools stop disappearing because each one has an outline. I keep chargers on a small dock on the side so cords don't become spaghetti. The closed cabinet makes the garage look finished even when you're mid-project.
Use foam sheets cut with a box cutter and a steel ruler. Lay out the tools so you leave 1/2 inch between outlines; it makes it easier to remove without tearing. Keep drill and driver in the top drawer, battery charger accessories in the bottom drawer. Add a small tray for keys and spare bit holders.
Pro tipWrite the battery type directly on the foam outline (like "18V") so you don't grab the wrong pack during a rush.
AvoidAvoid storing batteries in random pockets; loose packs end up lost and the charger area turns into clutter.
5. Top Shelf Only for Seasonal Bins (With Clear Labels)
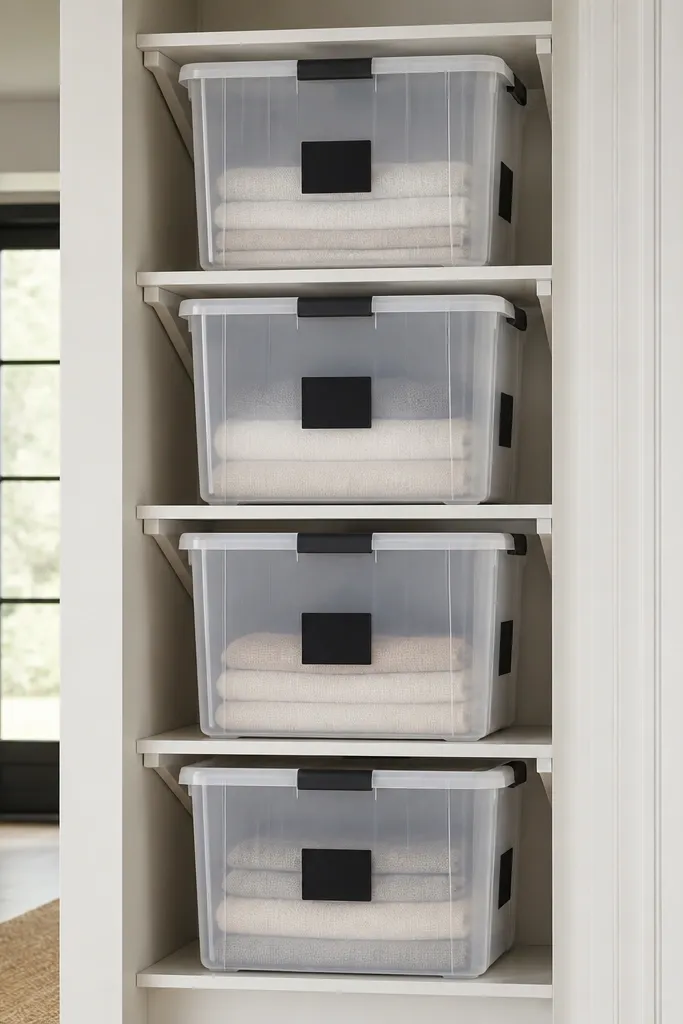
Top shelves work when they stay boring and organized. I store seasonal bins only - winter gloves, holiday lights, camping gear - because you don't need them every day. Clear totes let you confirm what's inside without climbing up again. Big labels on the side matter because you often check from the ladder angle.
Use totes with snap lids so they don't warp and leak dust. Keep no more than 2 high if you're grabbing them alone; higher stacks make you tip bins. Label with a thick black marker on white label tape, then add a second label to the side of the tote. Leave at least 3 inches between tote corners and any shelf lip.
Pro tipPhotograph the shelf with your phone and save it; when you find a tote missing later, the photo tells you where it belongs.
AvoidAvoid using "assorted" boxes up there; once you mix cardboard with plastic, the garage turns into a mess after one wet season.
6. Slat Wall for Yard Tools and Long Handles
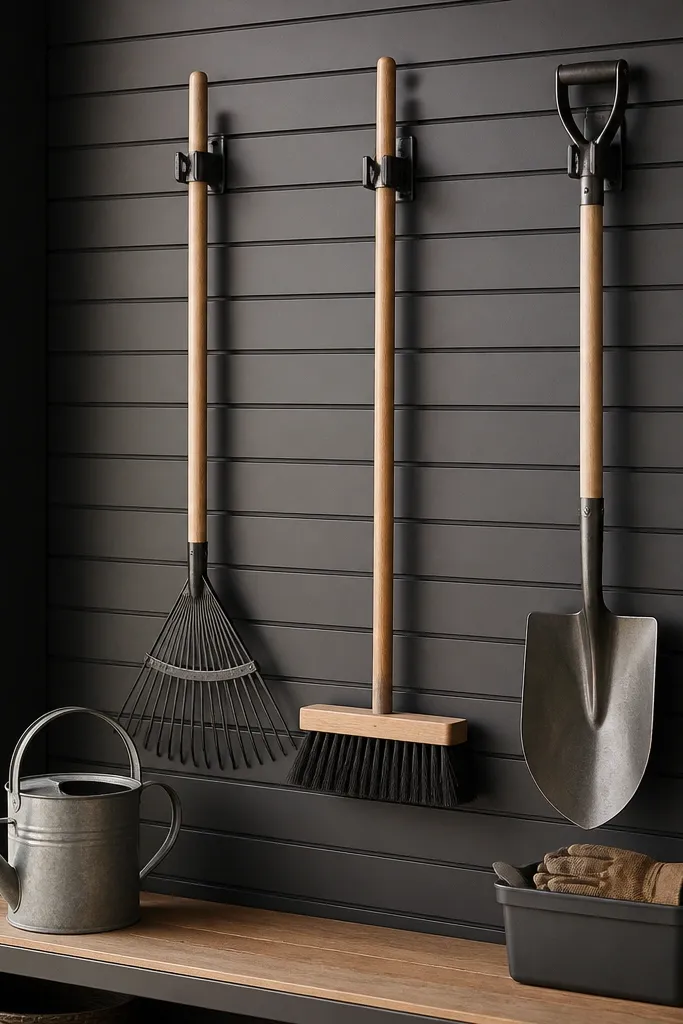
Slat walls are the cleanest way to hang long tools without drilling a hundred random holes. I use adjustable hooks so you can change spacing as your family's tools change. The slat pattern keeps everything aligned and makes the wall look intentional. It also stops the "lean pile" that forms by the side door.
Start by finding the stud line, then mount your slat wall with enough fasteners that it doesn't flex when you grab a rake. Use hooks sized for the tool handle thickness; don't force thin handles into oversized hooks. Keep heavy tools on the lower portion of the wall so they don't swing into each other.
Pro tipHang with the handles all facing the same direction - it makes grabbing faster and stops the wall from looking chaotic.
AvoidAvoid hanging tools by the head with weak hooks; the weight pulls them down and you get crooked spacing.
7. Concrete Floor Zone Mat for Dirty Gear
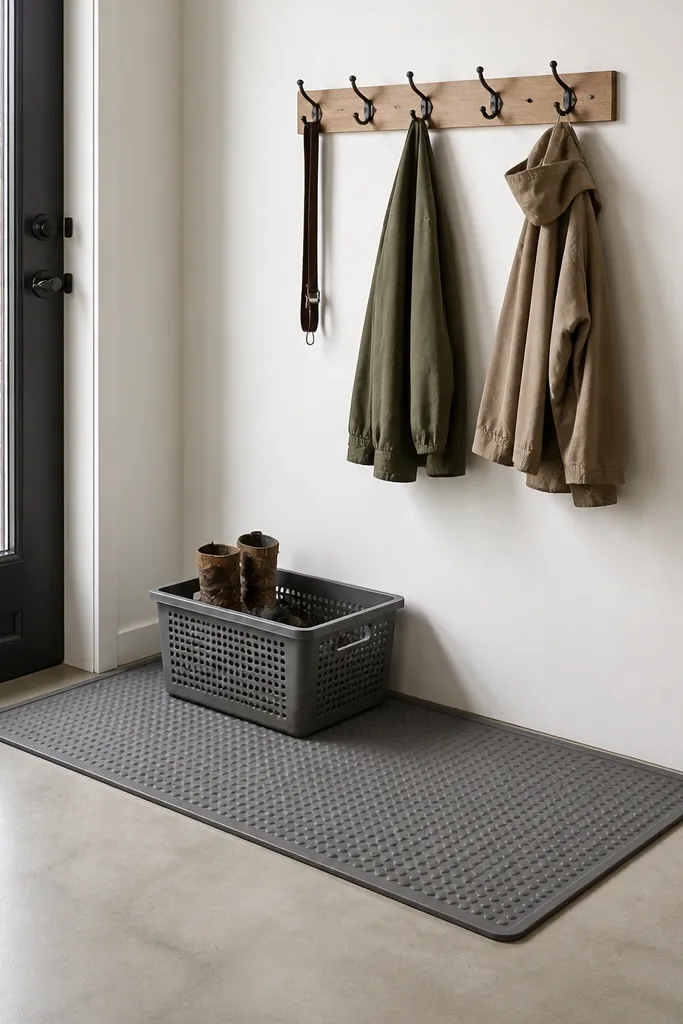
A floor mat gives dirty gear a boundary. I keep muddy shoes, wet jackets, and sports cleats on one rubber zone so water and grit never spread across the garage. The mat also makes the garage look "controlled" even when you've just come in from practice in the rain. It's one of the few fixes that kids actually follow because it's physically obvious.
Use a rubber mat with ridges so mud falls into the grooves instead of sliding around. Put a lidded, ventilated bin next to it for shoes - not a dry basket that traps stink. Install a small hook rack above the mat so coats don't end up on a chair or the workbench.
Pro tipKeep a small spray bottle of garage cleaner and a stiff brush in a caddy on the wall so you wipe the mat in 2 minutes.
AvoidAvoid placing dirty gear on a bare concrete corner; it stains and the spot becomes a permanent mess.
8. Clear Label System That Matches How You Actually Look
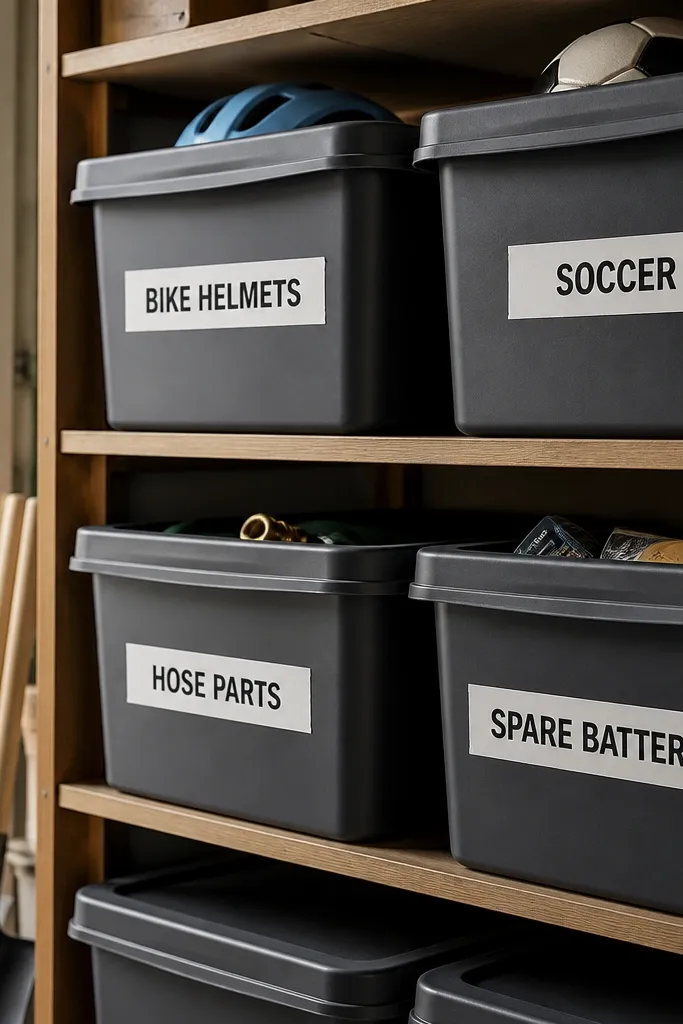
Labels fail when they're designed for a perfect world. I label from the doorway viewpoint, not from the workbench where you stand while organizing. Thick black text on white tape reads across a garage, and it stays legible when bins get dusty. I also label by category, not by brand, because the same person needs to find things fast.
Use a label maker for the first pass, then cover the text with a second strip of clear packing tape for durability. Make labels short enough to fit on a bin face without wrapping around corners. Put the "grab words" first - like "Soccer" instead of "Sports Equipment - Soccer." Keep font consistent across bins so your brain learns the pattern.
Pro tipPrint two label sets: one for bin fronts and one for bin lids. If lids get swapped, the front labels still guide you.
AvoidAvoid writing tiny handwriting on the side; you'll rotate bins and the labels won't help.
9. Cord Management for Chargers and Tool Batteries
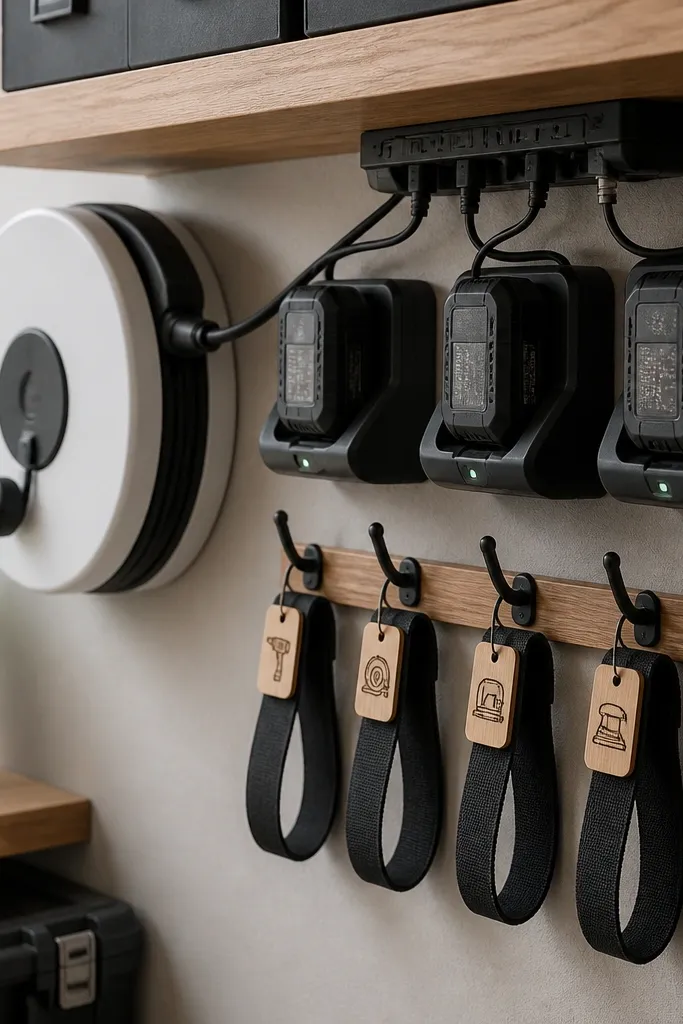
Cords create a mess faster than any bin. I keep chargers grouped in one spot and route cords into a simple cord reel or a short track so they don't hang low. When you label straps for each charger, you stop the "which cord is this?" chaos. The end result looks clean because cords don't drape across shelves.
Mount a power strip under a shelf with a drip loop so connectors don't sit in dust. Use short cable runs to avoid tangles; keep the longest cord length under 3 feet if you can. Velcro straps should be reusable and wide enough to hold the cable without pinching. Add a small tray for spare batteries so they don't roll.
Pro tipCharge everything at the same height. If the charger sits higher than kids' reach, cords stay put and batteries don't disappear.
AvoidAvoid charging on the floor or on top of bins; cords get stepped on and the system collapses.
10. Workbench Sorting With a Single "Parts Home" Drawer
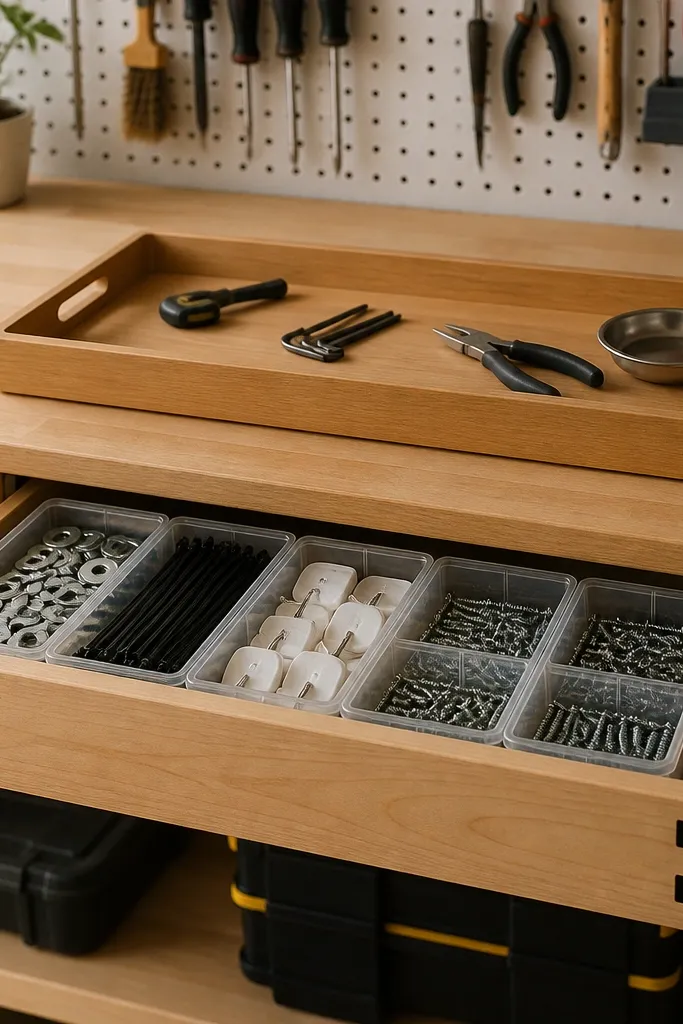
A workbench stays clean when you limit what can live on top. I keep one drawer for parts that belong to ongoing projects - zip ties, hooks, washers, spare screws. Everything else goes back to the main zones. This prevents the "bench pile" that turns into a storage system nobody uses. The drawer makes it easy to reset after a job.
Use drawer organizers that snap in place and are sized for common small hardware. Keep the drawer width around 20-24 inches so it holds multiple categories without getting deep. Put only current-project tools on the bench top, and use a tray with a raised edge for those items. When the project finishes, everything returns to the drawer.
Pro tipWrite the project name on a sticky note for the drawer section when you start a job, then remove it when done.
AvoidAvoid leaving random parts in open bowls on the bench; they spill and you end up re-buying hardware.


